Chilled Container Loading Tasks
How to Assign a Container to a Trailer
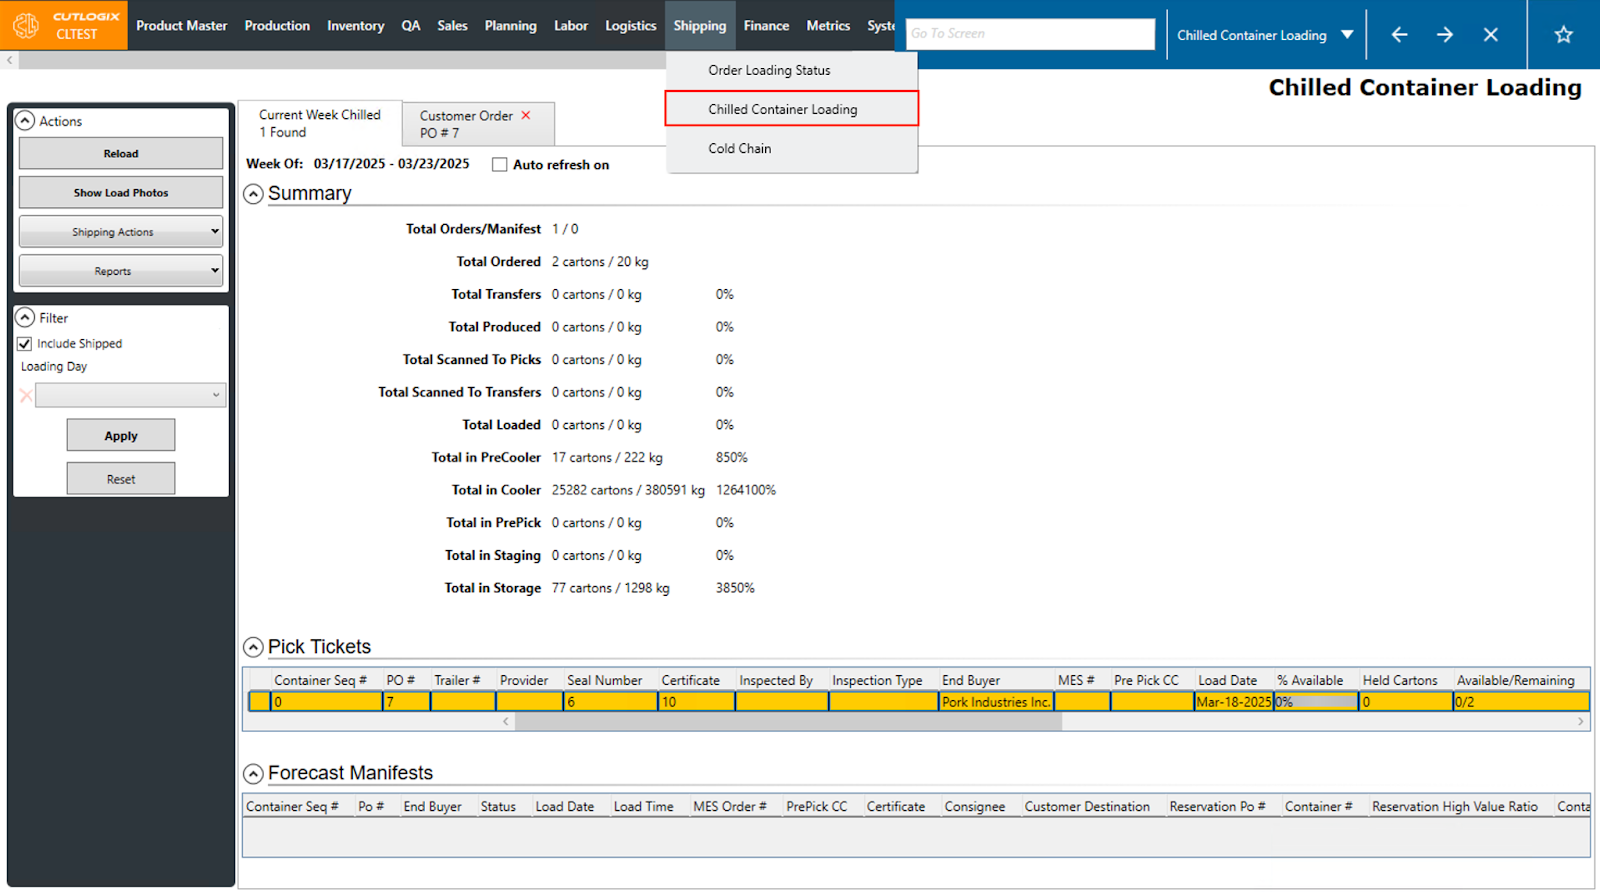
DemoStep 1: Navigate to the "Chilled Container Loading" page. (Located under the "Shipping" menu option)
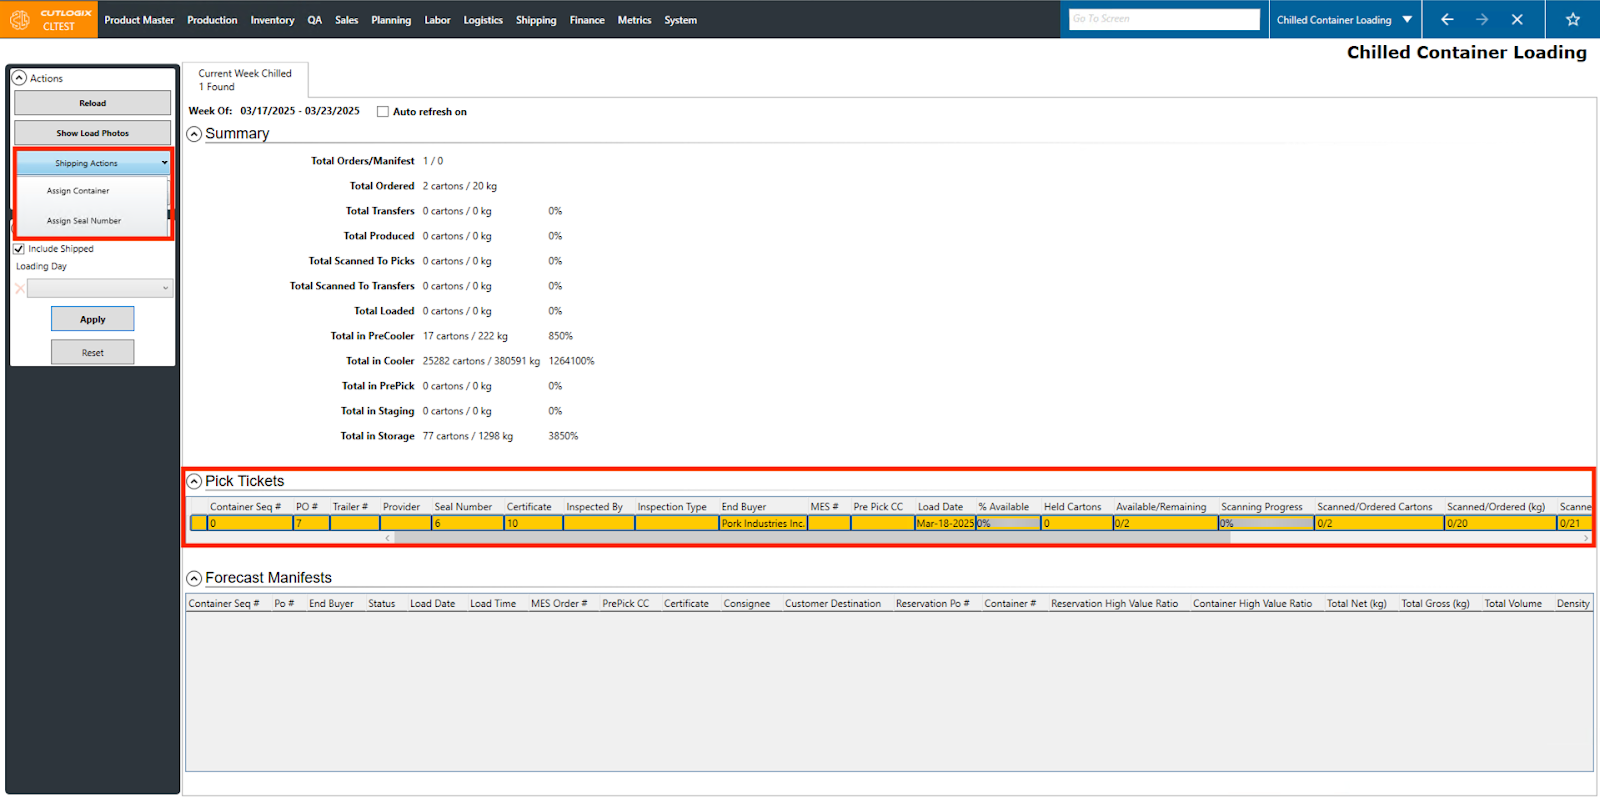
Step 2: Select the order in the Pick Ticket’s section that you wish to assign to a trailer. Then, click on Shipping Actions → Assign Container in the left ‘Actions’ sidepod. This action will be enabled under the following conditions:
• The user has the appropriate permissions.
• An order is selected in the Pick Tickets section.
• The selected order has a Canadian Food Inspection Agency (CFIA) certificate number assigned to it. Adding a certificate to an order can be done on the Sales → Customer Orders → Details tab of the appropriate order.
• The selected order has not been shipped.
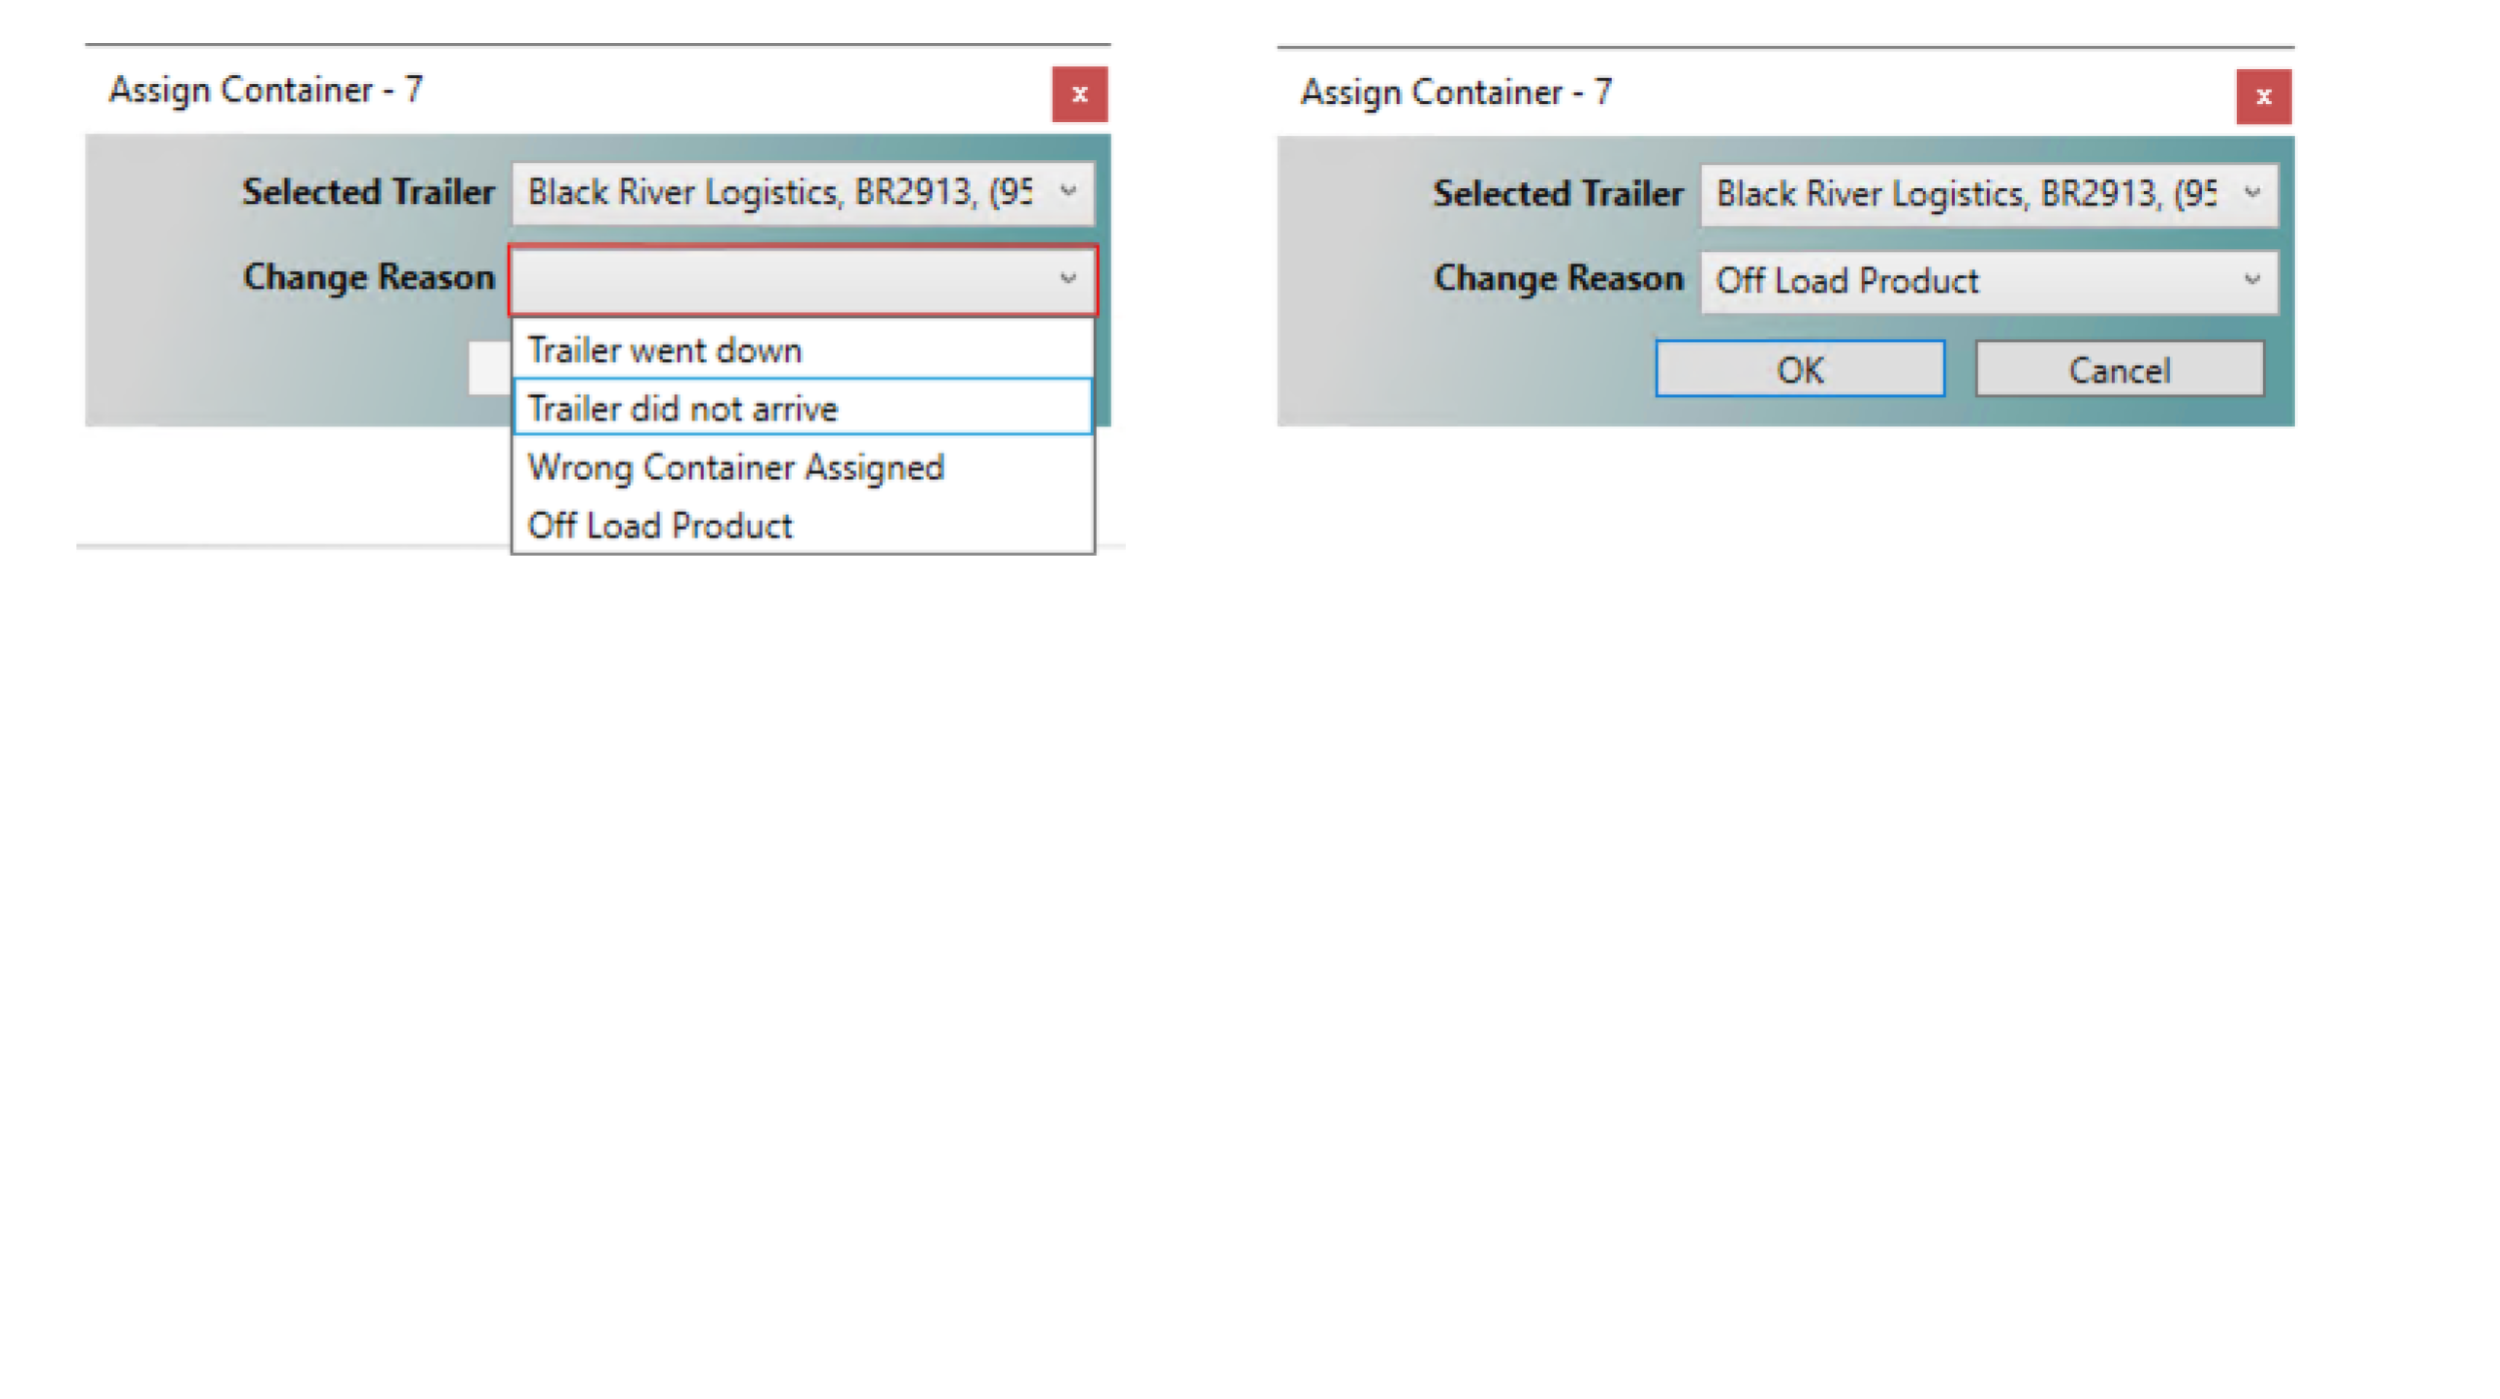
Step 3: Clicking the Assign Container action will bring up a dialogue box with two dropdown menus. From the Selected Trailer menu, users can choose a trailer to assign the selected order to. If this is the first time a trailer has been selected, then making a choice from the Change Reason drop is not necessary. On all subsequent trailer selections for this order, users are required to select one of the available reasons to enable the ‘OK’ button.
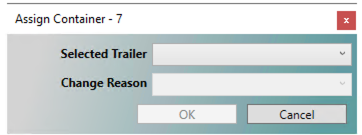
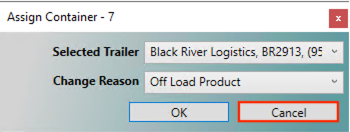
Step 4: A user wishing to save their trailer selection must click the ‘OK’ button. If a user is selecting a trailer for the first time, then making a selection from the Change Reason dropdown is not necessary. All subsequent trailer selections for the selected order will require users to select an option from the Change Reason dropdown to enable the ‘OK’ button.
Step 5: If a user does not wish to save their selection, they can click the ‘Cancel’ button. This will roll the selected trail back to the state it was in before the Assign Container action was clicked.
How to Assign a CFIA Seal Number
DemoStep 1: Navigate to the "Chilled Container Loading" page. (Located under the "Shipping" menu option)
Step 2: Select the order in the Pick Ticket’s section that you wish to assign a seal number to. Then, click on Shipping Actions → Assign Seal in the left Actions sidepod. This action will be enabled under the following conditions:
• The user has the appropriate permissions.
• An order is selected in the Pick Tickets section.
• The user has the appropriate permissions.
• An order is selected in the Pick Tickets section.

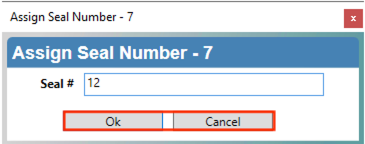
Step 3: Clicking the Assign Seal action will bring up a dialogue box with a Seal # field. In this field, users can enter in the identification number of the CFIA seal that will be applied to this order when shipped.
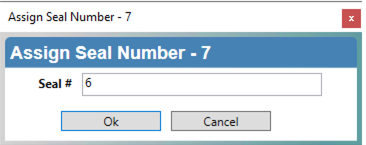
Step 4: In order to enable the ‘OK’ button, users must enter a value into the Seal # field.
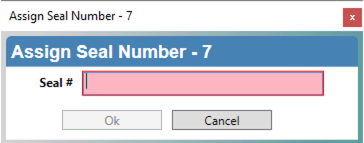
Step 5: Once the user has entered the seal number, they can click ‘OK’ to save it to the selected order. If they wish to undo their entry they can click the ‘Cancel’ button. This will reset the order’s seal number back to the state it was in before the Assign Seal Action was clicked.
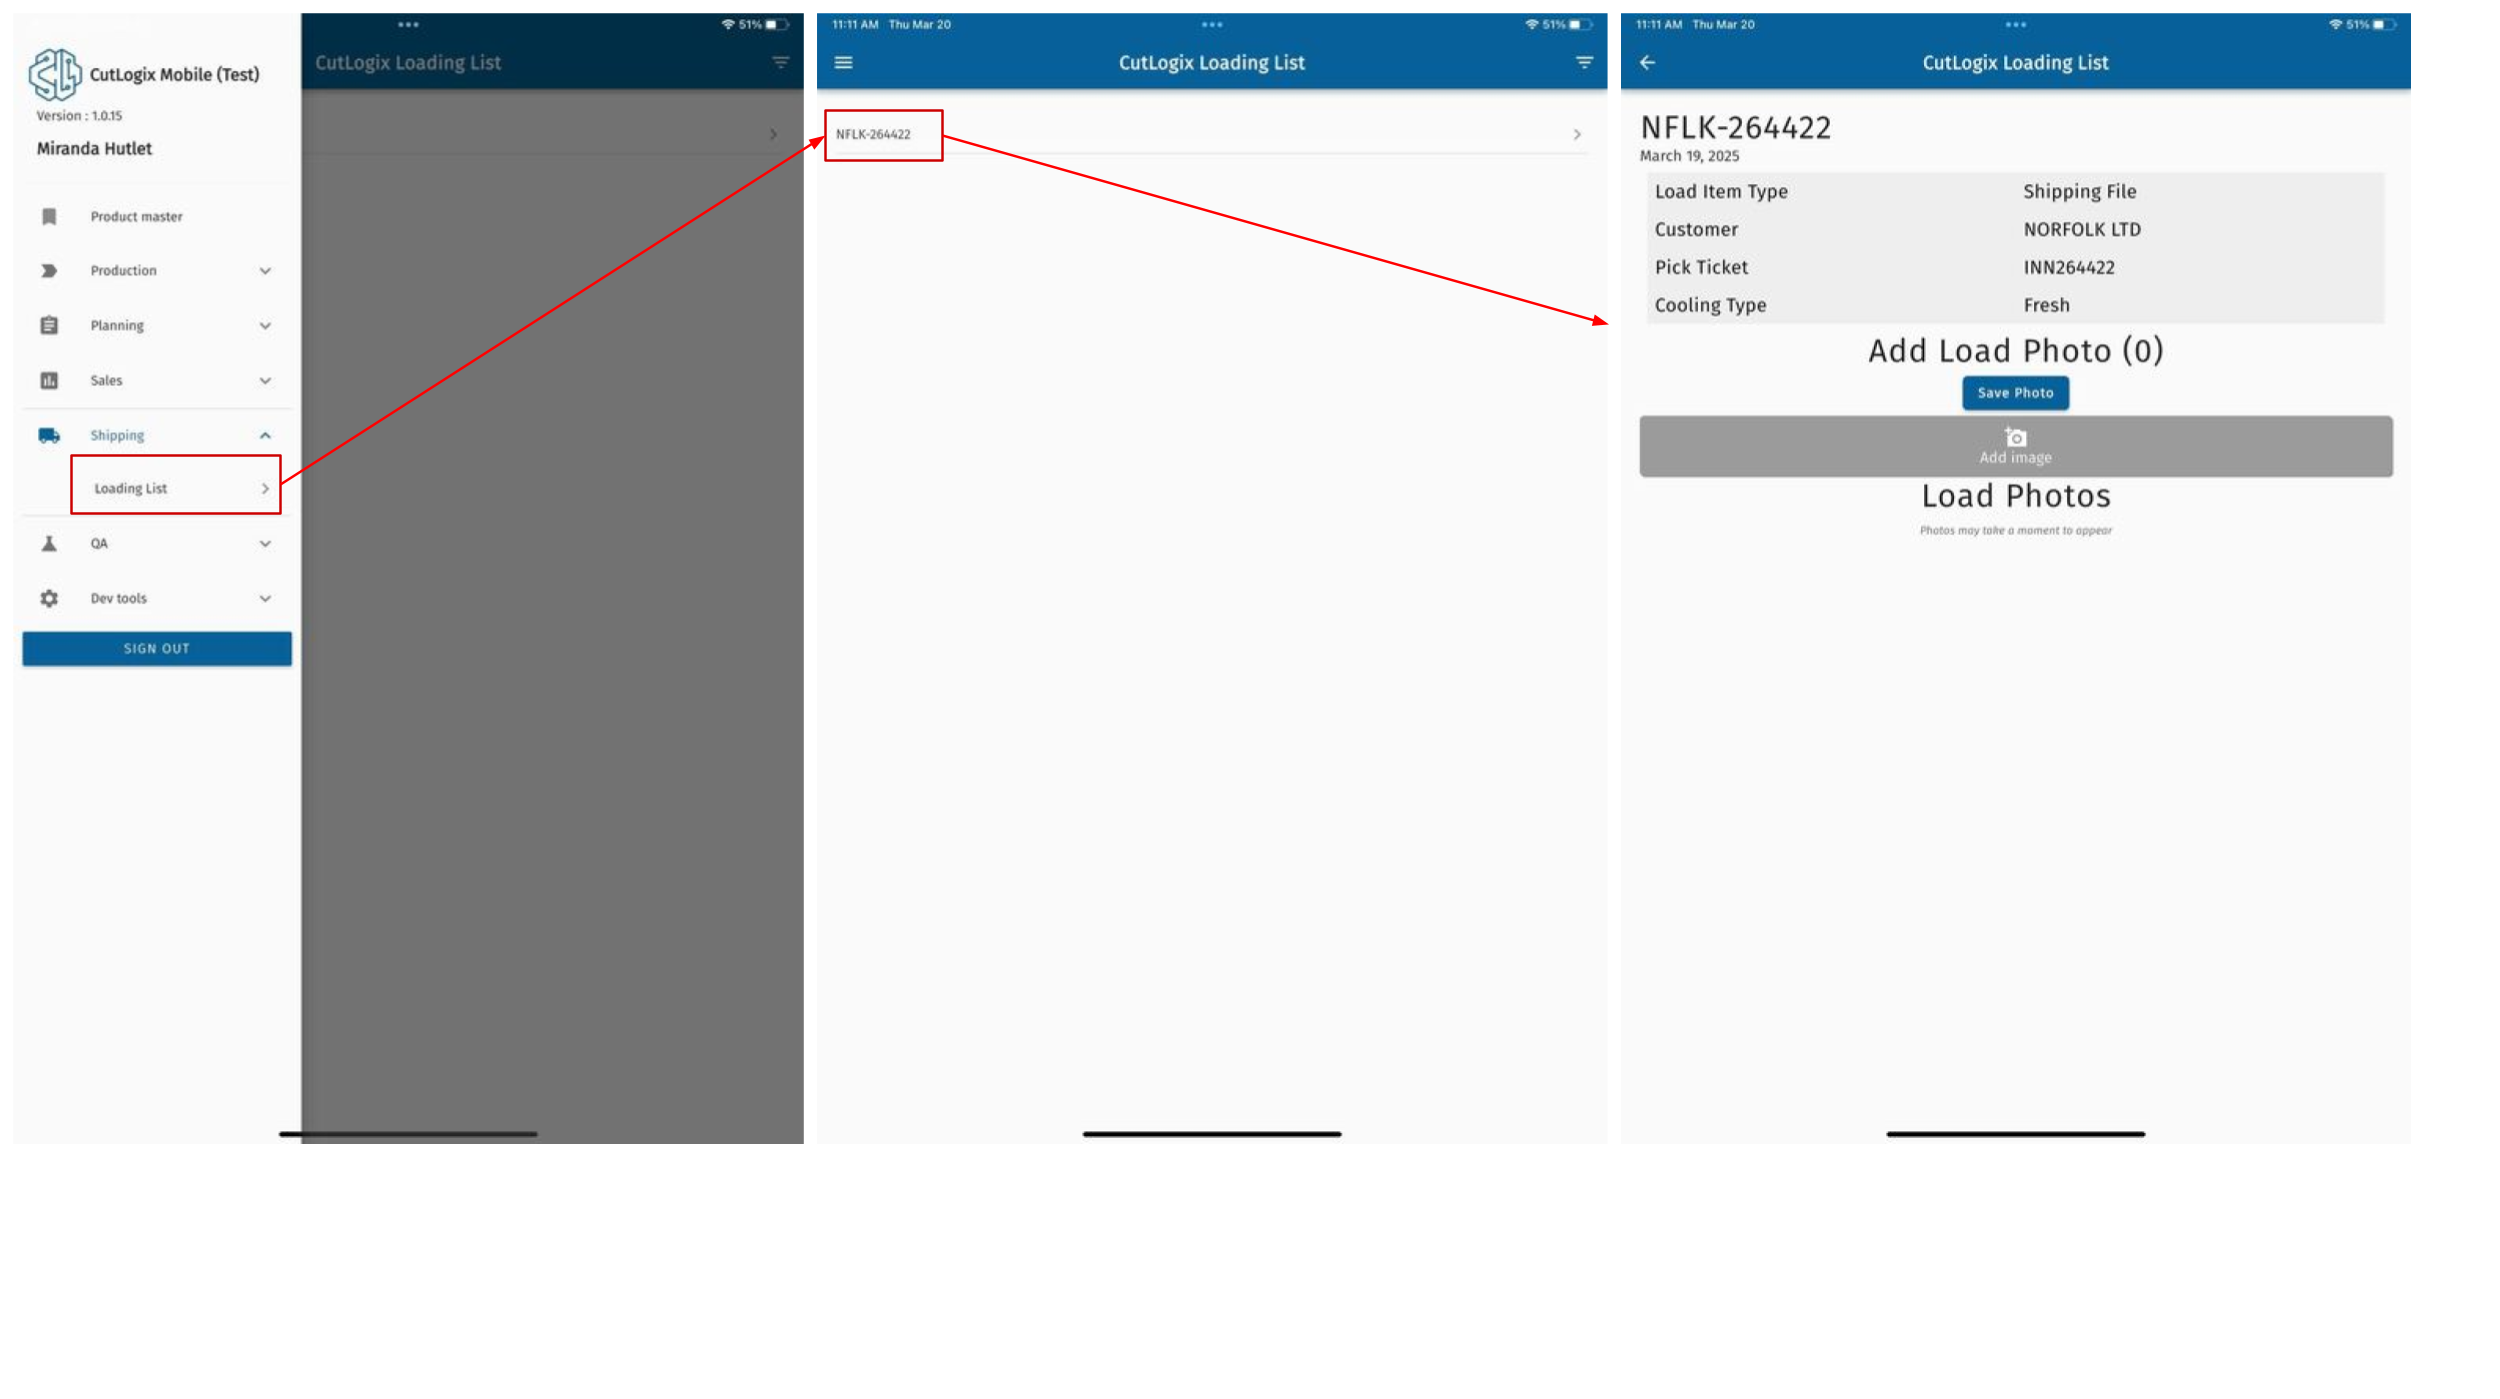
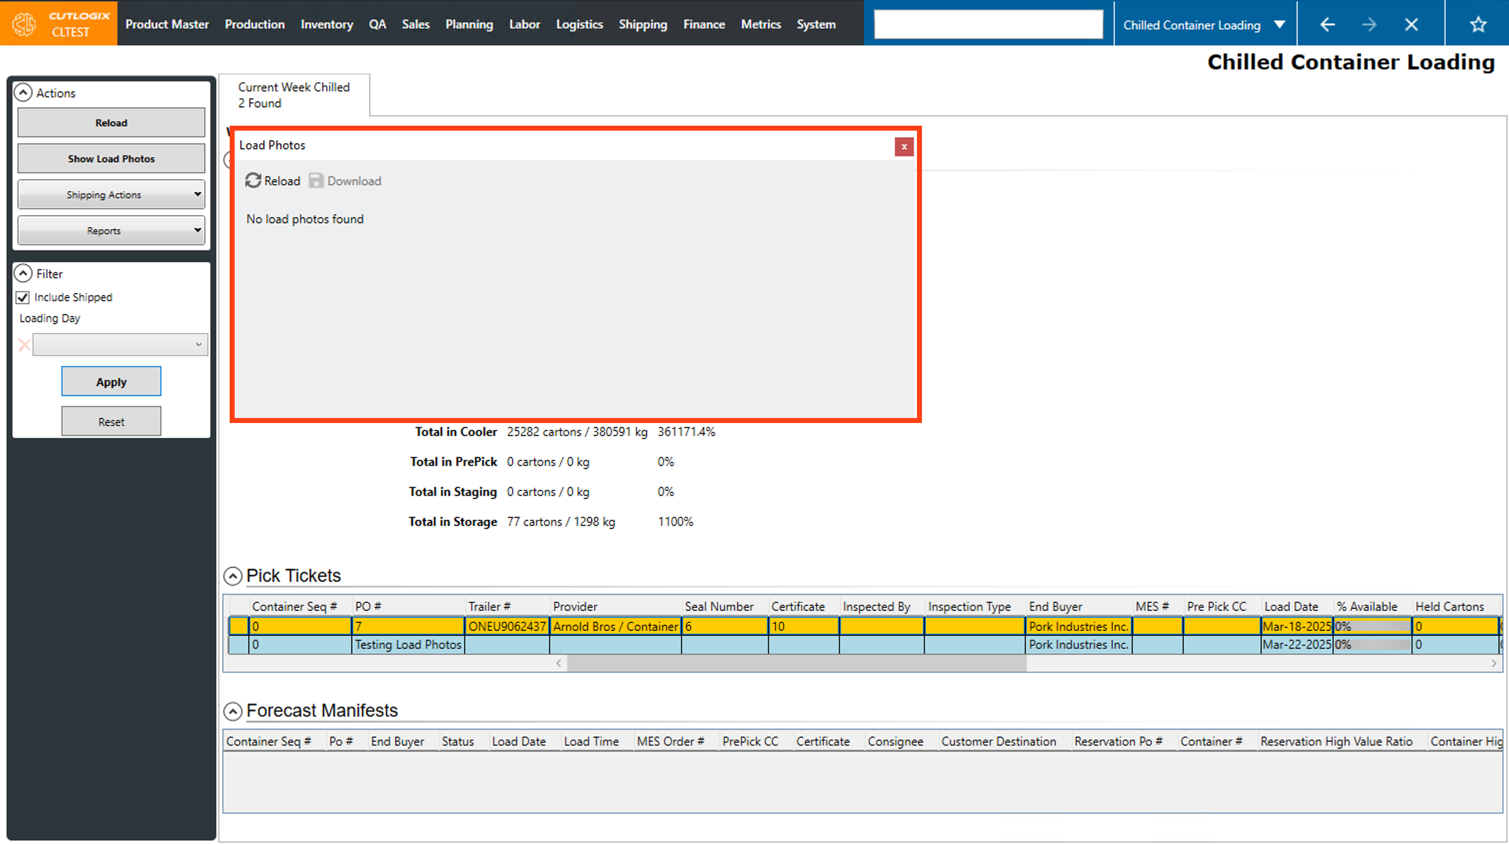
How to View Load Photos
DemoStep 1: Navigate to the "Chilled Container Loading" page. (Located under the "Shipping" menu option)
Step 2: Select the order in the Pick Ticket’s section that you wish to view load photos for and click the Show Load Photos button in the Actions sidepod on the left.

Step 3: A dialog will then appear where all photos for the selected load will appear. You can view and download the photos from here.
Step 4: These photos are added to the load from the CutLogix mobile app. This can be found under the "Shipping" → Loading List menu, then clicking on the load from the list. Then the option to upload load photos will appear.