Manual Production Order Tasks
How to Add Manual Production Orders
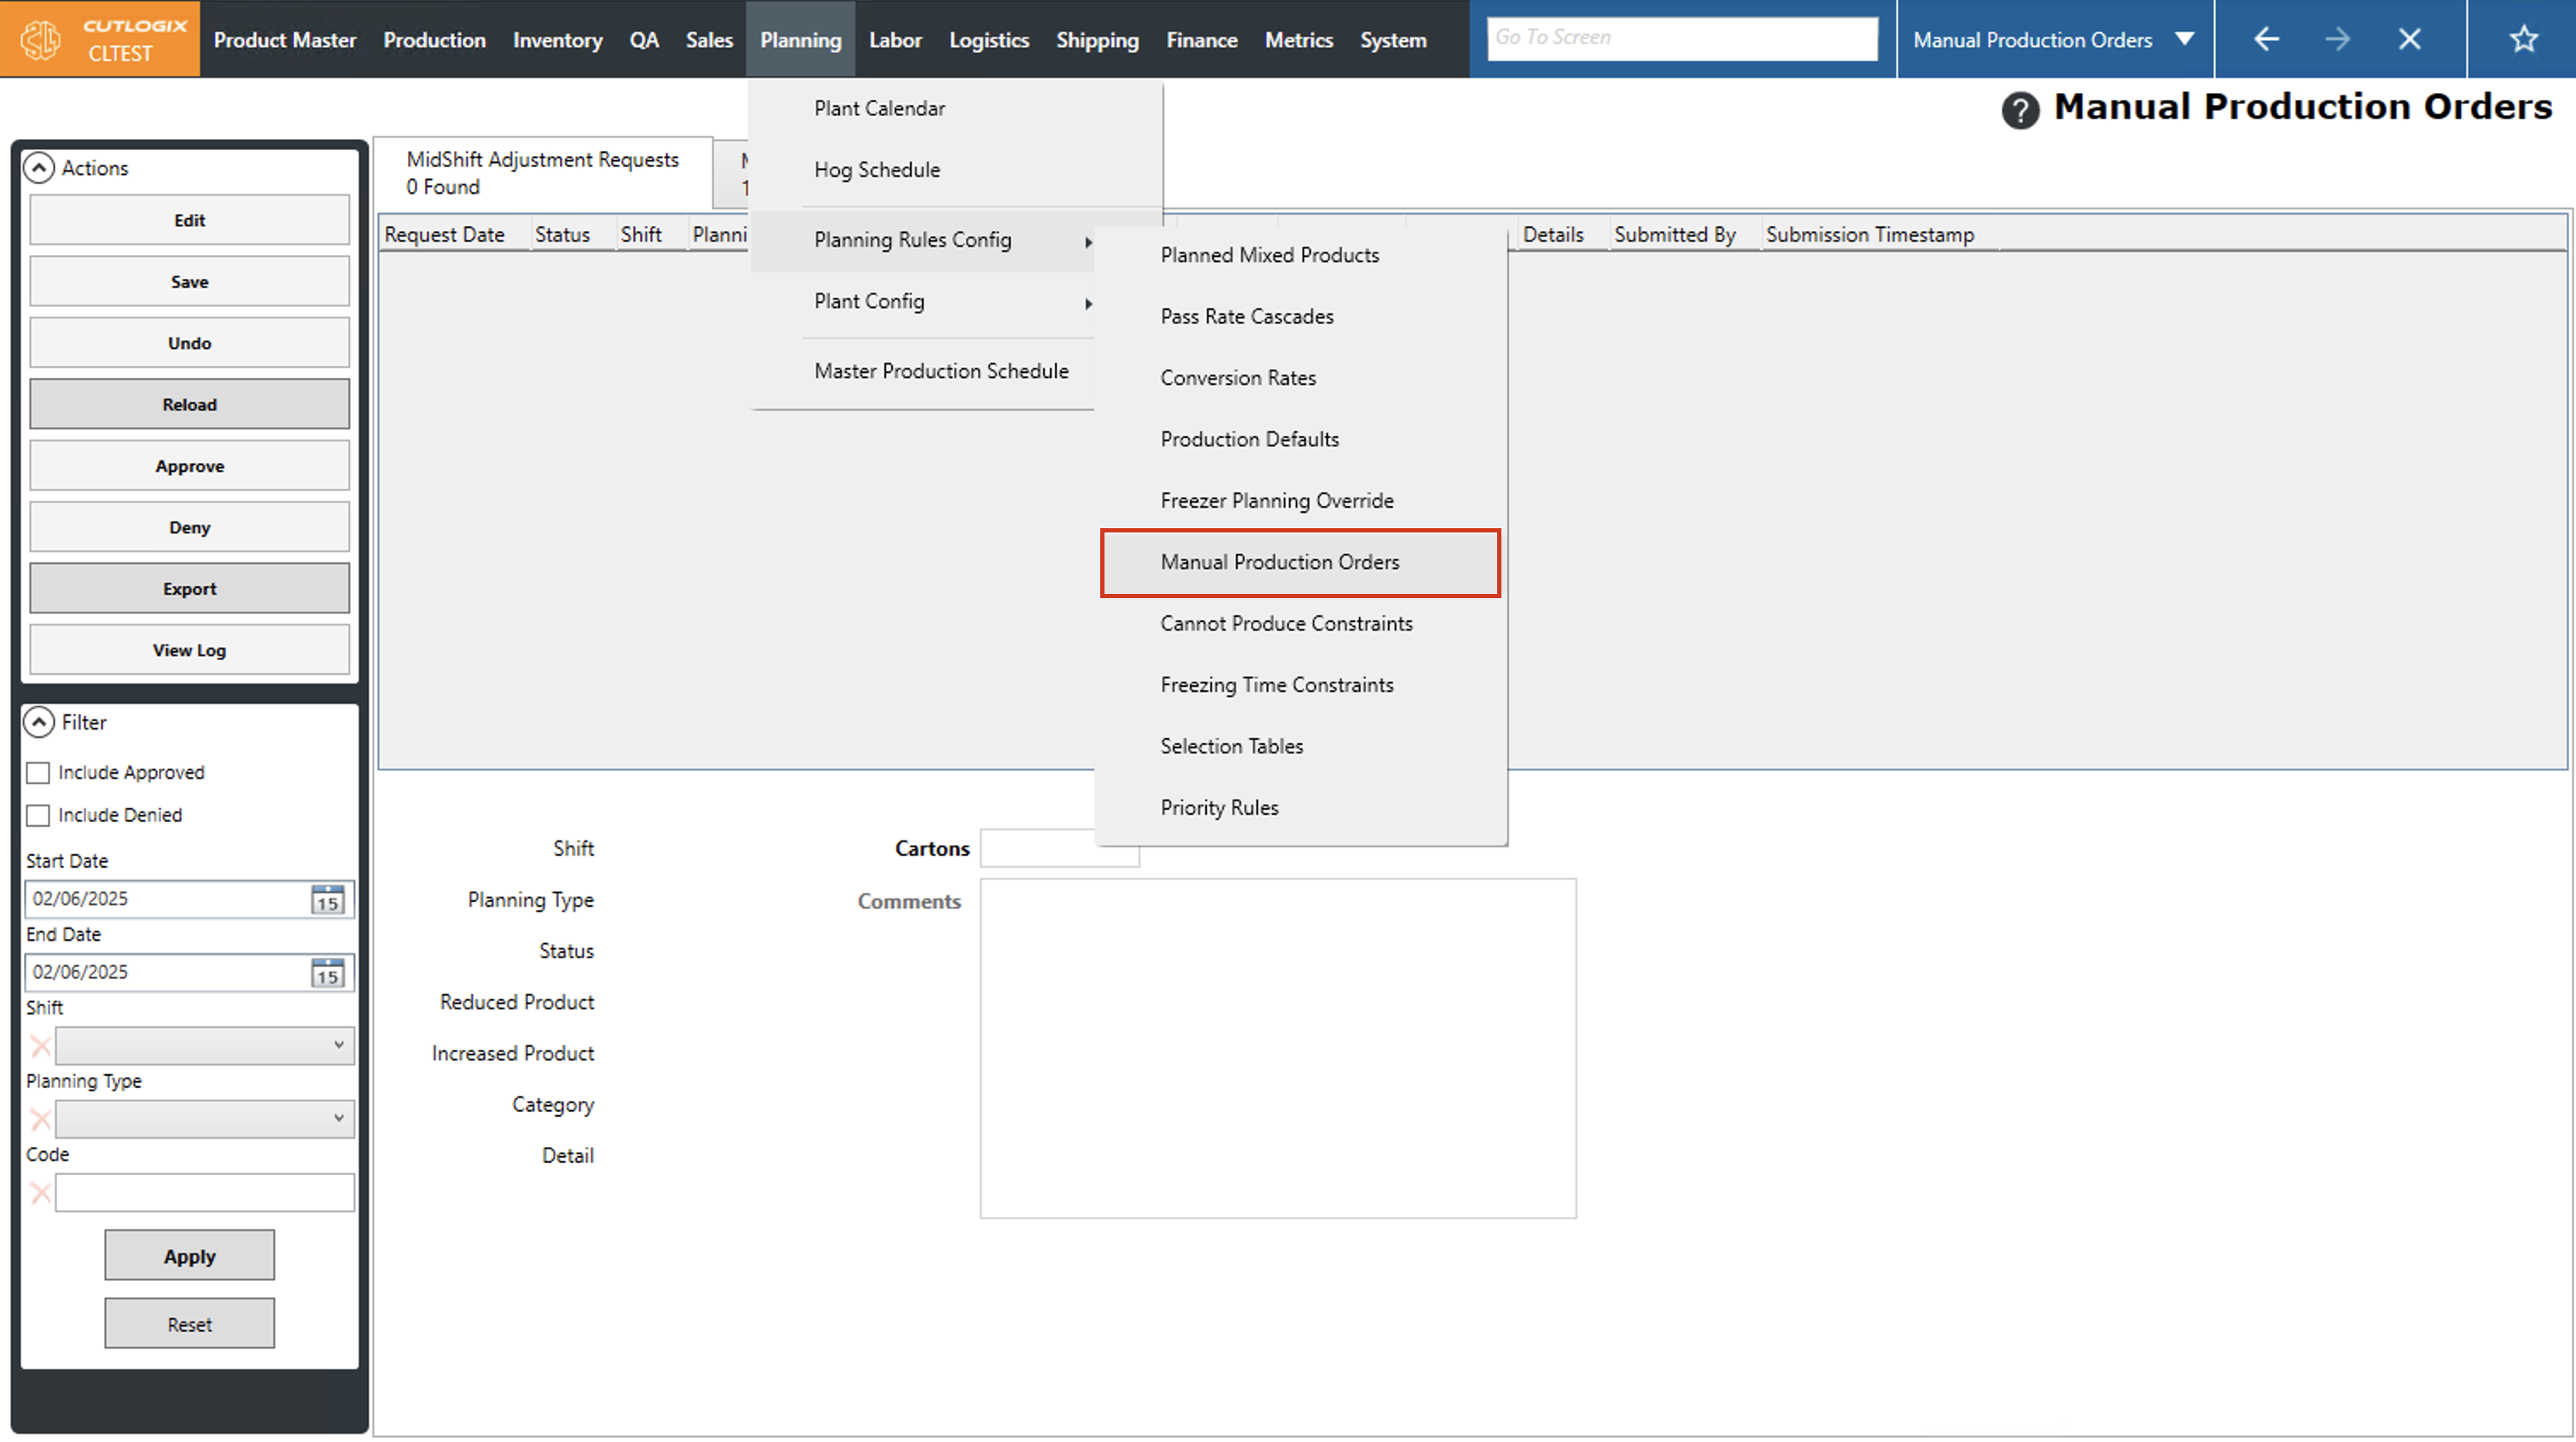
DemoStep 1: Navigate to the "Manual Production Orders" page (Under the Planning menu → Planning Rules Config → Manual Production Orders).
Step 2: Click on the "Manual Production Orders" tab, then click on the "Add" button in the left Actions Panel.
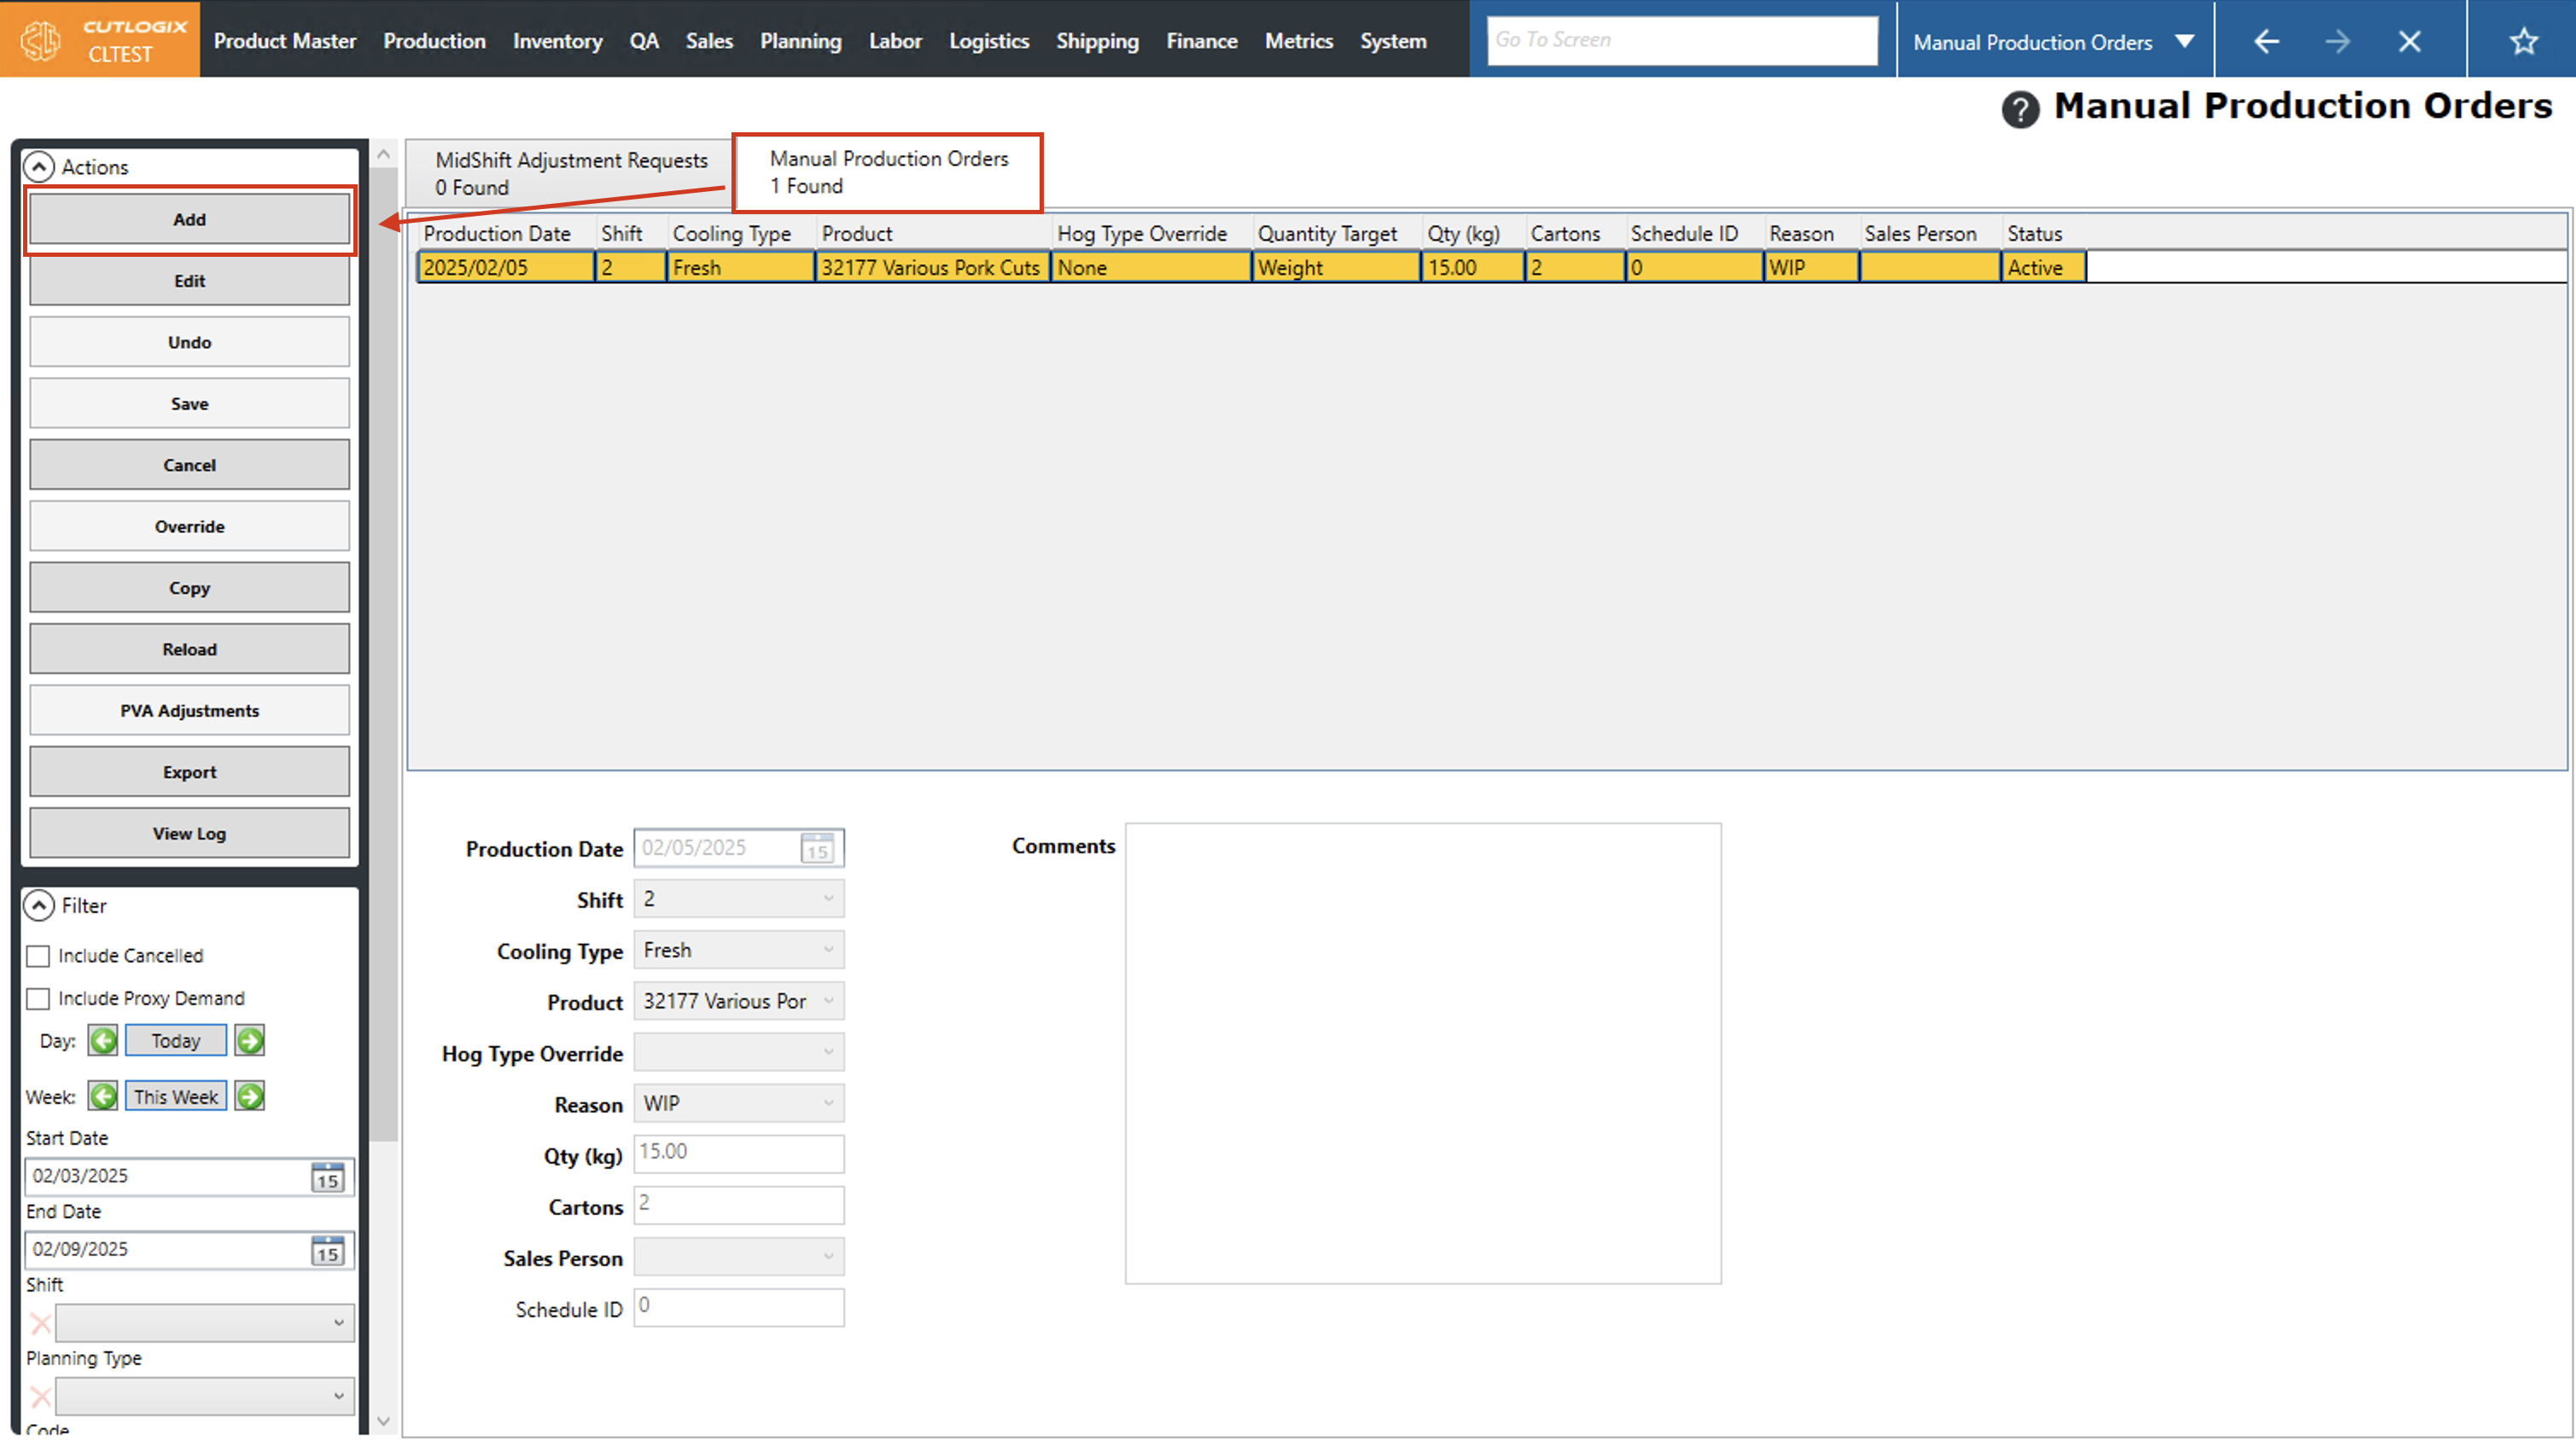
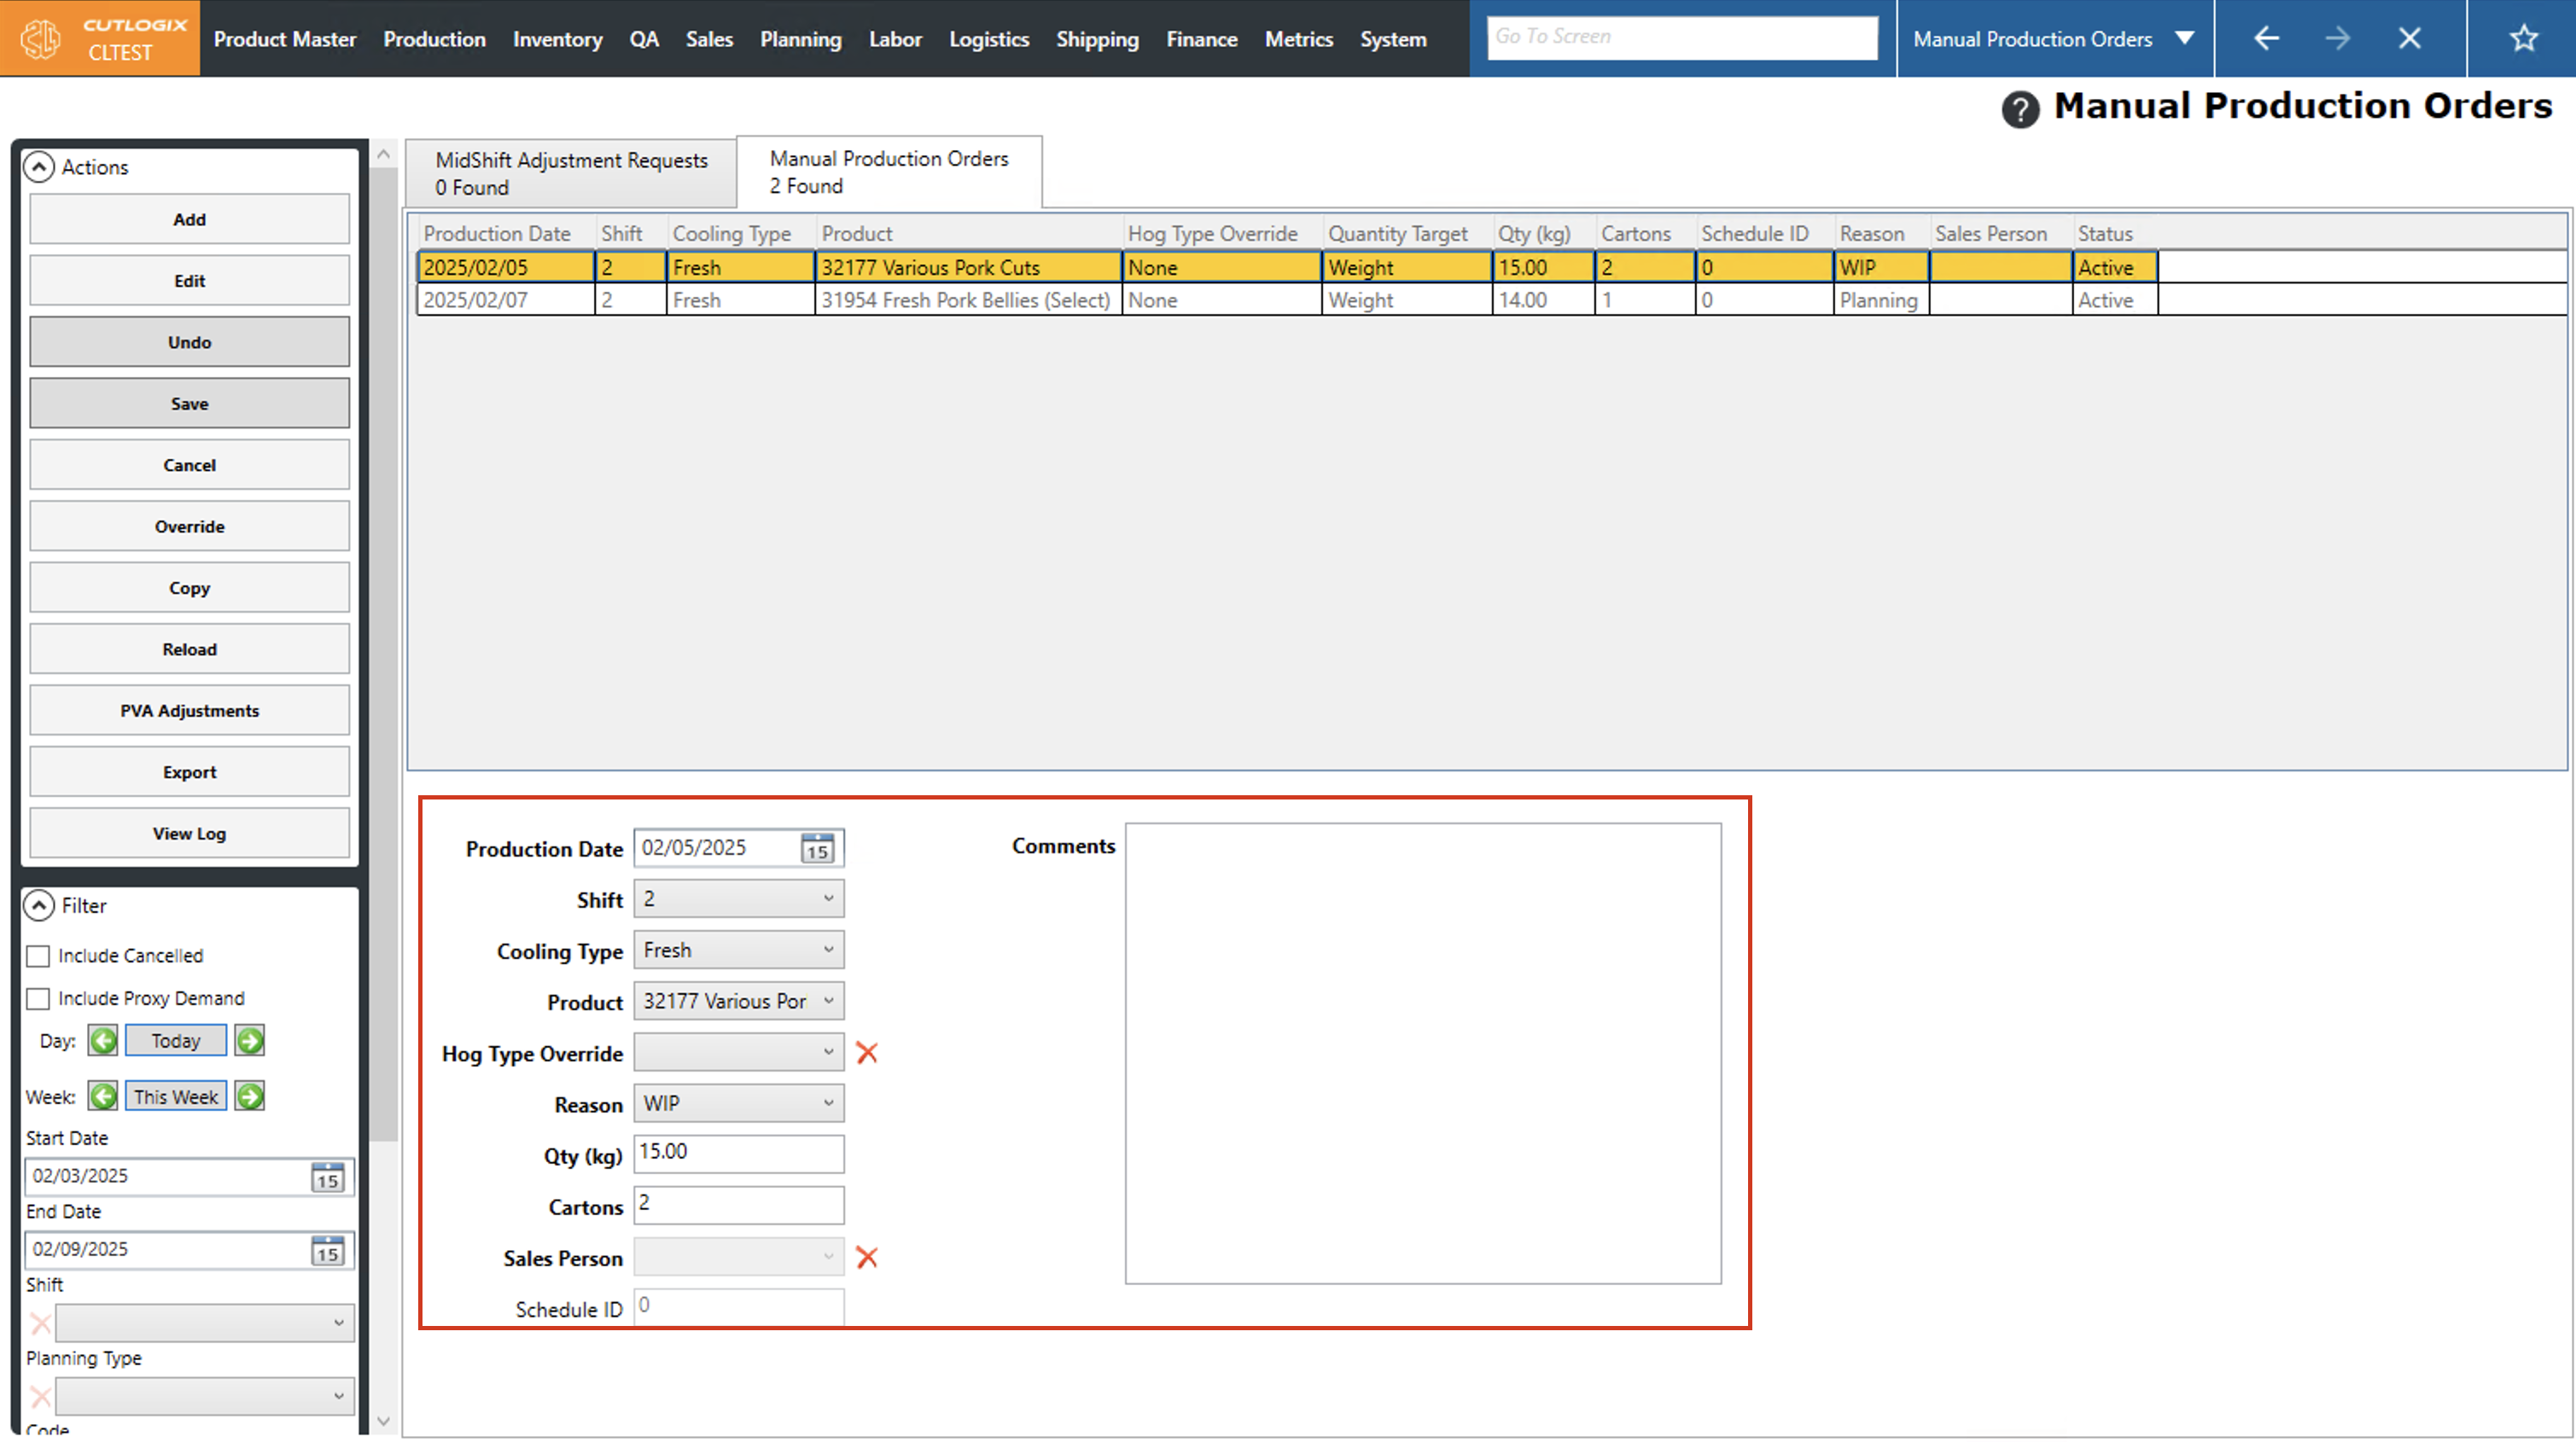
Step 3: Several input fields will appear near the bottom of the page where you can enter the details about the manual production order. Fields highlighted in red are required and must be entered before the manual production order can be saved. These fields are as follows:
• Production Date: The date the product on this manual production order should be produced.
• Shift: The shift on the selected production date that the product should be produced on.
• Cooling Type: The cooling type for the product to be produced.
• Product: The product to be produced on this manual production order.
• Reason: The reason for the manual production order)
• Qty: The quantity of the product to be produced. This can be entered in as an amount in Kgs in the Quantity field or as a number of cartons in the cartons field.

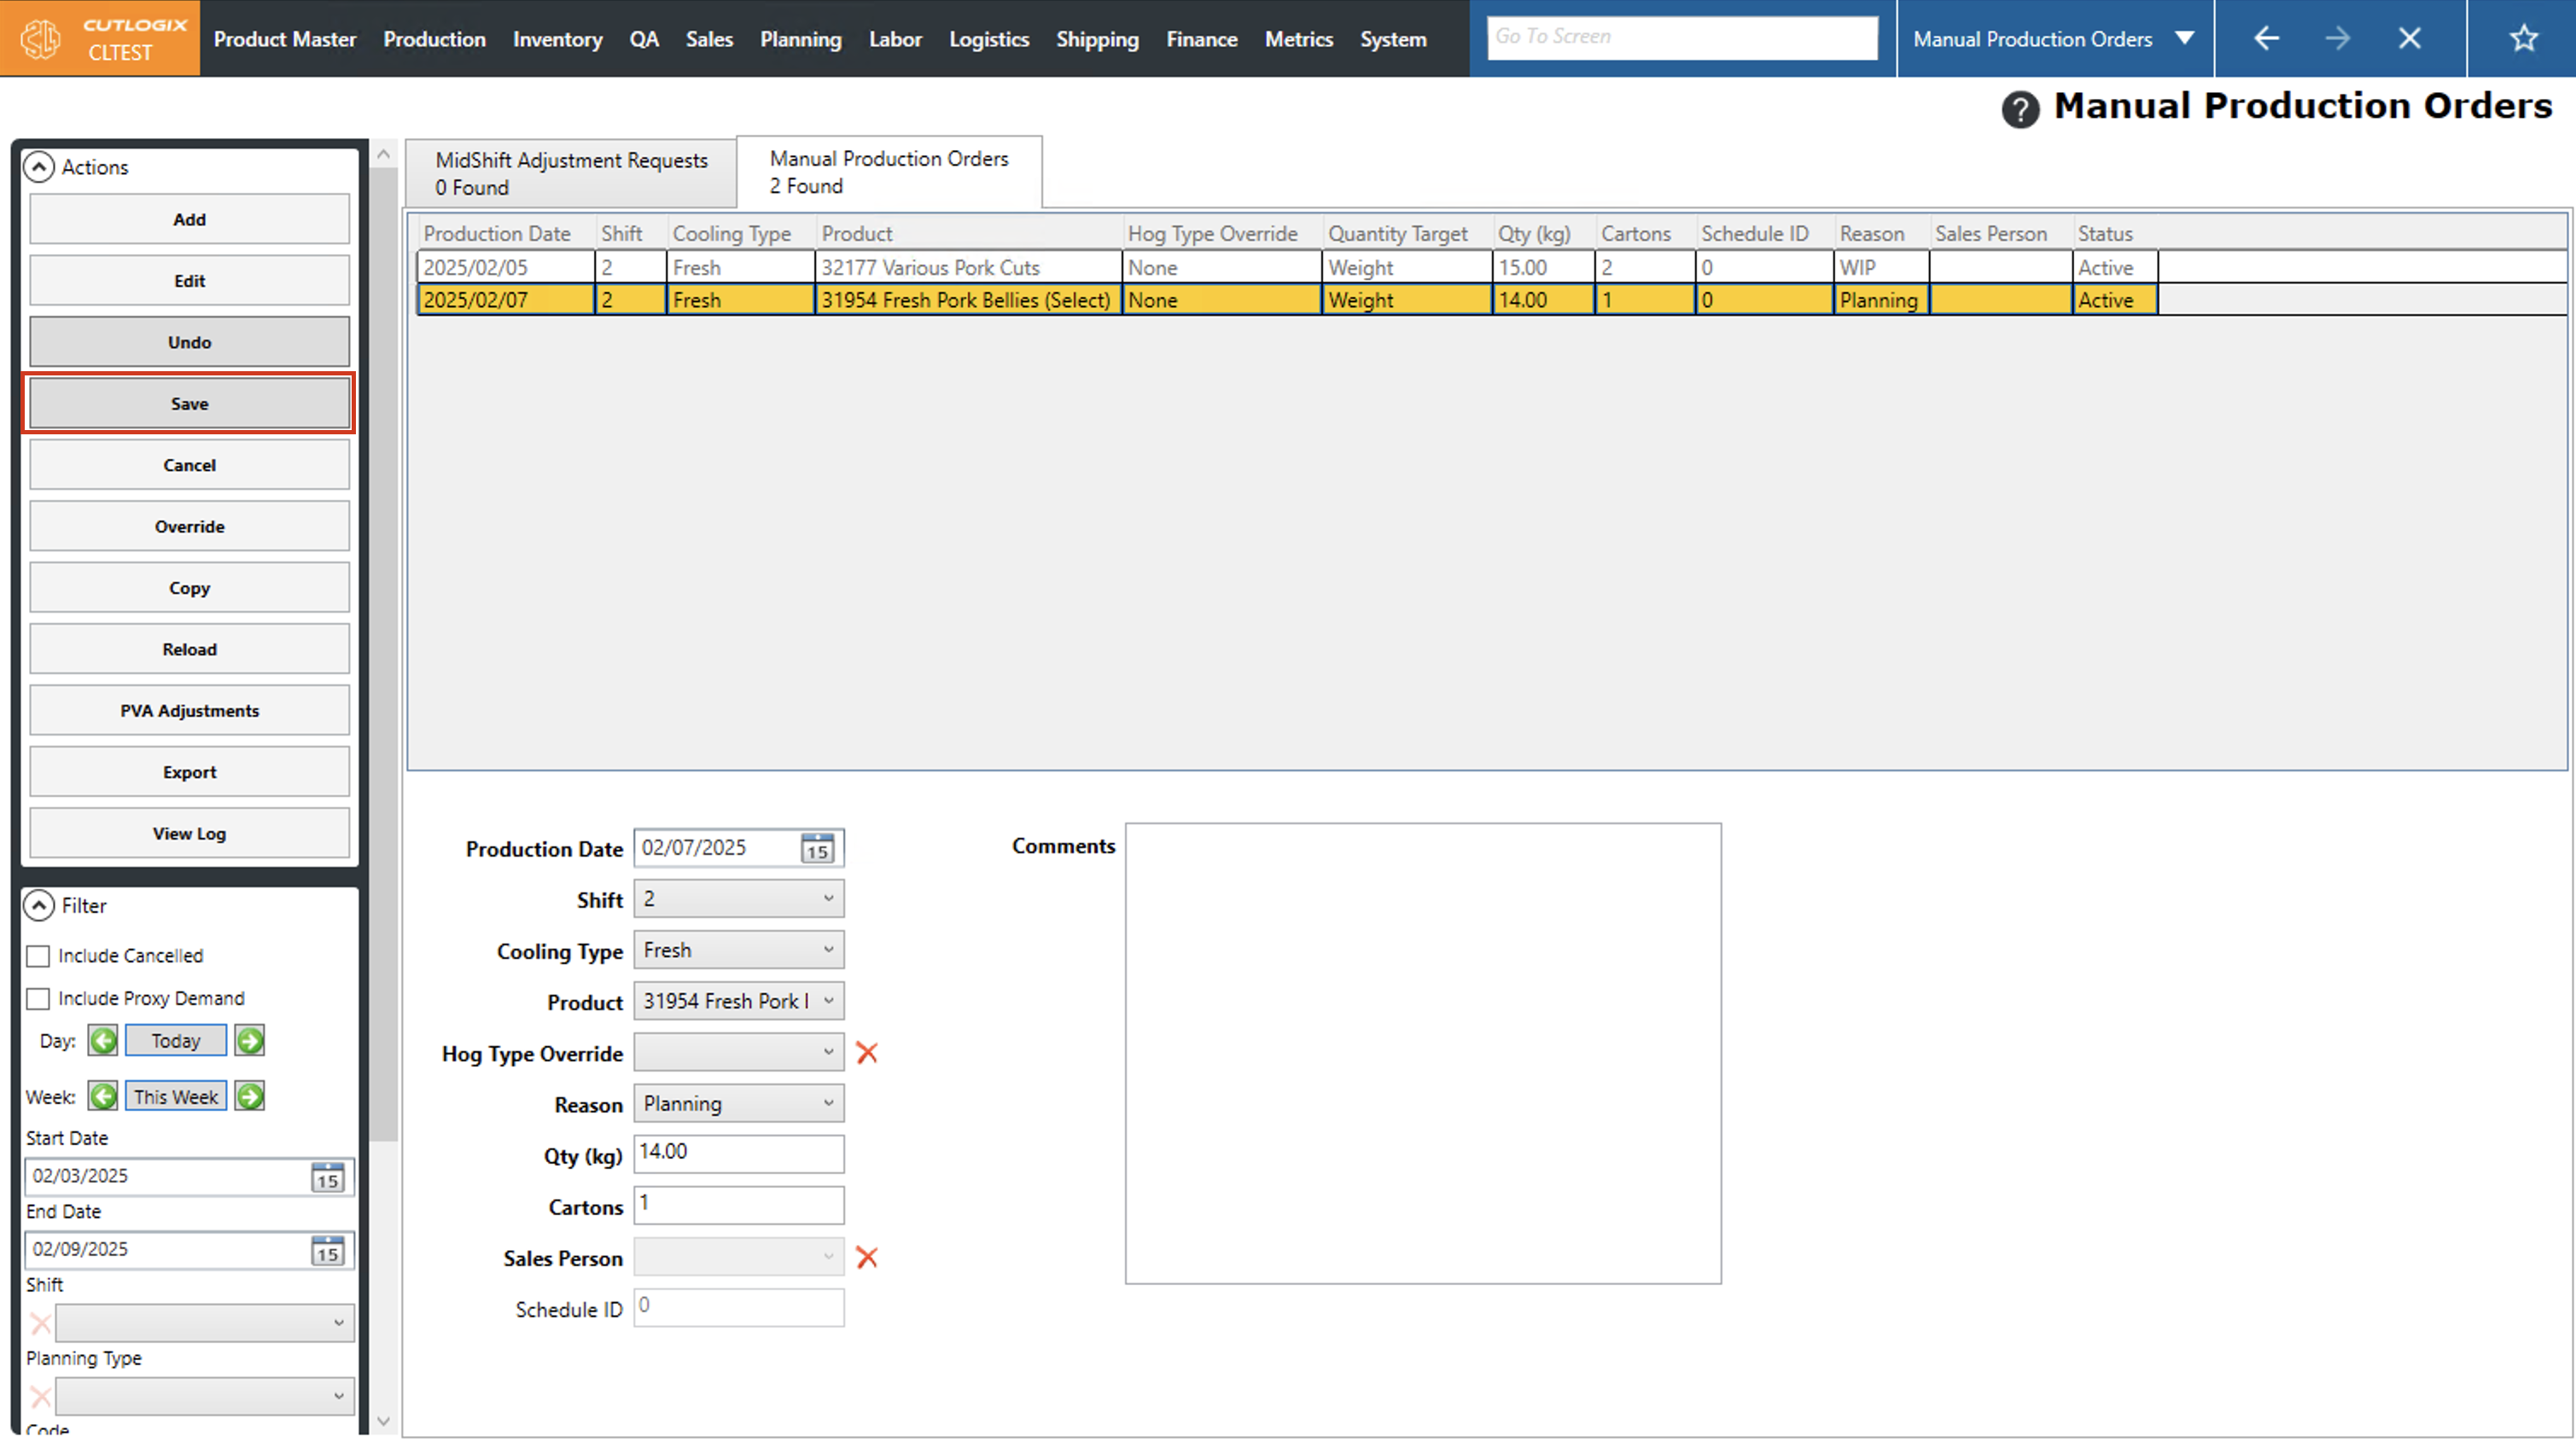
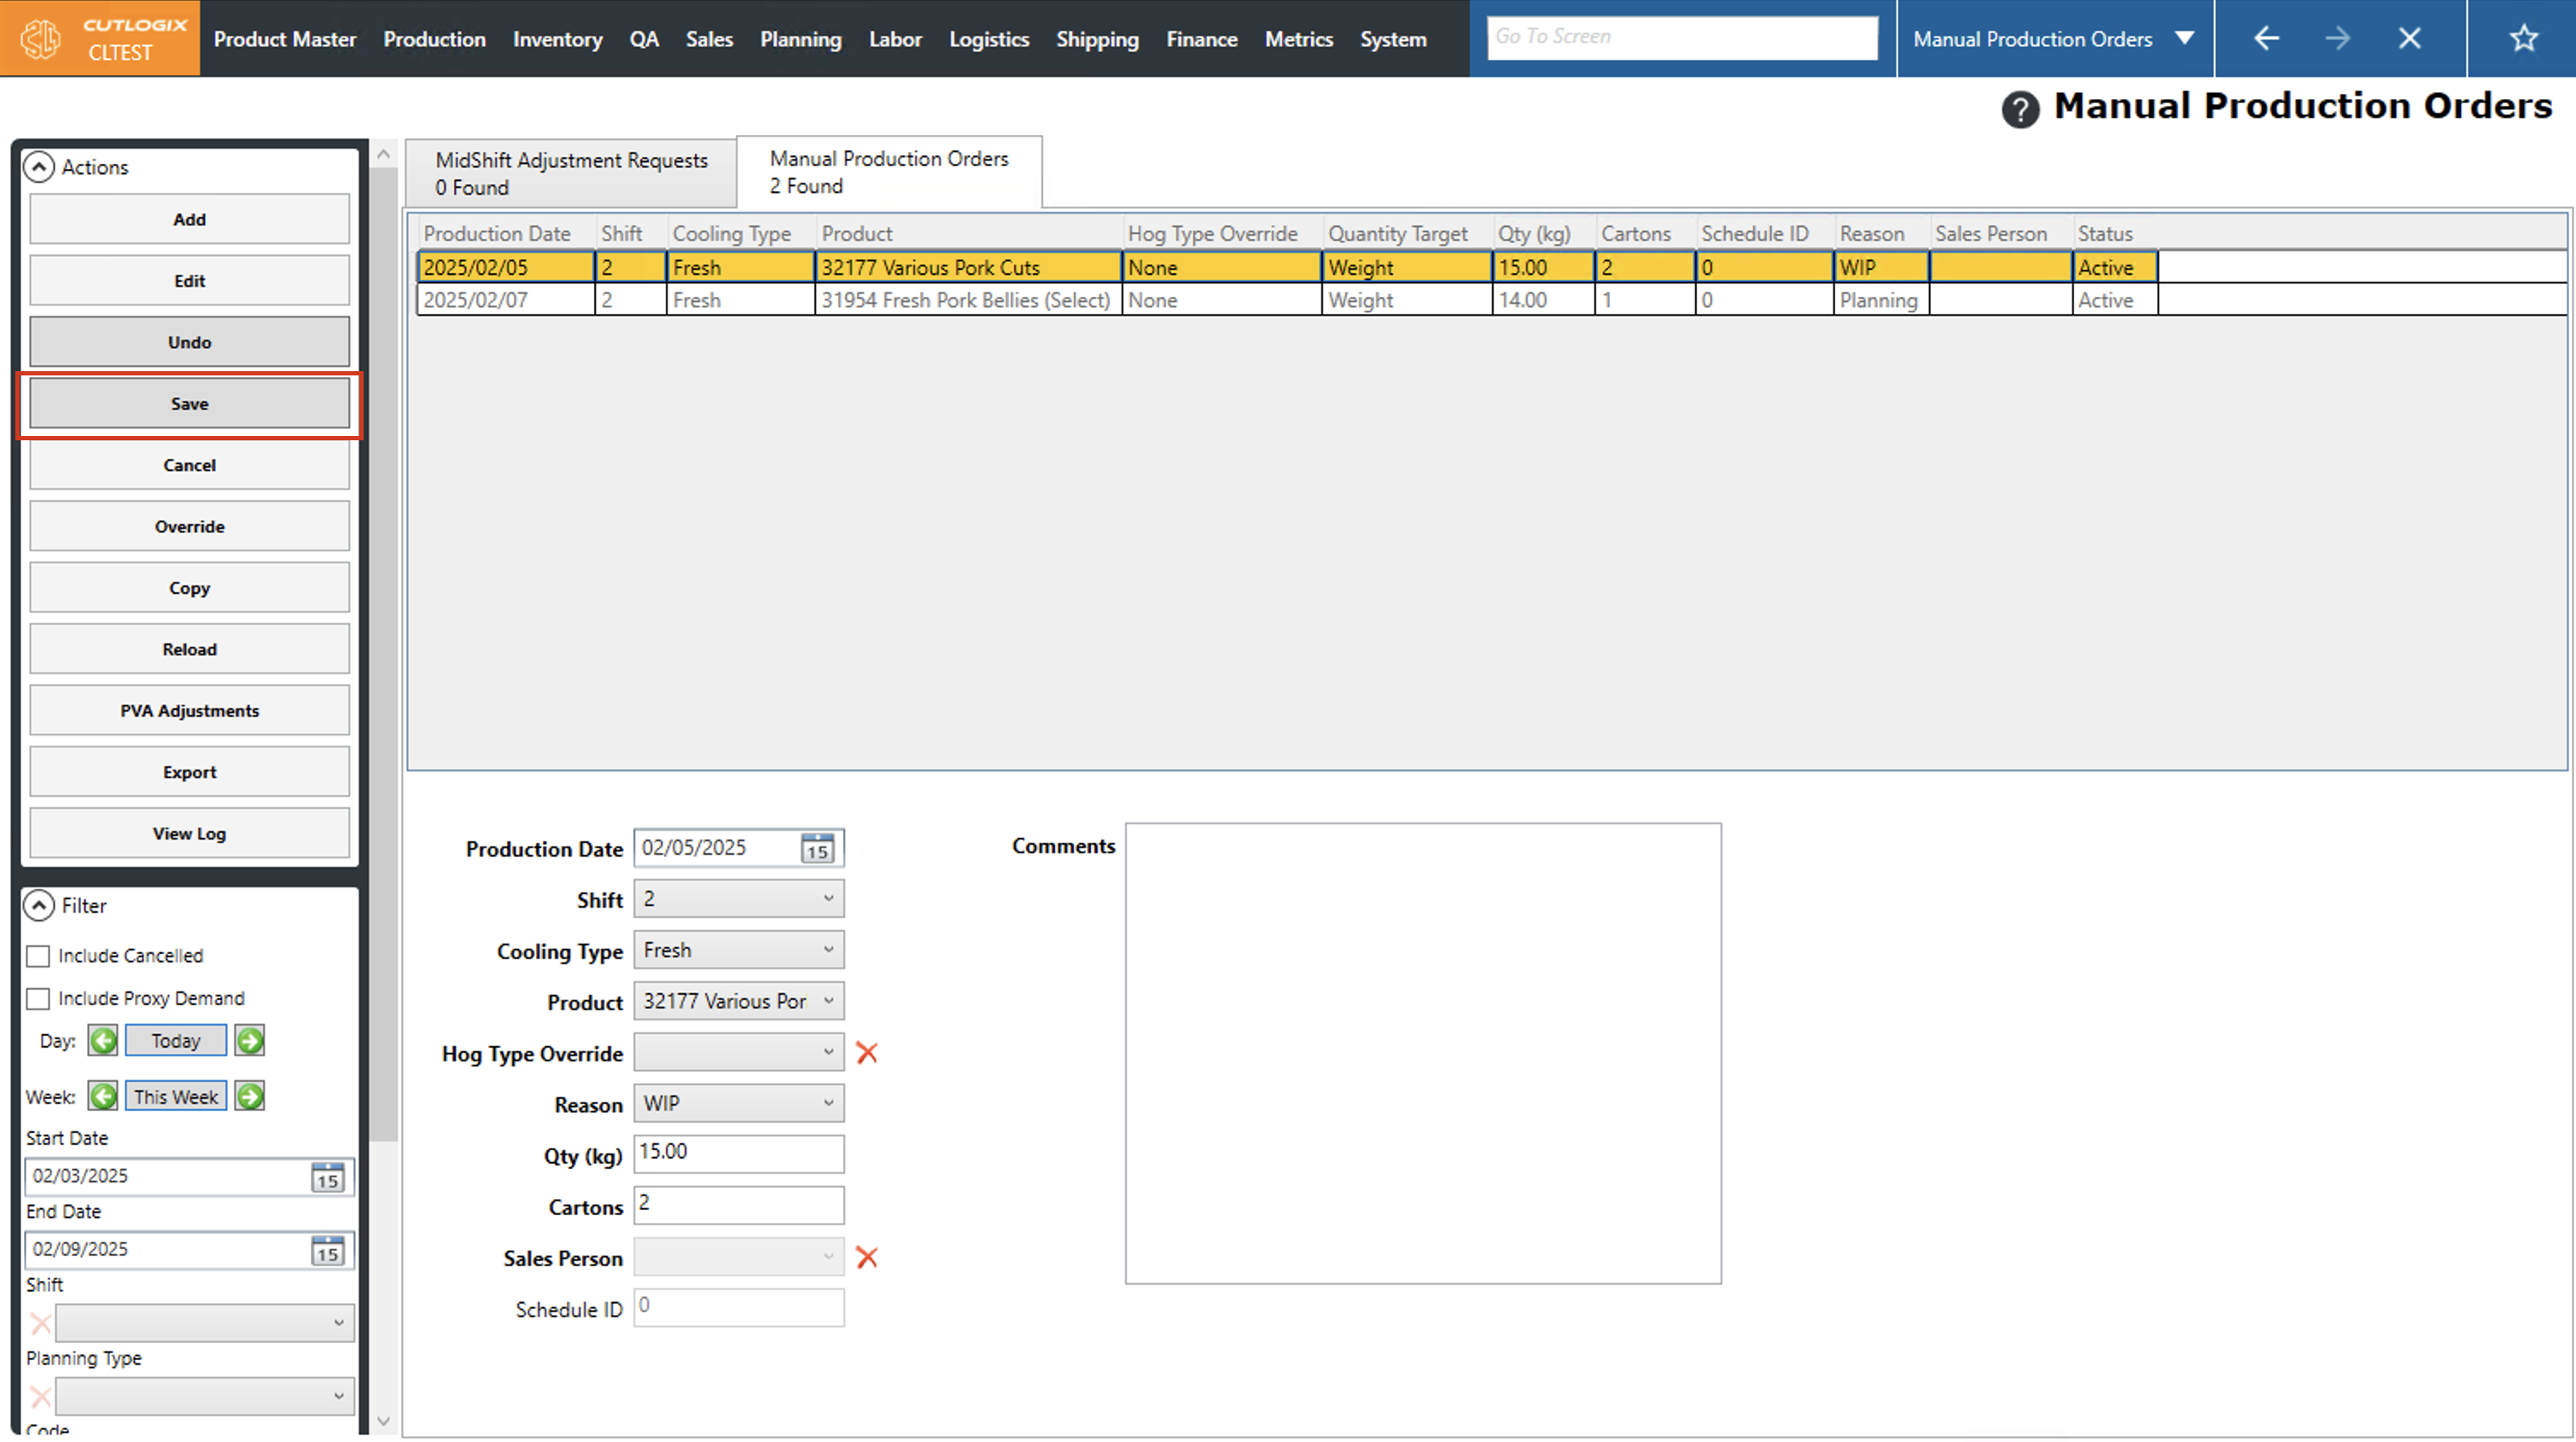
Step 4: Once all the required information has been entered, click "Save" in the Actions Panel to save the manual production order. If you don't want to save the manual production order, clicking "Undo" in the actions panel will discard it.
How to Edit Manual Production Orders
DemoStep 1: Navigate to the "Manual Production Orders" page (Under the Planning menu → Planning Rules Config → Manual Production Orders) and click on the "Manual Production Orders" tab.
Step 2: Click on the manual production order that you want to modify (it will be highlighted in orange once selected). Then click the "Edit" button in the Actions Panel.
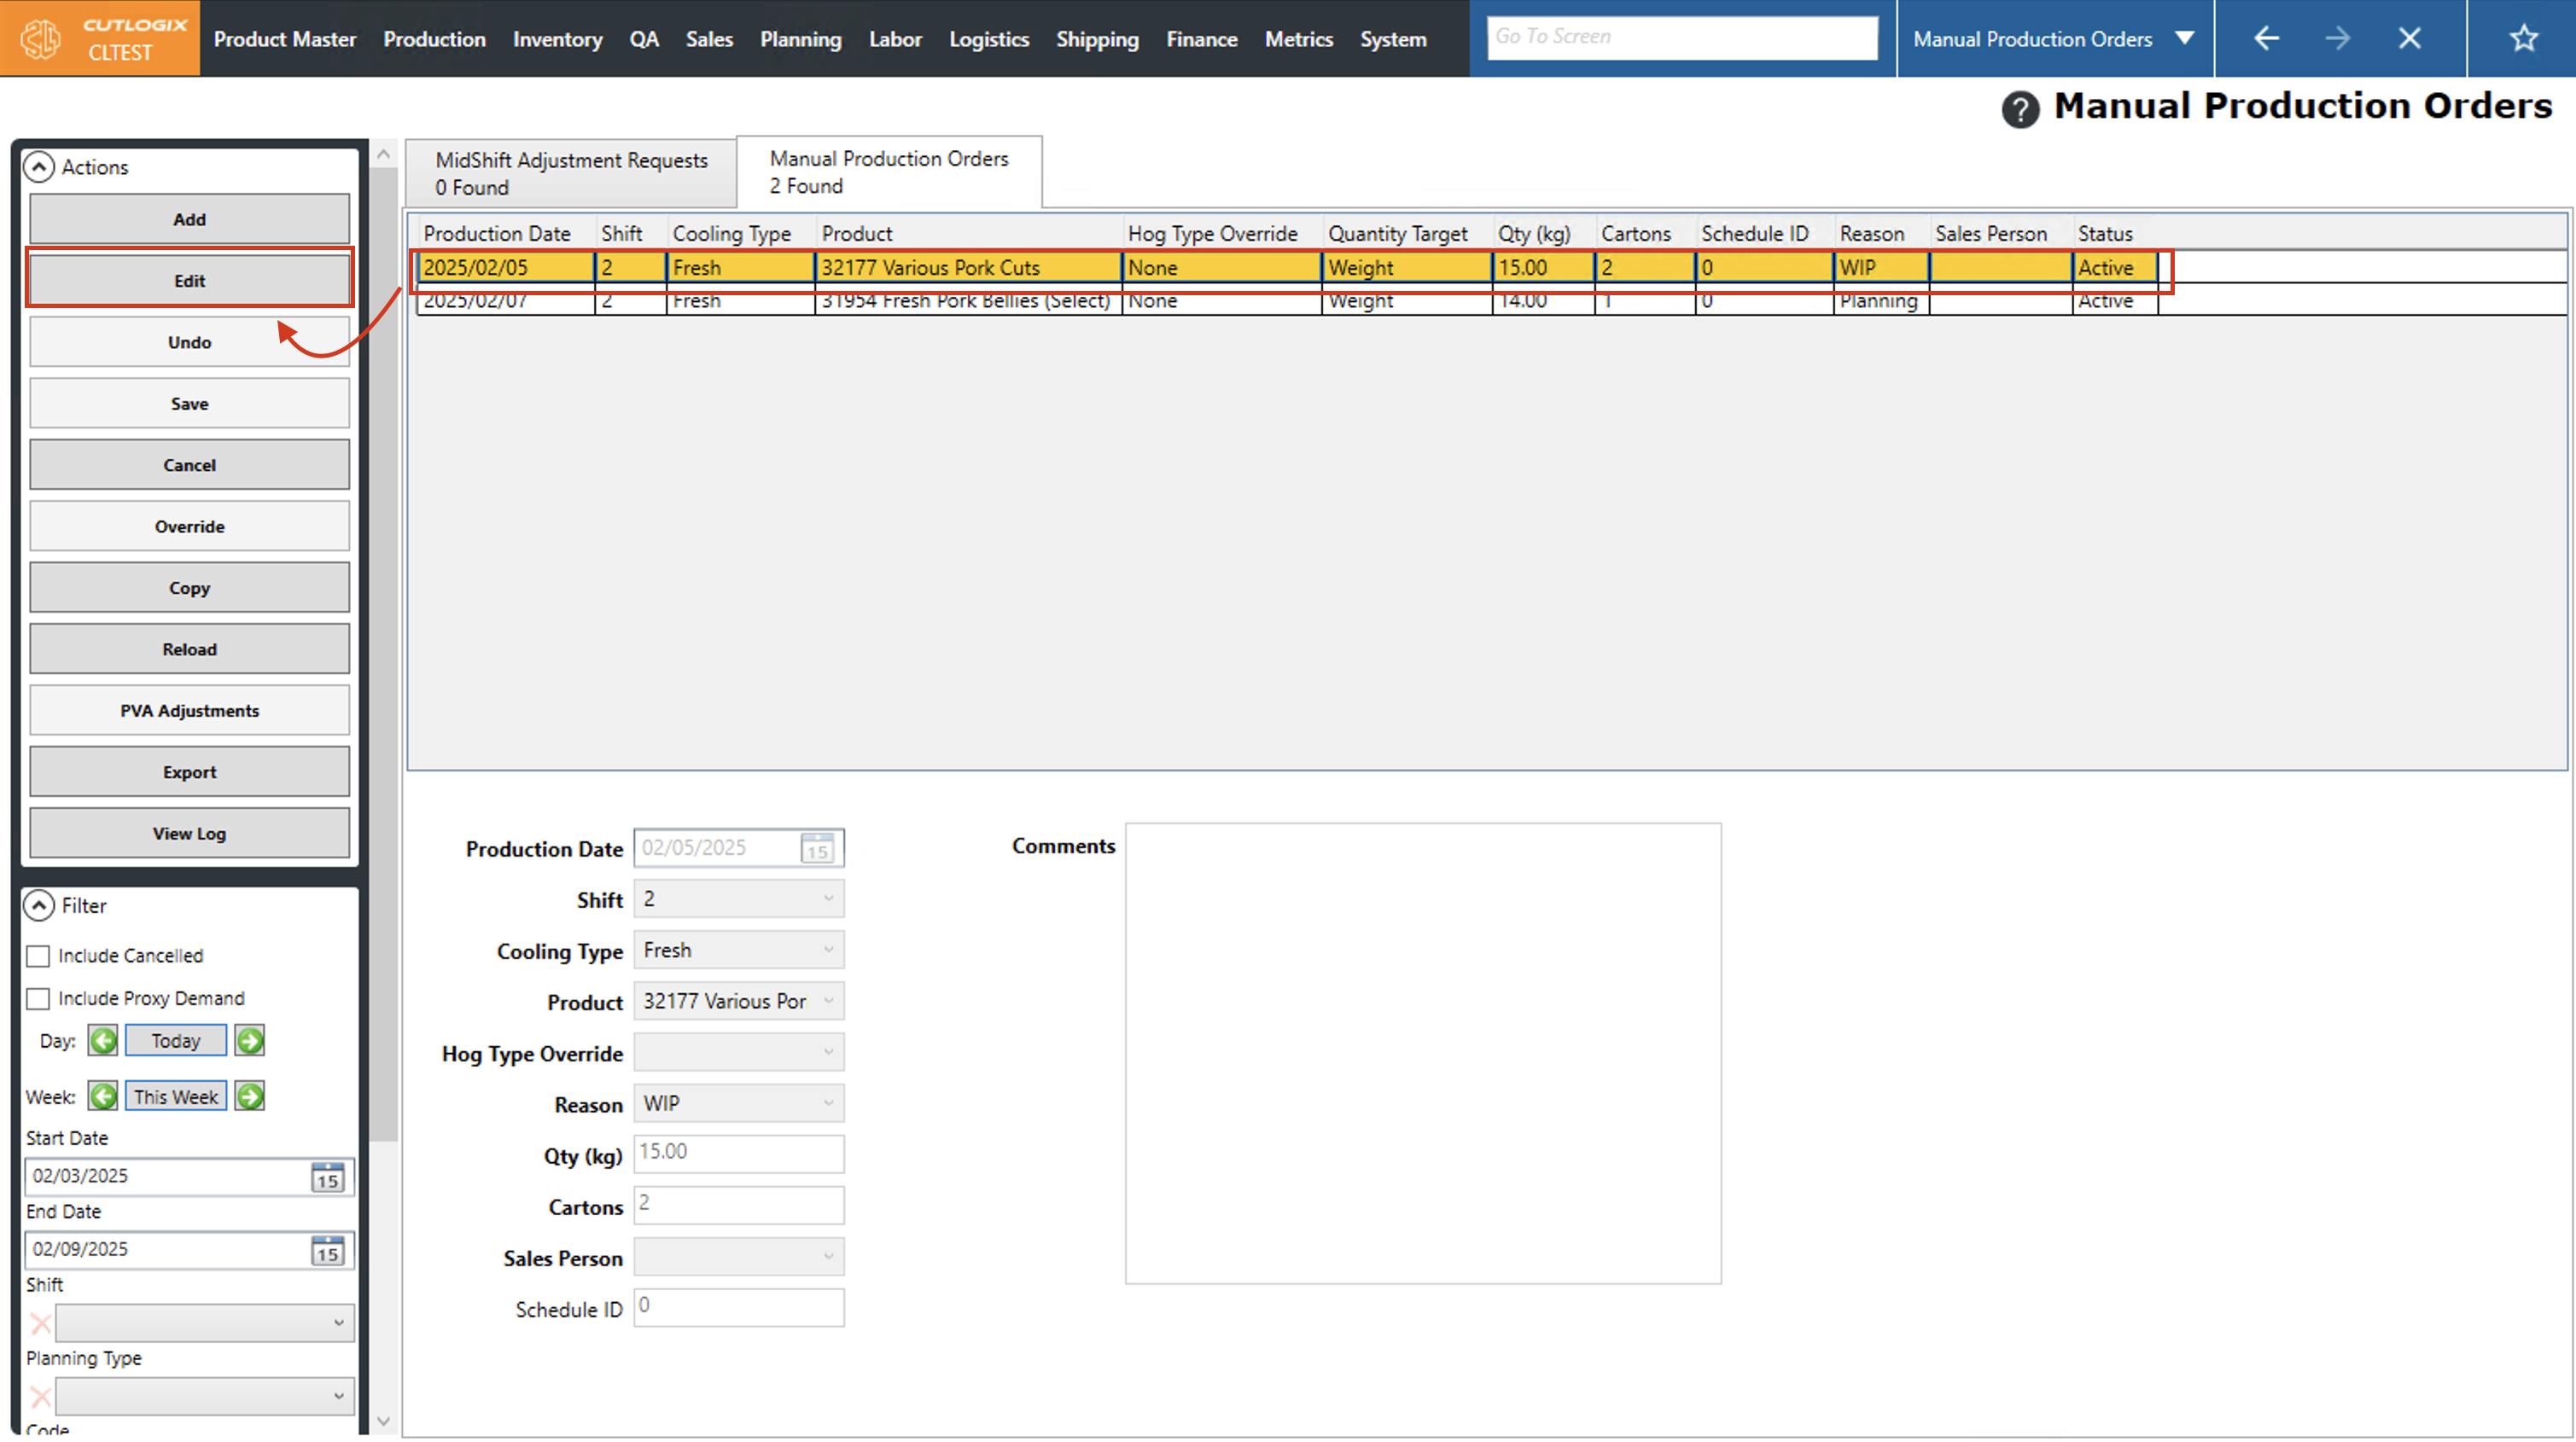
Step 3: Fields will appear at the bottom of the page where you can make the necessary changes to the manual production order.
Step 4: Once all the changes have been made, click "Save" in the Actions panel to save them. If you don't want to save the changes, click "Undo" in the actions panel. This will discard the changes and revert the manual production order to its state prior to your edits.
How to Auto Generate PVA Adjustments Mid Shift
DemoStep 1: Navigate to the "Manual Production Orders" page (Under the Planning menu → Planning Rules Config → Manual Production Orders) and click on the "Manual Production Orders" tab.
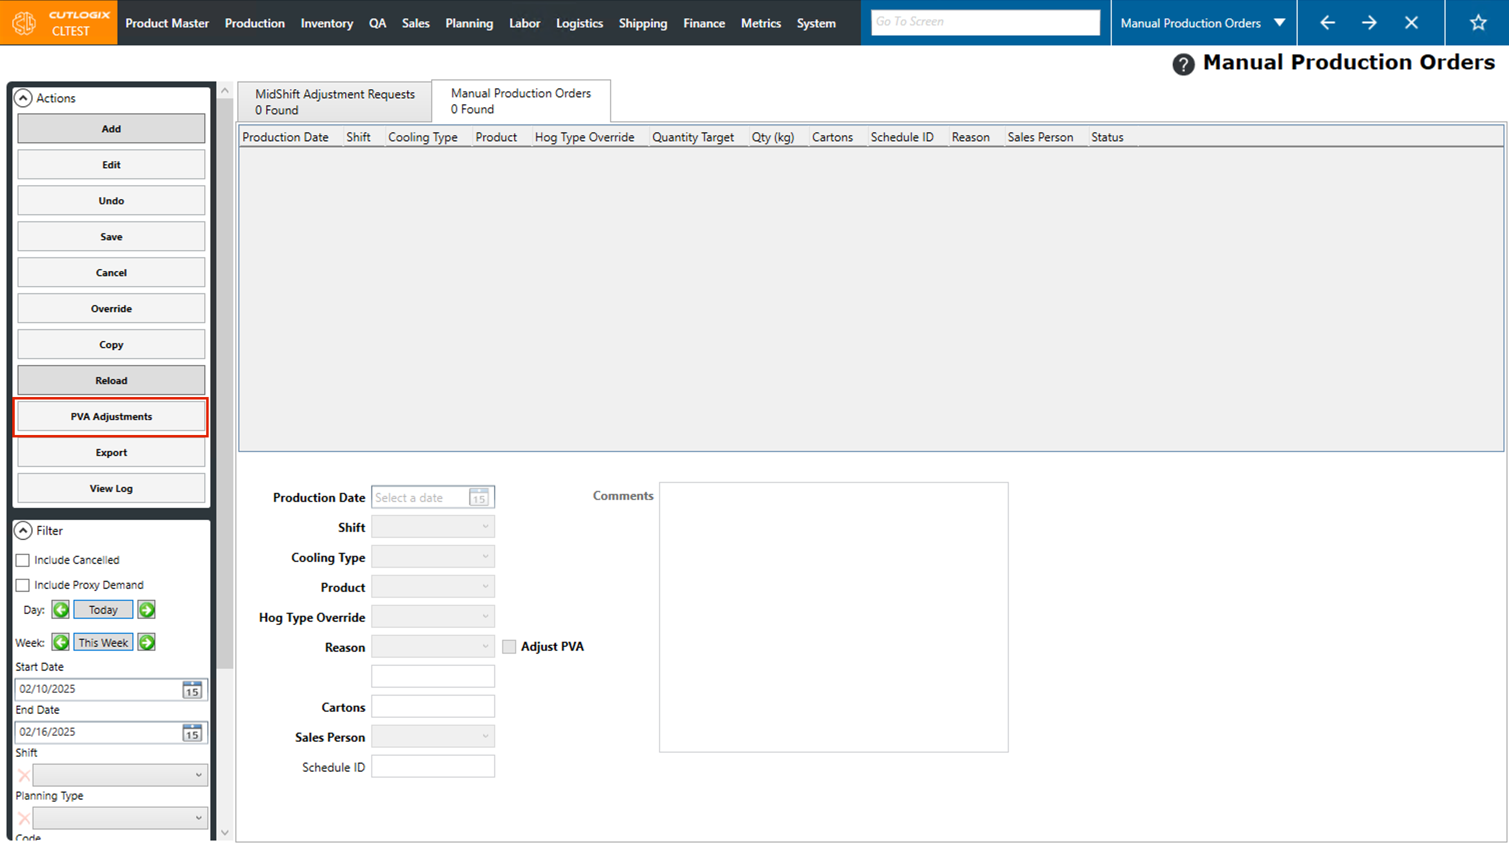
Step 2: Click the "PVA Adjustments" button in the Actions panel.
Note: This button is only enabled for one hour prior to the start of the next shift.
This will create adjustments based off of what has been produced vs what needed to be produced. It effectively tells the MPS that what has been made up to this point is all that will be made for the current shift, this allows the MPS to plan the remaining amounts in the next shift.
How to Create Mid-Shift Adjustments in CutLogix Mobile
Step 1: In CutLogix mobile, open the “Planning” menu and click on “Mid-shift adjustments”.
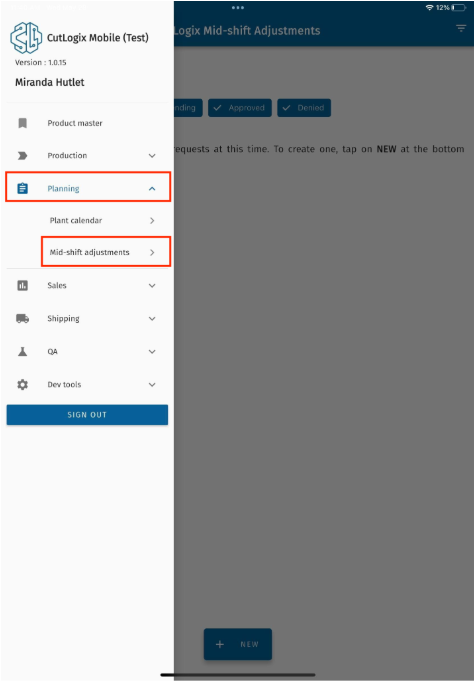
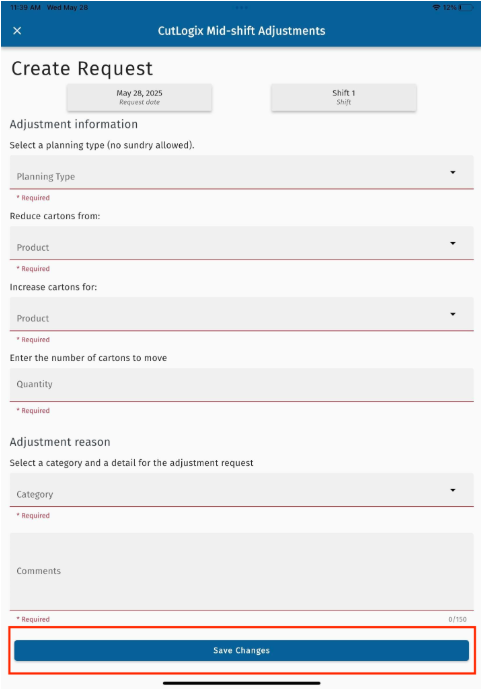
Step 2: The “CutLogix Mid-shift Adjustments” page will open. Click the “+ New” button to start creating a new mid-shift adjustment.
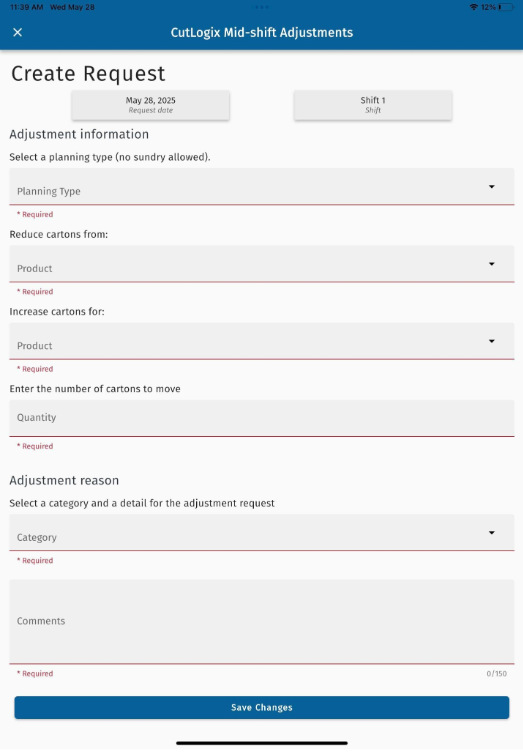
Step 3: The following fields need to be filled out in order to save the mid-shift adjustment:
• Planning Type: Choose the planning type that the adjustment is for from the drop down list.
• Reduce Cartons from: Choose the product that the adjustment will reduce cartons from.
• Increase cartons for: Choose the product that the adjustment will increase cartons for.
• Quantity: Enter the number of cartons to move from the reduced product to the increased product.
• Category: Choose the category for the reason for the mid-shift adjustment.
• Comments: Enter any relevant comments to the mid-shift adjustment.
Note: The date and the shift at the top of the page cannot be edited as they are automatically set based on when the mid-shift adjustment is being created.
Once you’ve filled out all of the required fields, click the “Save Changes” button at the bottom of the page to save the mid-shift adjustment.