Yield Specifications Tasks
How to Add a Yield Specification
DemoStep 1: Navigate to the "Yield Specifications" page, under the "Product Master" menu.
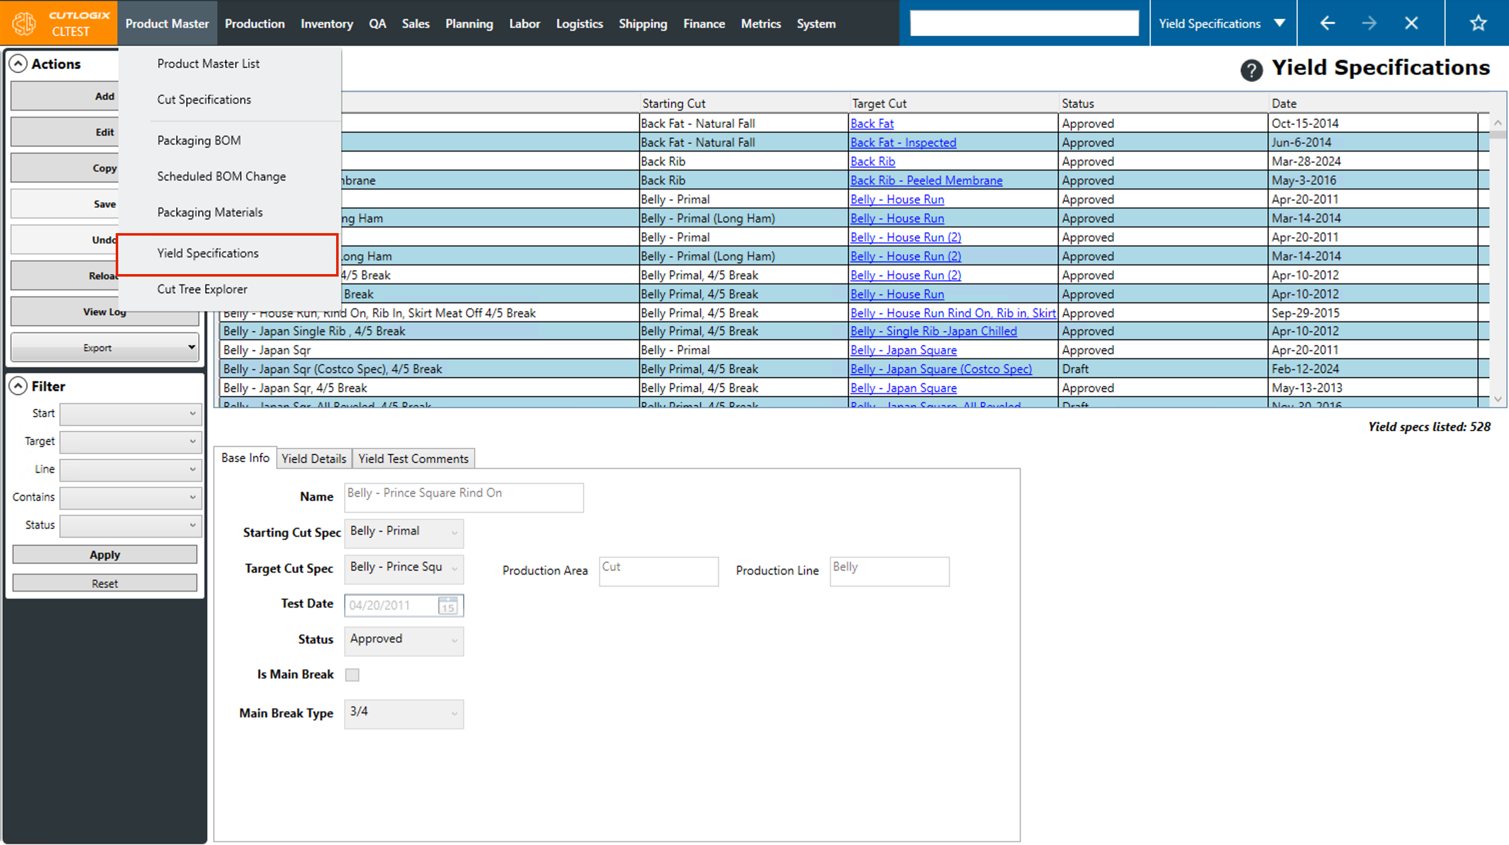
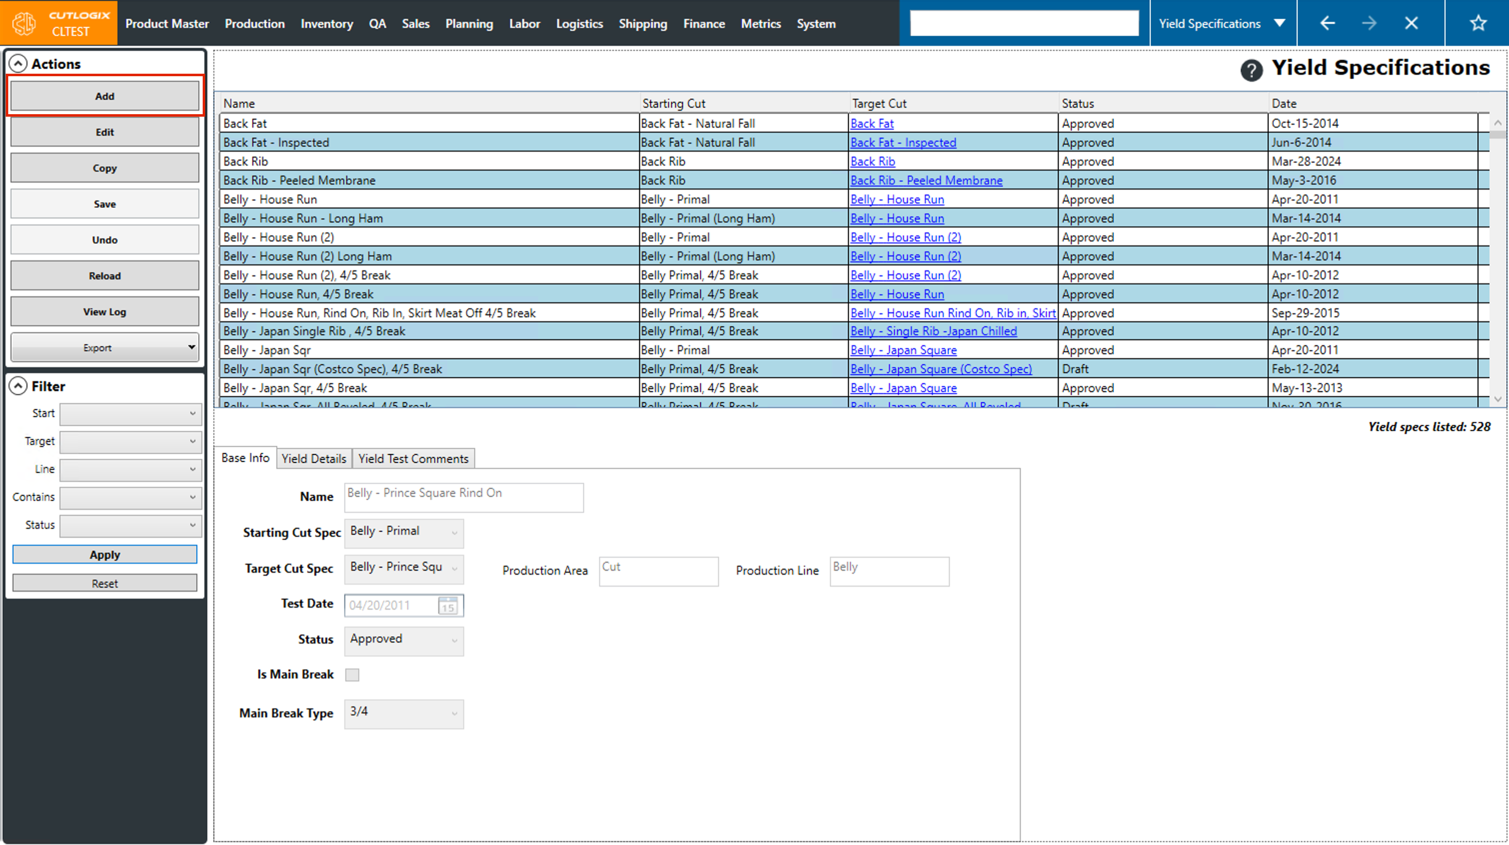
Step 2: Click the "Add" button in the Actions Panel.
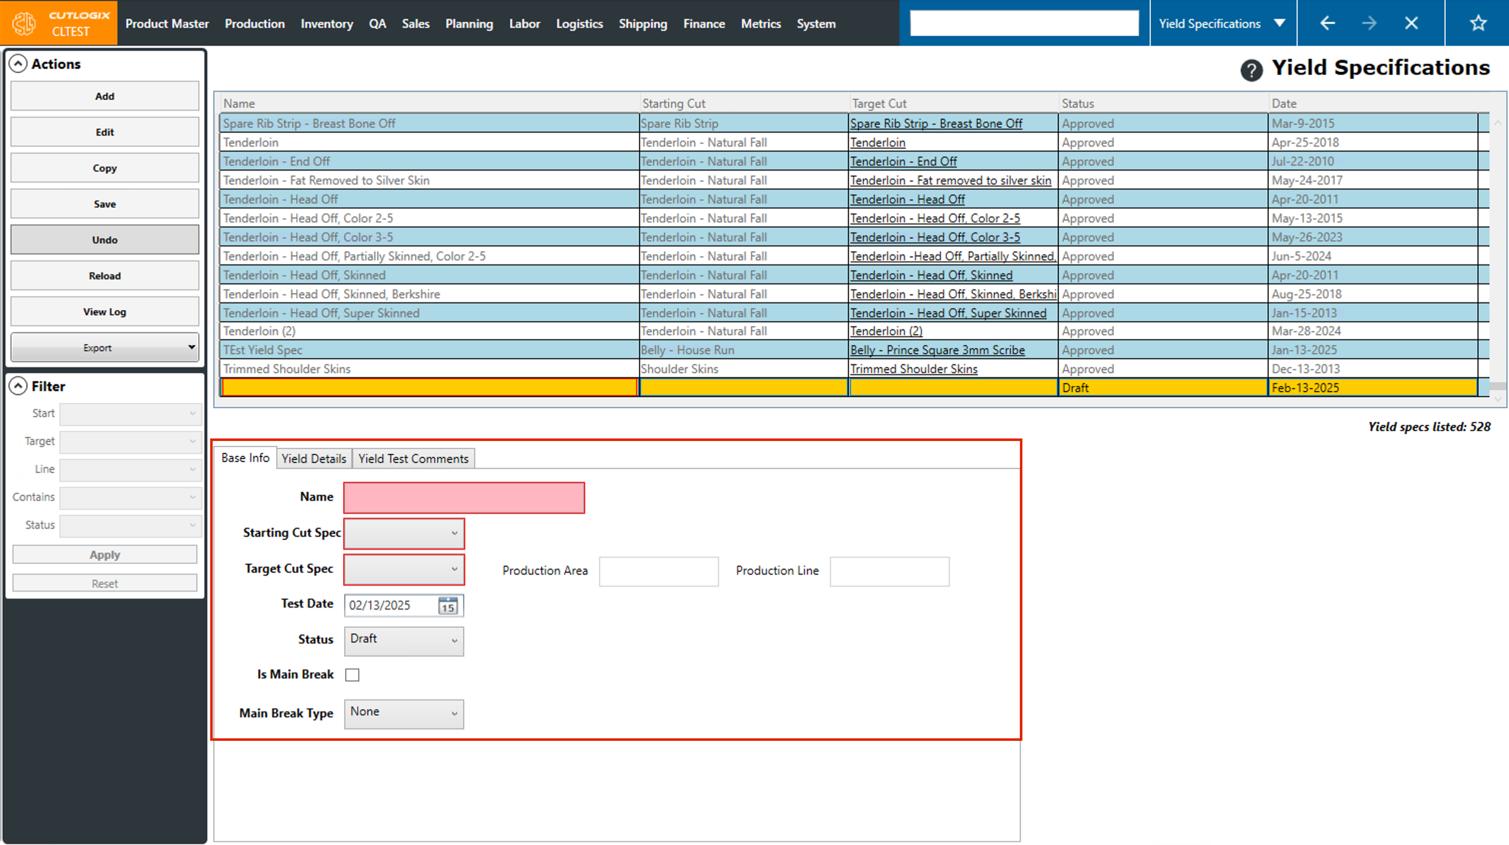
Step 3: Several input fields will appear at the bottom of the page in 3 tabs. This is where you can enter information about the new yield specification. Fields highlighted in red are required and must be entered before the new yield spec can be saved.
The required fields are as follows on the Base Info Tab:
• Name: The name of the new cut spec.
• Starting Cut Spec: Choose the starting cut spec from the drop-down list of cut specs
• Target Cut Spec: Choose the target cut spec for this yield spec from the drop-down list of cut specs.
The required fields are as follows on the Base Info Tab:
• Name: The name of the new cut spec.
• Starting Cut Spec: Choose the starting cut spec from the drop-down list of cut specs
• Target Cut Spec: Choose the target cut spec for this yield spec from the drop-down list of cut specs.
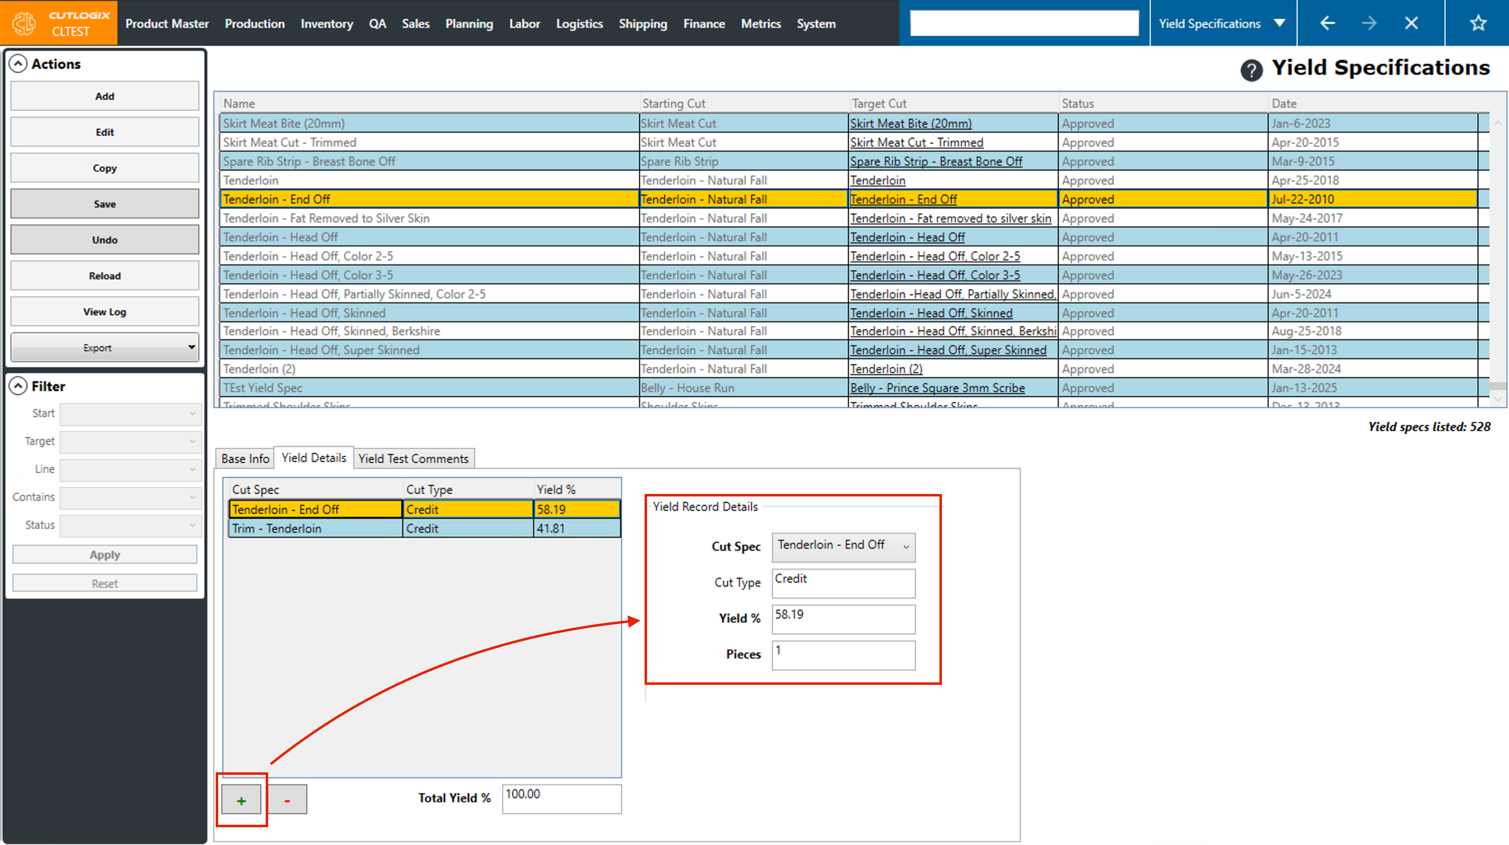
Step 4: Next, we'll go to the "Yield Details" tab, here you can enter multiple yield records to specify what percentage of each cut spec is yielded for this yield spec. You can enter multiple records and the total of them must be 100% before the yield specification can be saved.
Click the "+" button at the bottom of the page to begin adding yield records, you'll then be able to specify the cut spec, yield % and number of pieces for the yield record. You can keep adding records by using the "+" button until the total yield is 100%. You can also remove yield records by clicking the "-" button while the yield record that you want to delete is selected.
Click the "+" button at the bottom of the page to begin adding yield records, you'll then be able to specify the cut spec, yield % and number of pieces for the yield record. You can keep adding records by using the "+" button until the total yield is 100%. You can also remove yield records by clicking the "-" button while the yield record that you want to delete is selected.
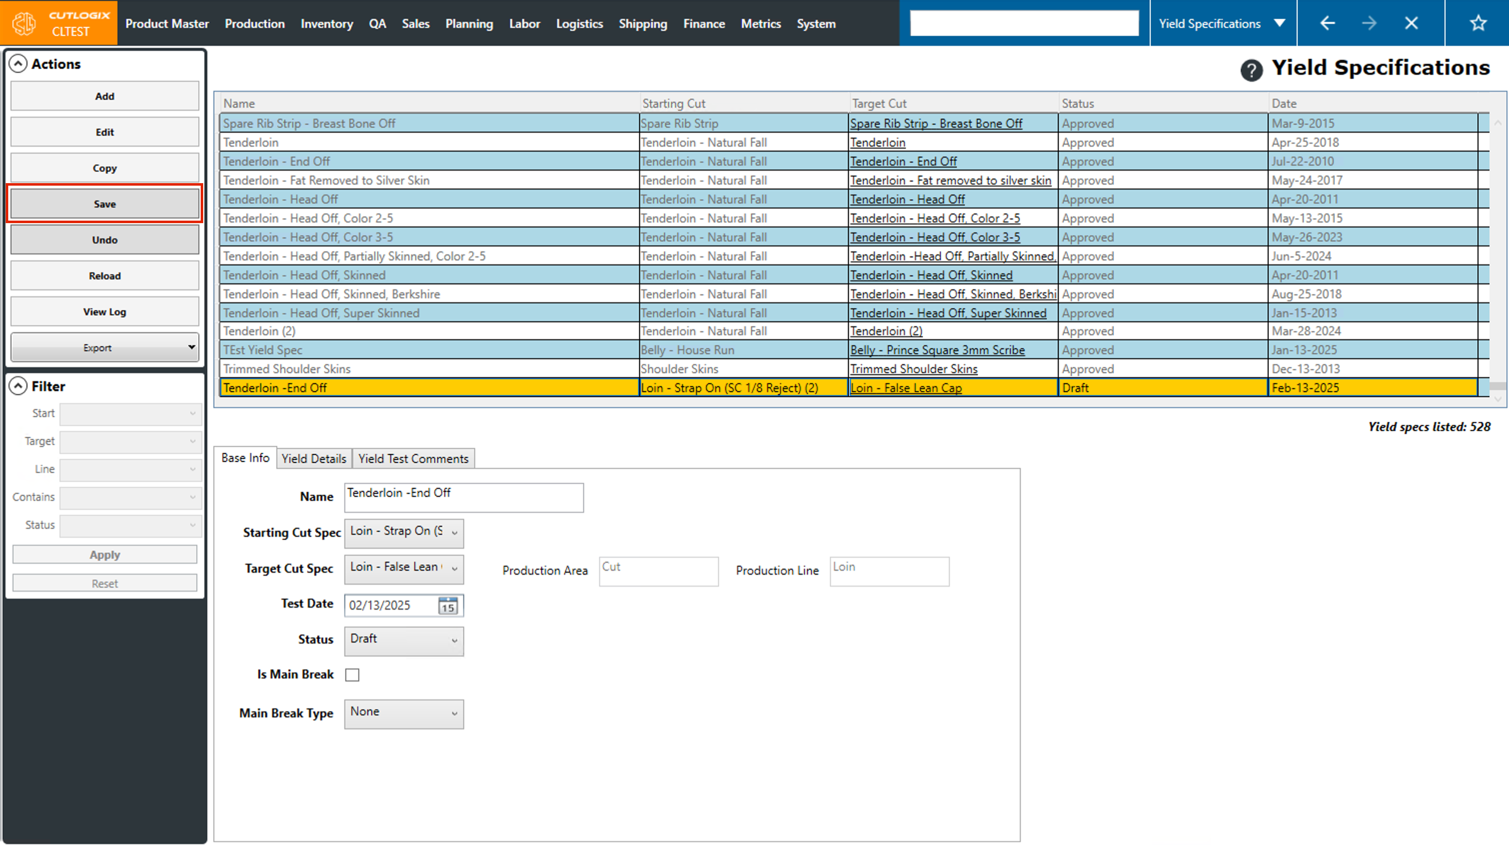
Step 5: Once all the information about the yield specification has been added, click "Save" in the actions panel to save the new yield specification. If you don't want to save it, clicking "Undo" in the Actions Panel will discard your changes and the new yield specification will not be saved.
How to Edit a Yield Specification
DemoStep 1: Navigate to the "Yield Specifications" page, under the "Product Master" menu.
Step 2: Click on the Yield Specification that you want to edit. Once selected, it will be highlighted in orange. Then click "Edit" in the Actions Panel.
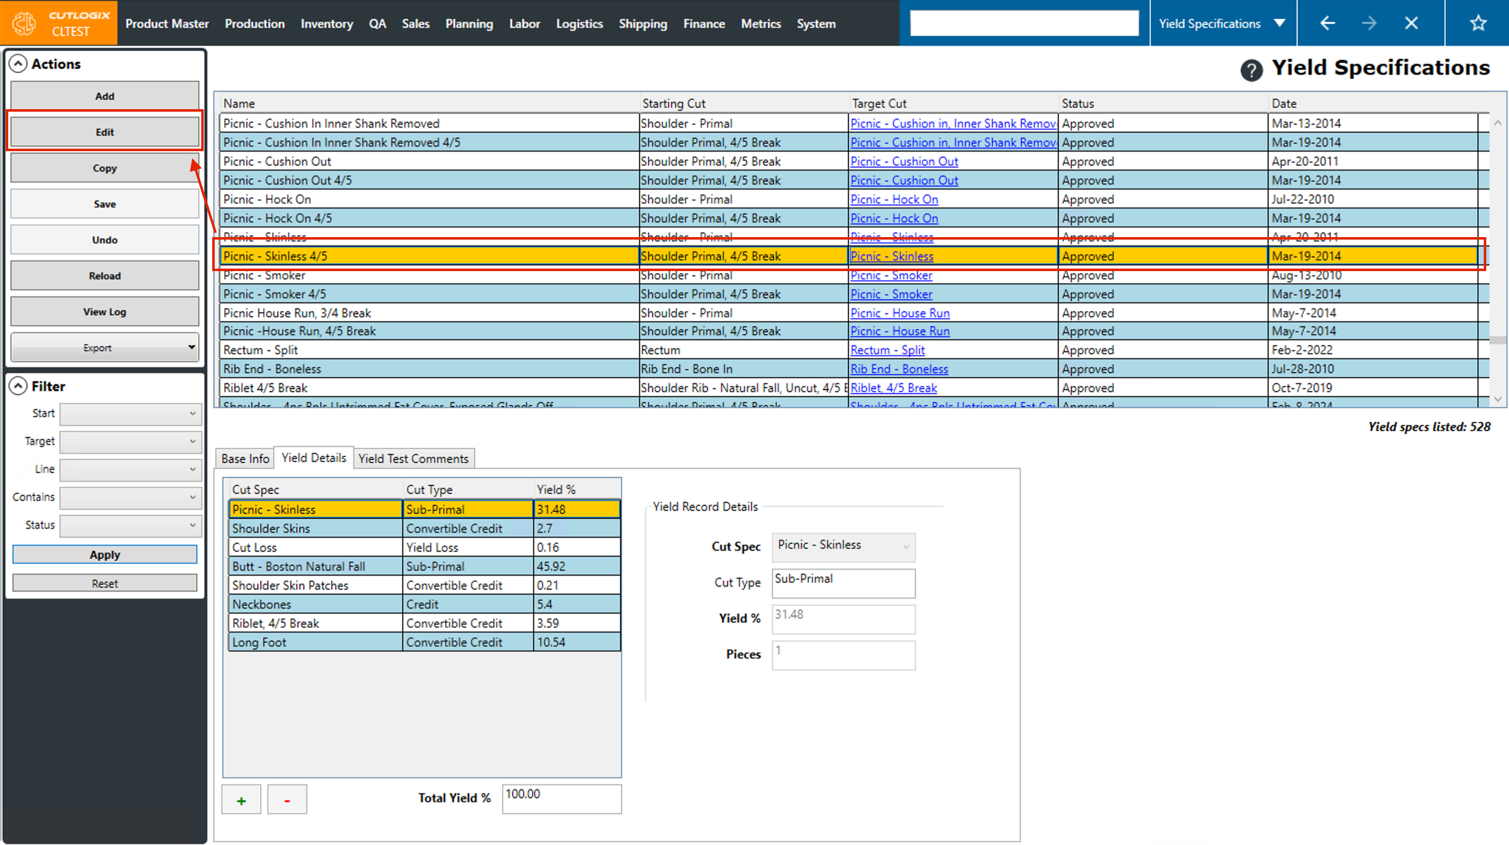
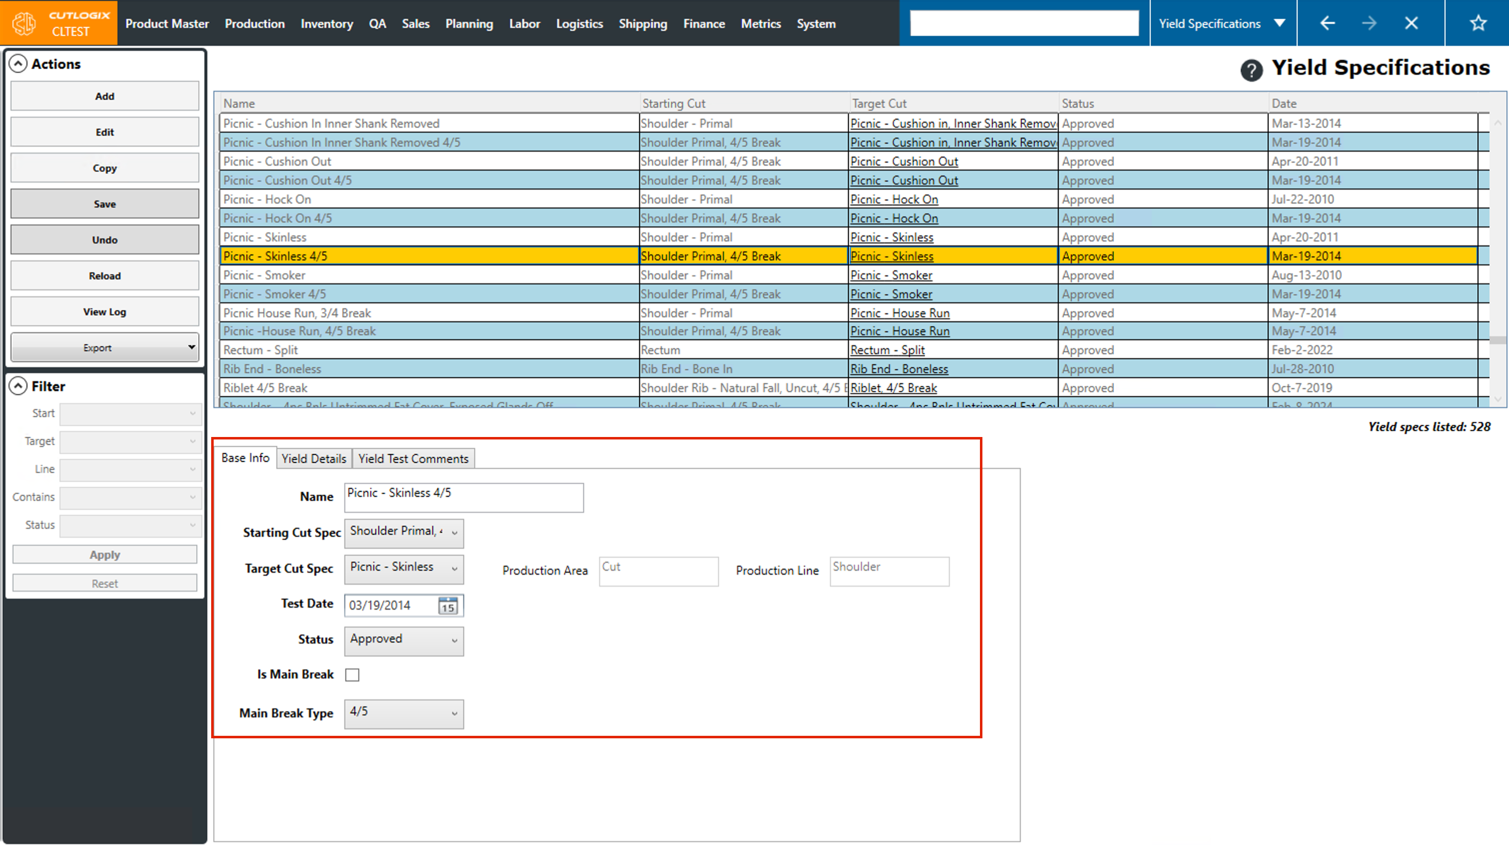
Step 3: Edit mode will now be enabled for the selected yield spec. At the bottom of the page you can make any necessary changes to the yield spec in the 3 tabs.
Step 4: Once all the necessary changes have been made, click "Save" in the Actions Panel to save them. If you don't want to save your changes, clicking "Undo" in the Actions Panel will discard them.

How to Copy a Yield Specification
Demo Copying a yield specification allows you to use an existing yield spec as a starting point to create a new one. It will take the existing one and make a copy of it, and you'll be required to give it (the copied one) a name. The rest of the information can then be modified as needed for the new yield spec.
Step 1: Navigate to the "Yield Specifications" page, under the "Product Master" menu.
Step 2: Click on the Yield Specification that you want to copy. Once selected, it will be highlighted in orange. Then, click the "Copy" button in the Actions Panel.
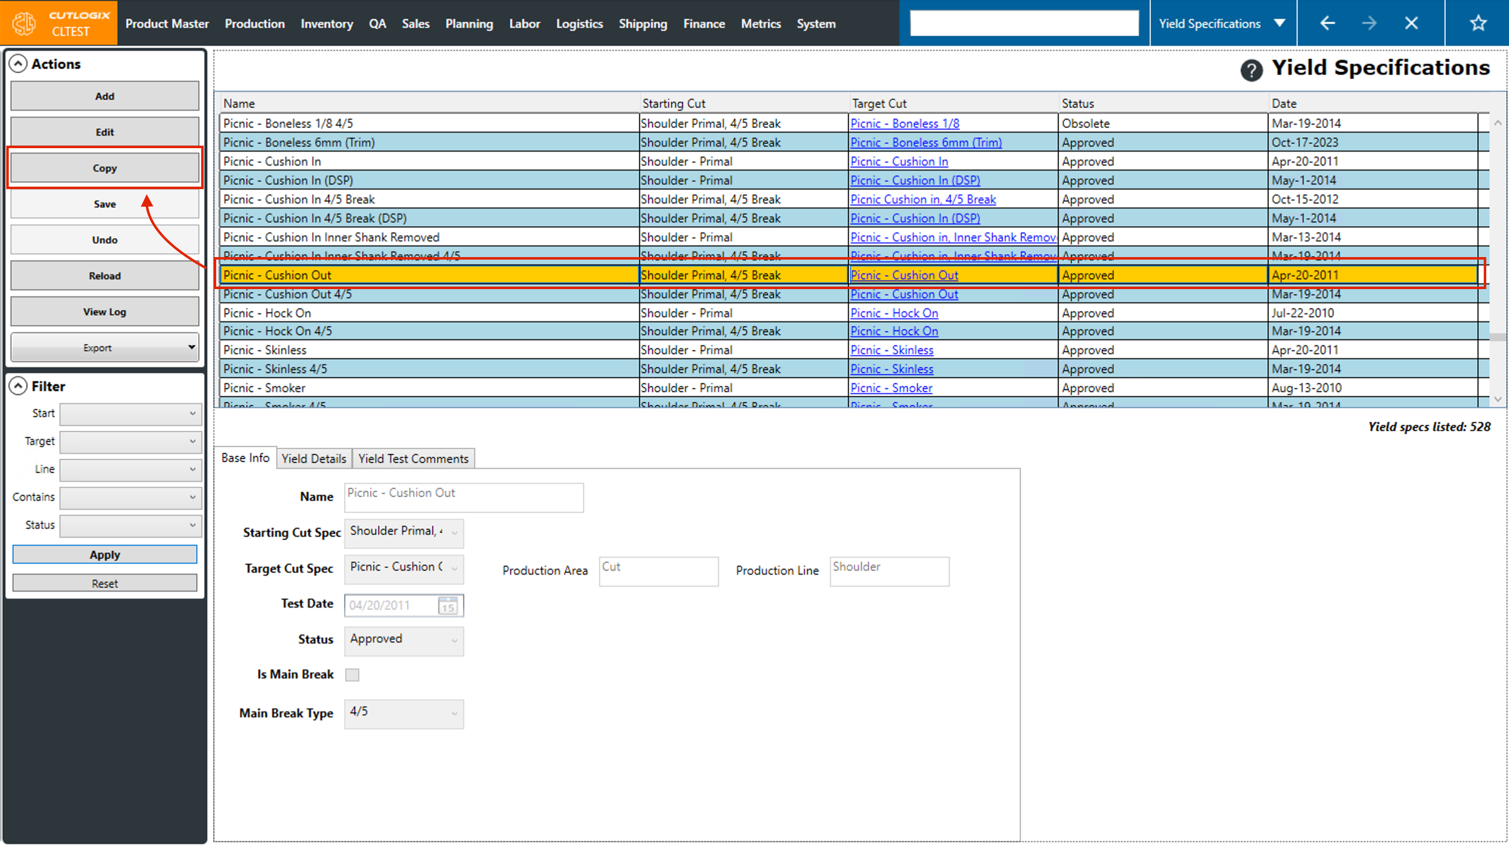
Step 3: A copy of the selected cut spec will then be created. At the bottom of the page you can see the input fields have been pre-populated with information from the product that was copied. The "Name" field needs to be changed to be a unique name. The rest of the information can be modified for the new yield spec.
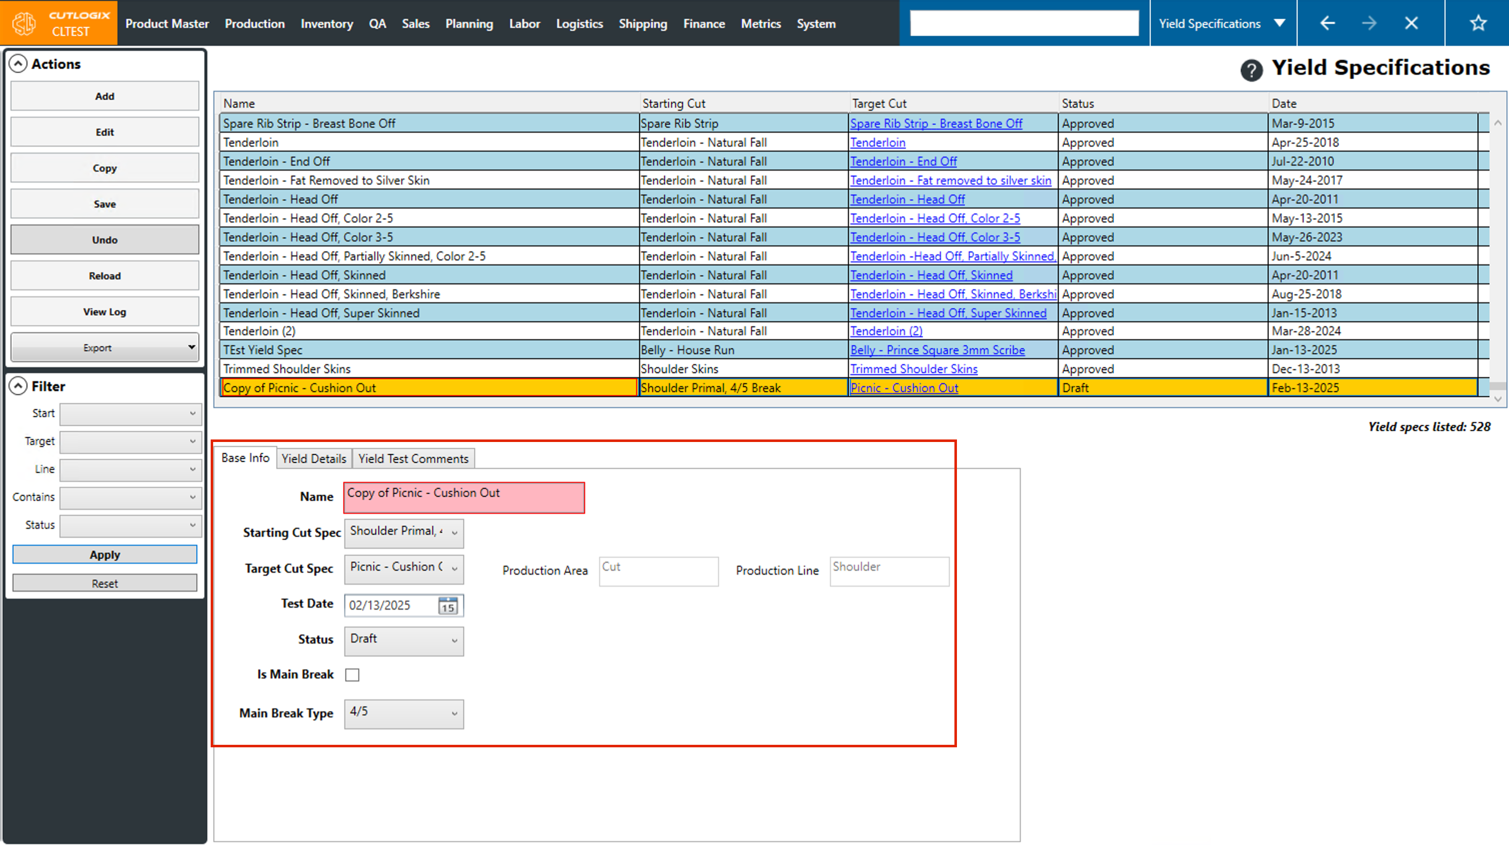
Step 4: Once you've modified the name of the yield specification and updated any necessary other information, click "Save" in the Actions Panel. If you don't want to save the copied yield specification, clicking "Undo" in the Actions Panel will discard it.
How to View Associated Products
DemoStep 1: Locate the yield spec in the list for which you would like to view associated products. Click the hyperlinked name of the product in the 'Target Cut' column.
Step 2: This will jump you to the Product Master List page with a filter applied to only show products with the cut specification that was selected.
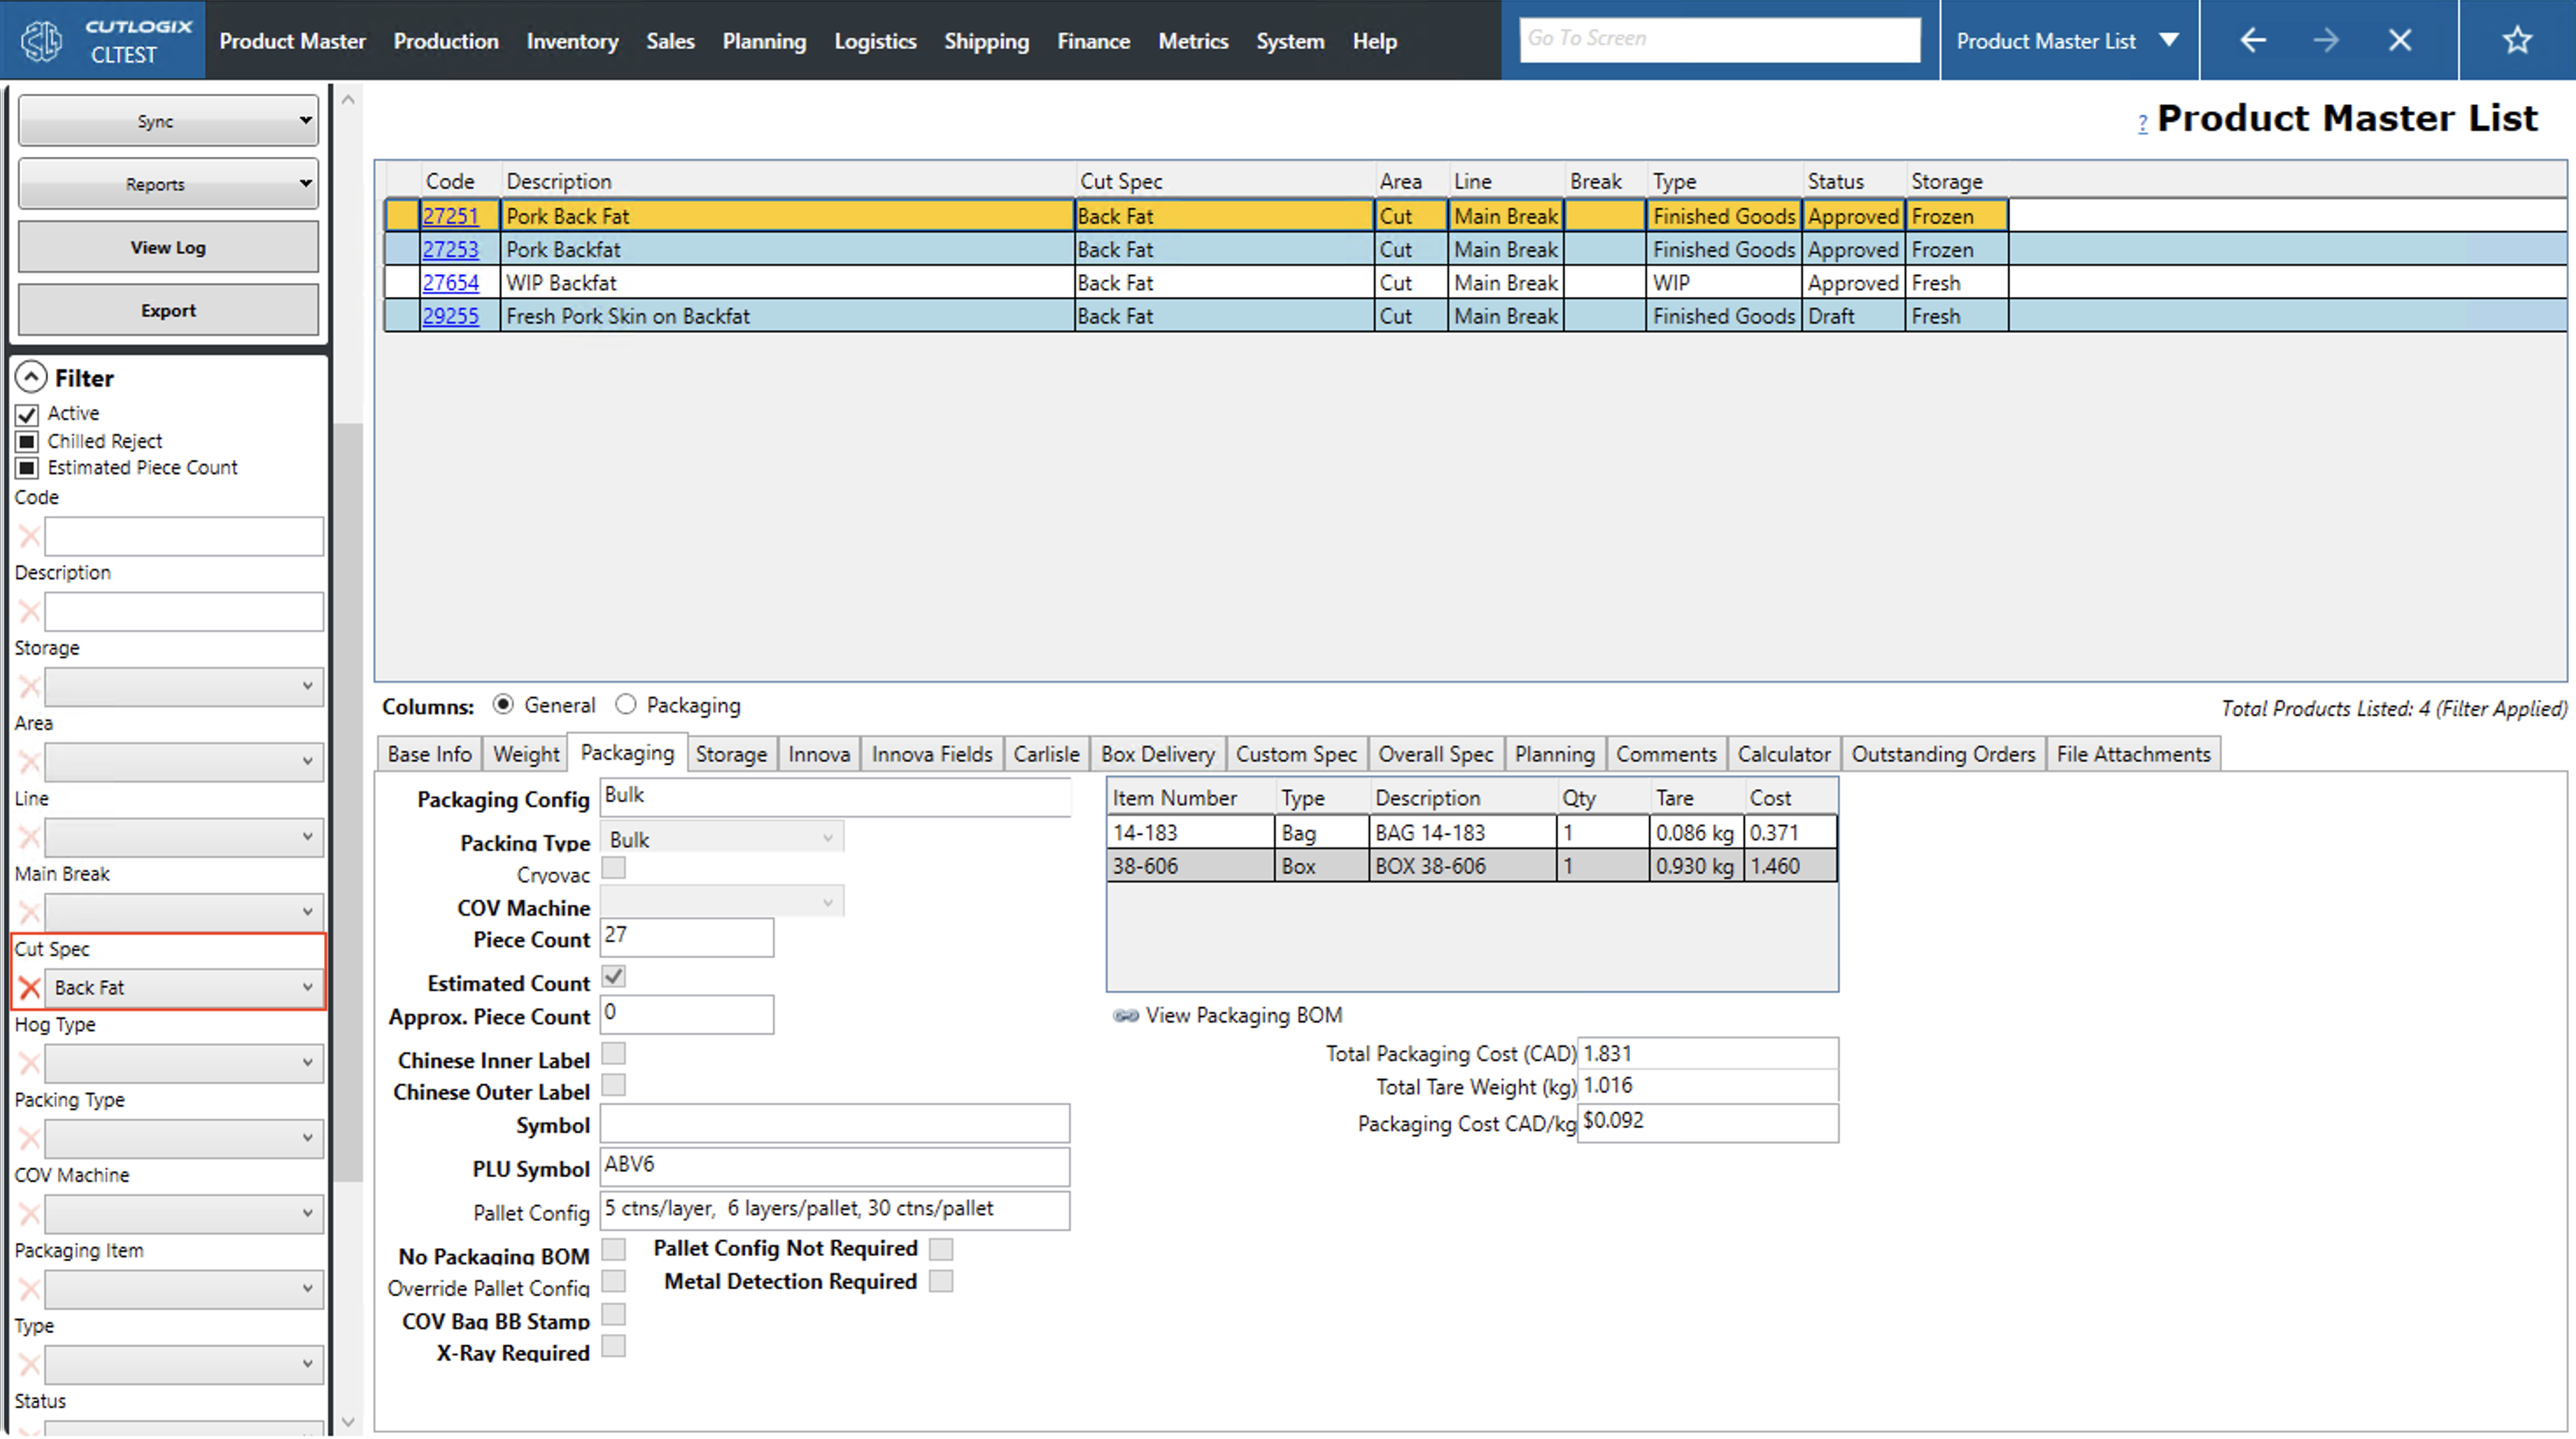
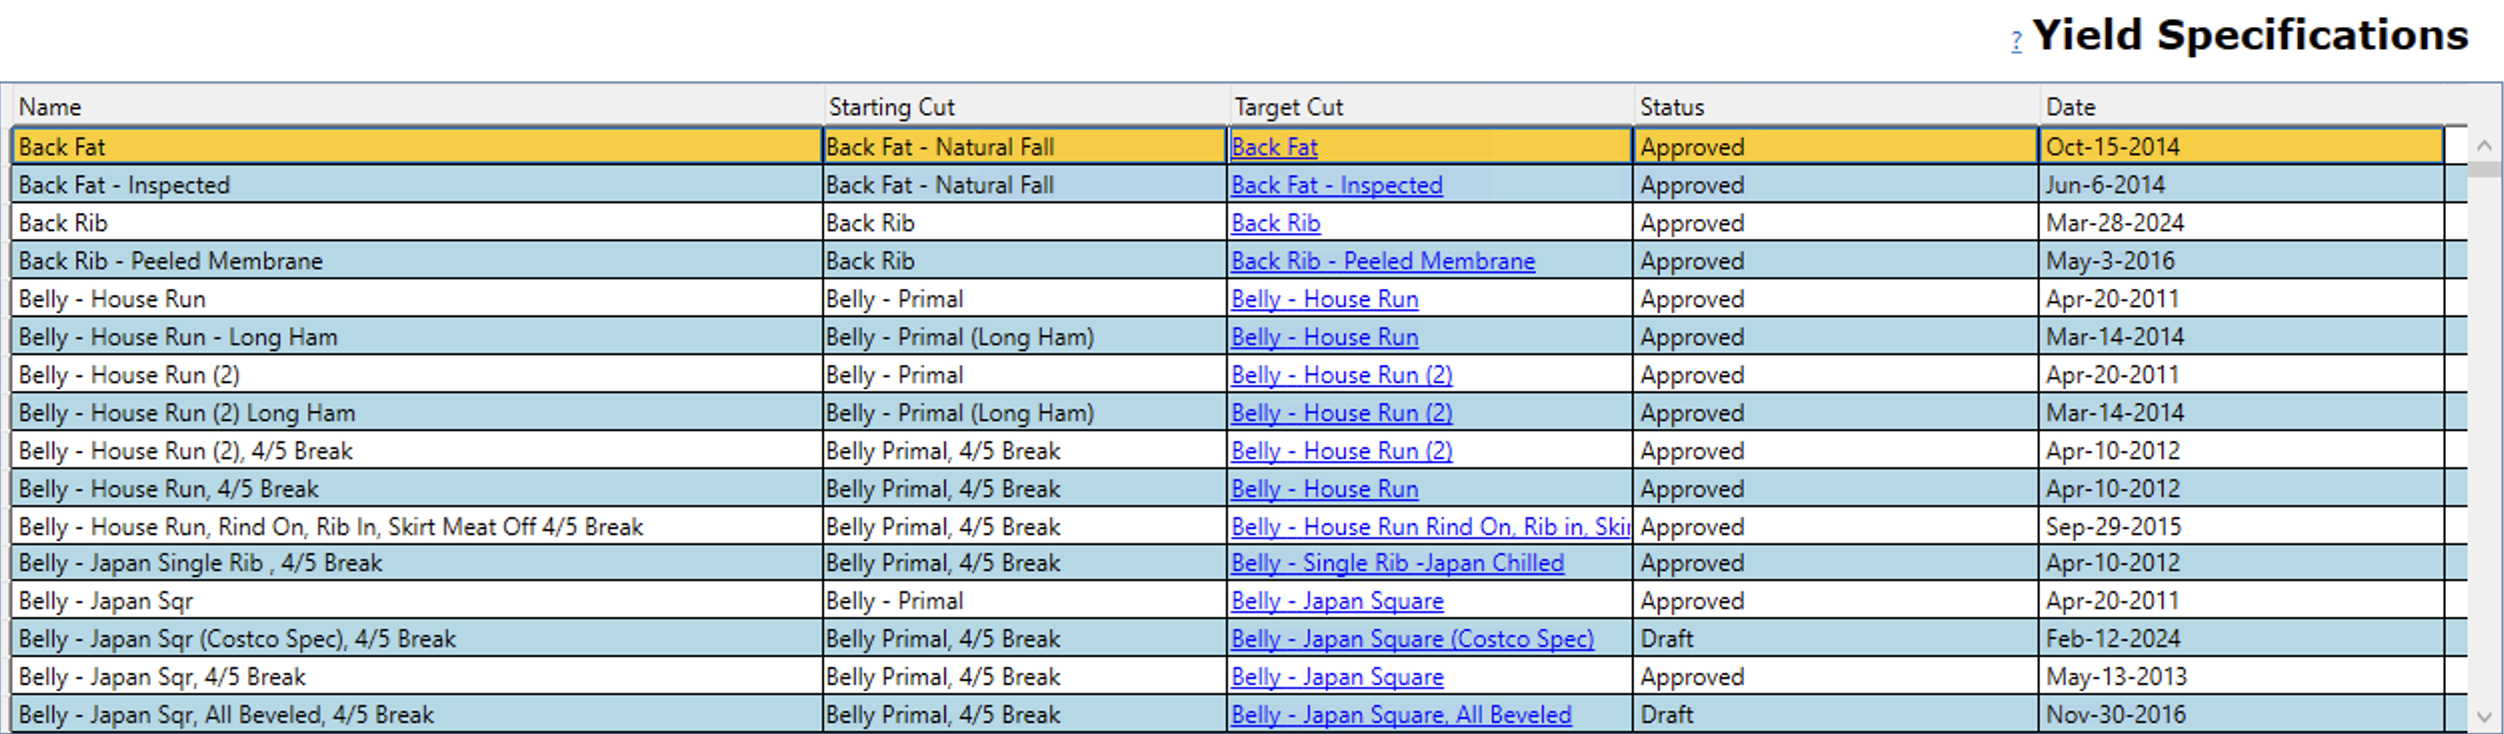
Why we link Target Cut-Spec for associated products to a Yield Spec: Yield specs are essentially how we start from a starting cut spec and reach a target cut spec. That’s why the way we show the associated products for a yield spec is by the target cut spec.