Customer Order Tasks
Note: Customer orders represent (at most) one shipped load to a customer.
How to Add Customer Orders
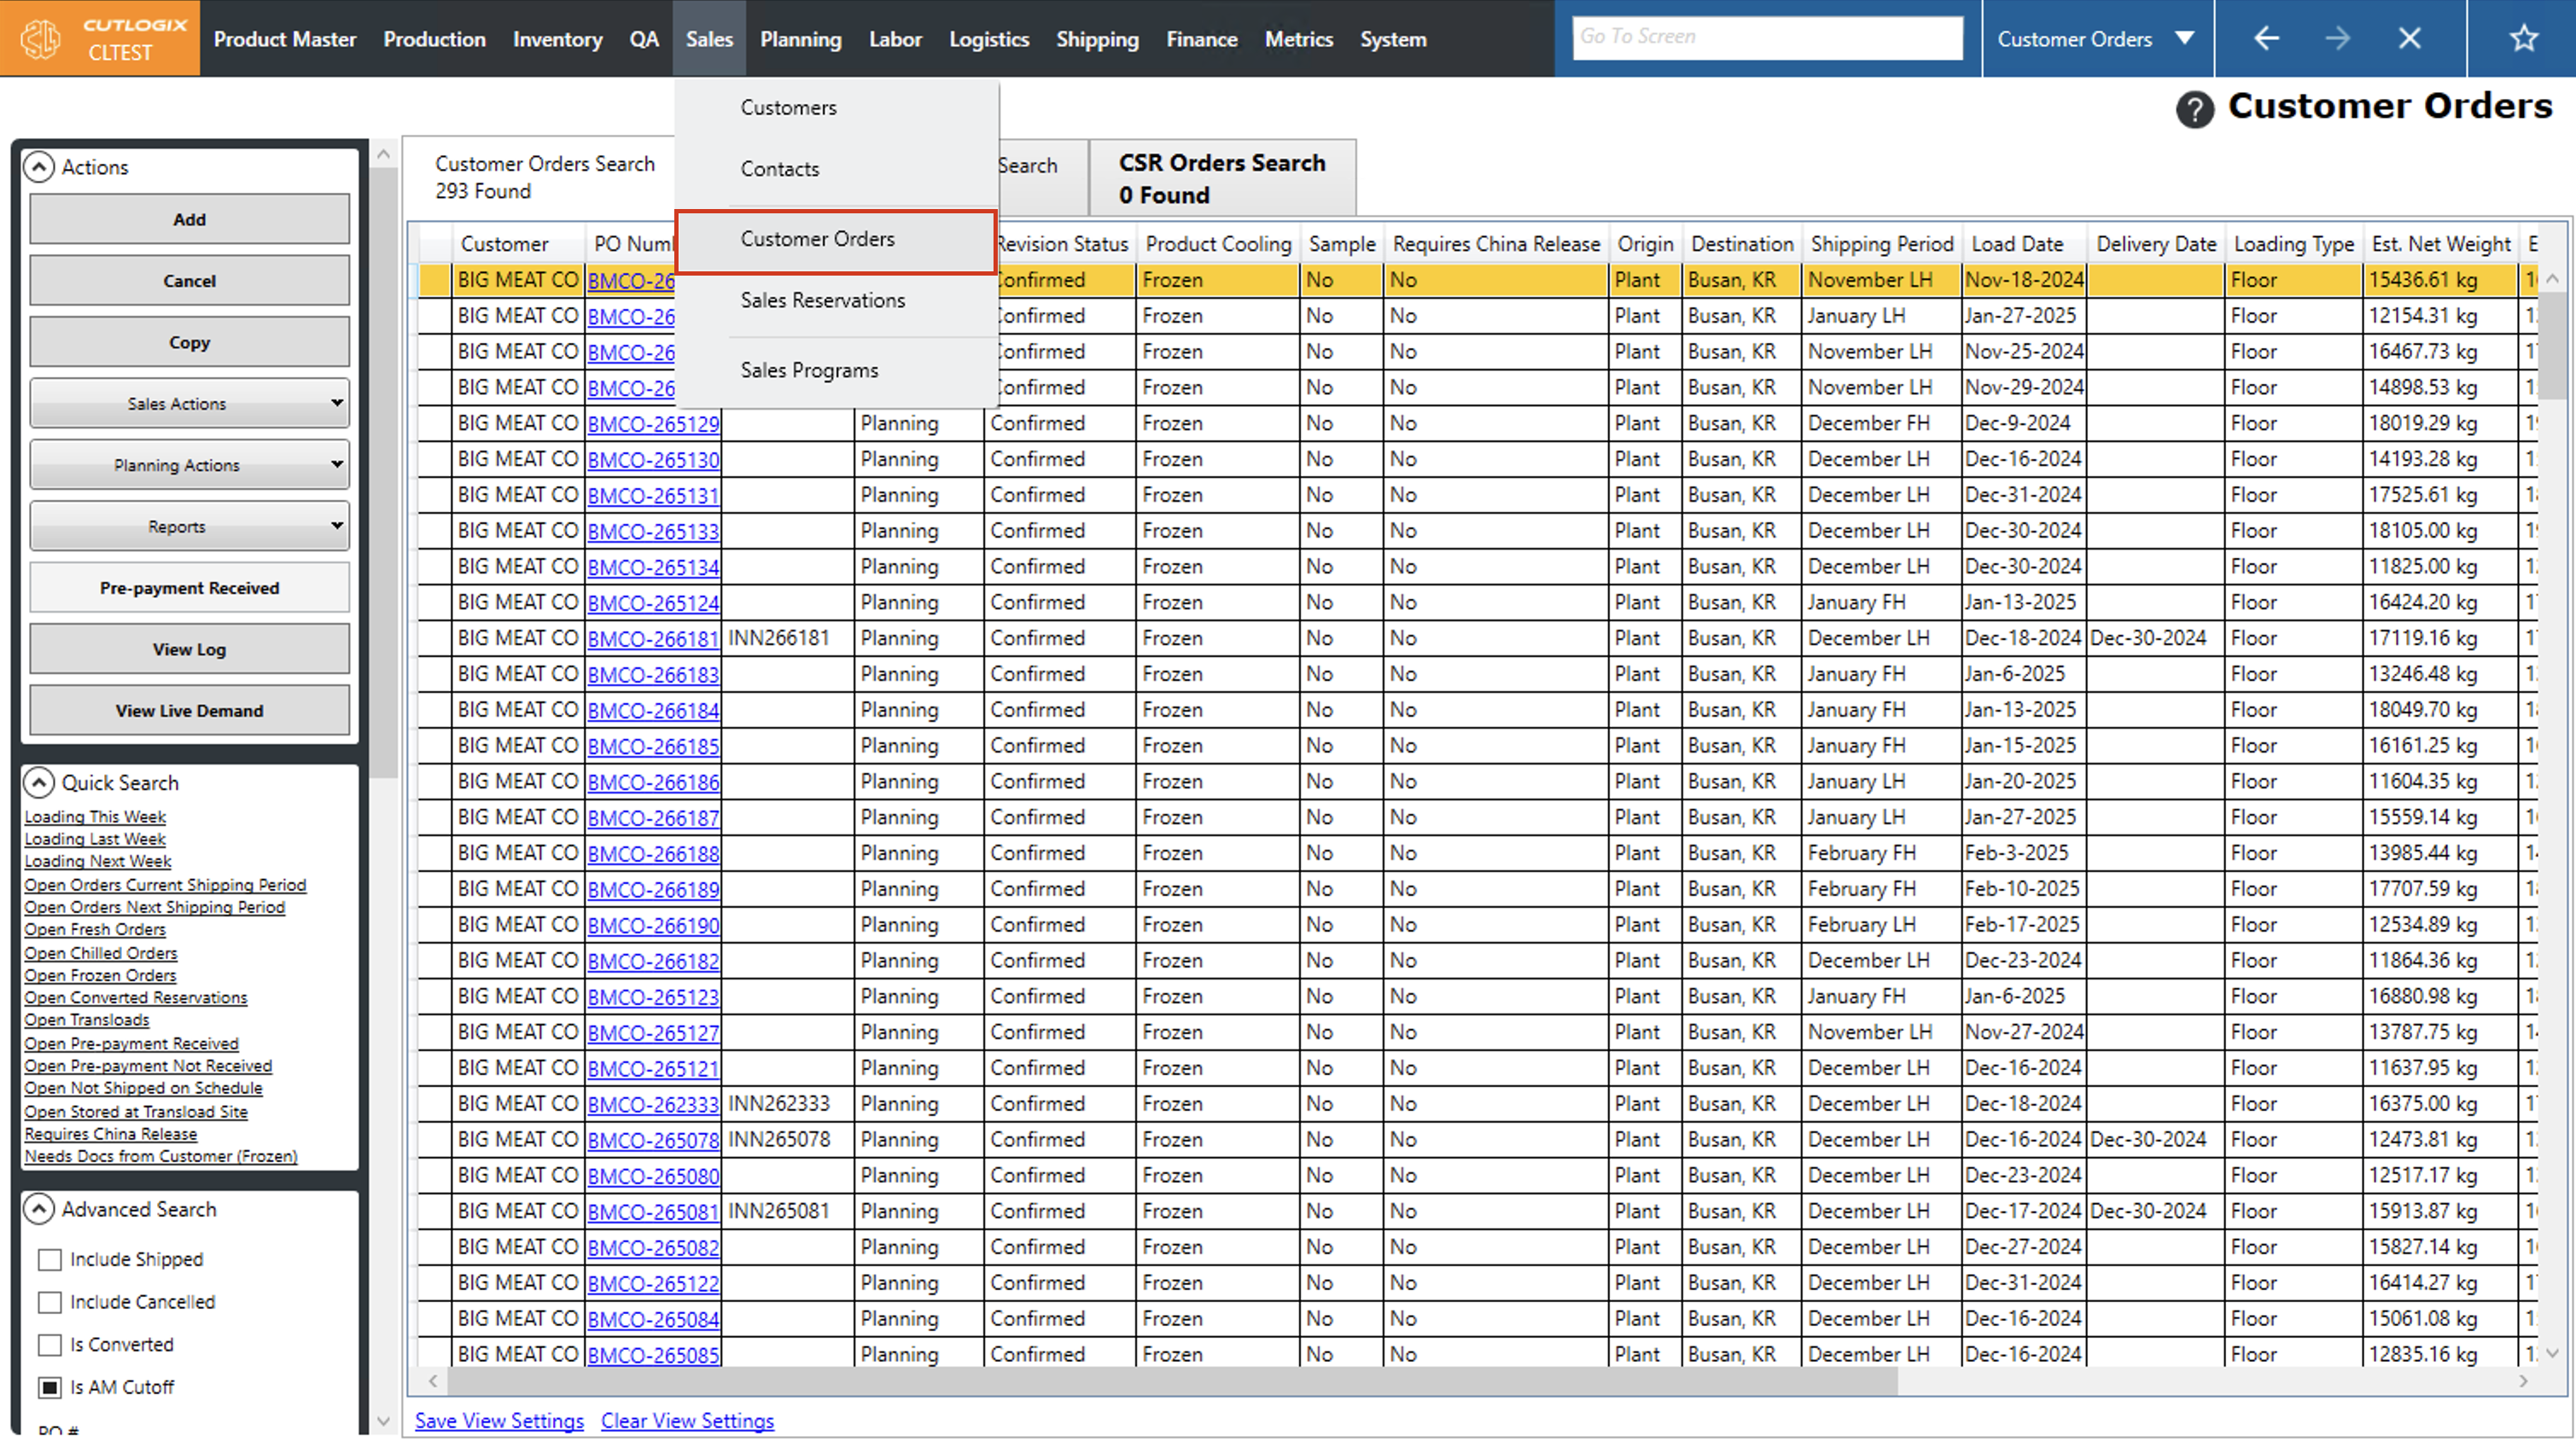
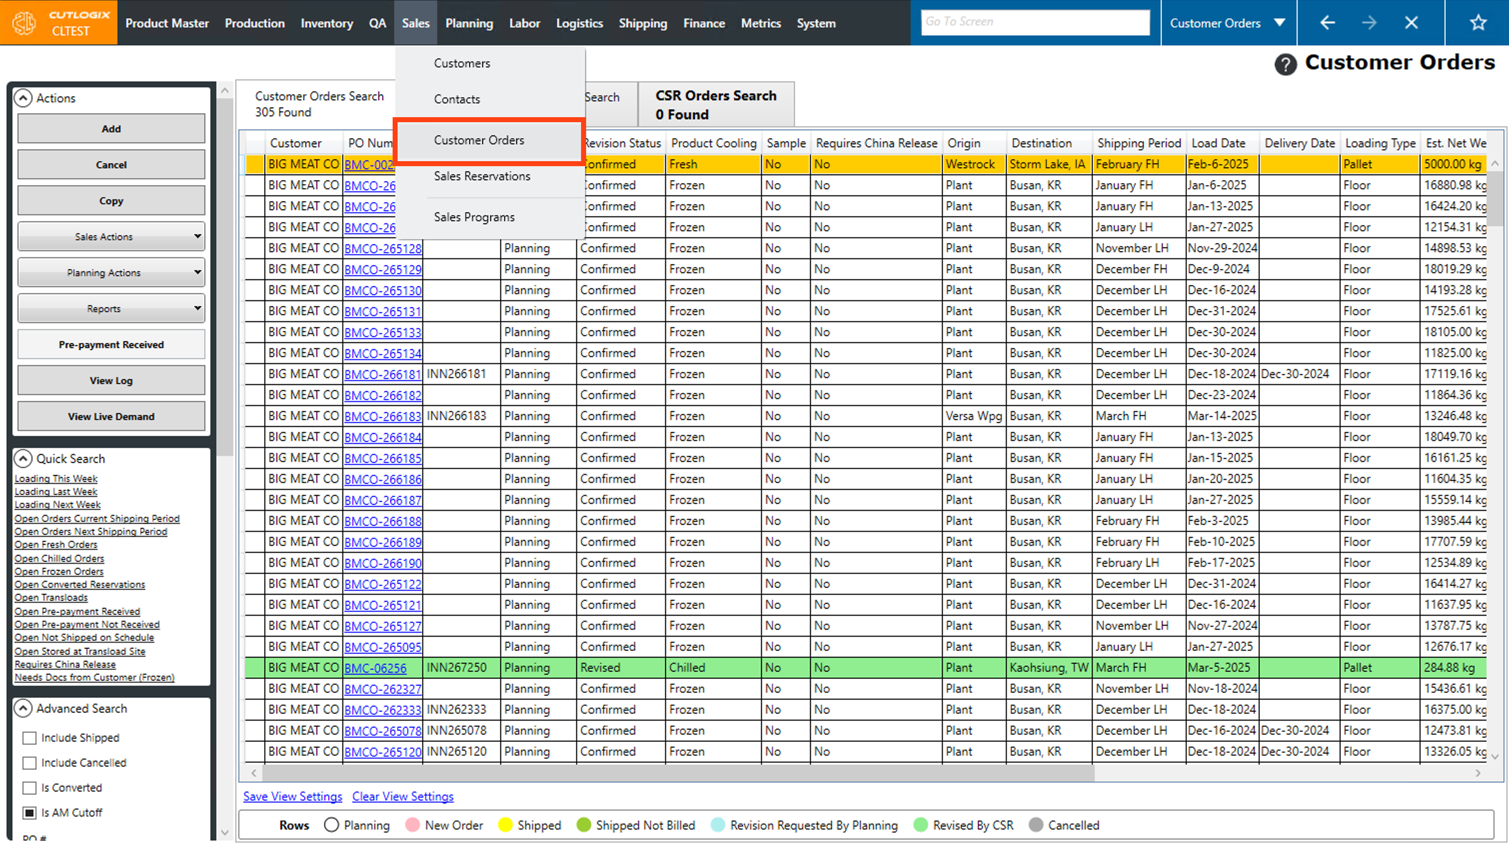
DemoStep 1: Navigate to the "Customer Orders" page. (Located under the "Sales" menu option)
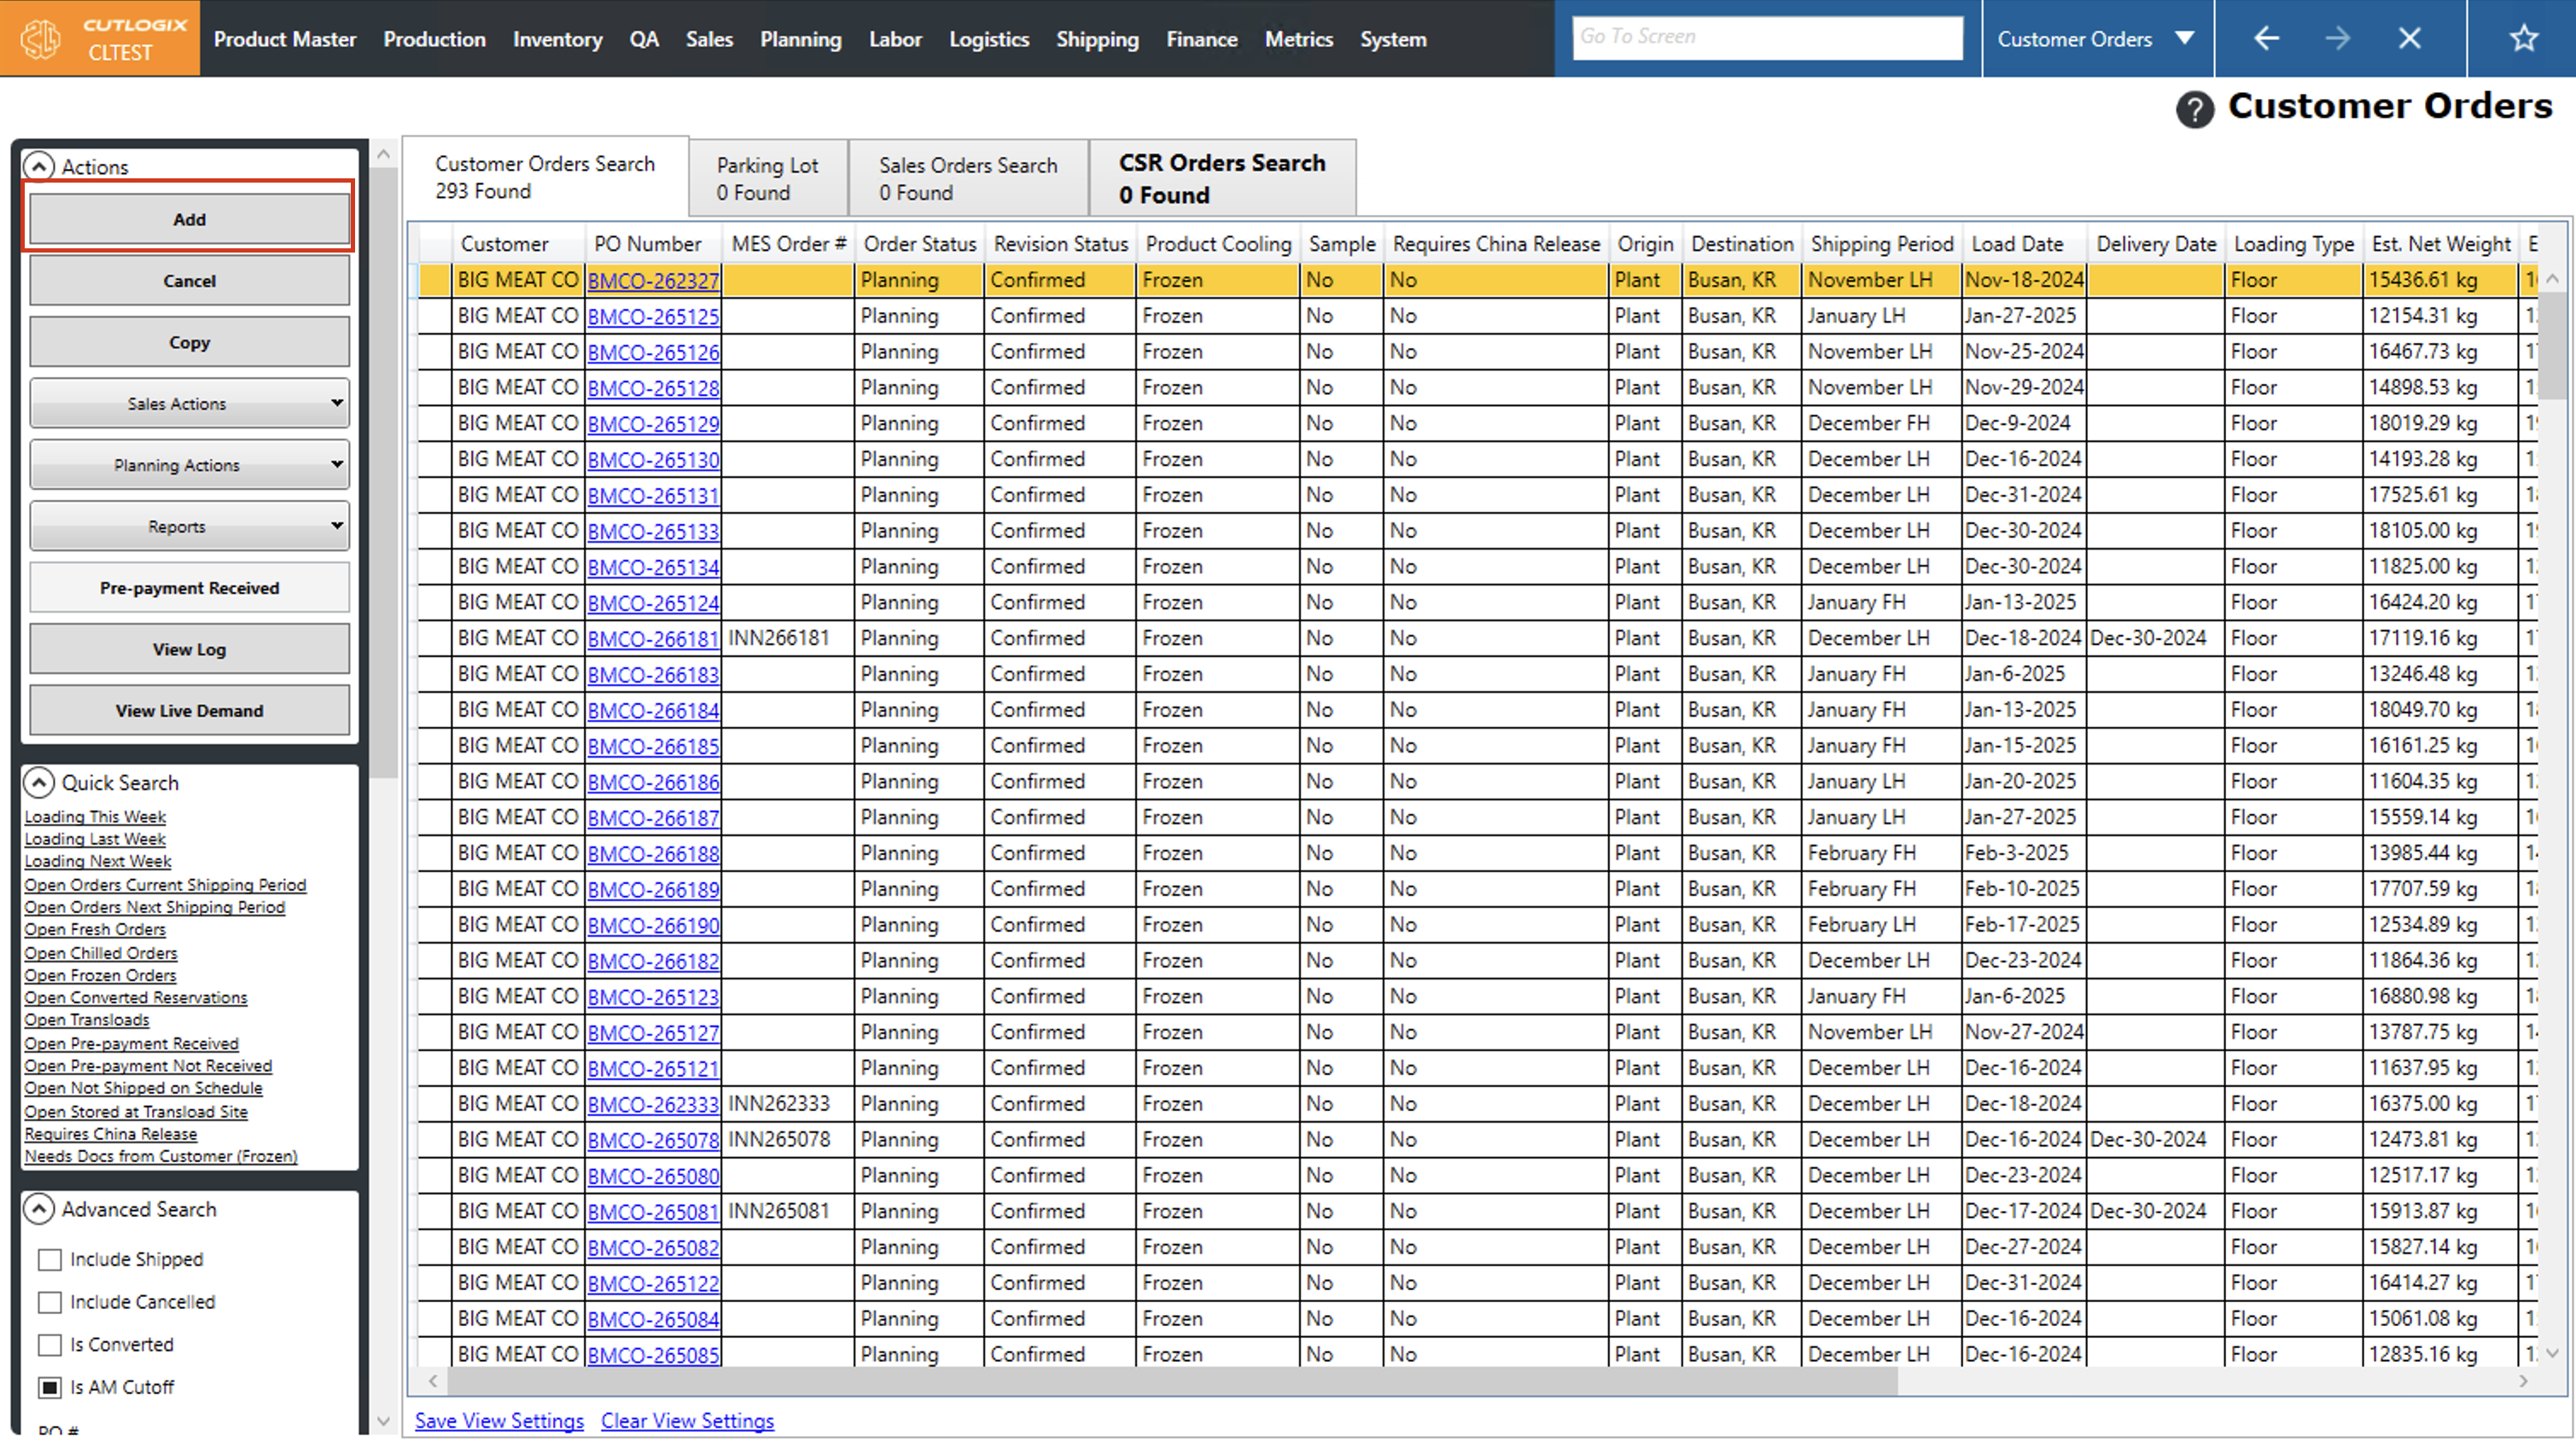
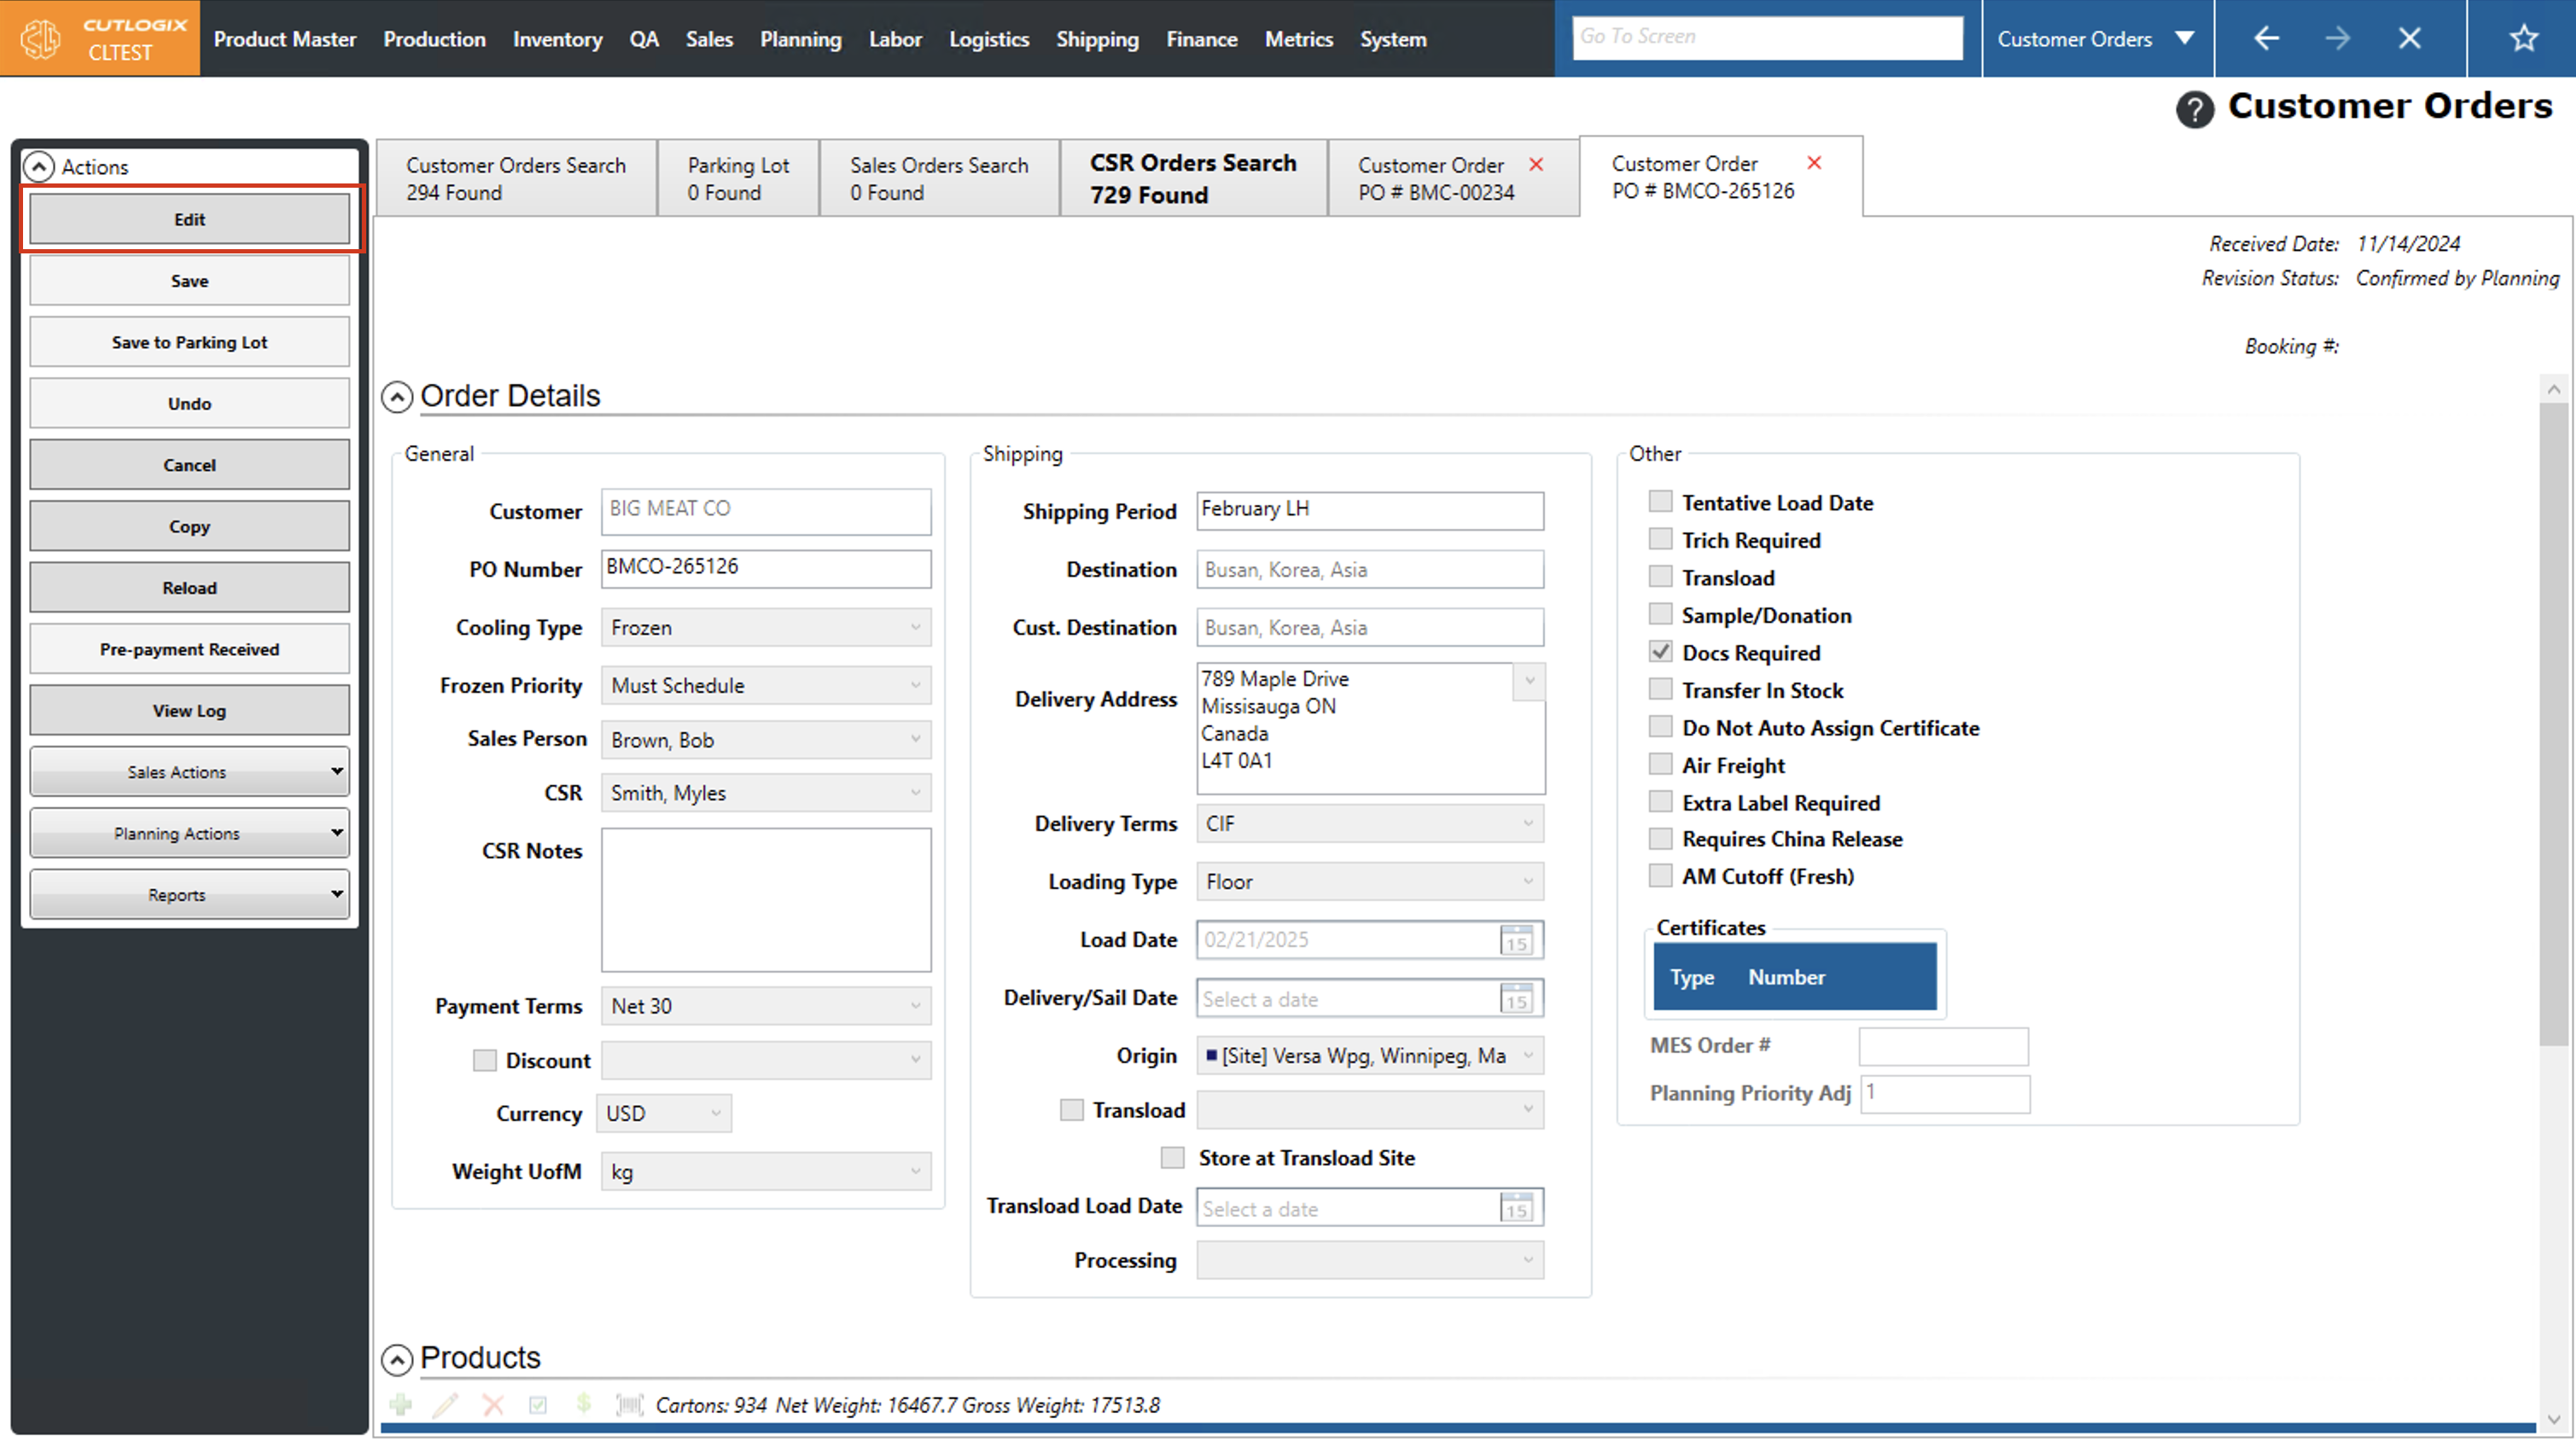
Step 2: Click on the "Add" button in the actions panel located on the left side of the page.
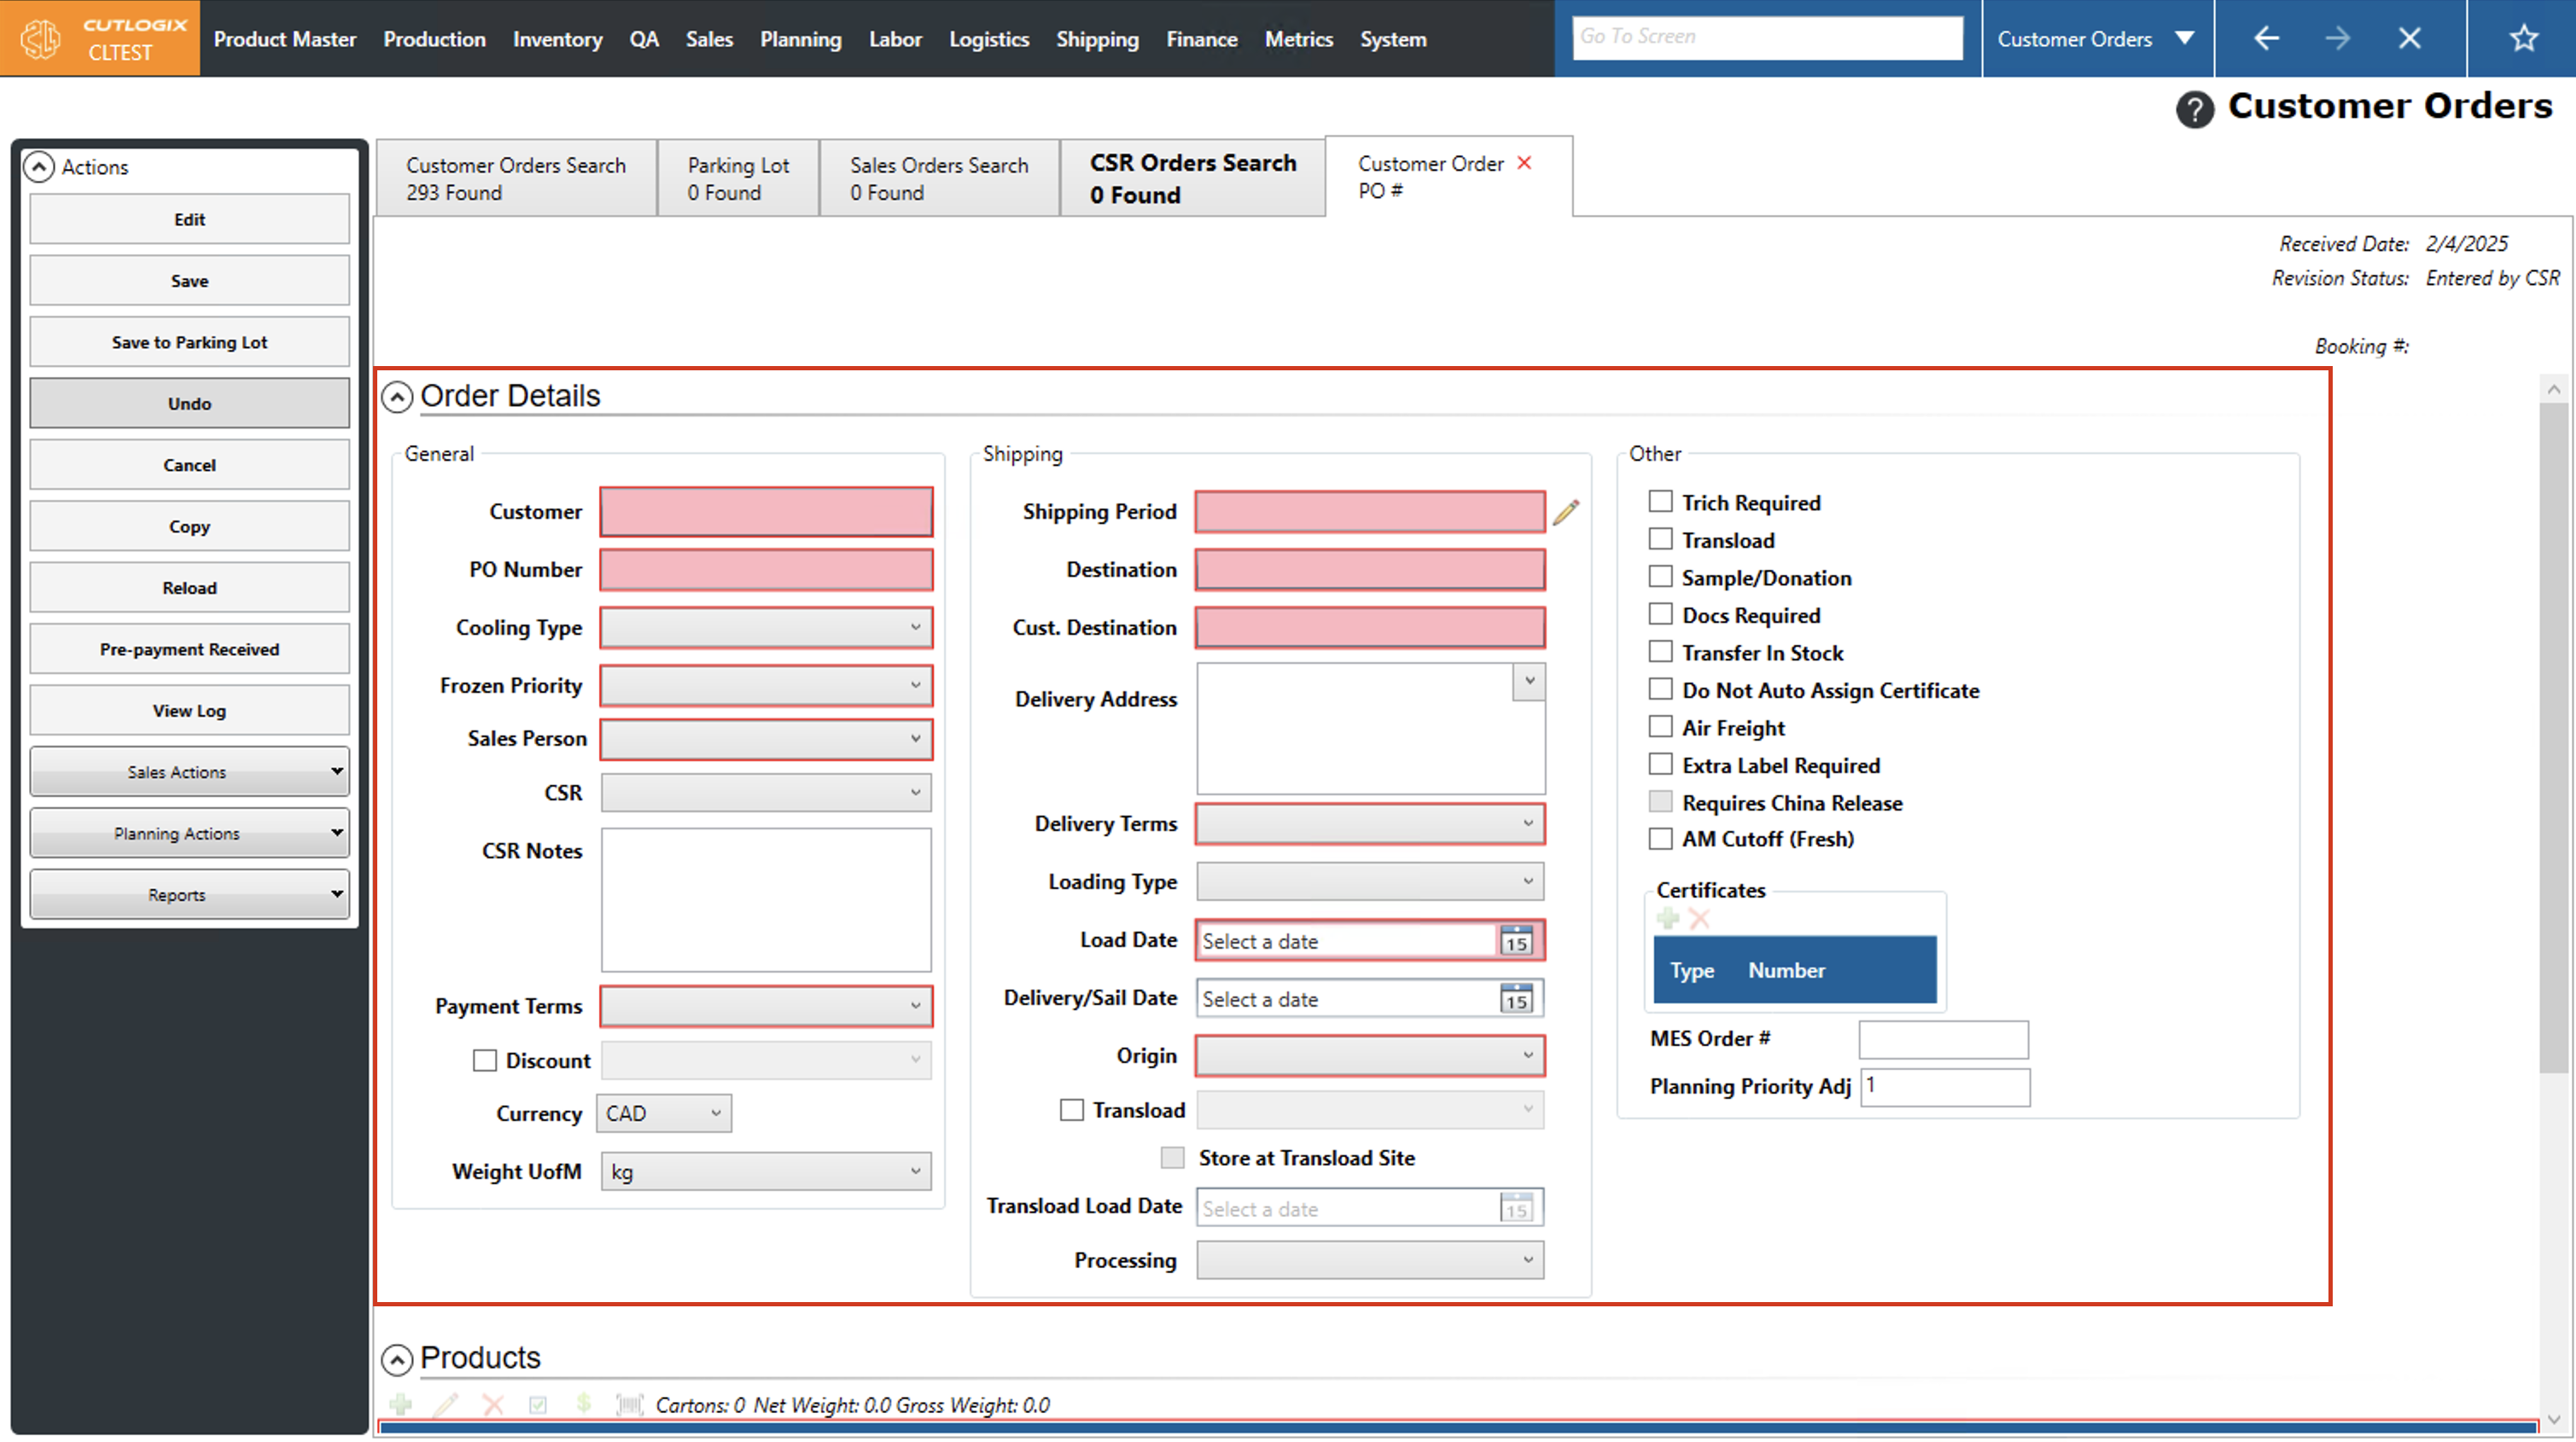
Step 3: A new tab will open on the page for the new customer order, this is where you can begin entering details about the order.
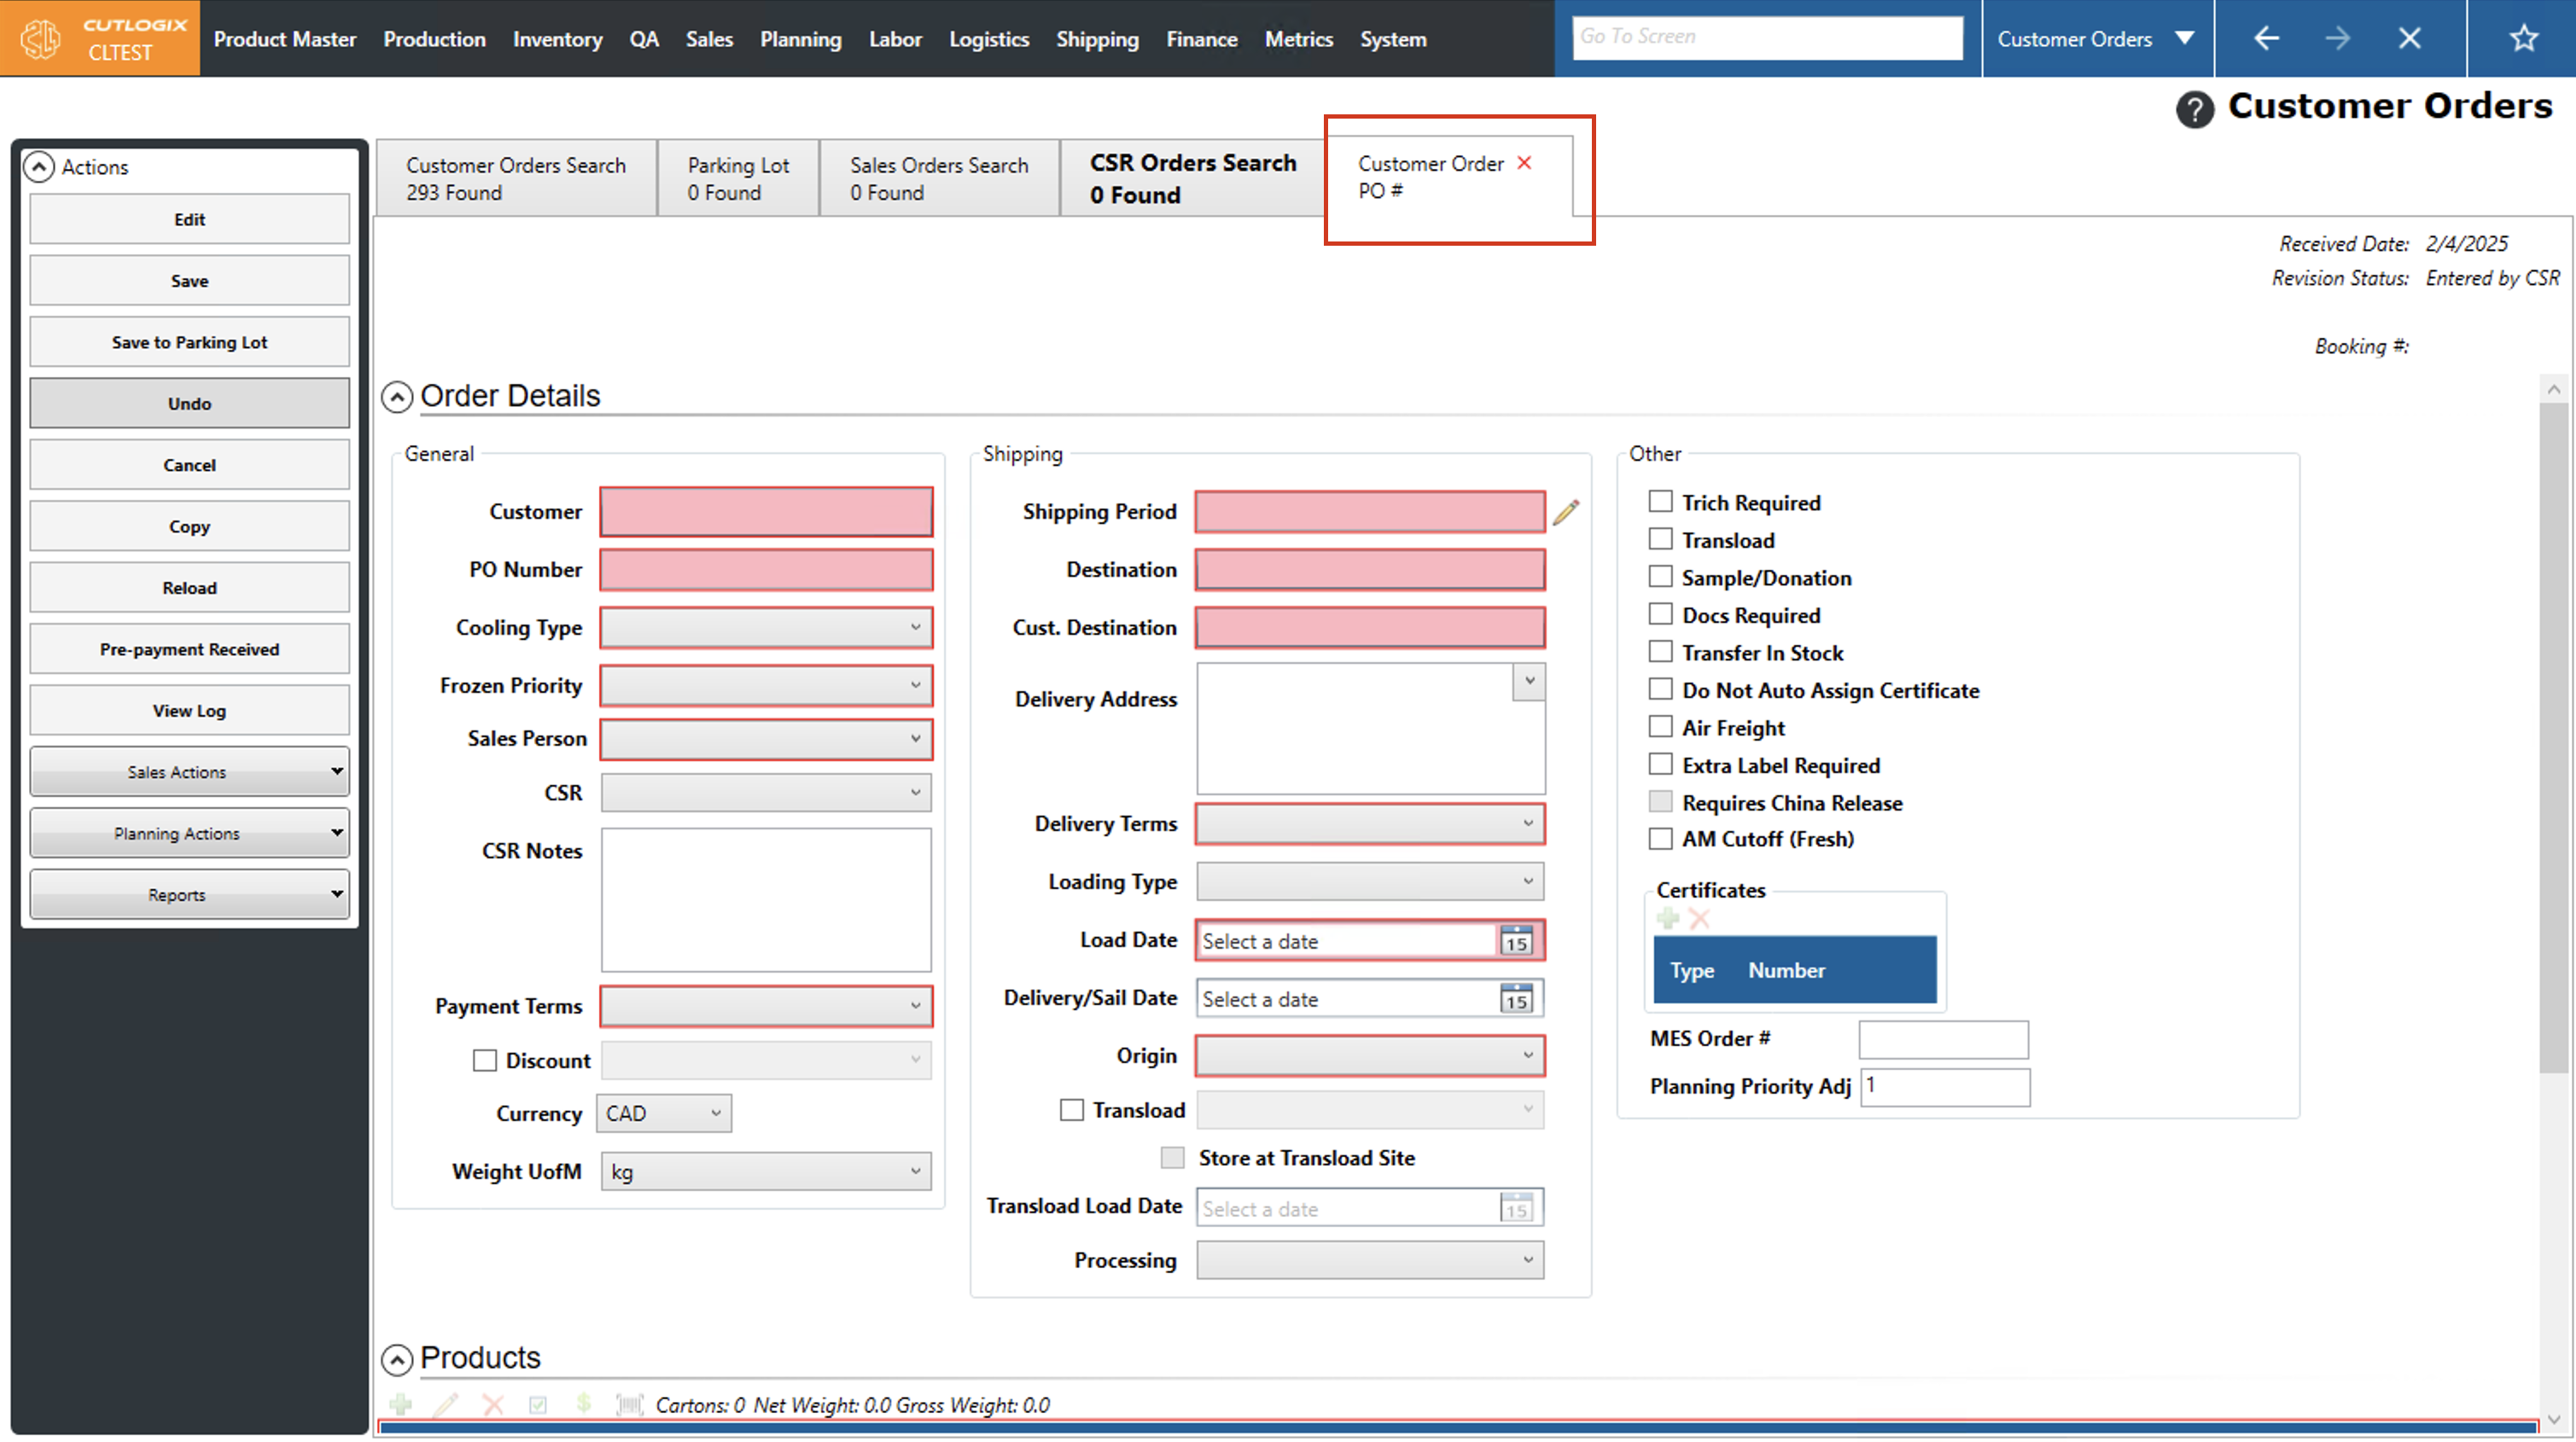
Step 4: All required fields are highlighted in red and must be entered to be able to save the customer order. The following are the required fields:
• Customer: The customer being invoiced for the order.
• PO Number: A Purchase Order Number (PO#). Best practice is to assign each order a unique number. However, users can assign the same PO to multiple orders if they wish.
• Cooling Type: Indicates whether the product will need to be kept and shipped at fresh, chilled or frozen temperatures.
• Frozen Priority: This tells the planning system the level of urgency with which a frozen order must be planned. This field is only required if the order cooling type is set to frozen.
• Sales Person: Individual who negotiated the sale with the customer.
• Payment Terms: These automatically populate from the selected customer if they have payment terms configured on them.
• Shipping Period: When the order is expected to be shipped. Indicated as the first or second half of the specified month.
• Destination: Where the order will be shipped to. May be an intermediate destination rather than the final destination.
• Cust. Destination: The final destination of the order, regardless of your company needs to ship it to.
• Delivery Terms: The specific date on which this order must be loaded. If a date outside the shipping period is chosen, the shipping period will be updated to match the load date.
• Load Date: When the order needs to be loaded by. If a date outside the shipping period is chosen, the shipping period will be updated to match the load date.
• Origin: The facility that the load will originate from.
Step 5: Saving a customer order requires that one or more products have been added to it. Leave this page open and continue to the "How to Add Products to Customer Orders" section below.
How to Add Products to Customer Orders
DemoStep 1: Products are added to customer orders on the customer order details page, under the "Products" section.
Note: To navigate to the customer order details page if you're not already there, go to the "Customer Order Search" tab (Under the Sales menu → Customer Orders) and locate the customer order that you want to add products to. (If it's already been saved, you'll also need to click "Edit" on the left actions panel)
Note: To navigate to the customer order details page if you're not already there, go to the "Customer Order Search" tab (Under the Sales menu → Customer Orders) and locate the customer order that you want to add products to. (If it's already been saved, you'll also need to click "Edit" on the left actions panel)
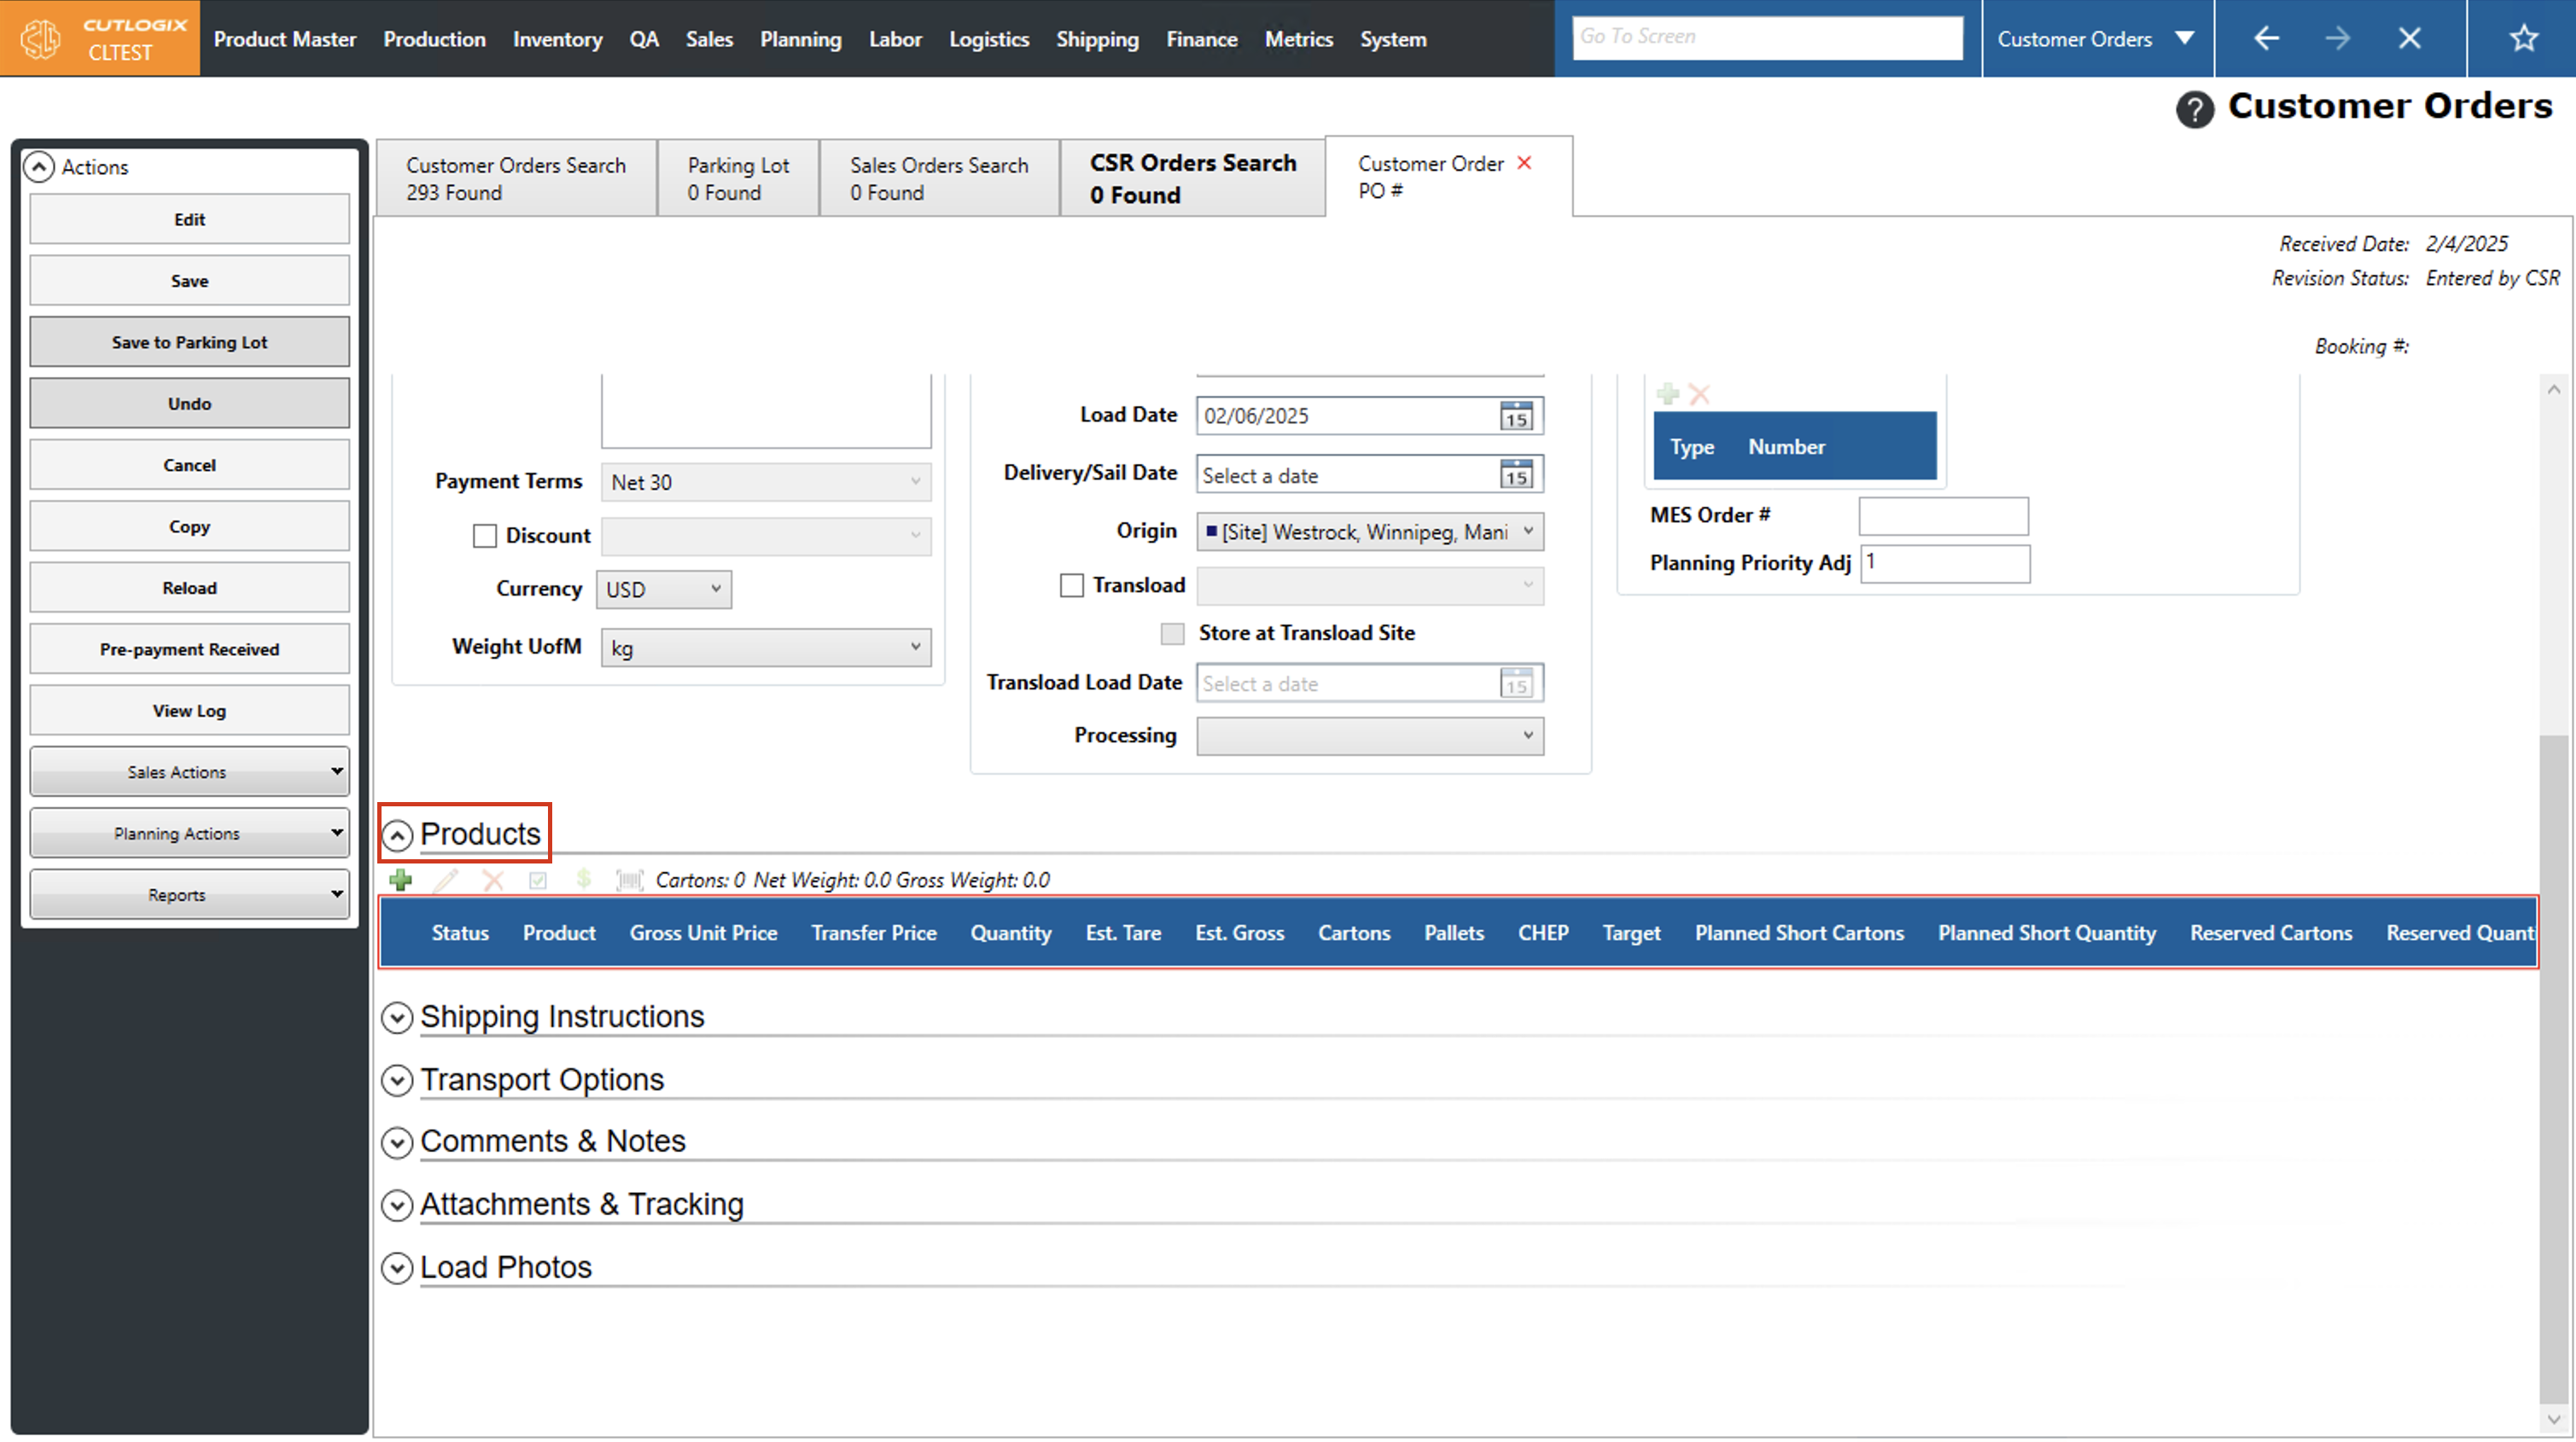
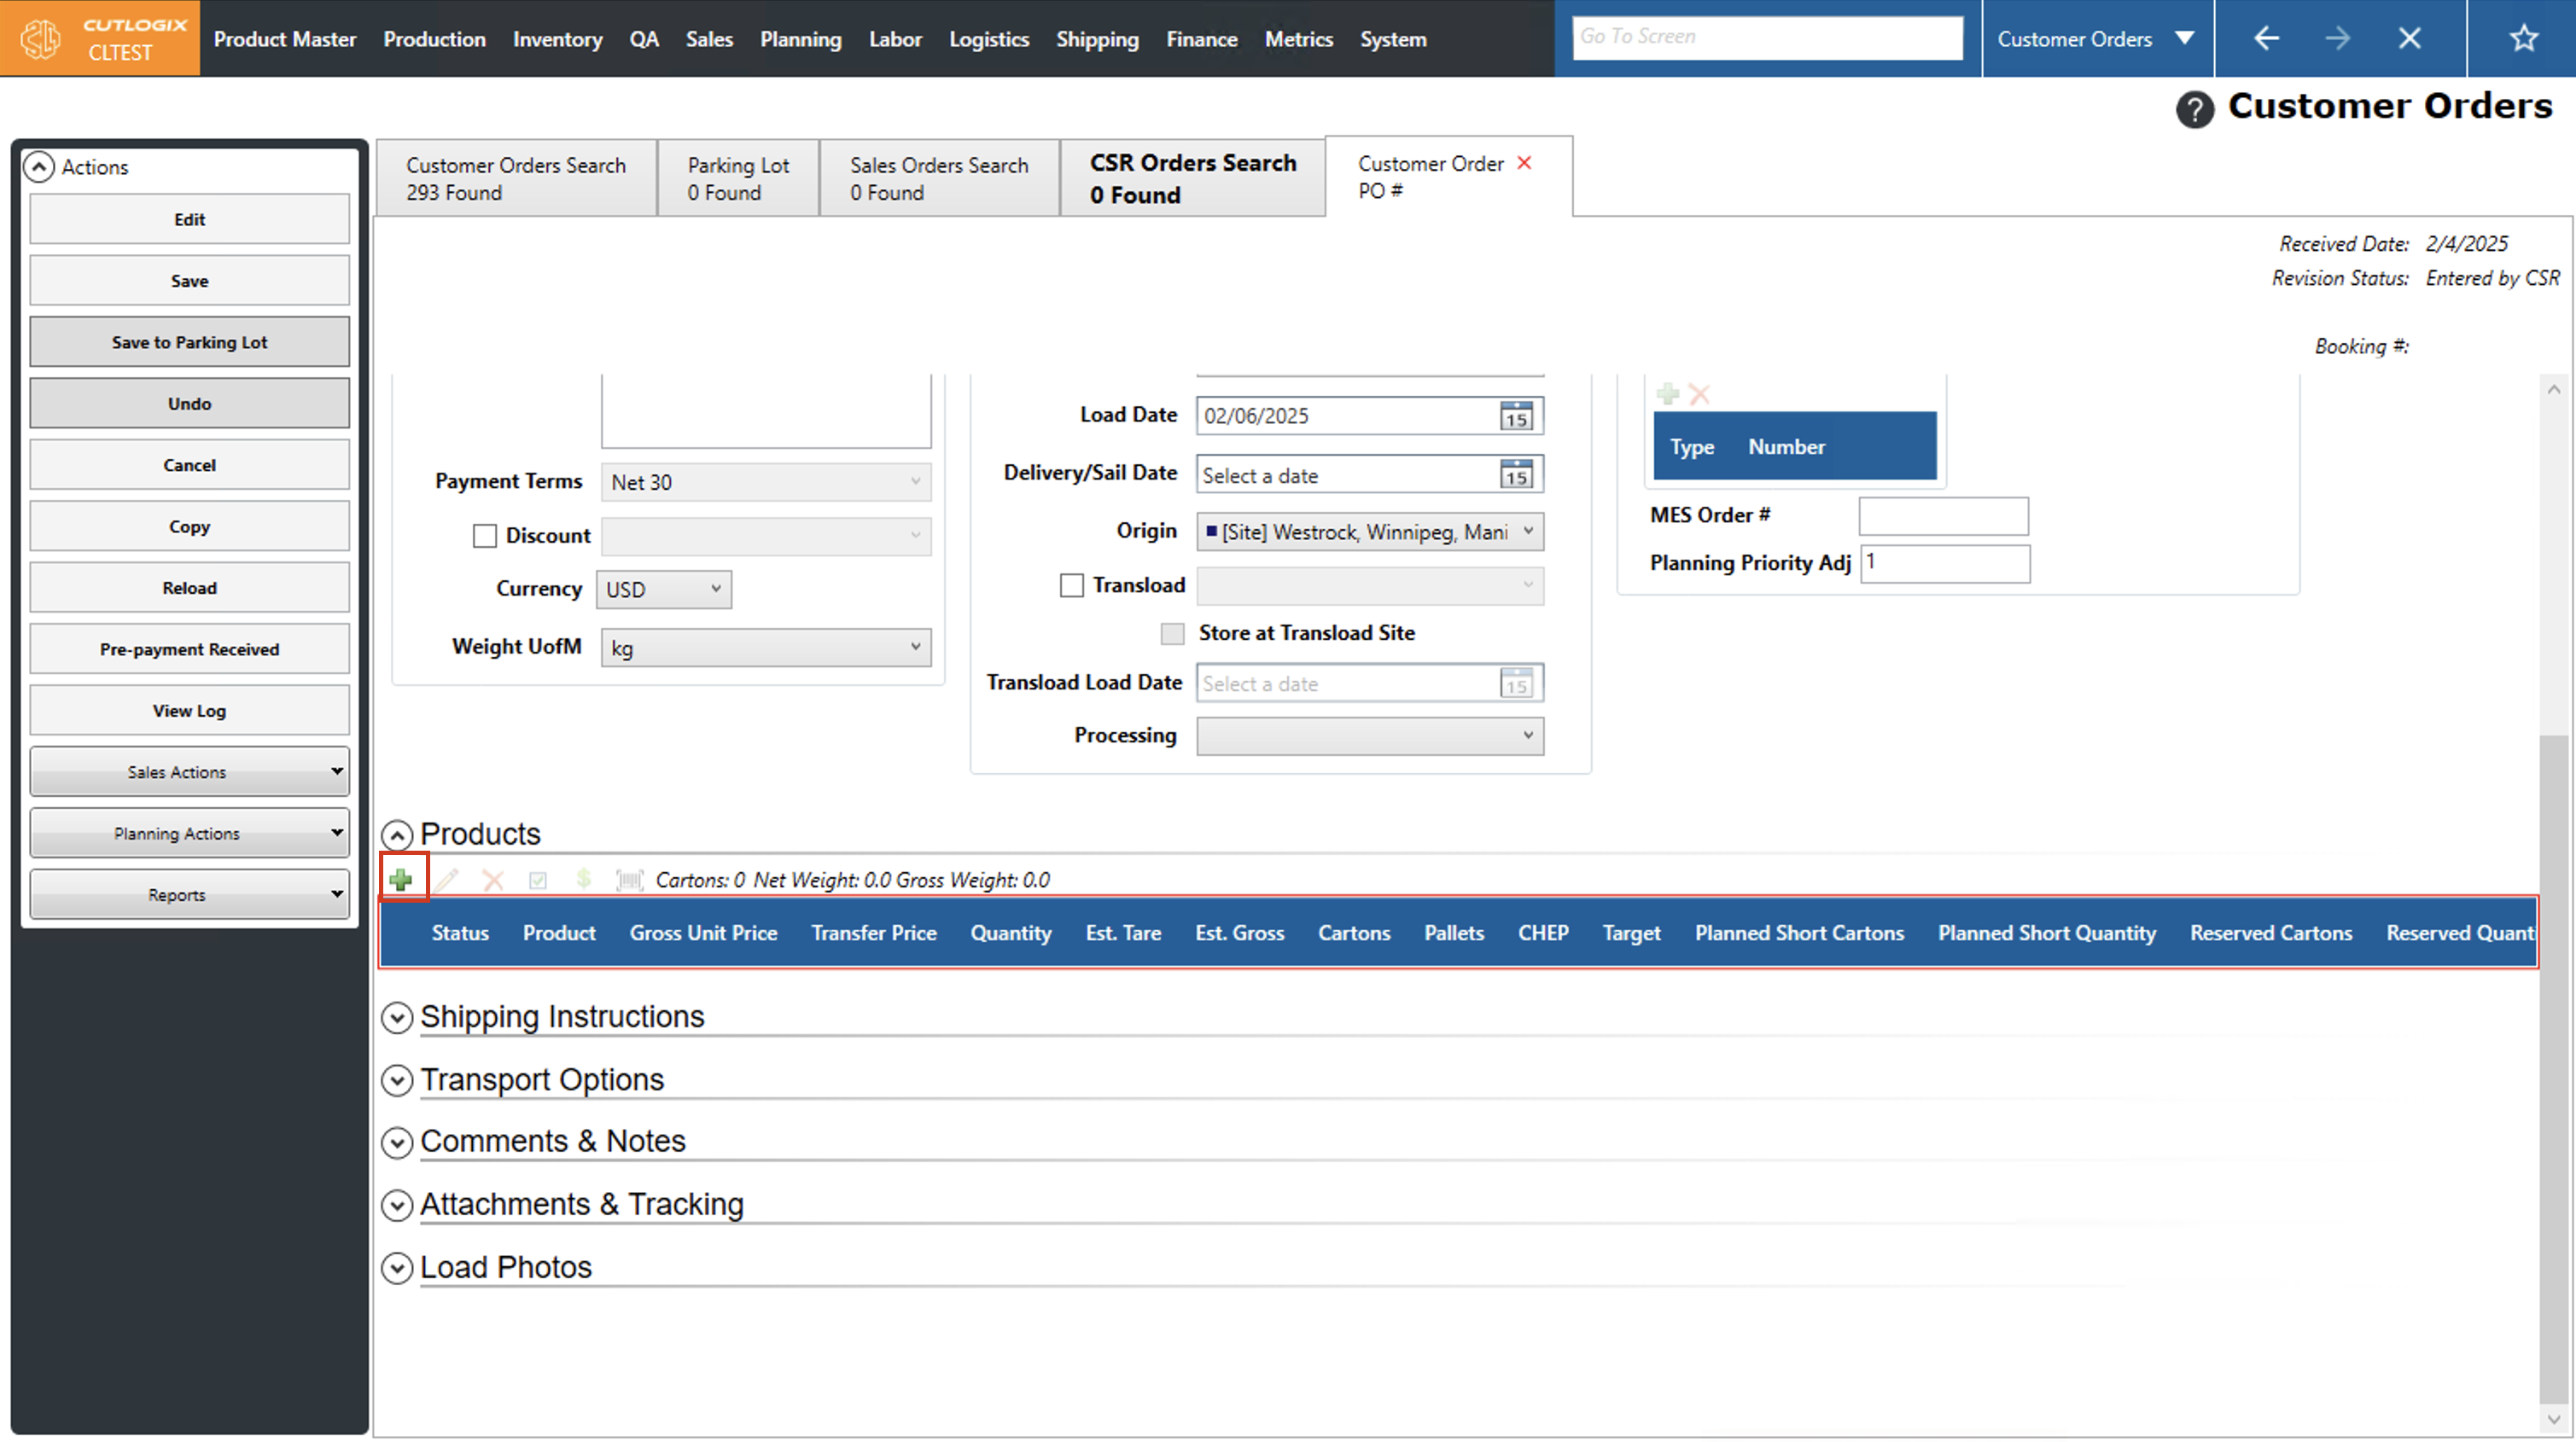
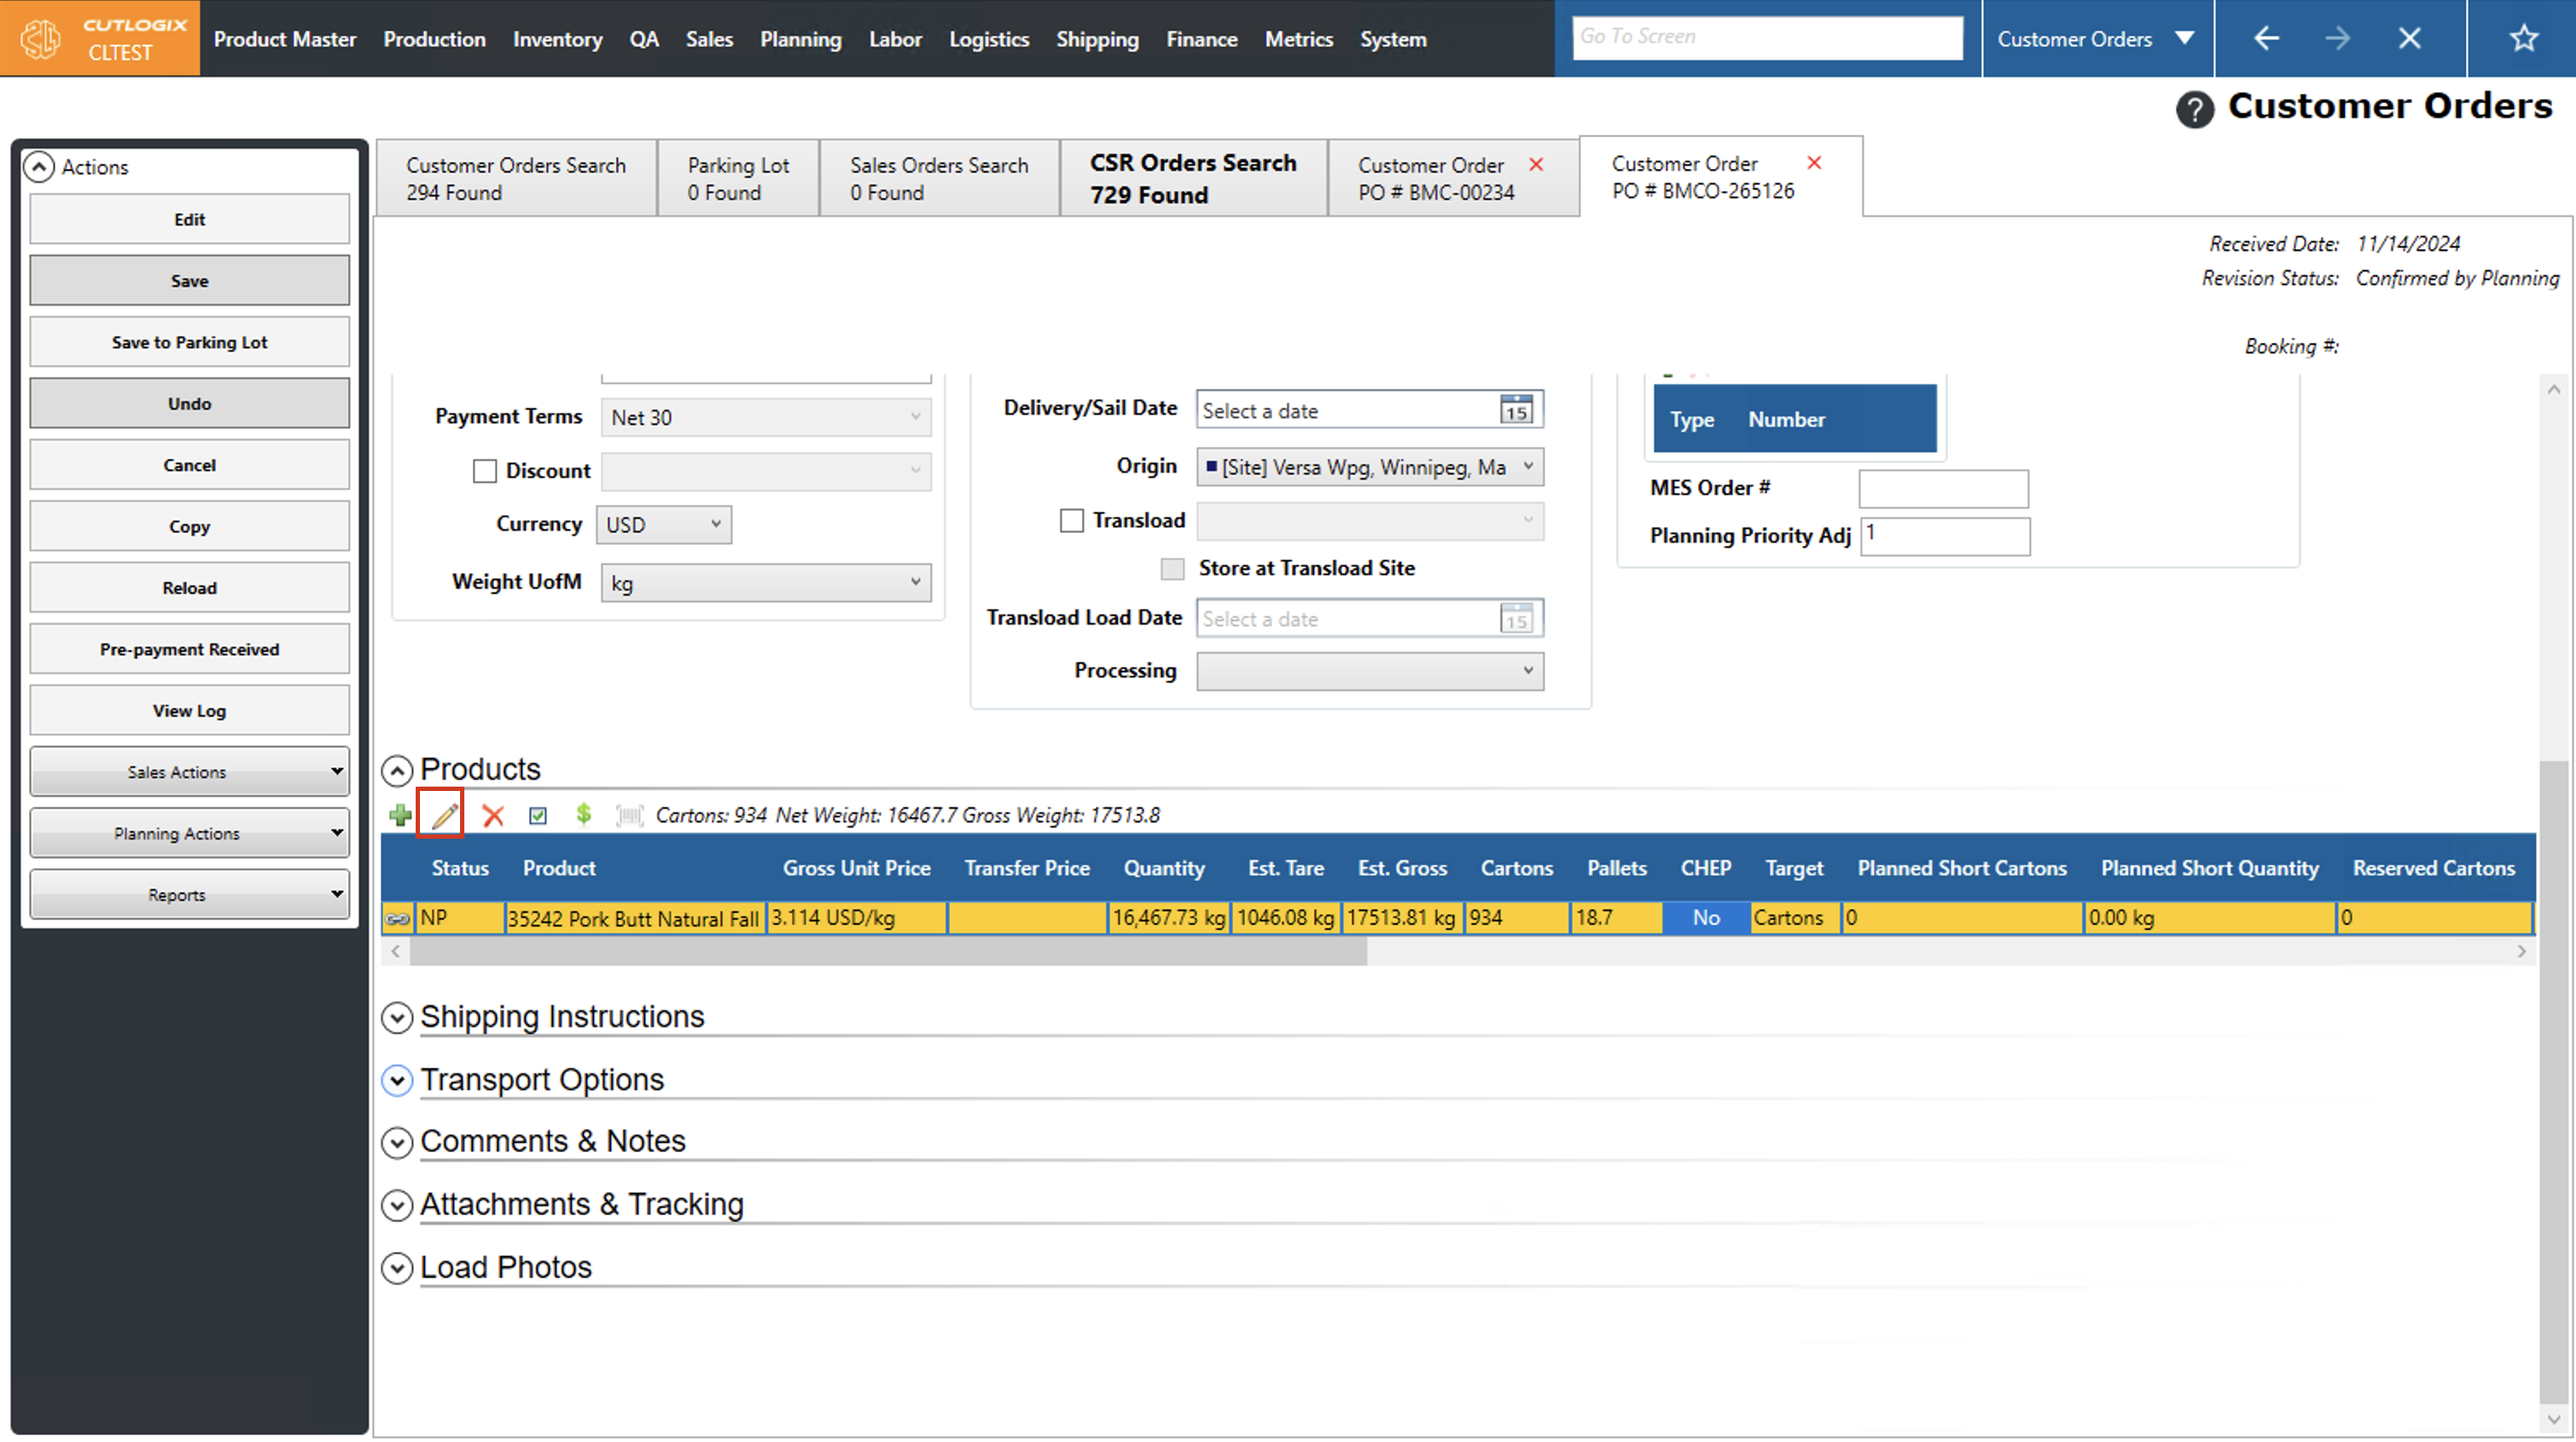
Step 2: Scroll down (on the "Customer Order Details" page) to the "Products" section. Click on the green "+" icon to add a product to the order.
Note: Currency, Unit of Measure, Load Date and Customer Destination must be filled out on the order for the + button to be enabled.
Note: Currency, Unit of Measure, Load Date and Customer Destination must be filled out on the order for the + button to be enabled.
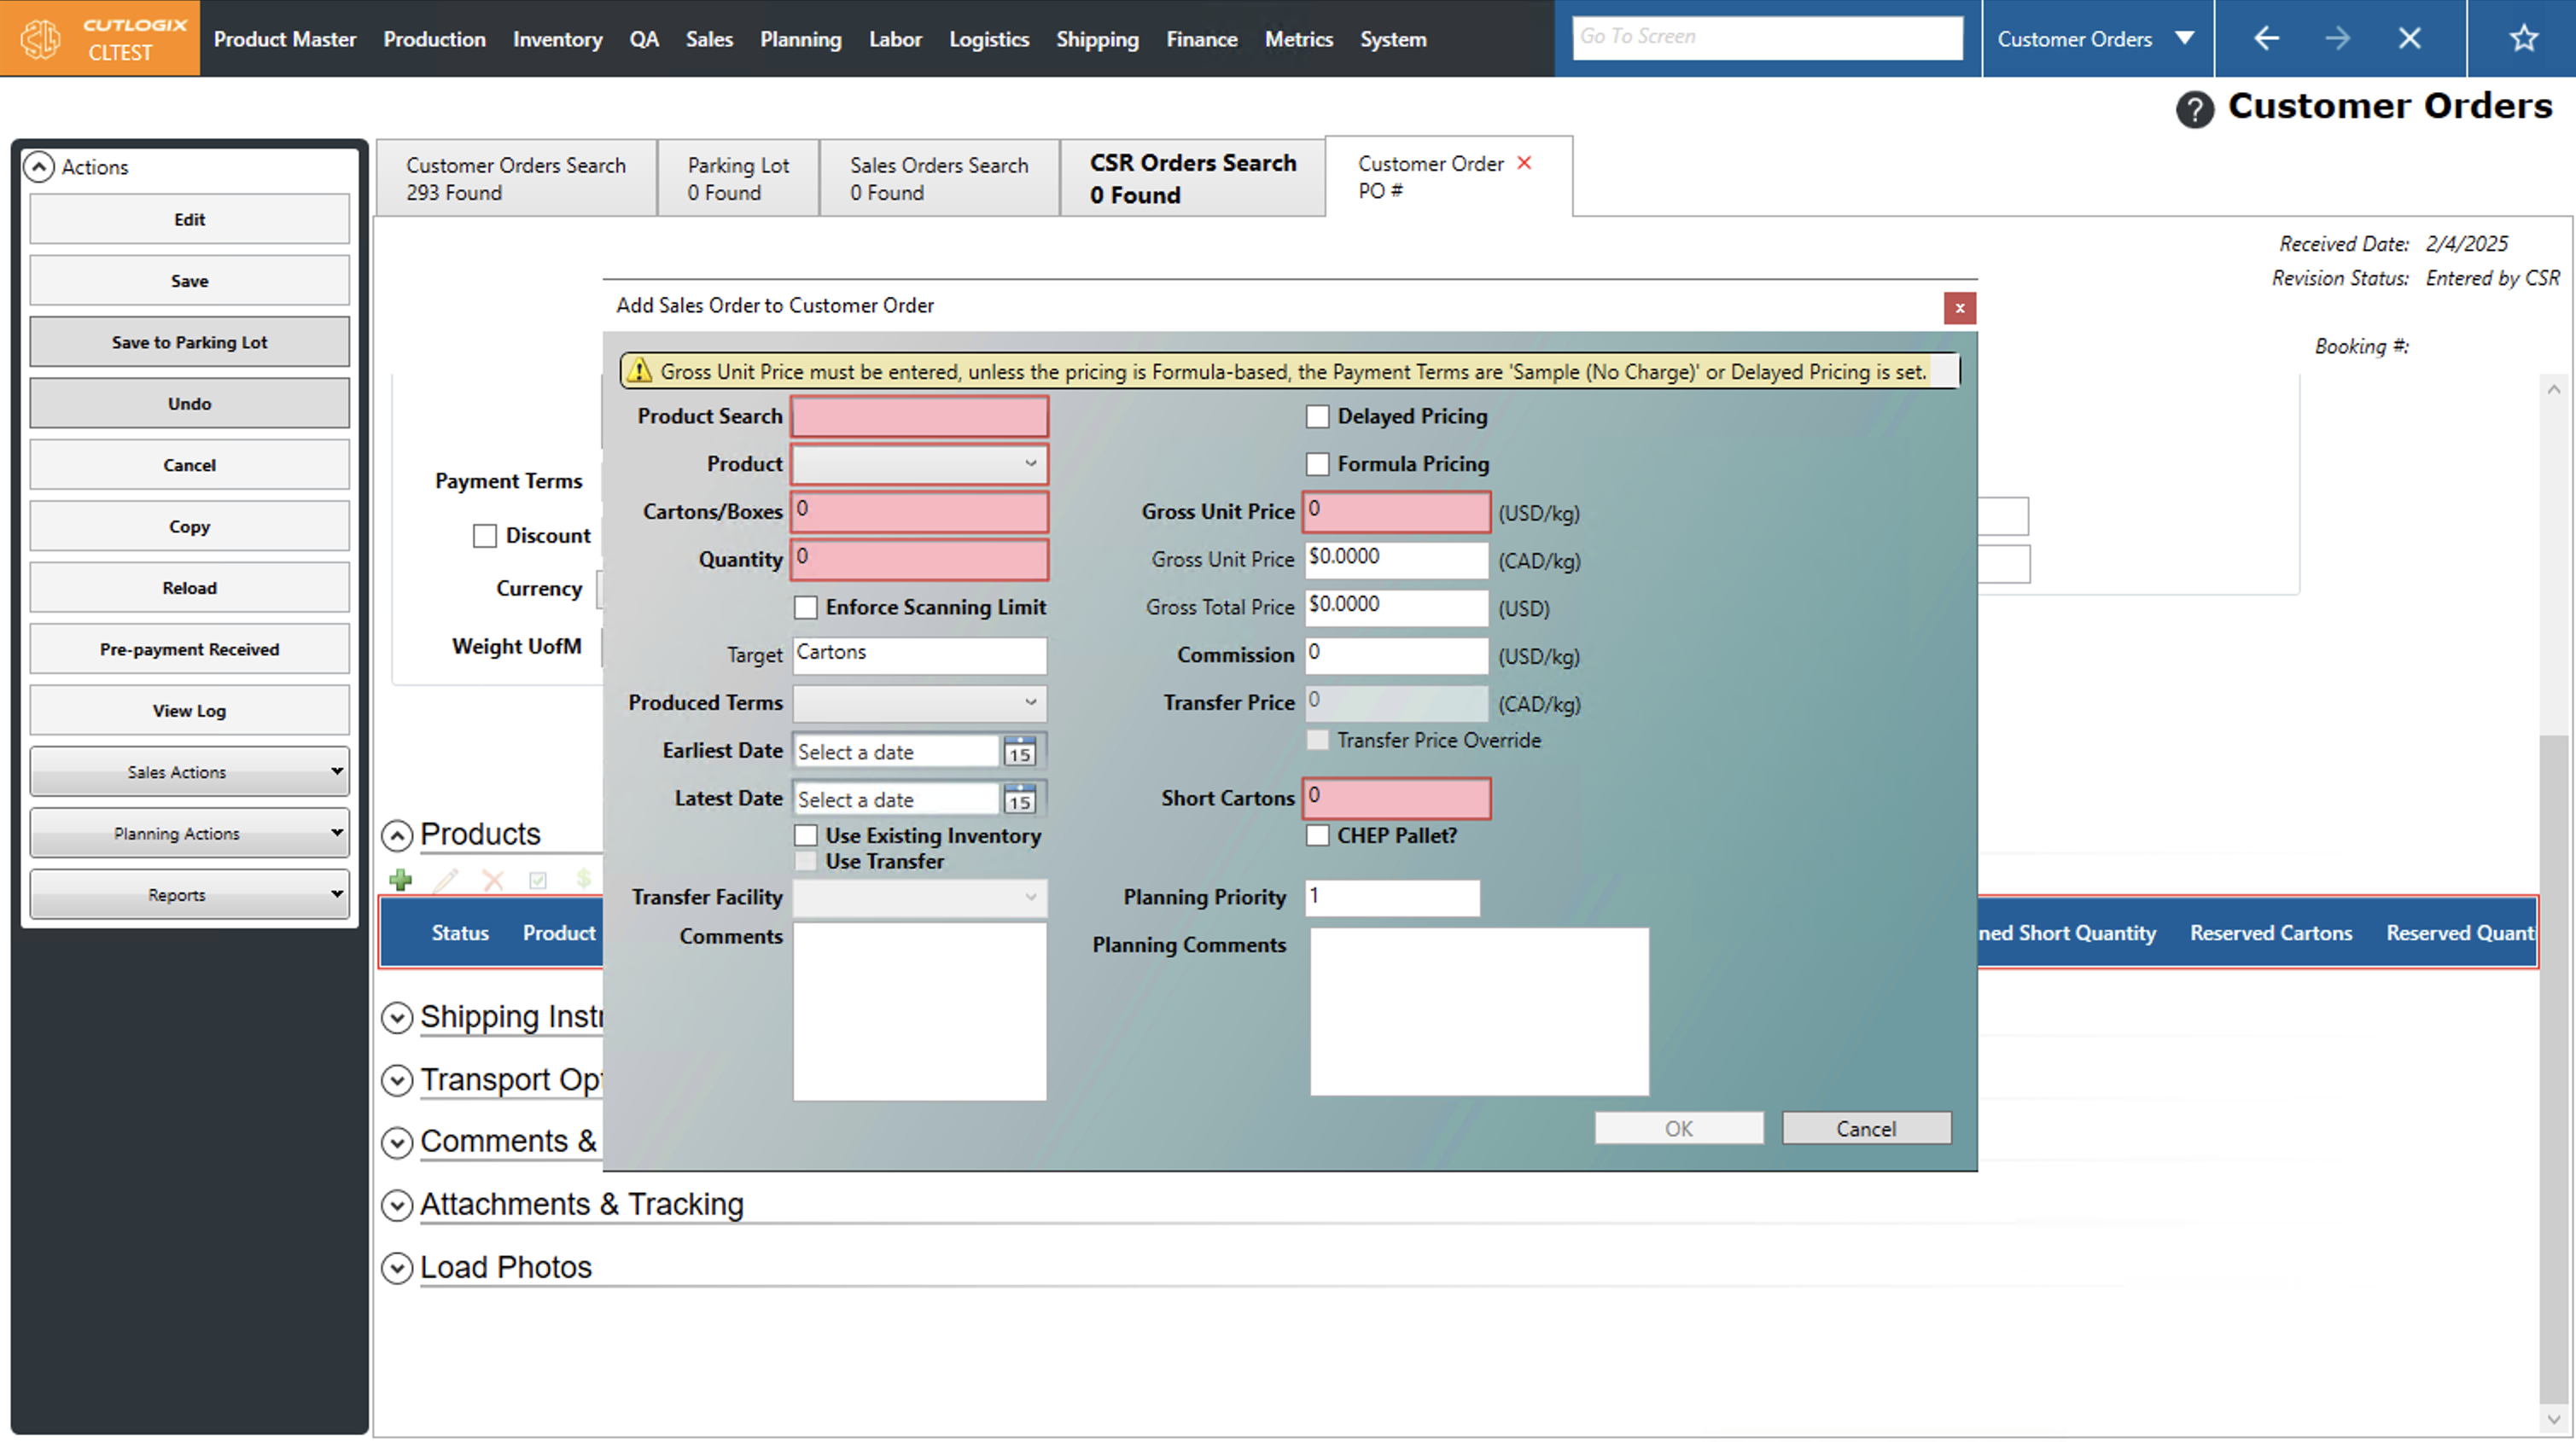
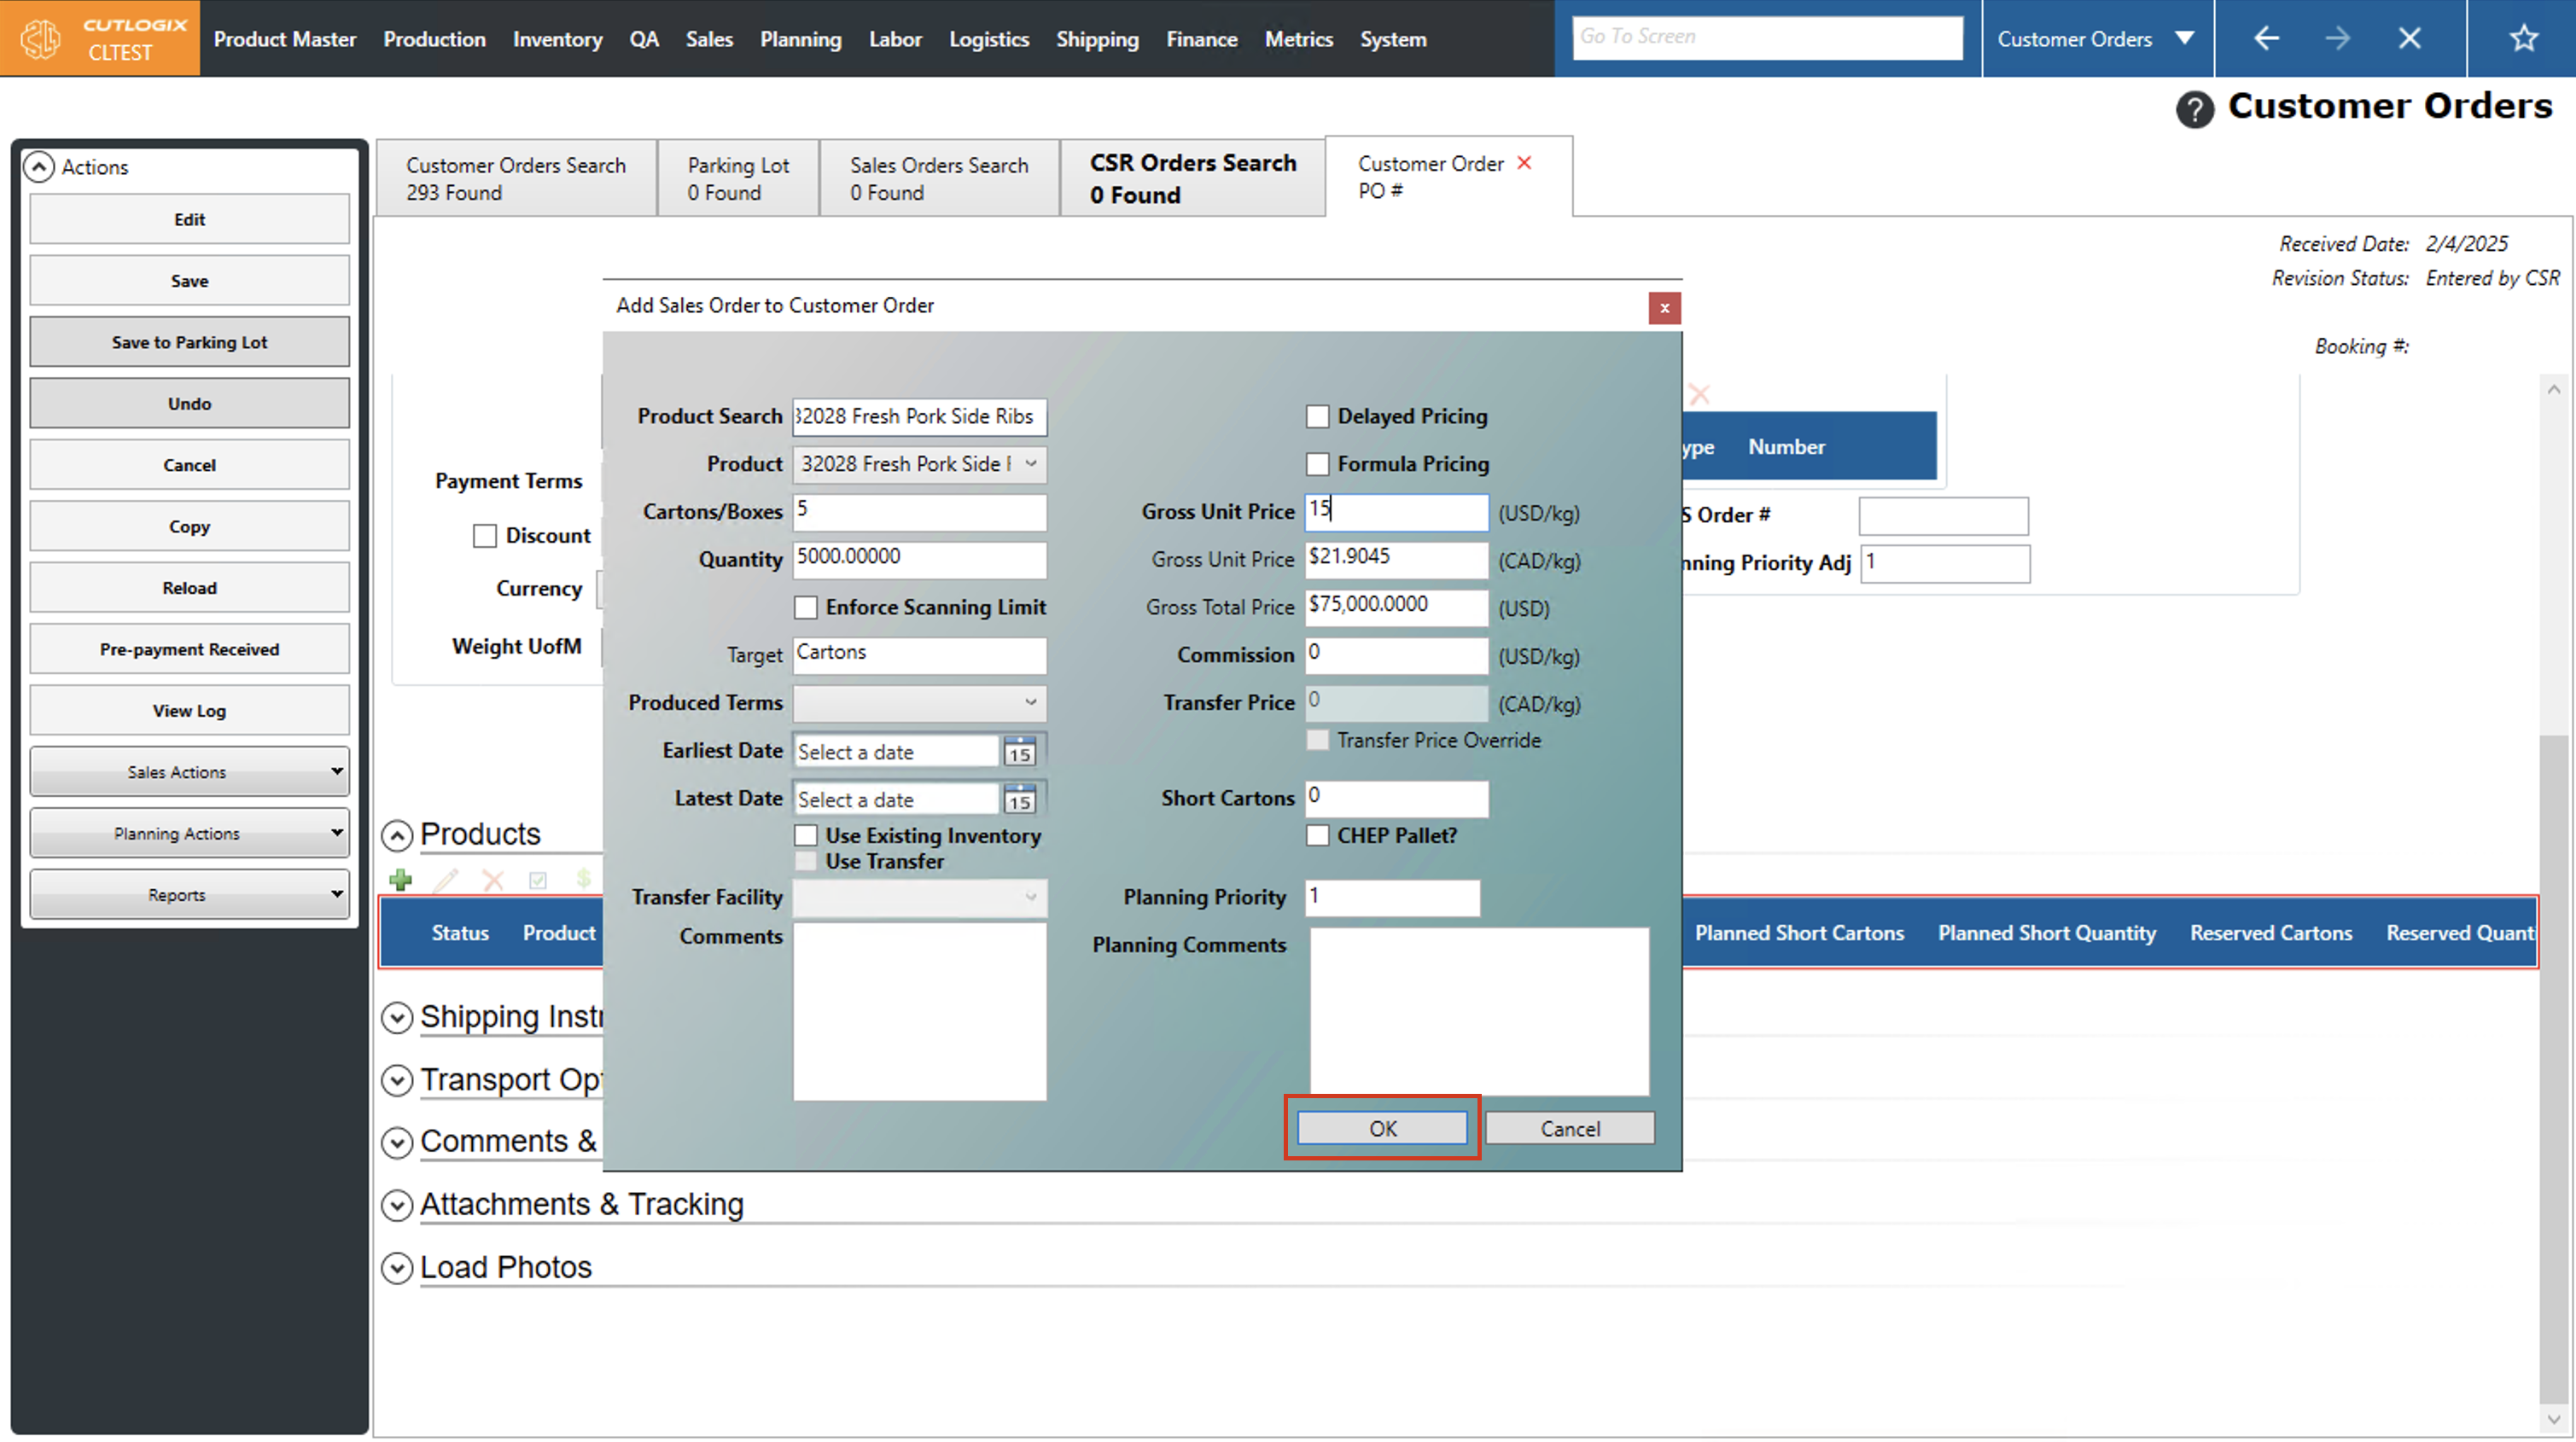
Step 3: A dialog will open where you can enter details on the product that you want to add to the order. The fields highlighted in red are required and must be entered to save the product on the customer order. These fields are as follows:
• Product Search: Used to select the product to add to the order. As users start typing in this field, CutLogix will perform a search for any products with names that contain what has been typed.
• Cartons/Boxes: These fields indicate the amount of product being ordered. As long as the product is specified first, filling out one of these fields will automatically fill out the other with the equivalent amount for that product. Whichever field is filled out will also set the target field. For instance, if cartons are filled out then the target field automatically becomes cartons. This indicates that when determining how much of this product needs to be made, reference will be made to the number of cartons ordered rather than the weight.
• Quantity: The weight of product that is ordered. This will be automatically calculated based on the number of cartons/boxes ordered.
• Gross Unit Price: The gross unit price in the customer's currency per unit of measure of the product.
• Delayed Pricing: Users commit to selling, but the final price is determined later based on market conditions.
• Formula Pricing: The price is calculated using a predefined formula. This formula is often based on USDA-reported market prices, quality factors and other industry benchmarks.
• Payment Terms are "Sample (No Charge": Users can specify the payment terms as ‘Sample (No Charge)’ on the customer order itself. In this case, there is no charge and so there is no need to specify how the price will be set.
• Short Cartons: How many cartons the order was shorted by.
Step 4: Once all the required information and any additional info that you want to add has been recorded, click the "OK" button at the bottom of the page to save the product on the customer order. If you don't want to save the product on the customer order, clicking "Cancel" will discard any changes, and close the dialog without adding the product to the order.
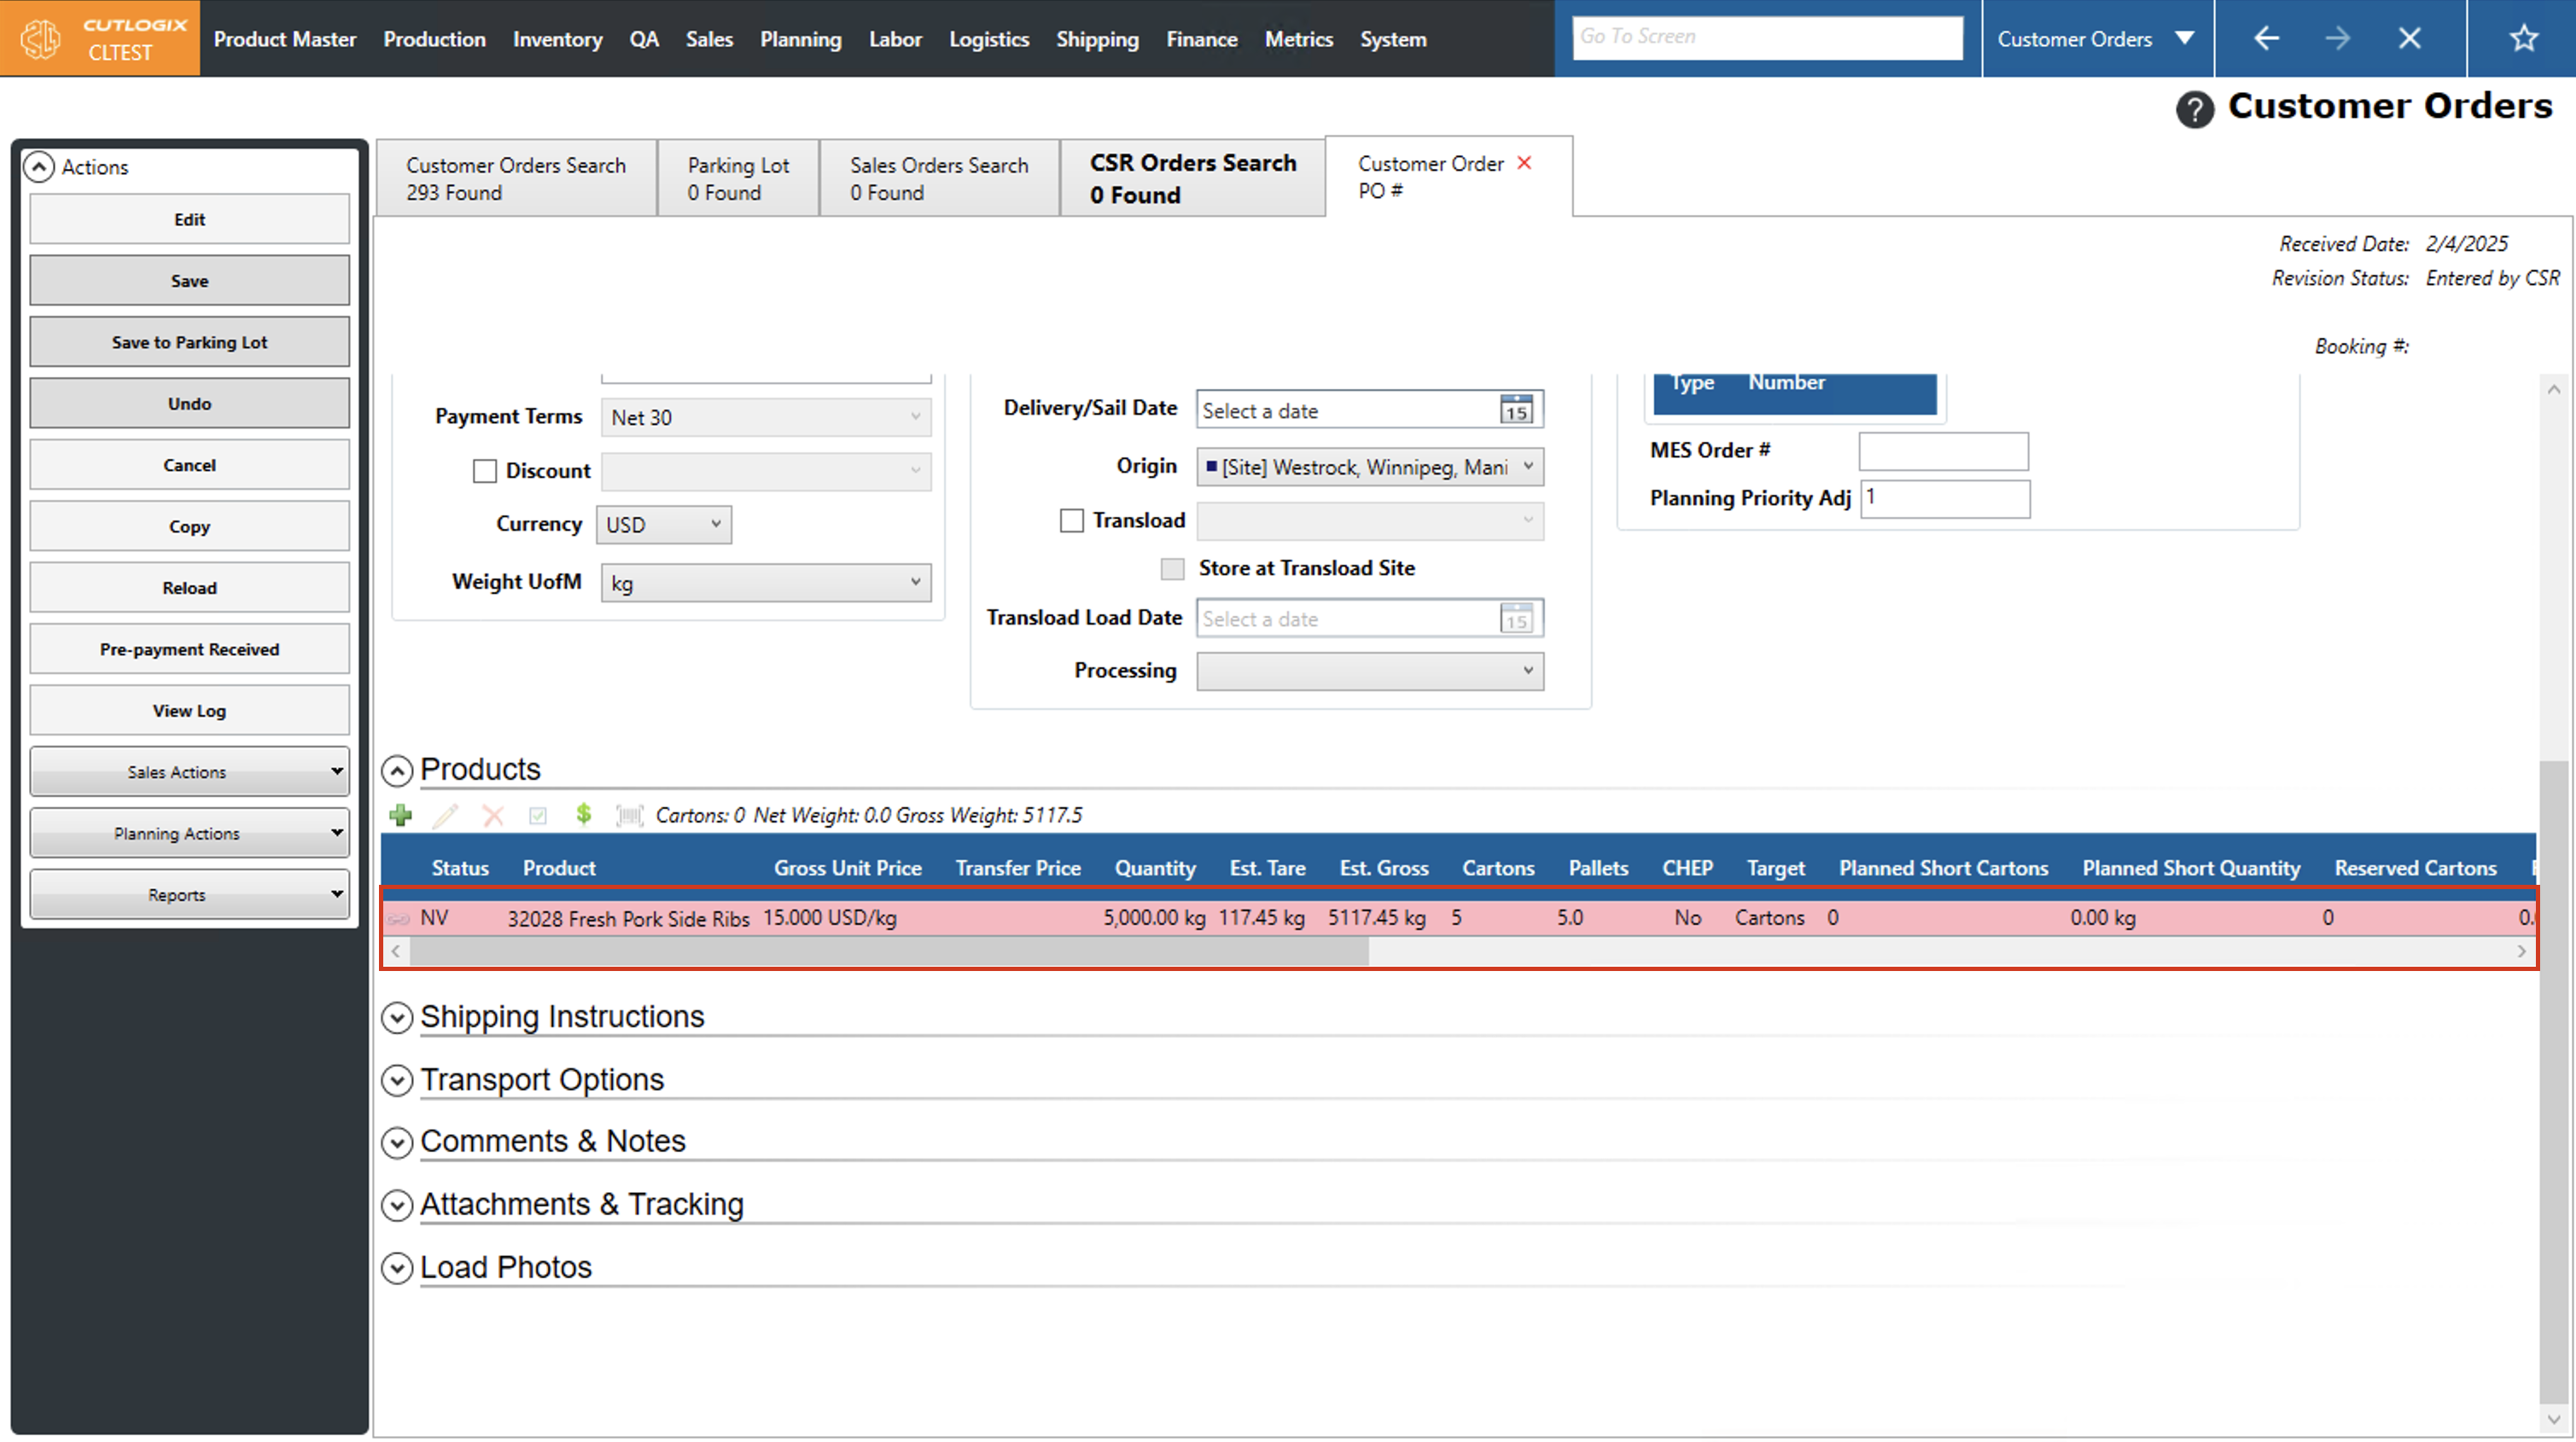
Step 5: After saving the product, it will appear under the "Products" section on the customer order details page. You can repeat the product adding process for any other products that need to be added to the order.
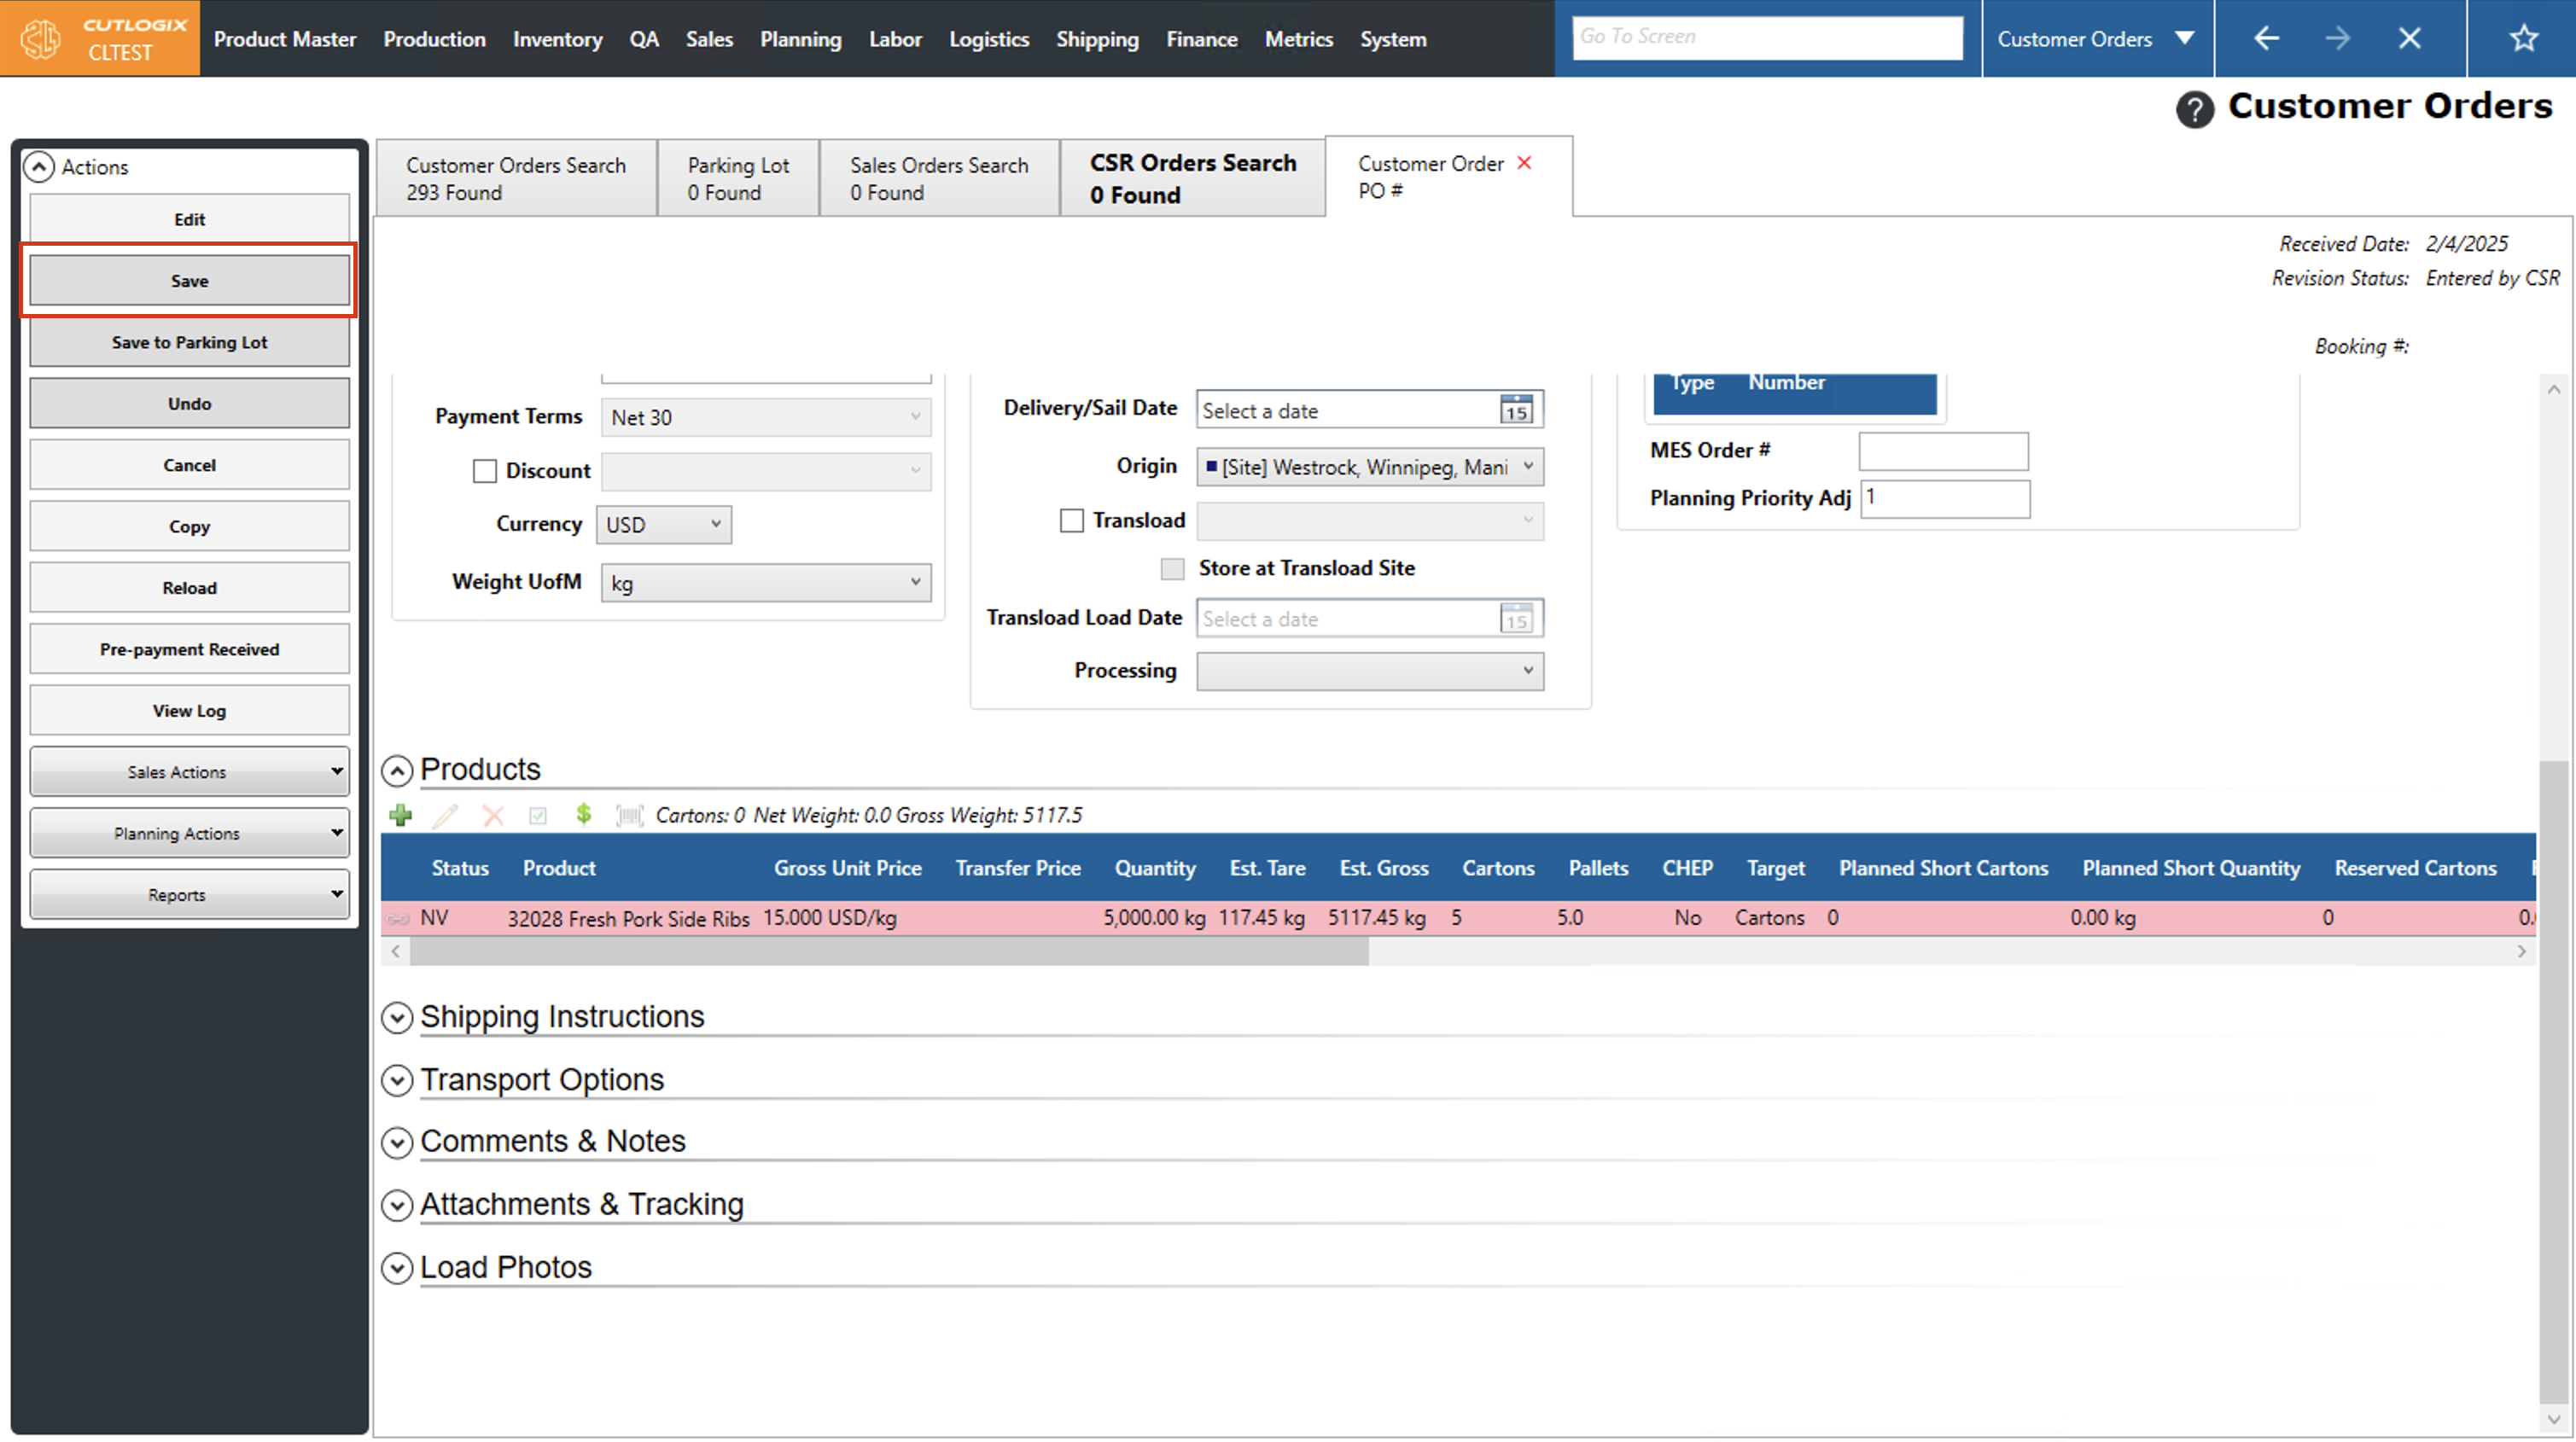
Step 6: Once all the necessary products have been added to the order, click the "Save" button in the left actions panel to save the new customer order.
How to Edit Customer Orders
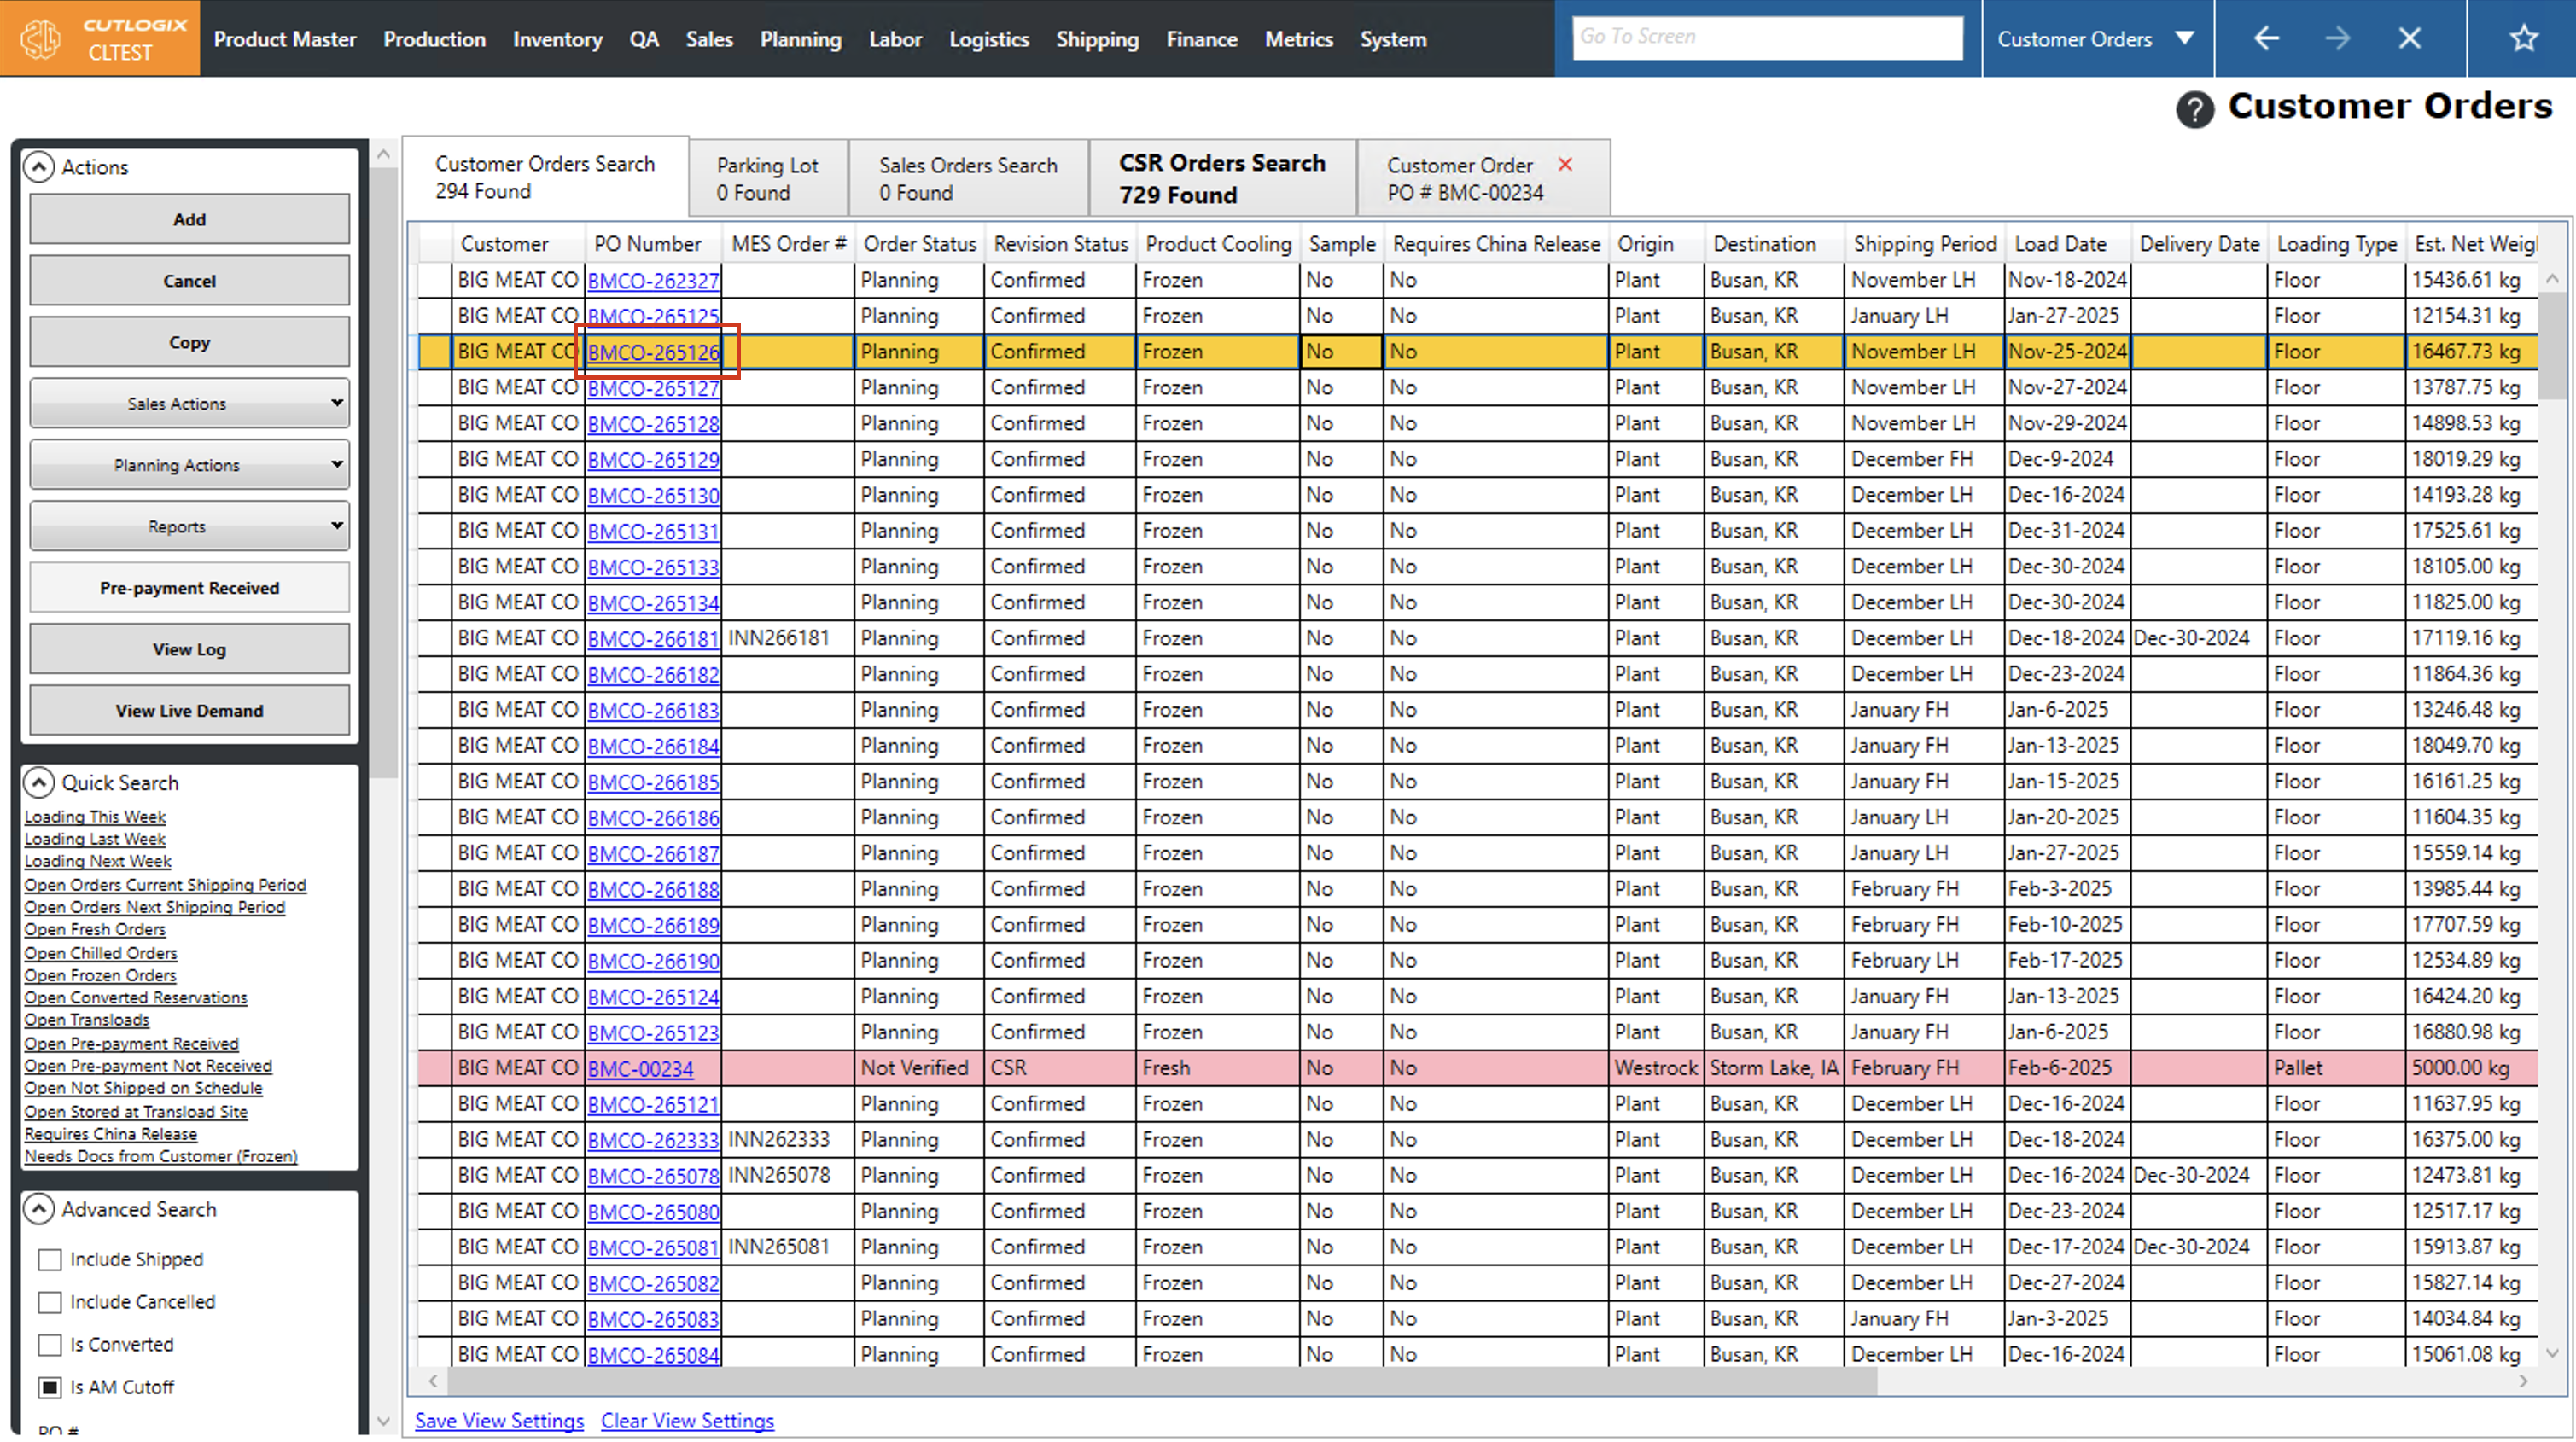
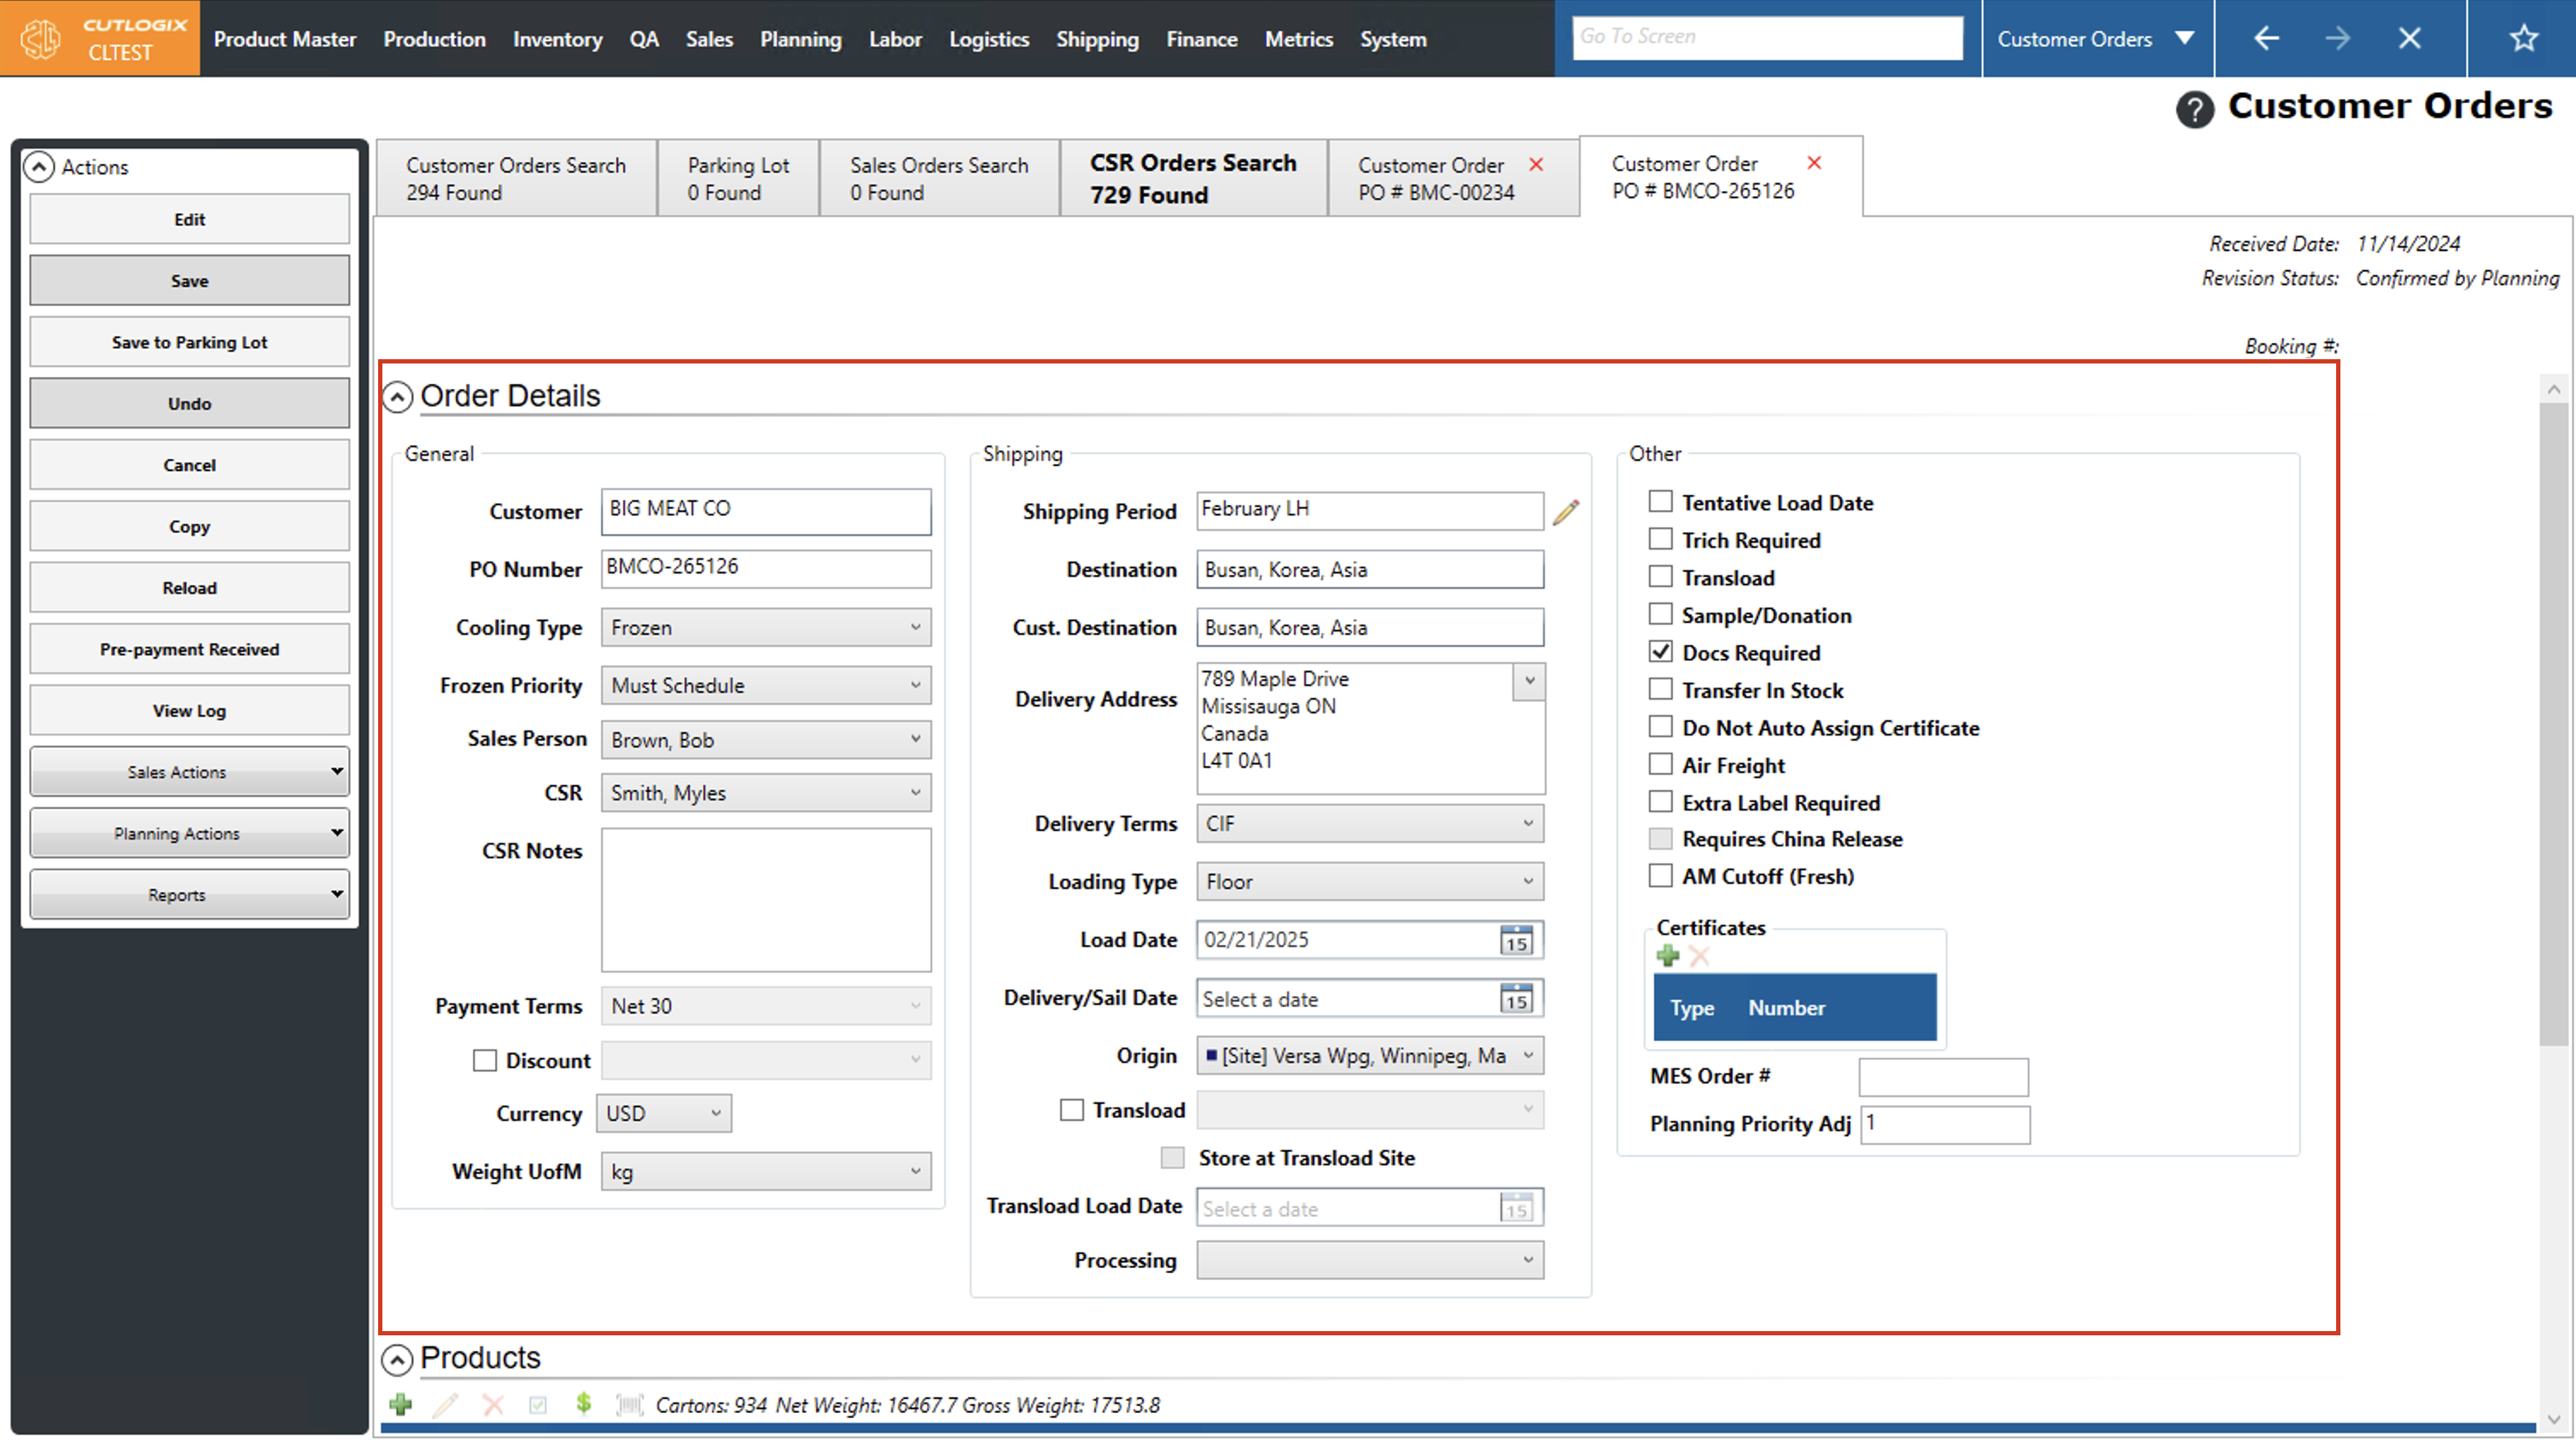
DemoStep 1: Customer orders can be edited from their details page. To get to the details page for a customer order that you want to edit, navigate to the "Customer Orders Search" page (Under the Sales menu → Customer Orders) and find the order in the list that you want to edit. To get to the details page for it, either double click anywhere on the row for that order, or single clicking on the "PO Number" for that order.
Step 2: Click on the "Edit" button in the left actions panel to enable editing on the order.
Step 3: Make the necessary changes to the order. Ensure that all required fields are still filled out.
Step 4: If you want to make changes to a product on an order, scroll down to the "Products" section on the order details page. Click on the product that you want to edit, then click the "Edit" button and make any necessary changes to the product in the dialog that appears. Click "Ok" at the bottom of the dialog to save your changes, if you don't want to save them, simply click the "X" button in the top right corner of the dialog to close it without saving the changes.
Note: If you want to delete a product from a customer order, instead of clicking "Edit" after selecting the product, click the "X" button.
Note: If you want to delete a product from a customer order, instead of clicking "Edit" after selecting the product, click the "X" button.
Step 5: Click the "Save" button in the left actions panel to save the changes to the order. If you don't want to save the changes that were made to the order, click the "Undo" button in the actions panel, this will remove all changes that were made and revert the order back to how it was before editing was enabled on it.

How to Copy a Customer Order
Demo Copying a Customer Order allows you to quickly create a duplicate order while making necessary modifications. Follow the steps below to copy an order.
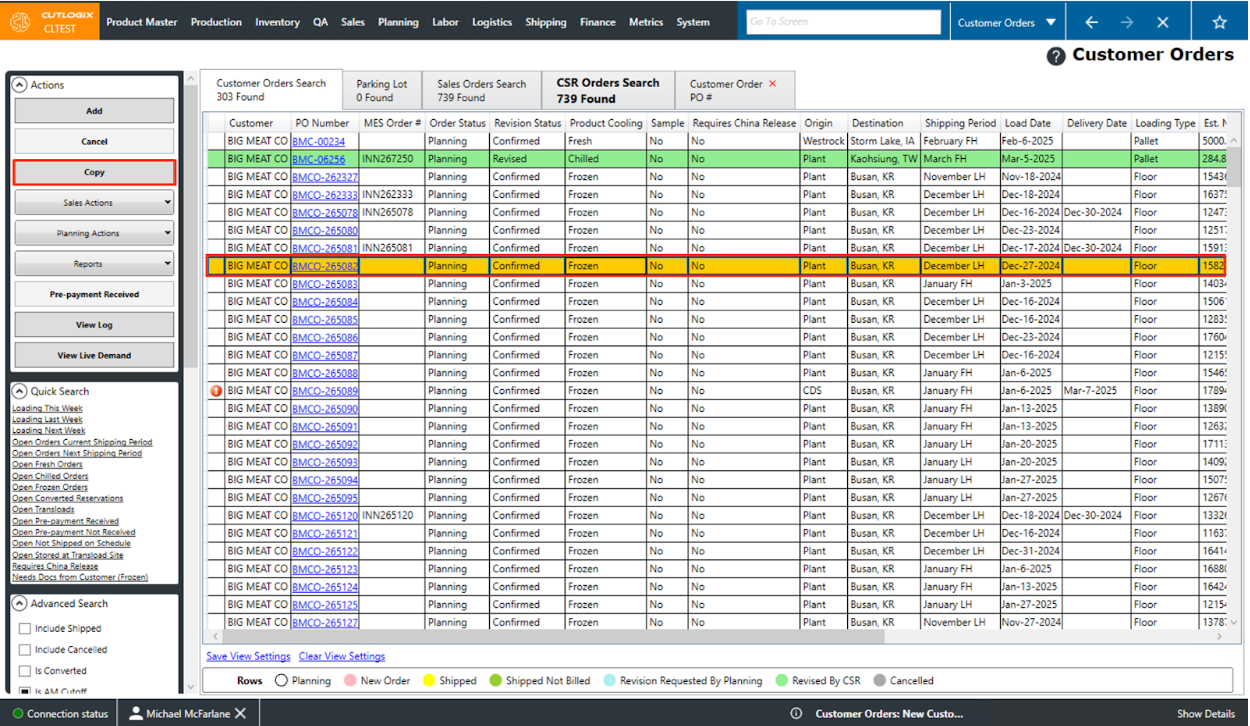
Step 1: Navigate to the Customer Orders page (Under the Sales menu → Customer Orders → Customer Orders Search tab)
Step 2: Click on the customer order you want to copy. The selected order will be highlighted in yellow. Then, click "Copy" in the Actions sidepod.
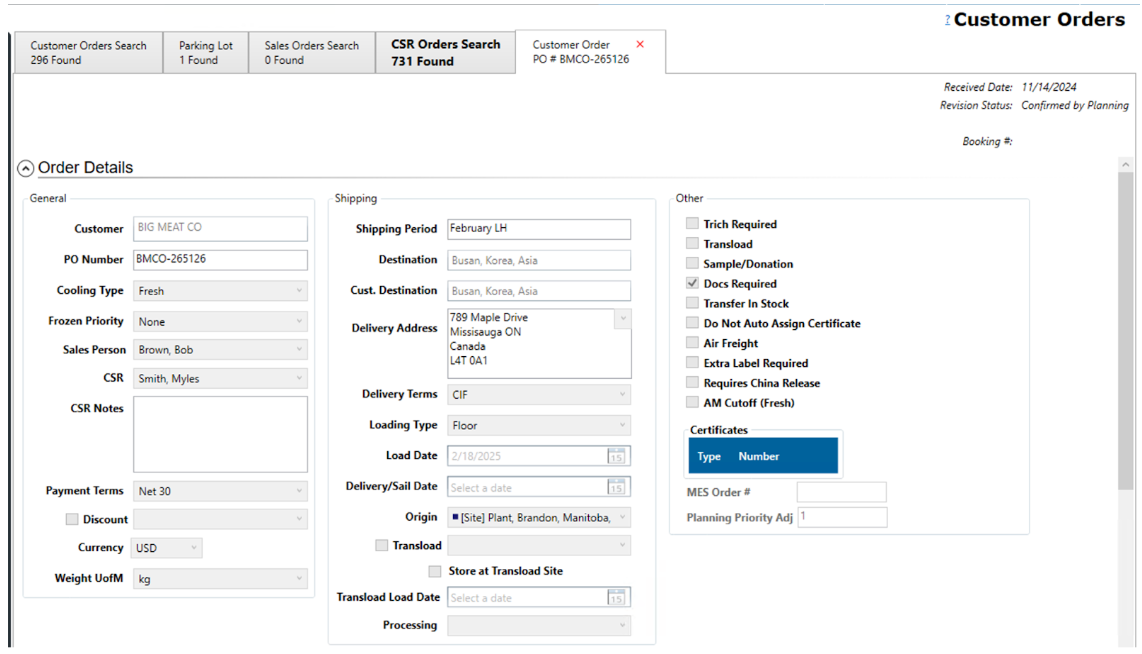
Step 3: A new details tab for the copied Customer Order will open. A new PO Number and Load Date must be entered. All other fields will remain the same as the original order.
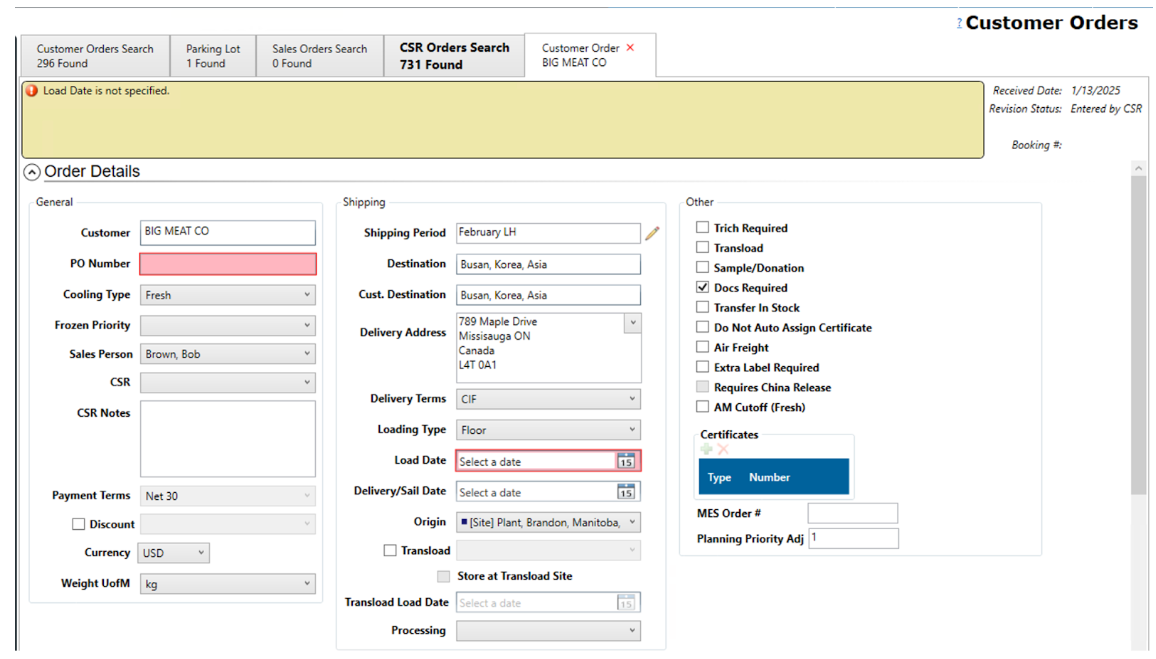
Step 4: Fill out the PO Number, Load Date, and modify any other necessary fields. Ensure that all required fields are completed and that at least one product is attached to the order to enable the "Save" button.
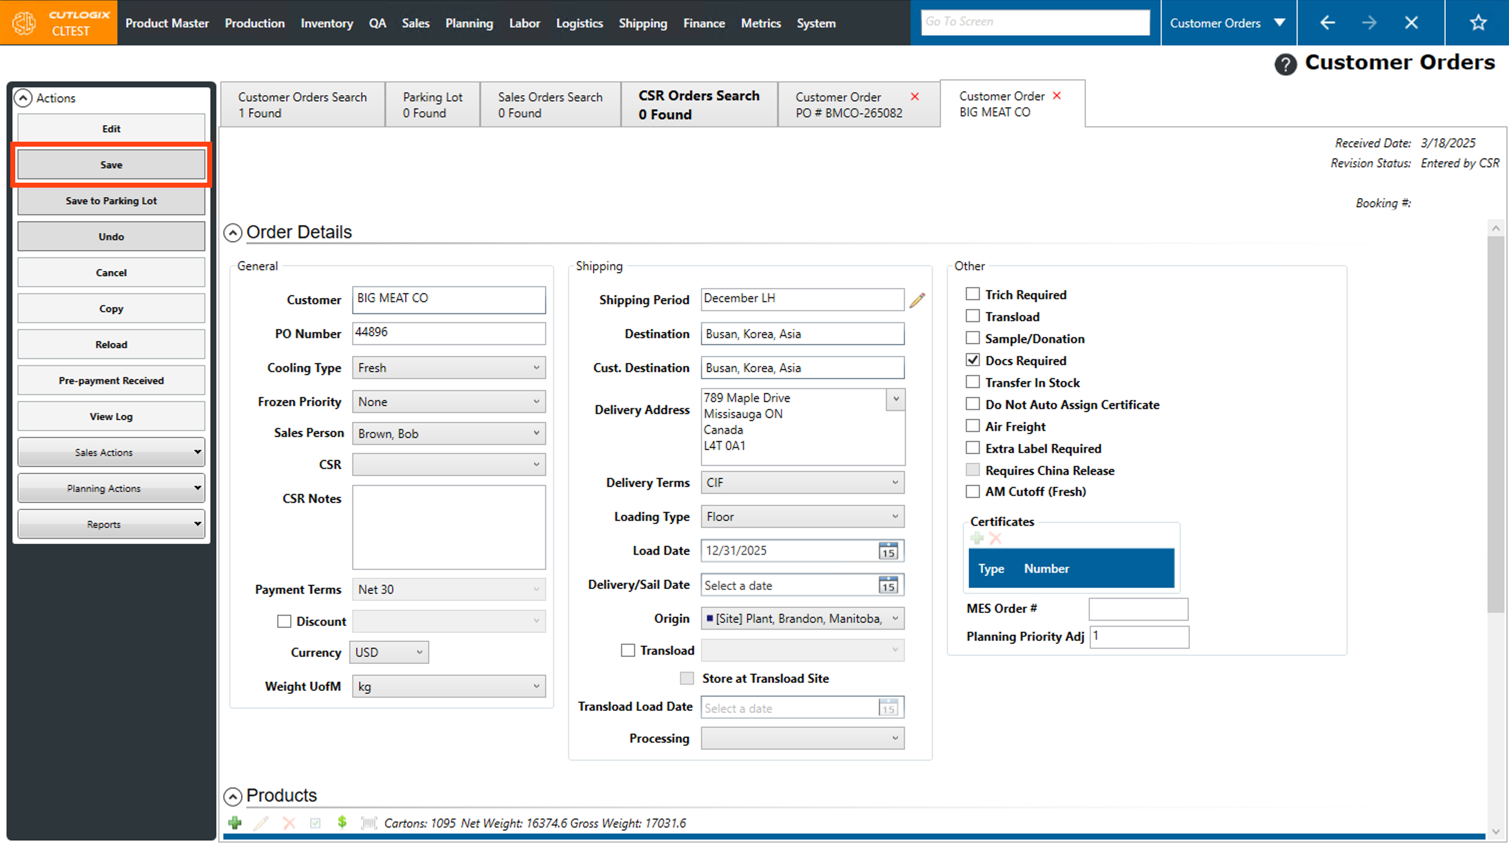
Step 5: Click the "Save" button in the Actions sidepod to save the copied order. If you no longer wish to create a copy, you can click the "Undo" button in the Action sidepod or close the copied order's details tab using the red "X."
How to Sync Customer Orders to your MES
Demo Syncing your Customer Orders to your Manufacturing Execution System is an important step in the sales process. Doing so informs the MES about the order and allows it to track and manage information about the order such as when it needs to be loaded, printing labels for products on the order and to send the order's loading status back to CutLogix for tracking purposes. The below steps outline how to sync an order to your MES.
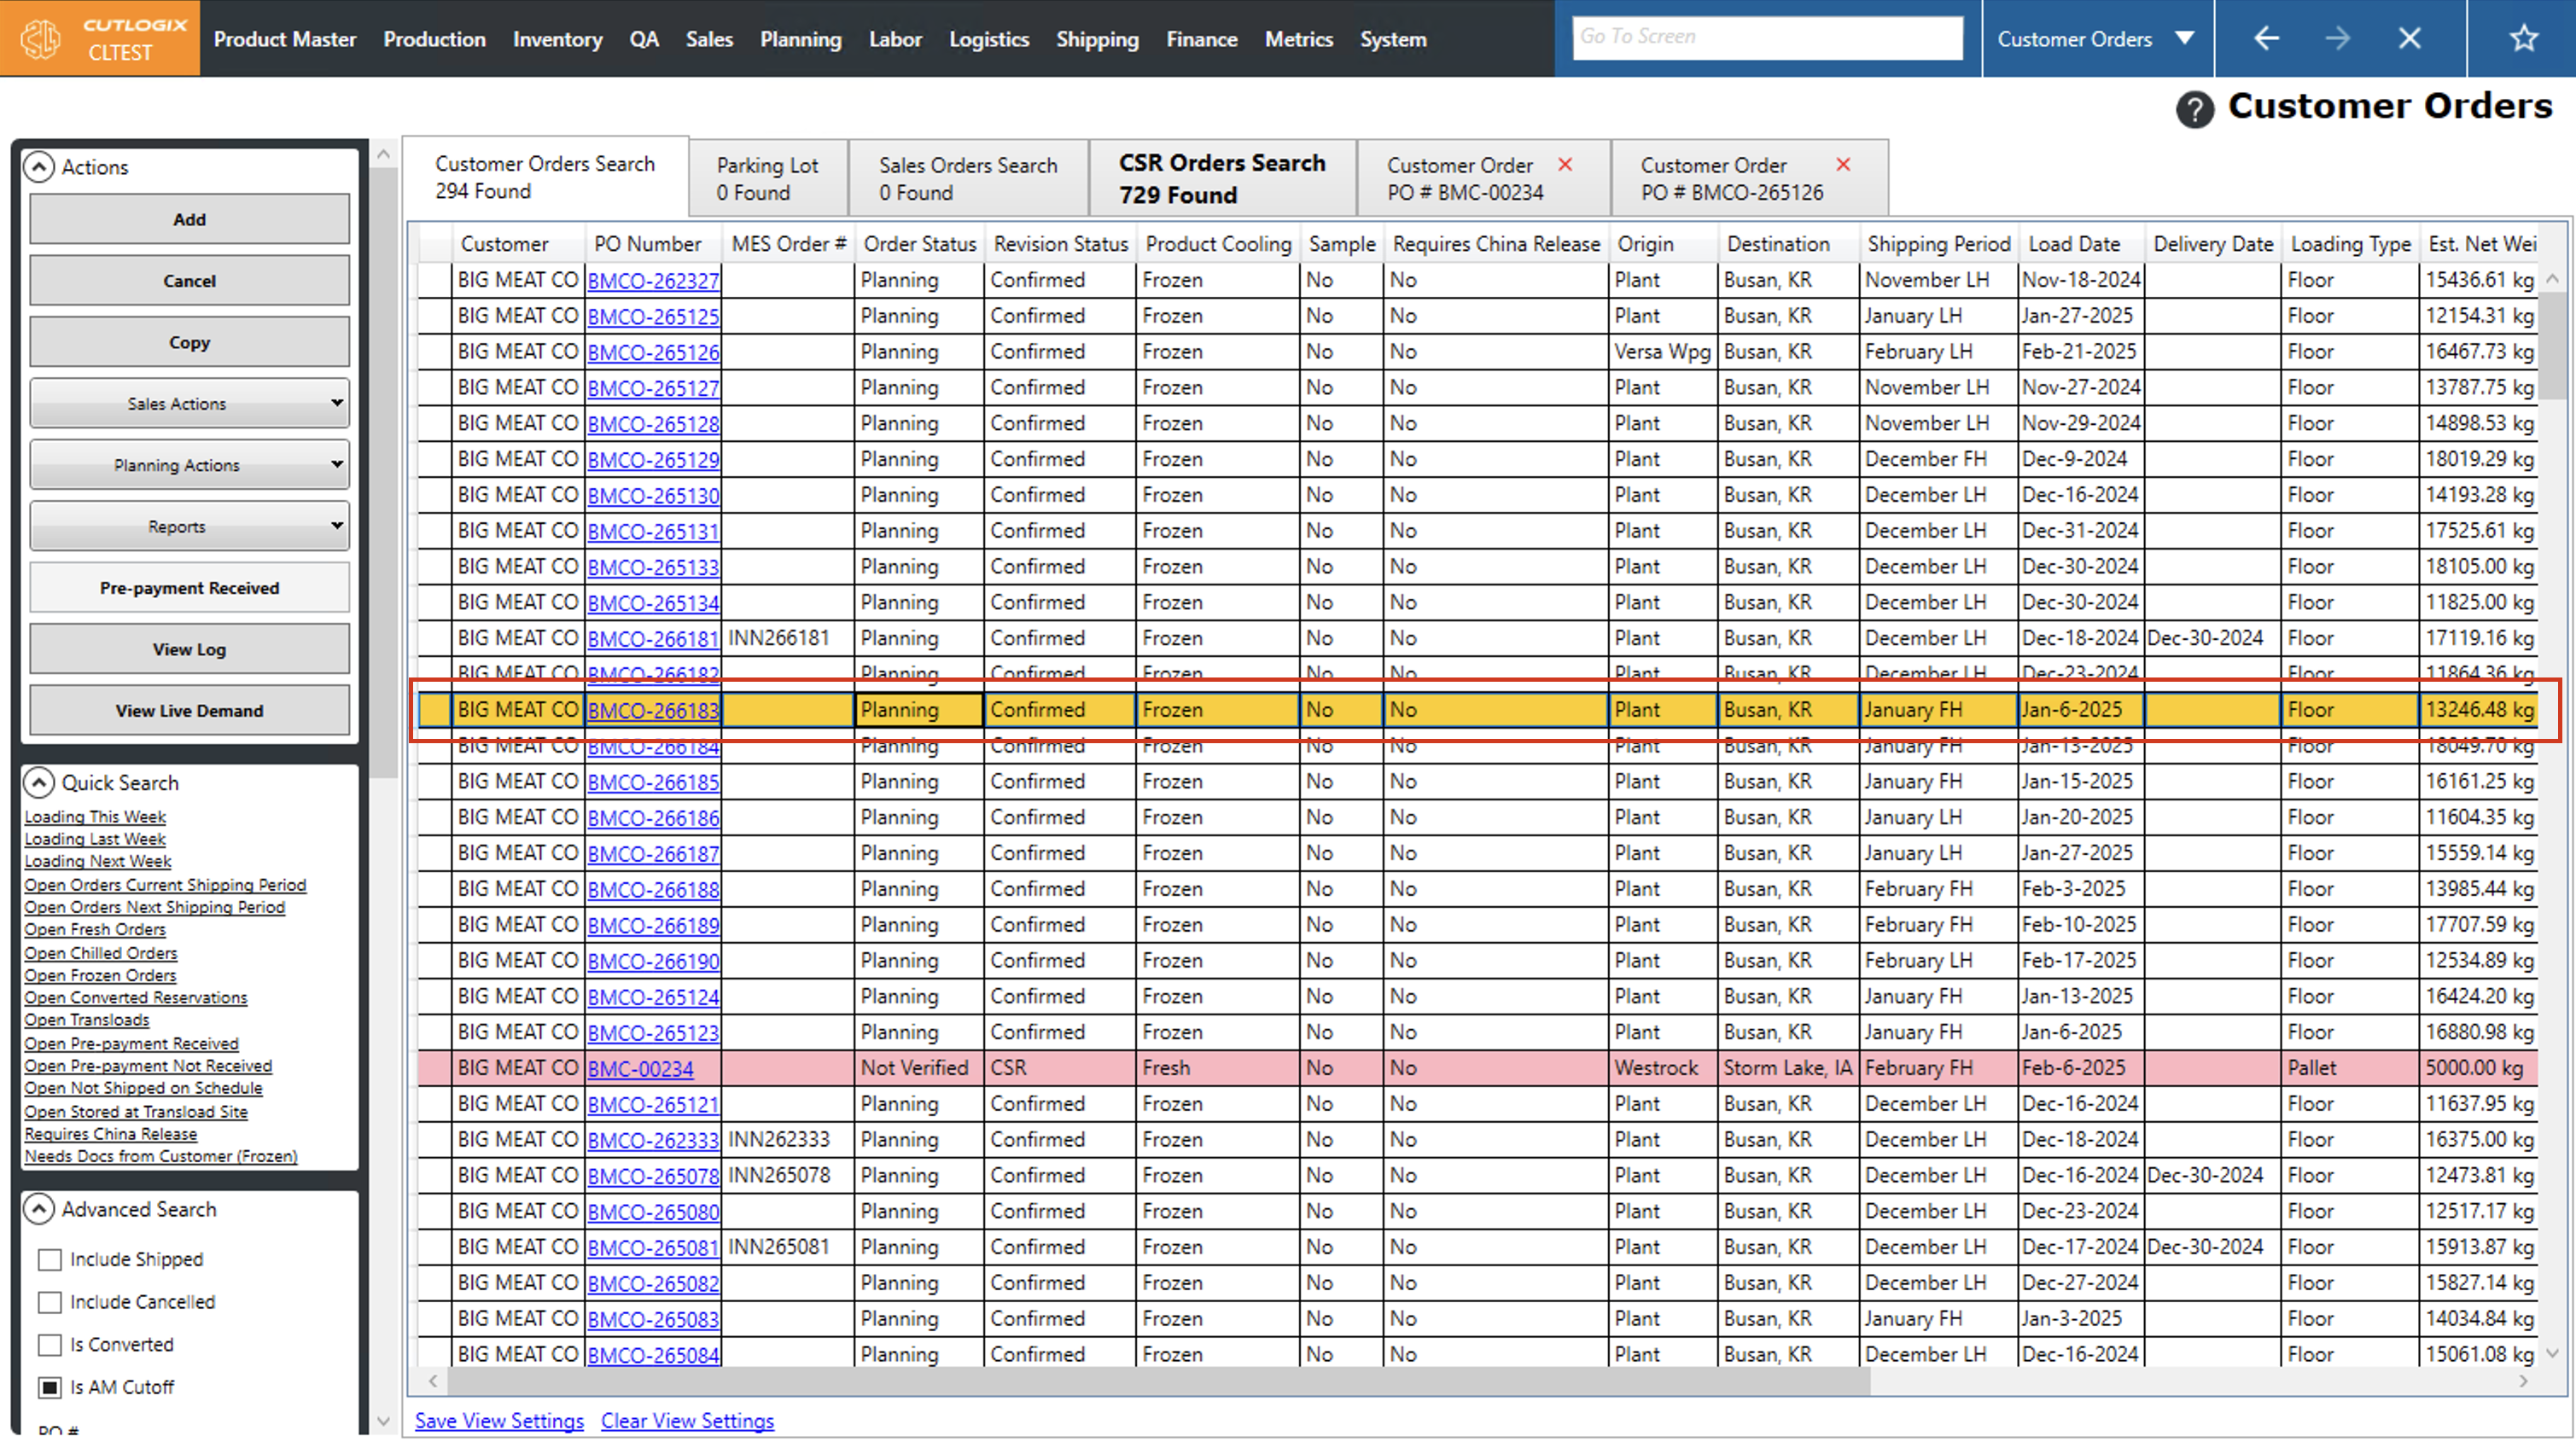
Step 1: Navigate to the Customer Orders page (Under the Sales menu → Customer Orders → Customer Orders Search tab) and click on the order that you want to sync to the MES.
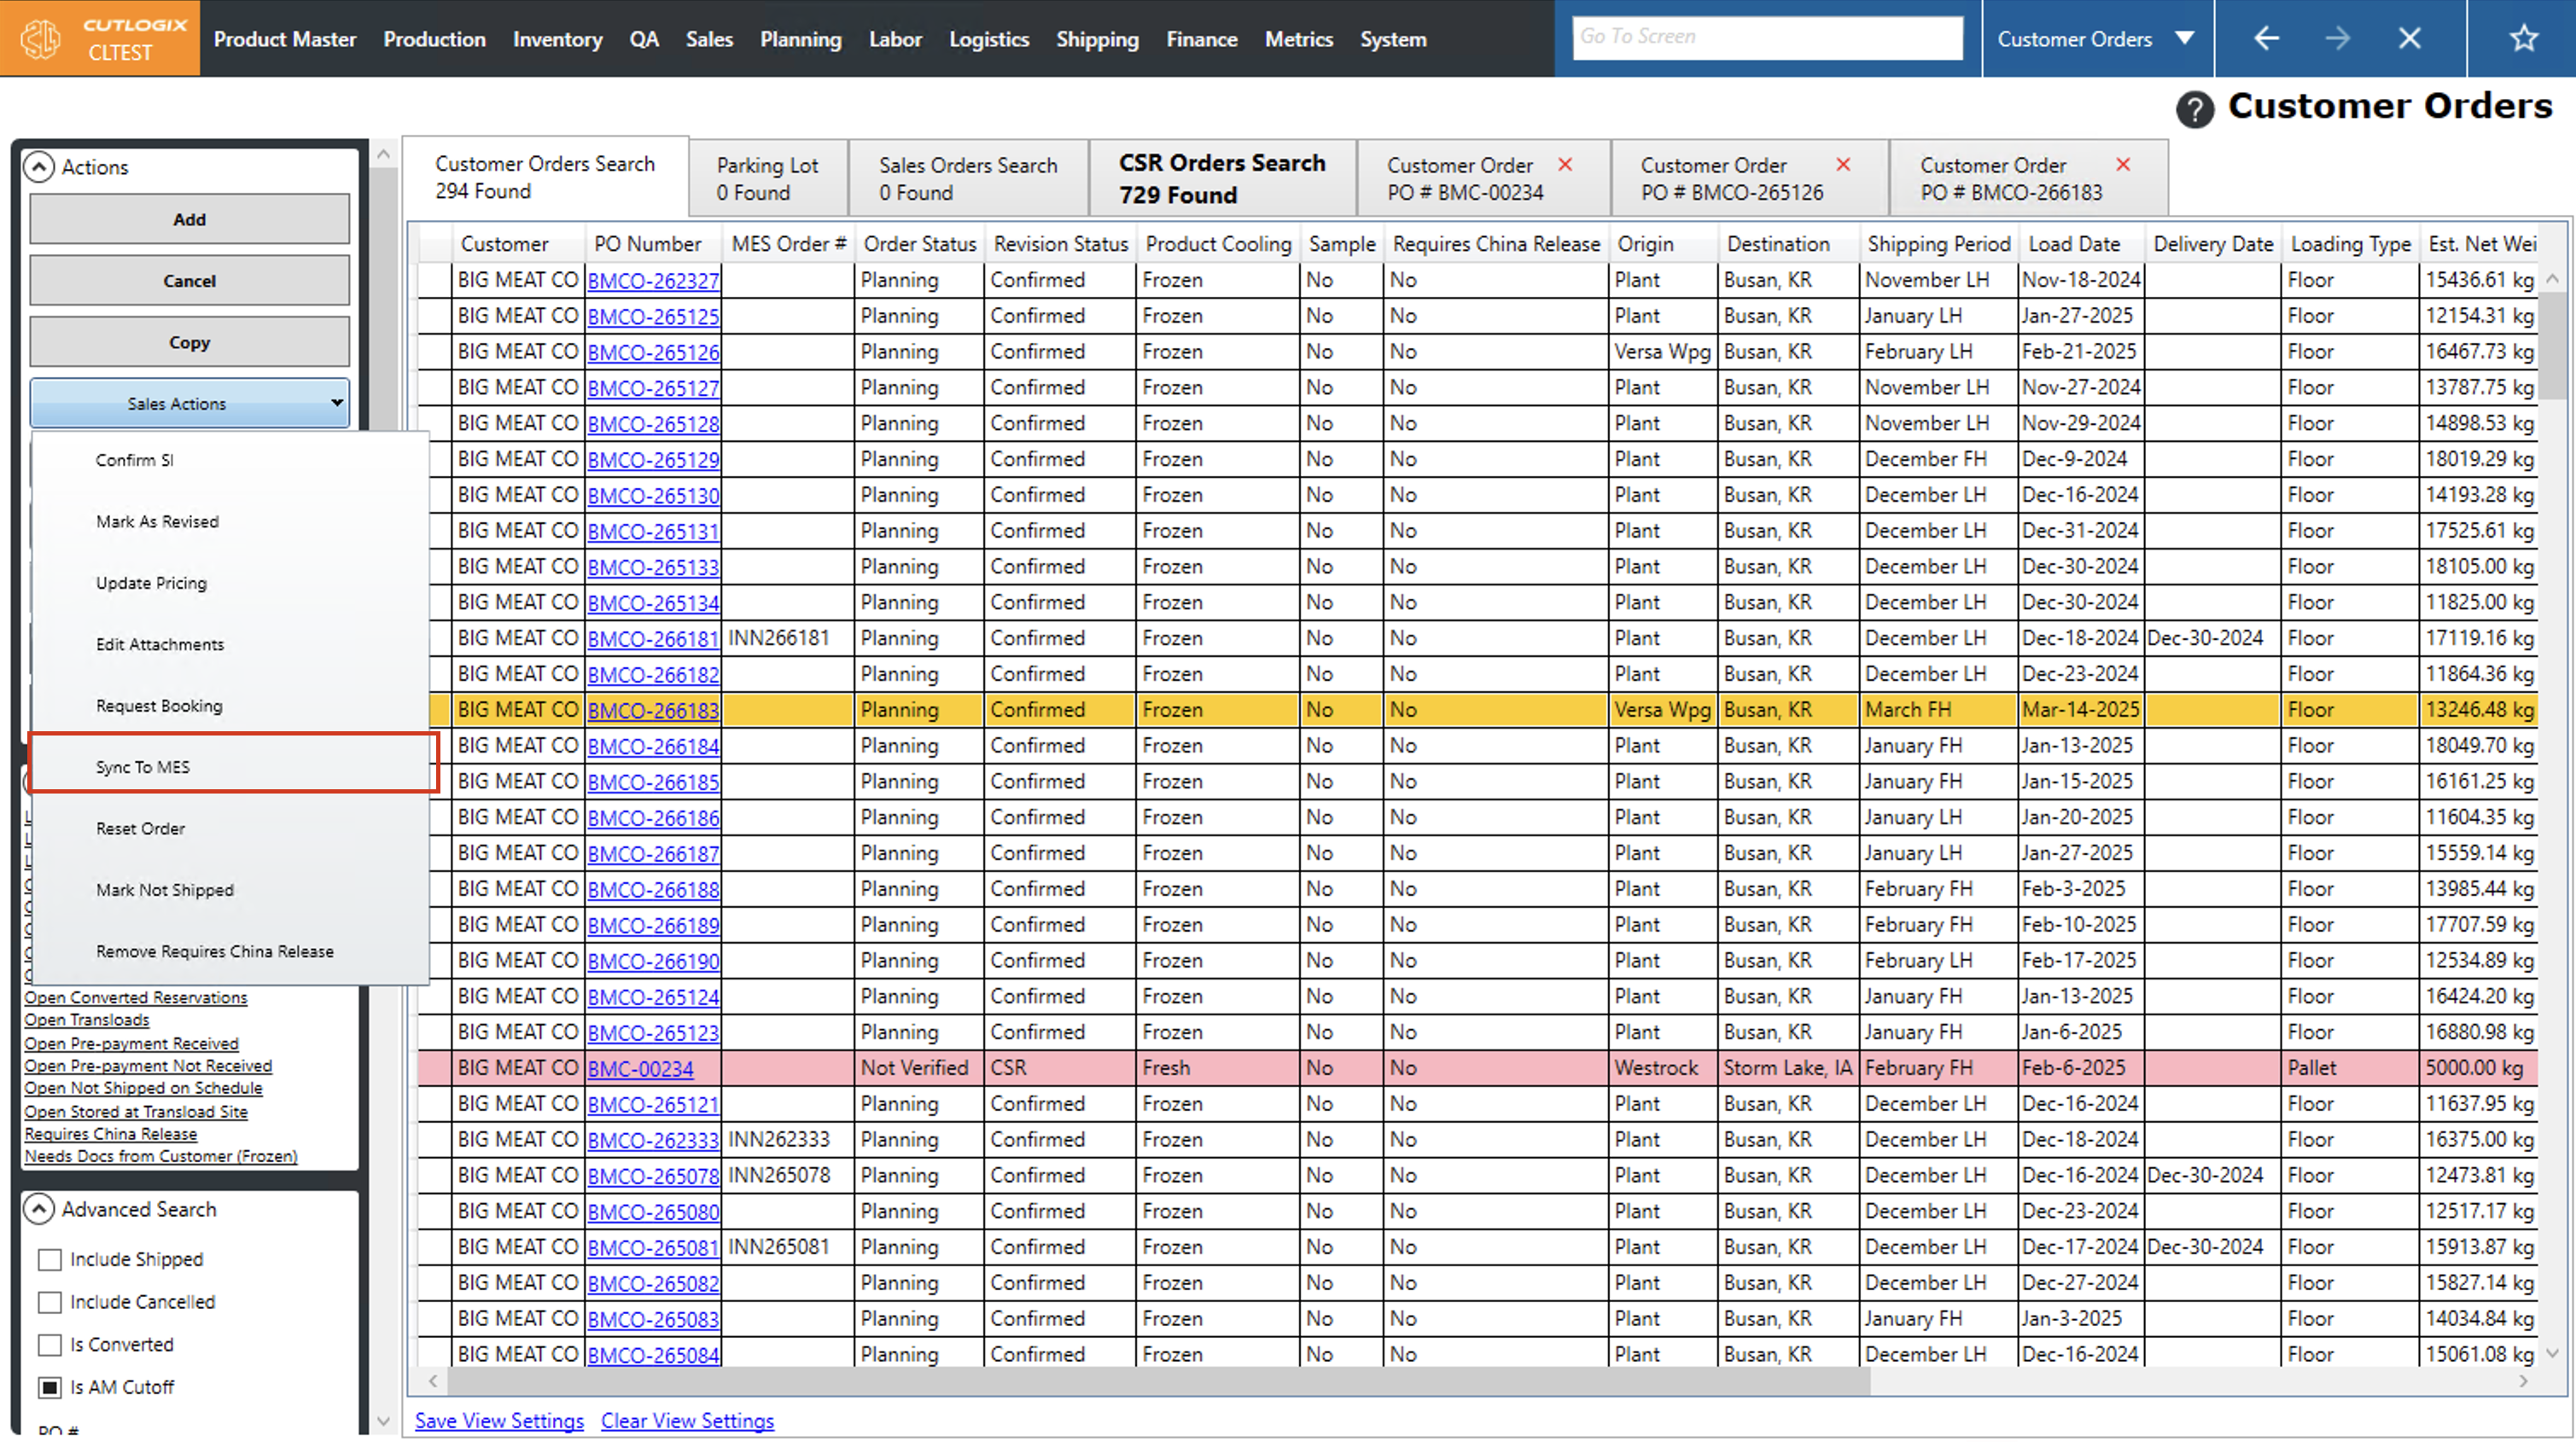
Step 2: Click on the "Sales Actions" dropdown menu on the left side actions panel. From the dropdown, click on "Sync to MES"
Step 3: CutLogix will then let you know once the sync was completed. It will let you know if it was successfully synced or if it was unsuccessful.
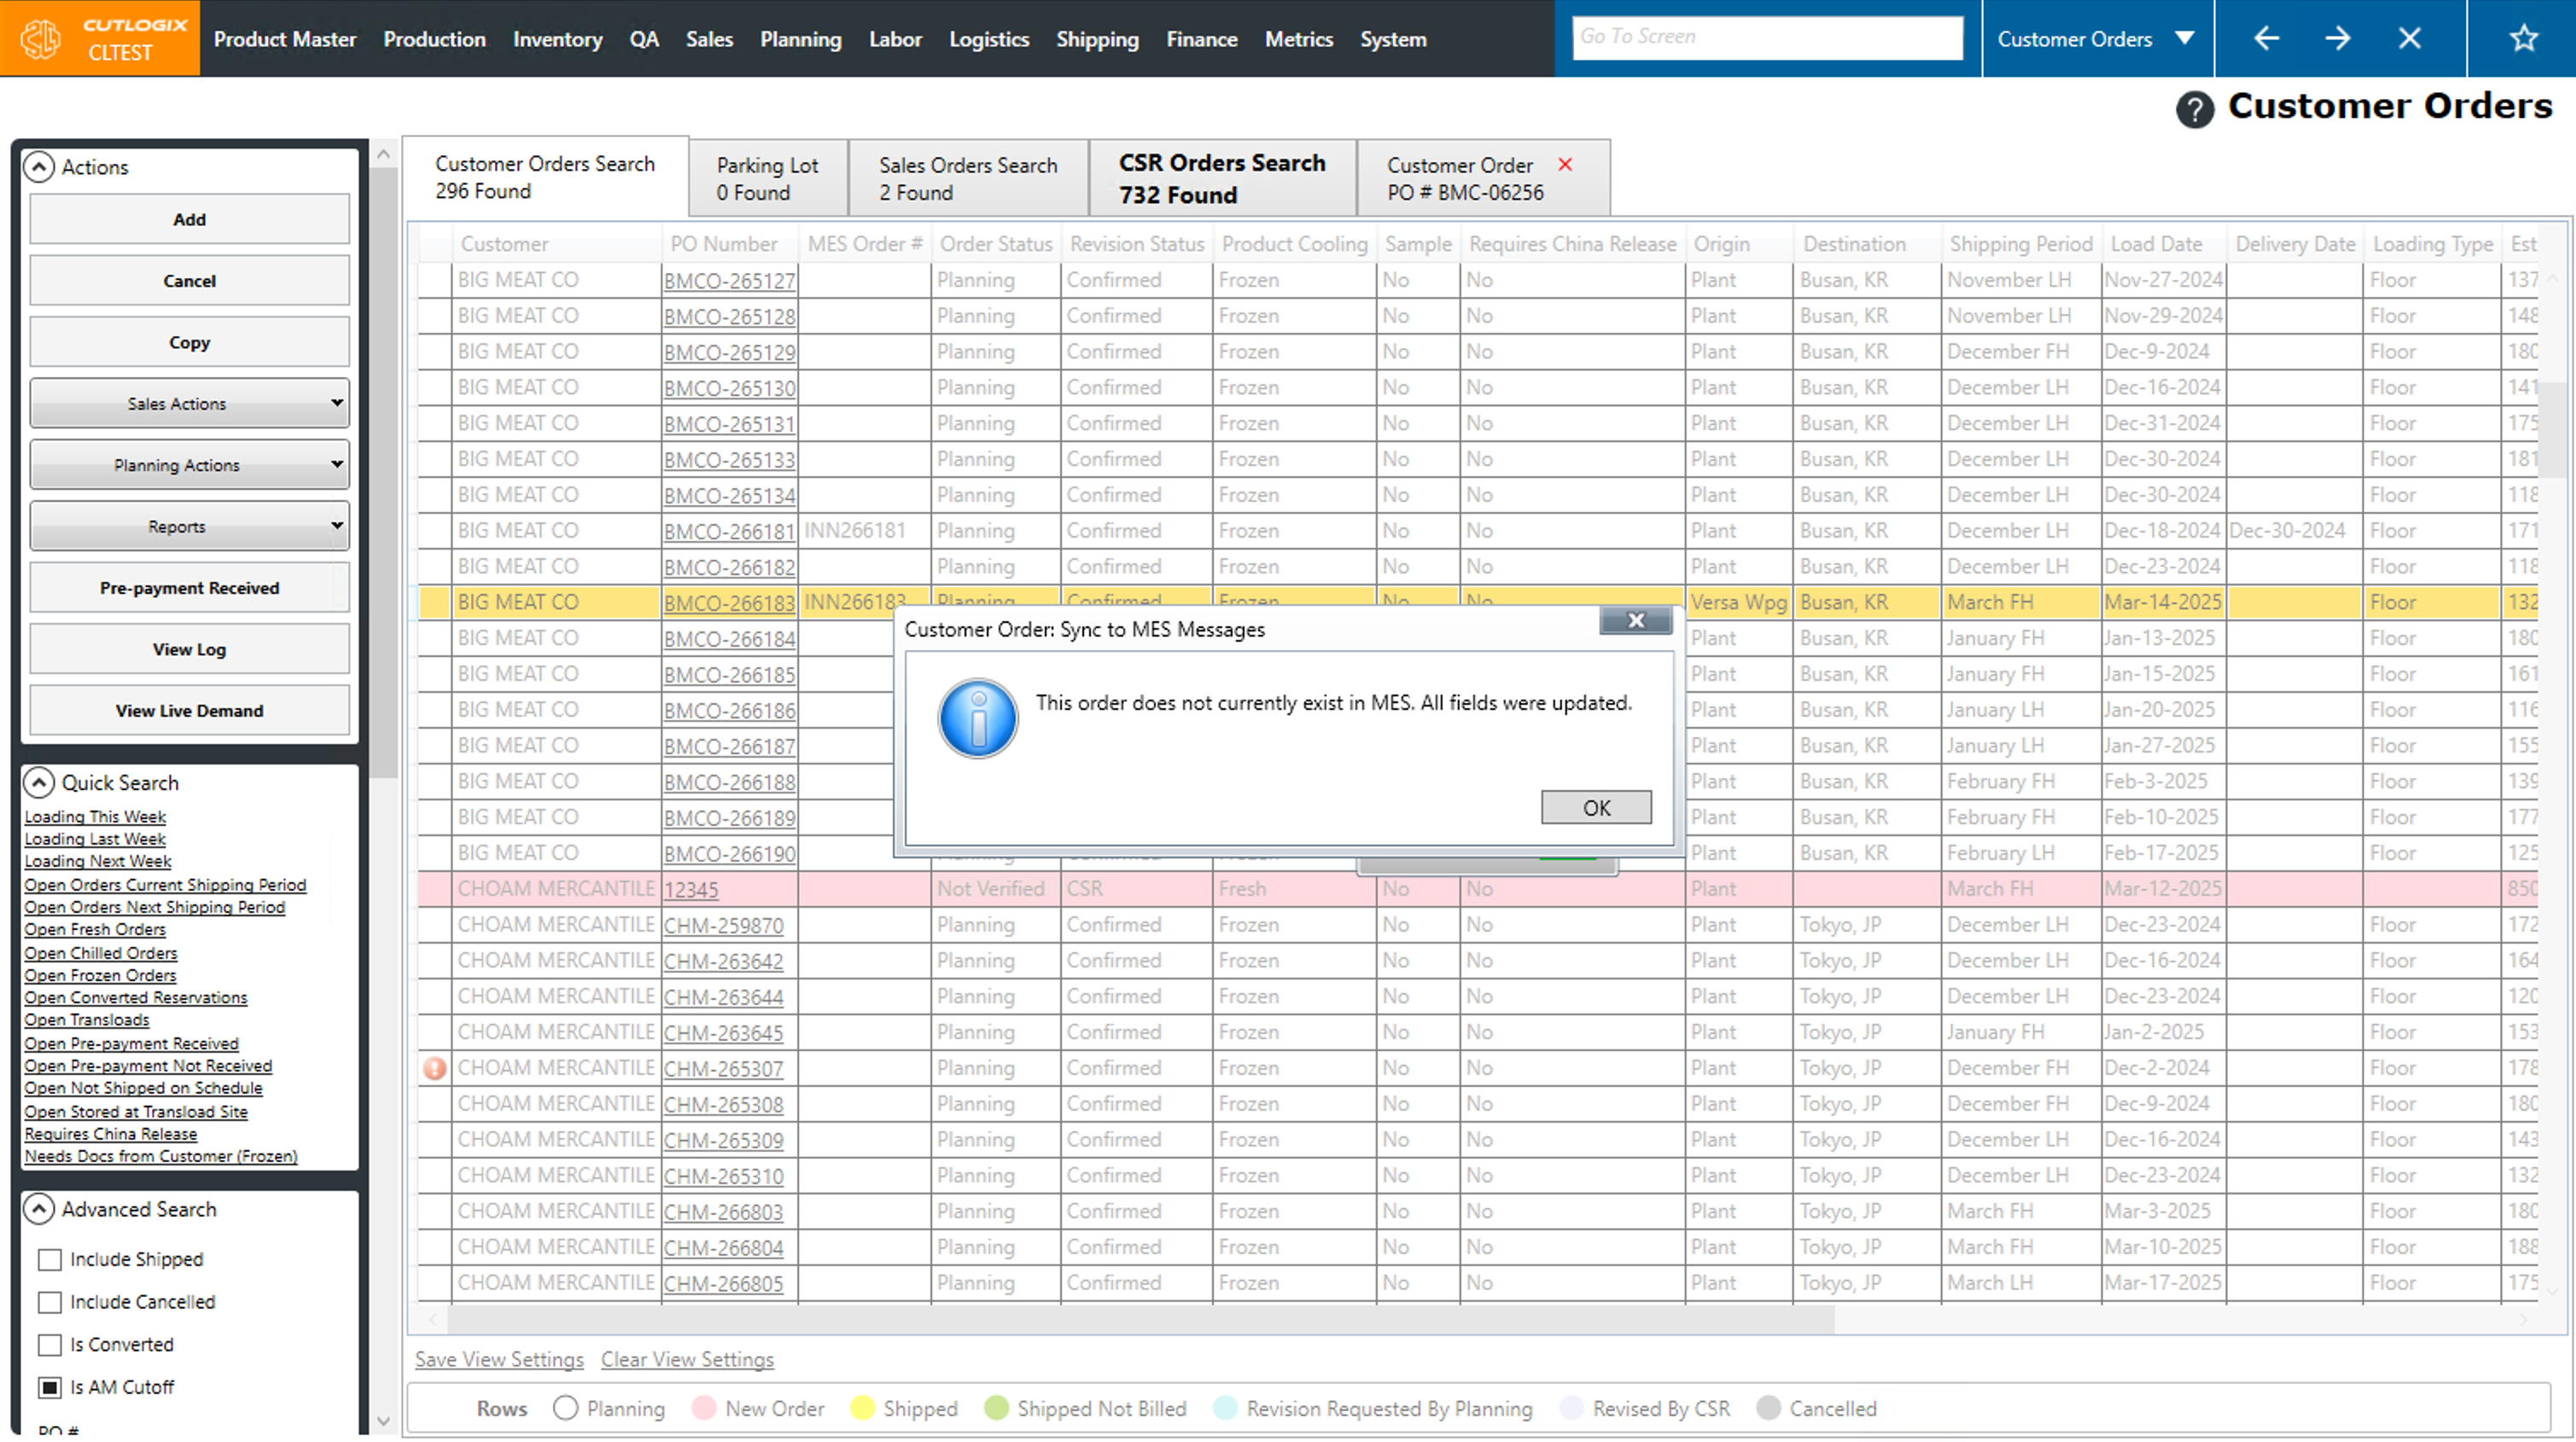
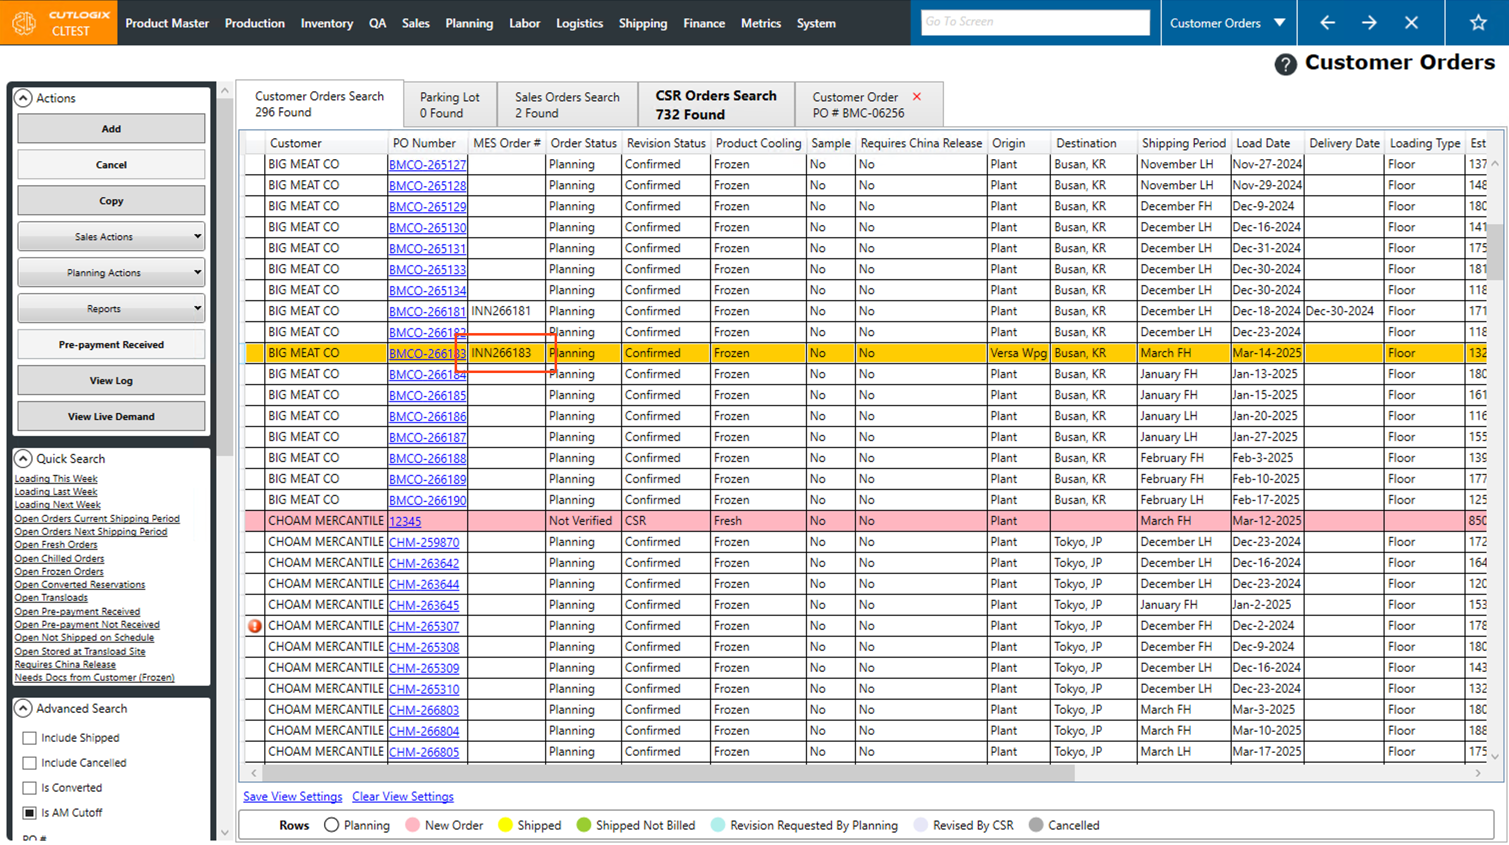
Step 4: If the sync completed successfully, the "MES Order #" field on the order that you synced will now have an ID assigned to it. This is the ID that the MES assigns to the order.