Pass Rate Cascades Tasks
How to Add Pass Rate Cascades
Demo A pass rate indicates how often a cut of meat meets the standards to be sold as a specific product. Typically, the lower the pass rate on a product, the higher the profit margin. This is why tables will often show products with a lower pass rate sitting at a higher position in the table (i.e. at a higher priority).
A pass rate cascade is a series of levels with similar products that vary in specifications. Cuts that don't meet the specifications for a high priority product can be used for a product with a lower priority in the table that has lower specifications.
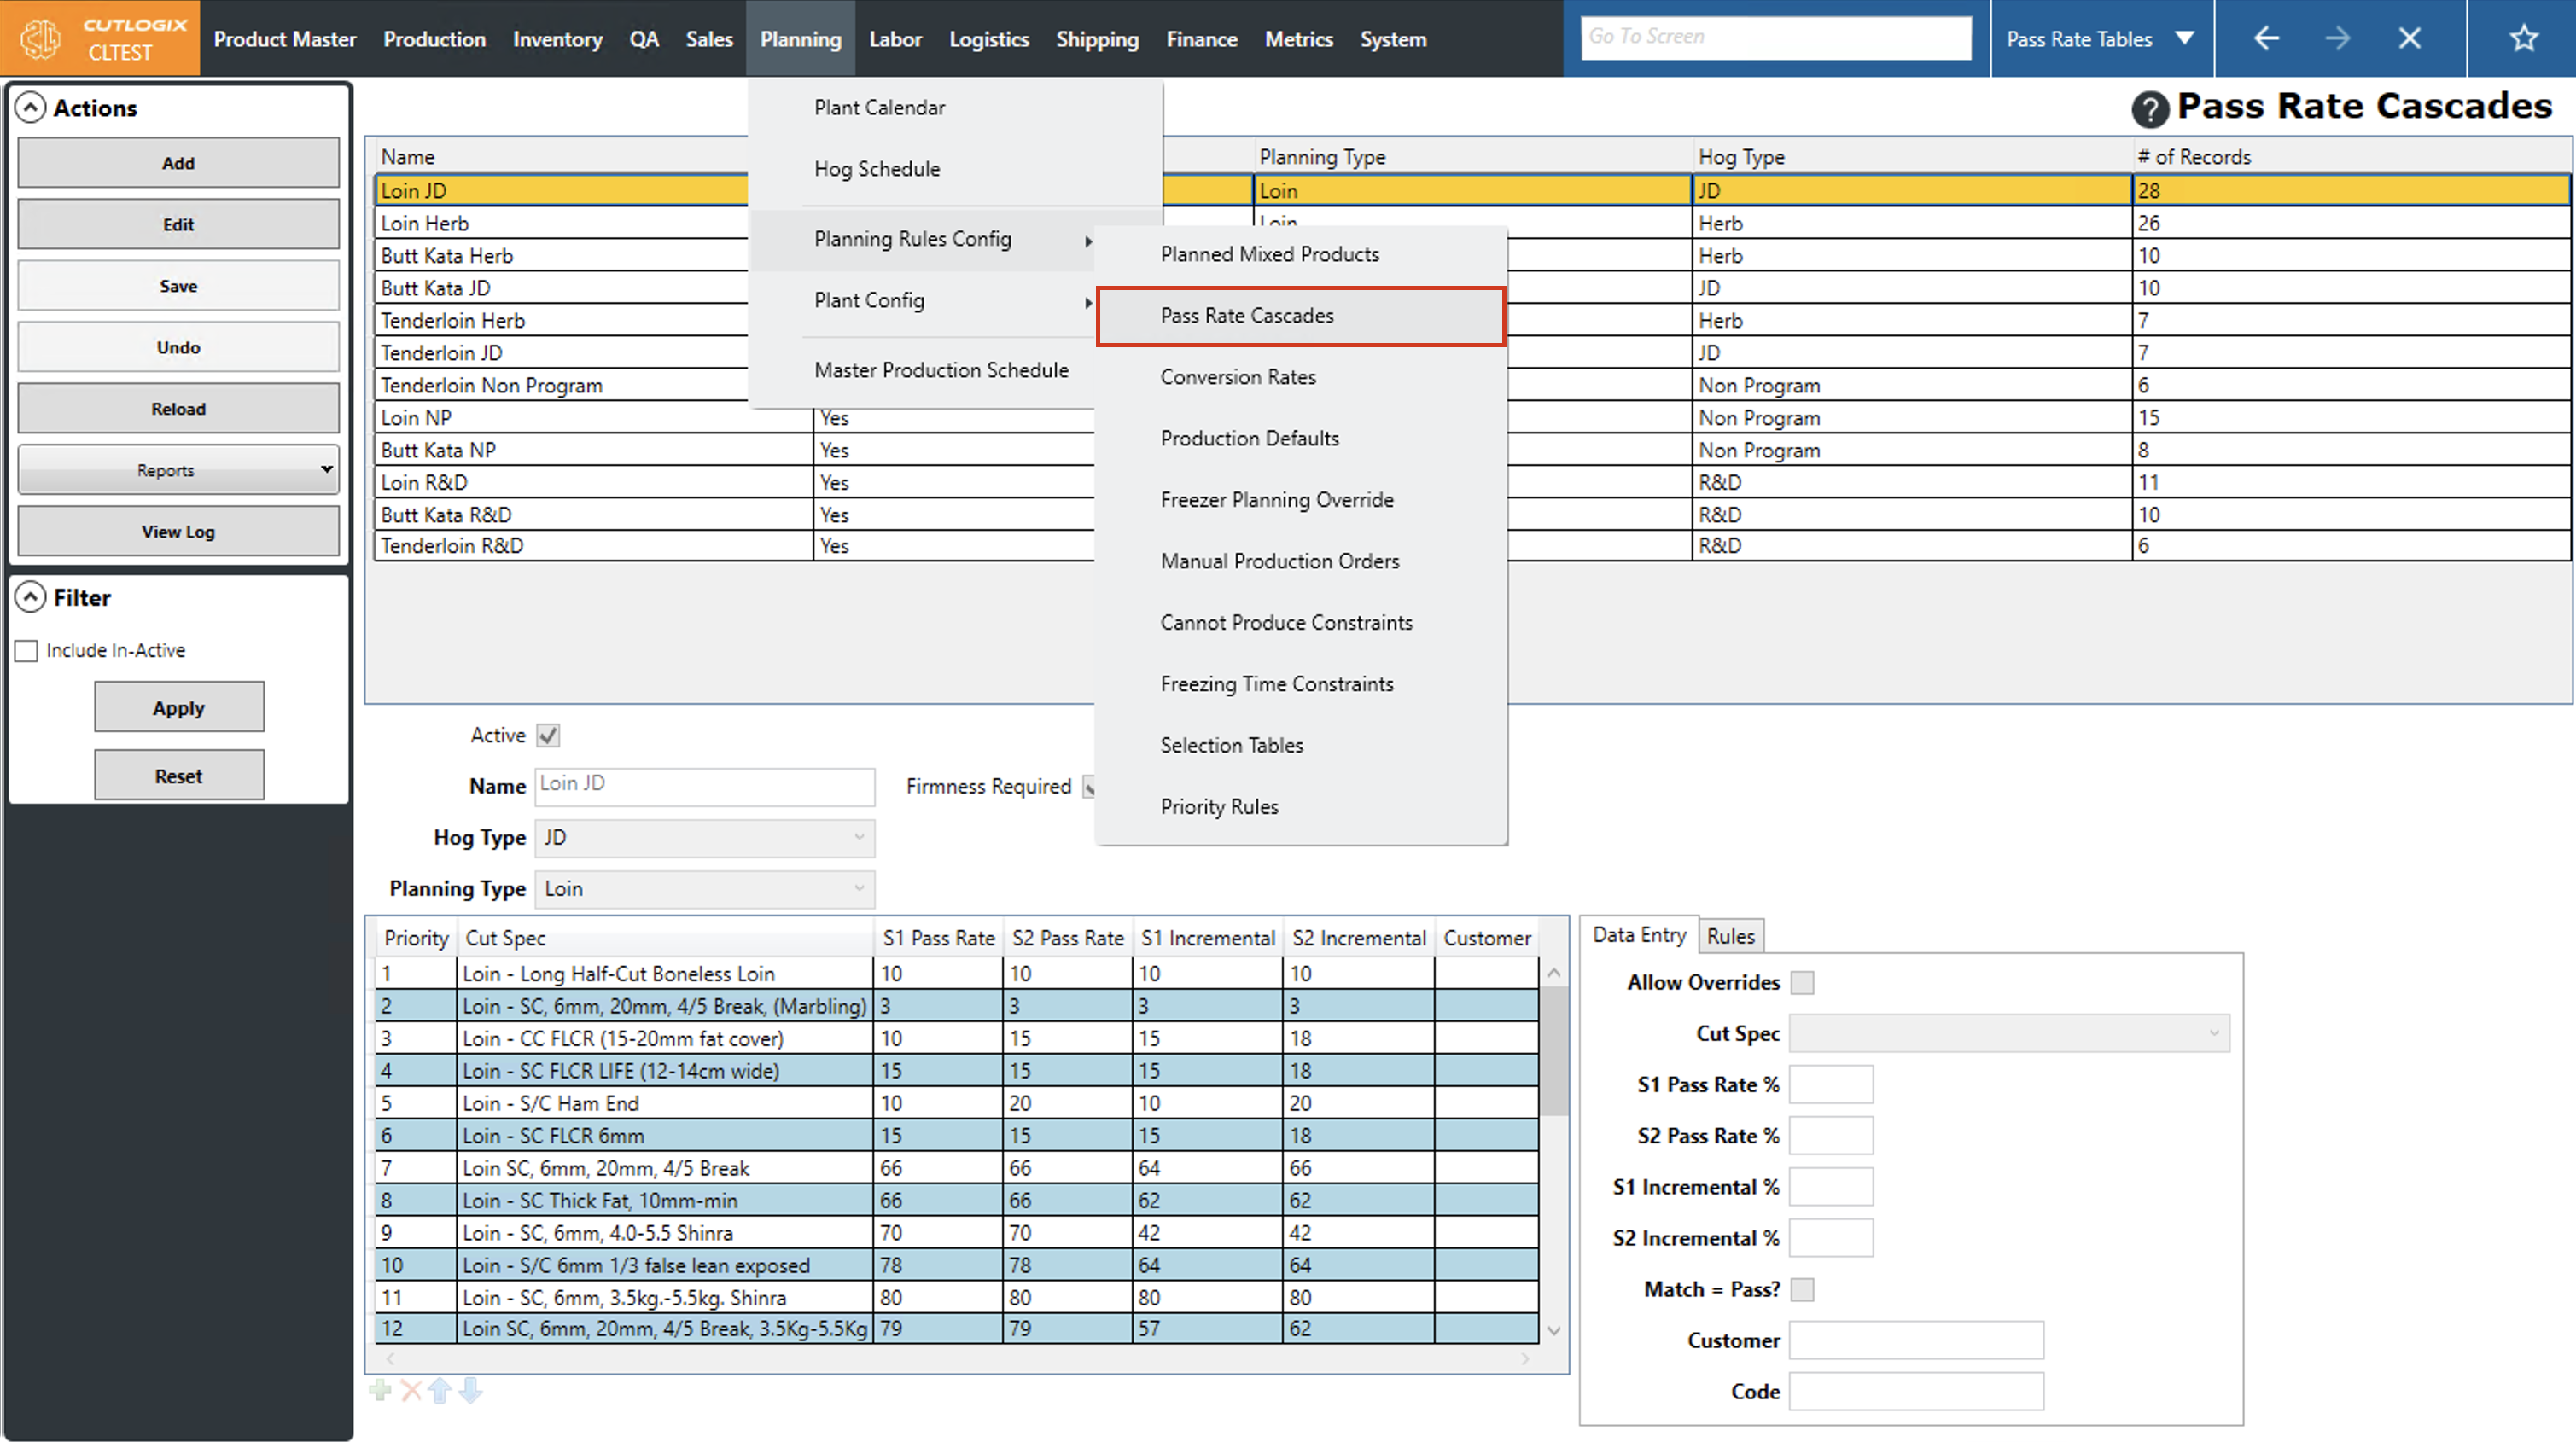
Step 1: Navigate to the "Pass Rate Cascades" page (Under the Planning menu → Planning Rules Config → Pass Rate Cascades)
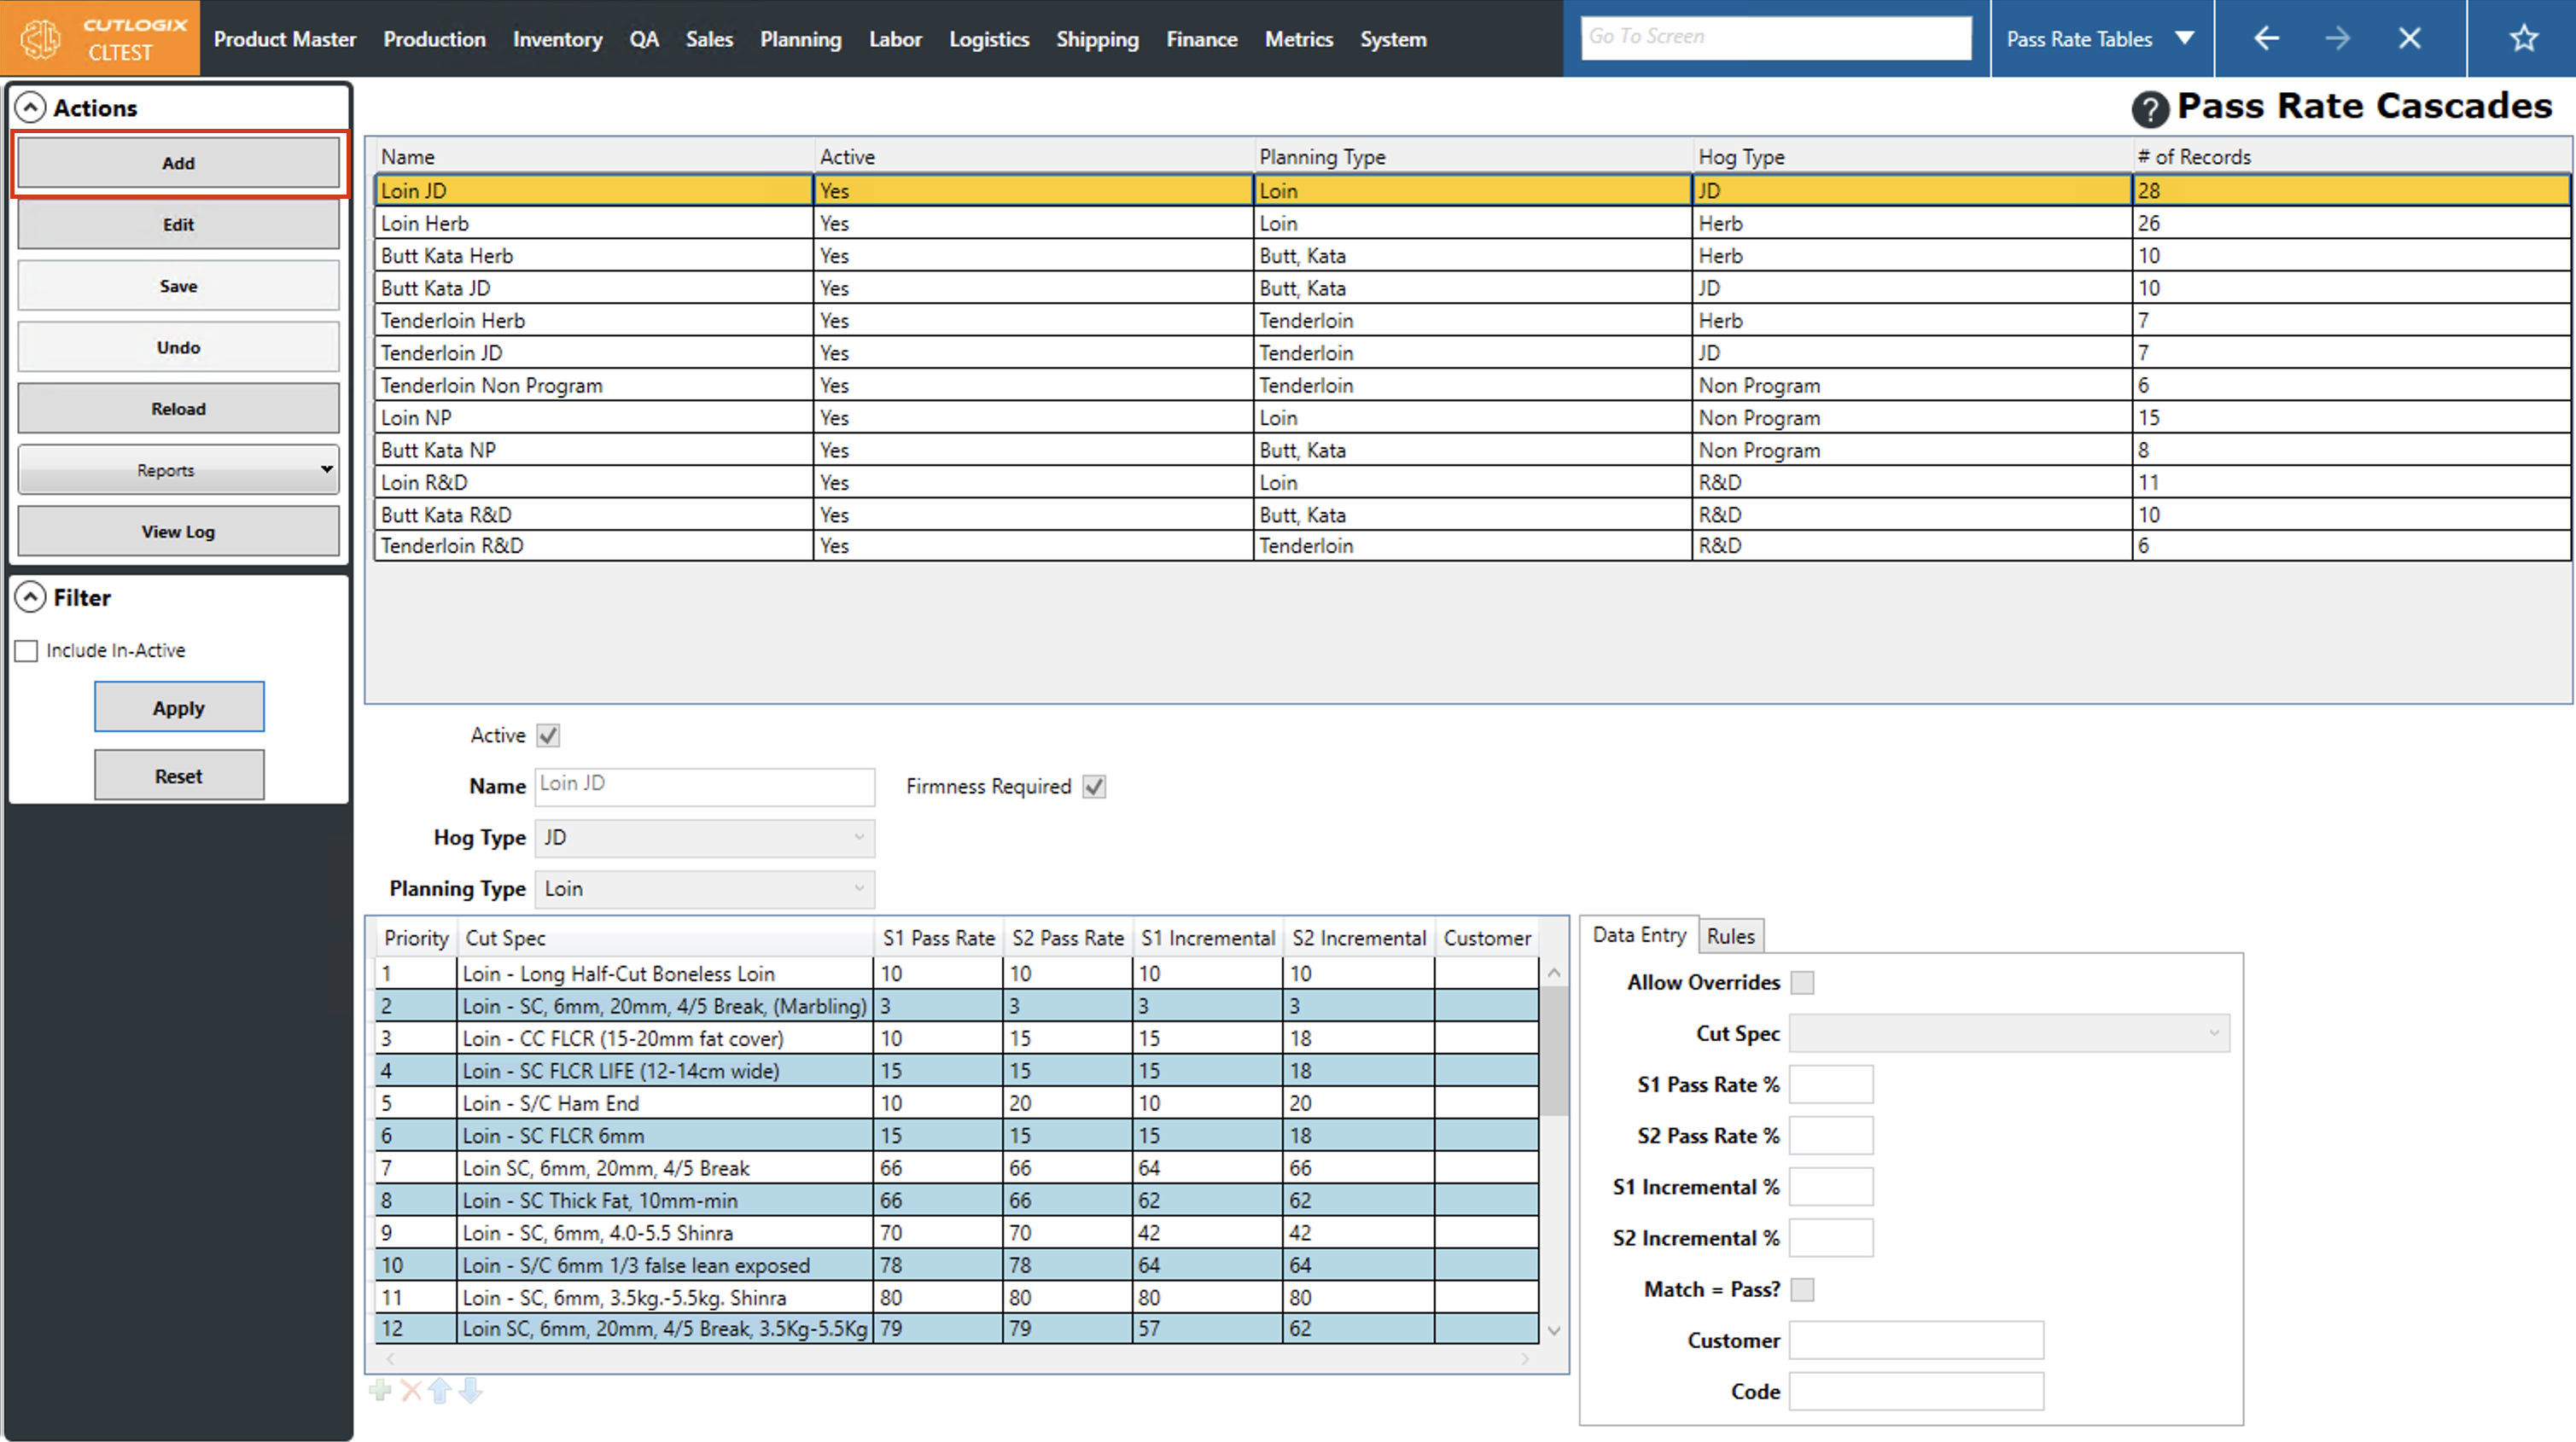
Step 2: Click the "Add" button in the actions panel.
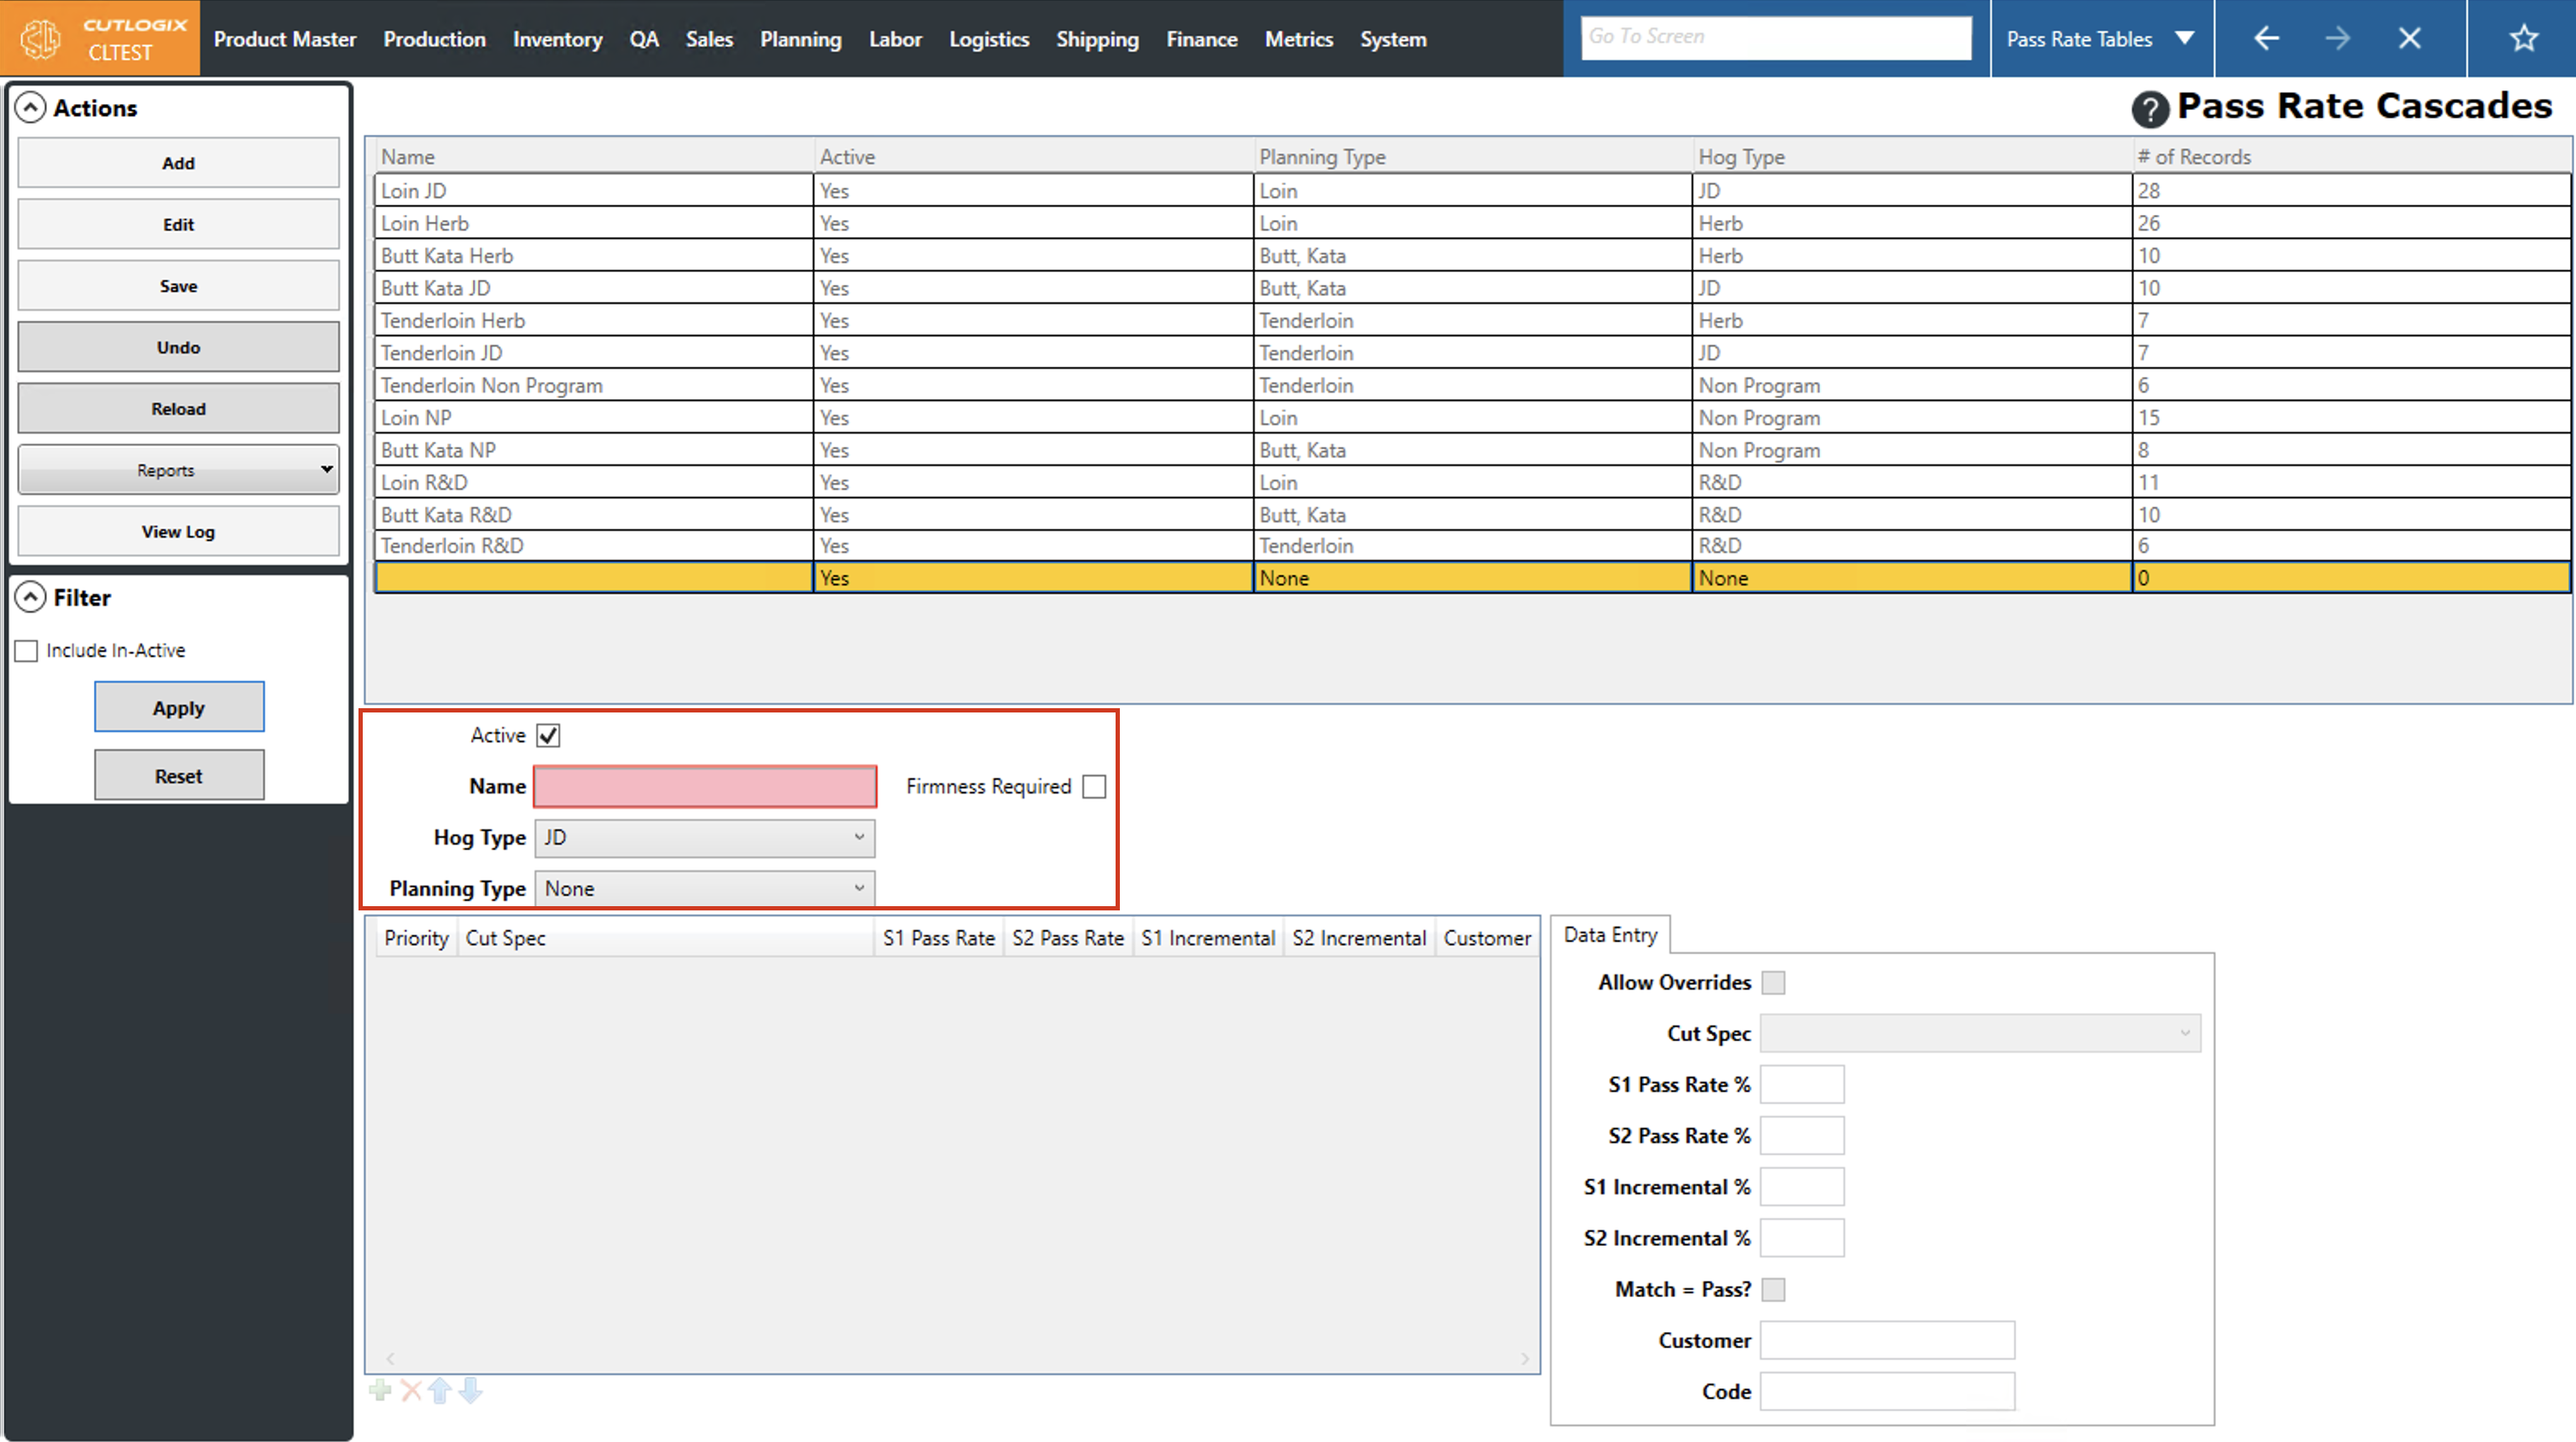
Step 3: Several fields will appear at the bottom of the page for you to enter information about the new pass rate cascade. Information highlighted in red is required and must be entered before the new pass rate cascade can be entered. In this case the only required information is the name, you can enter a name to identify the pass rate cascade in the list. The hog type and planning type have default values, but can be modified using the drop-down menus.
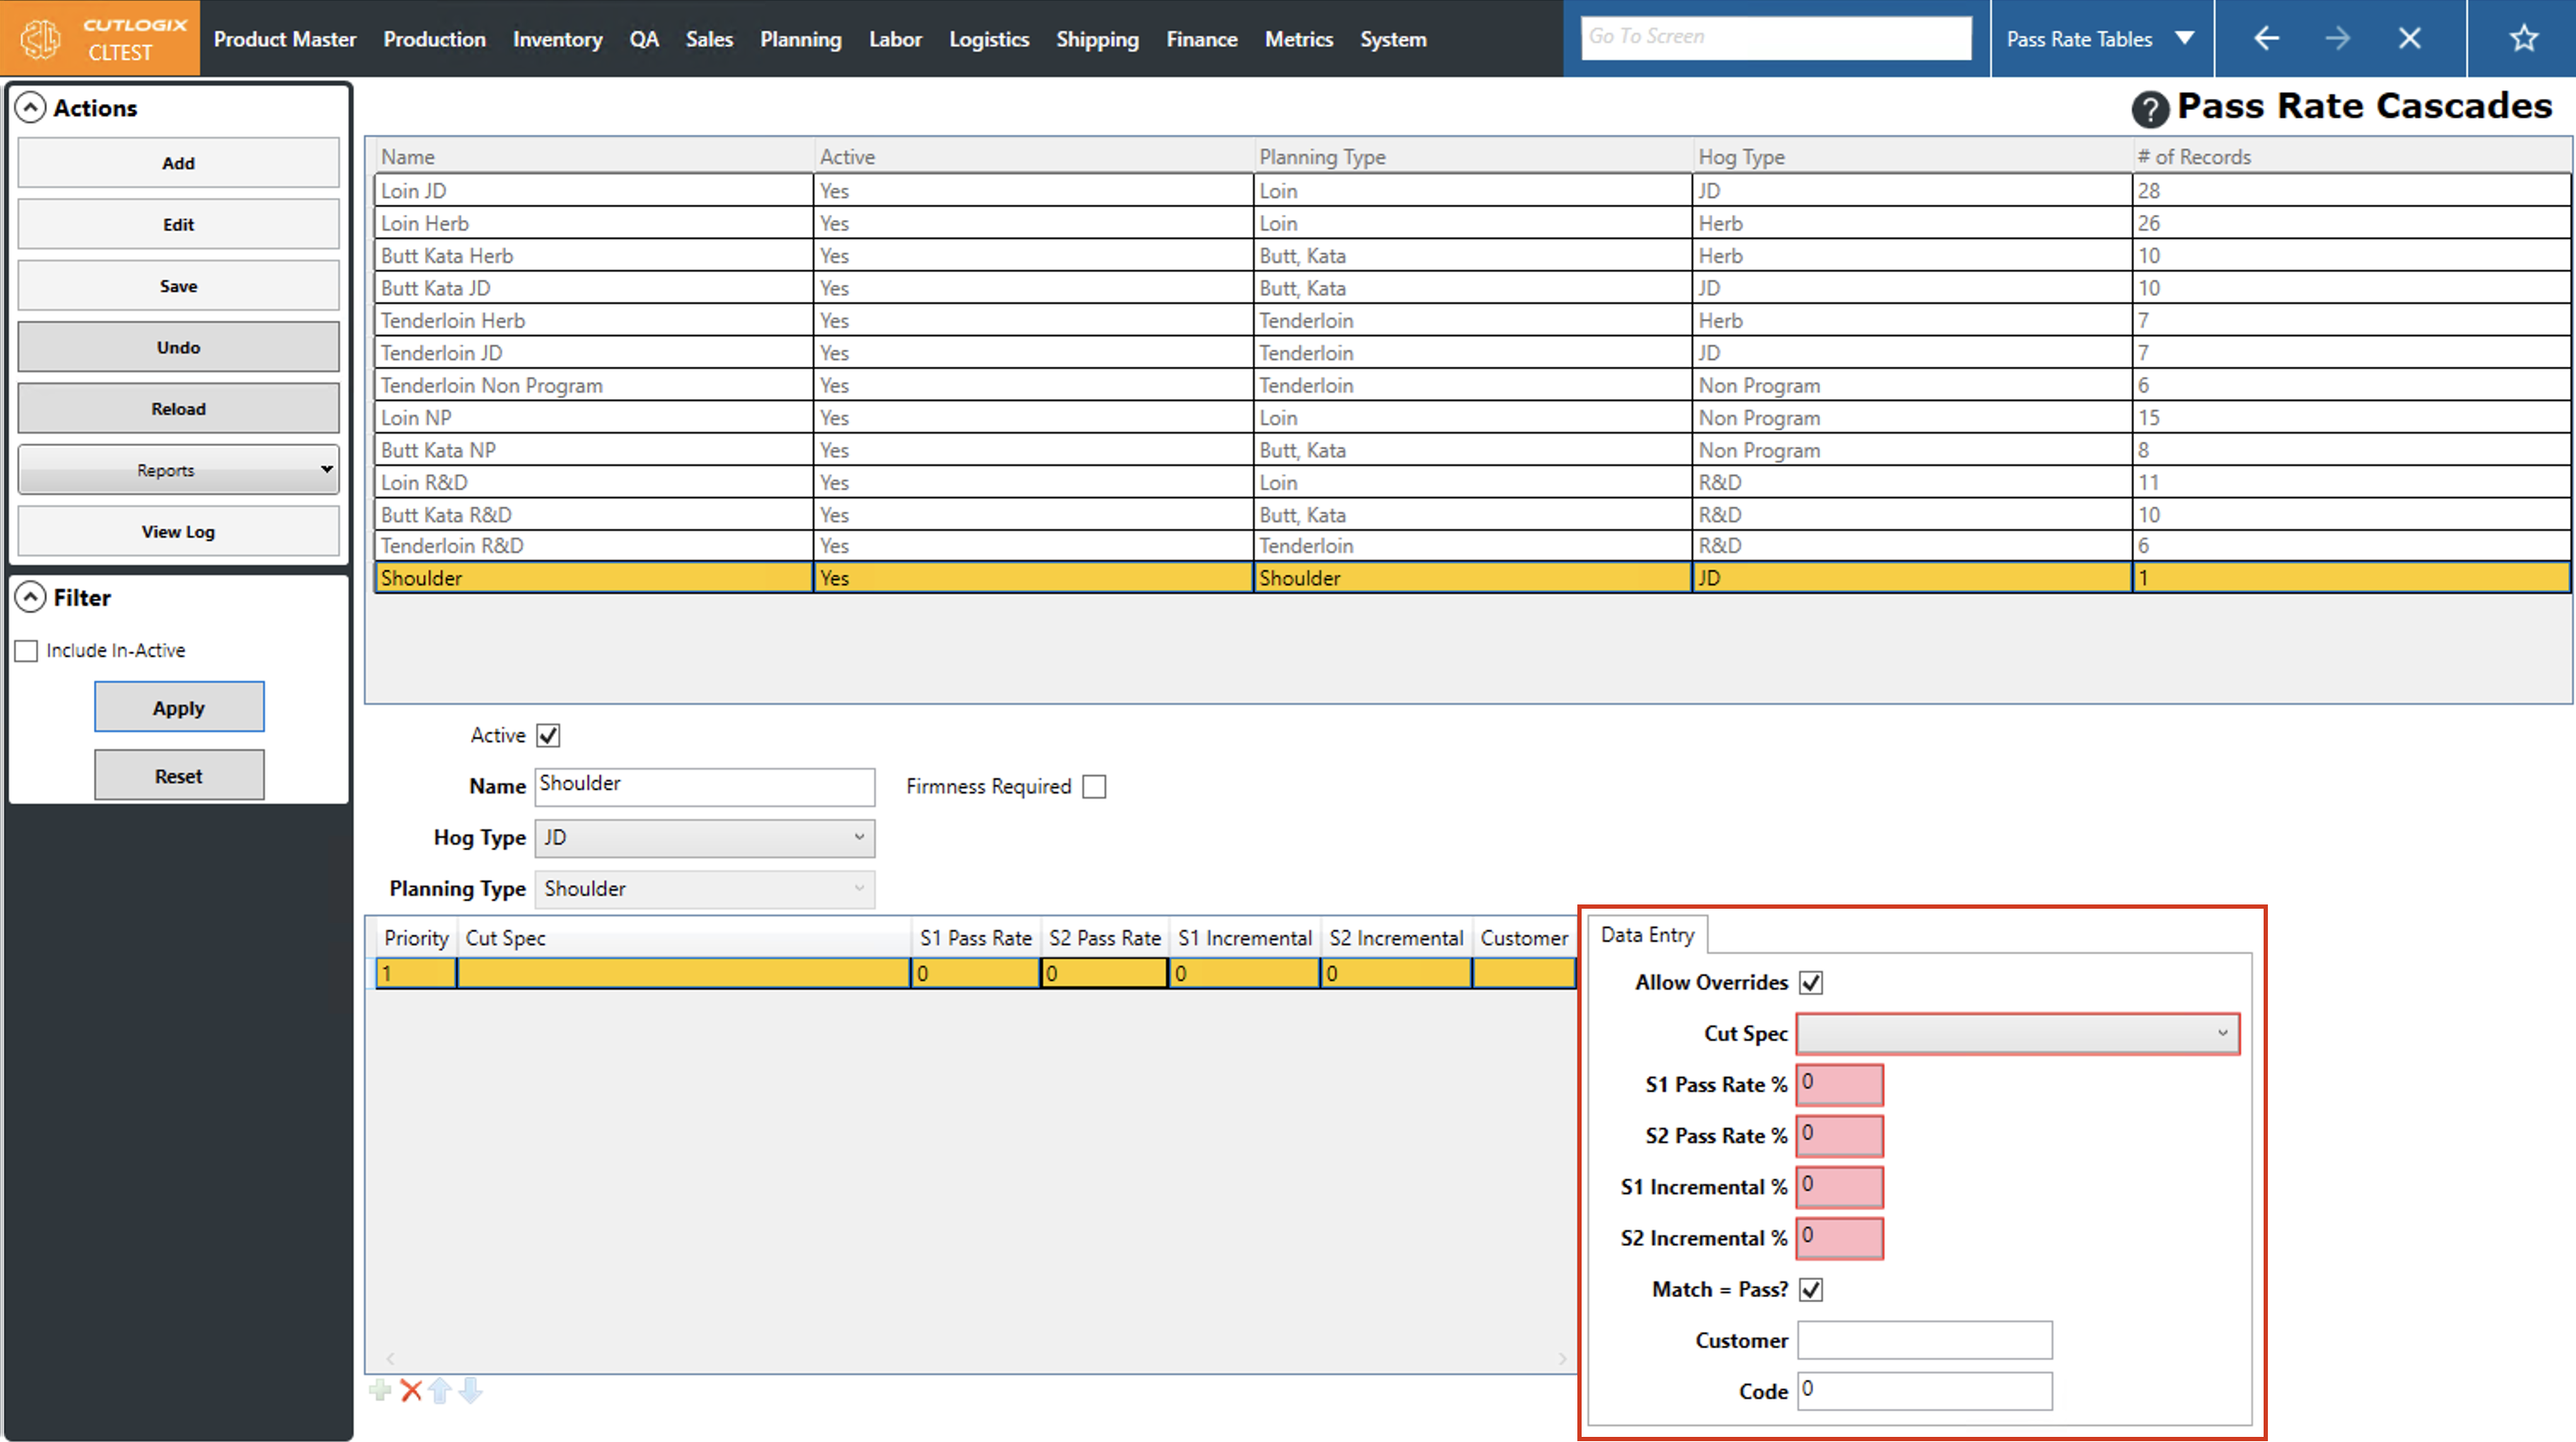
Step 4: Now we'll add a new pass rate record to the table. To do this, click the "+" button near the bottom of the page.

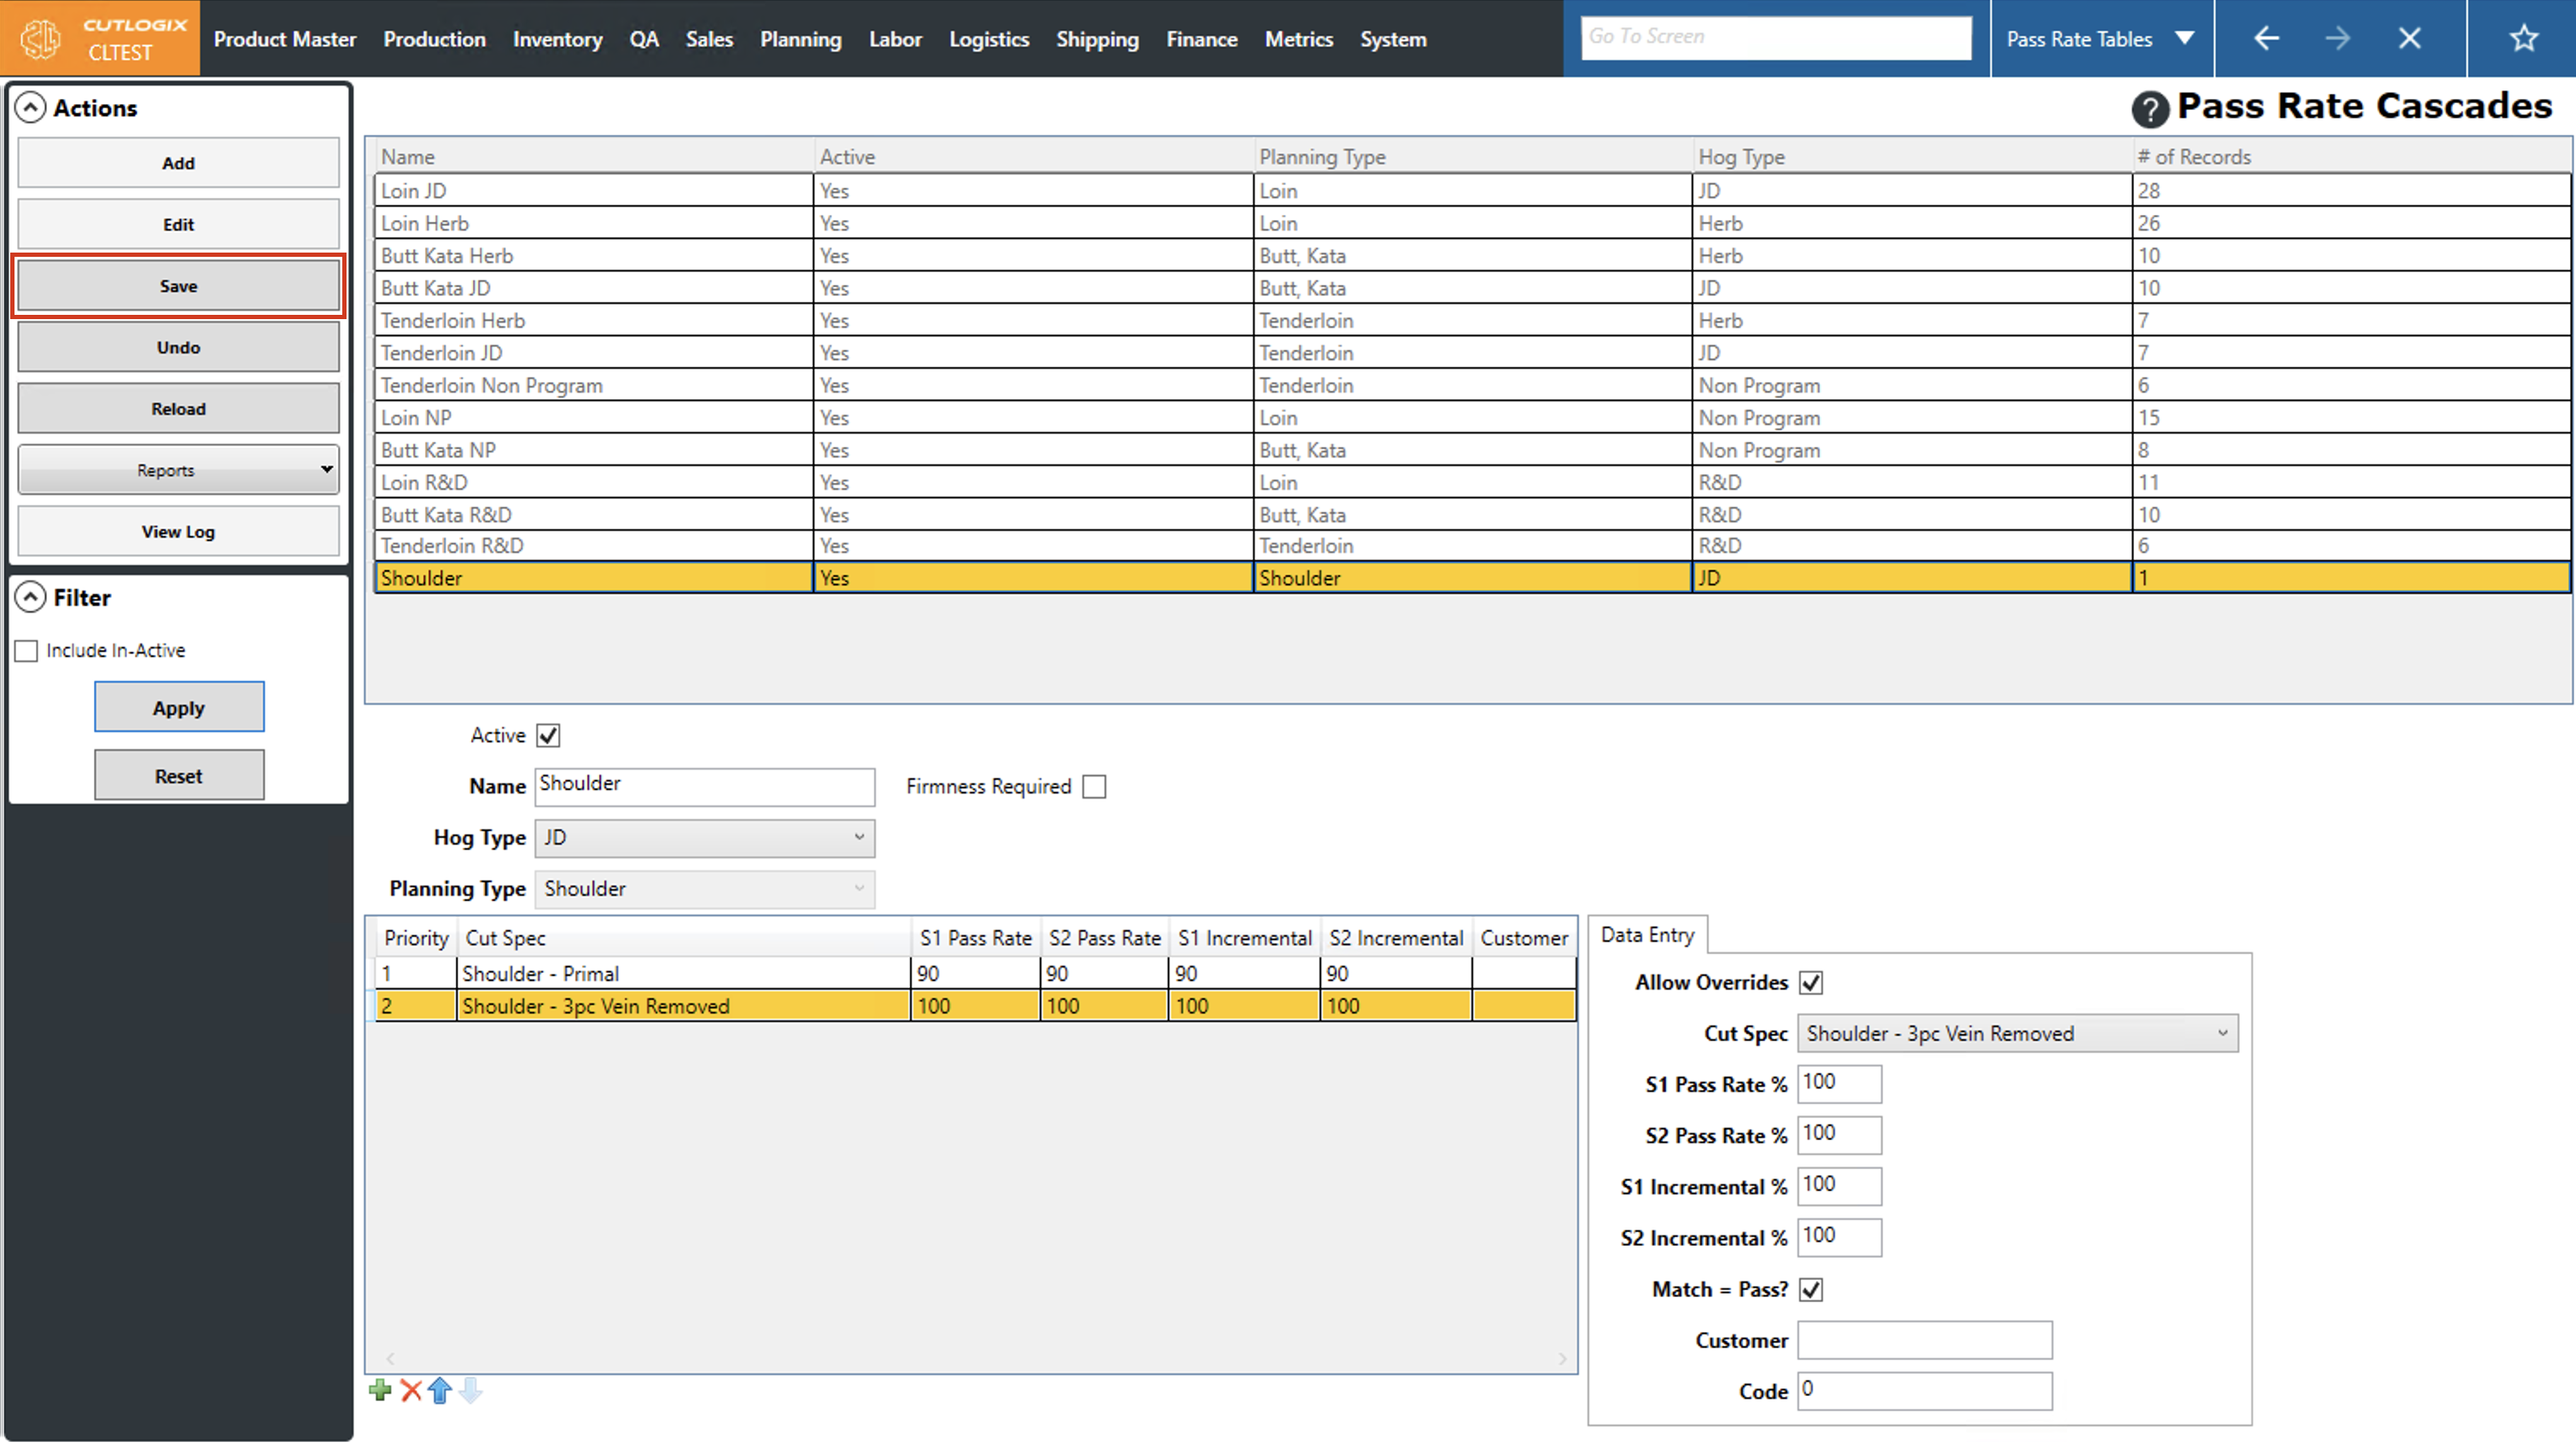
Step 5: A new entry will appear in the table and the data entry tab now has some fields for you to fill out about the new entry. Required information is highlighted in red and must be filled out before the entry can be saved. (Note: Ensure the "Planning Type" is not set to "None" or the cutspec drop down will be empty) The required fields are as follows:
• Cut Spec: The cut spec to add to the pass rate cascade.
• S1 Pass Rate %: The pass rate percentage of this cut spec for shift 1.
• S2 Pass Rate %: The pass rate percentage of this cut spec for shift 2.
• S1 Incremental %: The incremental pass rate percentage of this cut spec for shift 1.
• S2 Incremental %: The incremental pass rate percentage of this cut spec for shift 2.
Note: You can add multiple pass rate records on each pass rate cascade.
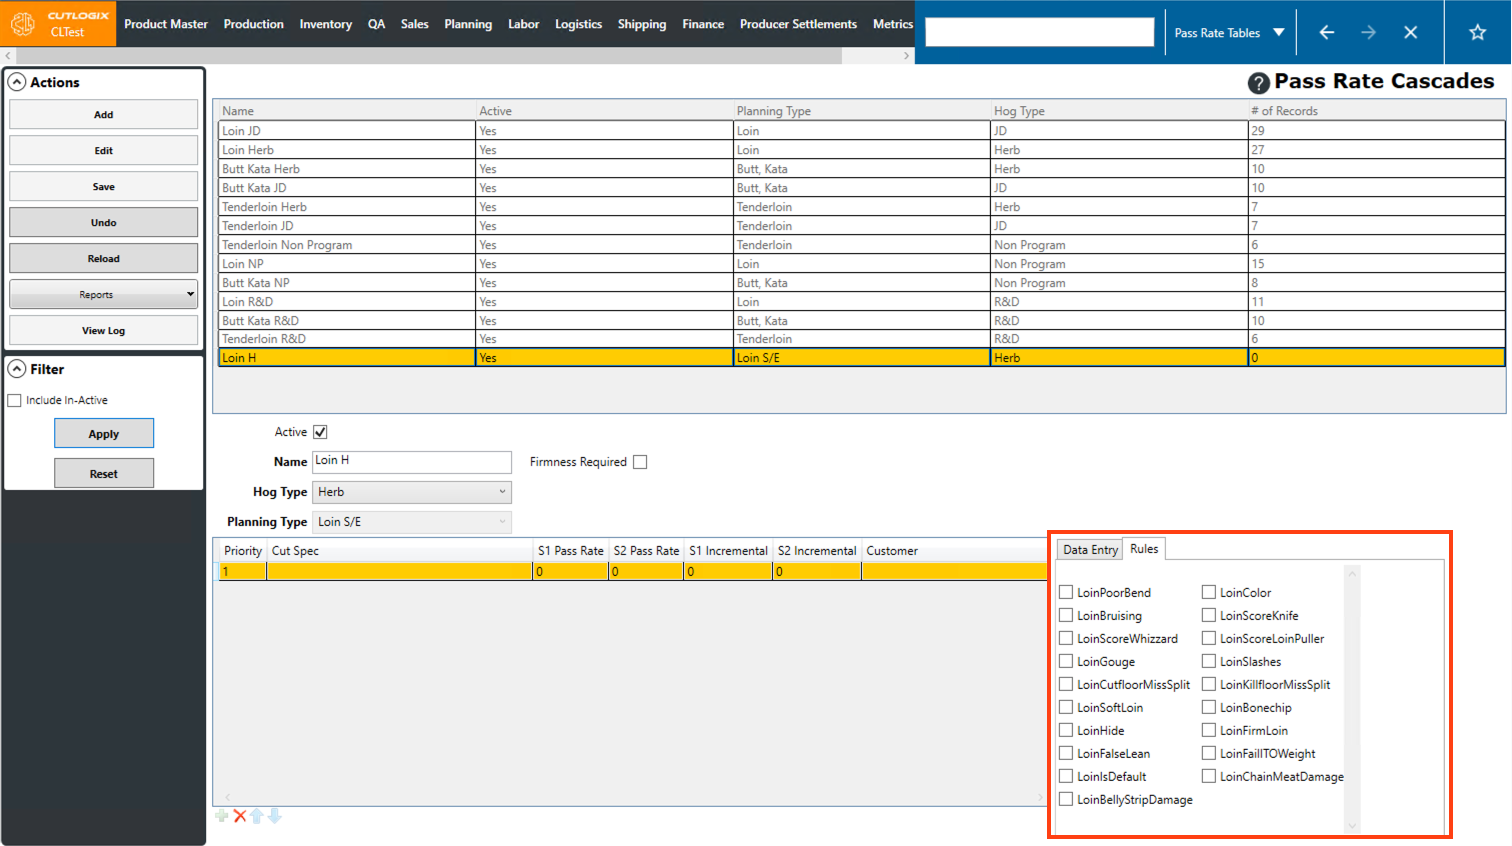
Step 6: When adding a new pass rate record for certain planning types (Ex. Loin) a “Rules” tab will be visible on the right side of the screen. On this tab, you can select the checkbox beside any rules that should apply to the pass rate record. If a cut spec matches any of the selected rules, it will not pass quality inspection for the selected pass rate record.
Step 7: Once all the required information for the pass rate cascade and the pass rate record have been entered, click the "Save" button in the left actions panel. If you don't want to save the new pass rate cascade, clicking the "Undo" button will discard the pass rate cascade and the pass rate record.
How to Edit Pass Rate Cascades
DemoStep 1: Navigate to the "Pass Rates Cascades" page (Under the Planning menu → Planning Rules Config → Pass Rate Cascades)
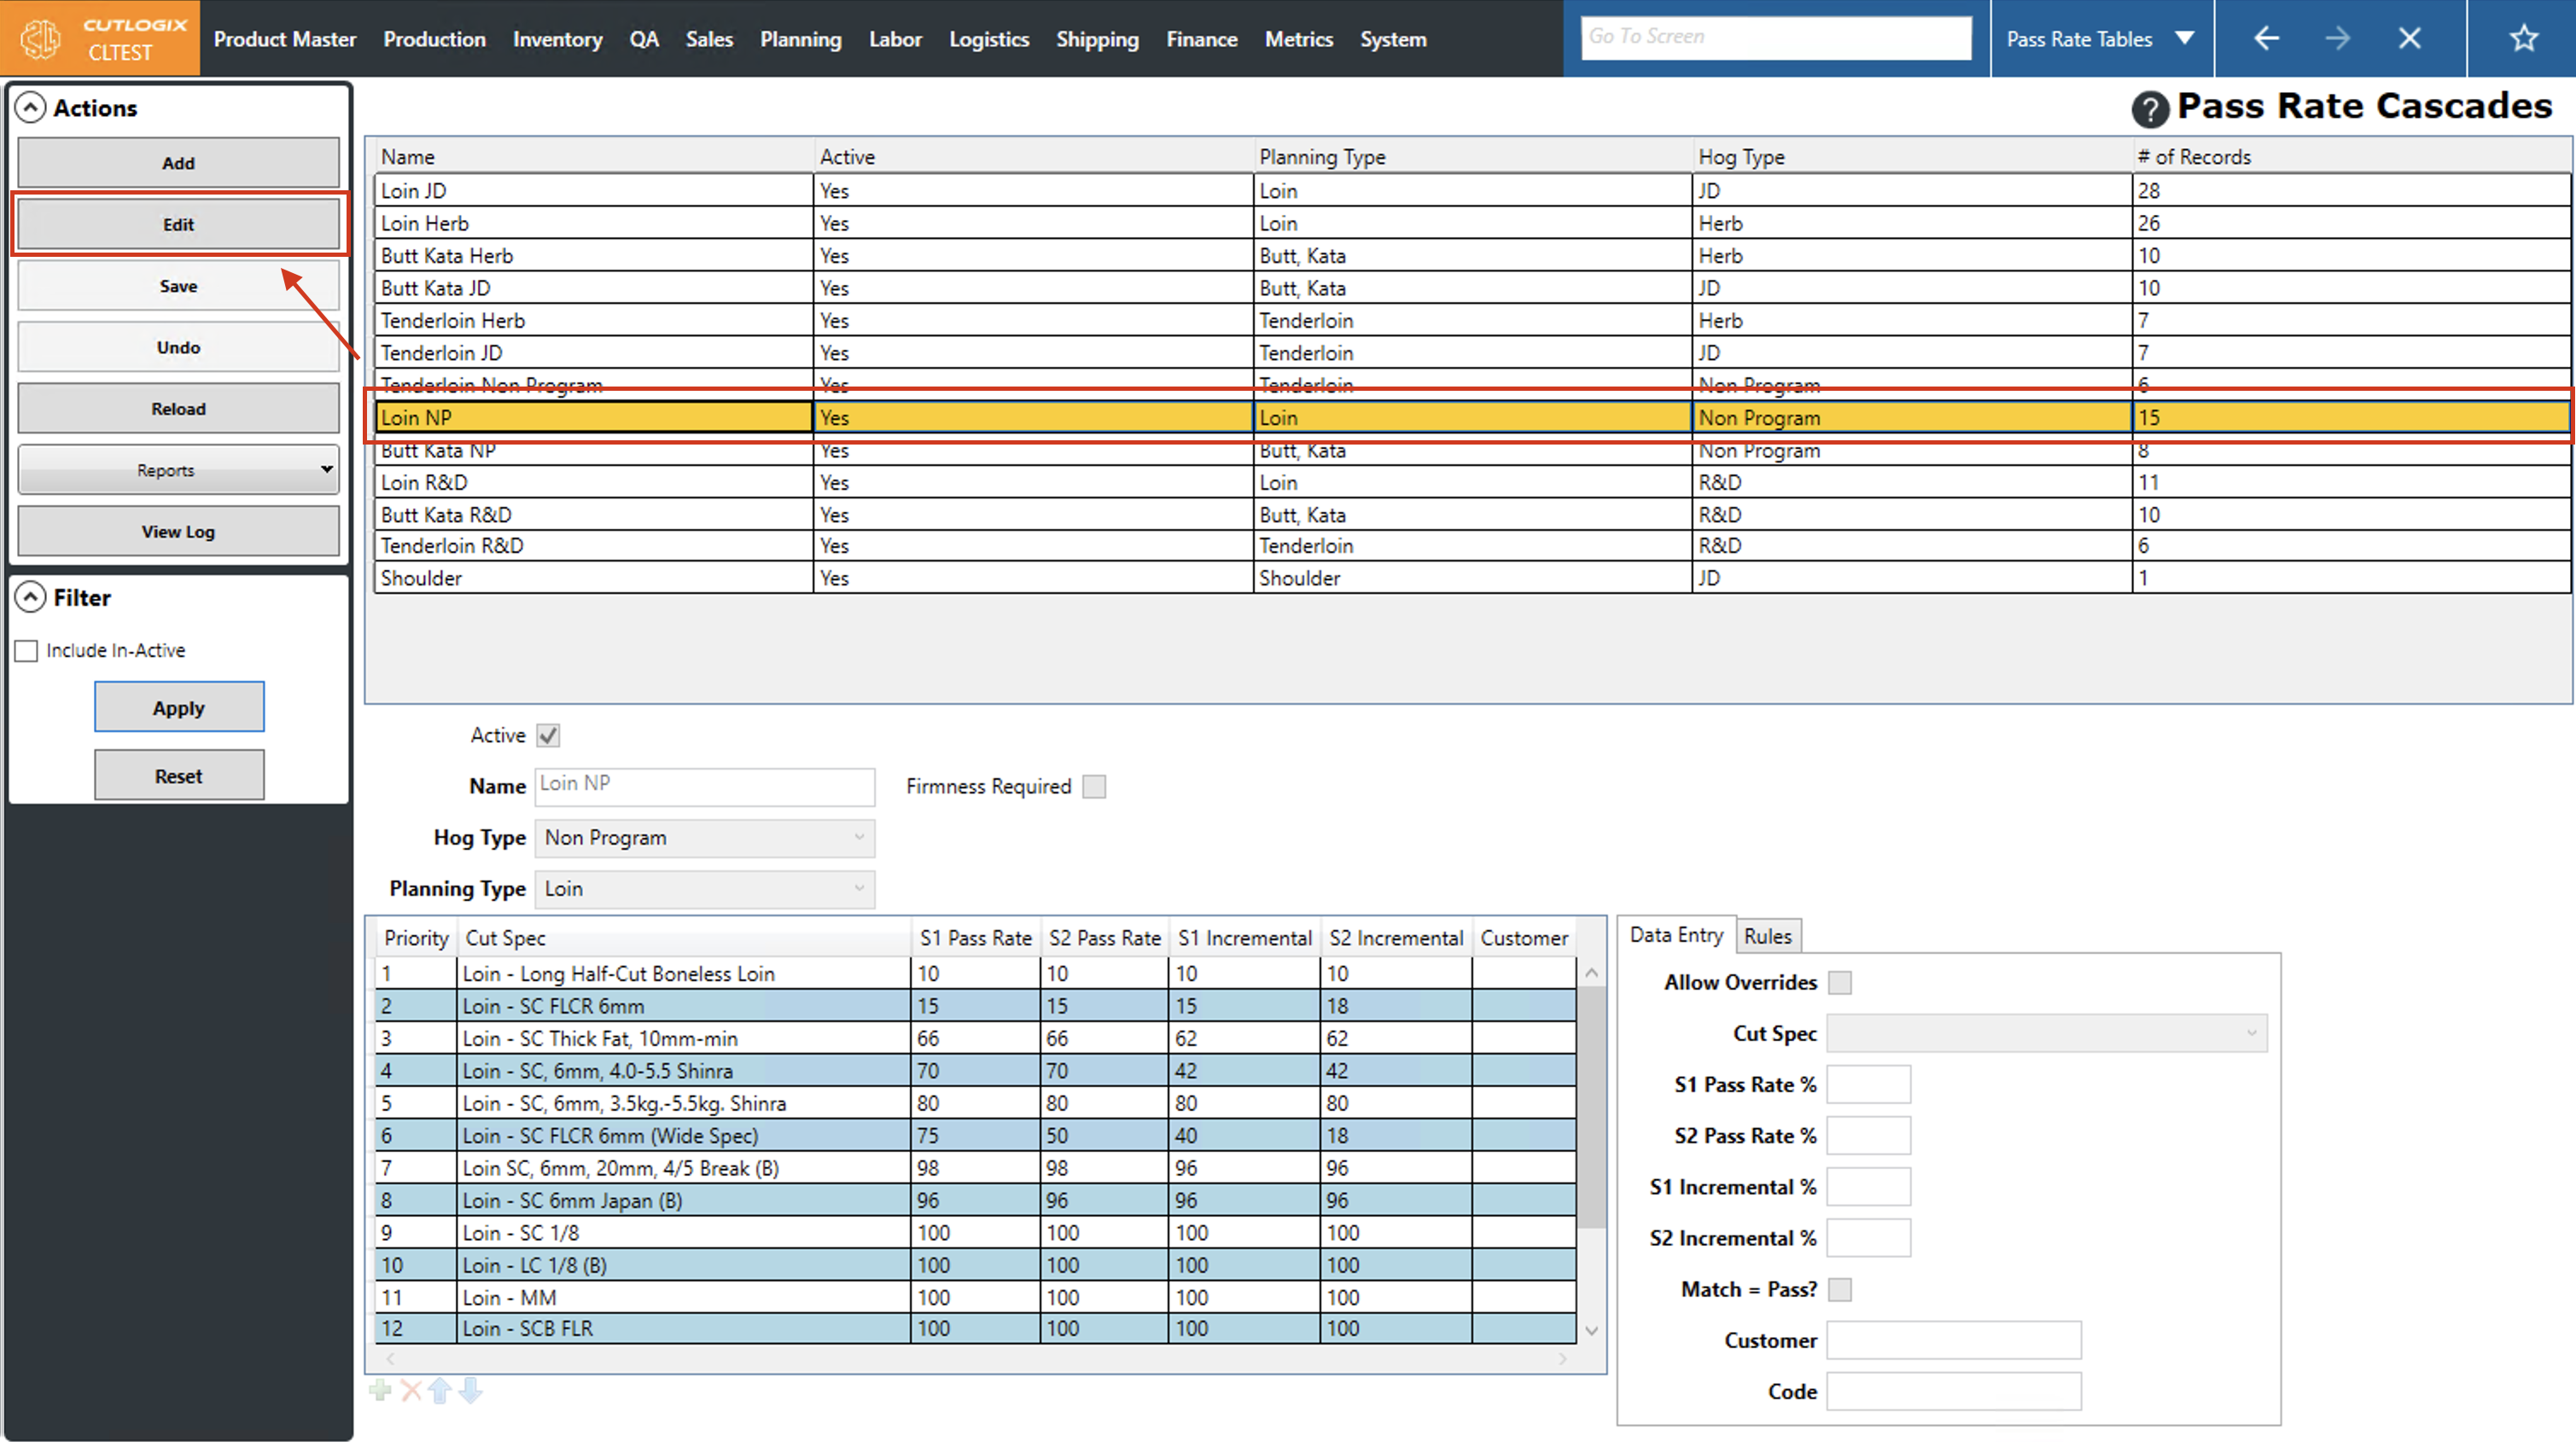
Step 2: Click on the pass rate cascade that you want to edit (it will be highlighted in orange once selected), then click the "Edit" button in the actions panel.
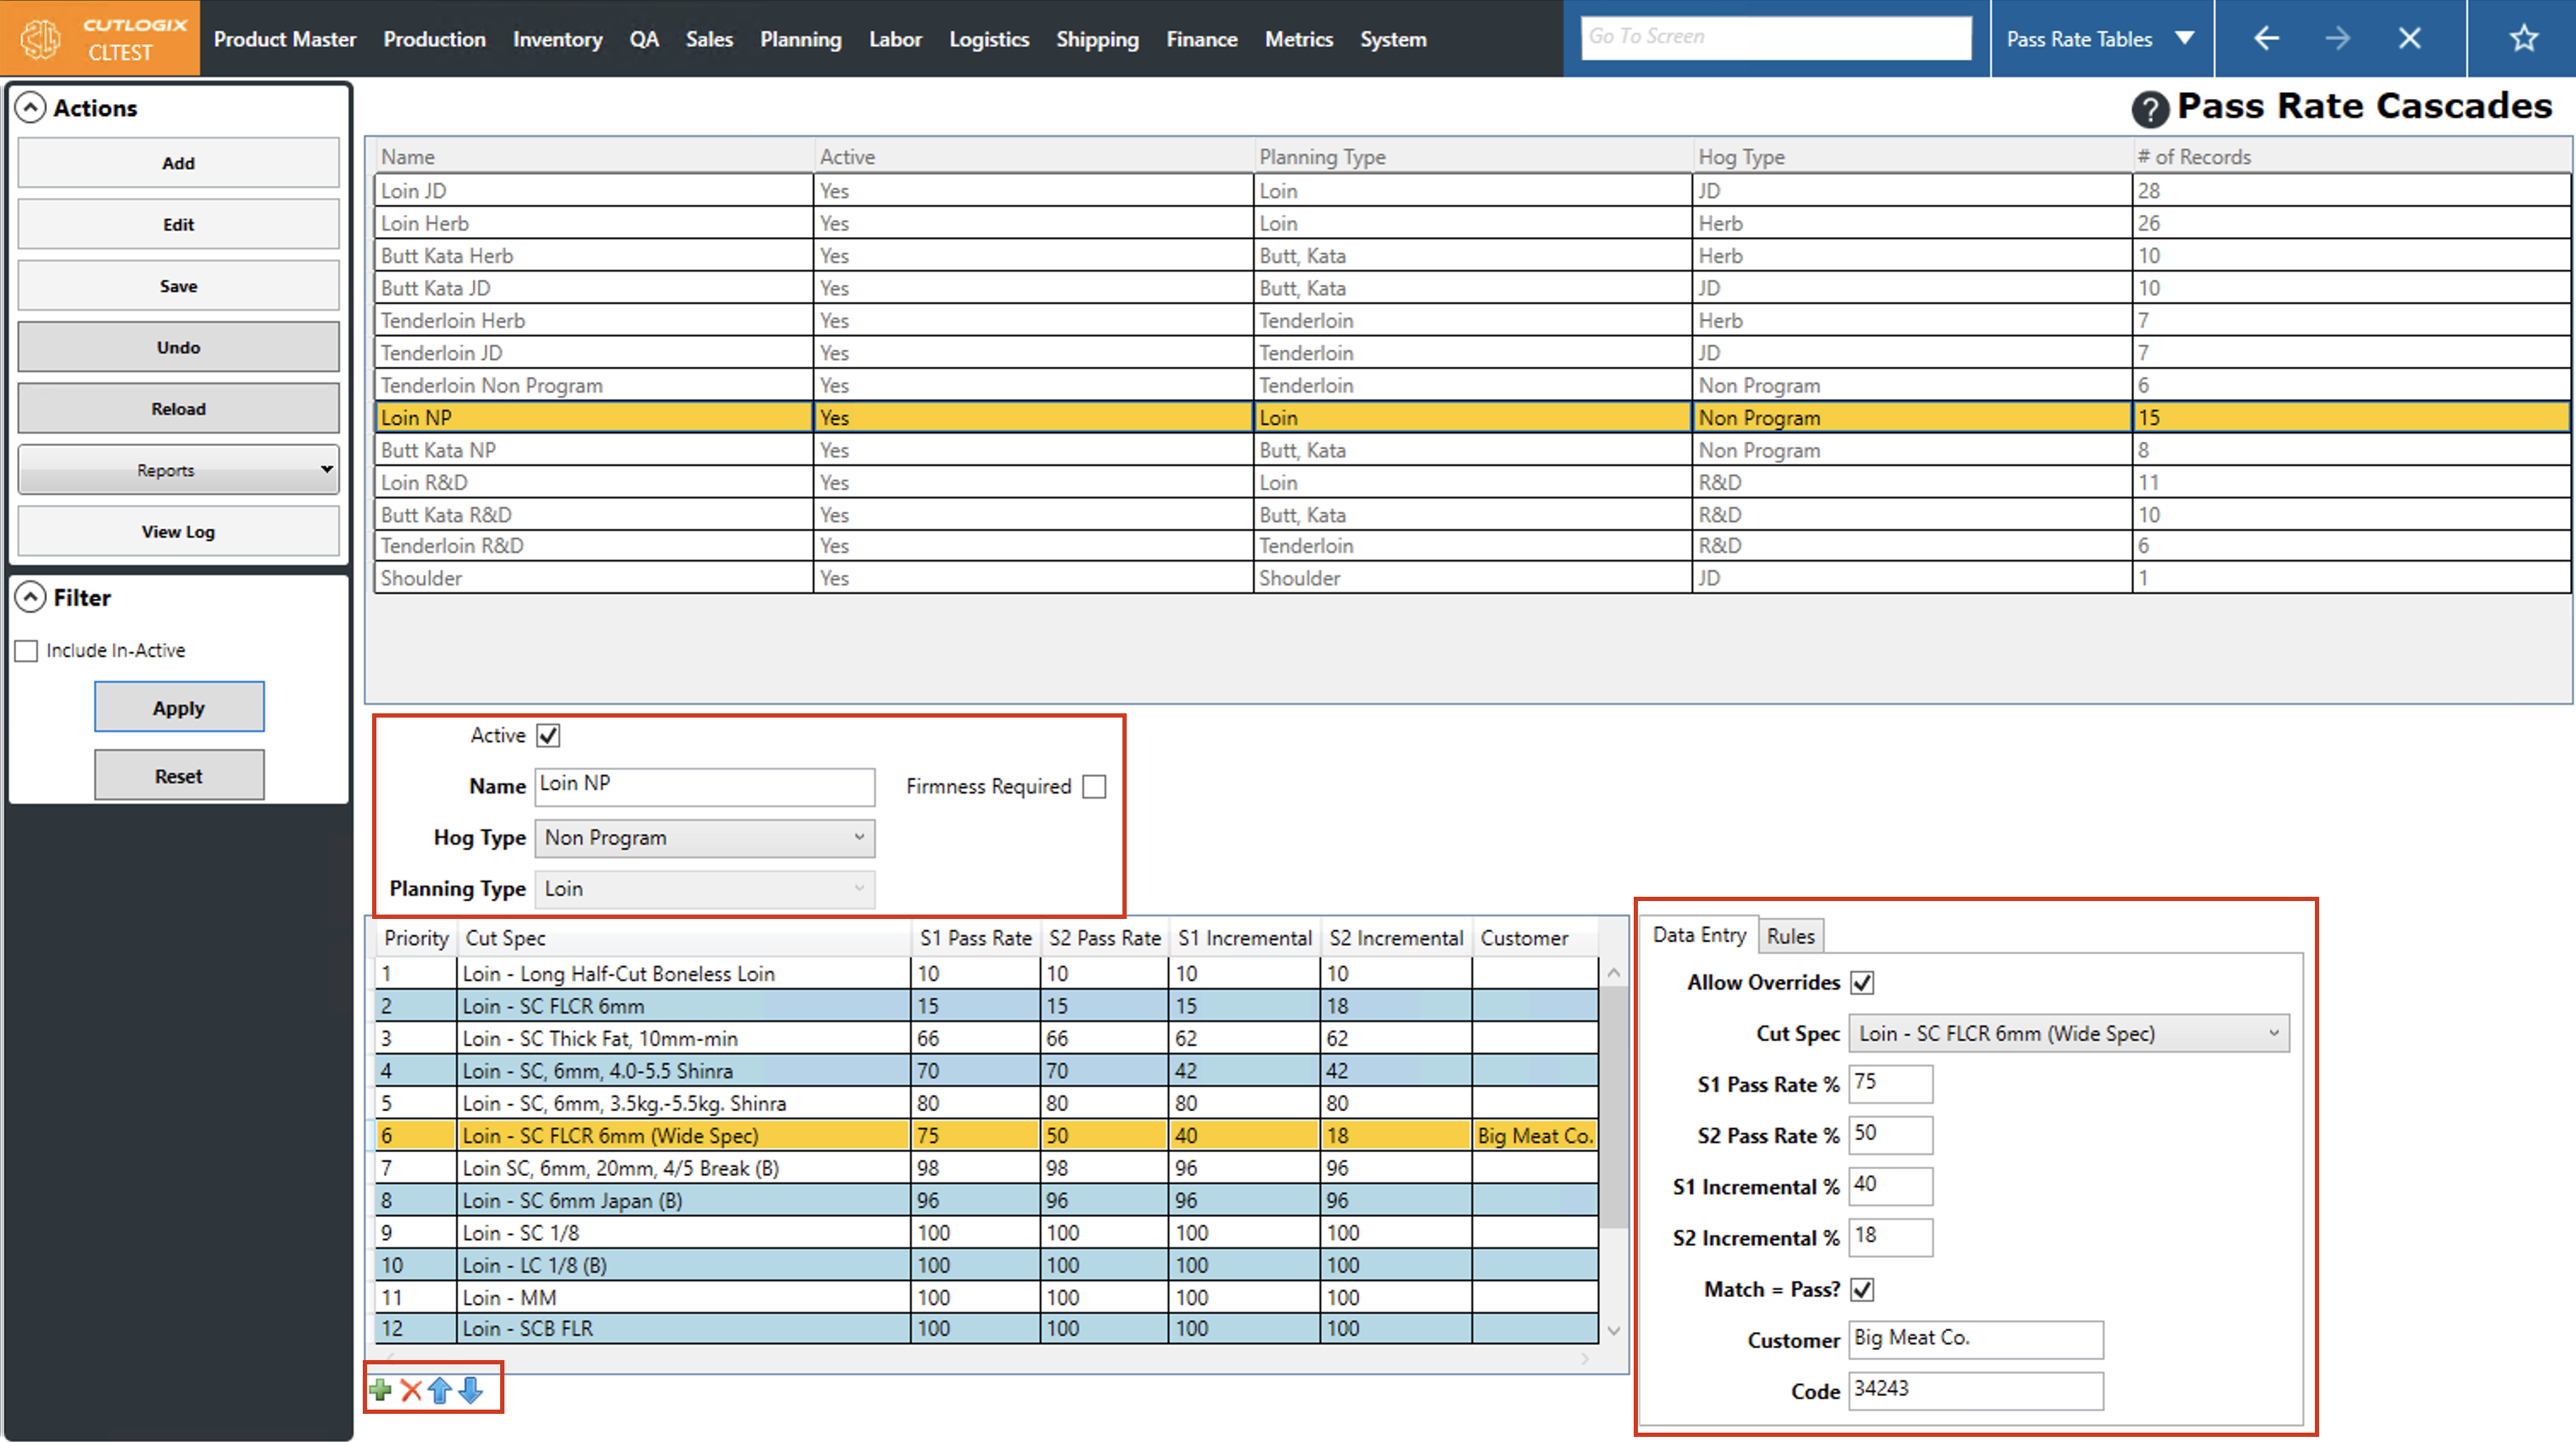
Step 3: This will enable editing at the bottom of the page for the pass rate cascade. You can edit the name and hog type for the pass rate cascade. For the records in the cascade you can click on them and use the blue up/down arrows at the bottom of the page to shift the priority of them up or down. Clicking "X" on a selected record will remove it and clicking "+" will let you add a new one to the pass rate cascade. On the right side of the page, details about the pass rate record can be edited in the "Data Entry" table and the rules that apply to the pass rate record can be modified in the "Rules" tab.
Step 4: After making the necessary changes, click the "Save" button in the actions panel to save the changes. If you don't want to save your changes, click the "Undo" button, which will discard any changes that have been made to the pass rate cascade and pass rate records.
