Transfer Plan Tasks
How to Create Transfers
Demo Since the production plan will include producing products that need to be frozen, all of this product will need to be transferred to a freezer. This includes products that have been sold where the cooling type is frozen or production defaults that have been made that are frozen. This page enables you to create a transfer plan for all of those products to get to a freezer.
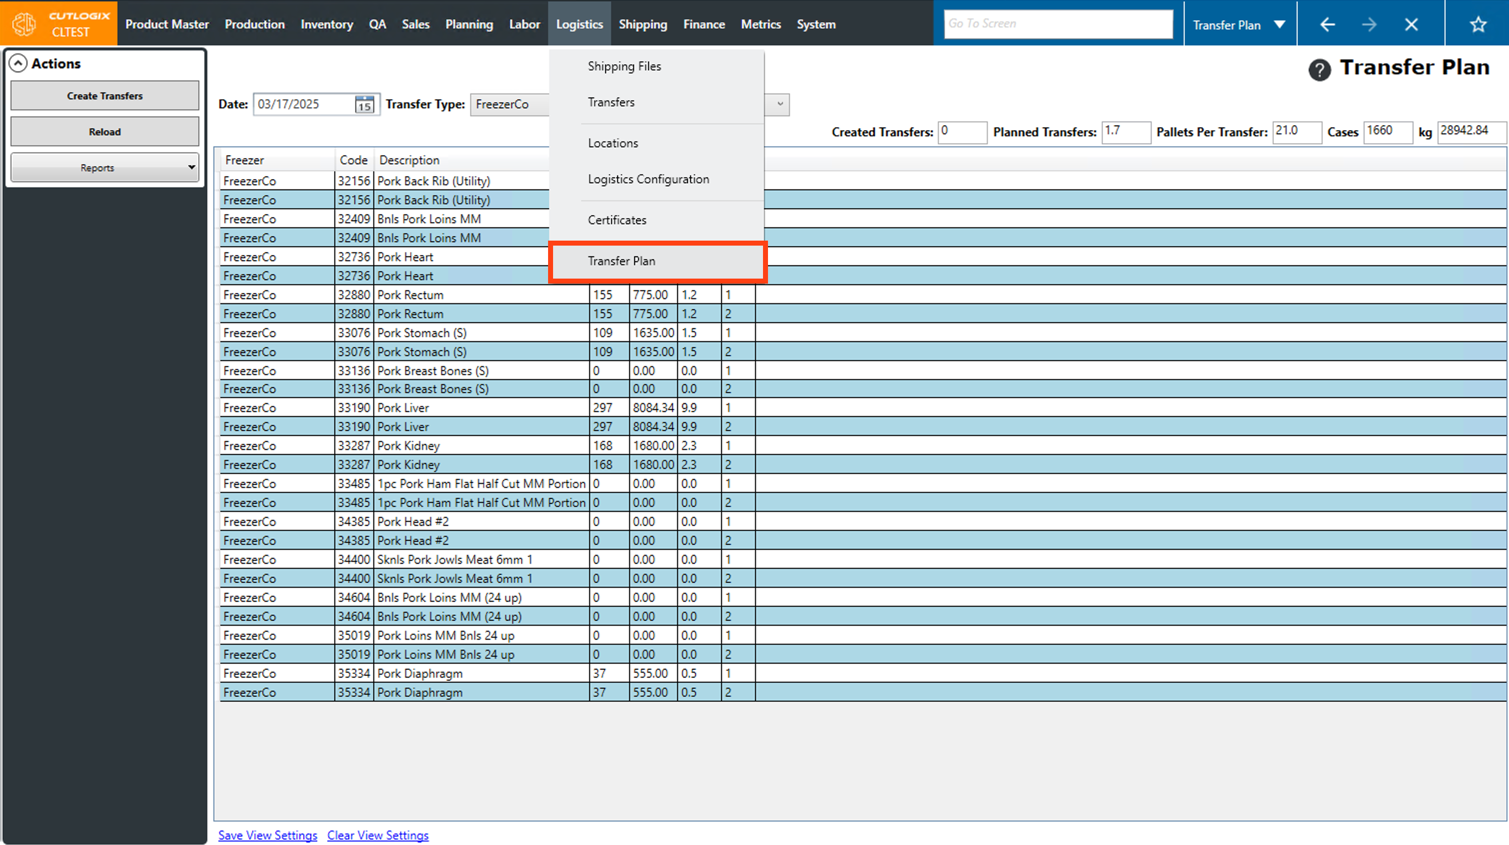
Step 1: Navigate to the "Transfer Plan" page (Under the Logistics menu → Transfer Plan).
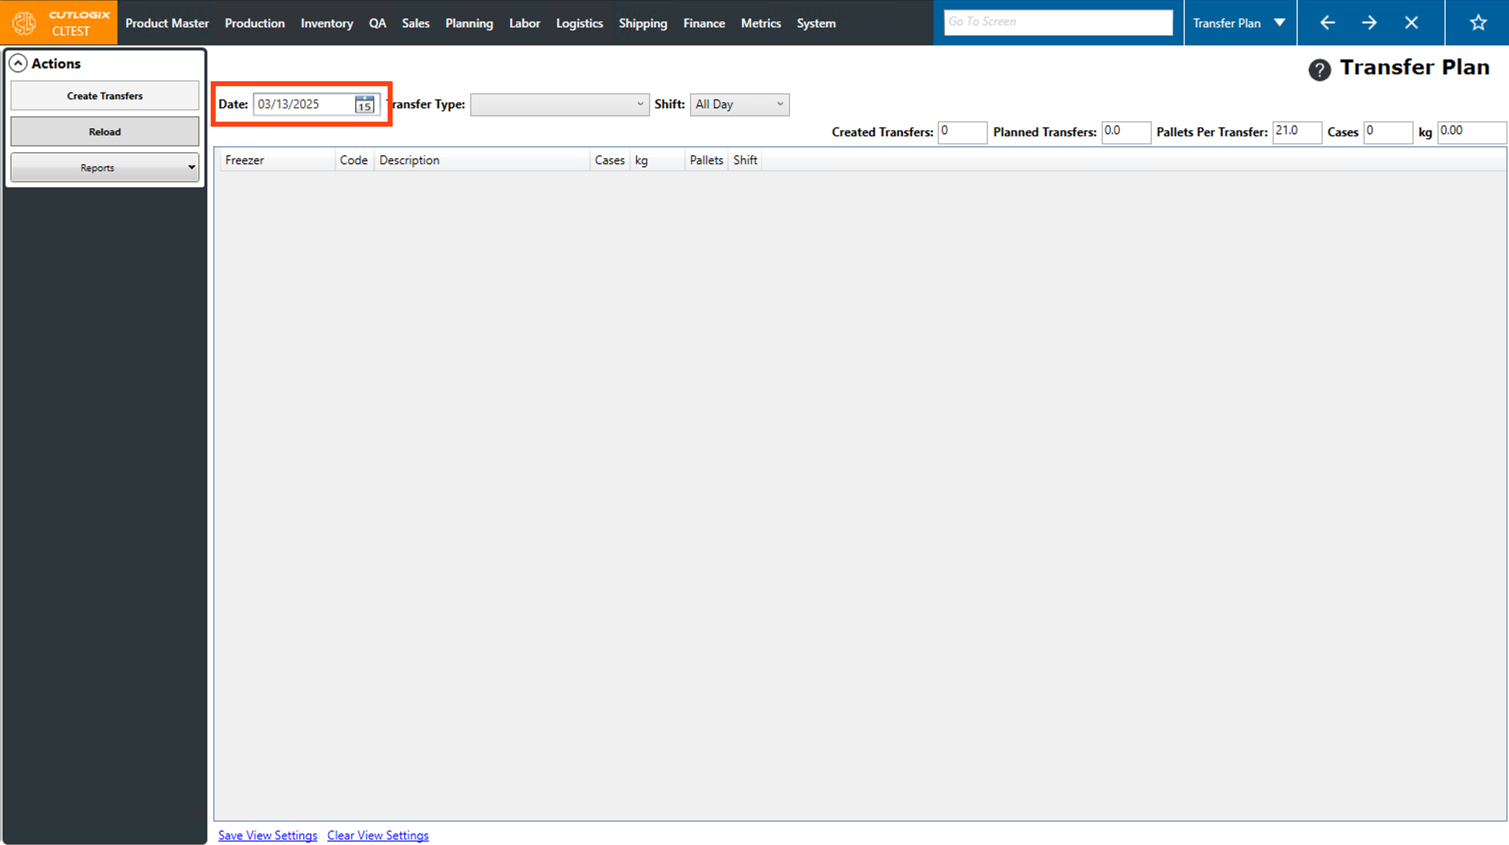
Step 2: By default the page will open with the "Date" field set to the current day. This can be changed if you want to view frozen products for a different day.
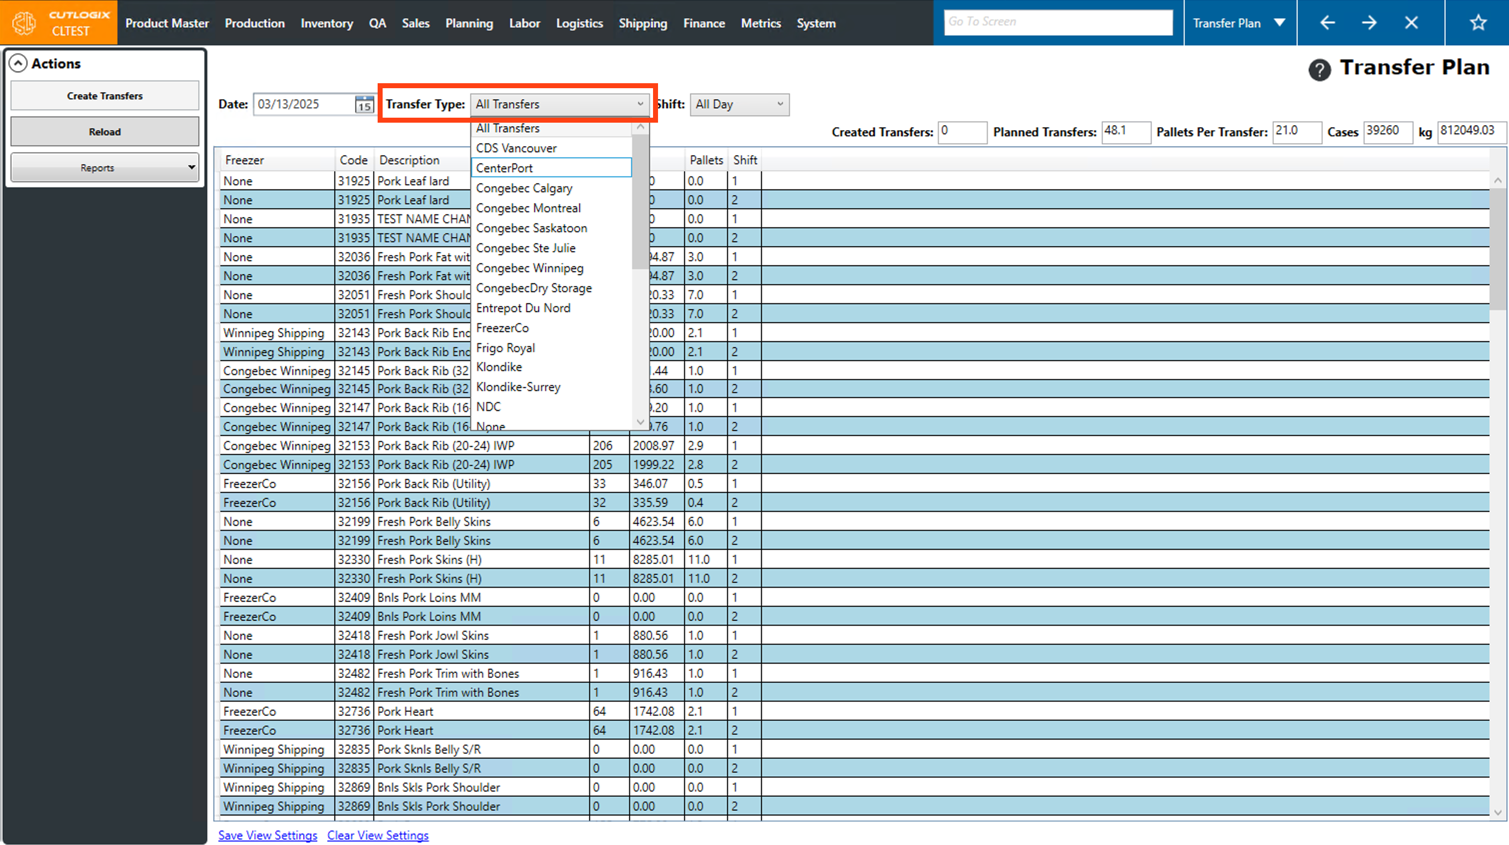
Step 3: Next, select the "Transfer Type" from the drop-down list. This is the destination freezer, once set only products with that freezer set as their default freezer will appear in the list. You also have the option to choose "All Transfers" to see everything, but in order to create a transfer you must pick a single freezer.
Step 4: Lastly, choose the shift to view products for from the "Shift" drop-down list. By default, it will be set to All Day.
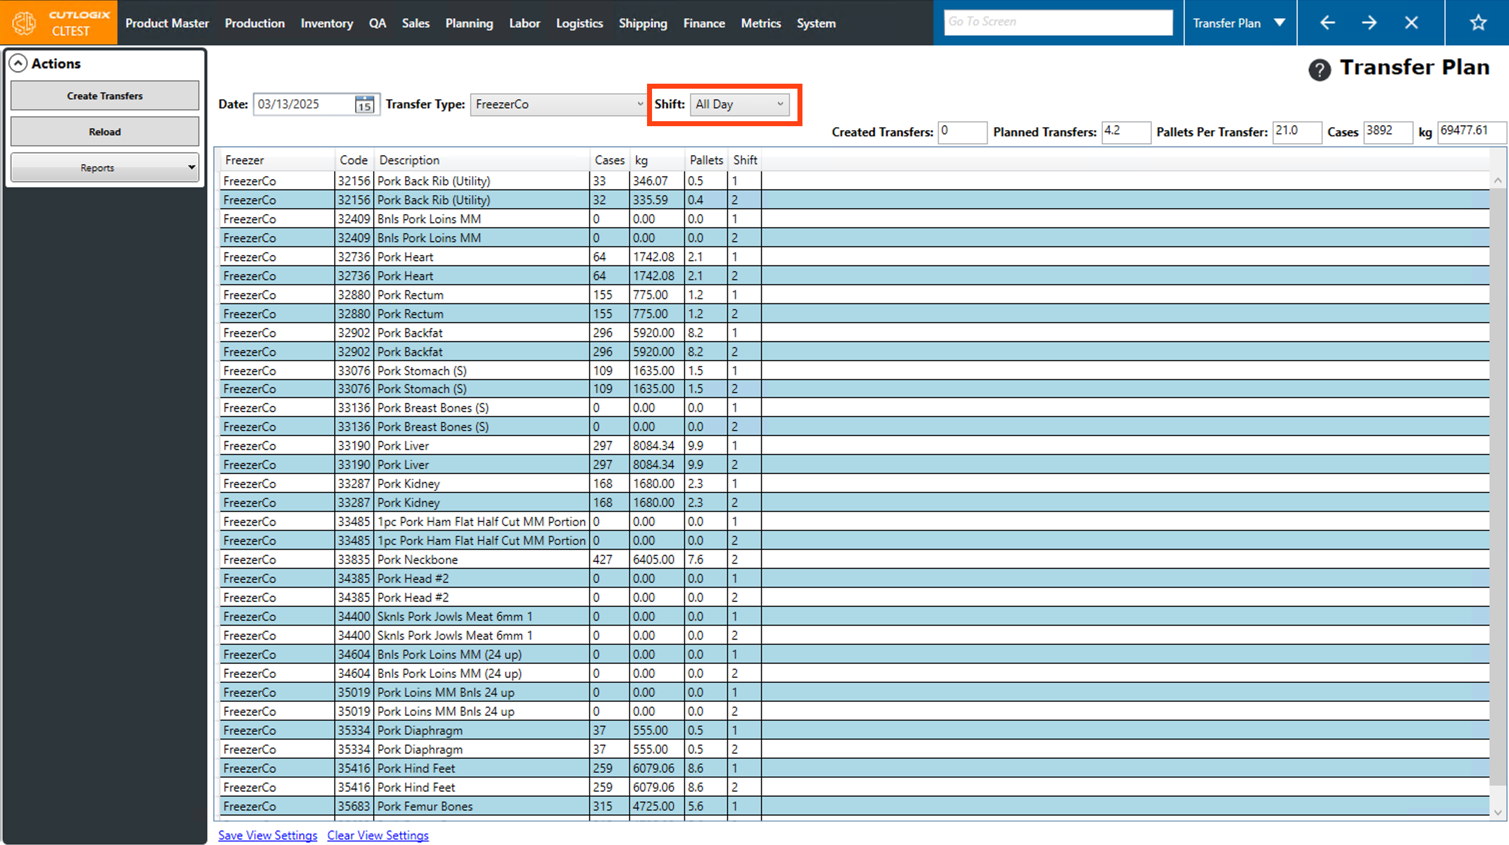
Step 5: Now the list will show all frozen products that are going to be produced on the selected day that match the chosen freezer and shift.

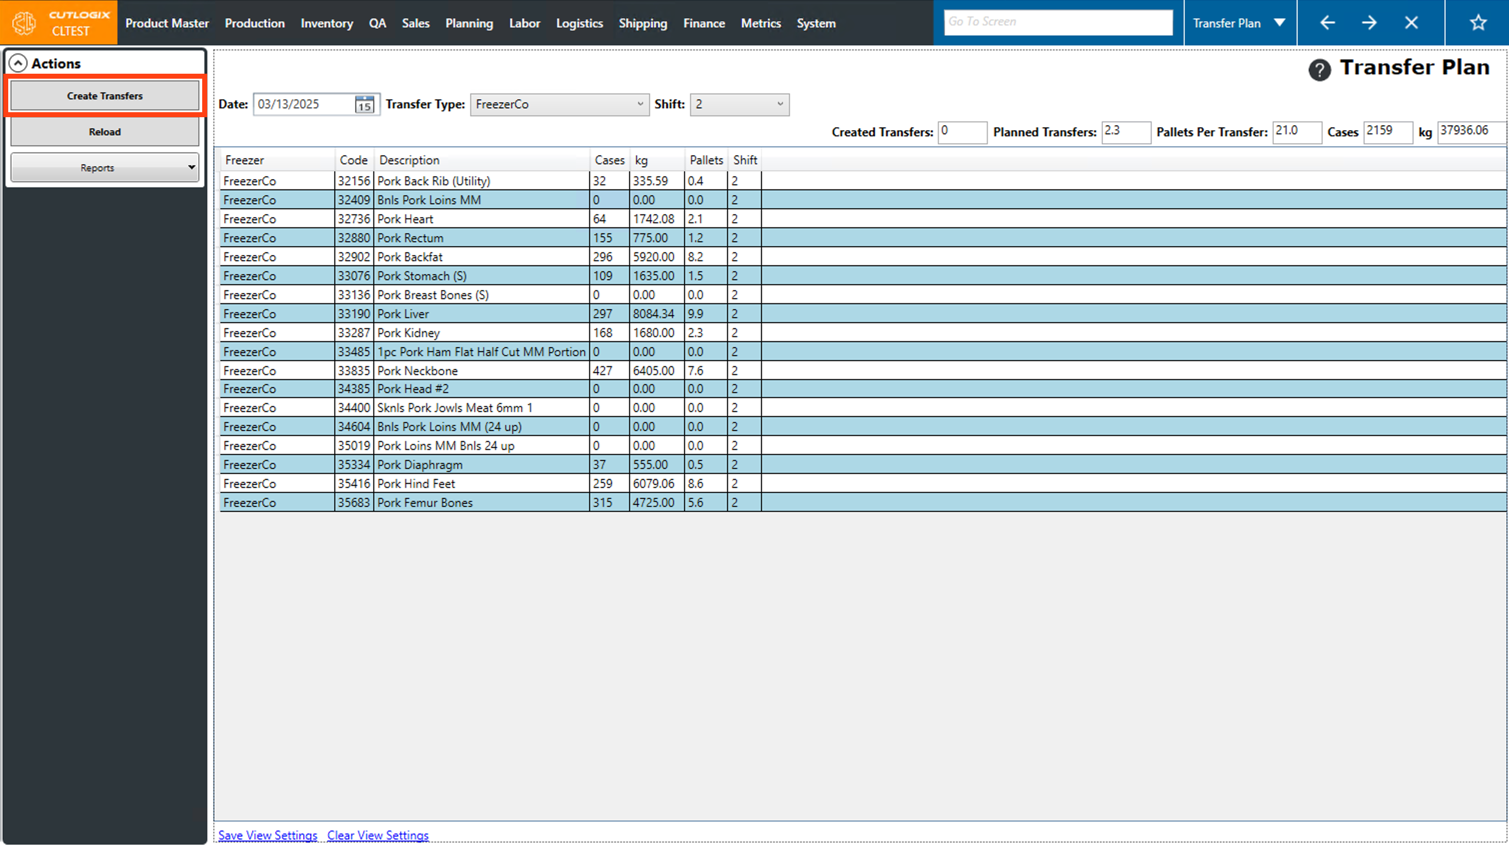
Step 6: Next, click the "Create Transfers" button in the Actions Panel.
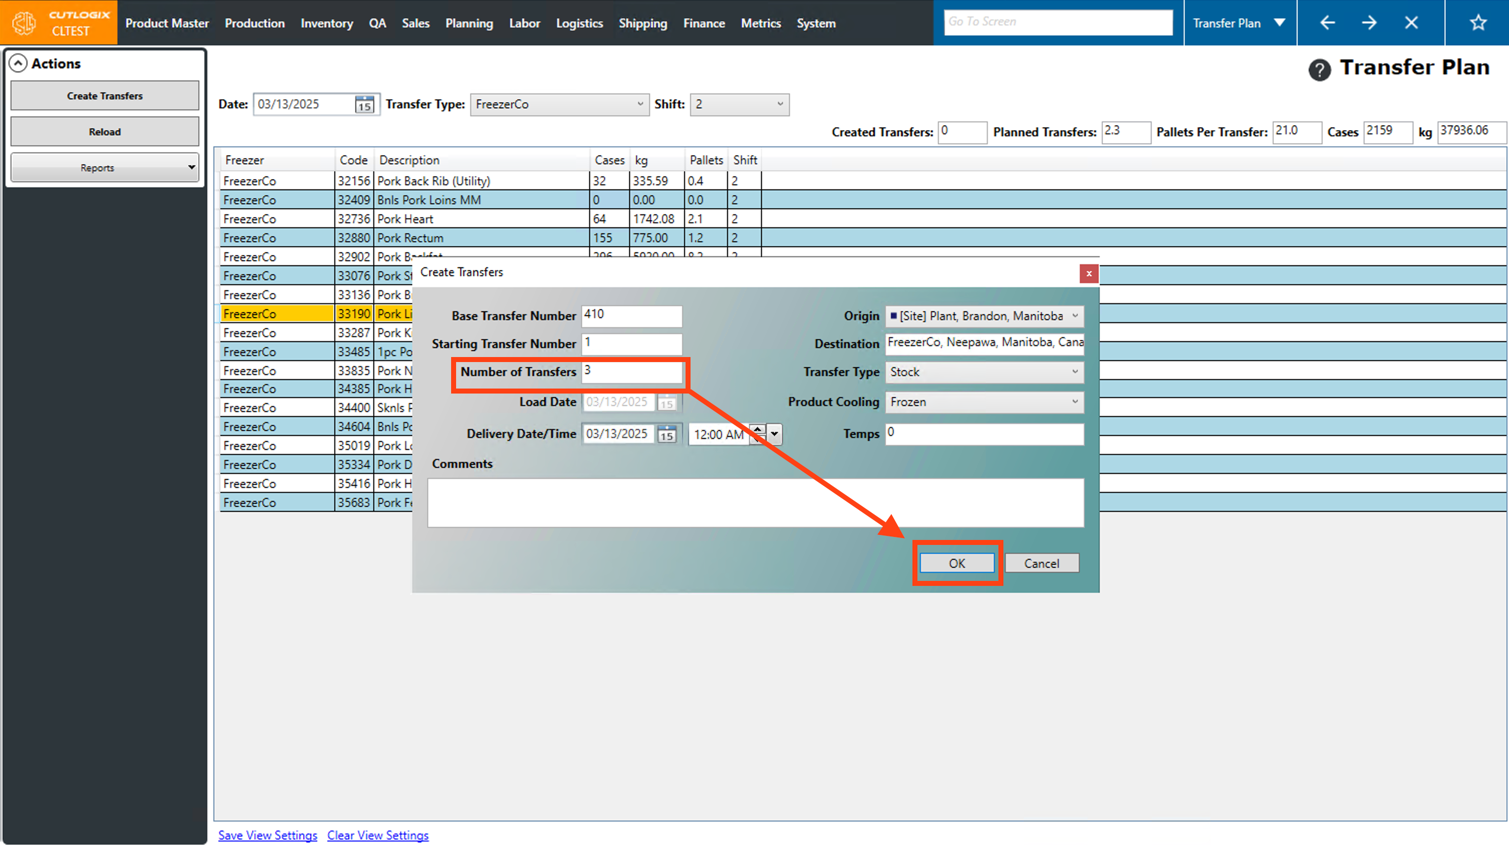
Step 7: A dialog will then appear where you can enter specifics about the transfers to be created. The fields that can be entered are as follows:
• Base Transfer Number: This is the code of the facility (freezer) that we are transferring to, this will automatically populate and is configured on the freezer/location itself.
• Starting Transfer Number: The number that you want to start creating transfers from (Ex. It will start with 410 in this case so if we enter 1 the first transfer number will start with 410-01, the next would start with 410-02, etc..)
• Number of Transfers: The number of transfers to be created. CutLogix will suggest how many transfers will be needed for the selected product codes on the selected day in the "Planned Transfers" field near the top right corner. This field requires a whole number so typically you'd round up. In this case it's saying 2.3 transfers would be required so we'd enter 3 in this field.
• Load Date: The date that the products on the transfer will be loaded. By default, this is set to the date the screen is filtered to and cannot be changed.
• Delivery Date/Time: The date/time that the products will be delivered to the freezer.
• Origin: The origin of the products to be transferred. By default, this is set to your plant.
• Destination: The freezer destination that the transfer is to. This is automatically set to the freezer that was previously selected under "Transfer Type" and cannot be changed.
• Transfer Type: By default, this will be set to "Stock", which means product leaving the plant to go to a freezer. Transfers can also have the type "Freezer", which indicates it's a transfer between two freezers.
• Product Cooling: The type of cooling for the products on the transfer.
• Temps: A temperature override can be entered here.
• Comments: Enter any comments about the transfer here.
Once all the fields are filled out, click the "OK" button to create the transfers.
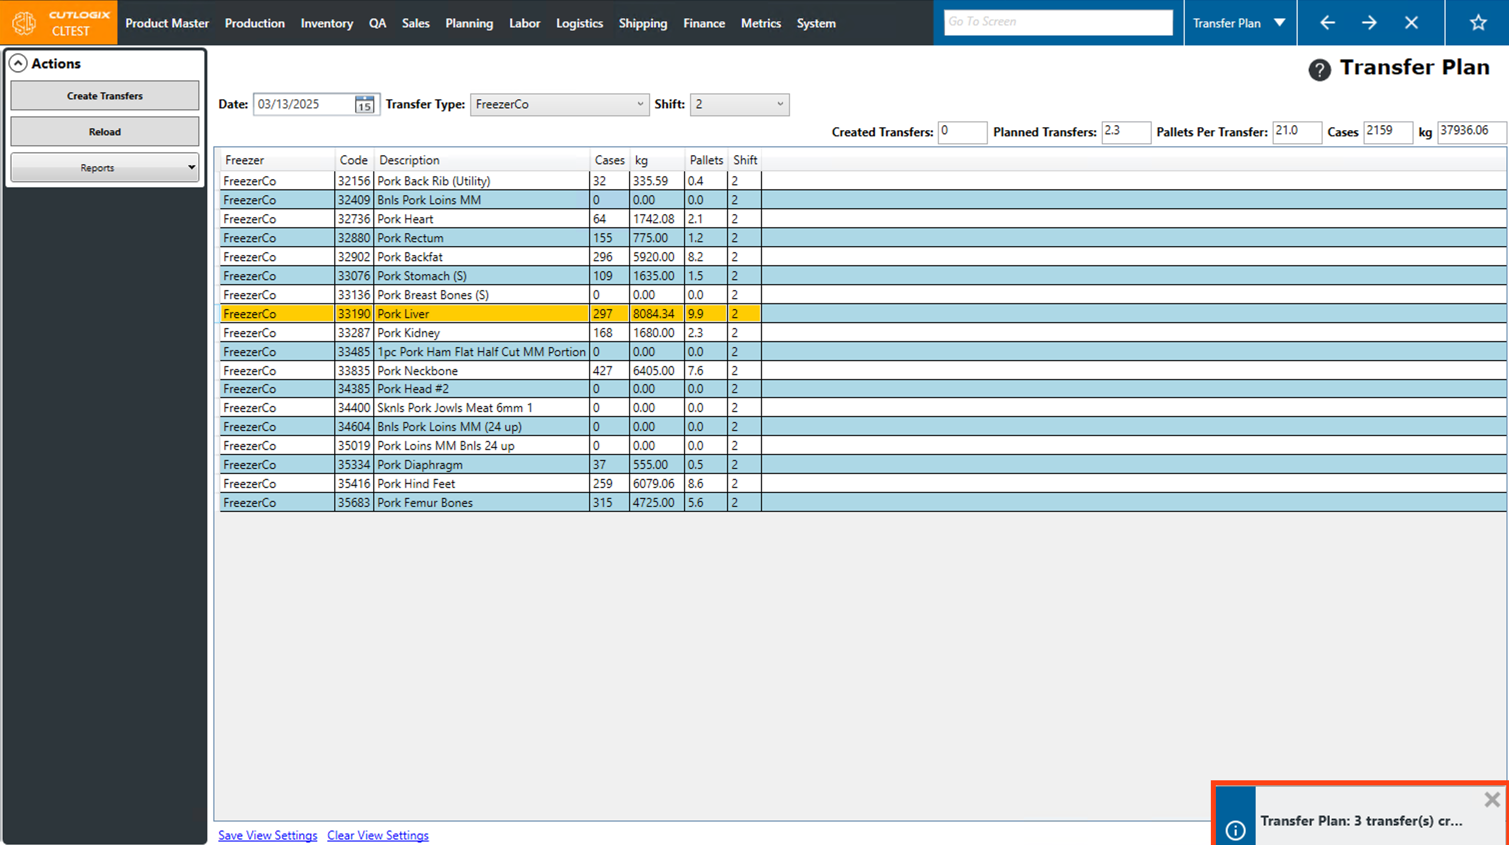
Step 8: You'll then see a pop-up message in the bottom right corner, that your transfers have been created.
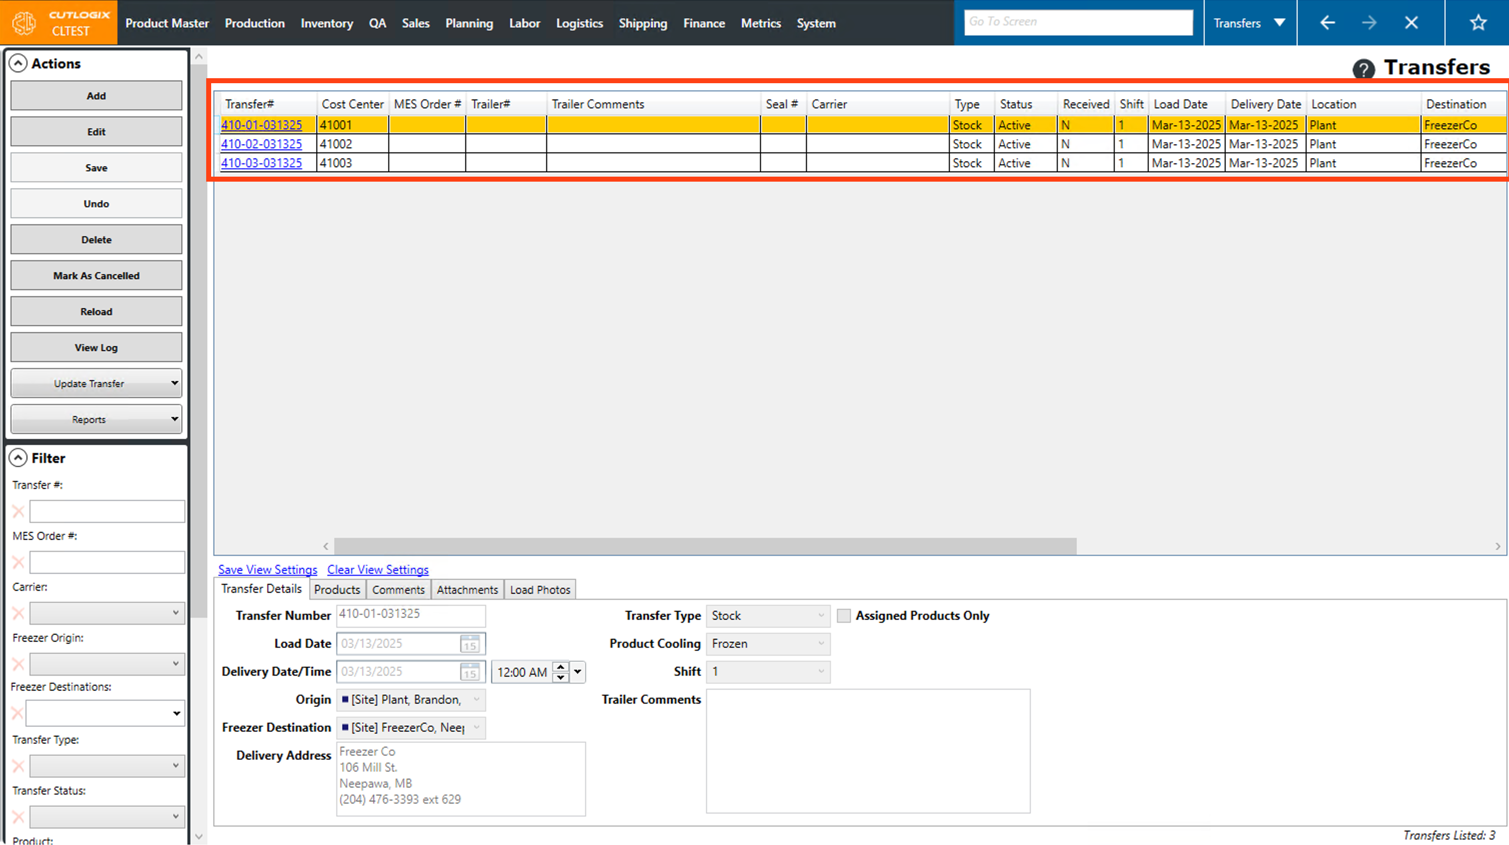
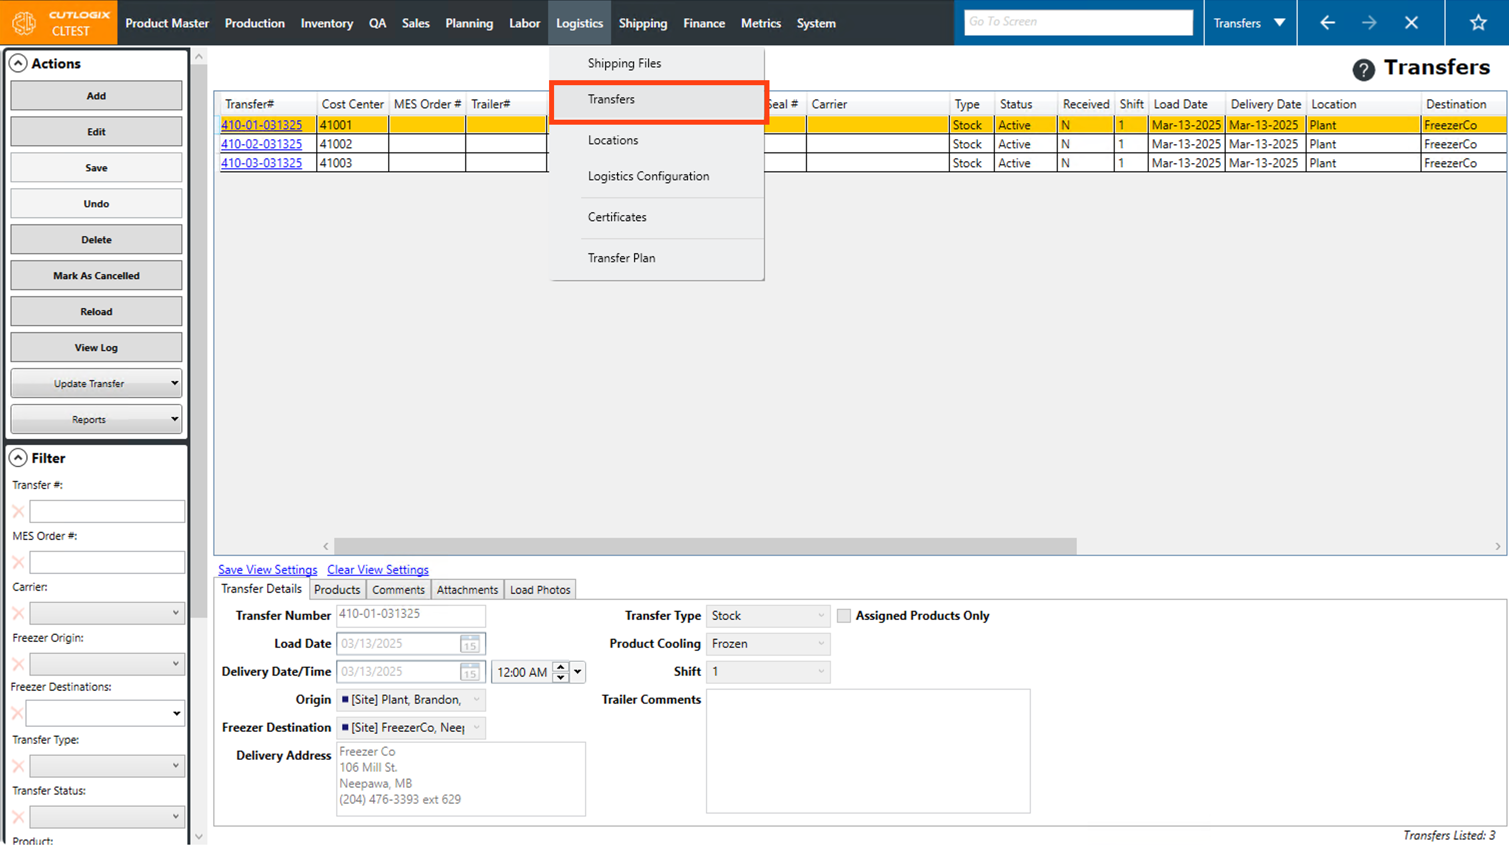
Step 9: Then we'll go to the "Transfers" page (Under "Logistics" → "Transfers").
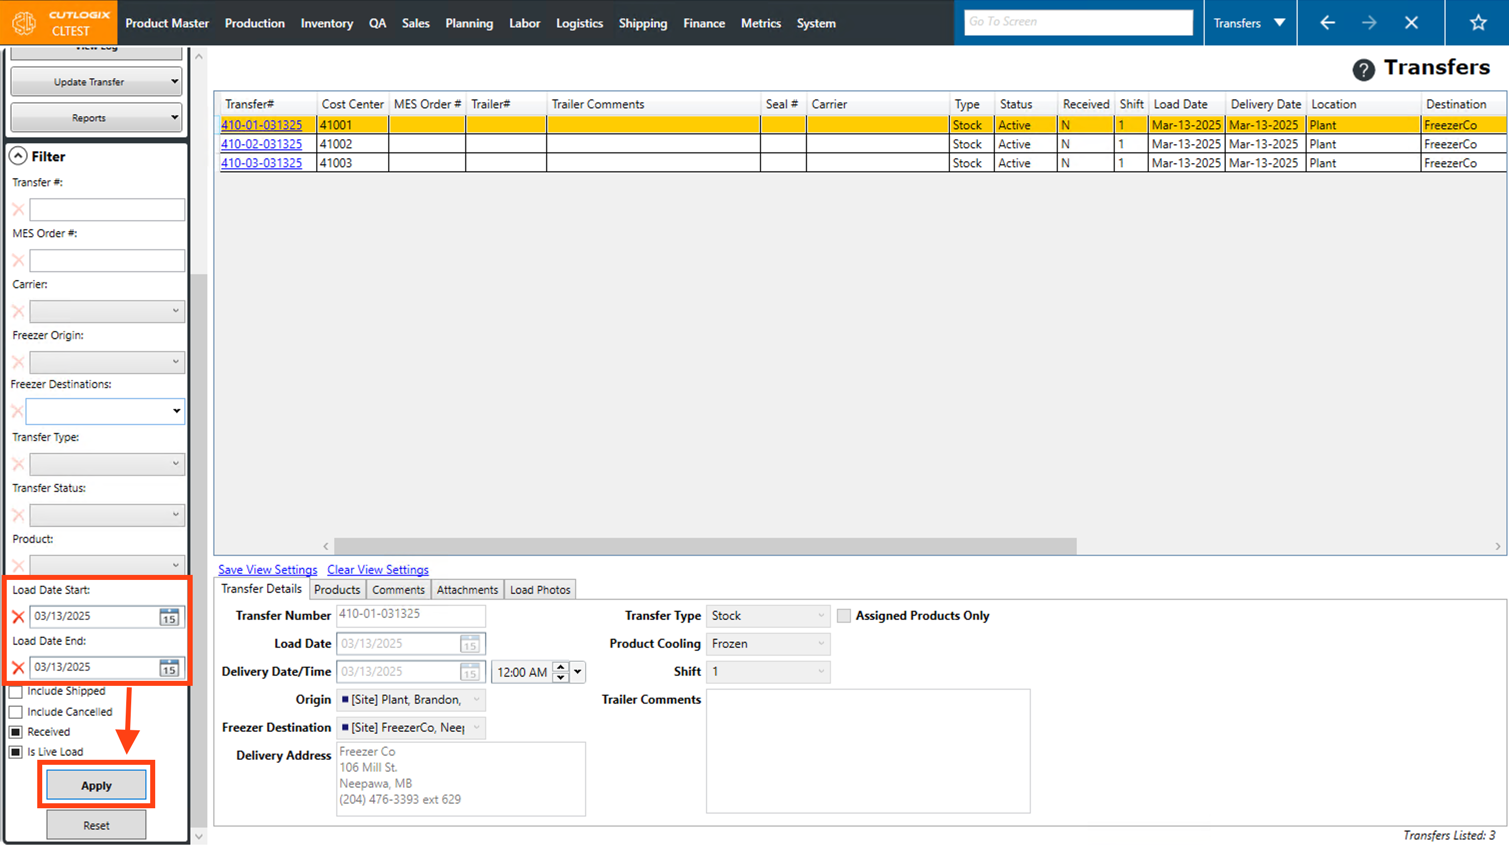
Step 10: Next, we'll set "Load Date Start" and "Load Date End" dates on the filter to the day we set the transfers to be created on, then we'll click "Apply" to apply the filter to the page.
Step 11: Now we can see the 3 transfers that we told CutLogix to create. These transfers are similar to customer orders in that they have a list of products, will have products scanned on to them, can be marked as shipped, synced to the MES & more.