Conversion Rate Tasks
How to Add Default Conversion Rates
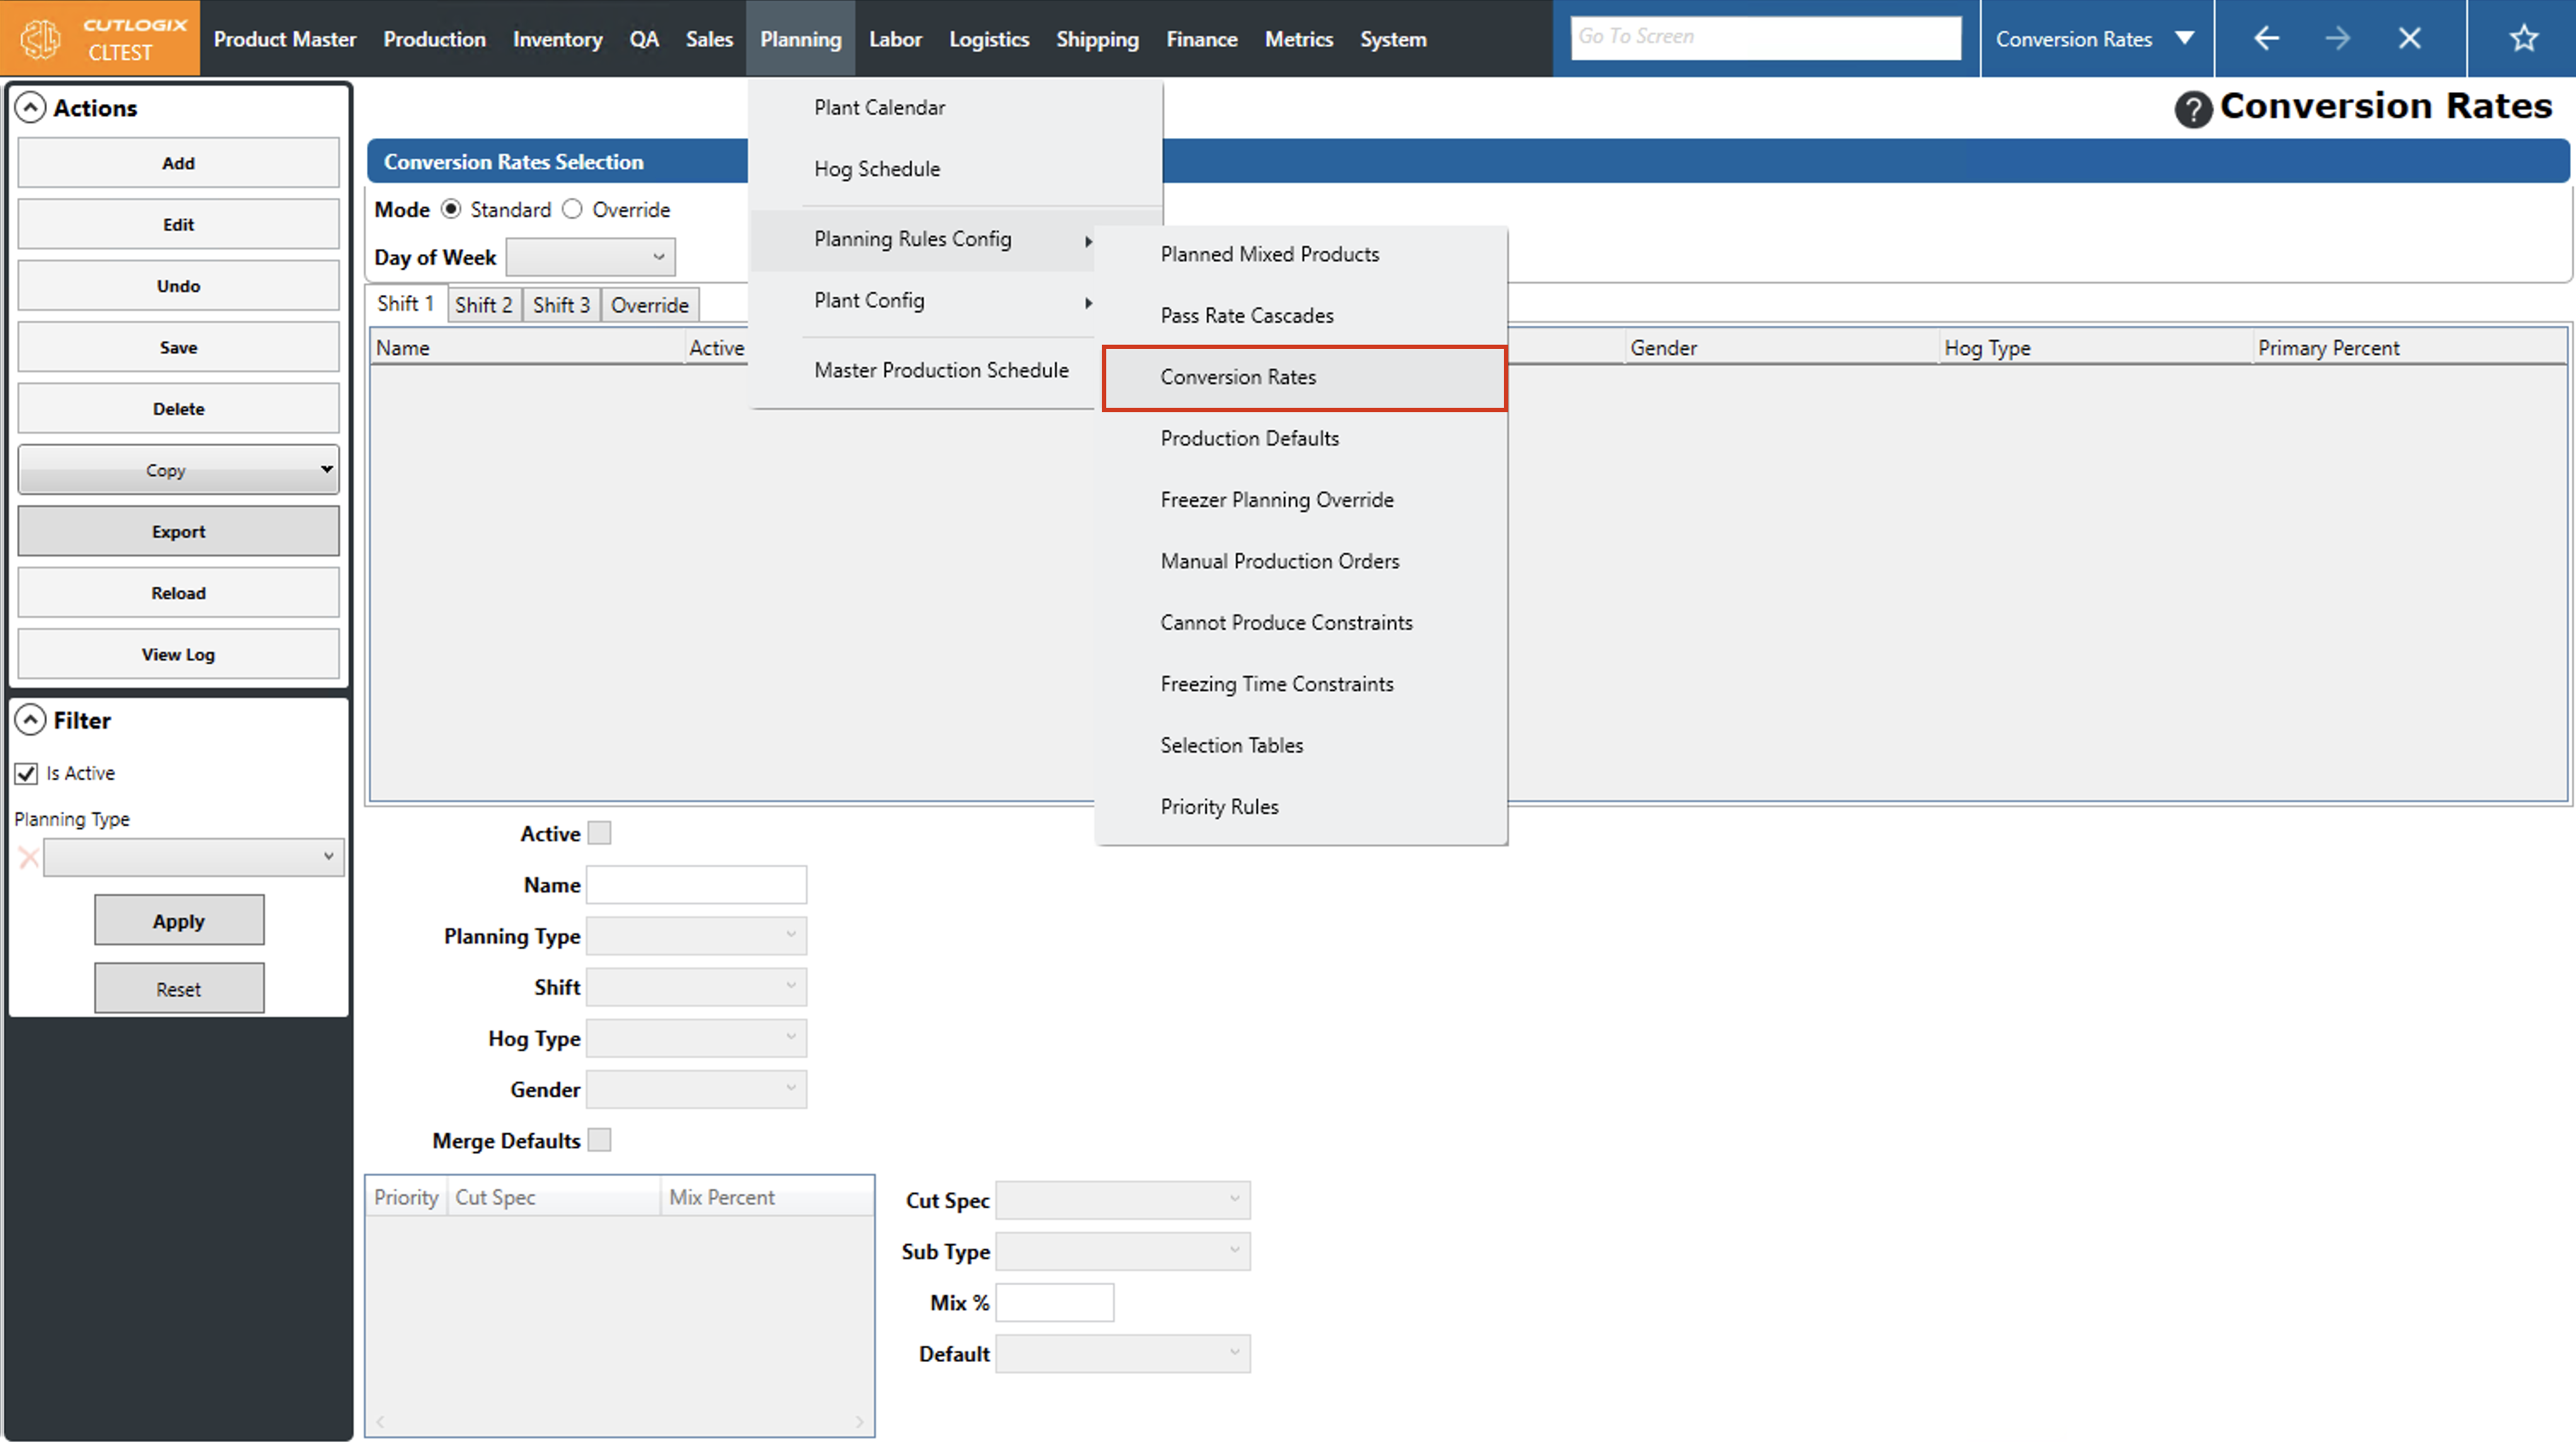
DemoStep 1: Navigate to the "Conversion Rates" page (Under the Planning menu → Planning Rules Config → Conversion Rates).
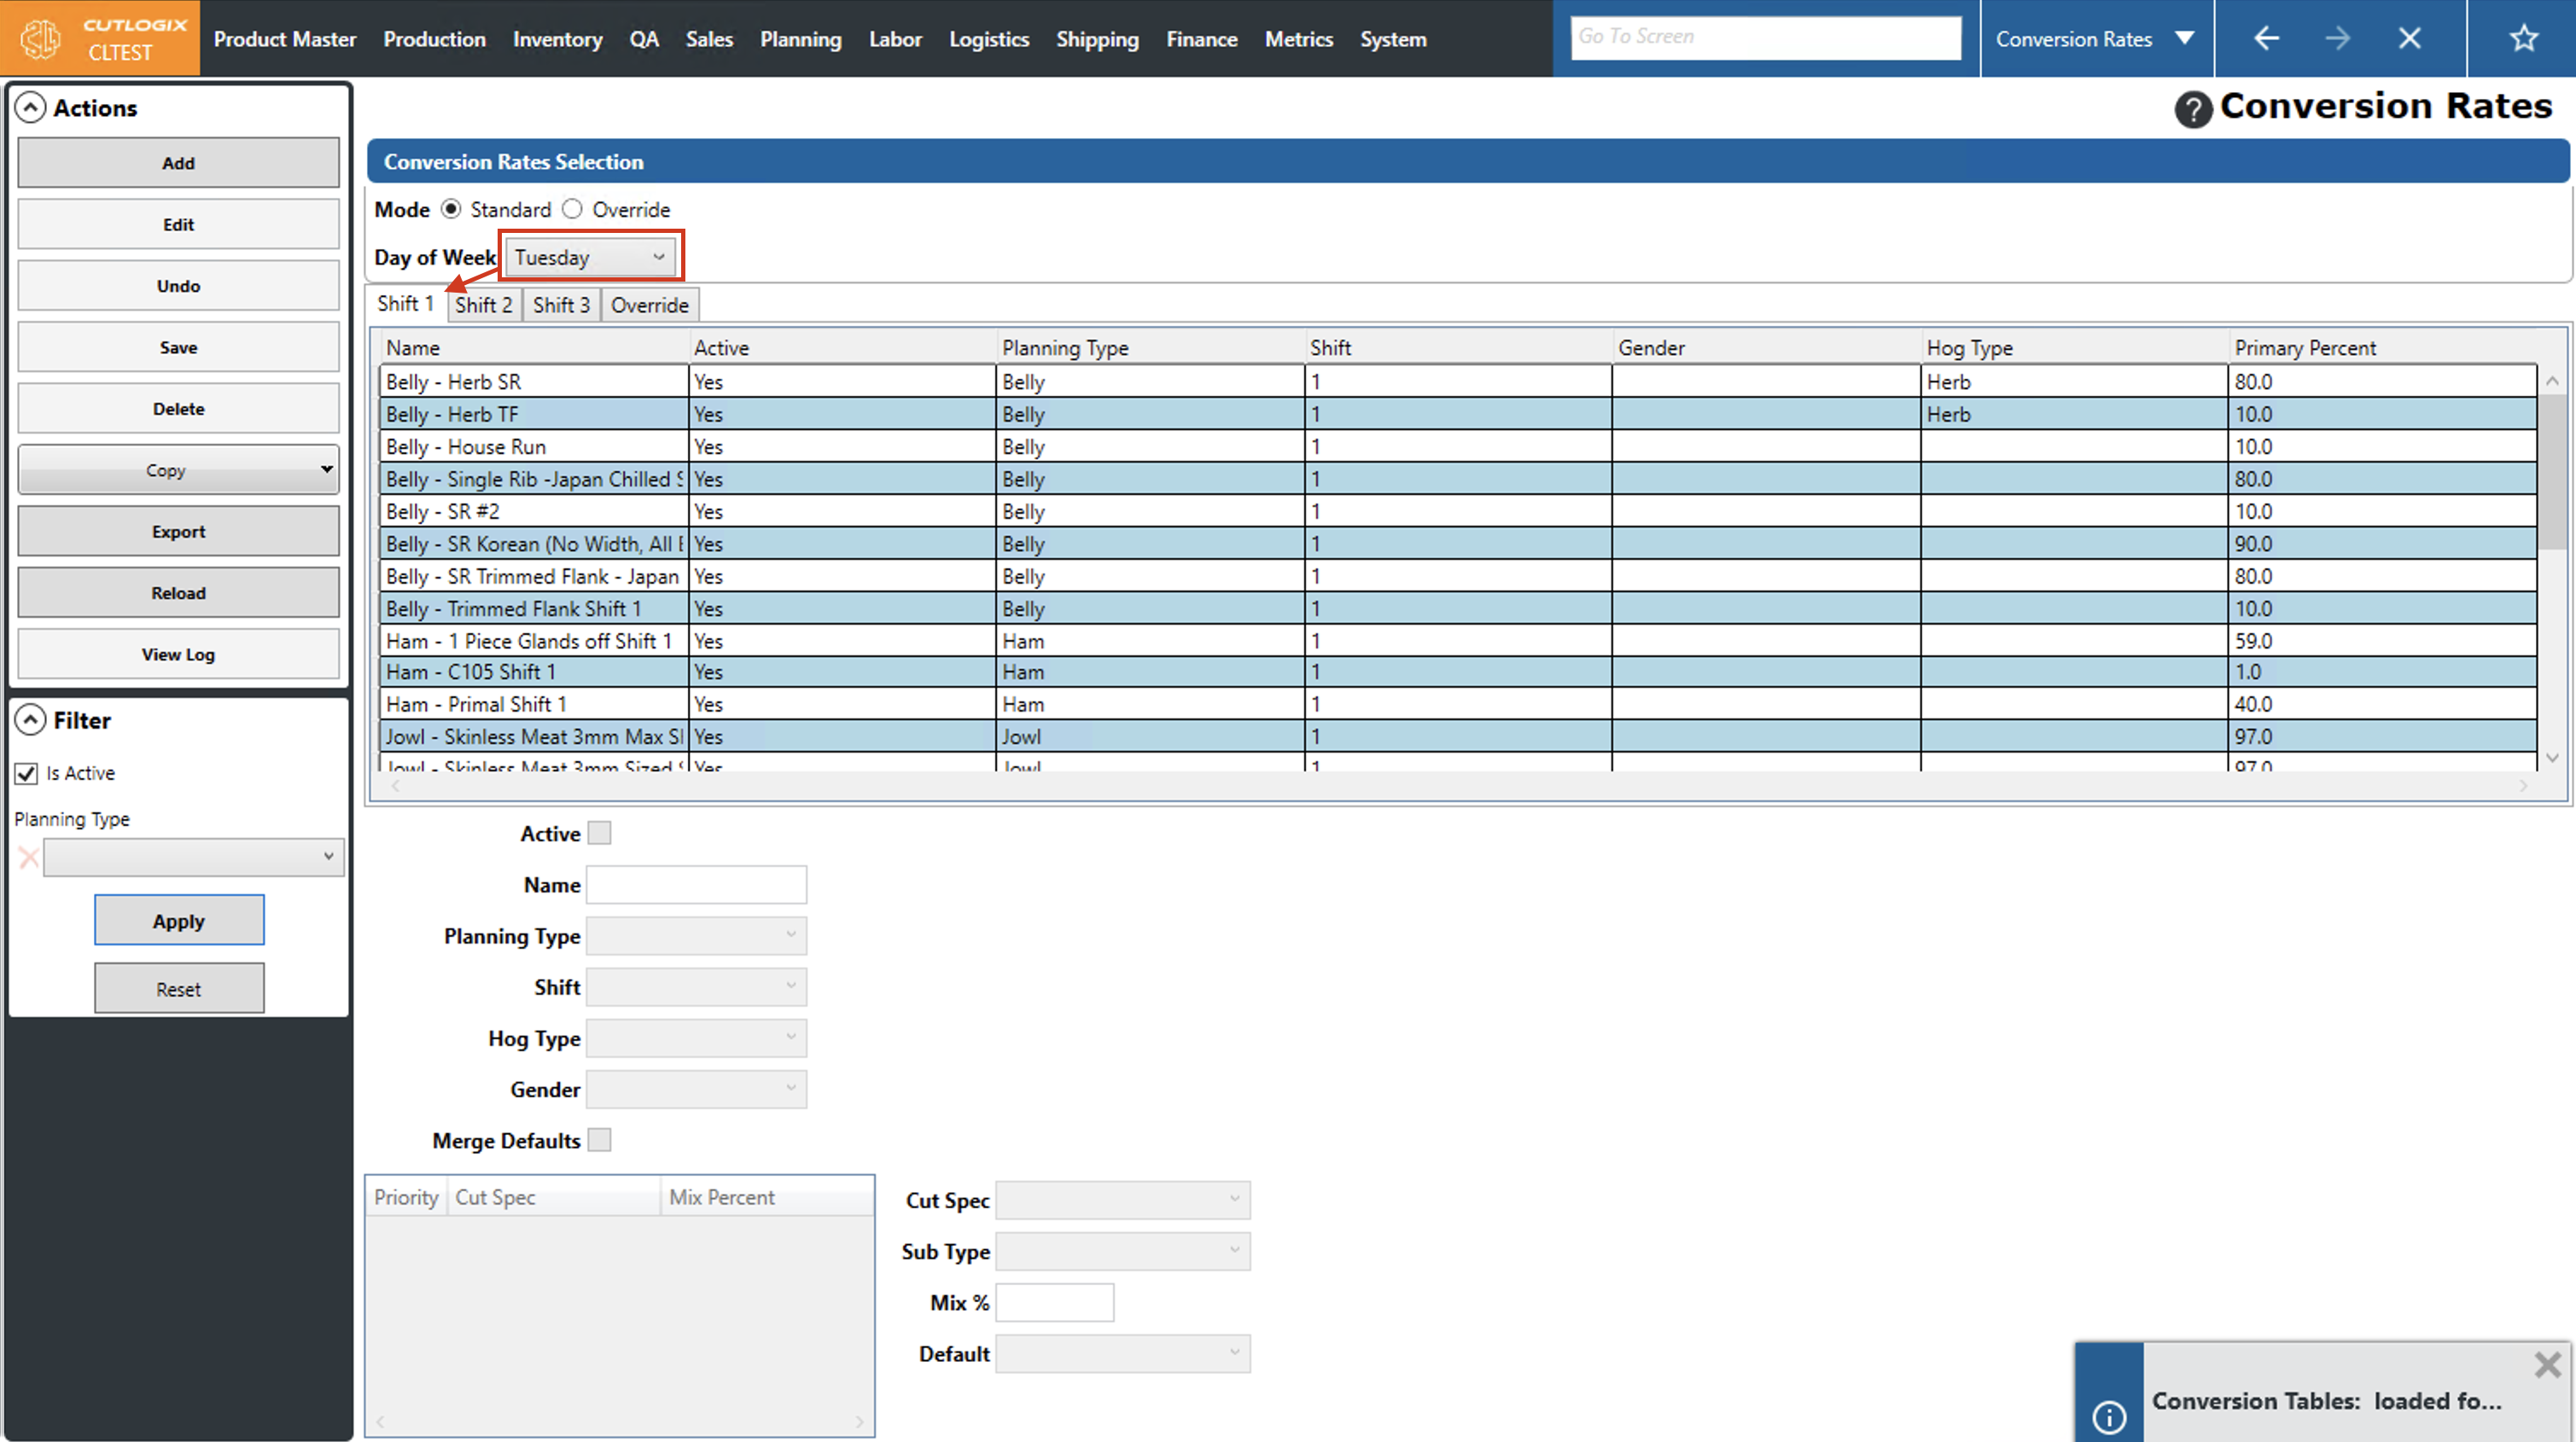
Step 2: Select a day of the week from the dropdown list that you want to add default conversion rates for using the "Day of Week" dropdown list, then click on the shift tab that you want to add it to.
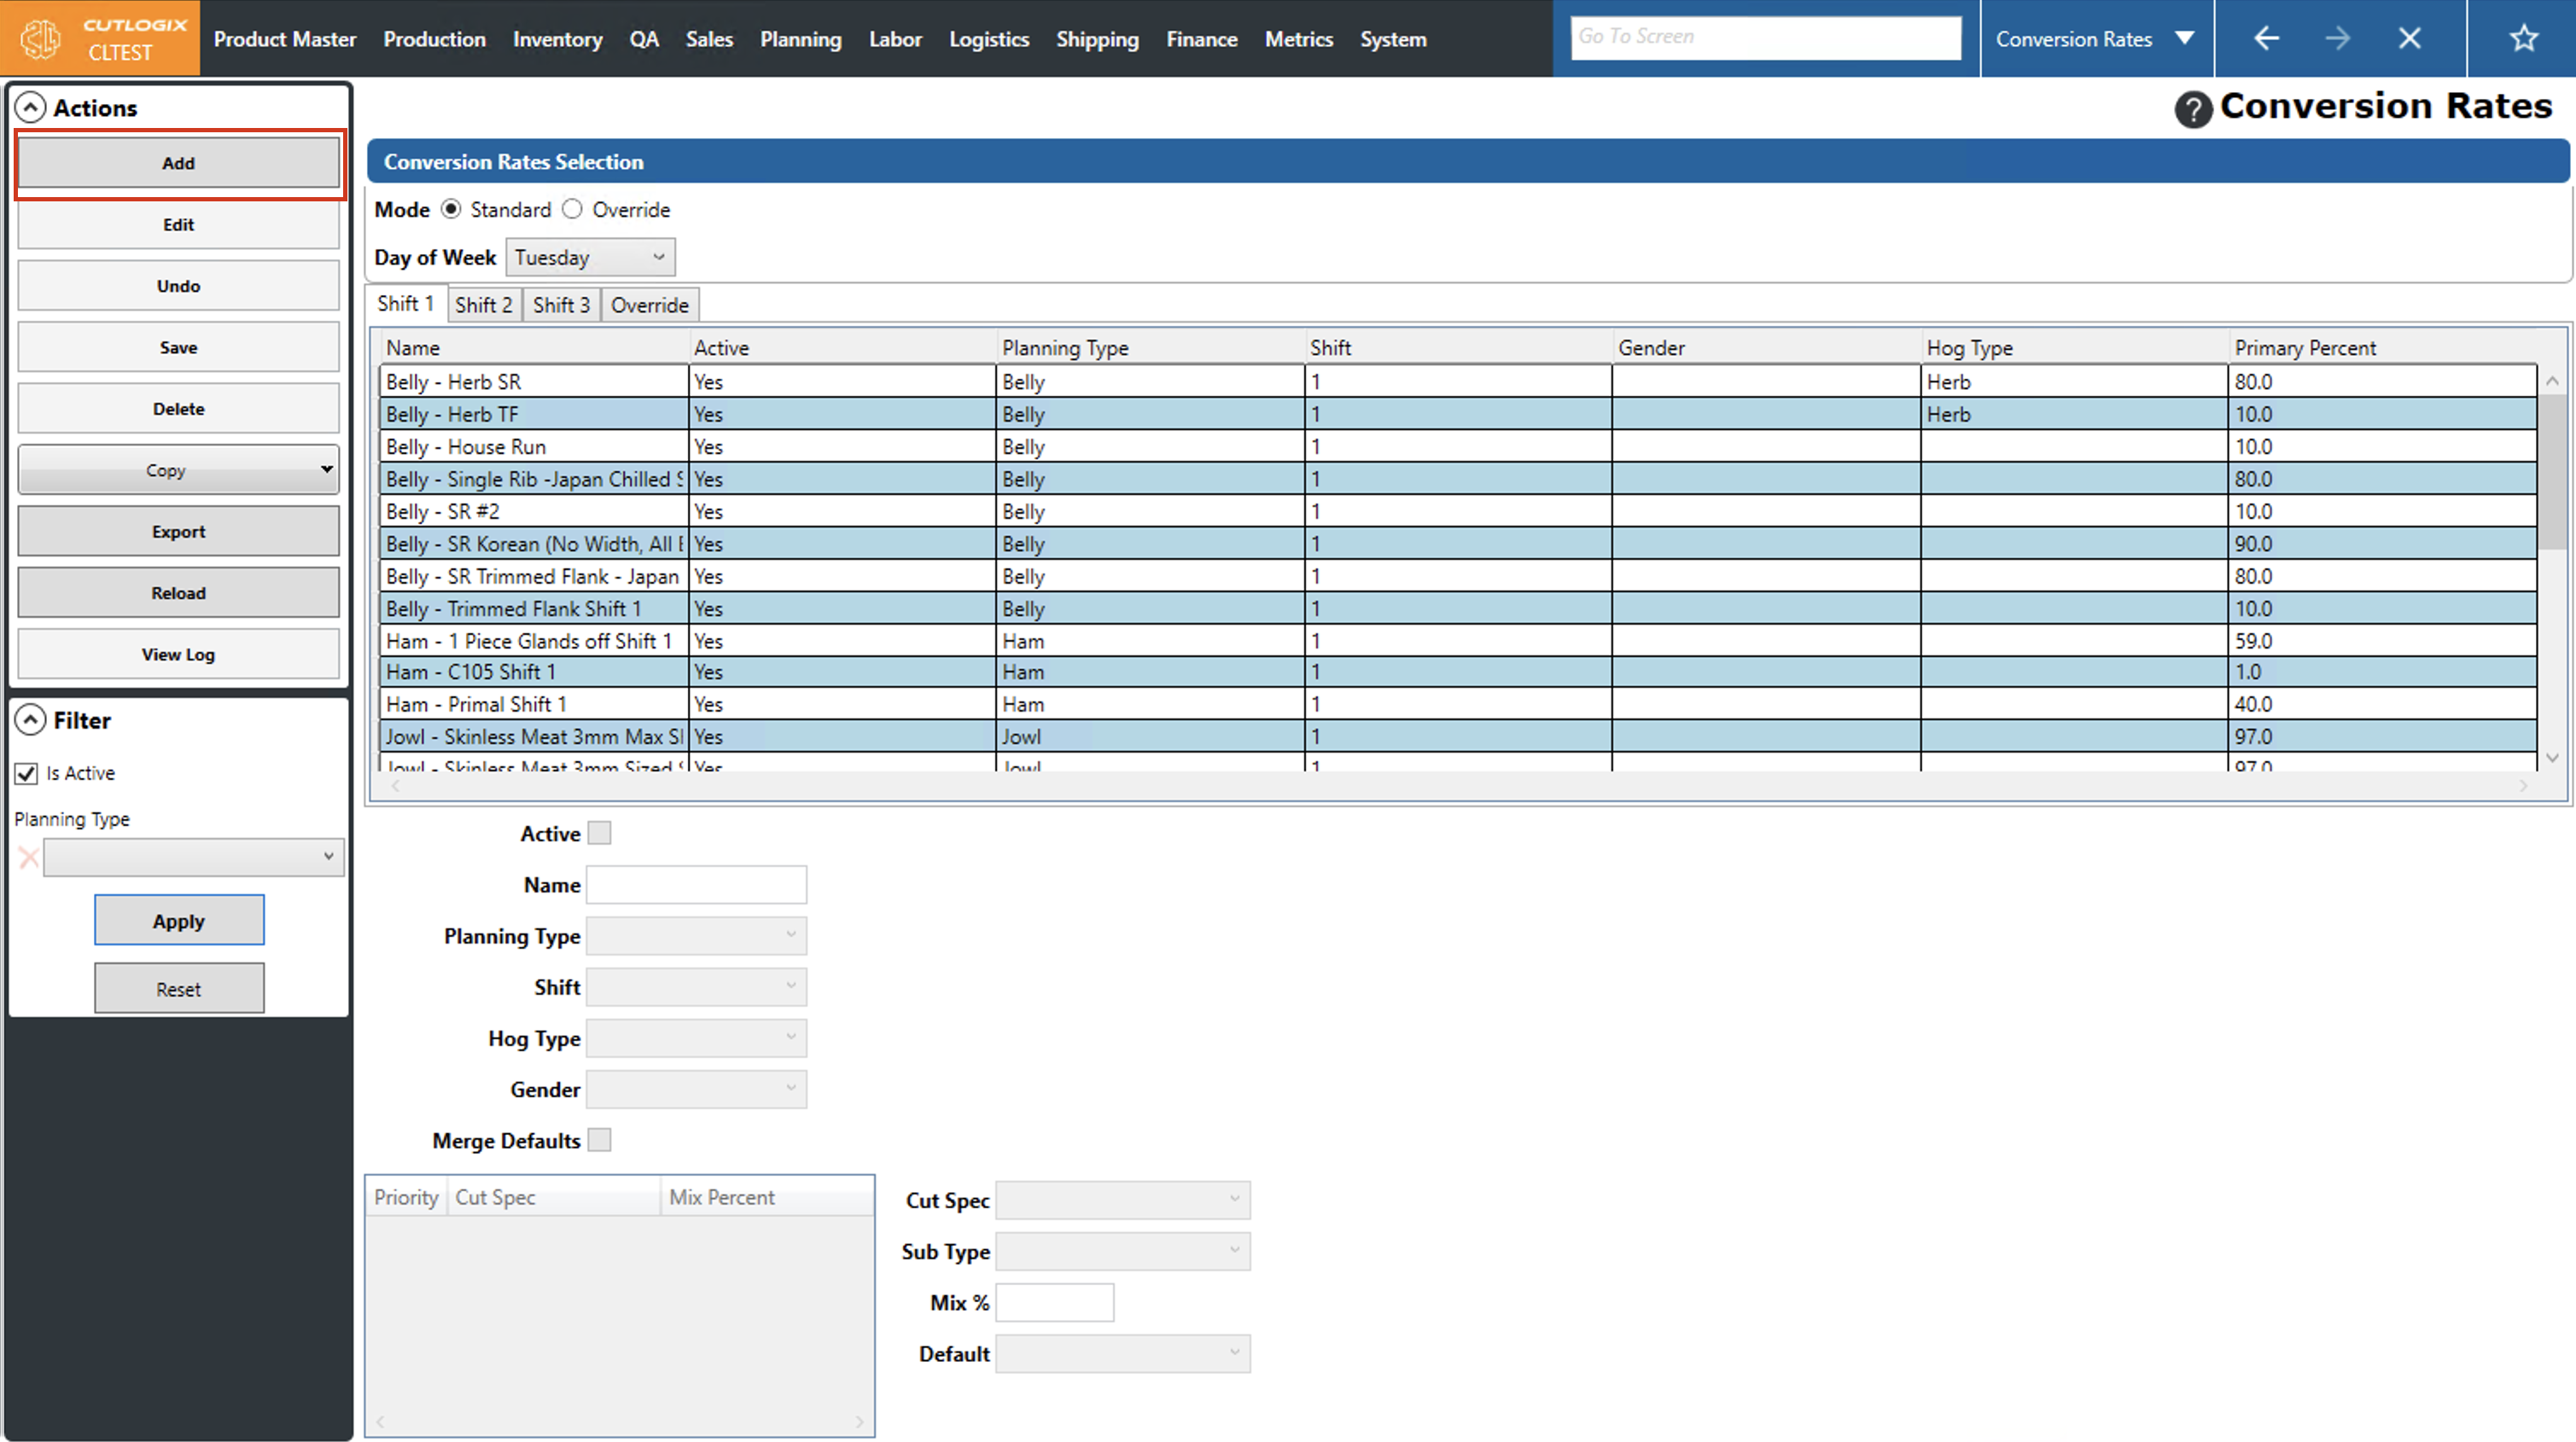
Step 3: Click the "Add" button in the actions panel.
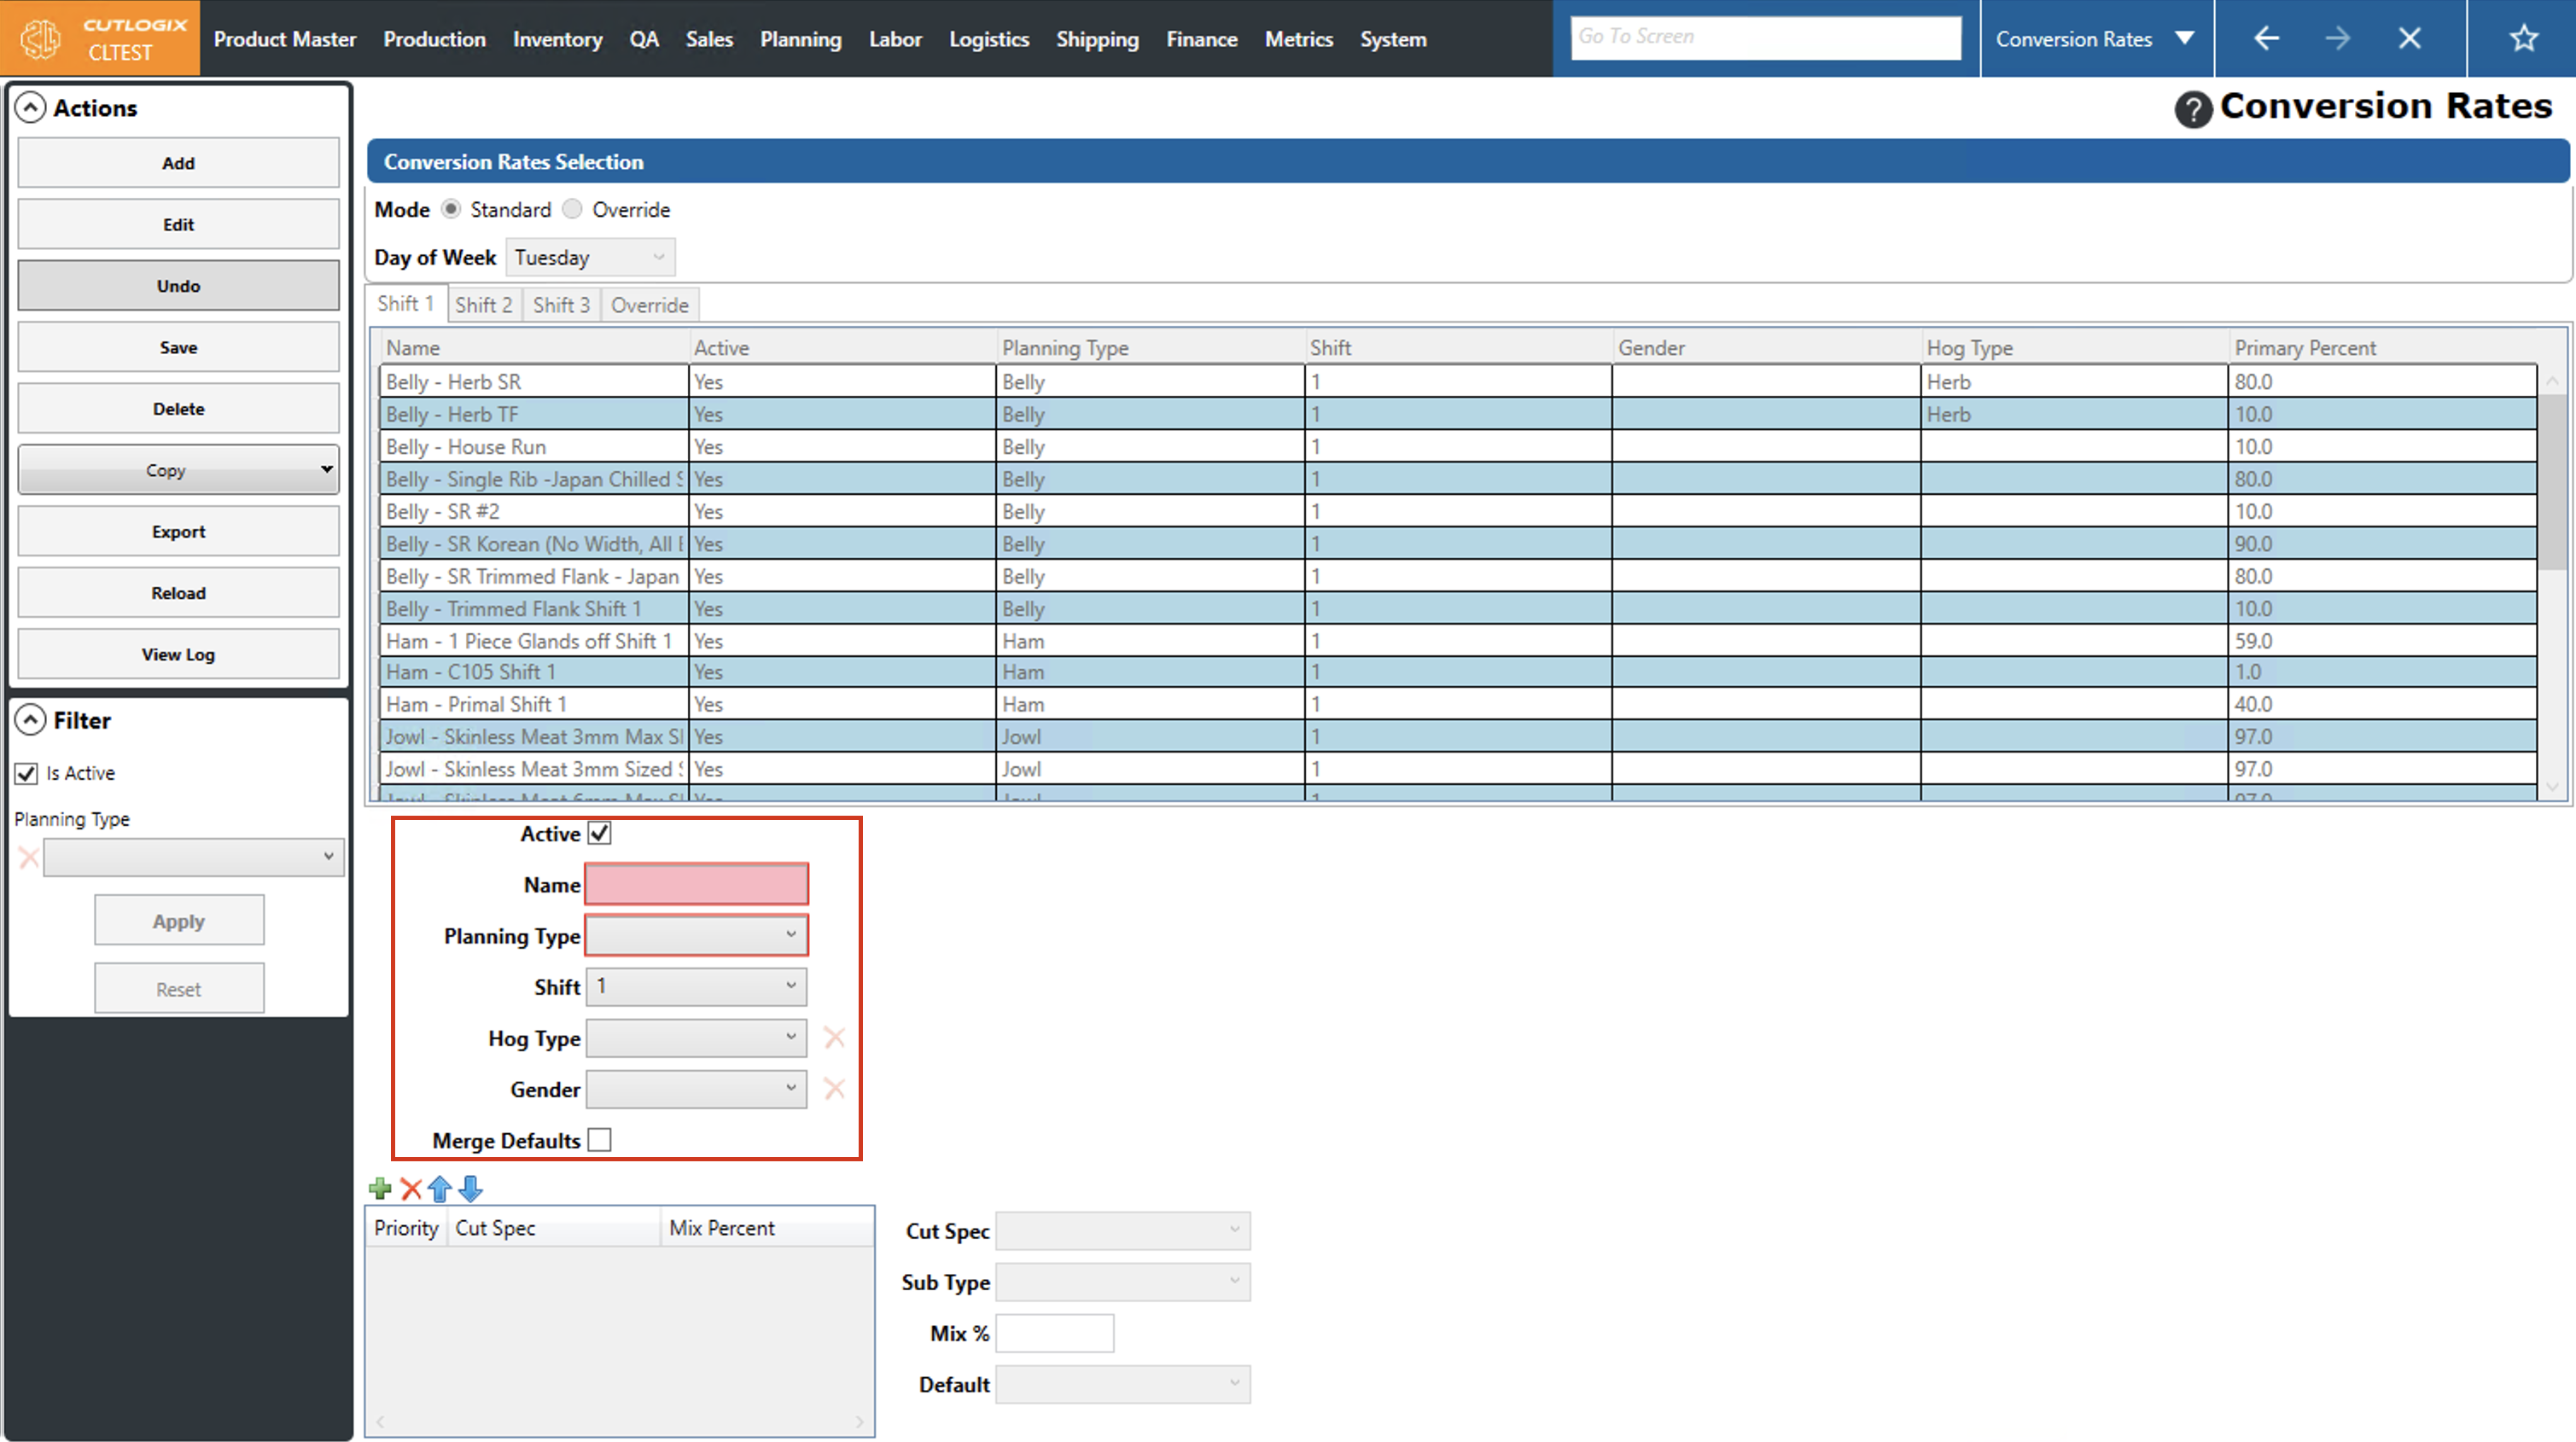
Step 4: This opens some temporary tabs at the bottom of the screen where information about the conversion rate can be entered. Required fields are highlighted in red and must be entered to save the conversion rate. The required fields are as follows:
• Name: The name of the conversion rate.
• Planning Type: The planning type of the conversion rate.
• Name: The name of the conversion rate.
• Planning Type: The planning type of the conversion rate.
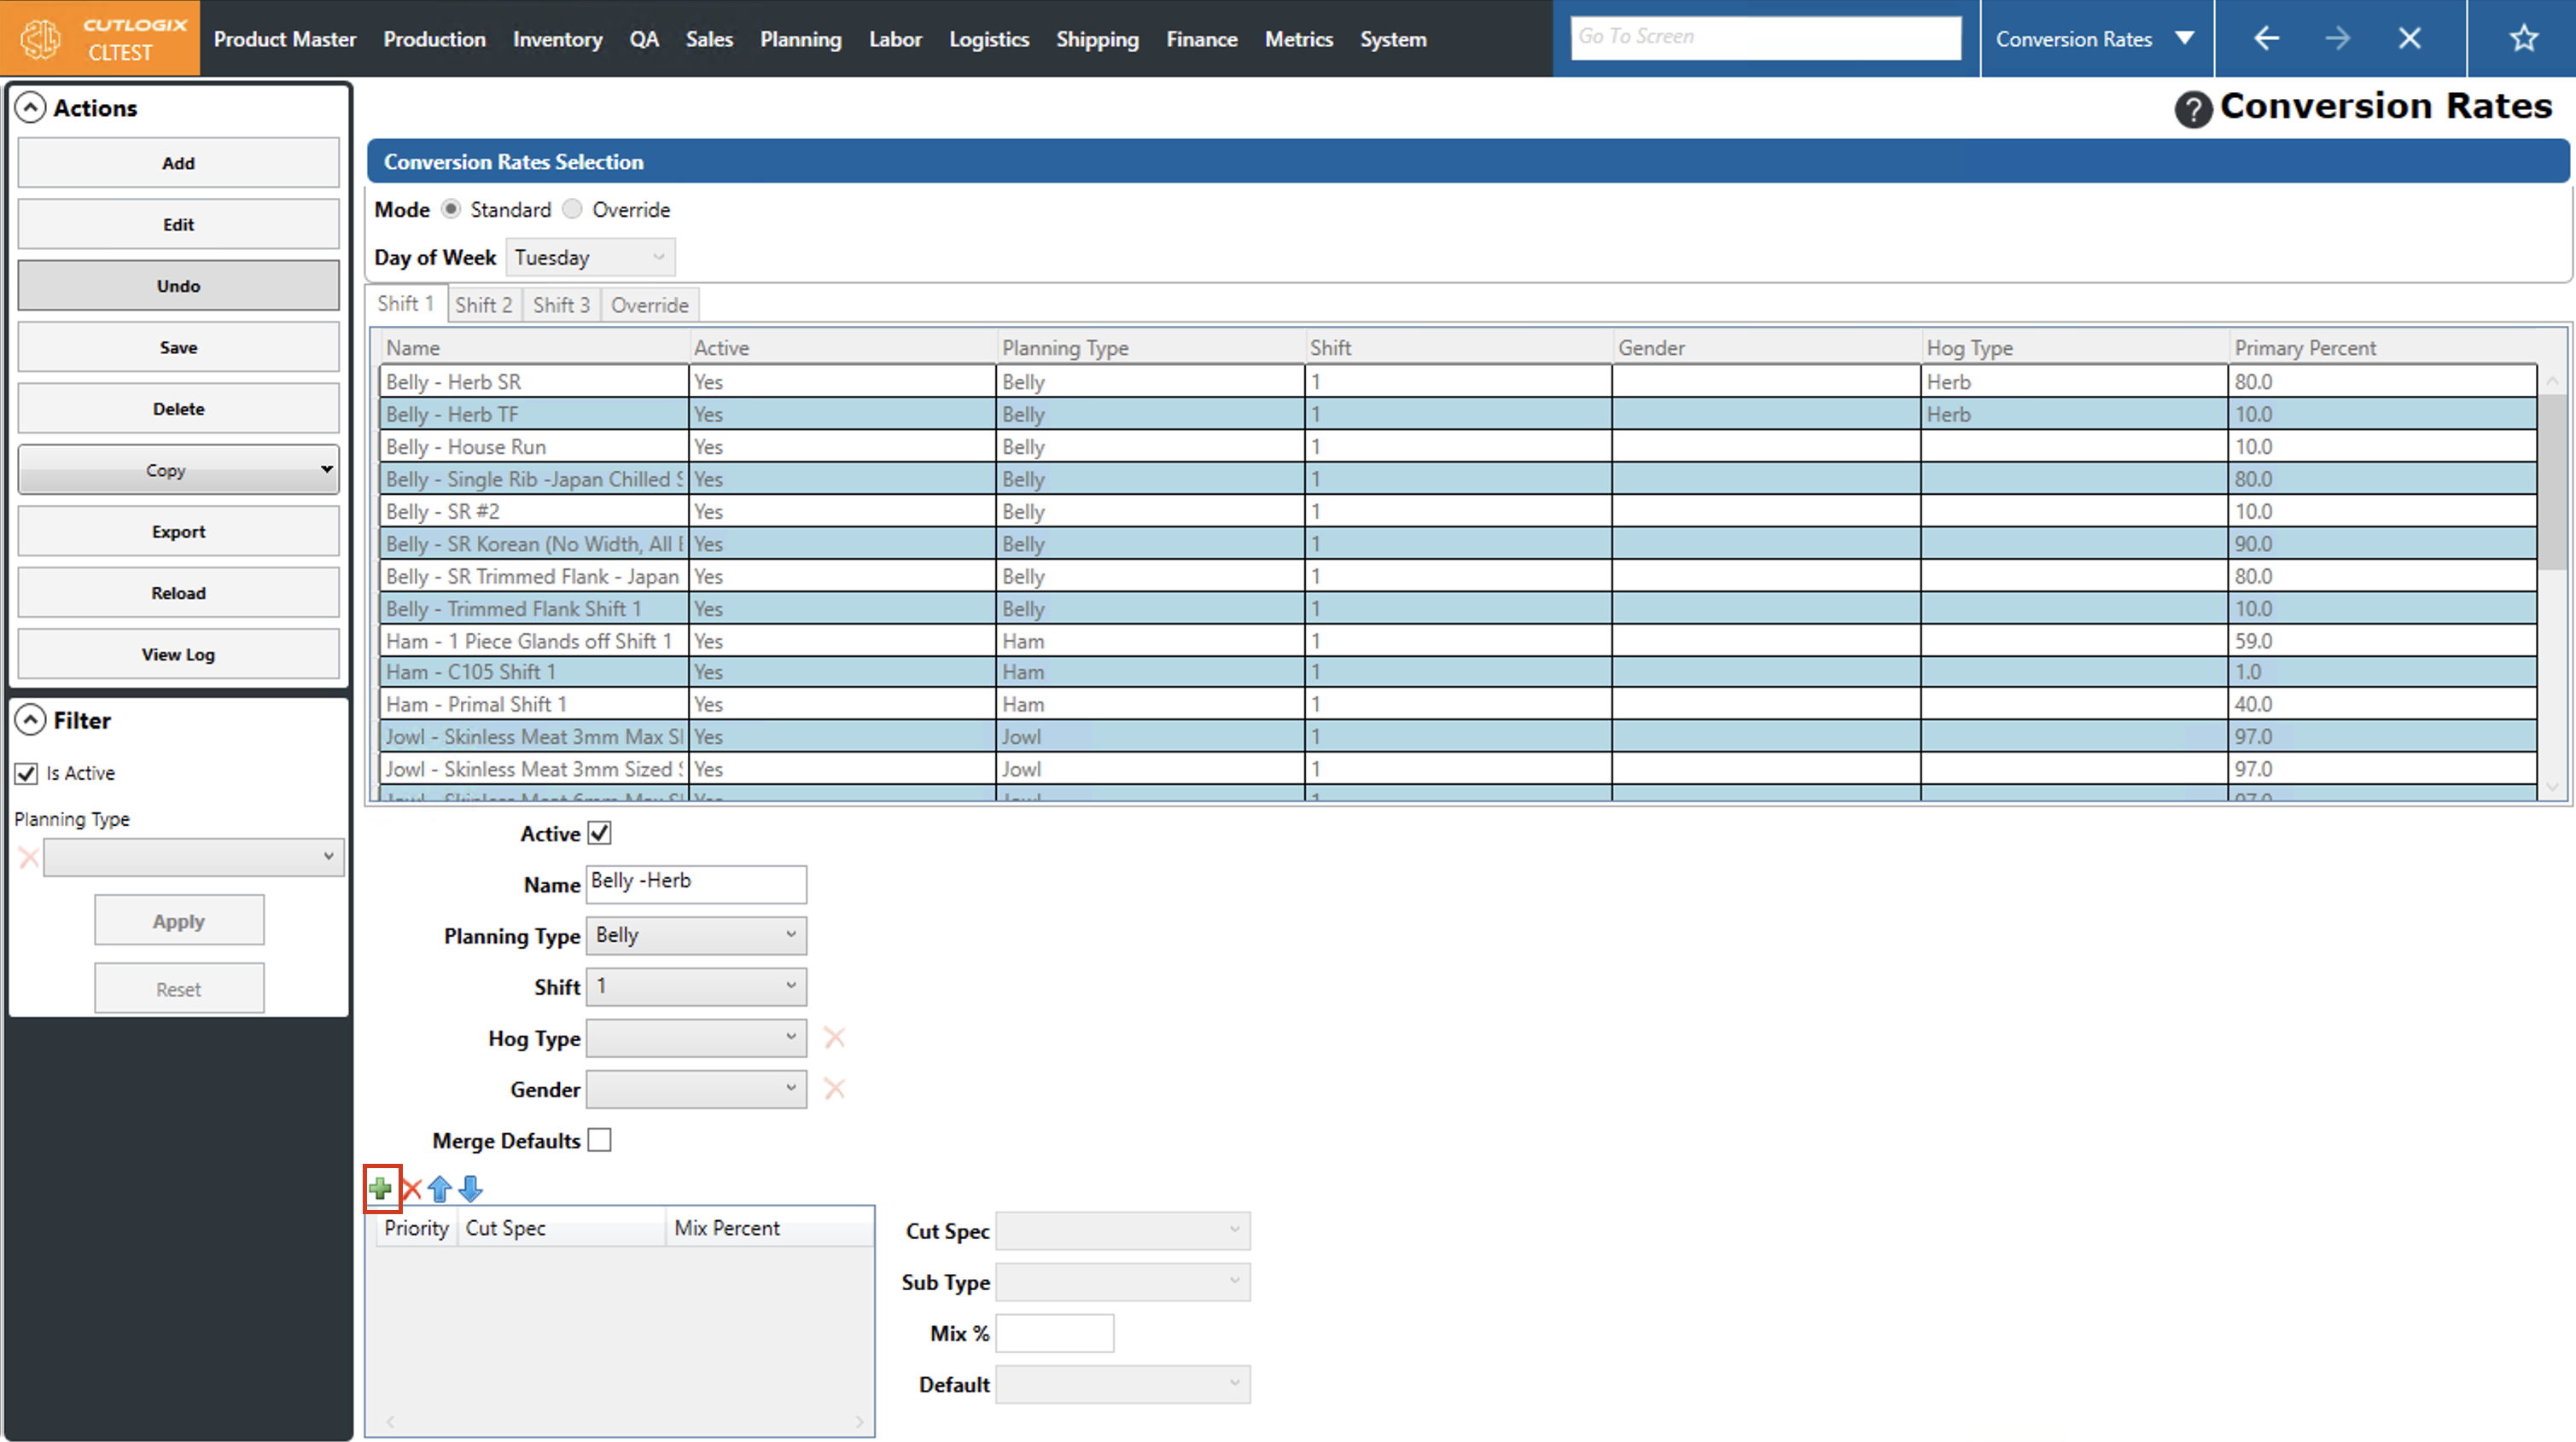
Step 5: Next you can add conversion rate records to the table at the bottom of the page. This is where you're going to specify what products can be made for that planning type, and at what priority and percentage they should be made at. Click the green "+" button to add a new record.
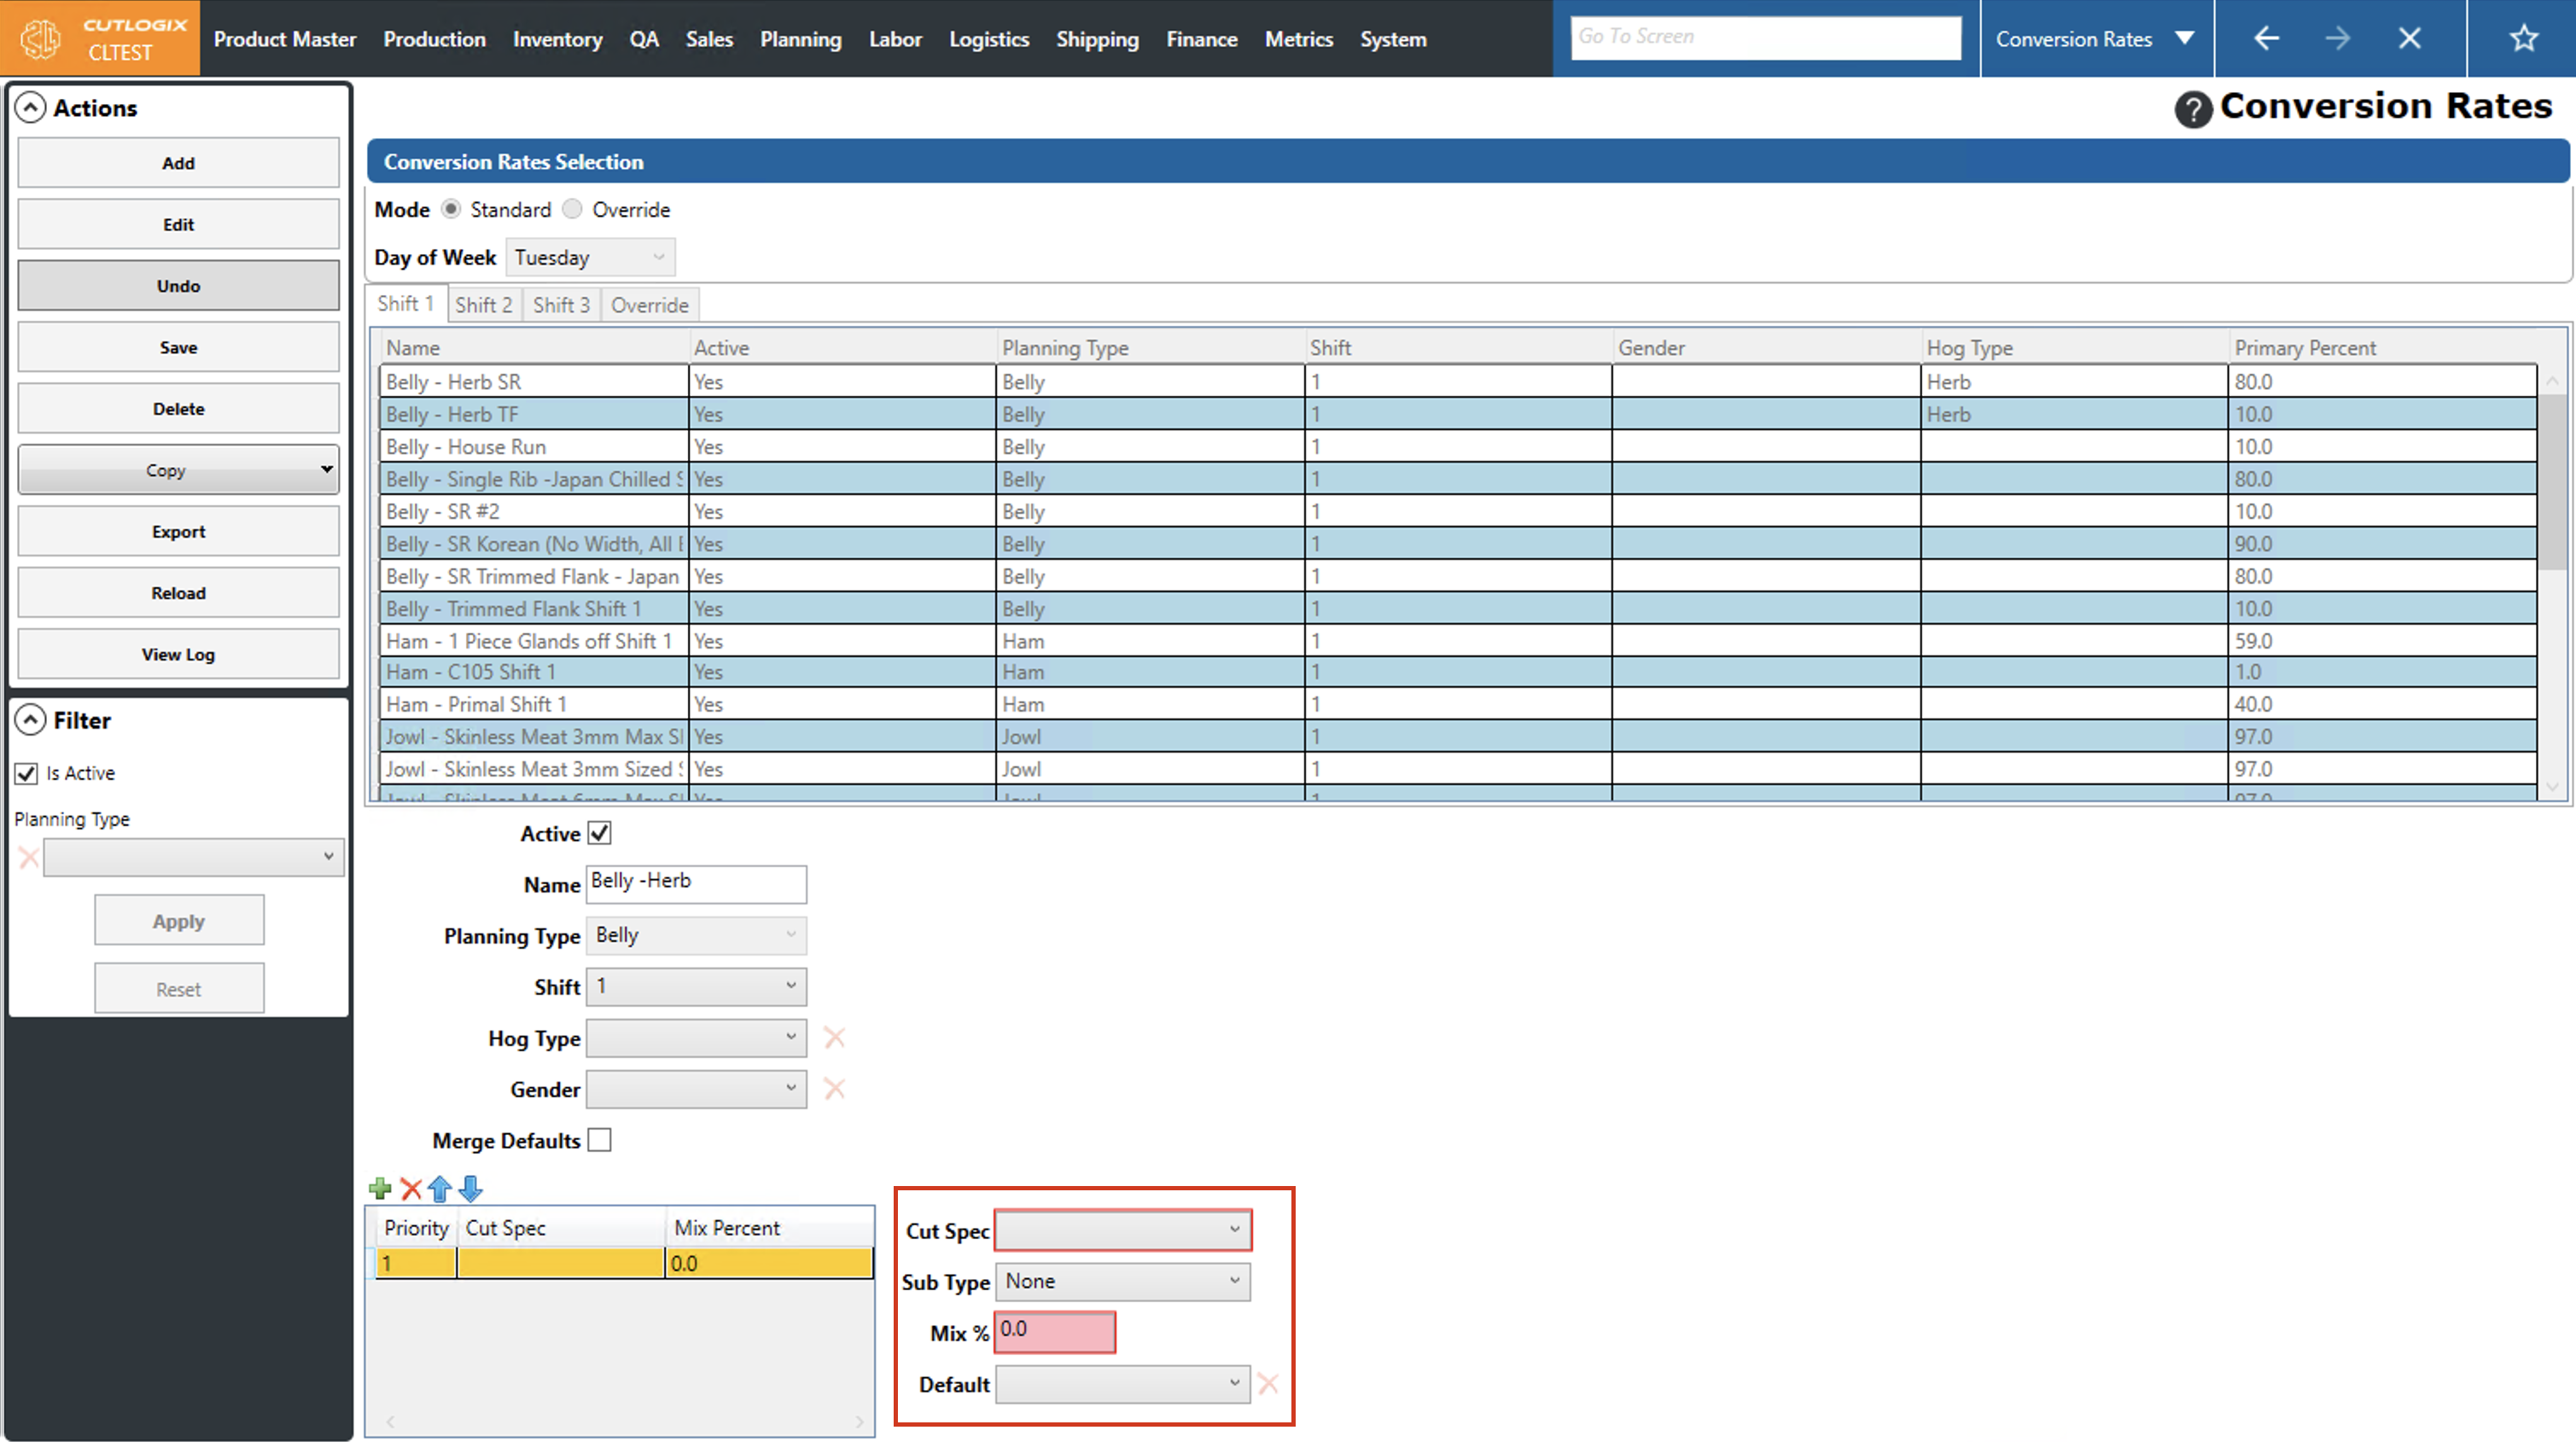
Step 6: To the right of the table a few fields will appear for you to input information about the record. You'll need to enter the cut spec (from the dropdown list) and the min% that can be made into that cut spec. The Sub Type is an optional field.
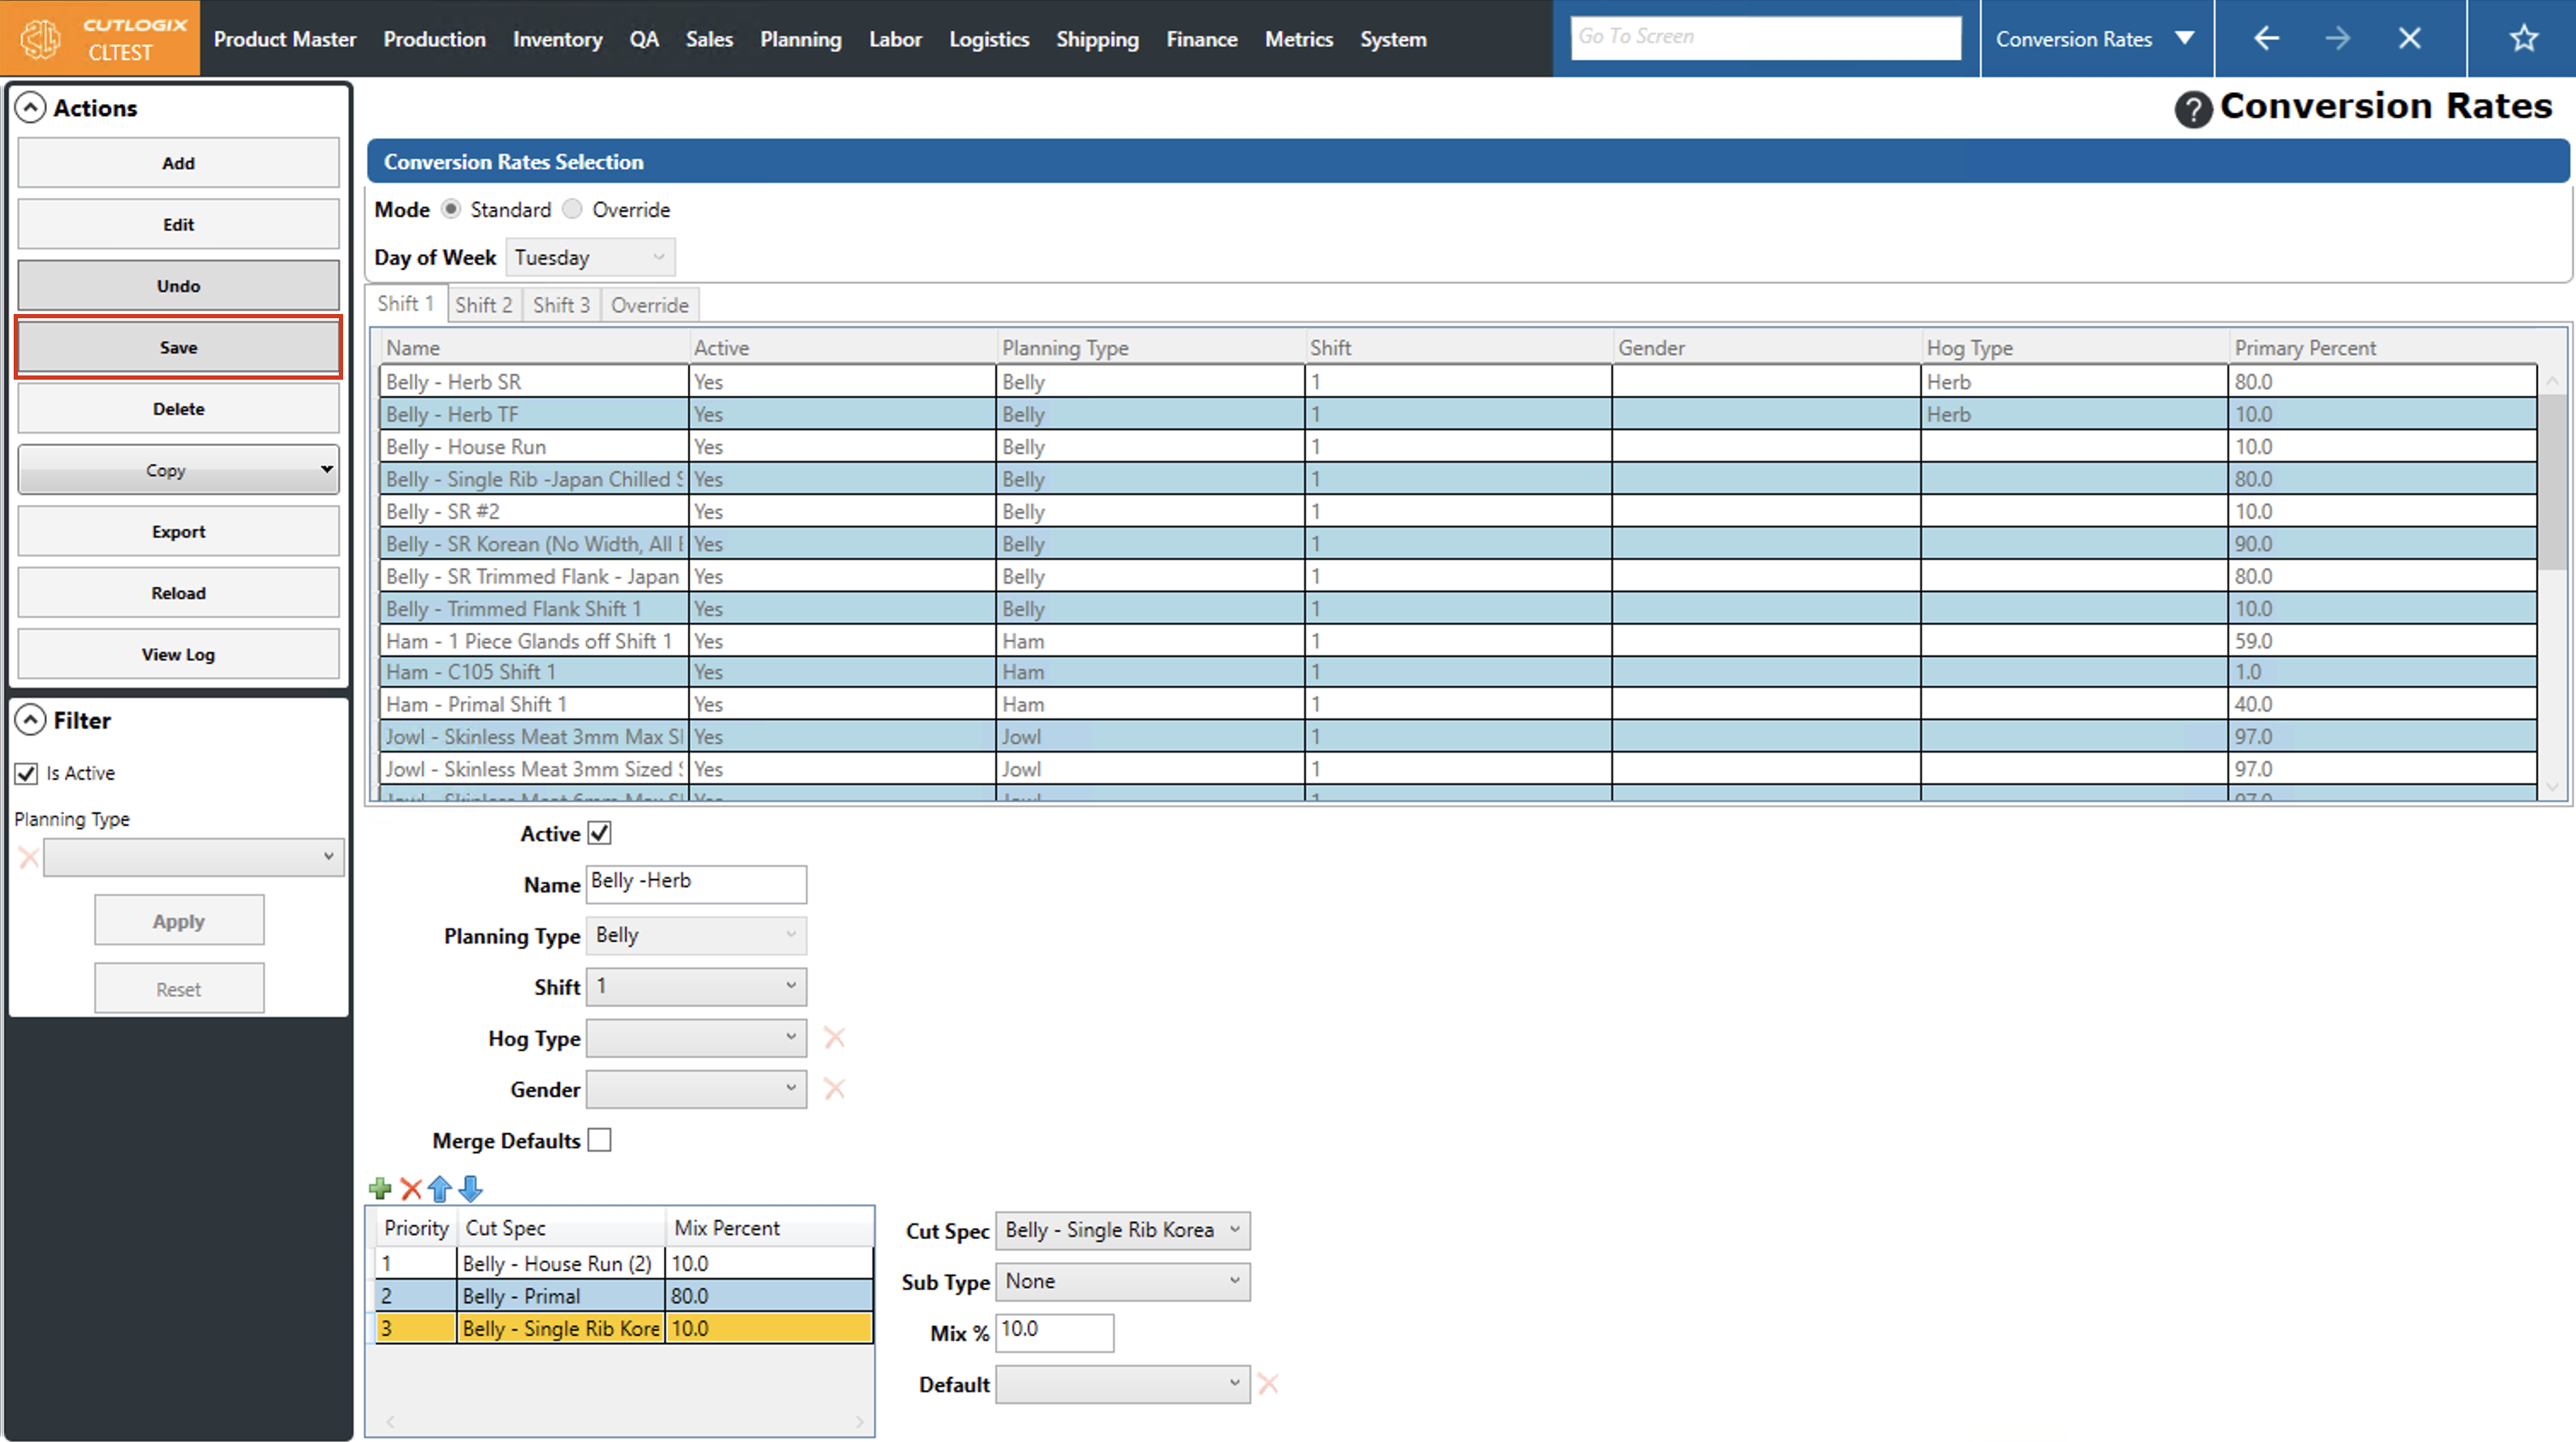
Step 7: You'll need to add enough records so that the total mix percentage is 100%. Repeat the above process to add more records. You can also rearrange the priority of the records by selecting the record that you want to move and then using the up/down arrows to move it up or down in the list.
Step 8: Once the total mix % equals 100%, you'll be able to save the conversion rate. Click the "Save" button in the actions panel to save the new conversion rate. If you don't want to save the new conversion rate, clicking "Undo" in the actions panel will discard the conversion rate and it will not be added to the conversion rates list.
How to Edit Default Conversion Rates
DemoStep 1: Navigate to the "Conversion Rates" page (Under the Planning menu → Planning Rules Config → Conversion Rates).
Step 2: Click on the conversion rate that you want to modify (it will be highlighted in orange once selected), then click the "Edit" button in the actions panel.
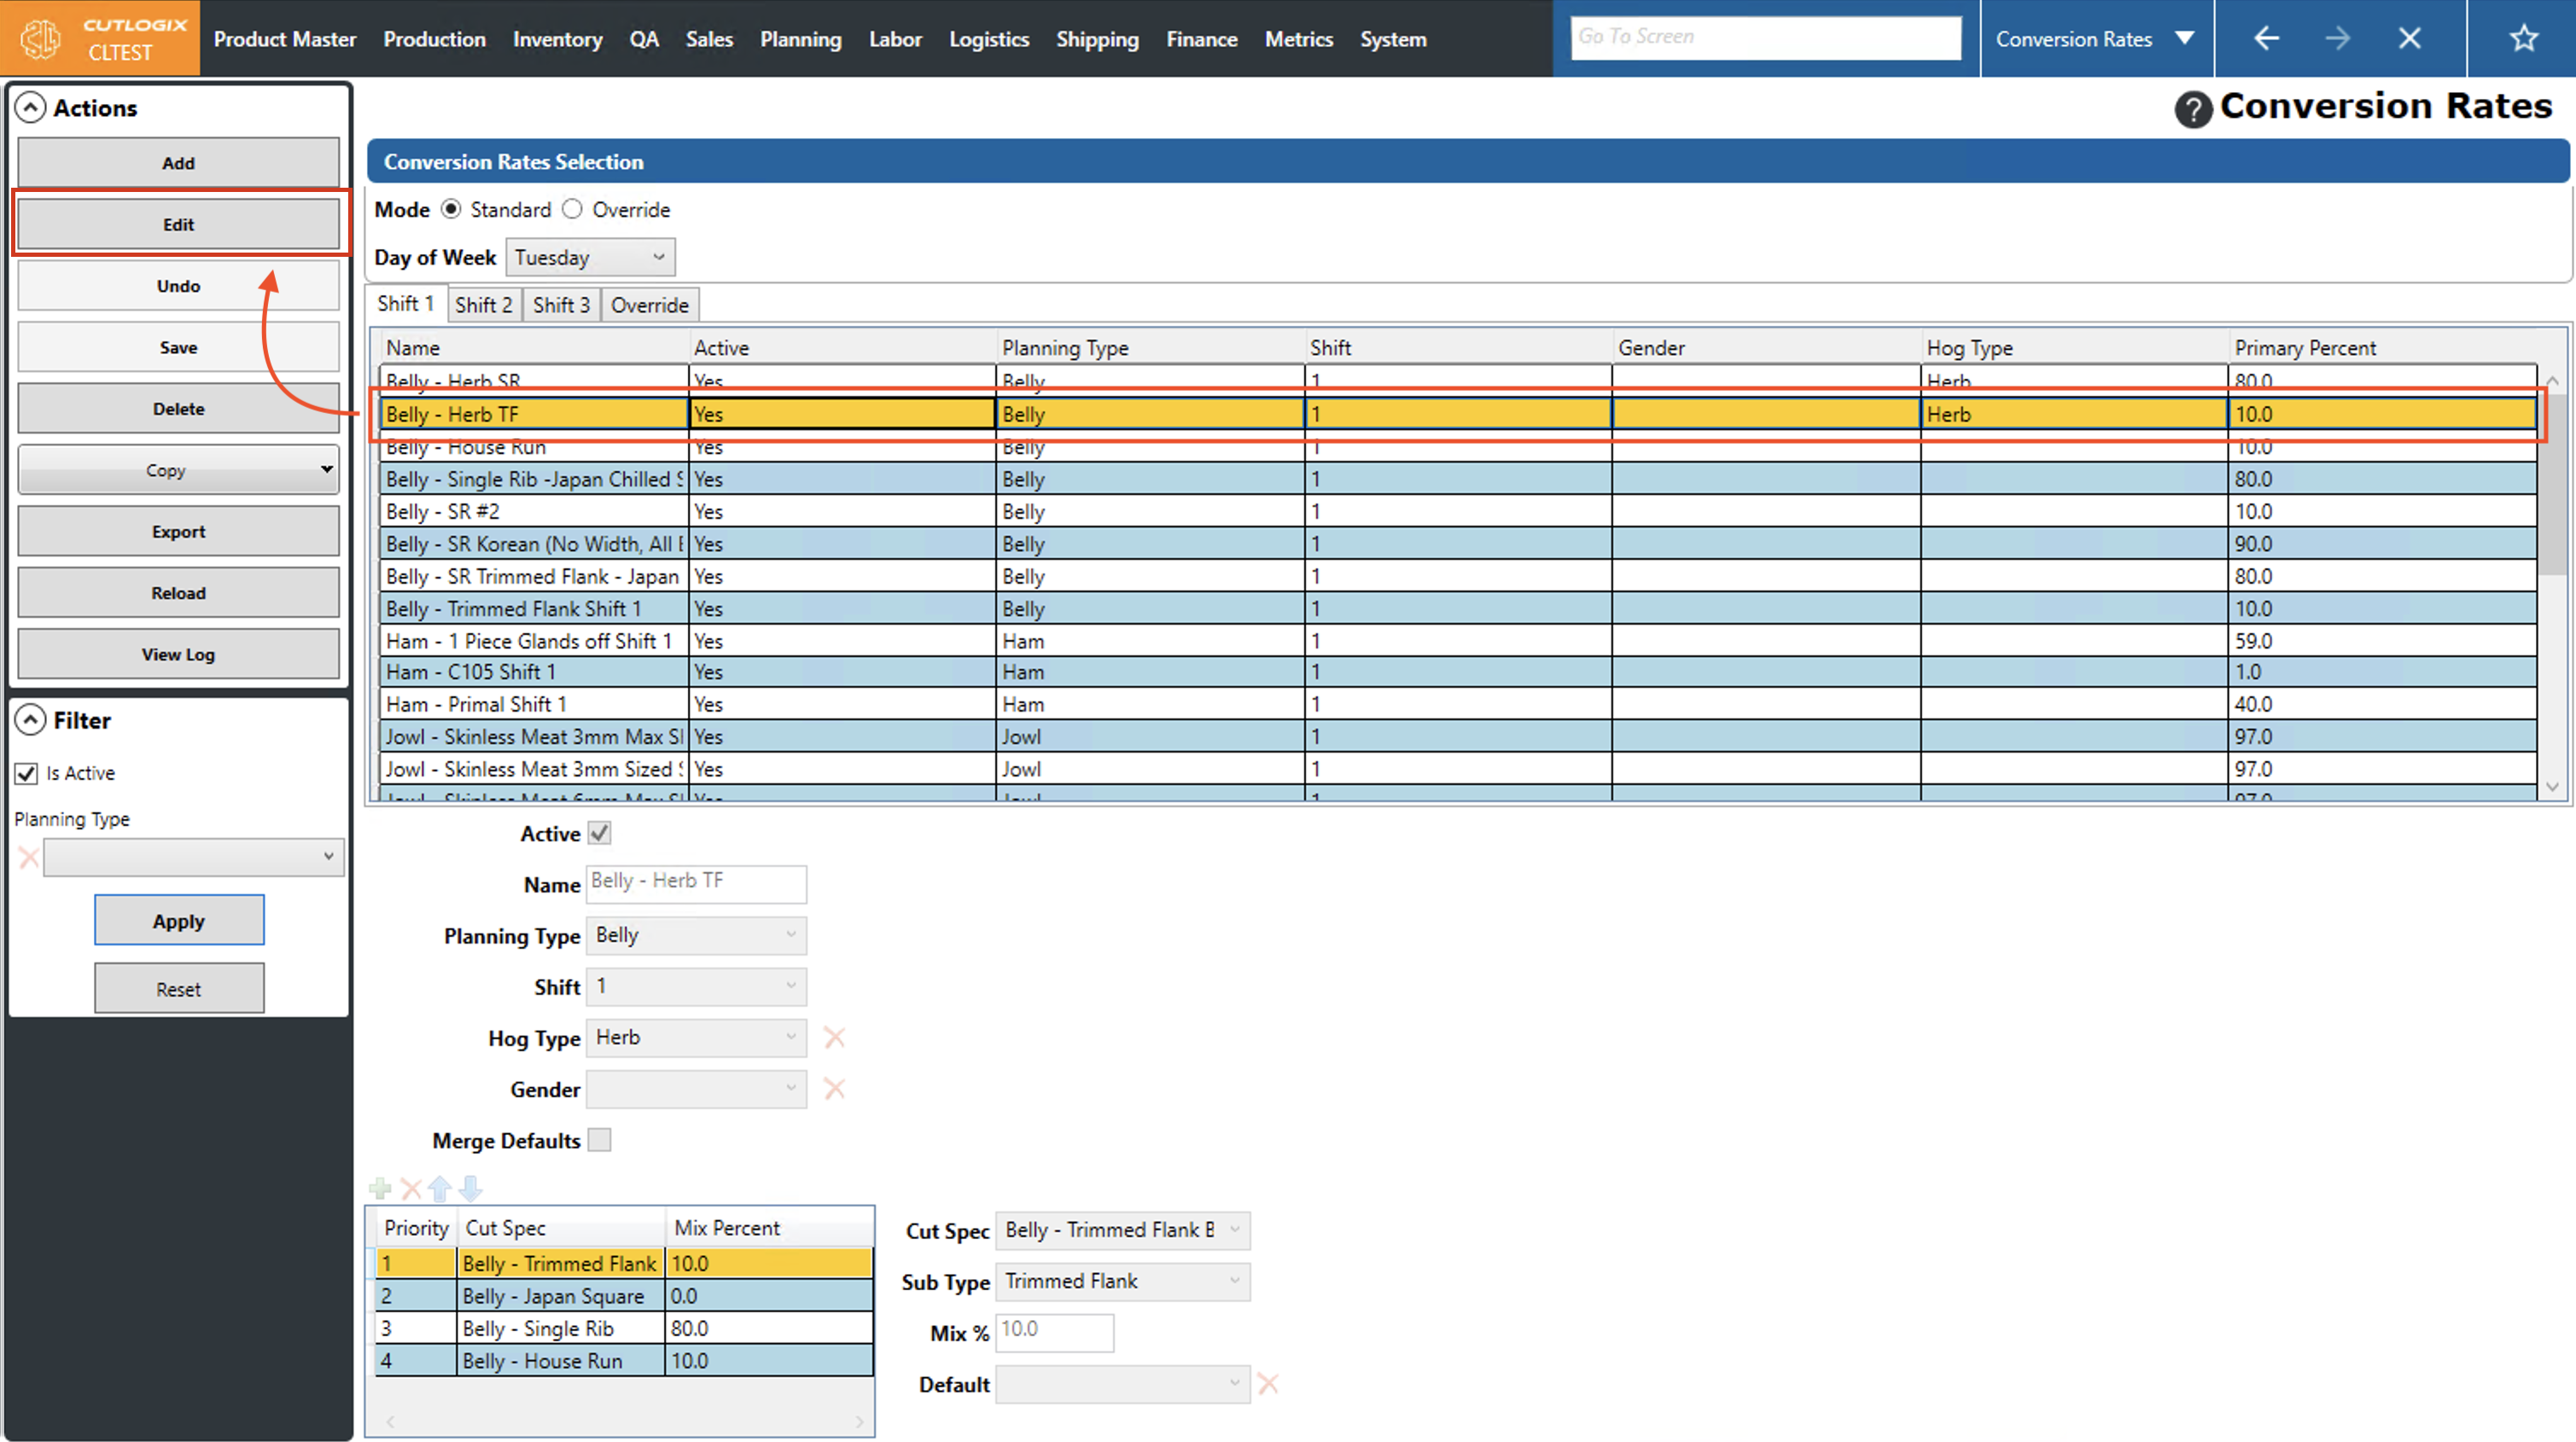
Step 3: The fields at the bottom of the page will now be editable. You can modify information about the conversion rate such as the name, the shift it applies to, the hog type and gender. You can also make changes to the table within the conversion rate, managing cut spec priorities, mix percents, as well as adding and removing records on it.
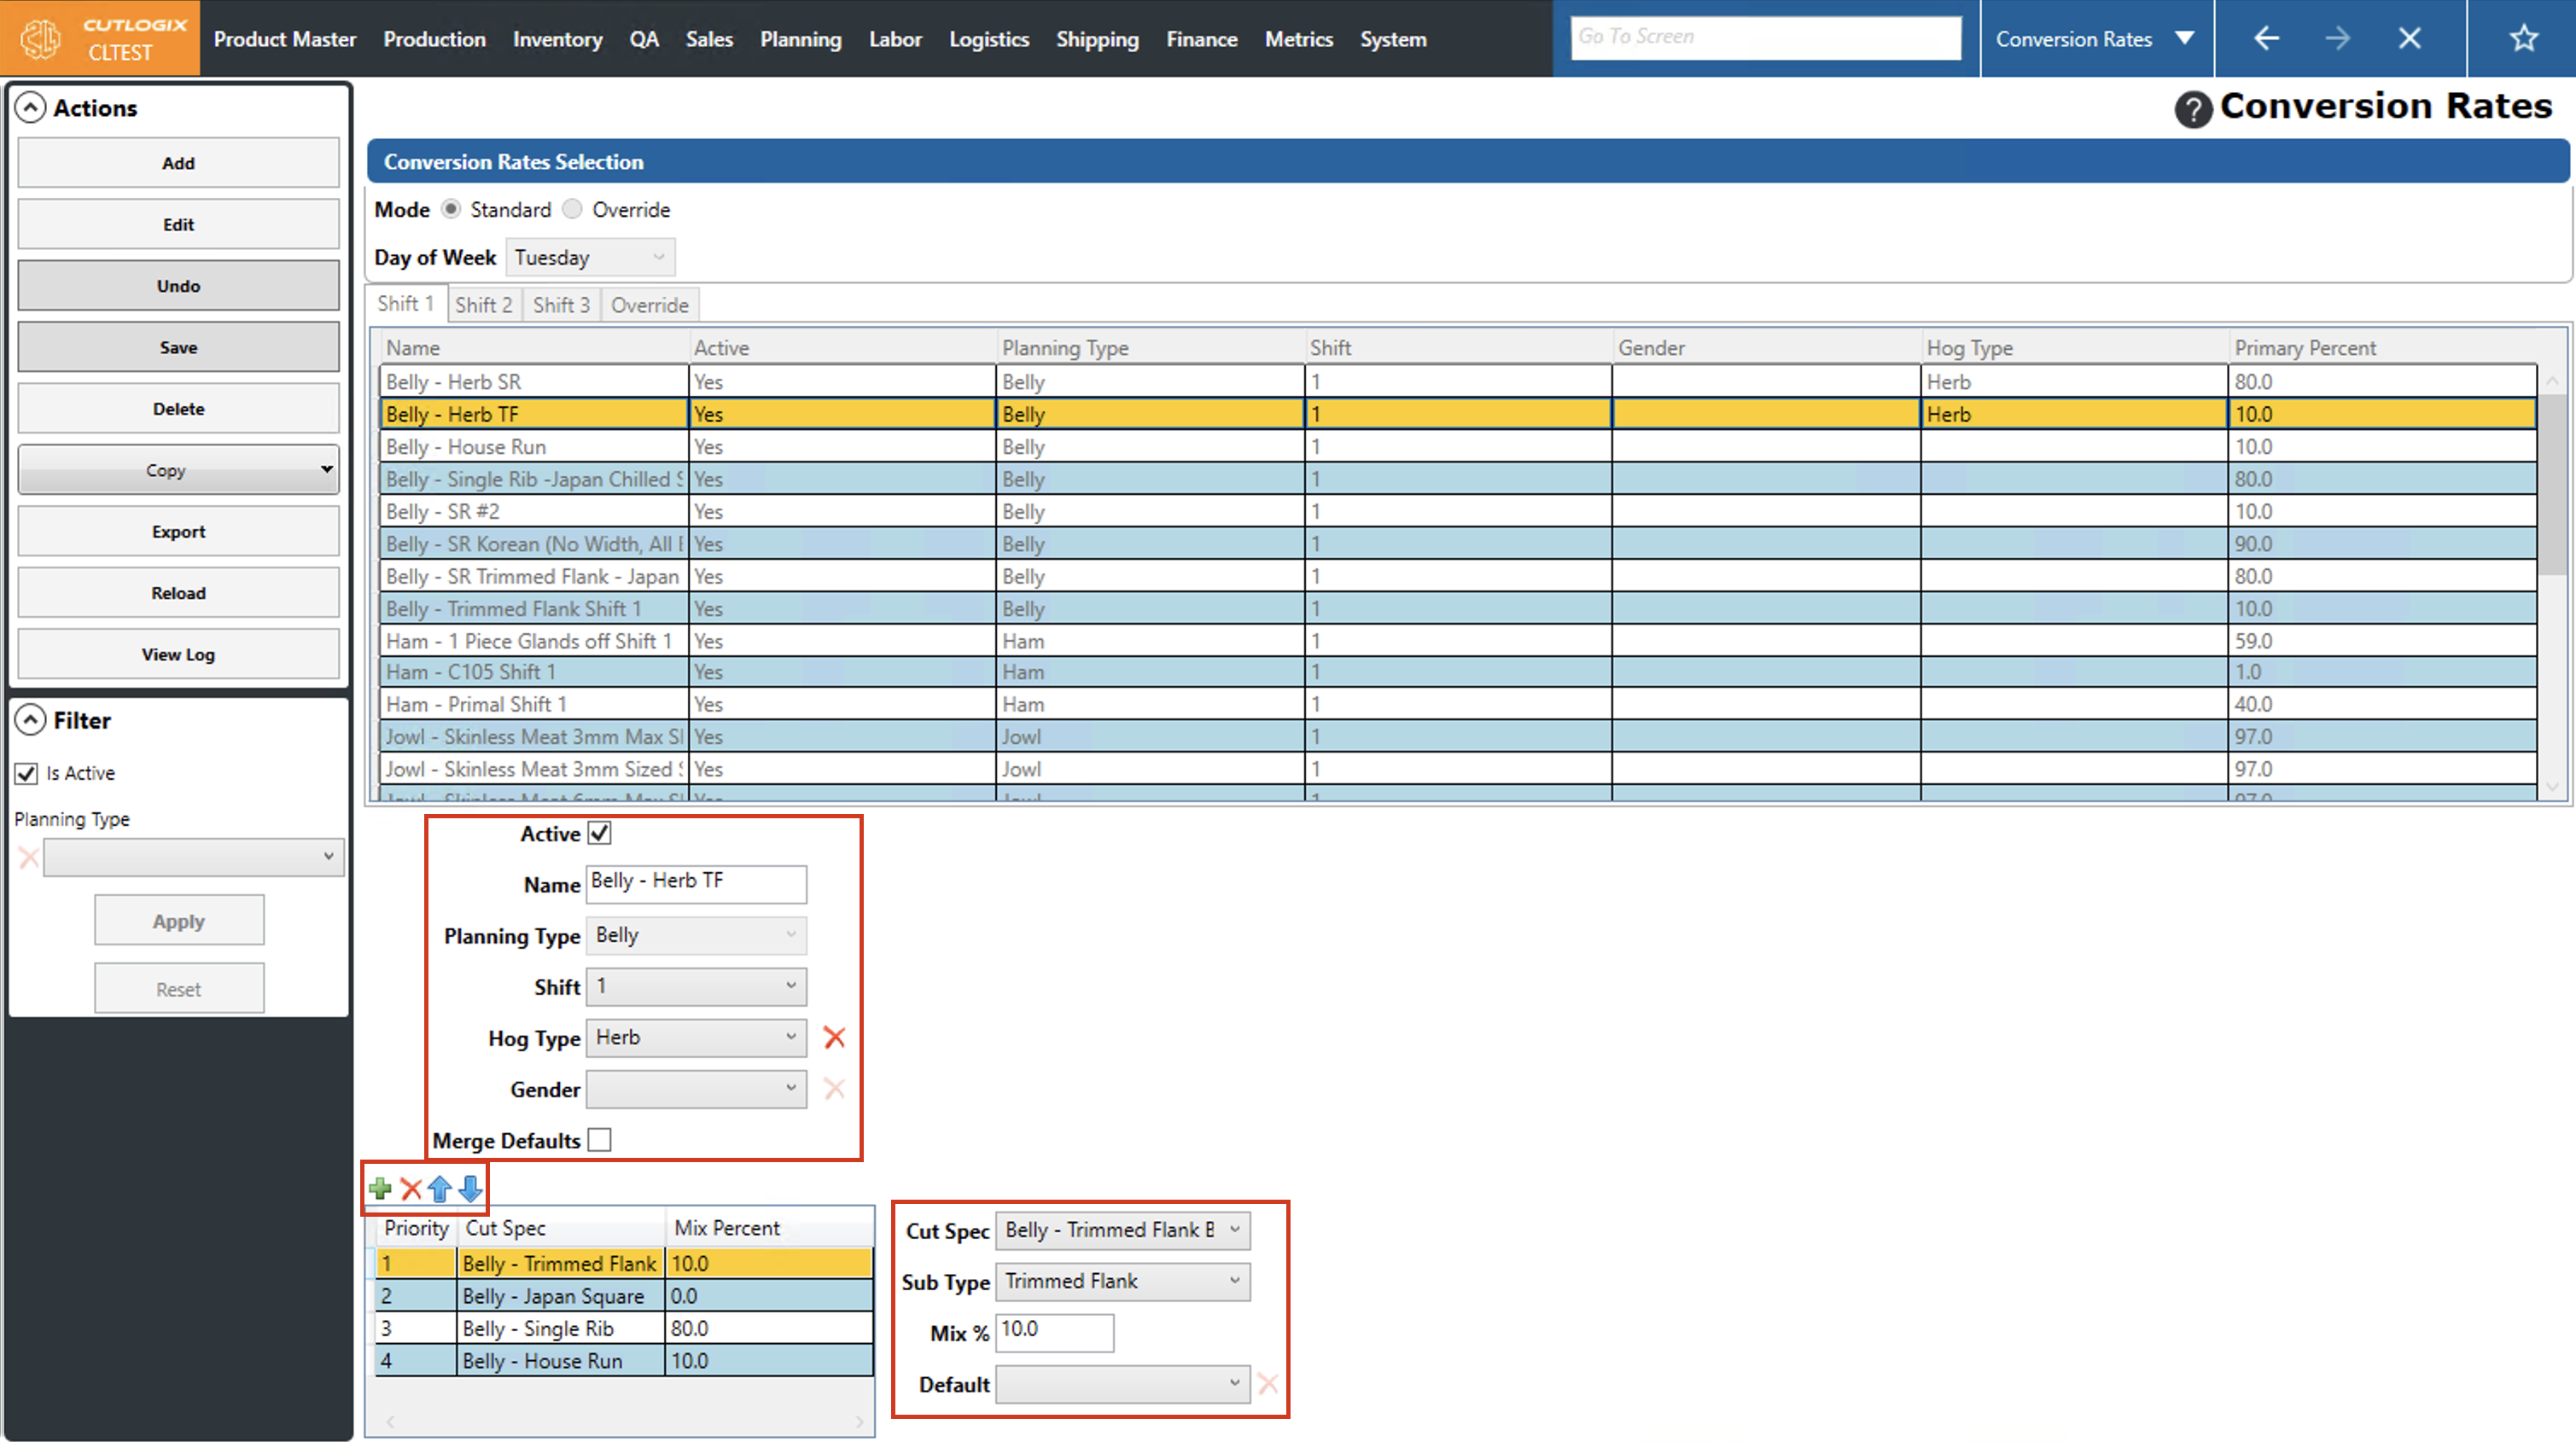
Step 4: Once your changes have been made, click the "Save" button in the actions panel. If you don't want to save your changes, click the "Undo" button in the actions panel to discard the changes.

How to Copy Default Conversion Rates
Demo Conversion rates have the option to copy from one day to another. This is helpful when a conversion rate is applicable to more than one day, it can simply be copied to other days (and shifts on those days) as opposed to being manually recreated on other days.
Step 1: Navigate to the "Conversion Rates" page (Under the Planning menu → Planning Rules Config → Conversion Rates) and select the day that you'd like to copy conversion rates from (by using the "Day of Week" dropdown list) and the shift you want to copy from (using the shift tabs).
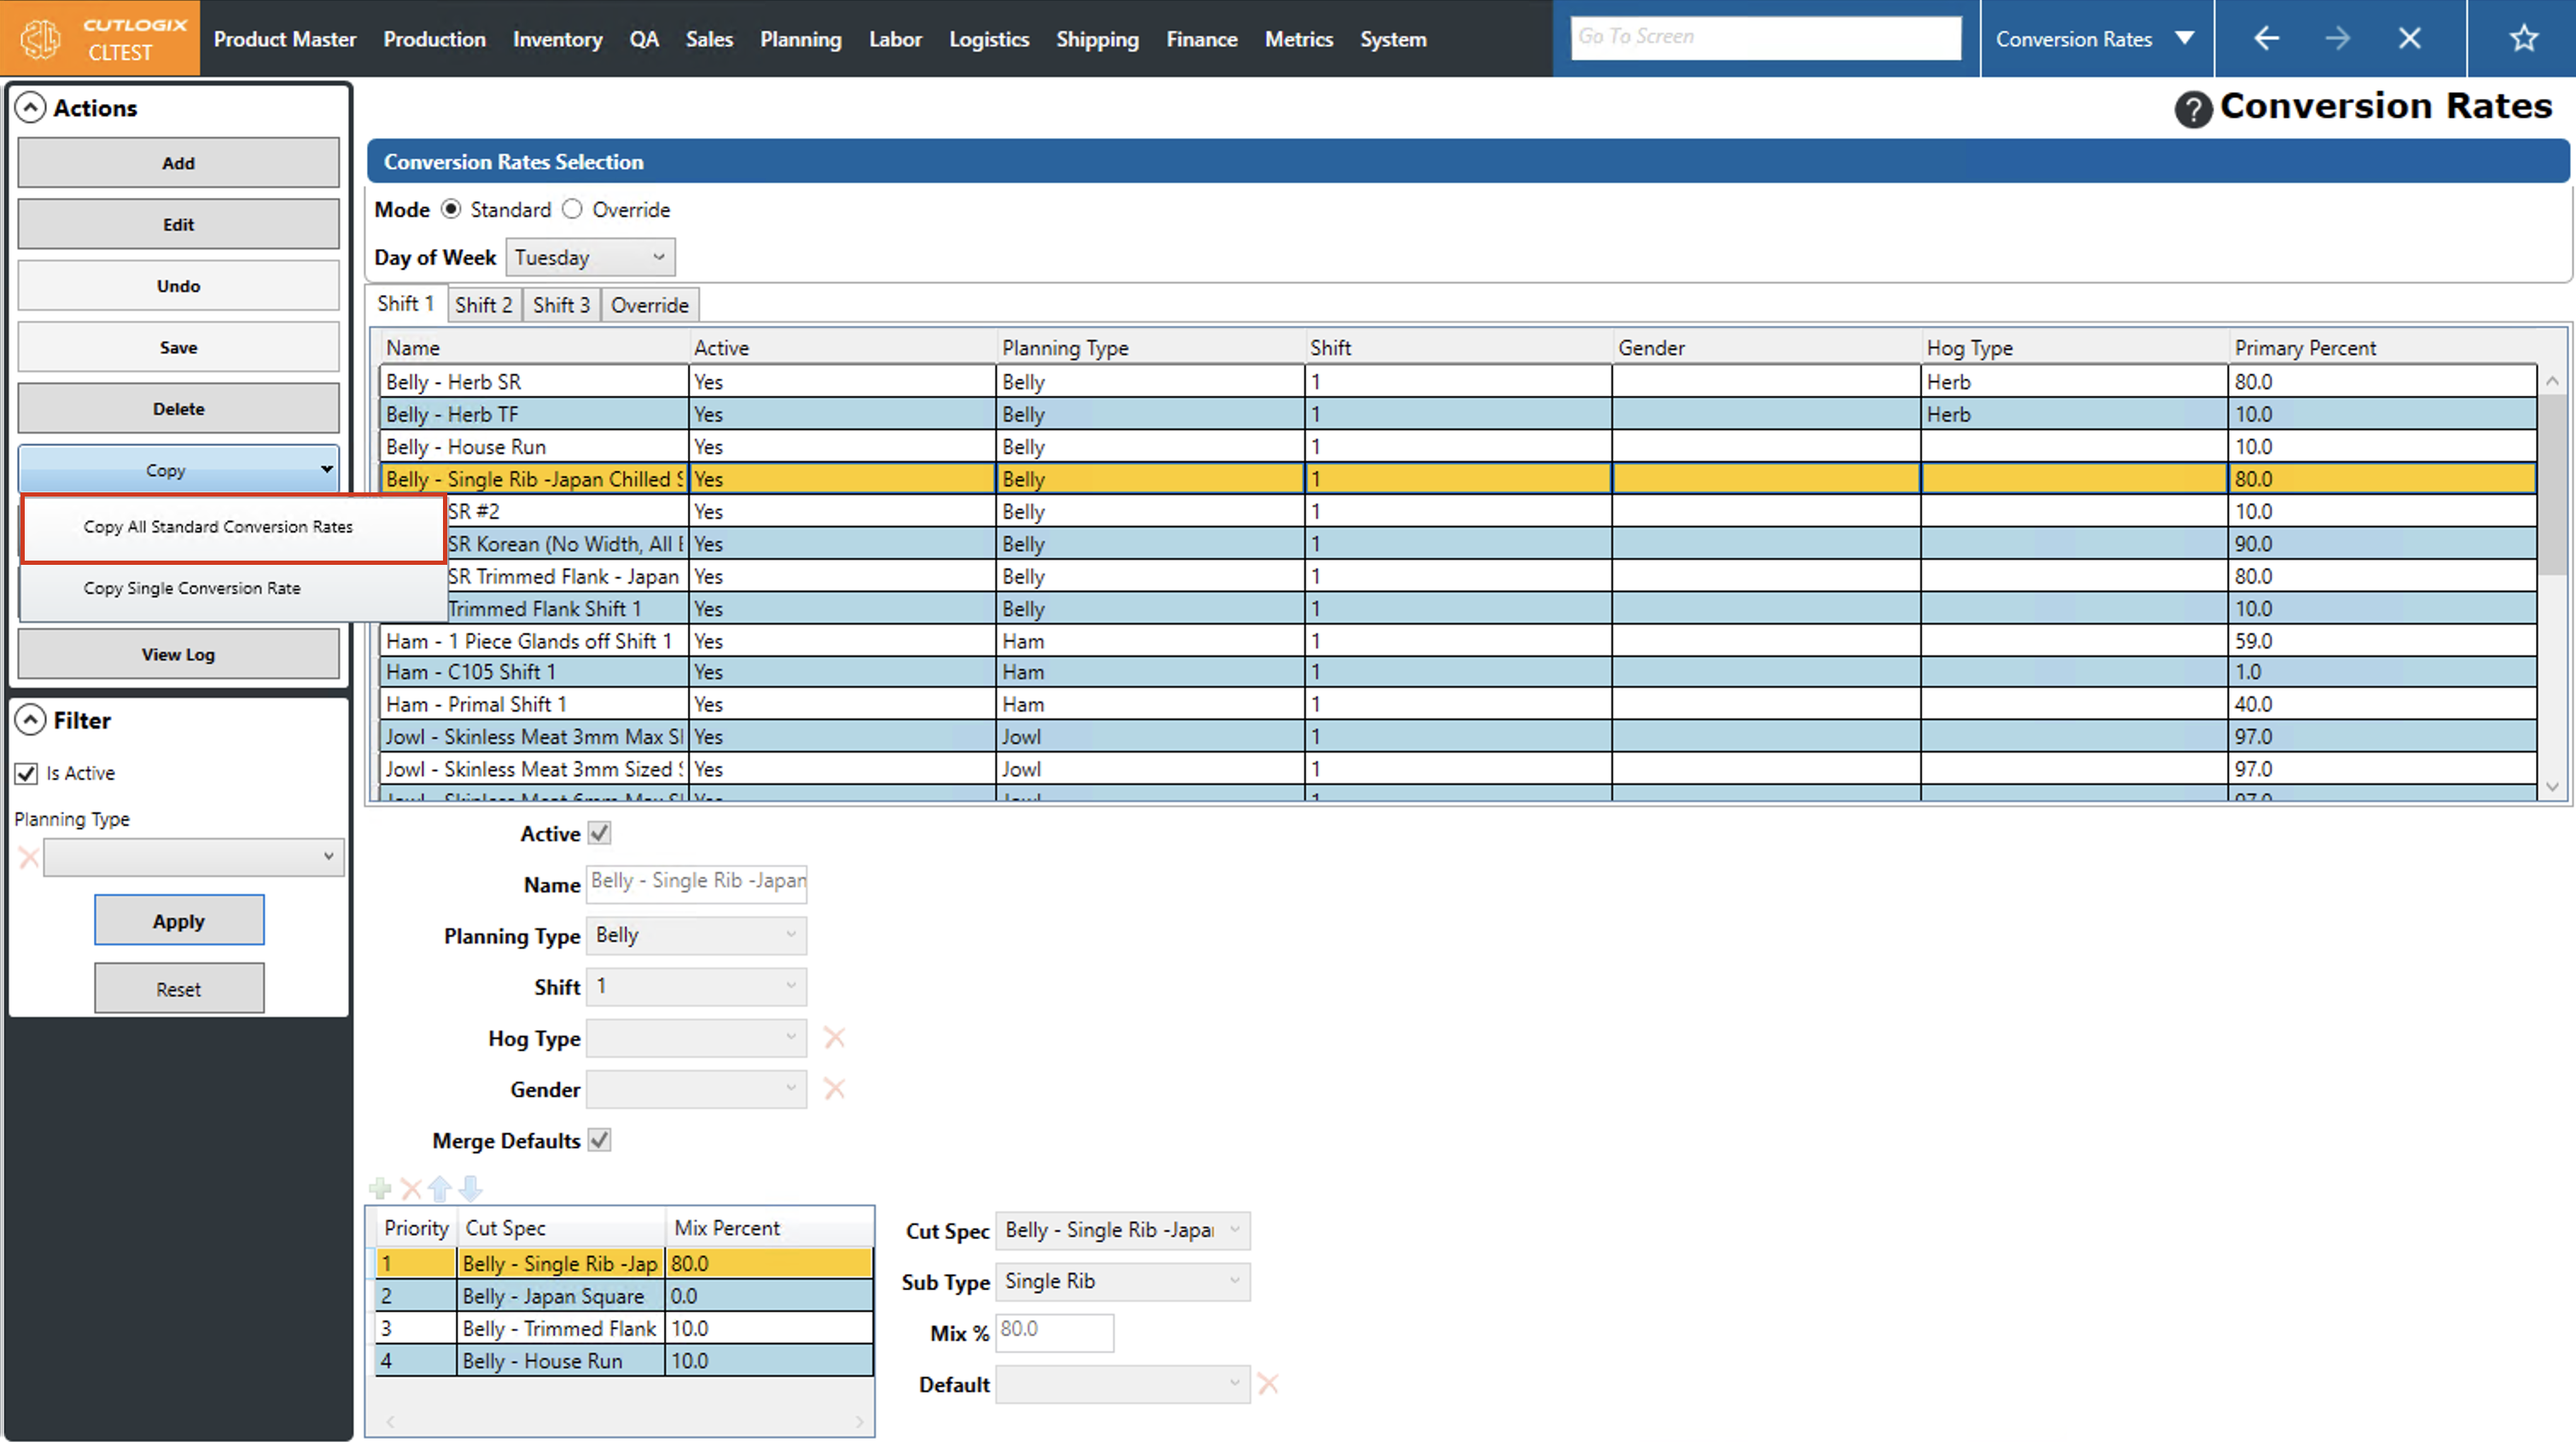
There are 2 options for copying conversion rates. a) Copying all standard conversion rates for the selected day to one or more other days or b) Copying only the selected conversion rate to one or more other days.
Step 2: To copy all conversion rates from the selected day, click on the "Copy" menu in the actions panel, then select "Copy All Standard Conversion Rates". (To copy only a single conversion rate, proceed to Step 4)
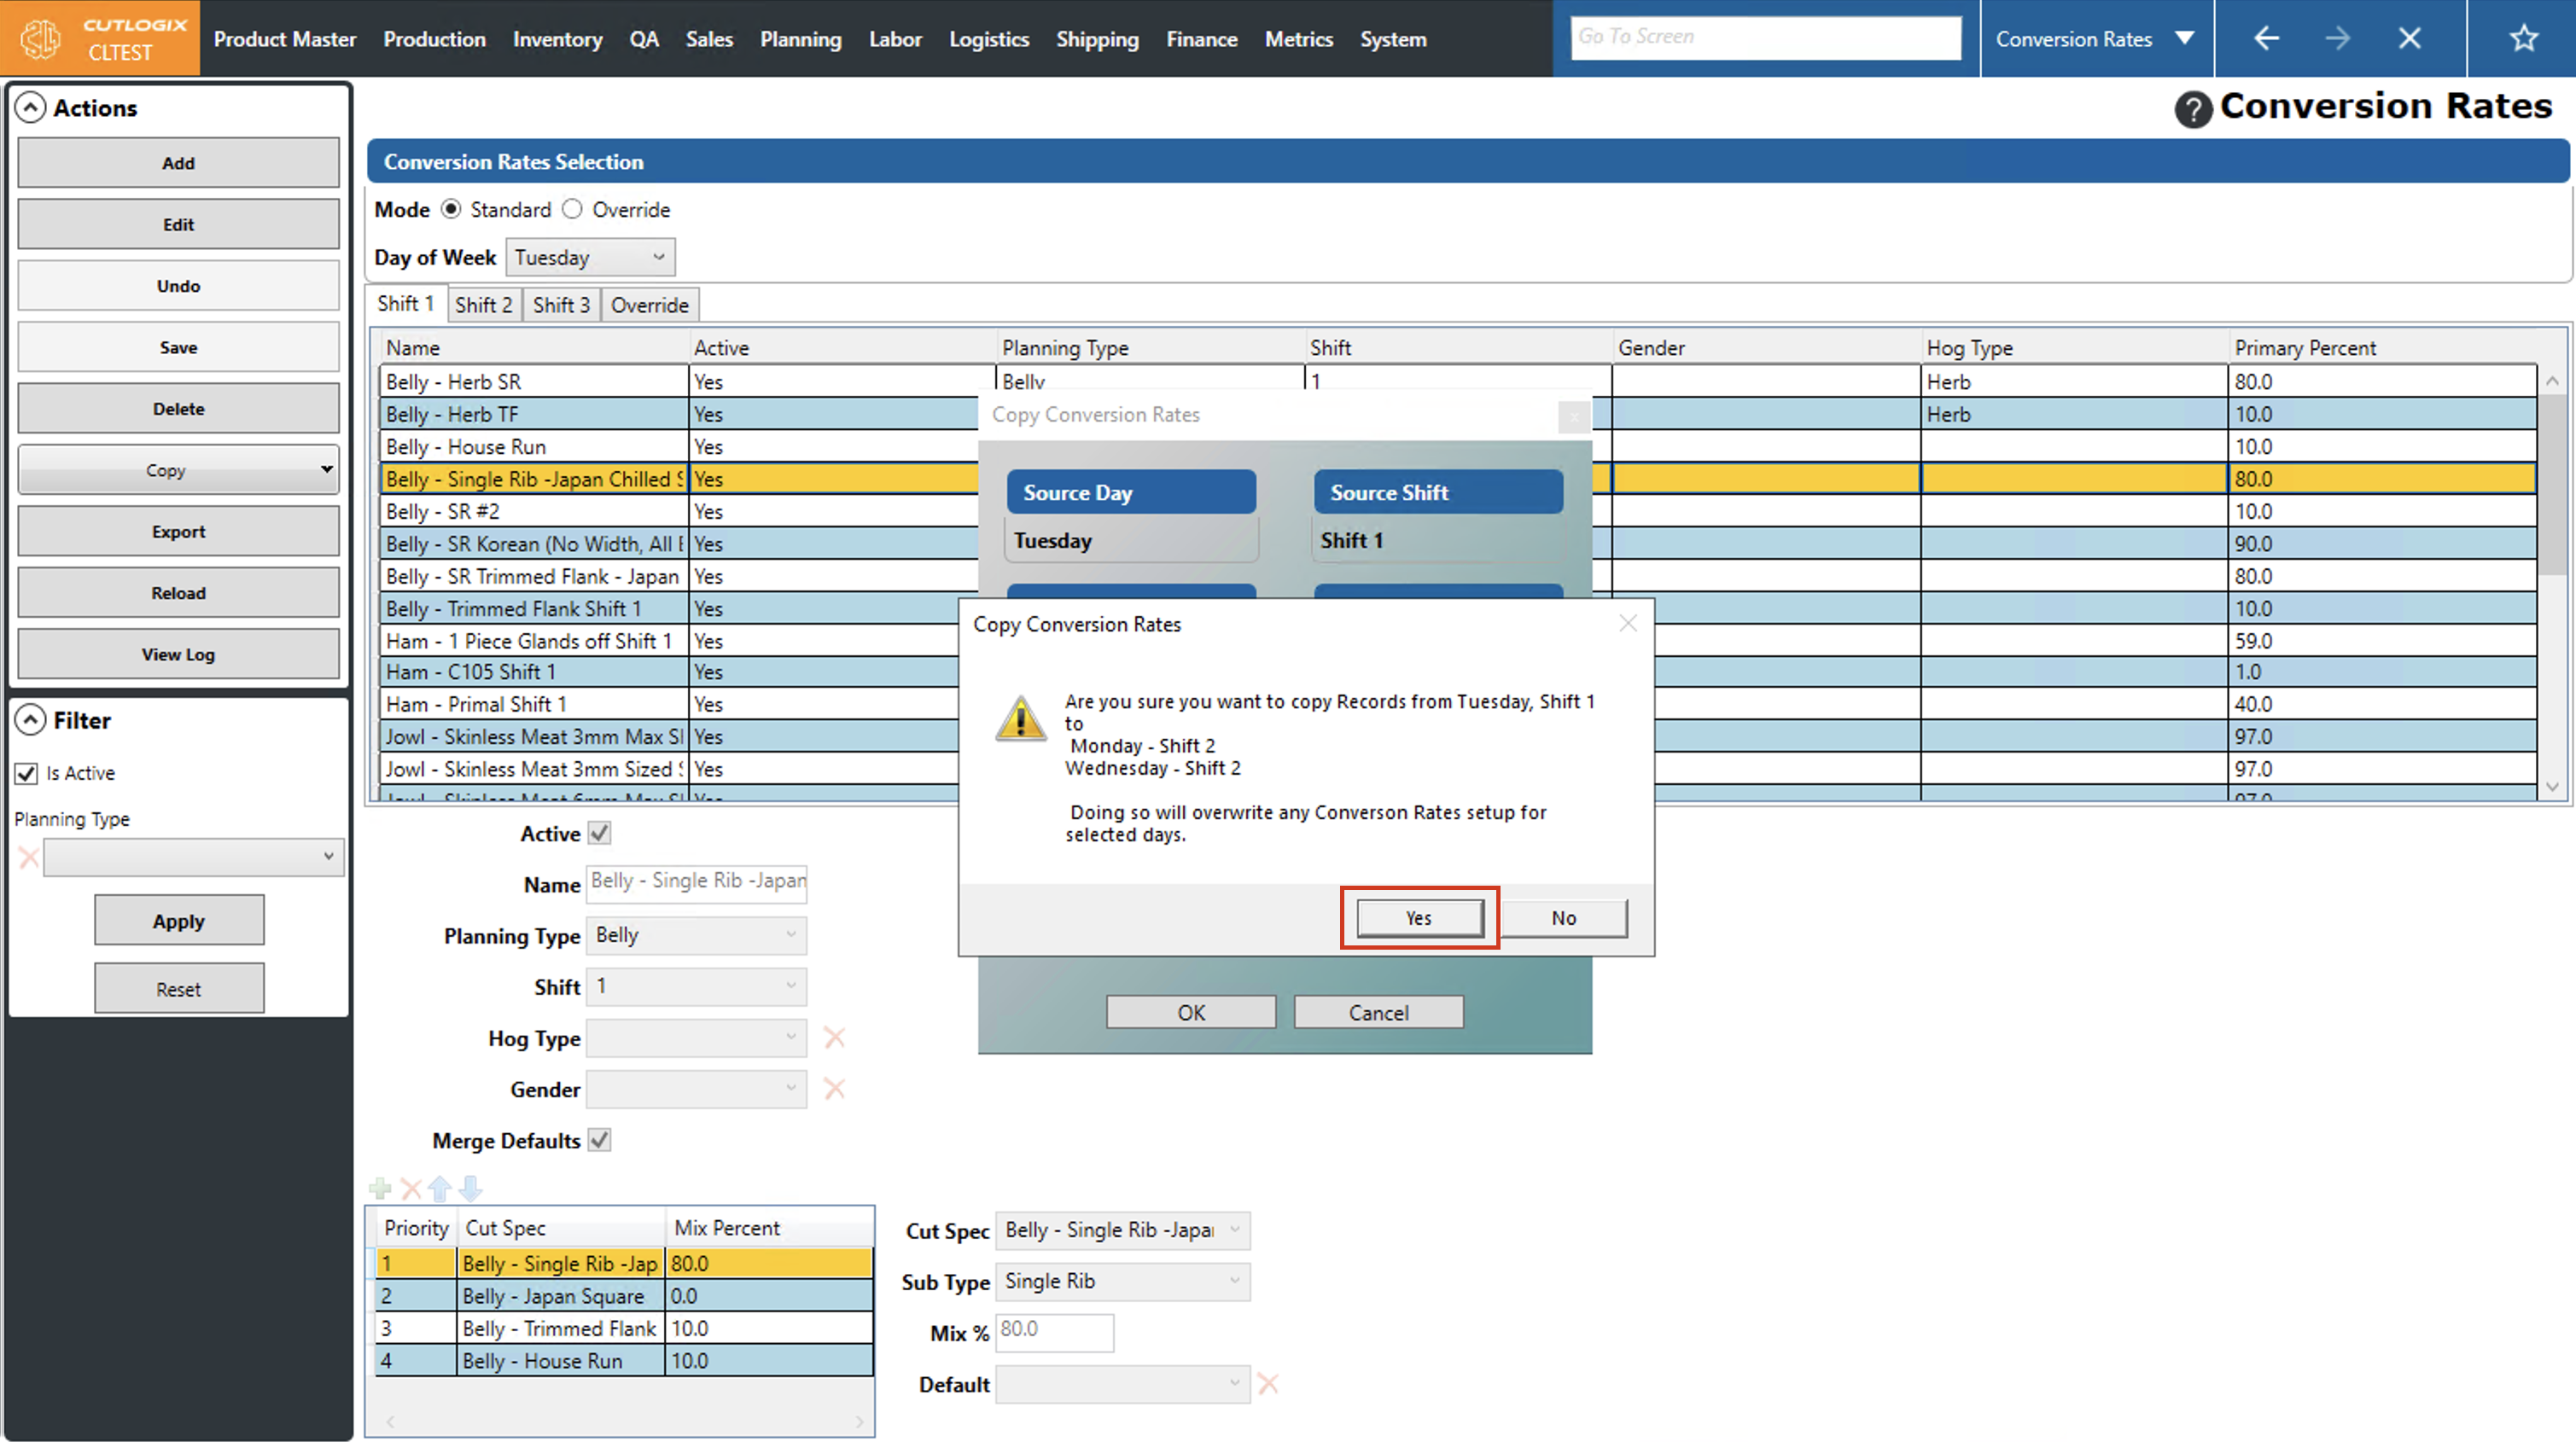
Step 3: The "Copy Conversion Rates" dialog will appear. It will display the source day that you previously selected and give you the option to select which target days and shifts on those days that you want to copy the conversion rates to. Use the checkboxes beside the target days and shifts to indicate which ones you want to have the conversion rates copied to. Click "Save" to complete the copying to the target days/shifts. If you don't want to save, clicking the "Cancel" button will exit the dialog and the copying will not be completed.

Step 4: To copy a single conversion rate from the selected day, click on the conversion rate that you want to copy so that it's highlighted in orange. Then click the "Copy" menu in the actions panel and choose the "Copy Single Conversion Rate" option.

Step 5: The "Copy Conversion Rates" dialog will appear. It will display the source day that you previously selected and give you the option to select which target days and shifts on those days that you want to copy the conversion rate to. Use the checkboxes beside the target days and shifts to indicate which ones you want to have the selected conversion rate copied to. Click "Save" to complete the copying to the target days/shifts. If you don't want to save, clicking the "Cancel" button will exit the dialog and the copying will not be completed.
How to Copy Overrides of Default Conversion Rates
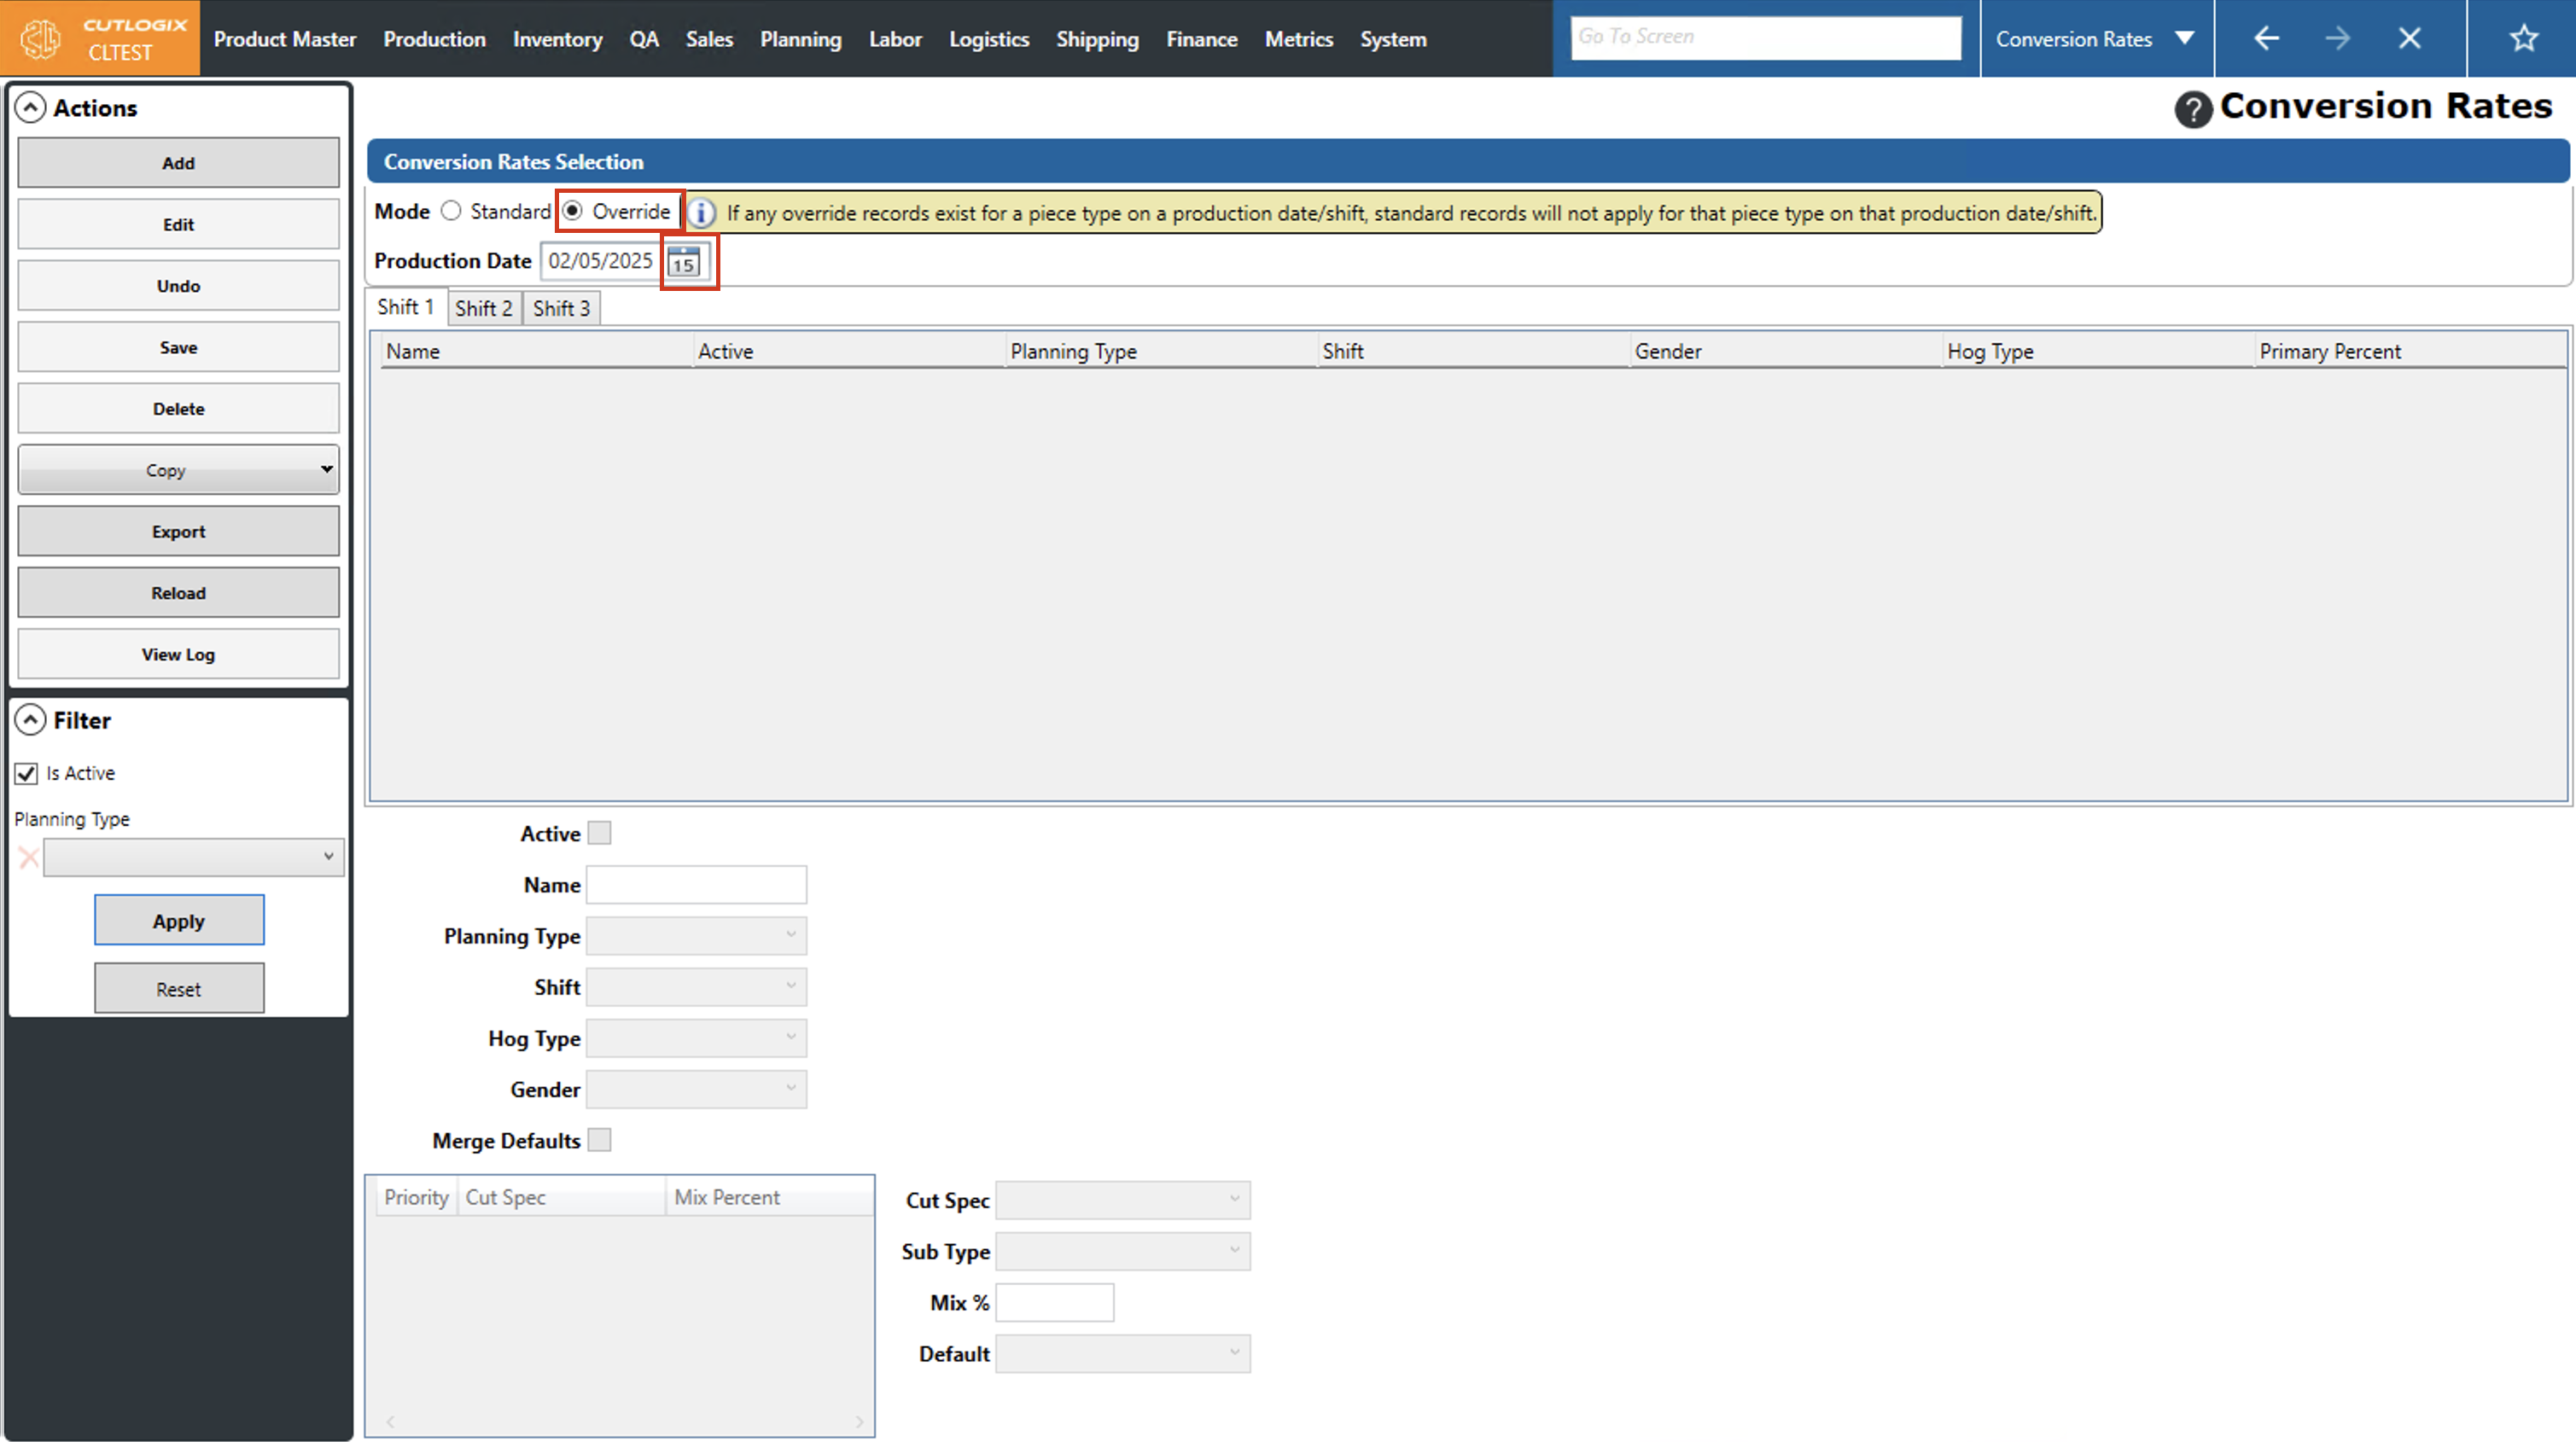
DemoStep 1: Navigate to the "Conversion Rates" page (Under the Planning menu → Planning Rules Config → Conversion Rates) and click the "Override" option. Then select the day that you'd like to copy conversion rates from (by using the "Day of Week" dropdown list) and the shift you want to copy from (using the shift tabs).
There are 2 options for copying override conversion rates. a) Copying a standard conversion rate for the selected day to the override for one or more days/shifts to use as a starting point or b) Copying only the selected override conversion rates to the override for one or more other days.
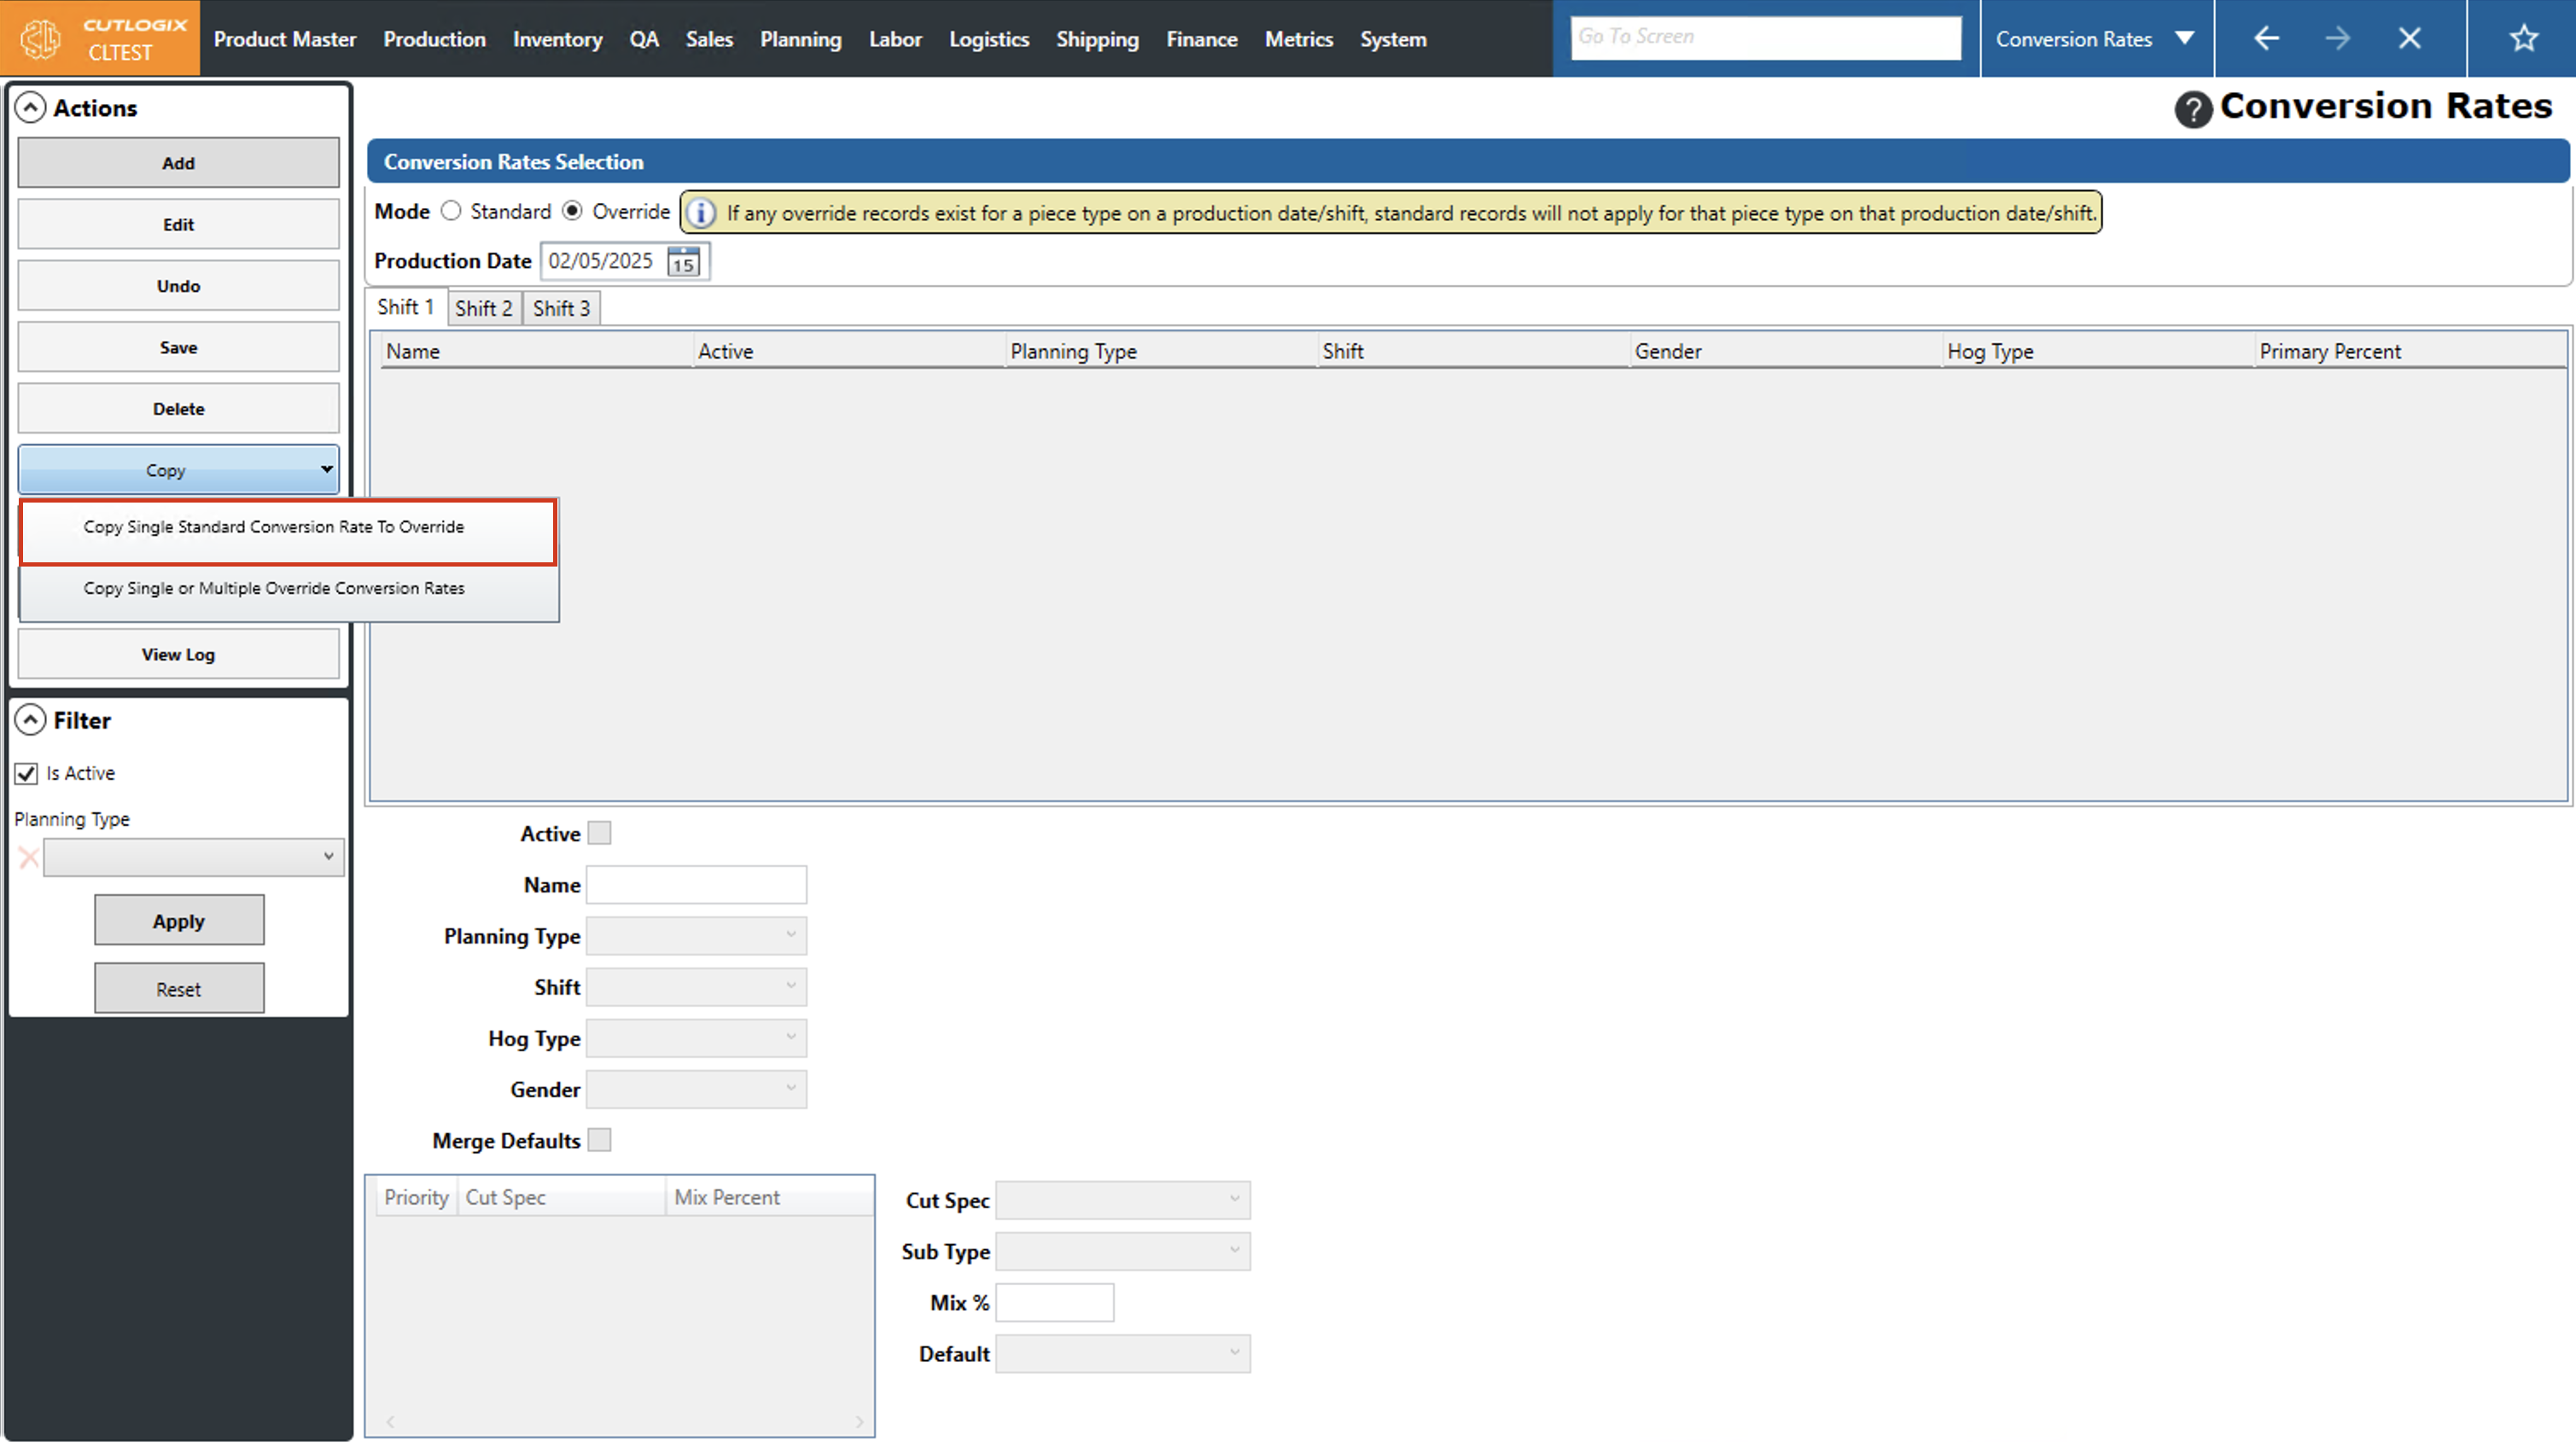
Step 2: To copy a standard conversion rate to an override for one or more days/shits, ensure that you have the day that you want to copy from selected, then click the "Copy" menu in the actions panel. Click on the "Copy Single Standard Conversion Rate To Override" option. (To copy single or multiple override conversion rates, to other days as overrides, proceed to step 4)
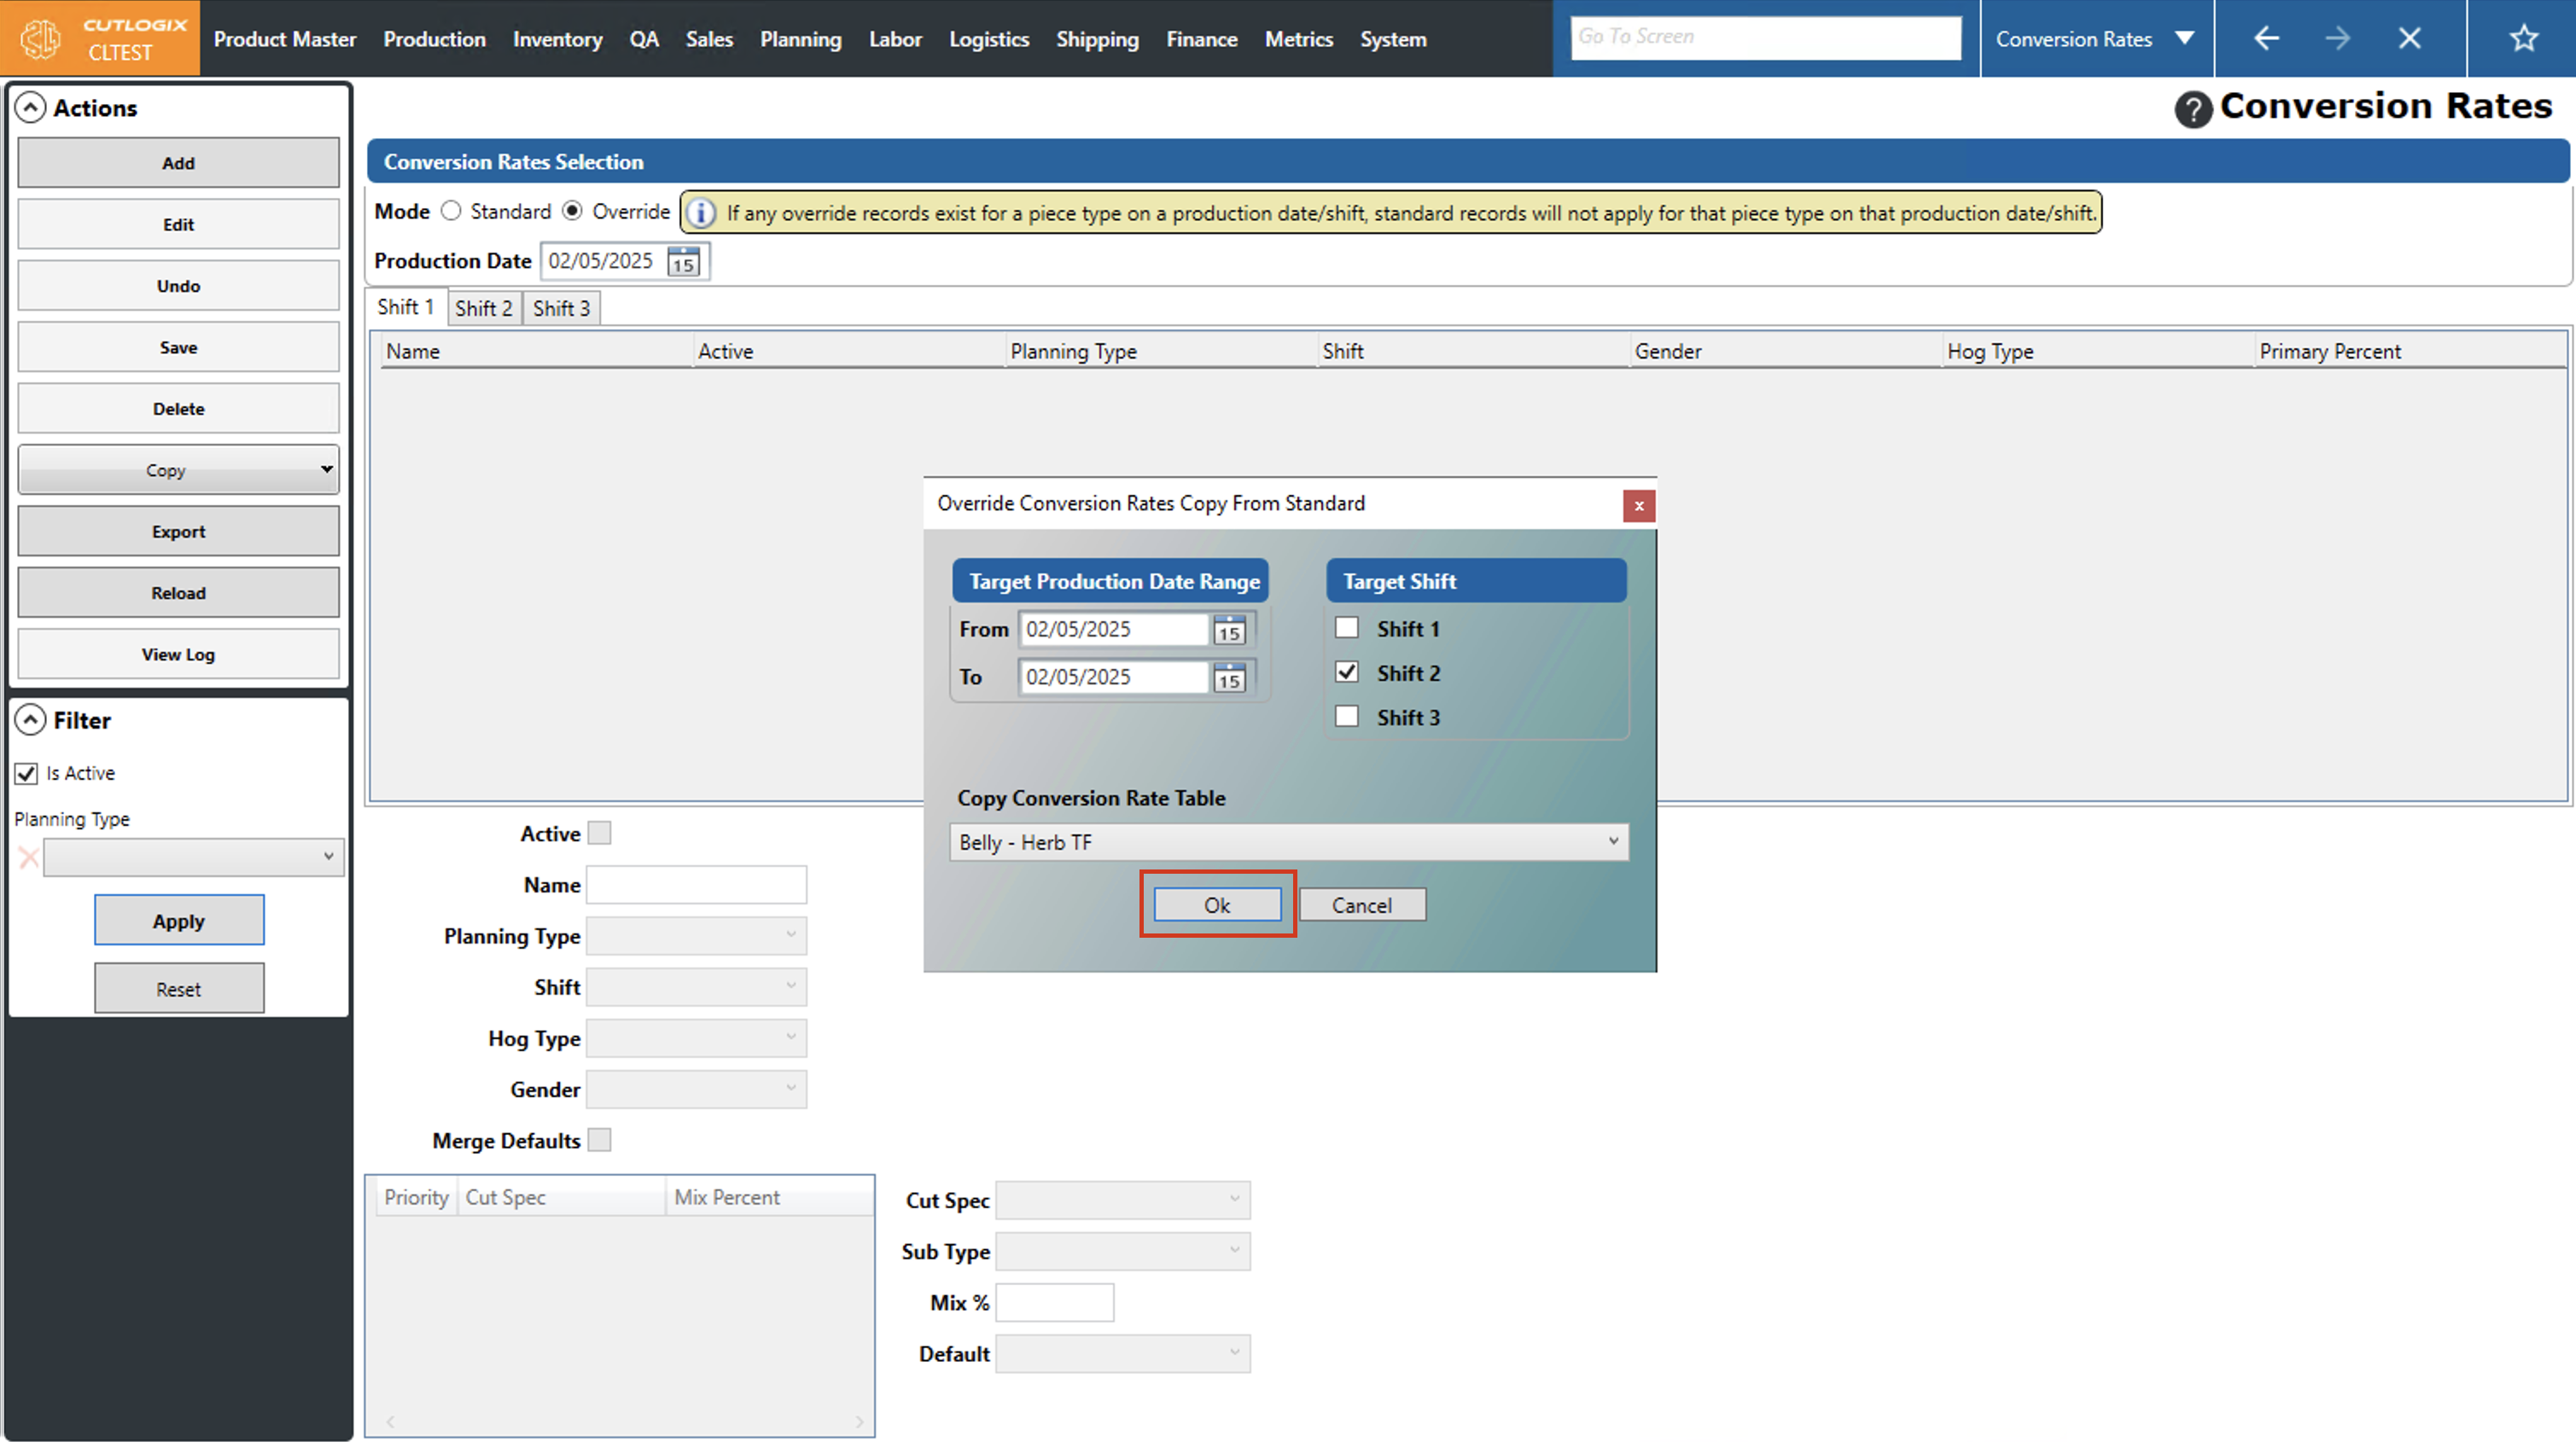
Step 3: The "Override Conversion Rates Copy From Standard" dialog will open. Here you can select the target production date range using the datepickers (calendar icons), this will set all the dates that you want to copy to. then check the box beside each shift that you want to copy to under "Target Shift". Finally, you'll need to choose the standard conversion rate table that you want to copy, this can be done using the "Copy Conversion Rate Table" dropdown list.

When you're ready to complete the copying, click the "OK" button. If you don't want to copy the tables, clicking the "Cancel" button will stop the copying process.
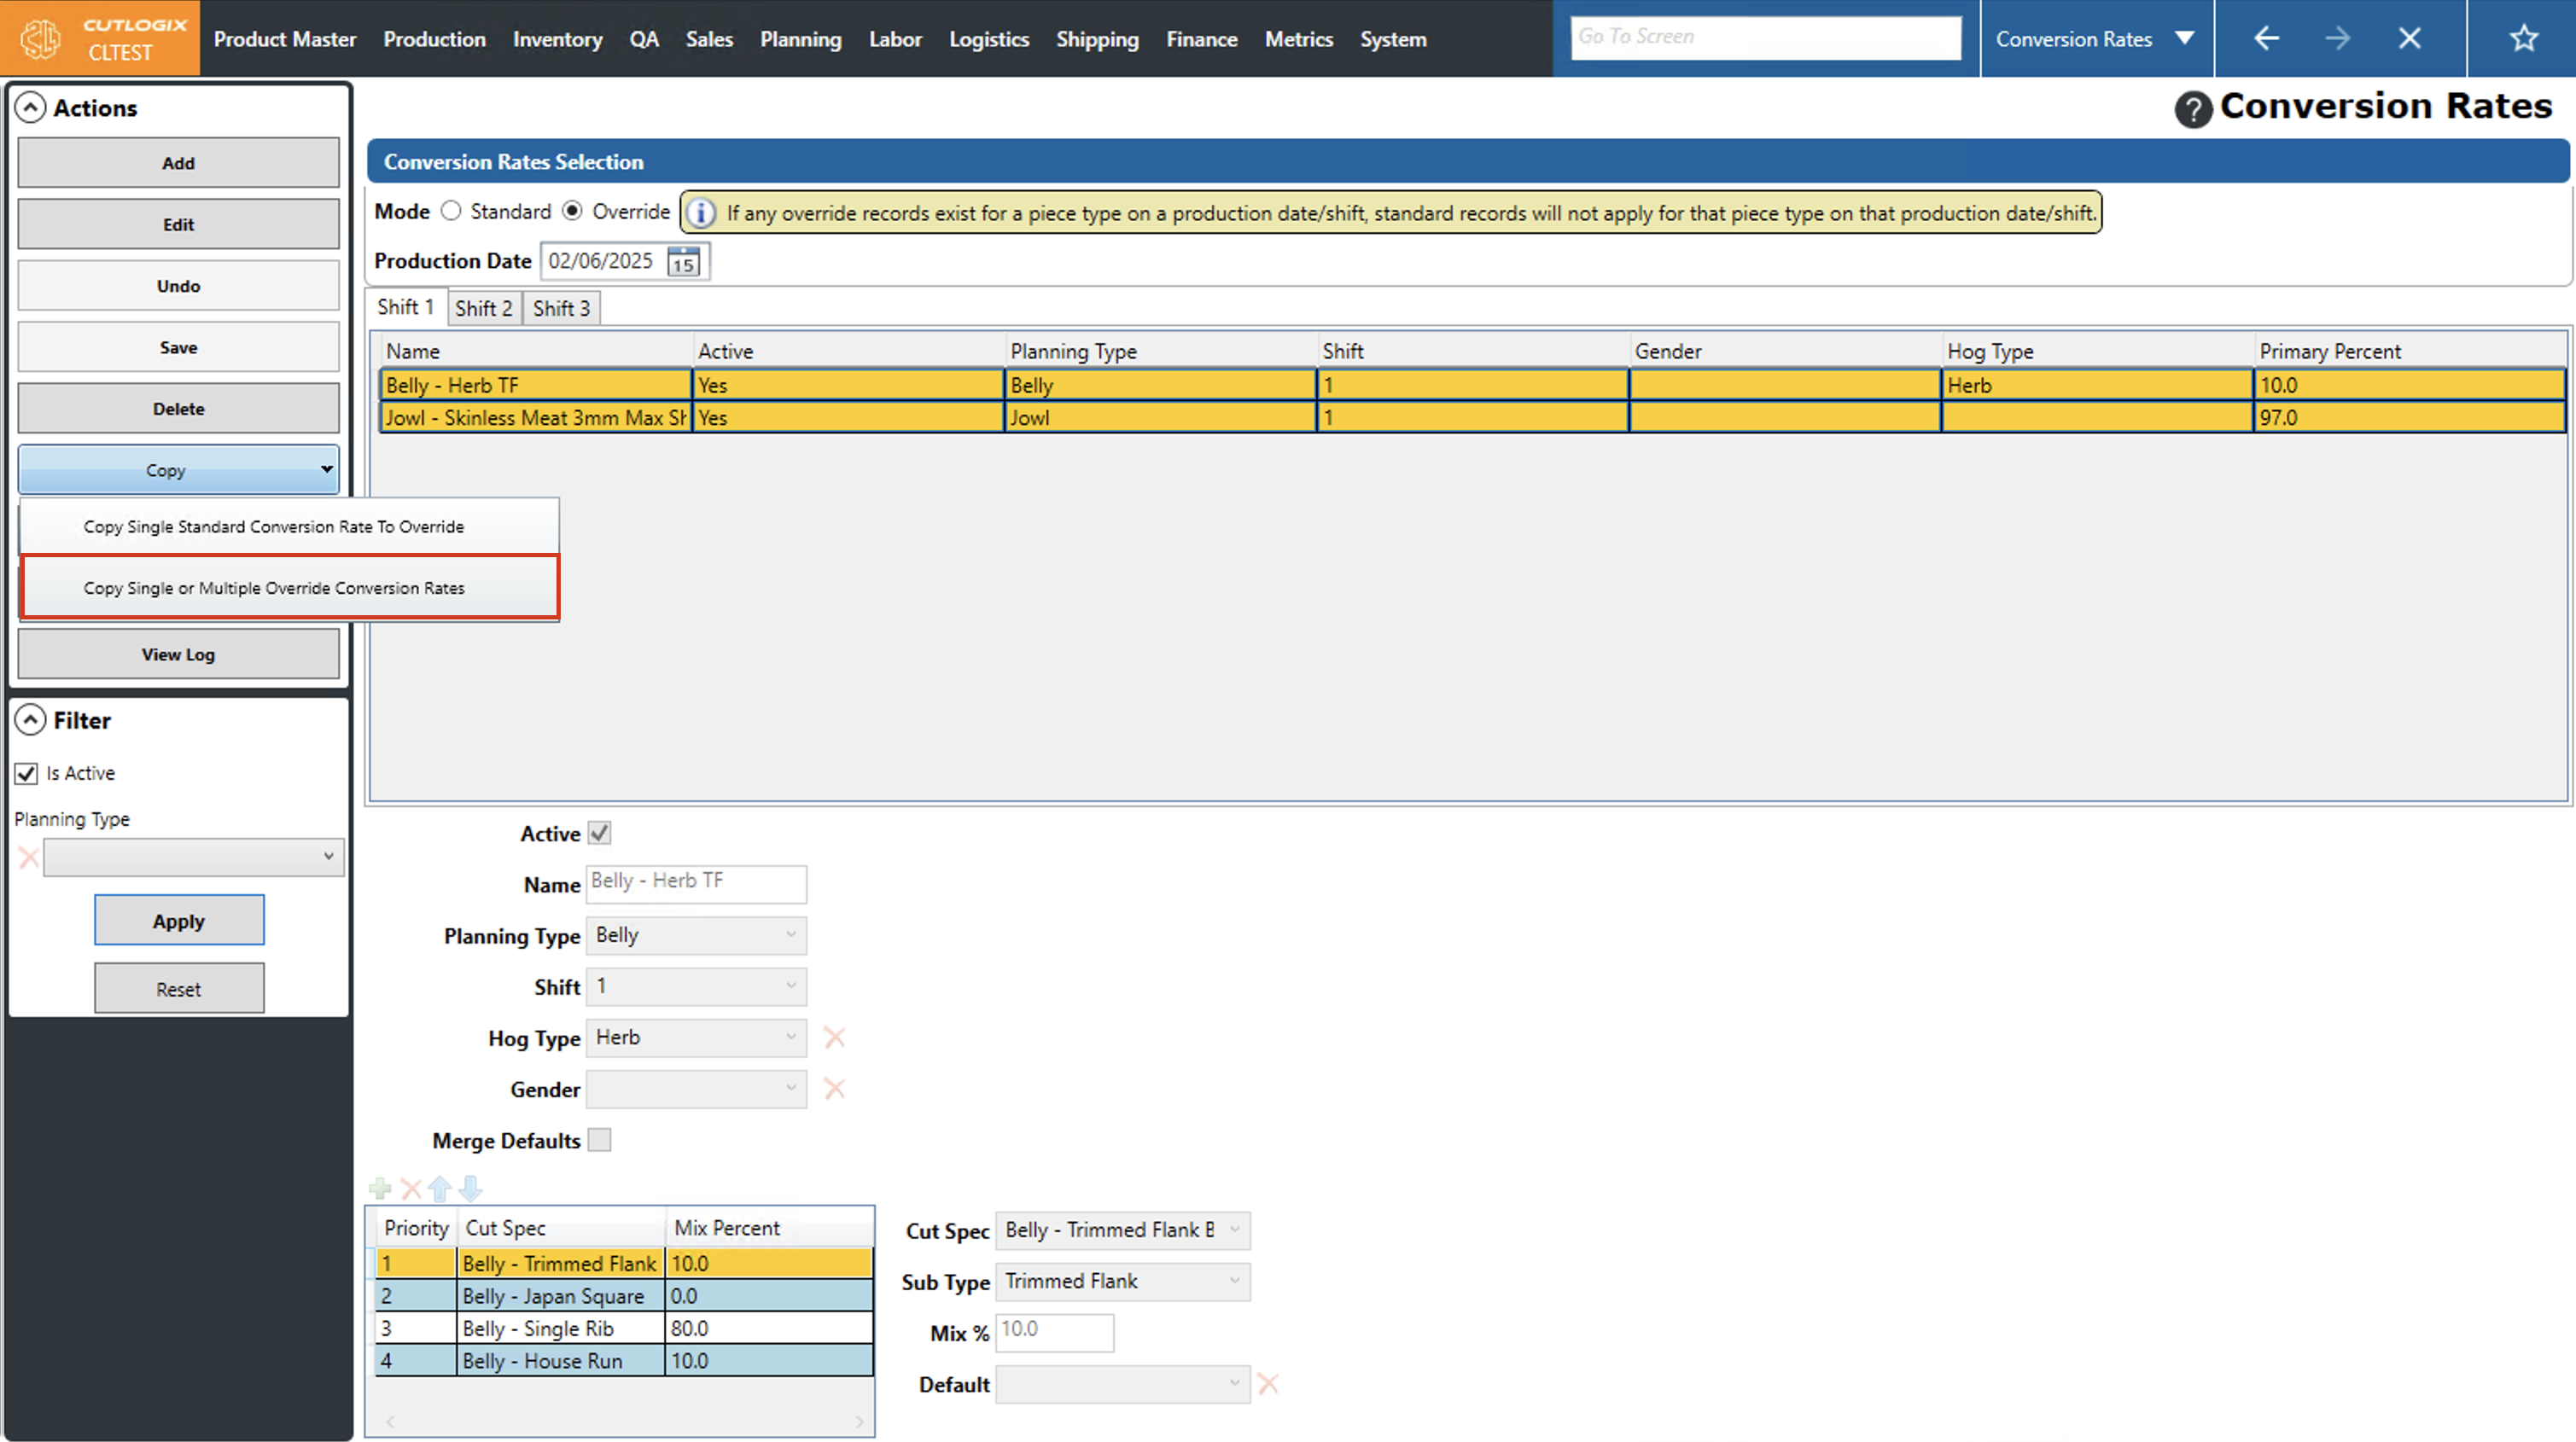
Step 4: To copy one or more override conversion rates as overrides for other days, ensure that you're on the page showing override rates. Then select all the rates that you want to copy (they should all be highlighted in orange), and open the "Copy" menu in the actions' column and choose "Copy Single or Multiple Override Conversion Rates".
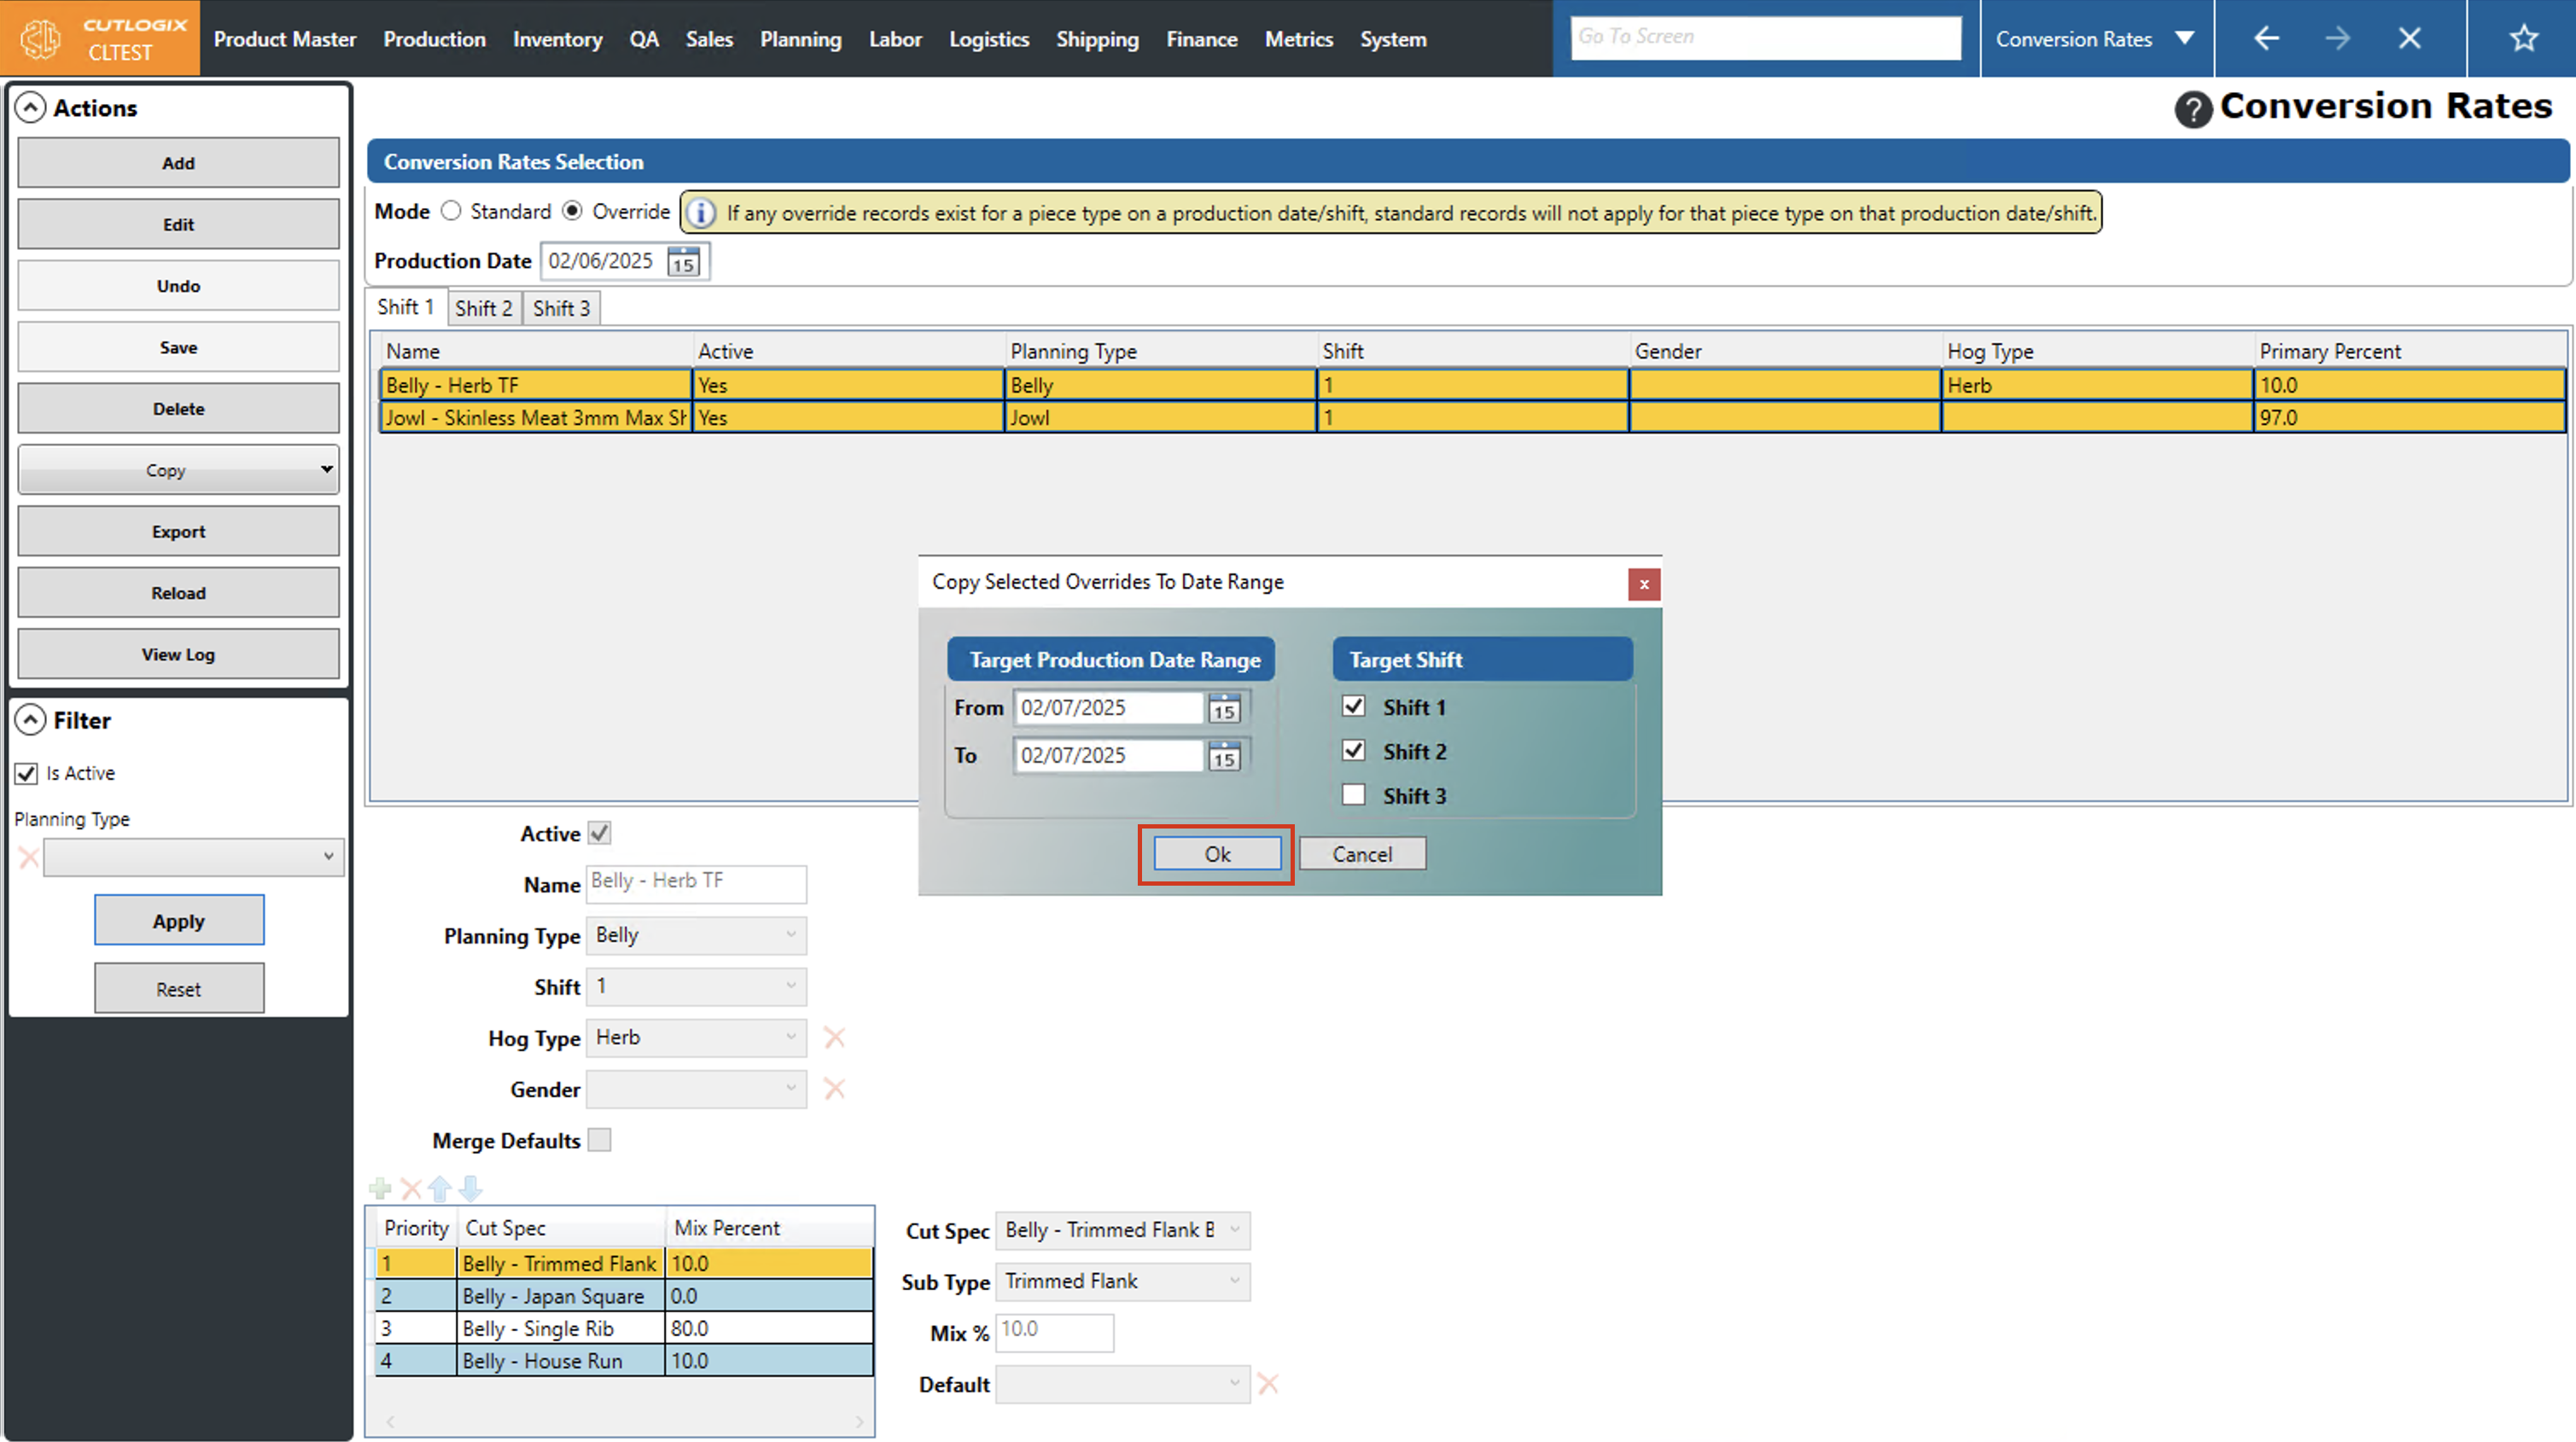
Step 5: The "Copy Selected Overrides To Date Range" dialog will appear. Here you can choose the target dates that you want to copy the selected overrides to by using the datepickers (click on the calendar icon) as well as the target shifts on those days to copy them to (using the checkboxes beside them). Clicking "OK" will complete the copying, if you don't want to proceed with copying, click the "Cancel" button.
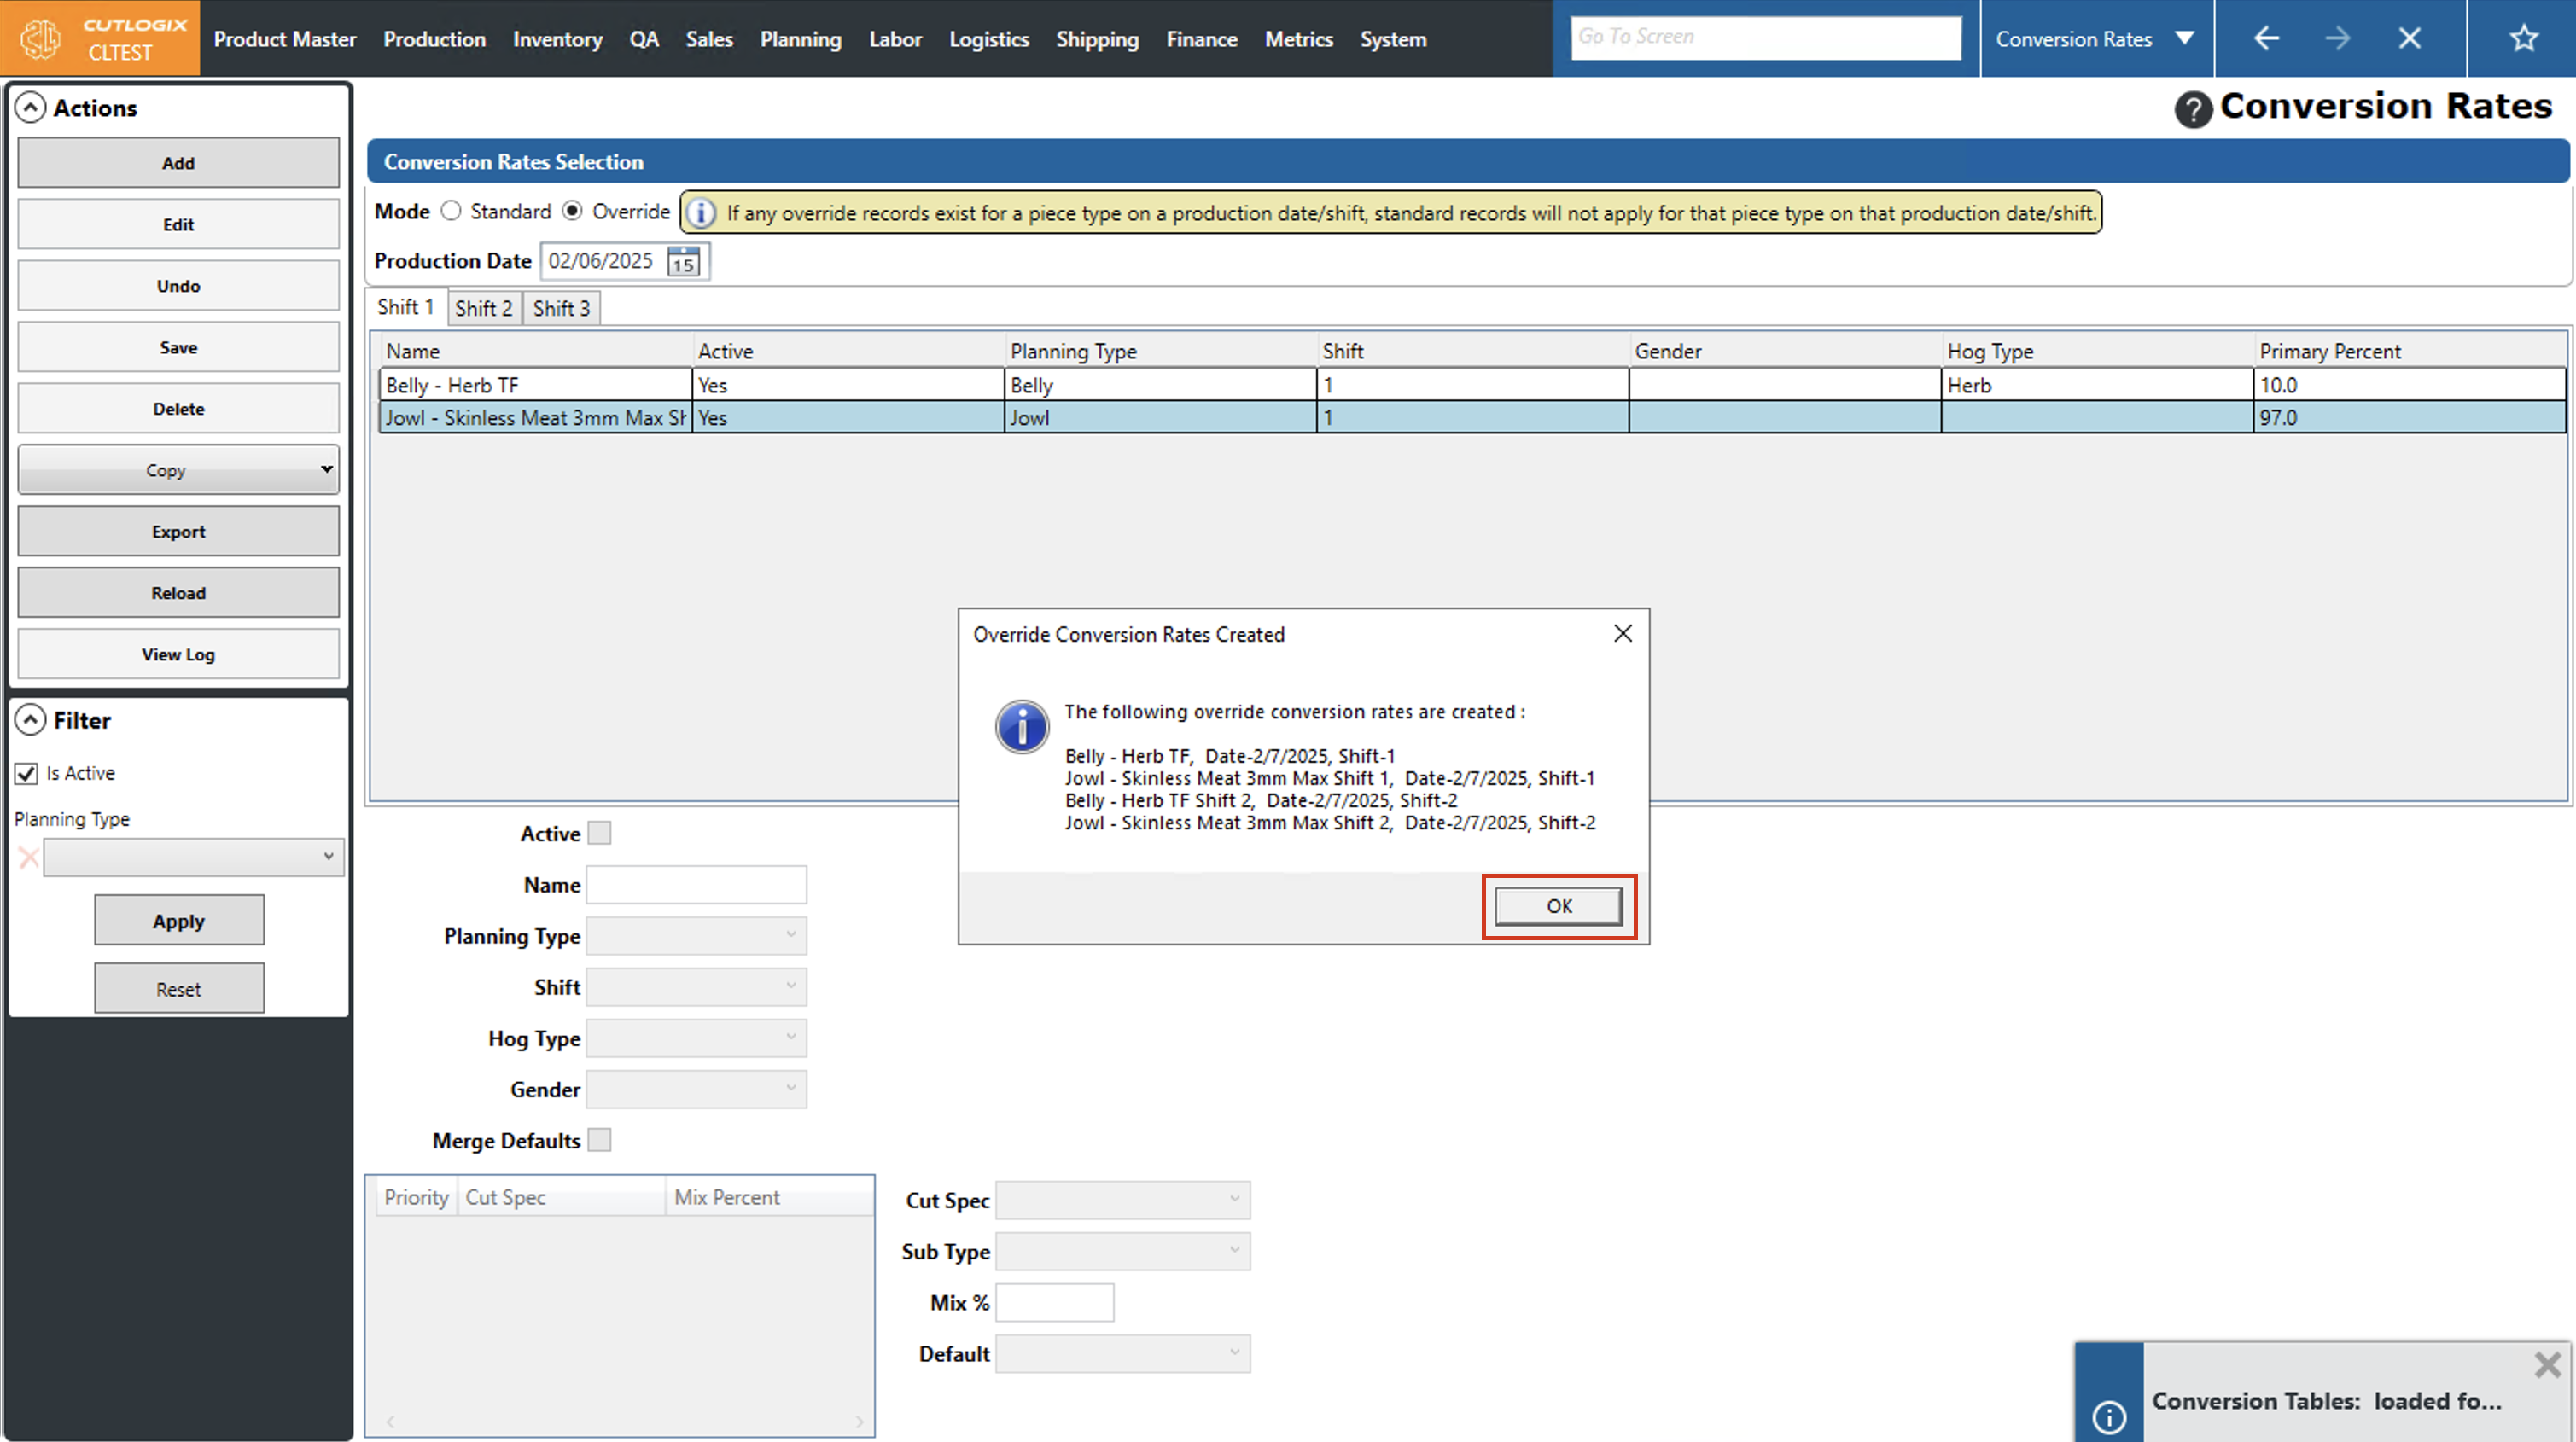
Step 6: A confirmation message will appear, showing all the override conversion rates that were created and on what days/shifts they're on. Clicking "OK" will close this message.