Labor Master Data Tasks
How to Add a Labor Activity
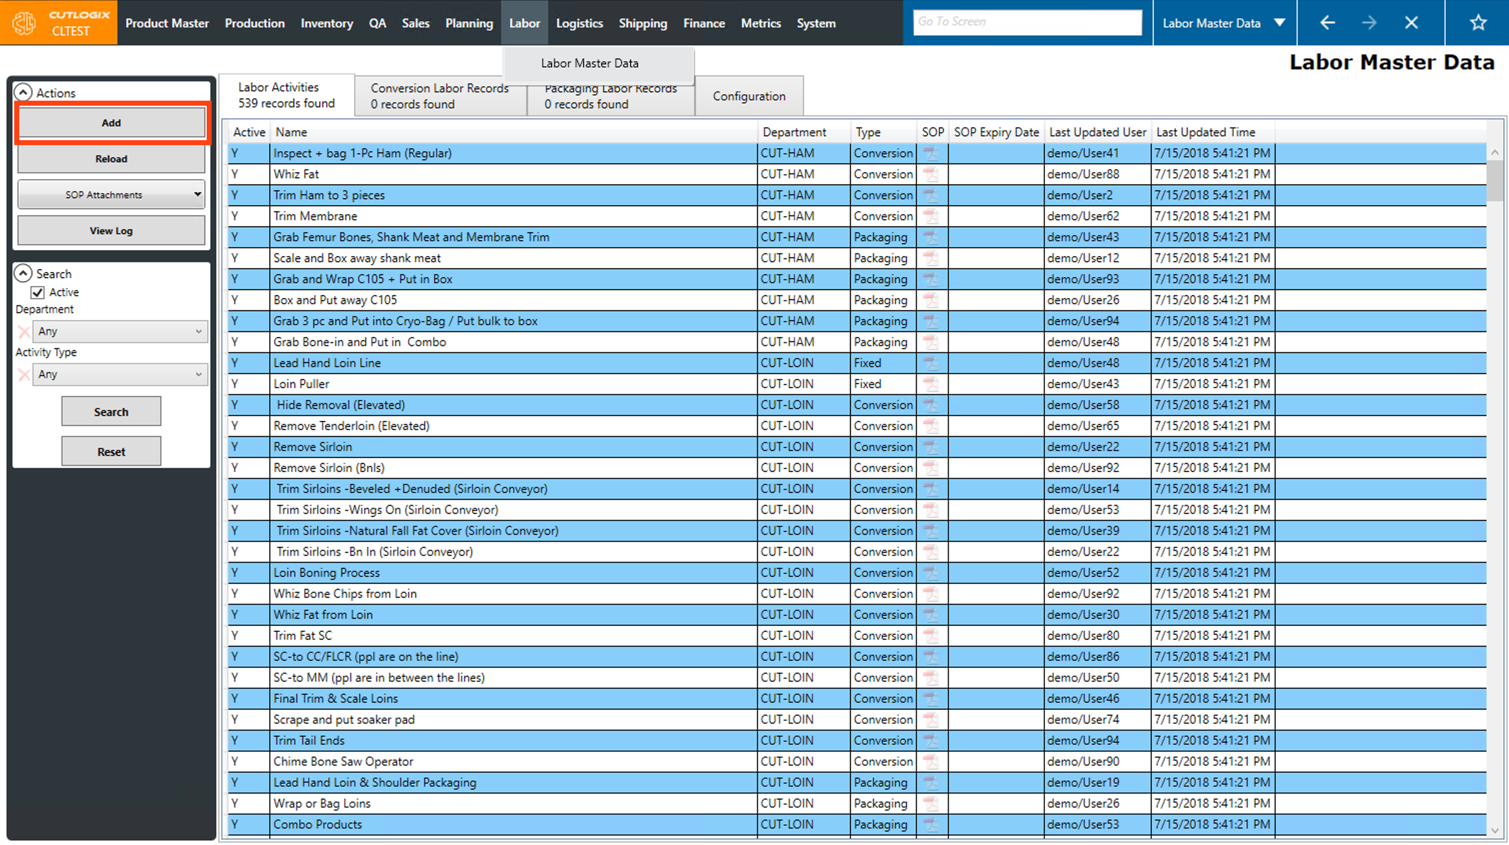
DemoStep 1: Navigate to the "Labor Master Data" page (Under the Labor menu → Labor Master Data).

Step 2: Click the "Add" button in the Actions Panel.
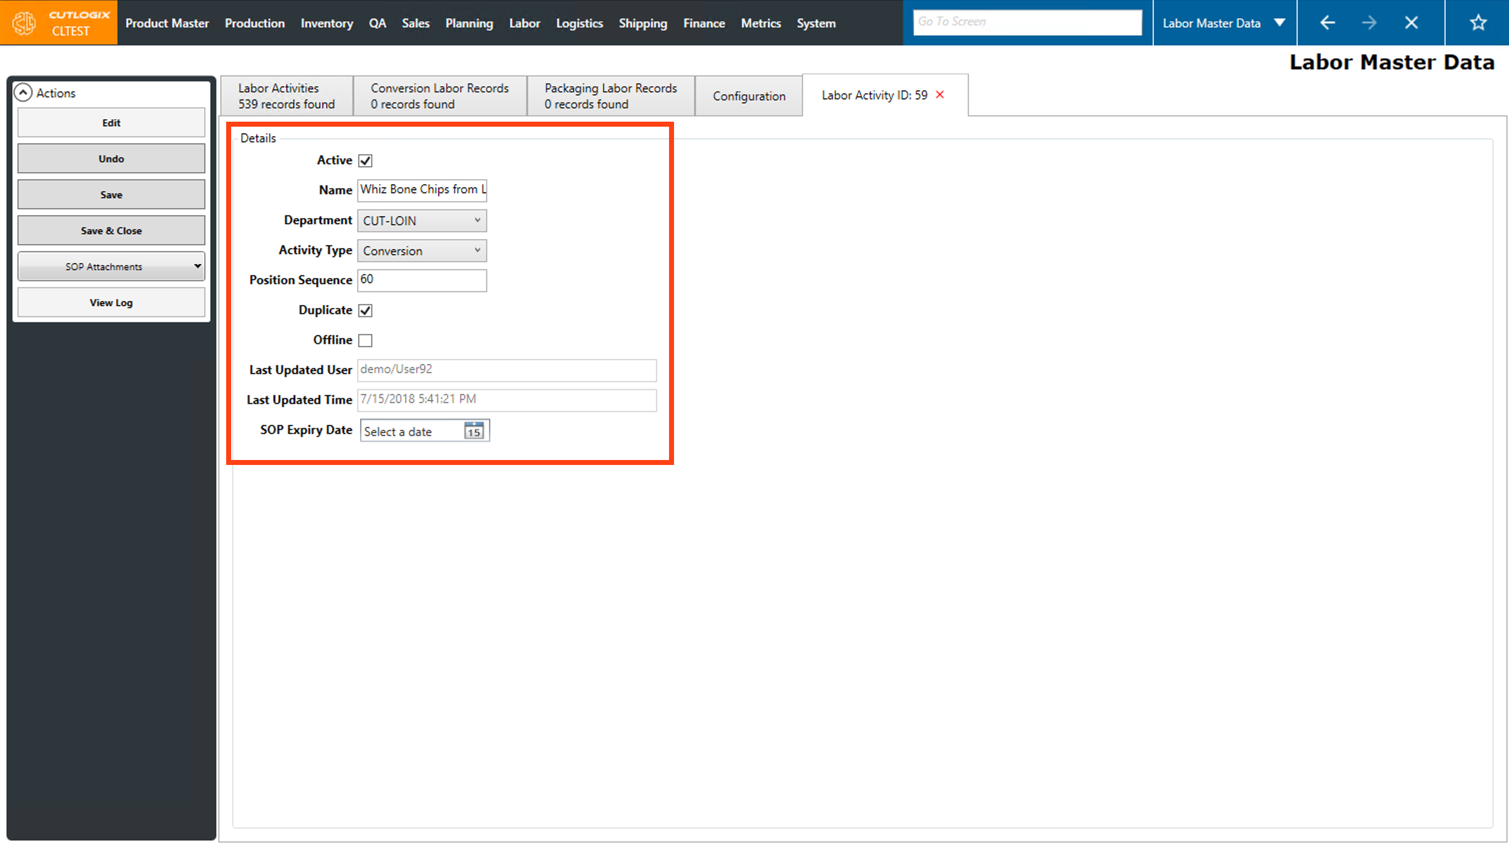
Step 3: A new tab will open where you can enter the details about the new labor activity. Fields that are highlighted in red are required and must be entered, these fields are as follows:
• Name: The name of the new labor activity to be added.
• Department: Choose the department that the labor activity is associated with.
• Activity Type: Choose the type for the activity. (Conversion, Packaging or Fixed)
• Name: The name of the new labor activity to be added.
• Department: Choose the department that the labor activity is associated with.
• Activity Type: Choose the type for the activity. (Conversion, Packaging or Fixed)

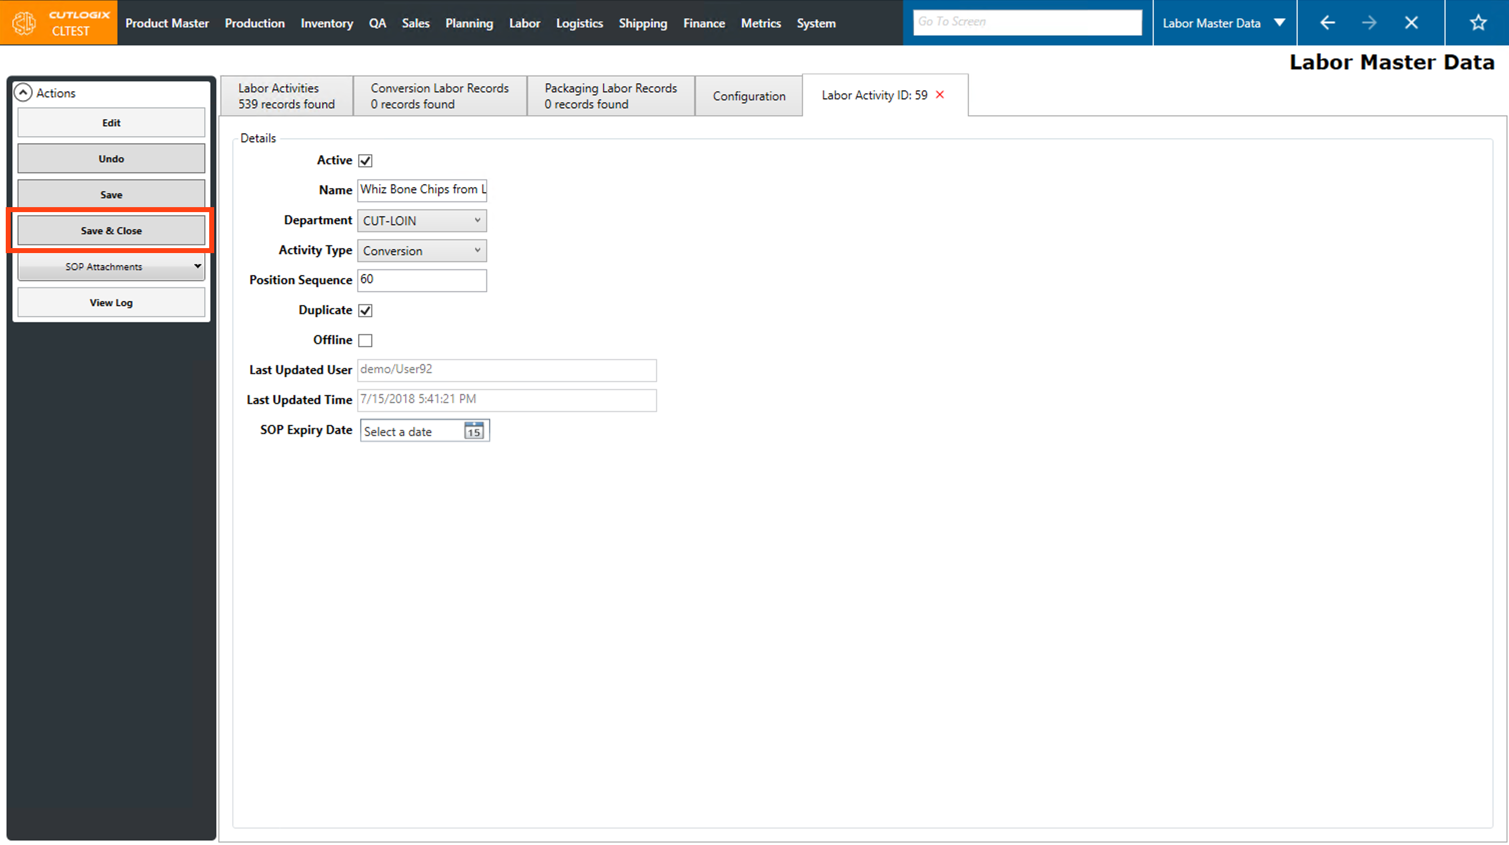
Step 4: Once all the required information has been added to the labor activity, click the "Save & Close" button in the Actions Panel to save the new labor activity.

Step 5: You'll then be returned to the "Labor Activities" tab, and the newly added labor activity will be shown in the list.
How to Edit a Labor Activity
DemoStep 1: Navigate to the "Labor Master Data" page (Under the Labor menu → Labor Master Data).
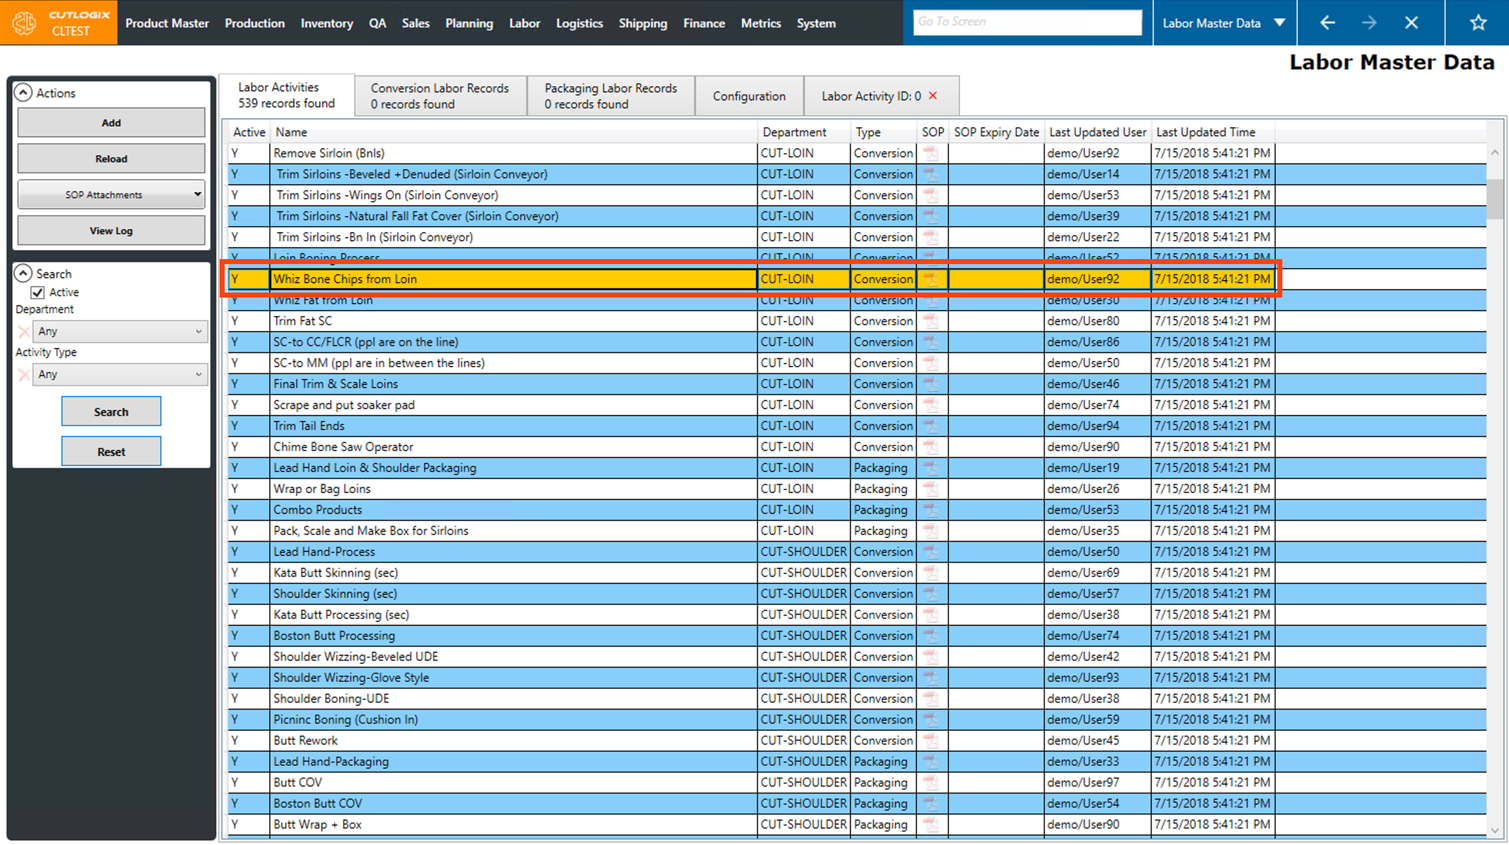
Step 2: Locate the labor activity in the list that you want to edit, then double-click on it.
Step 3: A tab will open with the details of the selected labor activity. Click the "Edit" button in the Actions Panel to enable editing.
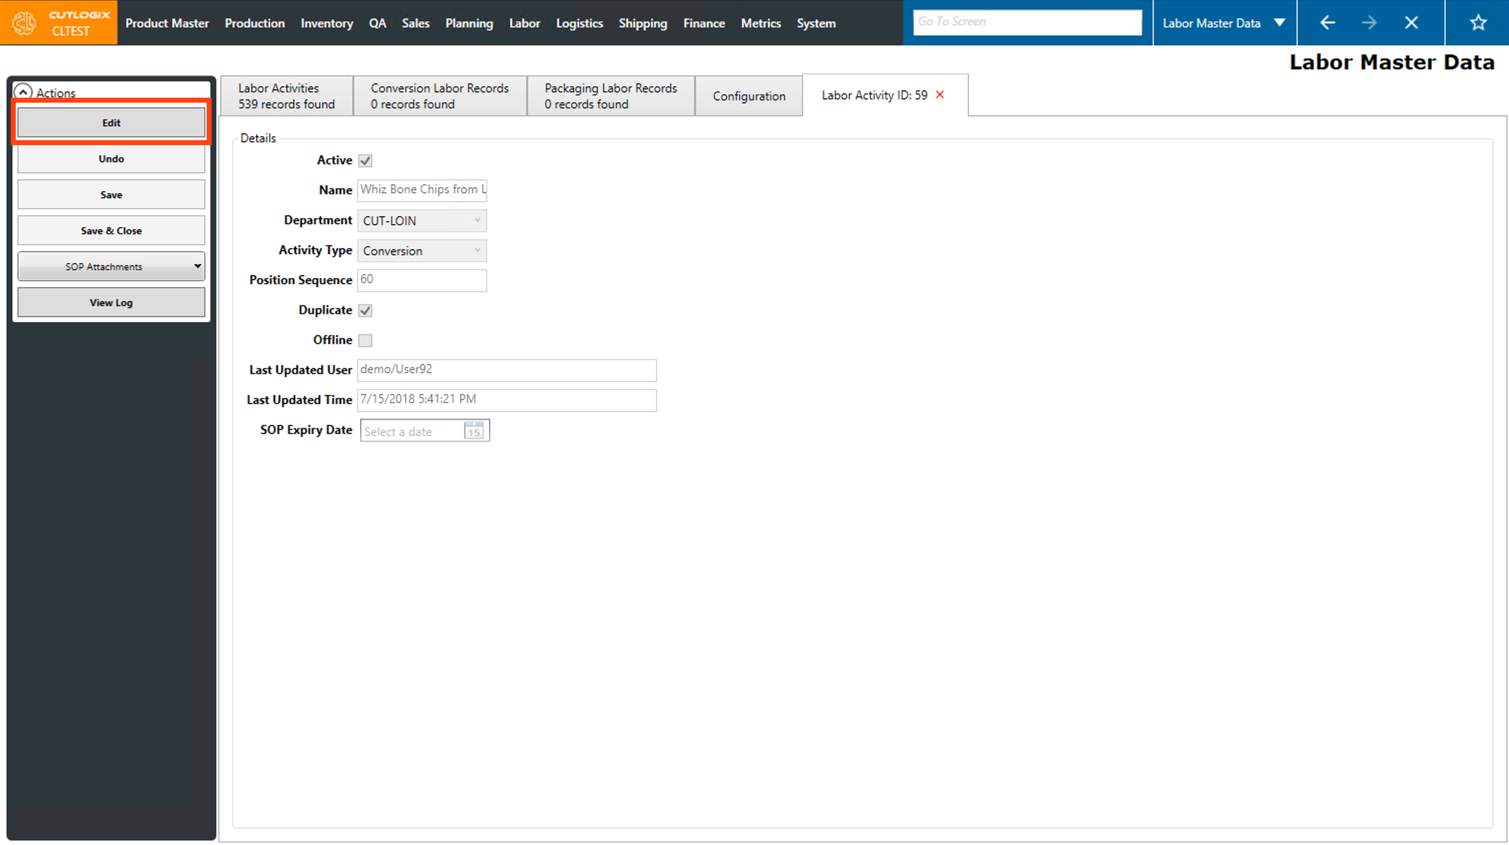
Step 4: The fields in the labor activity details will then be enabled for editing. Make any necessary edits to the labor activity.
Step 5: Once all you're finished making the necessary changes, click on the "Save & Close" button in the Actions Panel. The changes to the labor activity will then be saved.
How to Attach an SOP to a Labor Activity
DemoStep 1: Navigate to the "Labor Master Data" page (Under the Labor menu → Labor Master Data).
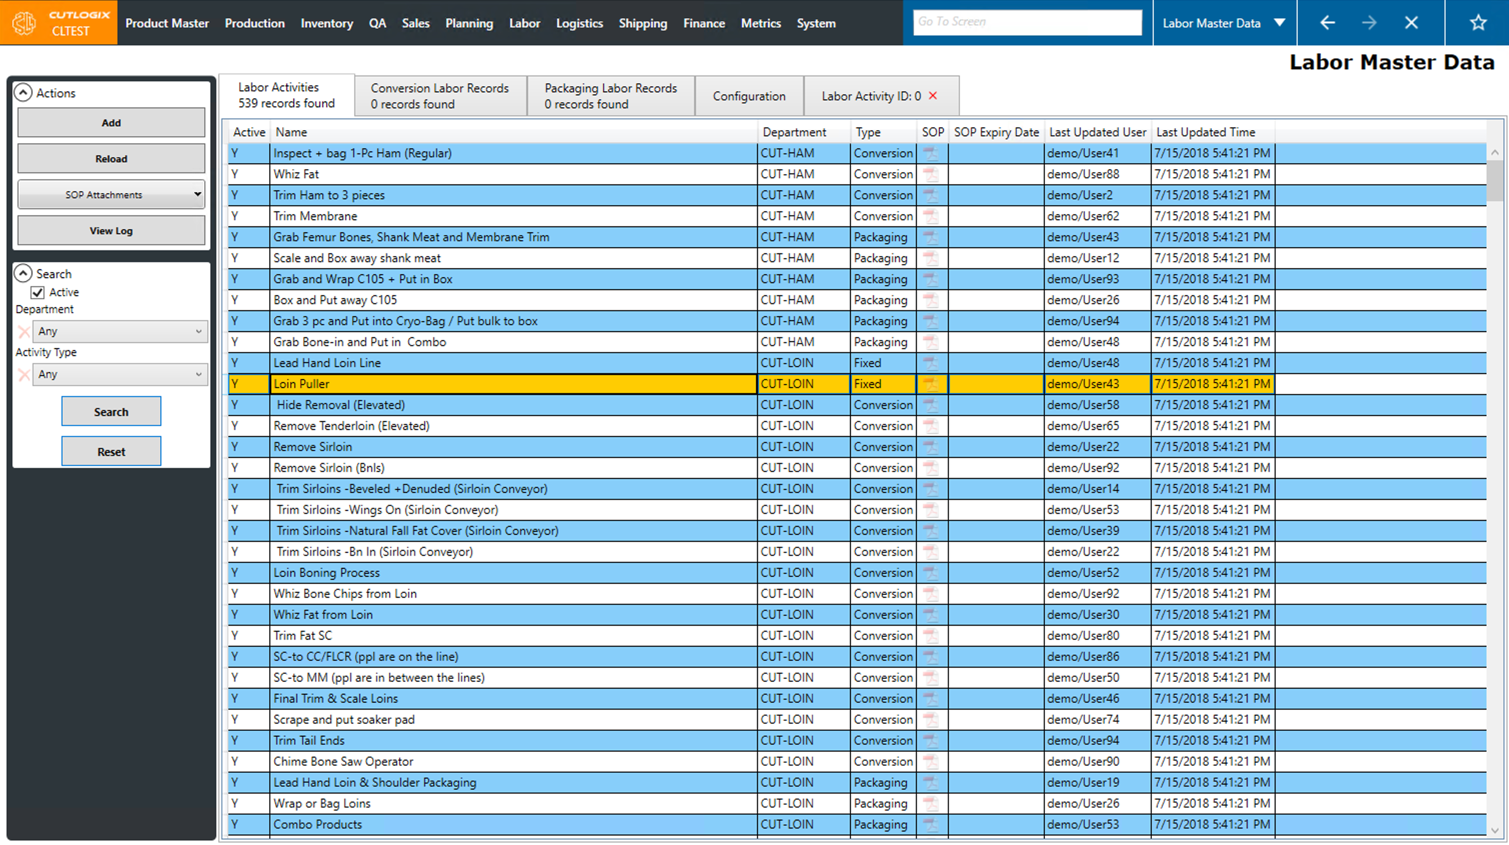
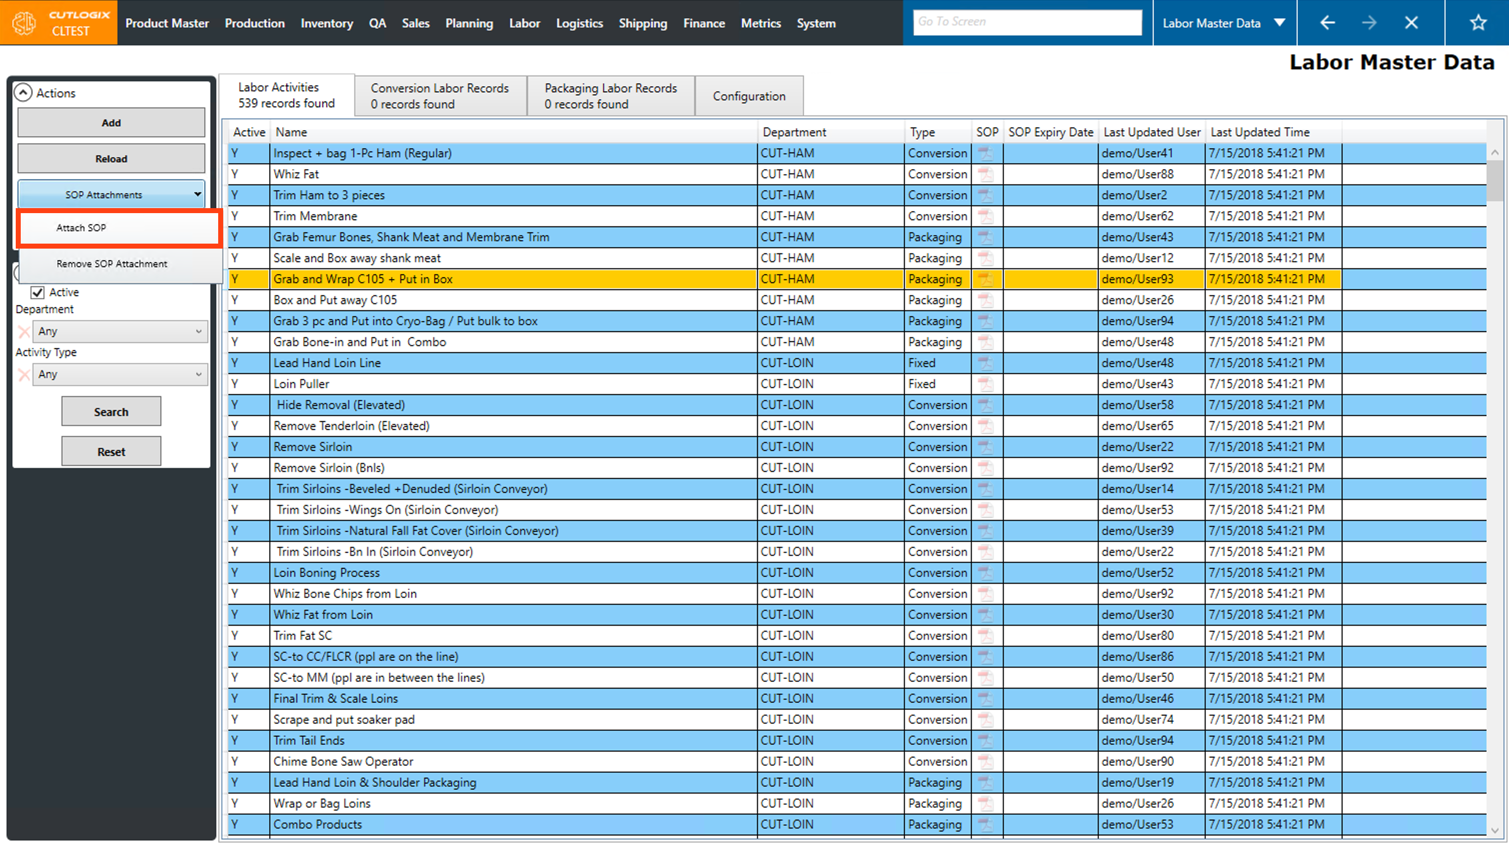
Step 2: Click on the labor activity that you want to attach an SOP to, once selected it will be highlighted in orange. Ensure that it does not already have an SOP attached by confirming the icon in the "SOP" column is a faded color.

Step 3: Click on the "SOP Attachments" menu in the Actions Panel, then click on the "Attach SOP" option.
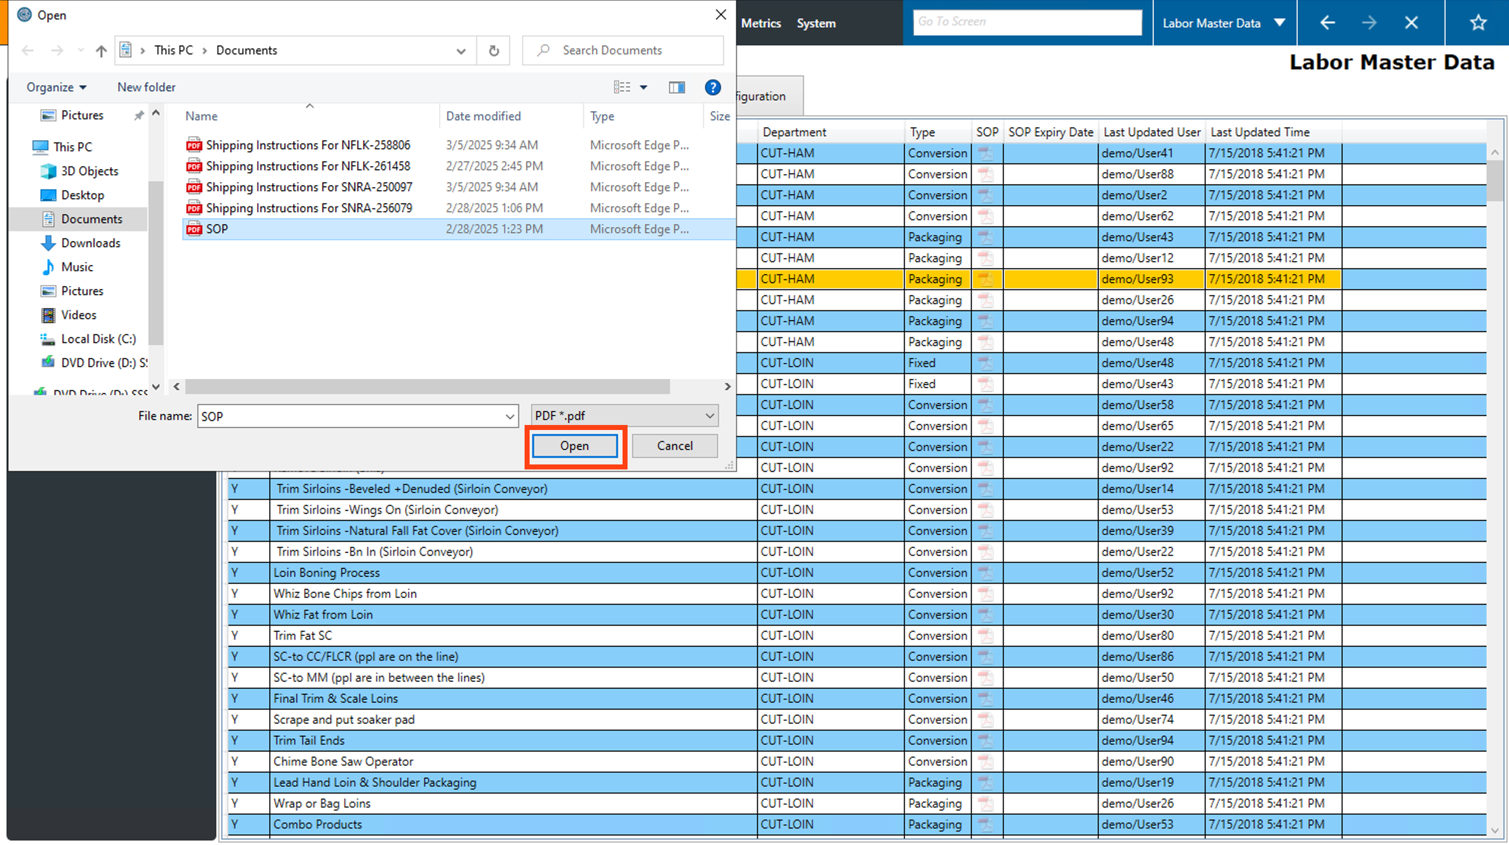
Step 4: Your file explorer will open where you can then choose the PDF file that you want to attach to the labor activity in CutLogix. Click on the file and then click "Open".
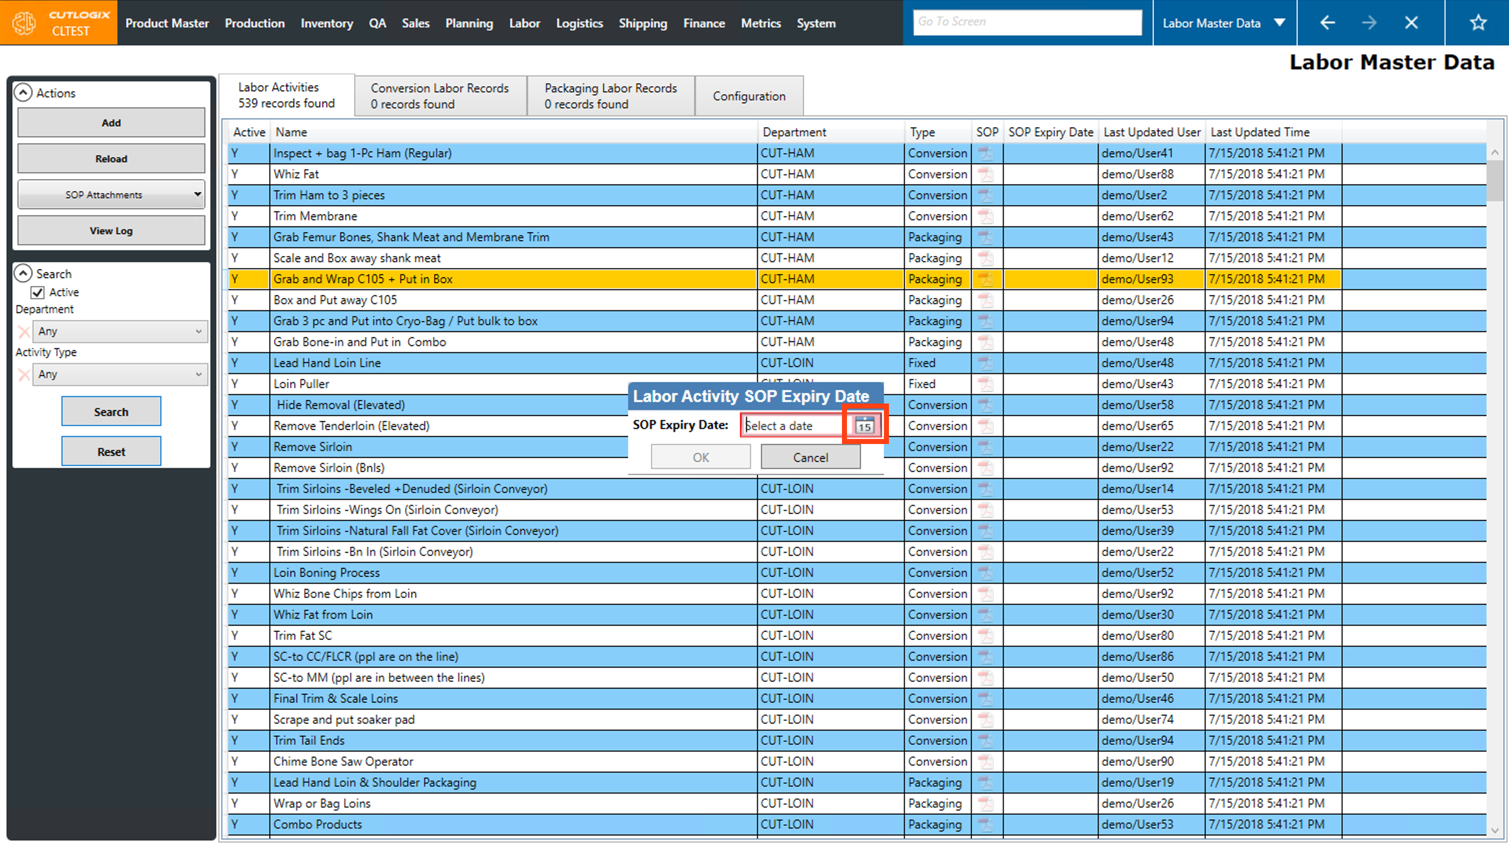
Step 5: A dialog will then open for you to set an dSOP Expiry Date. Click on the calendar icon to bring up a calendar to choose the expiry date from.
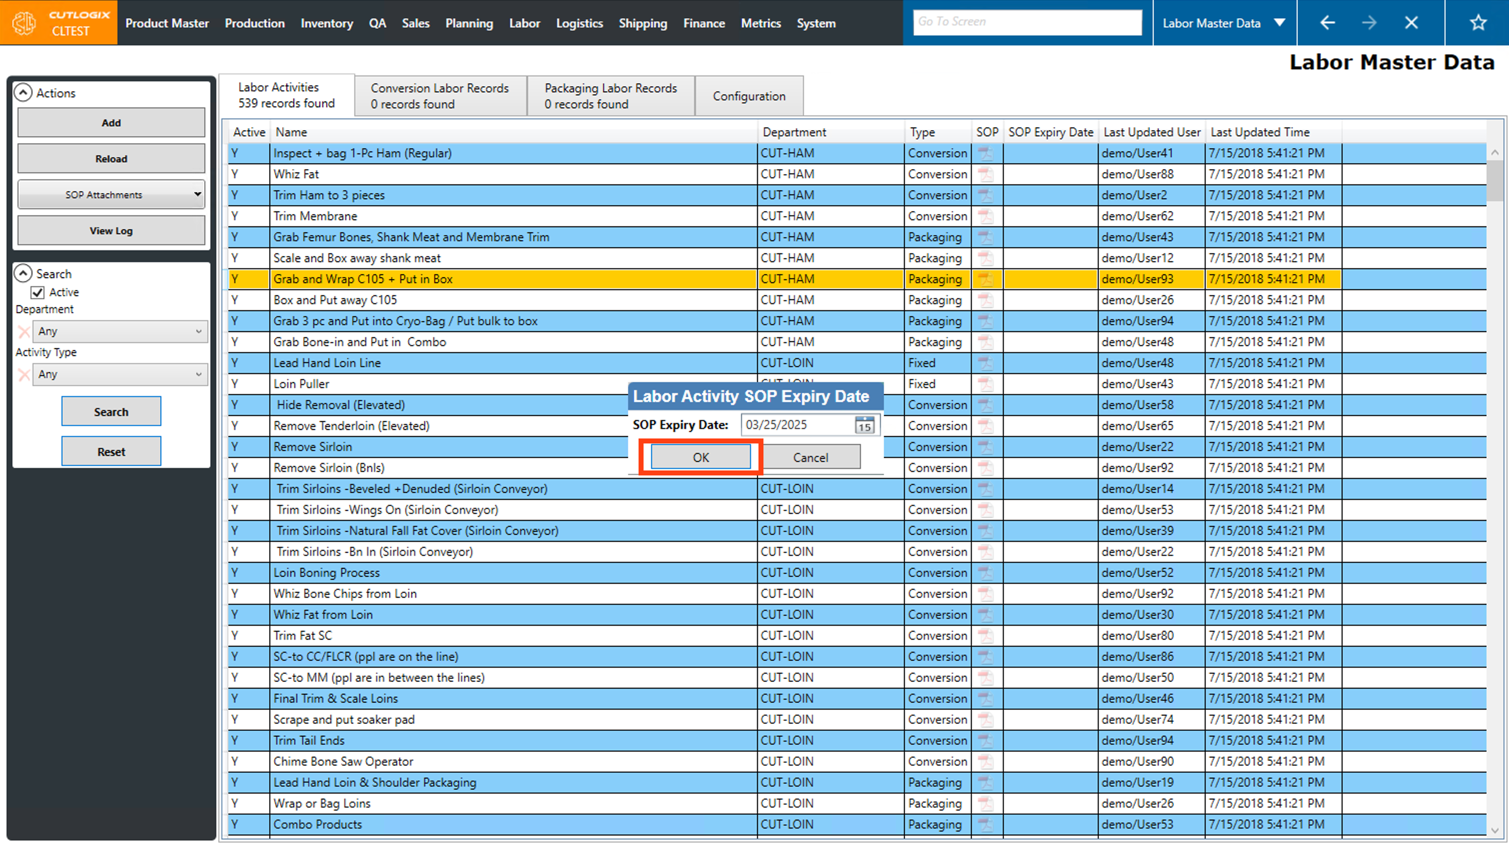
Step 6: Once the SOP Expiry Date has been set, click the "OK" button. The SOP icon beside the labor activity will now display in full color, indicating that the activity has an attached SOP.
How to Add a Conversion Labor Record
DemoStep 1: Navigate to the "Labor Master Data" page (Under the Labor menu → Labor Master Data).
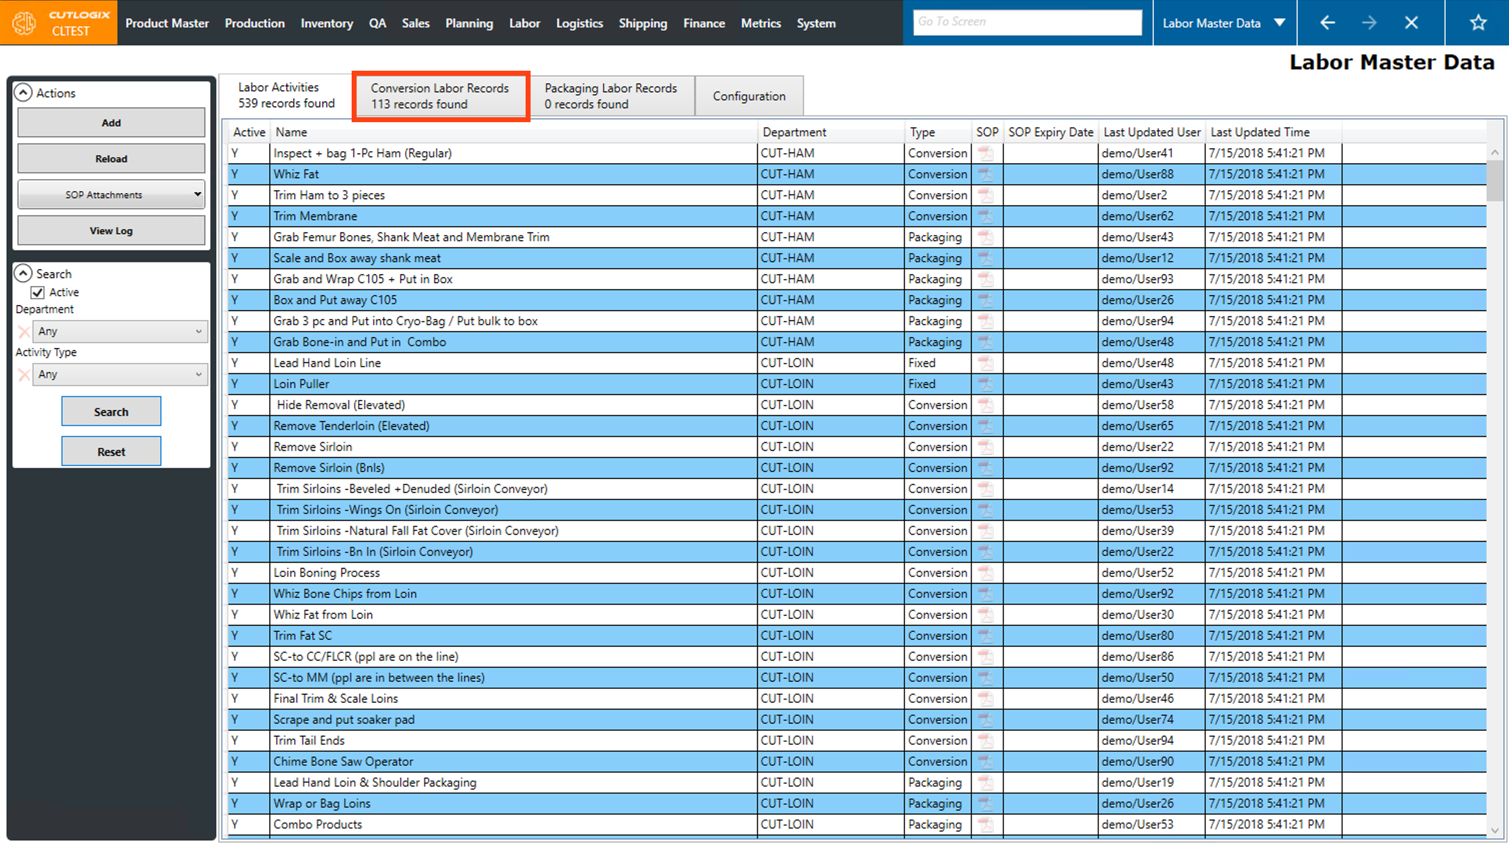
Step 2: Click on the "Conversion Labor Records" tab.
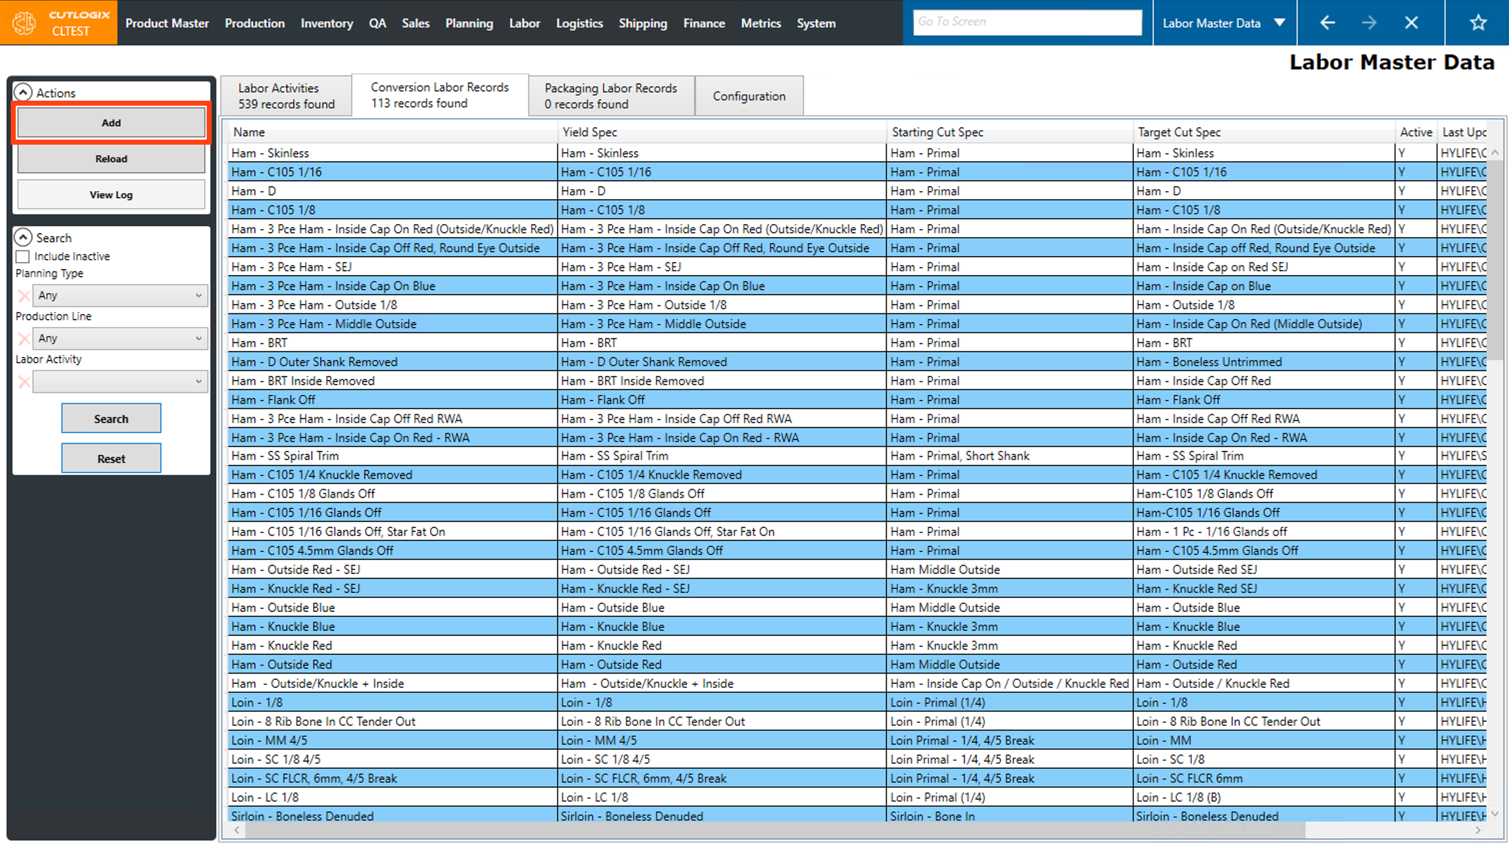
Step 3: Click the "Add" button in the Actions Panel.
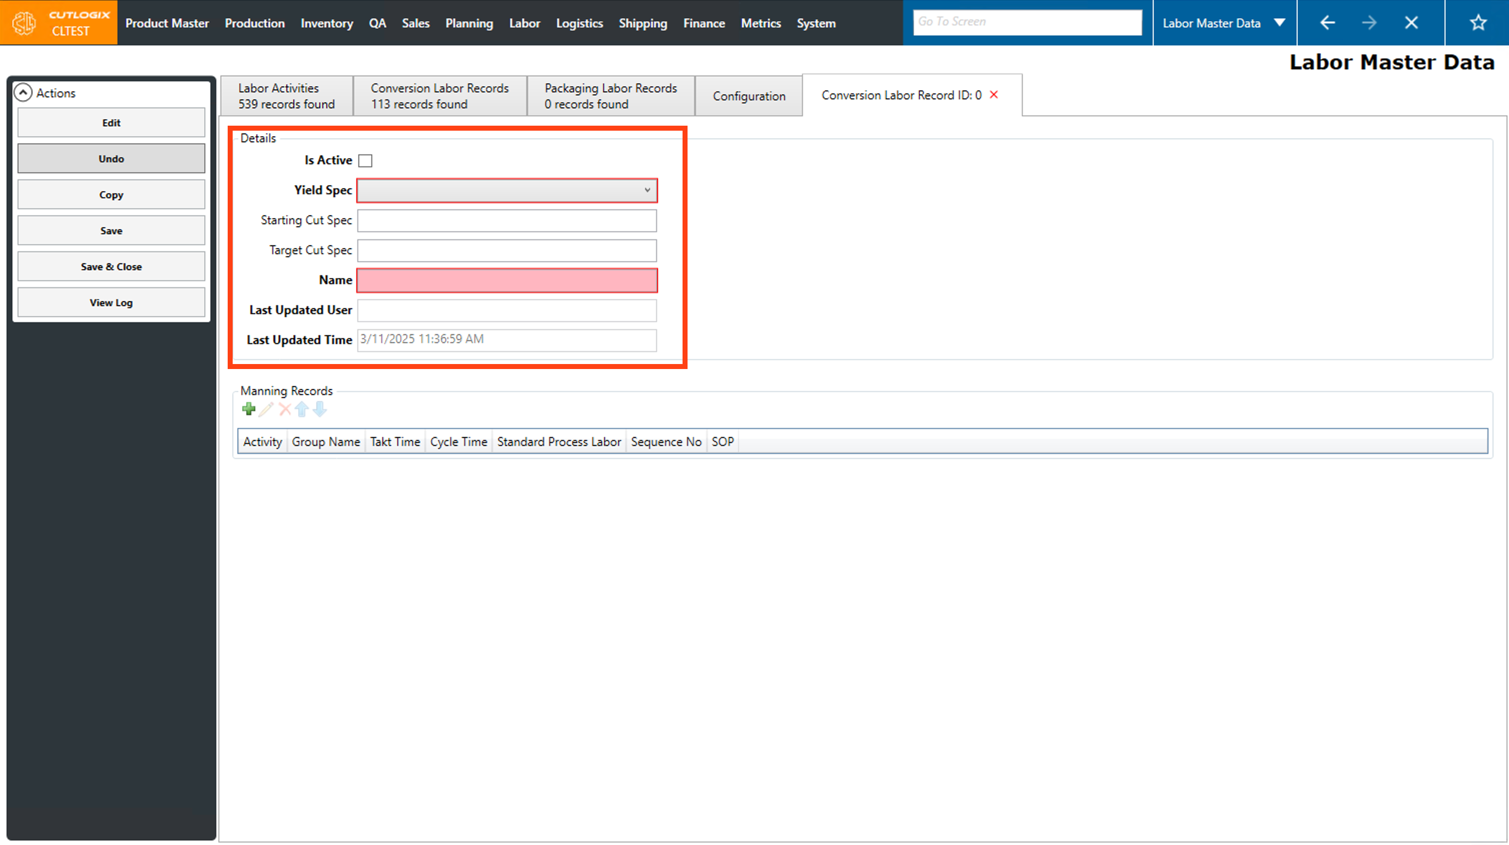
Step 4: A new tab will open where you can enter the details about the conversion labor record. Fields that are highlighted in red are required and must be entered before the record can be saved. These fields are as follows:
• Yield Spec: Choose the yield spec from the drop-down list that the conversion labor record is for.
• Name: Enter a name for the new conversion labor record. This will be automatically populated once the Yield Spec has been chosen, but can be modified if necessary.
• Yield Spec: Choose the yield spec from the drop-down list that the conversion labor record is for.
• Name: Enter a name for the new conversion labor record. This will be automatically populated once the Yield Spec has been chosen, but can be modified if necessary.
Step 5: Next, you can start adding Manning Records. Manning records are labor activities (from the labor activities tab) that are involved in competing the conversion labor record (converting meat from one cut spec to another). Click the green "+" button under the "Manning Records" title.

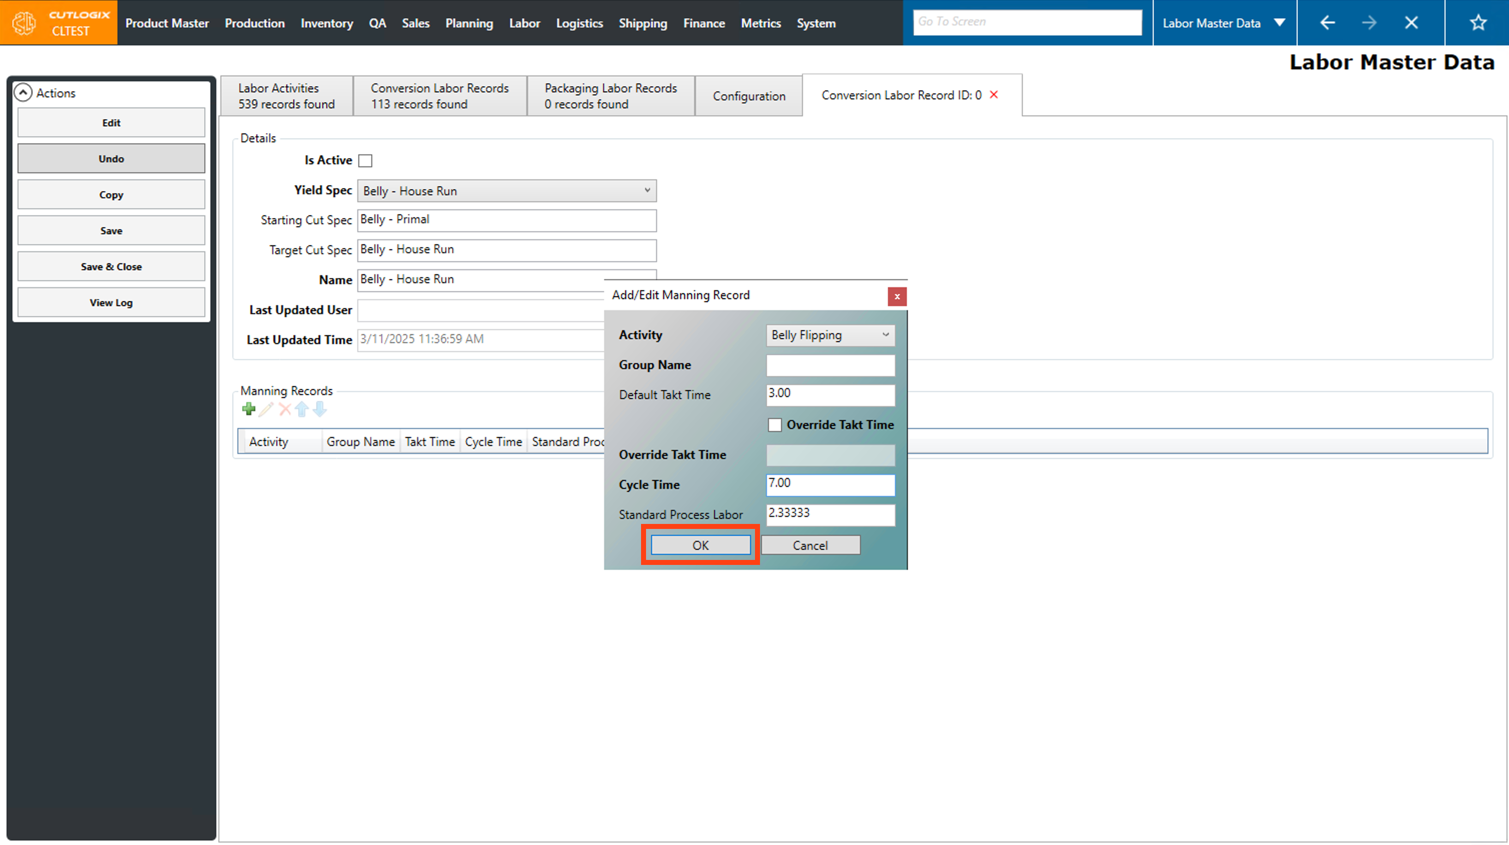
Step 6: A dialog will then open where you can enter information about the new manning record. Fields highlighted in red are required and must be entered before the record can be saved. They are as follows:
• Activity: Choose the activity to add to the manning record from the drop-down list.
• Cycle Time: Enter the amount of time (in seconds) that it takes to complete this task. This will be sued to calculate the standard process labor required for the conversion labor record.
• Activity: Choose the activity to add to the manning record from the drop-down list.
• Cycle Time: Enter the amount of time (in seconds) that it takes to complete this task. This will be sued to calculate the standard process labor required for the conversion labor record.

Step 7: Once all the required fields have been entered for the manning record, click the "OK" button to save the manning record on the conversion record.
Step 8: Repeat steps 6 and 7 to add all the required manning records to the conversion labor record. Once all the manning records have been added, click the "Save & Close" button in the Actions Panel to save the conversion labor record. The record will then be displayed on the conversion labor records page.

How to Edit a Conversion Labor Record
DemoStep 1: Navigate to the "Labor Master Data" page (Under the Labor menu → Labor Master Data).
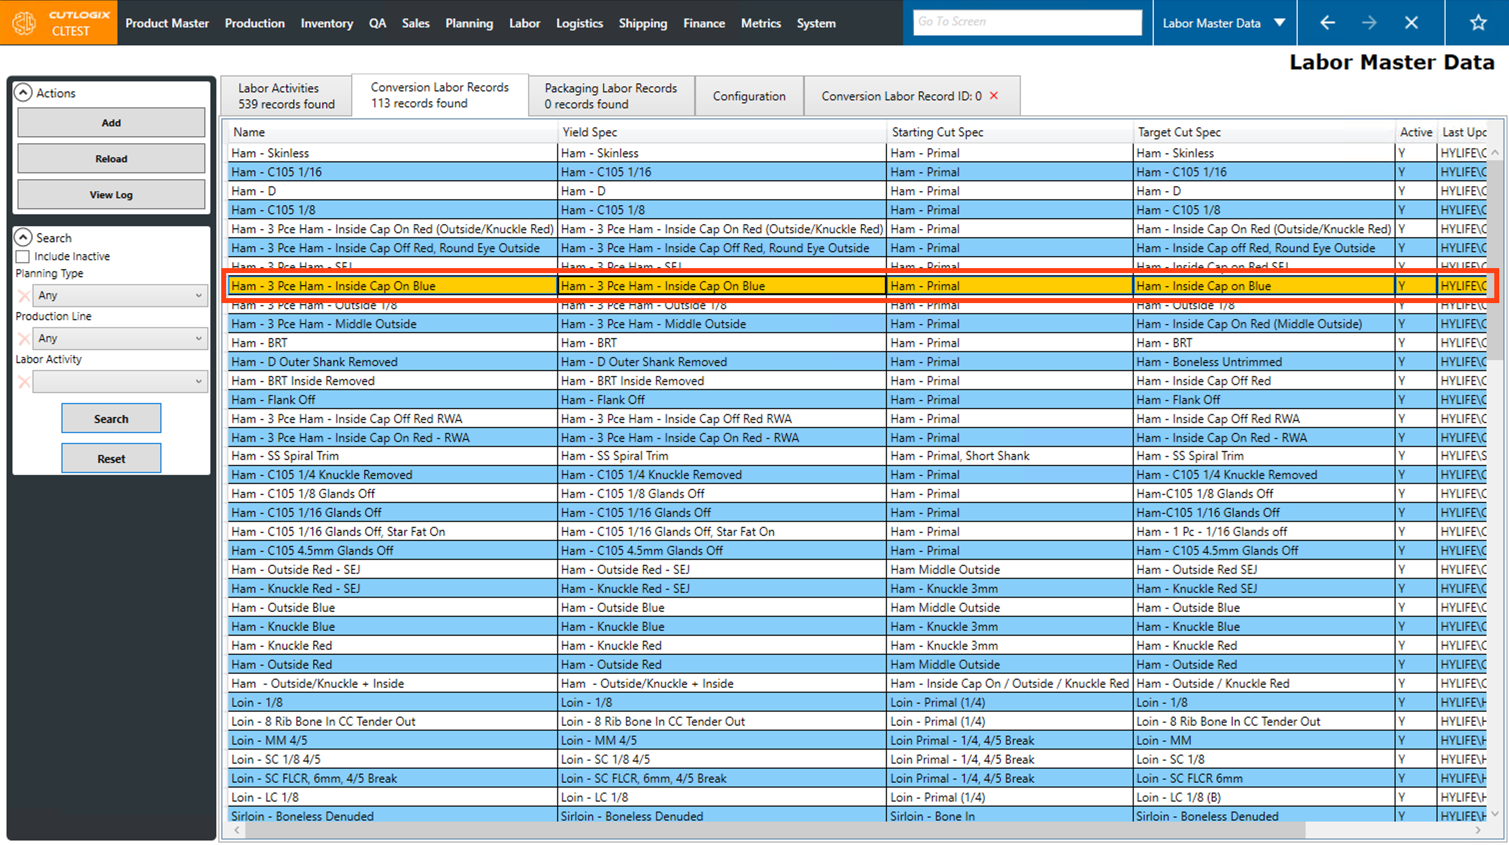
Step 2: Go to the "Conversion Labor Records" tab and double-click on the conversion labor record that you want to edit.
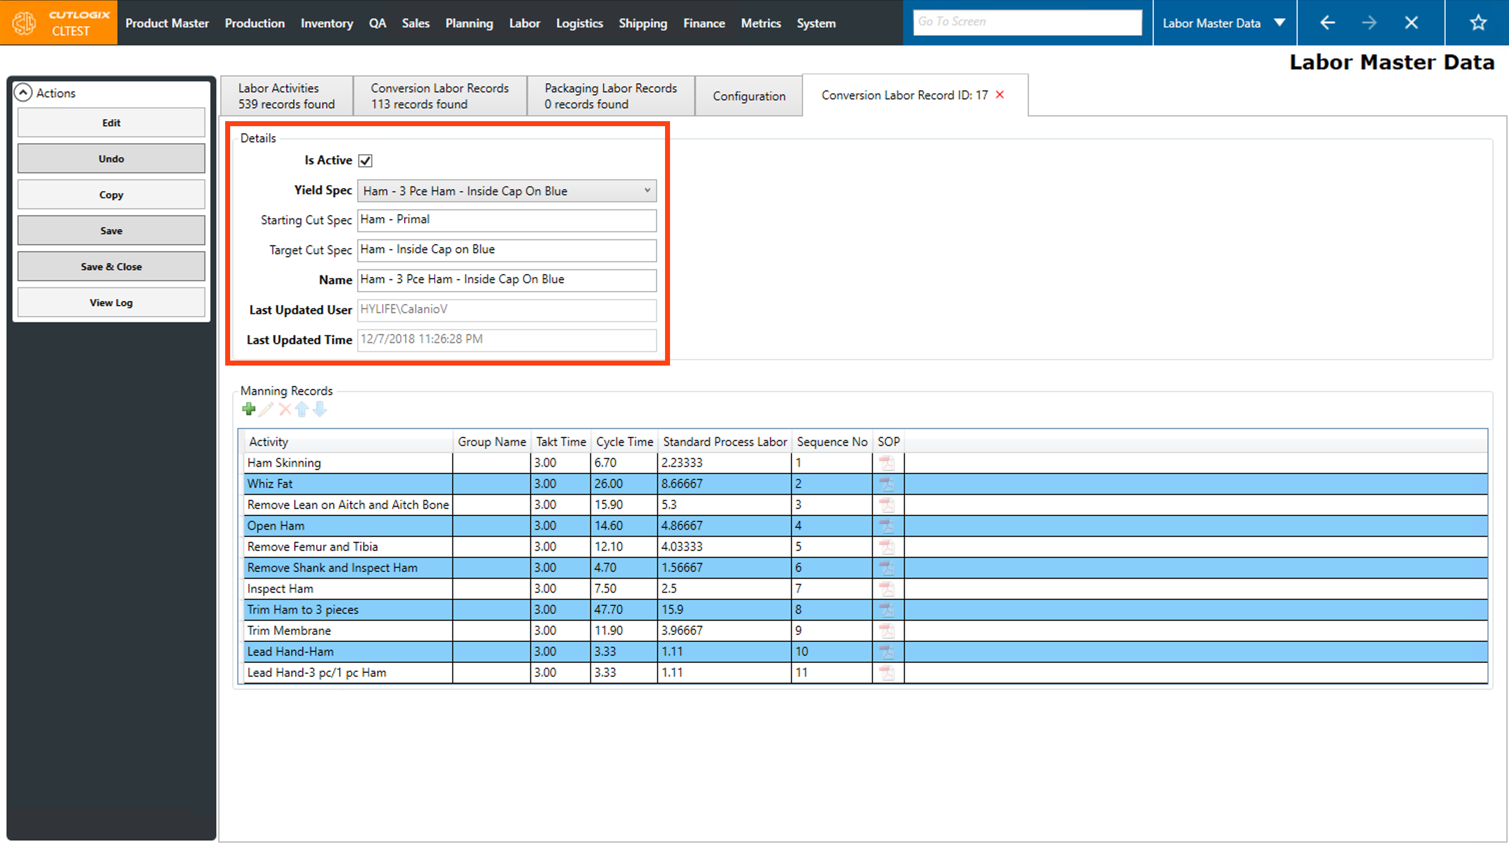
Step 3: A tab will open, displaying the details about the conversion labor record. Click the "Edit" button in the Actions Panel to enable editing the conversion record.
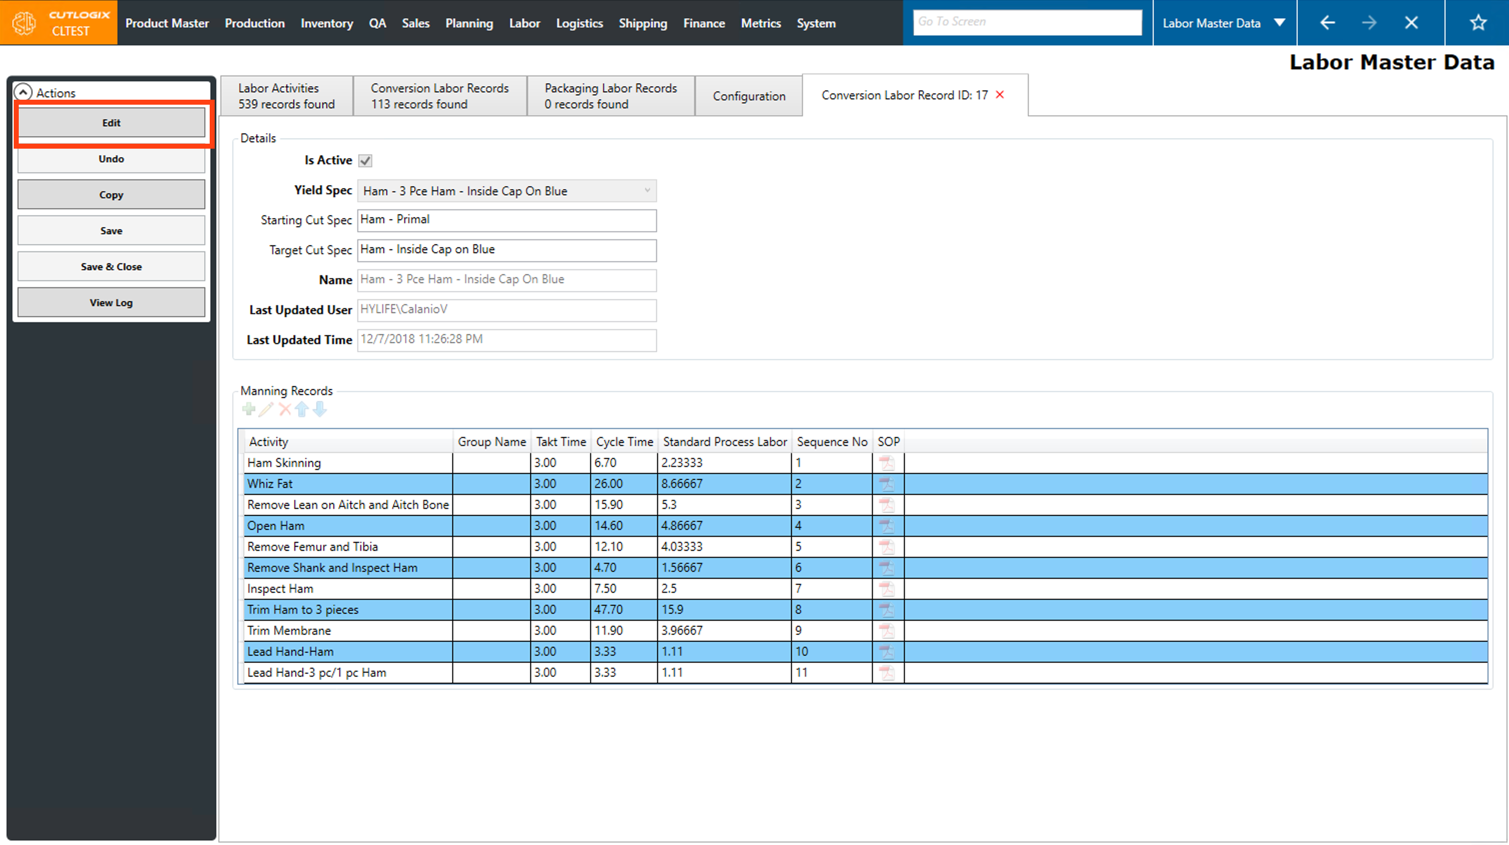
Step 4: In the "Details" section, you can then make changes to the yield spec, the name of the conversion labor record and the active status.
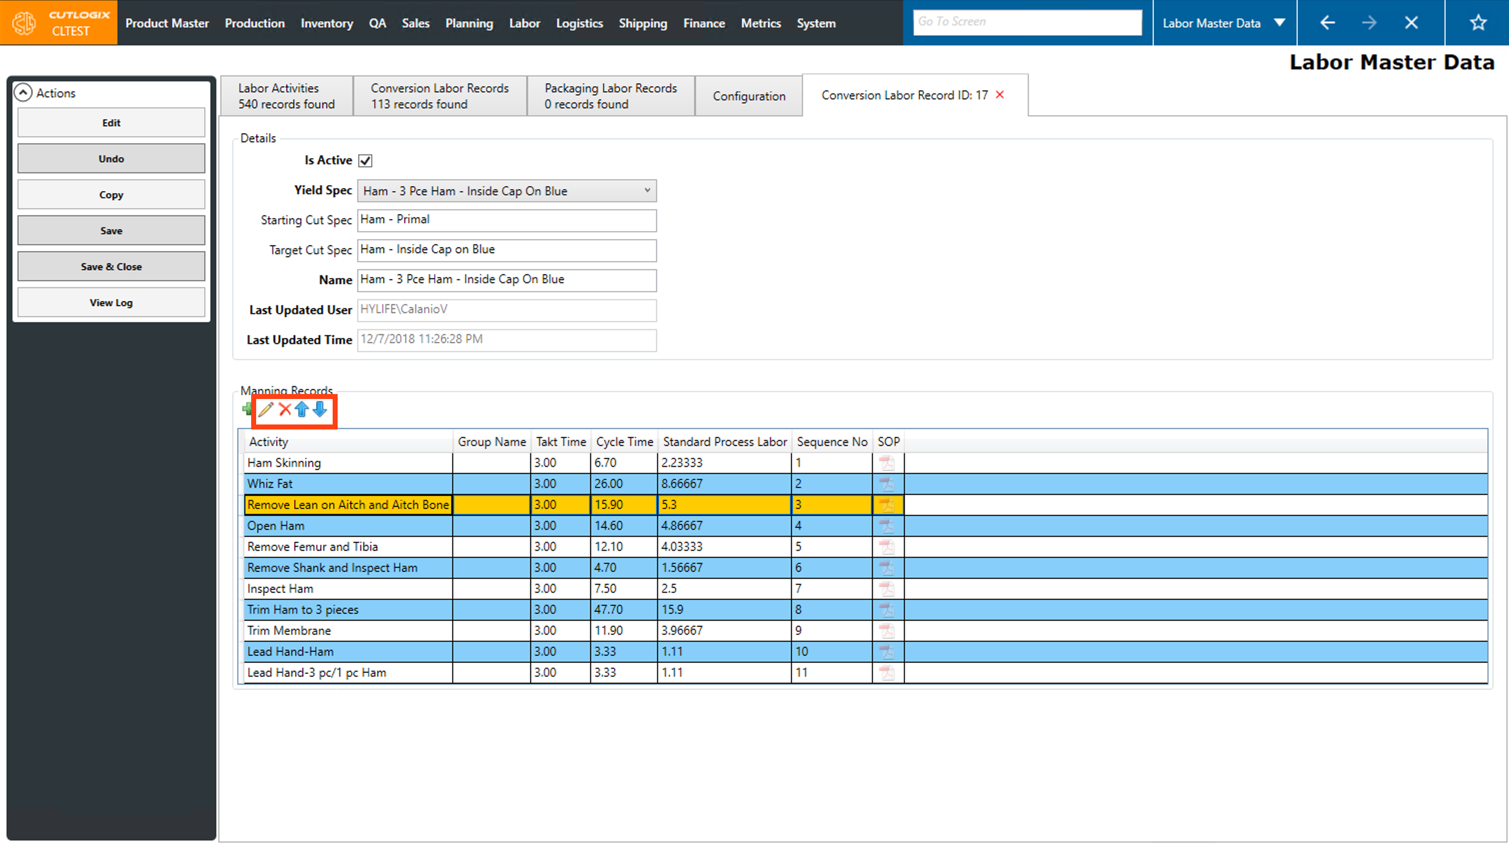
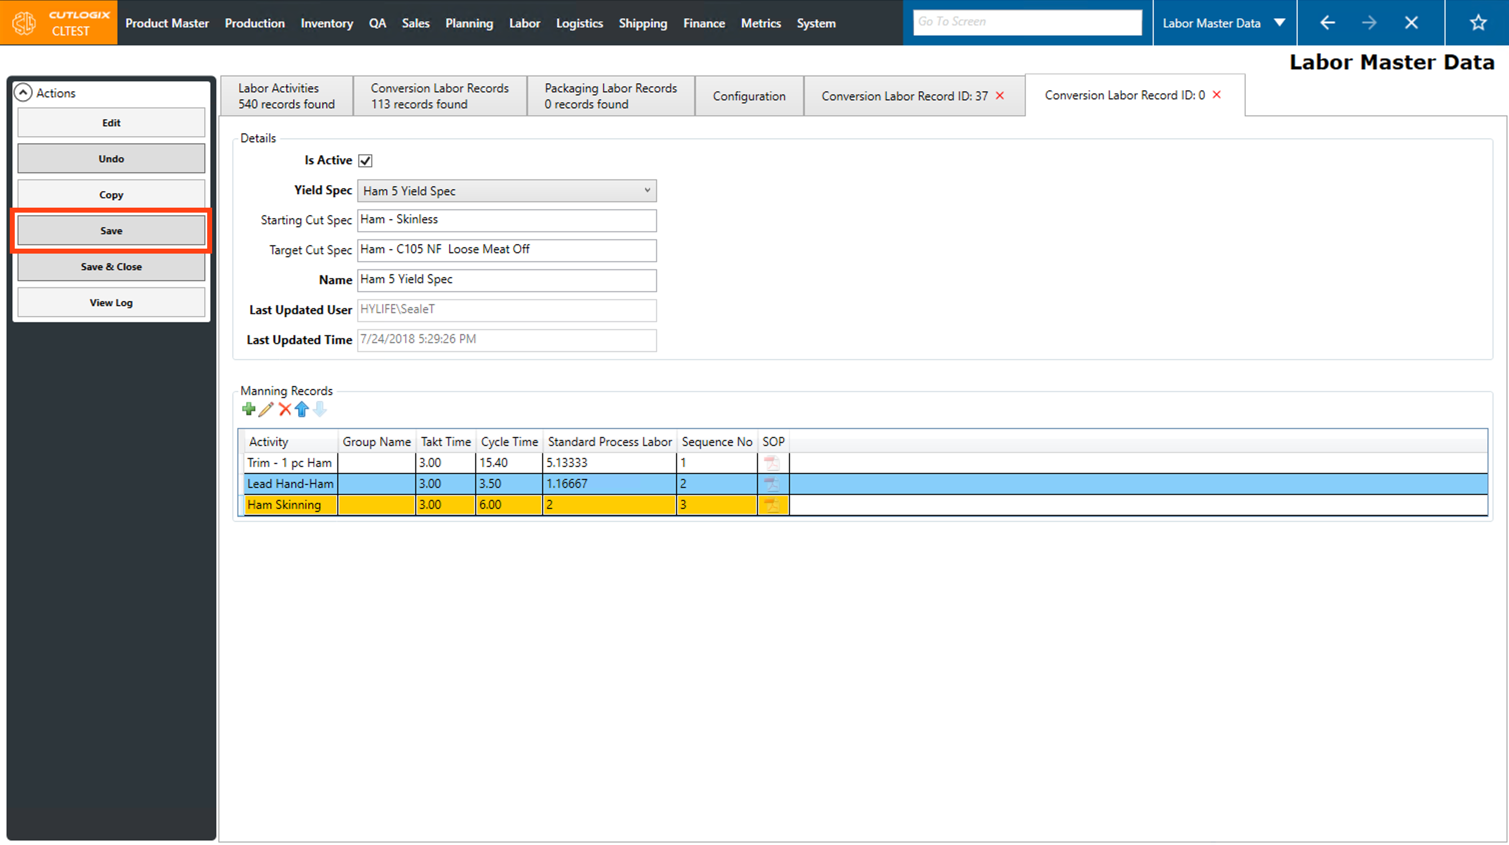
Step 5: Several actions are also available to make changes in the Manning Records section. Click on a Manning Record (once selected it will be highlighted in orange), then several actions buttons will be enabled. The first one is the pencil icon, clicking this option will allow you to edit the manning record. Next is the "X" icon, this action will delete the currently selected manning record. Lastly are the Up/Down arrows, clicking on one of these will move the selected manning record in the direction of the arrow in the list. Doing this will adjust the sequence number associated with the manning record, as they are shown in order they need to be completed from top to bottom.
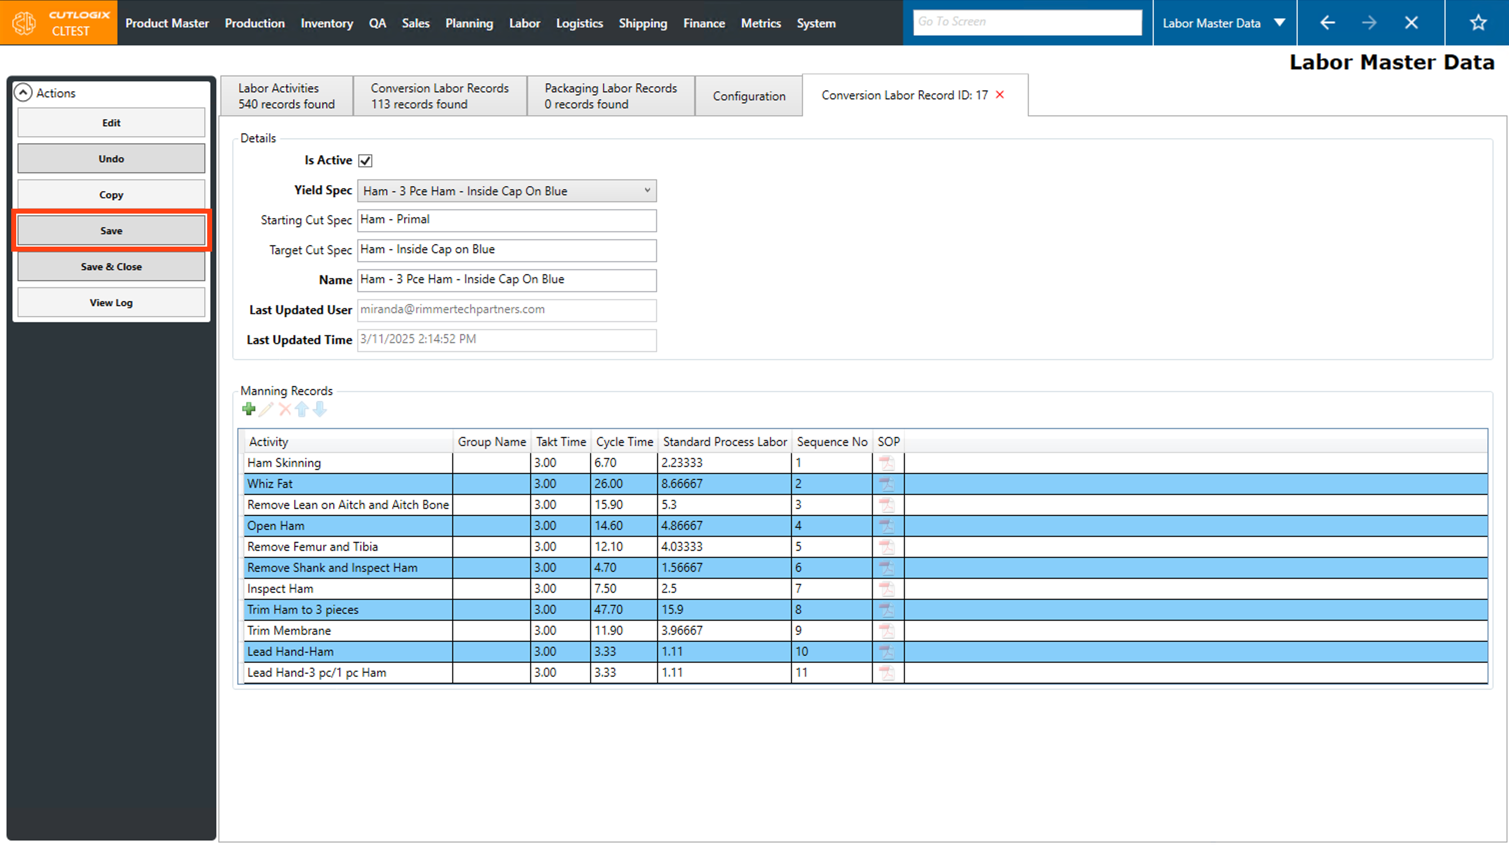
Step 6: Once you're finished making changes to the conversion labor record, click the "Save" button in the Actions Panel to save your changes. Alternatively if you want to save and close the edit tab, click the "Save and Close" button.
If you don't want to save your changes, clicking "Undo" will discard them.
If you don't want to save your changes, clicking "Undo" will discard them.
How to Copy a Conversion Labor Record
Demo Conversion Labor Records can be copied for use as a starting point when creating a new conversion labor record.
Step 1: Navigate to the "Labor Master Data" page (Under the Labor menu → Labor Master Data).
Step 2: Go to the "Conversion Labor Records" tab and double click on the conversion labor record that you want to copy.
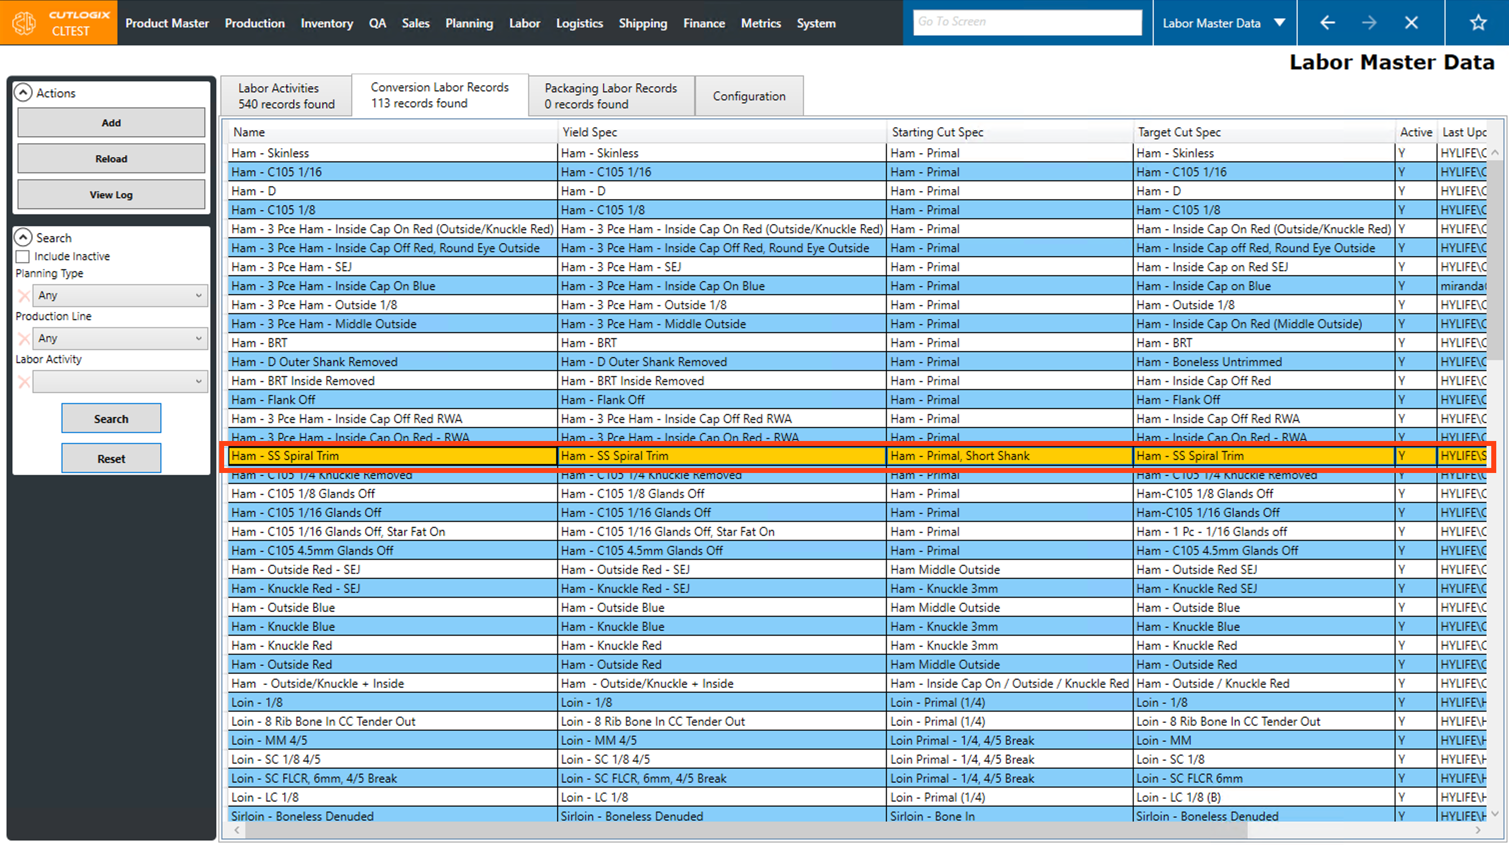
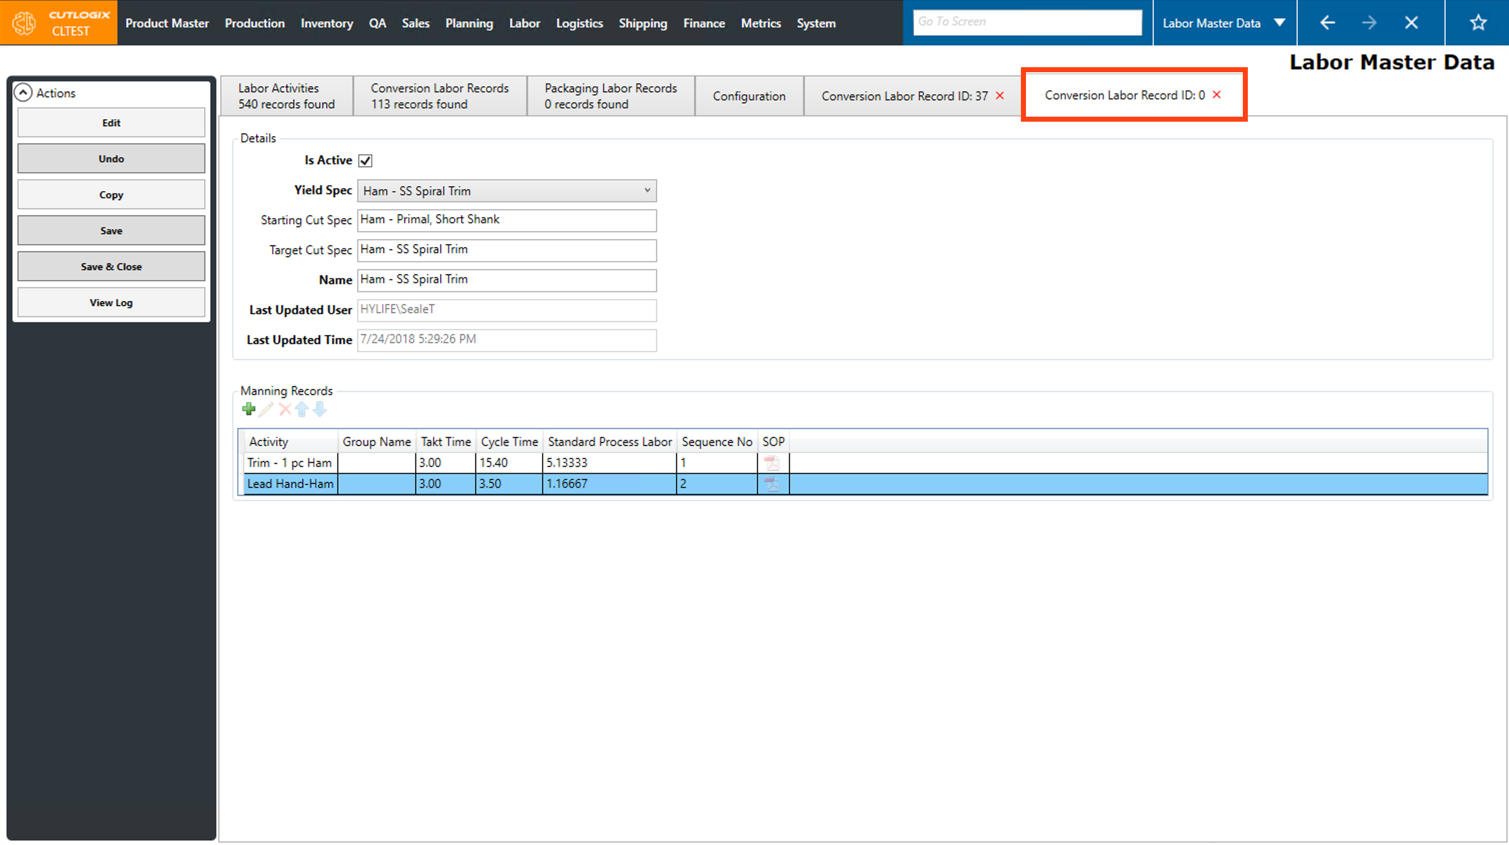
Step 3: The details page for the conversion labor record will open. Click on the "Copy" button in the Actions Panel.

Step 4: A new tab will open on the page. This tab is a duplicate of the record that was copied. Here you can make changes to the record such as changing the yield spec, name and adding/editing manning records to make it suitable for the new conversion labor record. (Further information on how to edit can be found in the section above.)
Step 5: Once all the modifications to the new conversion labor record have been completed, click the "Save" button in the Actions Panel to save the new record. Alternatively if you want to save and close the details tab, click the "Save and Close" button.
How to Add a Packaging Labor Record
DemoStep 1: Navigate to the "Labor Master Data" page (Under the Labor menu → Labor Master Data).
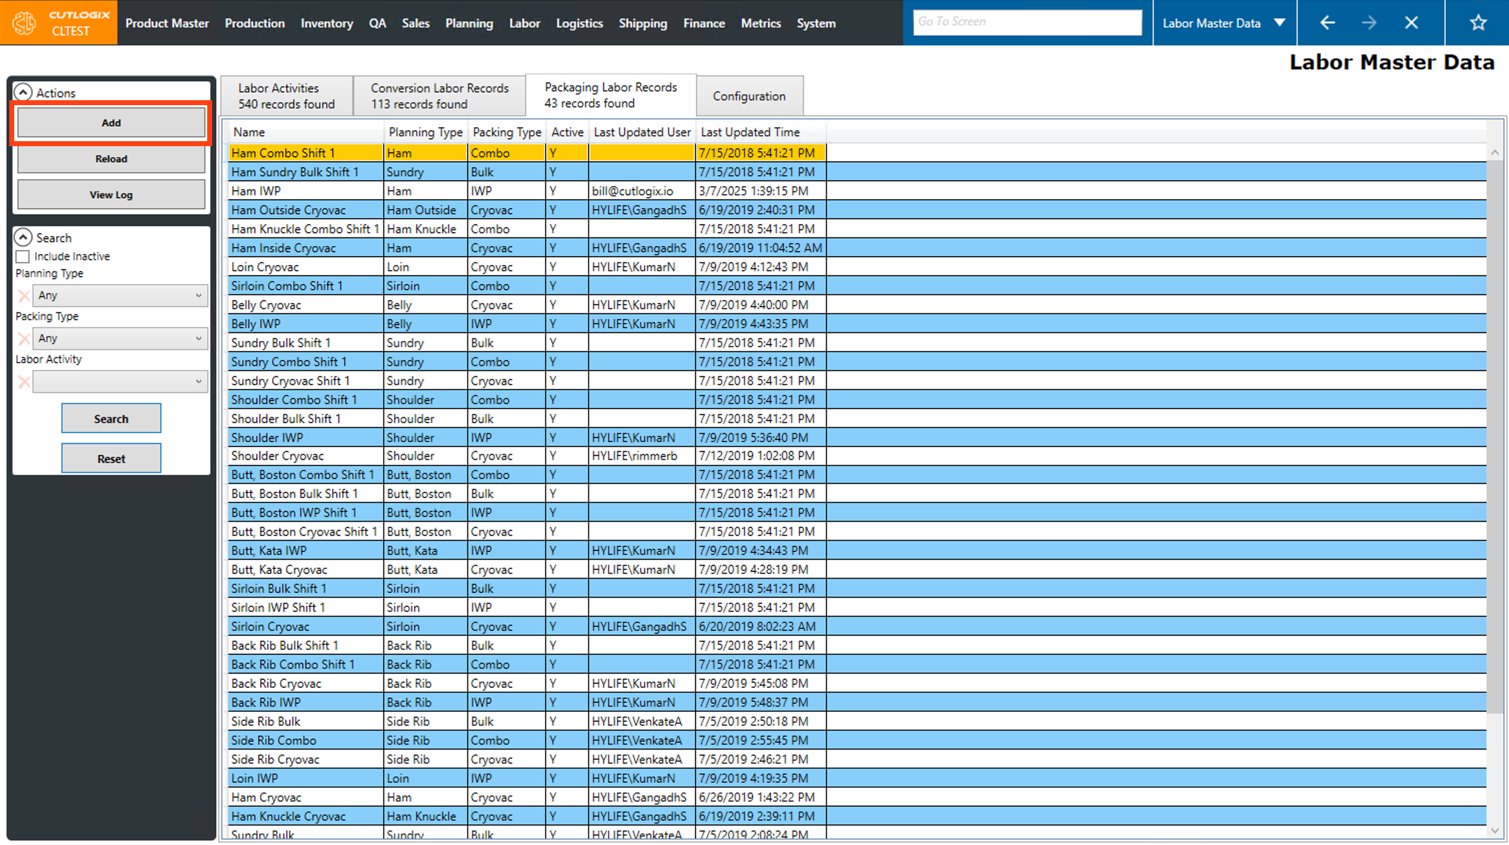
Step 2: Click on the "Packaging Labor Records" tab.
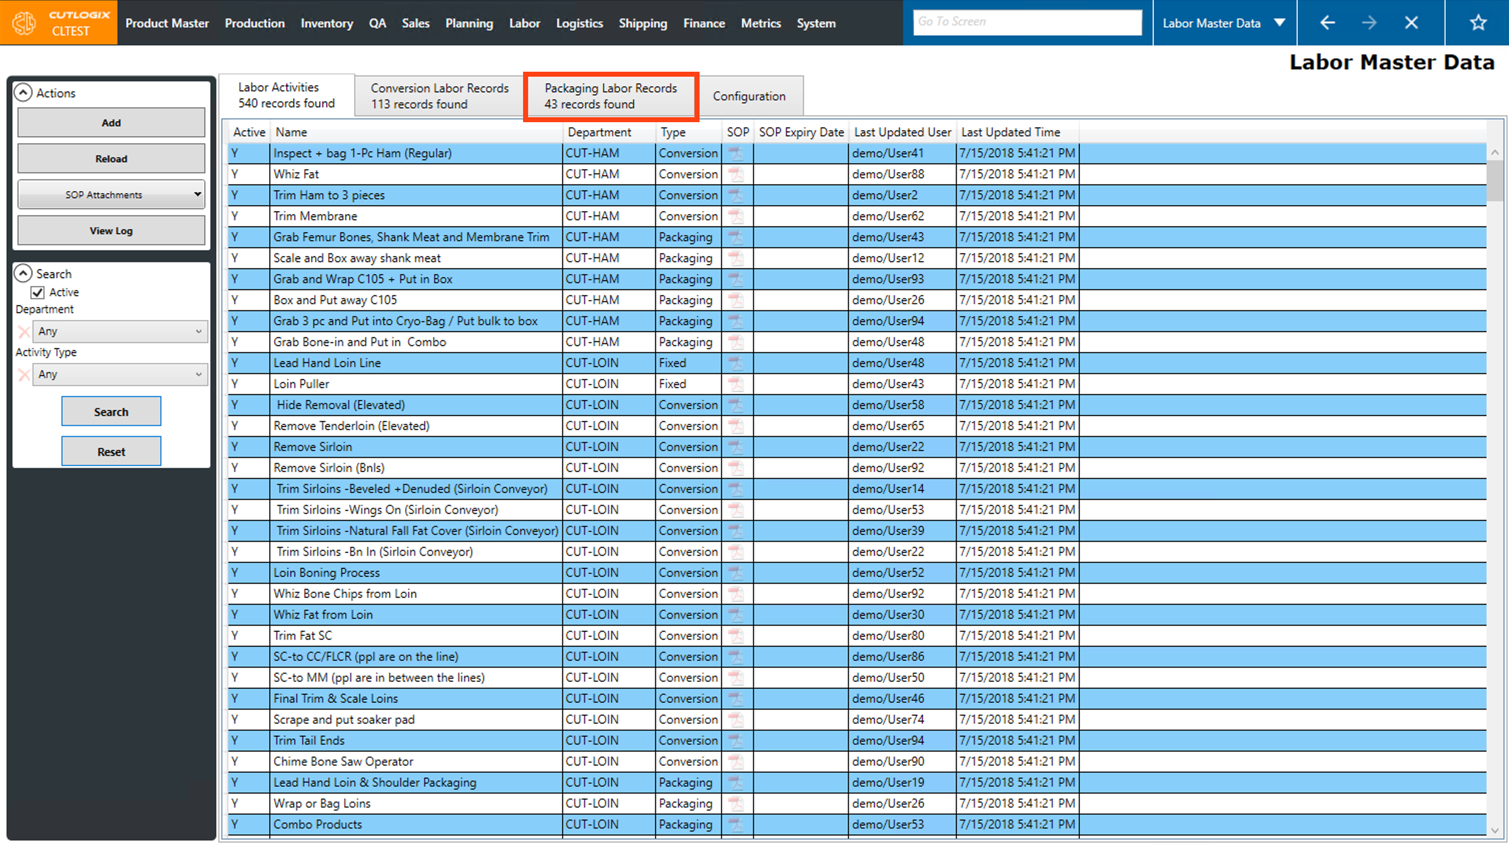
Step 3: Click the "Add" button in the Actions Panel.
Step 4: A new tab will open where you can enter the details about the packaging labor record. Fields that are highlighted in red are required and must be entered before the record can be saved. These fields are as follows:
• Planning Type: Choose the planning type that the labor record is for from the drop-down list.
• Packing Type: Choose the packing type from the drop-down list that the labor record is for.
• Name: The name of the packaging labor record. This will automatically be populated based on the selected planning type and packing type, but it can be changed if desired.

Step 5: Next, you can start adding Manning Records. Manning records are labor activities (from the labor activities tab) that are involved in competing the packaging labor record (converting meat from one cut spec to another). Click the green "+" button under the "Manning Records" title.

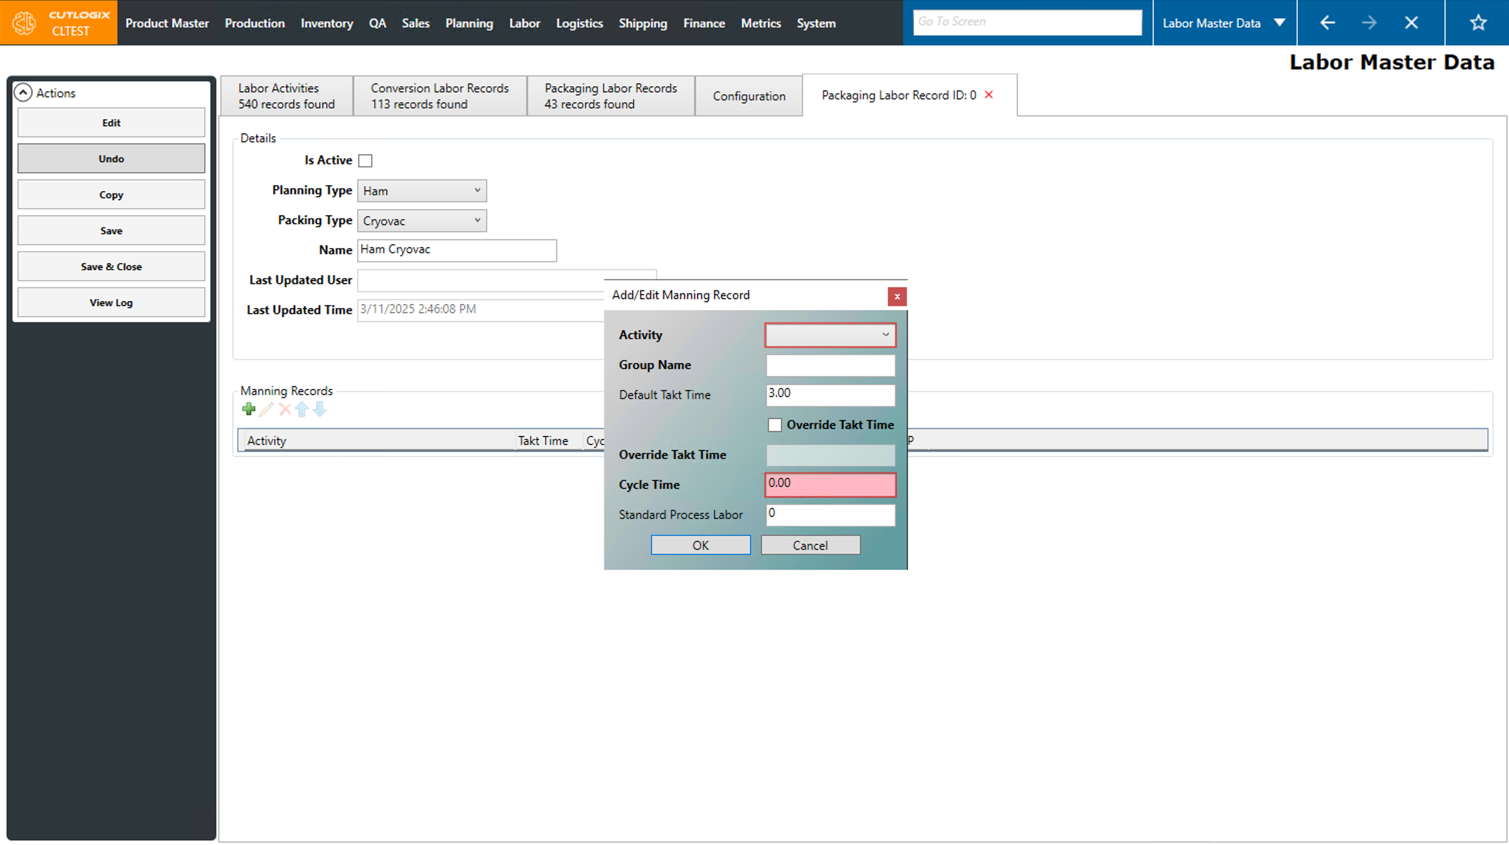
Step 6: A dialog will then open where you can enter information about the new manning record. Fields highlighted in red are required and must be entered before the record can be saved. They are as follows:
• Activity: Choose the activity to add to the manning record from the drop-down list.
• Cycle Time: Enter the amount of time (in seconds) that it takes to complete this task. This will be sued to calculate the standard process labor required for the packaging labor record.
• Activity: Choose the activity to add to the manning record from the drop-down list.
• Cycle Time: Enter the amount of time (in seconds) that it takes to complete this task. This will be sued to calculate the standard process labor required for the packaging labor record.
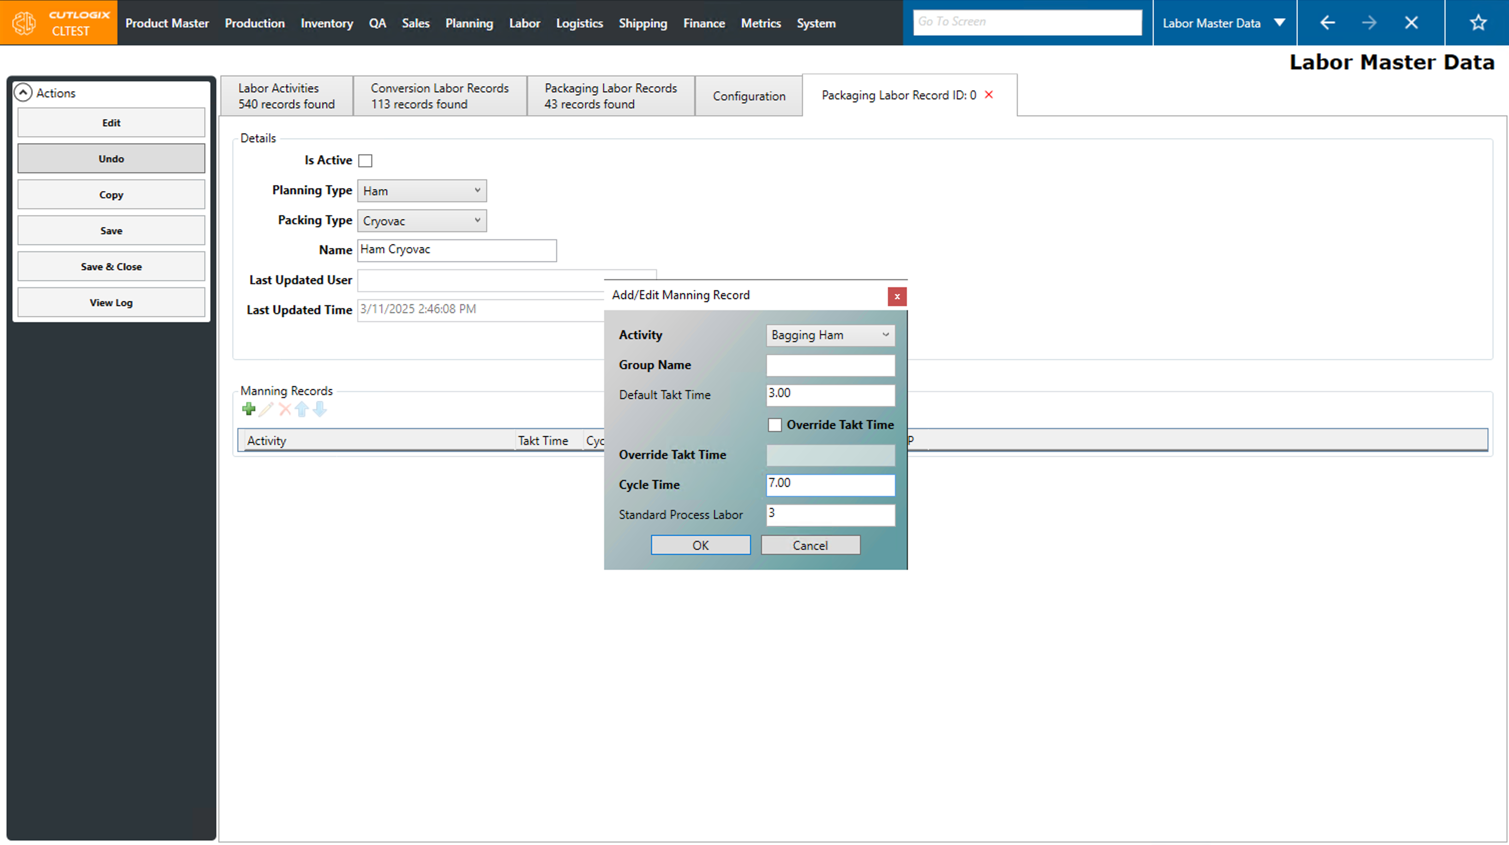
Step 7: Once all the required fields have been entered for the manning record, click the "OK" button to save the manning record on the packaging labor record.
Step 8: Repeat steps 6 and 7 to add all the required manning records to the packaging labor record. Once all the manning records have been added, click the "Save & Close" button in the Actions Panel to save the packaging labor record. The record will then be displayed on the packaging labor records page.

How to Edit a Packaging Labor Record
DemoStep 1: Navigate to the "Labor Master Data" page (Under the Labor menu → Labor Master Data).
Step 2: Go to the "Packaging Labor Records" tab and double-click on the packaging labor record that you want to edit.
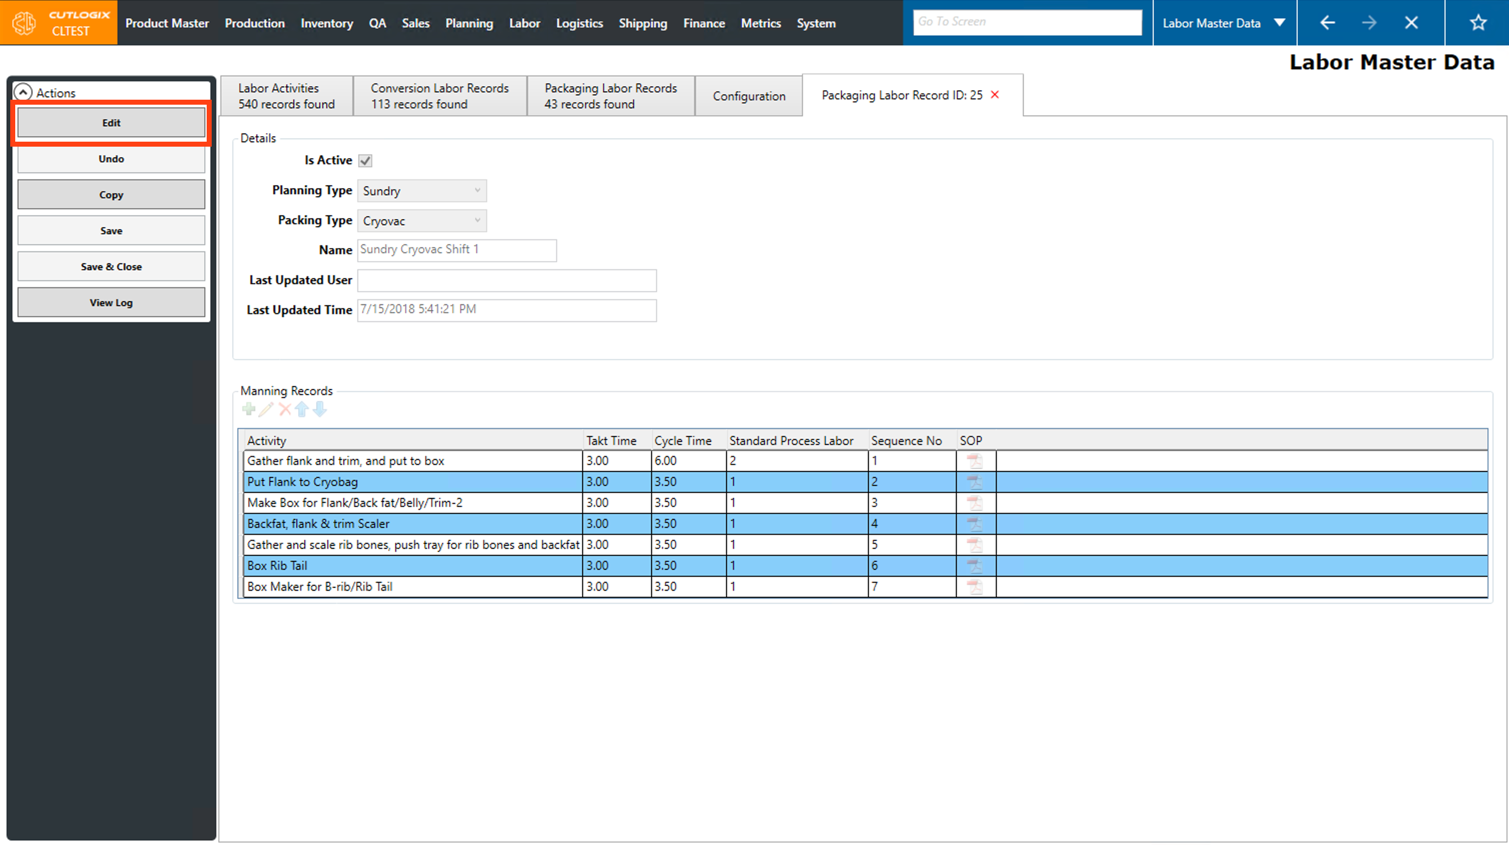
Step 3: A tab will open, displaying the details about the packaging labor record. Click the "Edit" button in the Actions Panel to enable editing the packaging record.
Step 4: In the "Details" section, you can then make changes to the planning type, packing type, name and active status.

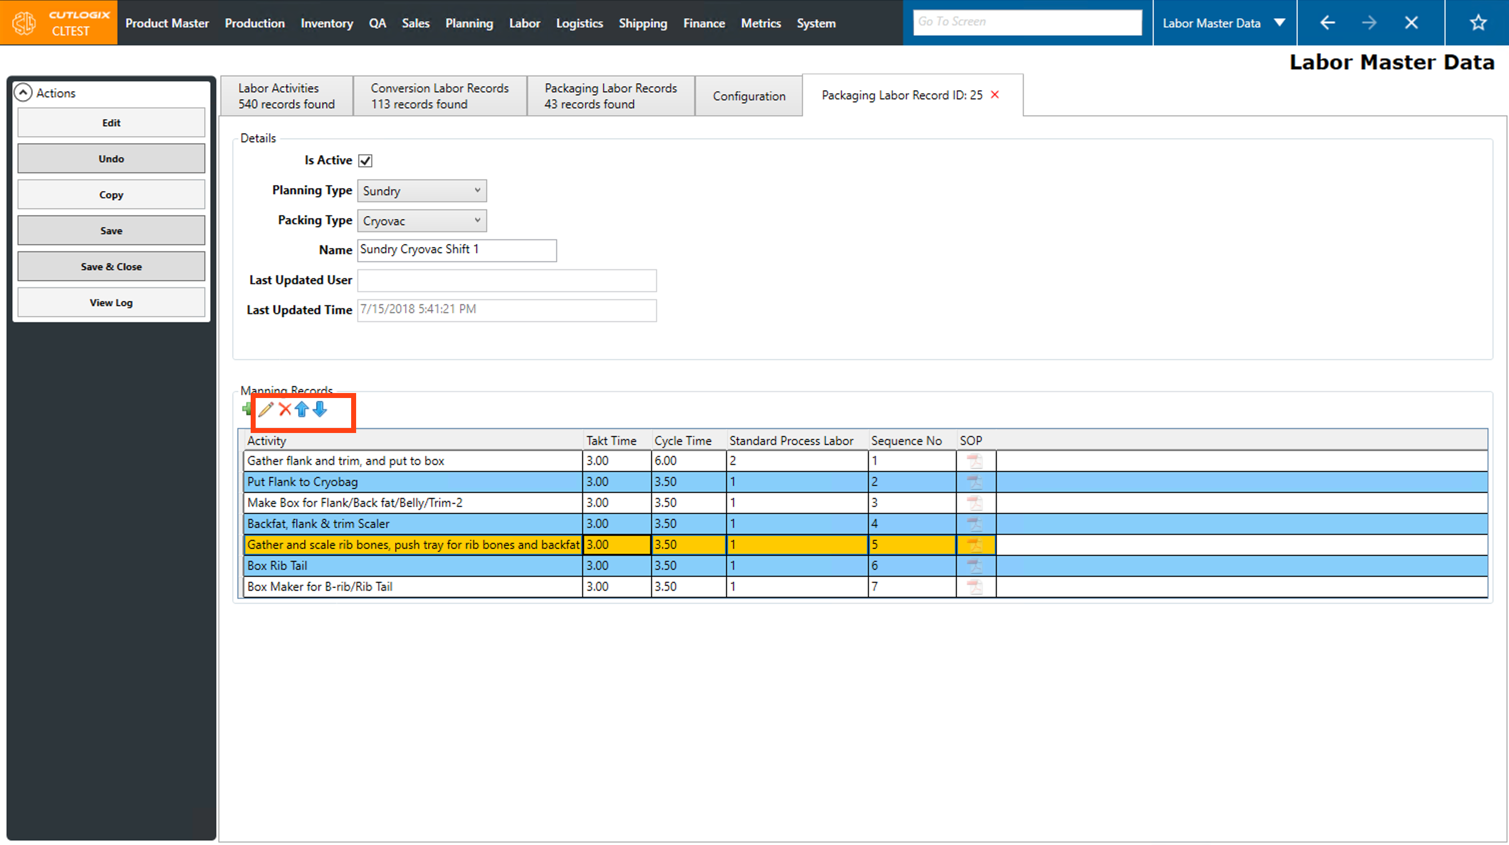
Step 5: Several actions are also available to make changes in the Manning Records section. Click on a Manning Record (once selected it will be highlighted in orange), then several actions buttons will be enabled. The first one is the pencil icon, clicking this option will allow you to edit the manning record. Next is the "X" icon, this action will delete the currently selected manning record. Lastly are the Up/Down arrows, clicking on one of these will move the selected manning record in the direction of the arrow in the list. Doing this will adjust the sequence number associated with the manning record, as they are shown in order they need to be completed from top to bottom.
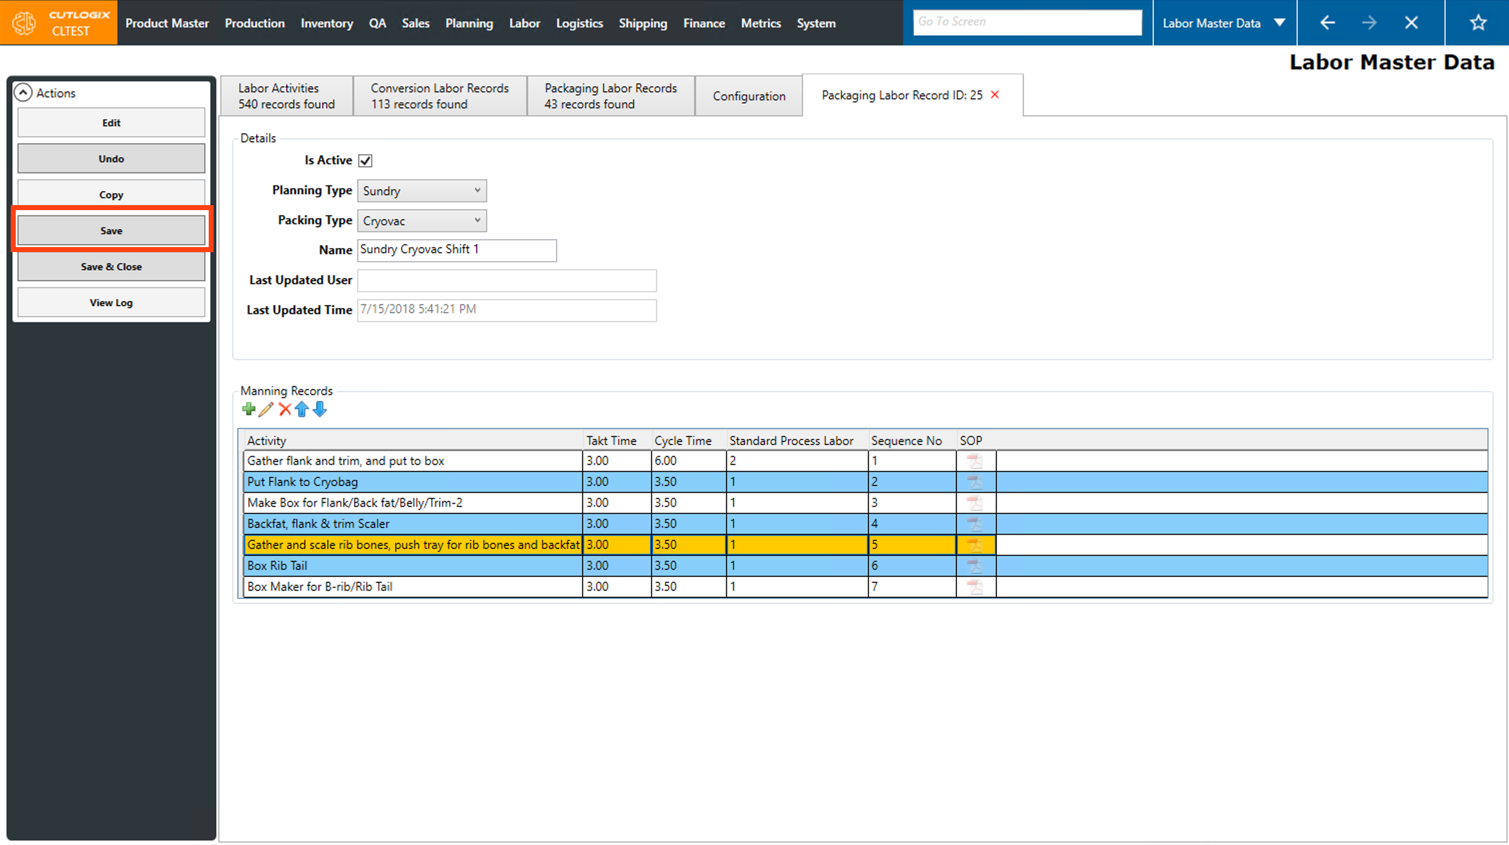
Step 6: Once you're finished making changes to the packaging labor record, click the "Save" button in the Actions Panel to save your changes. Alternatively if you want to save and close the edit tab, click the "Save and Close" button.
If you don't want to save your changes, clicking "Undo" will discard them.
If you don't want to save your changes, clicking "Undo" will discard them.
How to Copy a Packaging Labor Record
Demo Packaging Labor Records can be copied for use as a starting point when creating a new co packagidnww labor record.
Step 1: Navigate to the "Labor Master Data" page (Under the Labor menu → Labor Master Data).
Step 2: Go to the "Packaging Labor Records" tab and double-click on the packaging labor record that you want to copy.
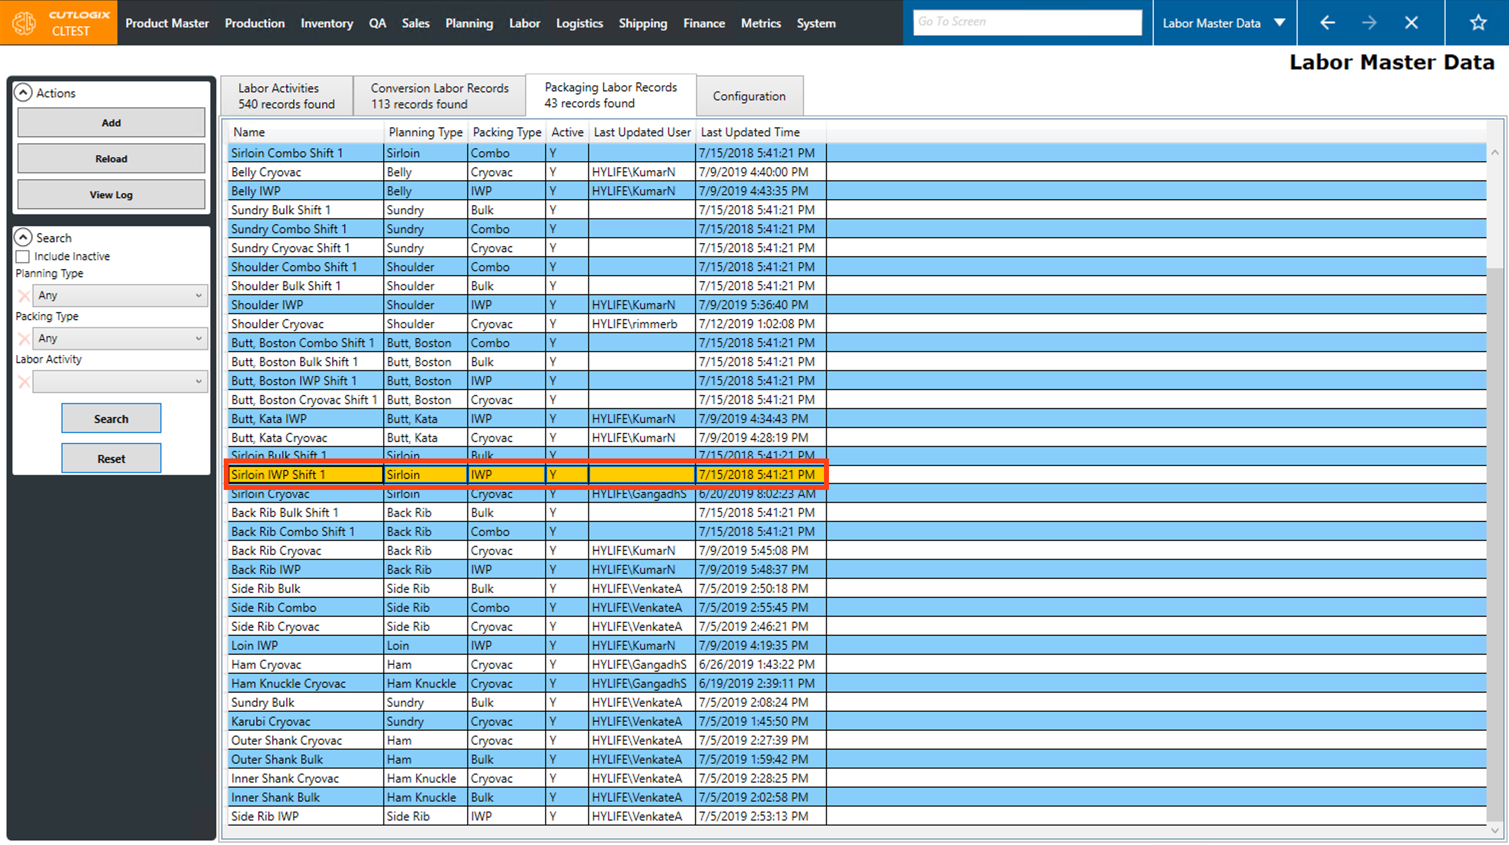
Step 3: The details page for the packaging labor record will open. Click on the "Copy" button in the Actions Panel.

Step 4: A new tab will open on the page. This tab is a duplicate of the record that was copied. Here you can make changes to the record such as changing the yield spec, name and adding/editing manning records to make it suitable for the new conversion labor record. (Further information on how to edit can be found in the section above.)
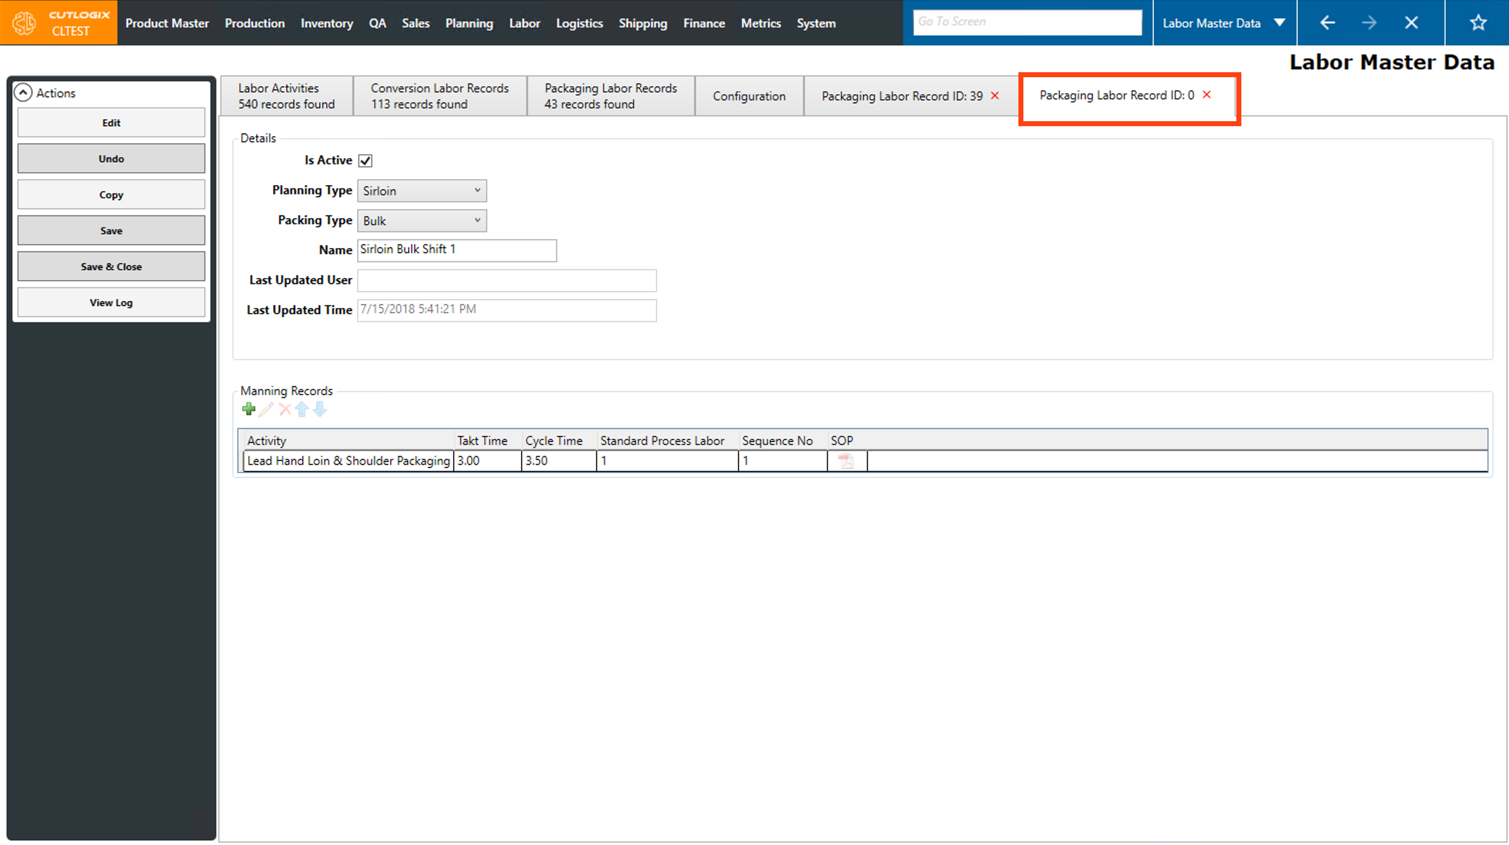
Step 5: Once all the modifications to the new packaging labor record have been completed, click the "Save" button in the Actions Panel to save the new record. Alternatively if you want to save and close the details tab, click the "Save and Close" button.
