Master Production Schedule Tasks (MPS)
How to Select a Schedule in the MPS
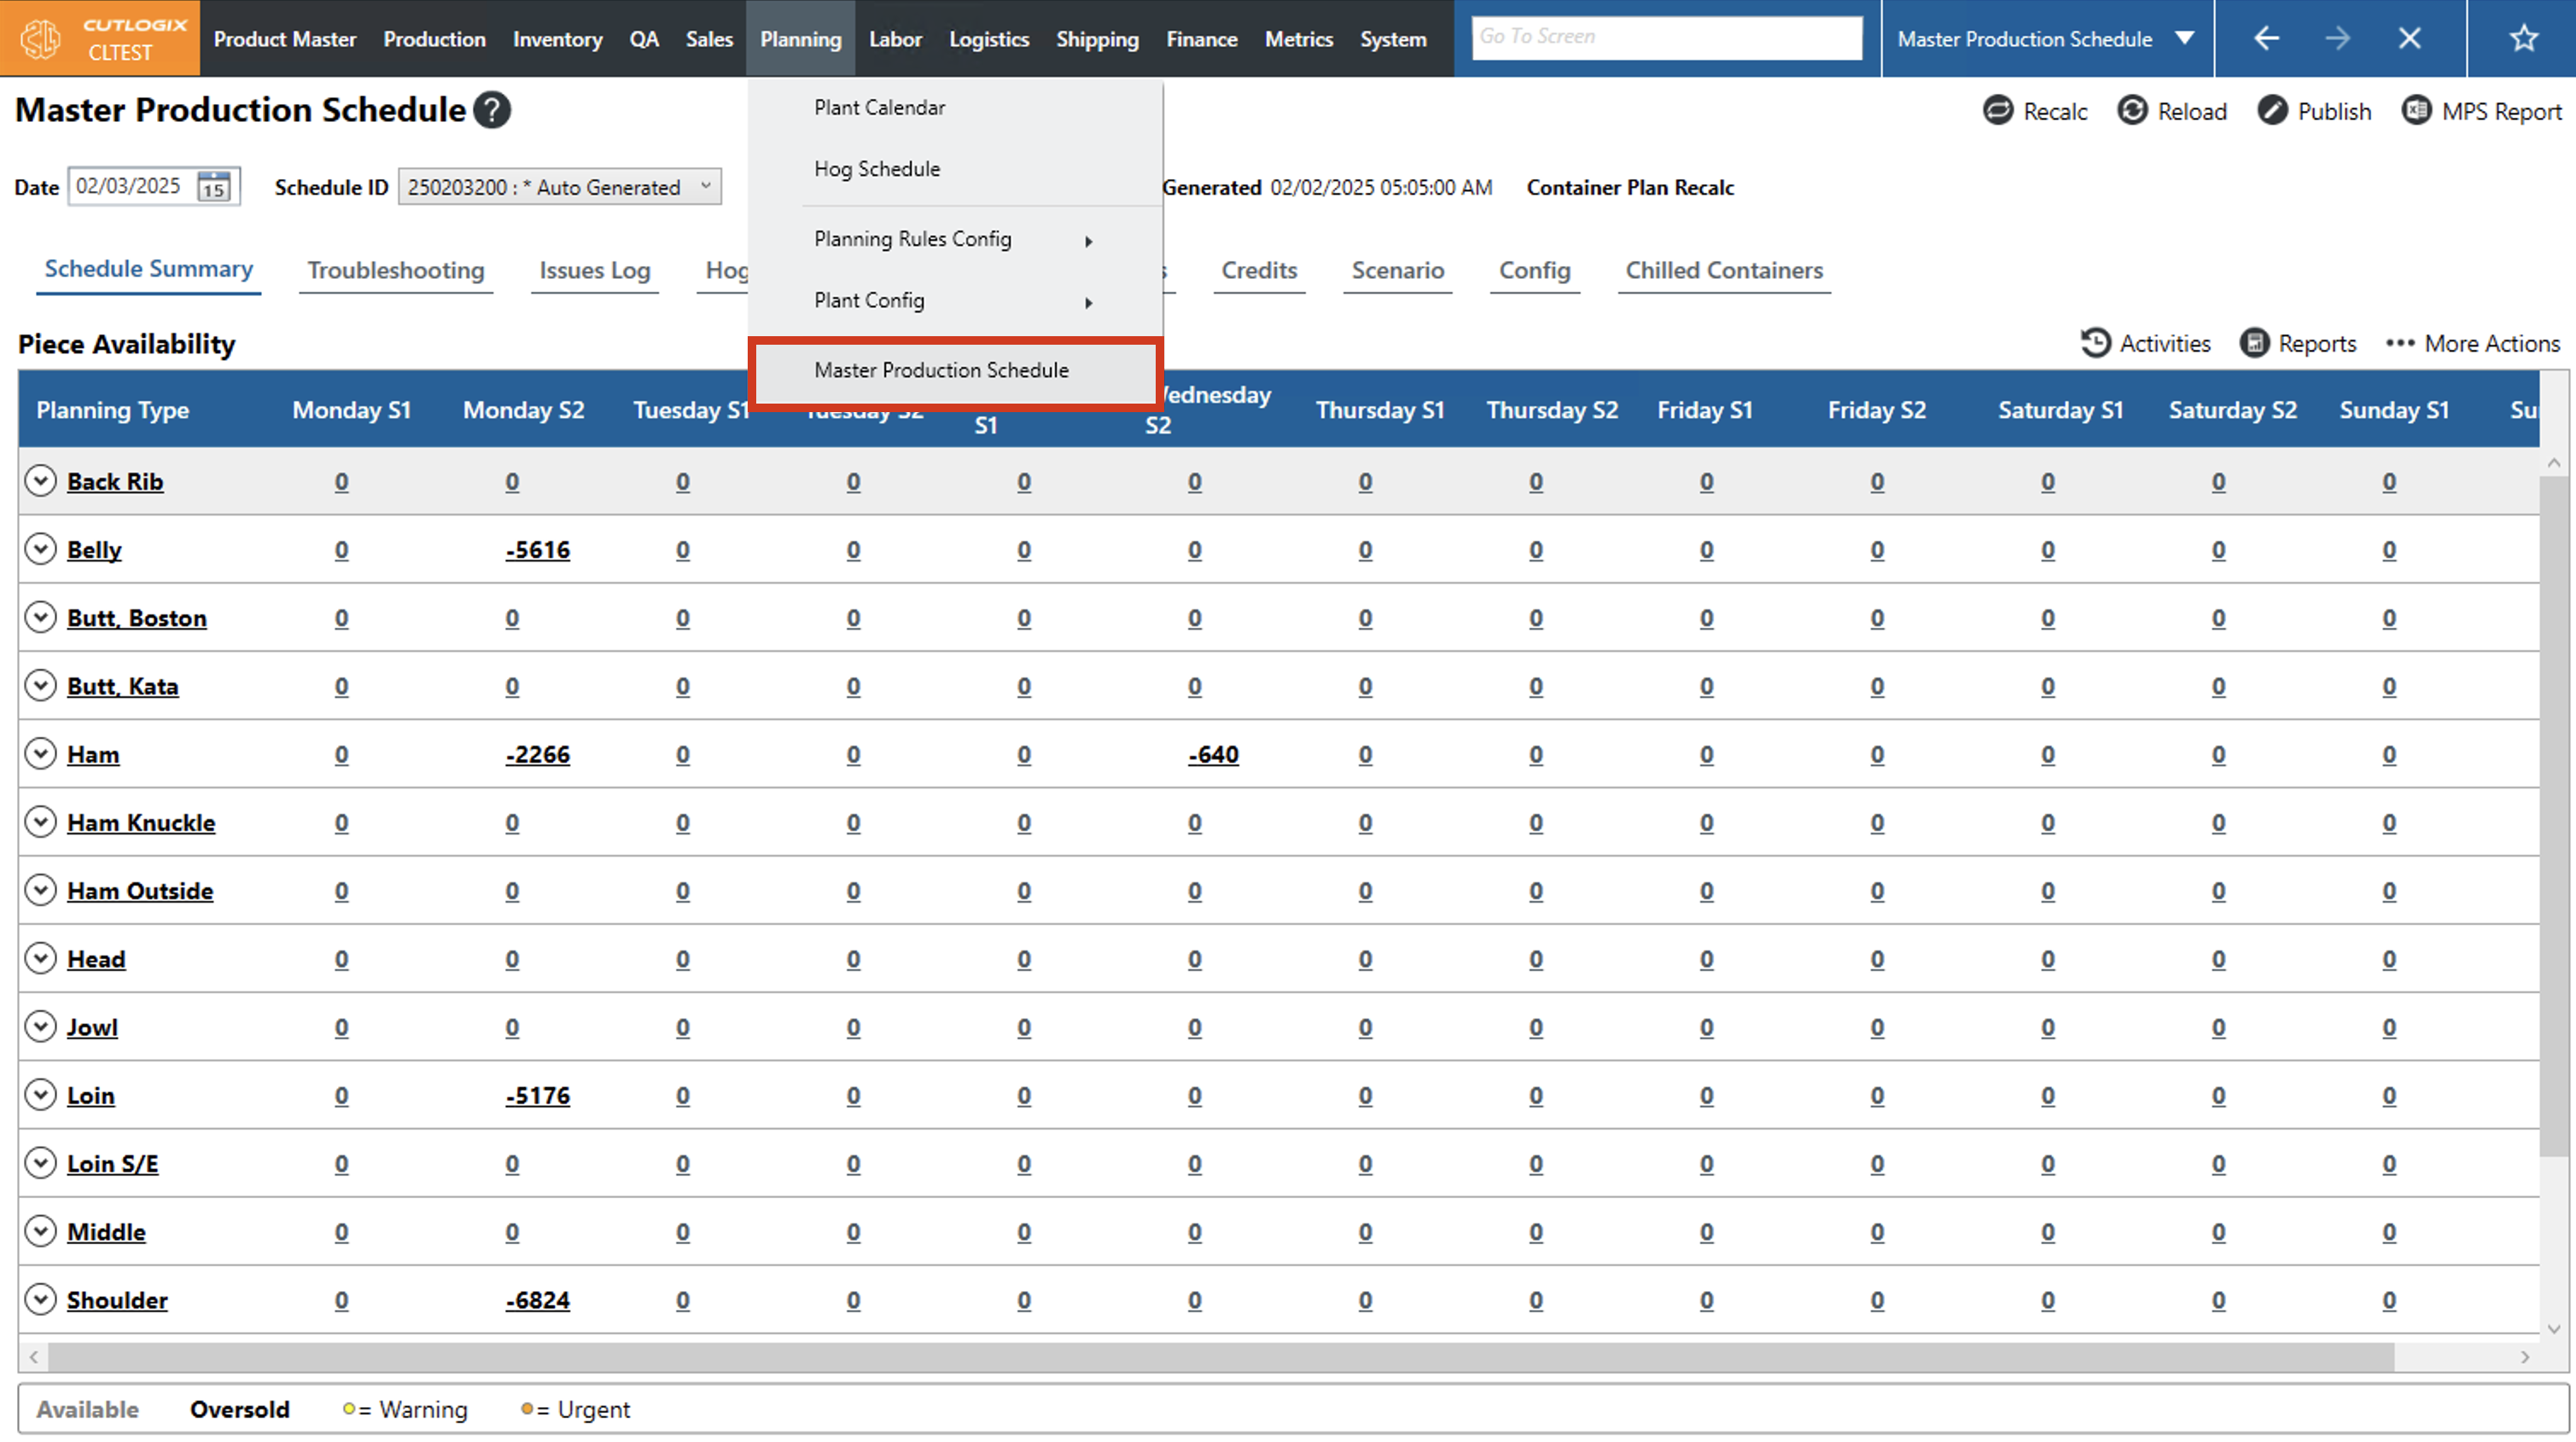
DemoStep 1: Navigate to the "Master Production Schedule" page (Under the Planning menu → Master Production Schedule).
Step 2: In the top left corner you'll see a "Date" field. This is where you can choose the date that you want to view the production schedule for.

Step 3: Clicking on the calendar icon will bring up a calendar where you can choose the month, day and year that you want to view the schedule for.
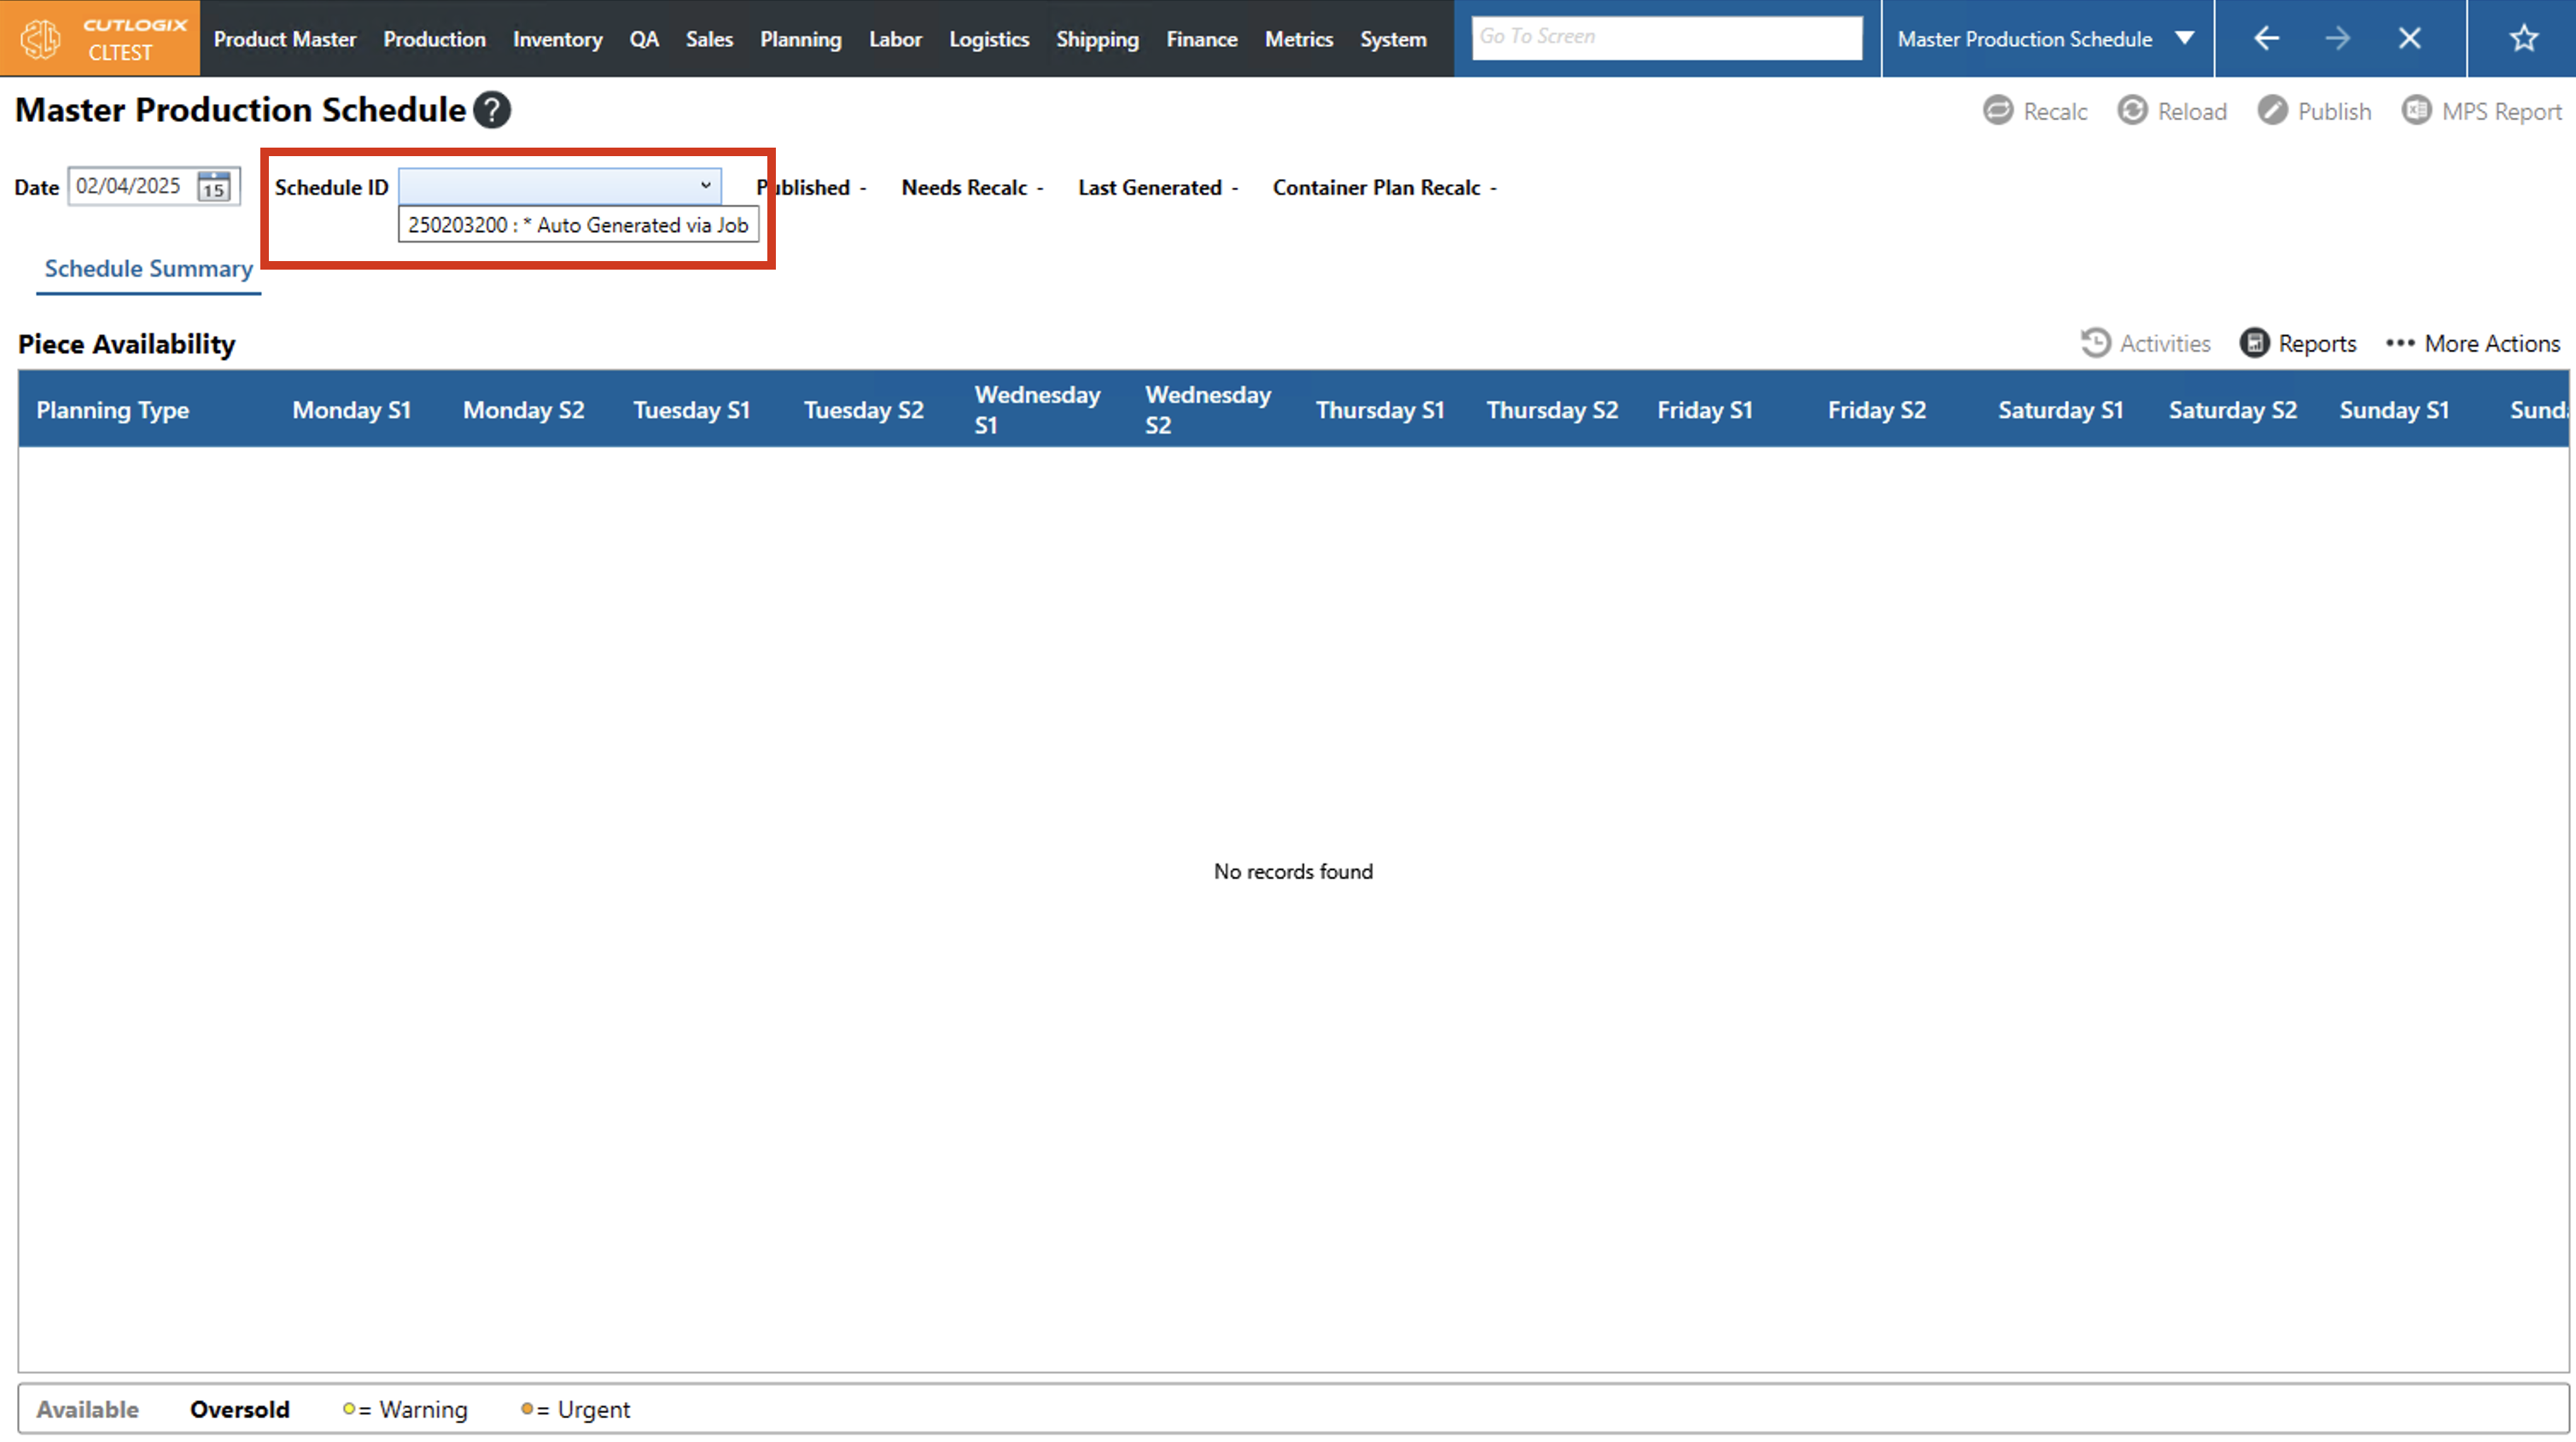
Step 4: Next, you'll need to choose a schedule to view from the "Schedule ID" dropdown list. Once selected, that schedule will appear on the screen.
How to Create a Schedule in the MPS
DemoStep 1: Navigate to the Planning menu → Master Production Schedule → Schedule Summary tab. This tab will be selected by default if no schedule has been selected yet.

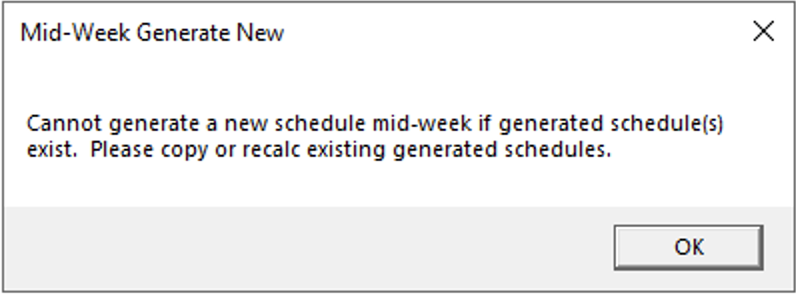
Step 2: Select the More Actions menu on the right side of the screen and select Generate New from the menu.


NOTE: Users cannot generate new schedules for the week they are currently in if there is already a schedule generated.
Step 3: Fill out the new schedule's description and click ok.
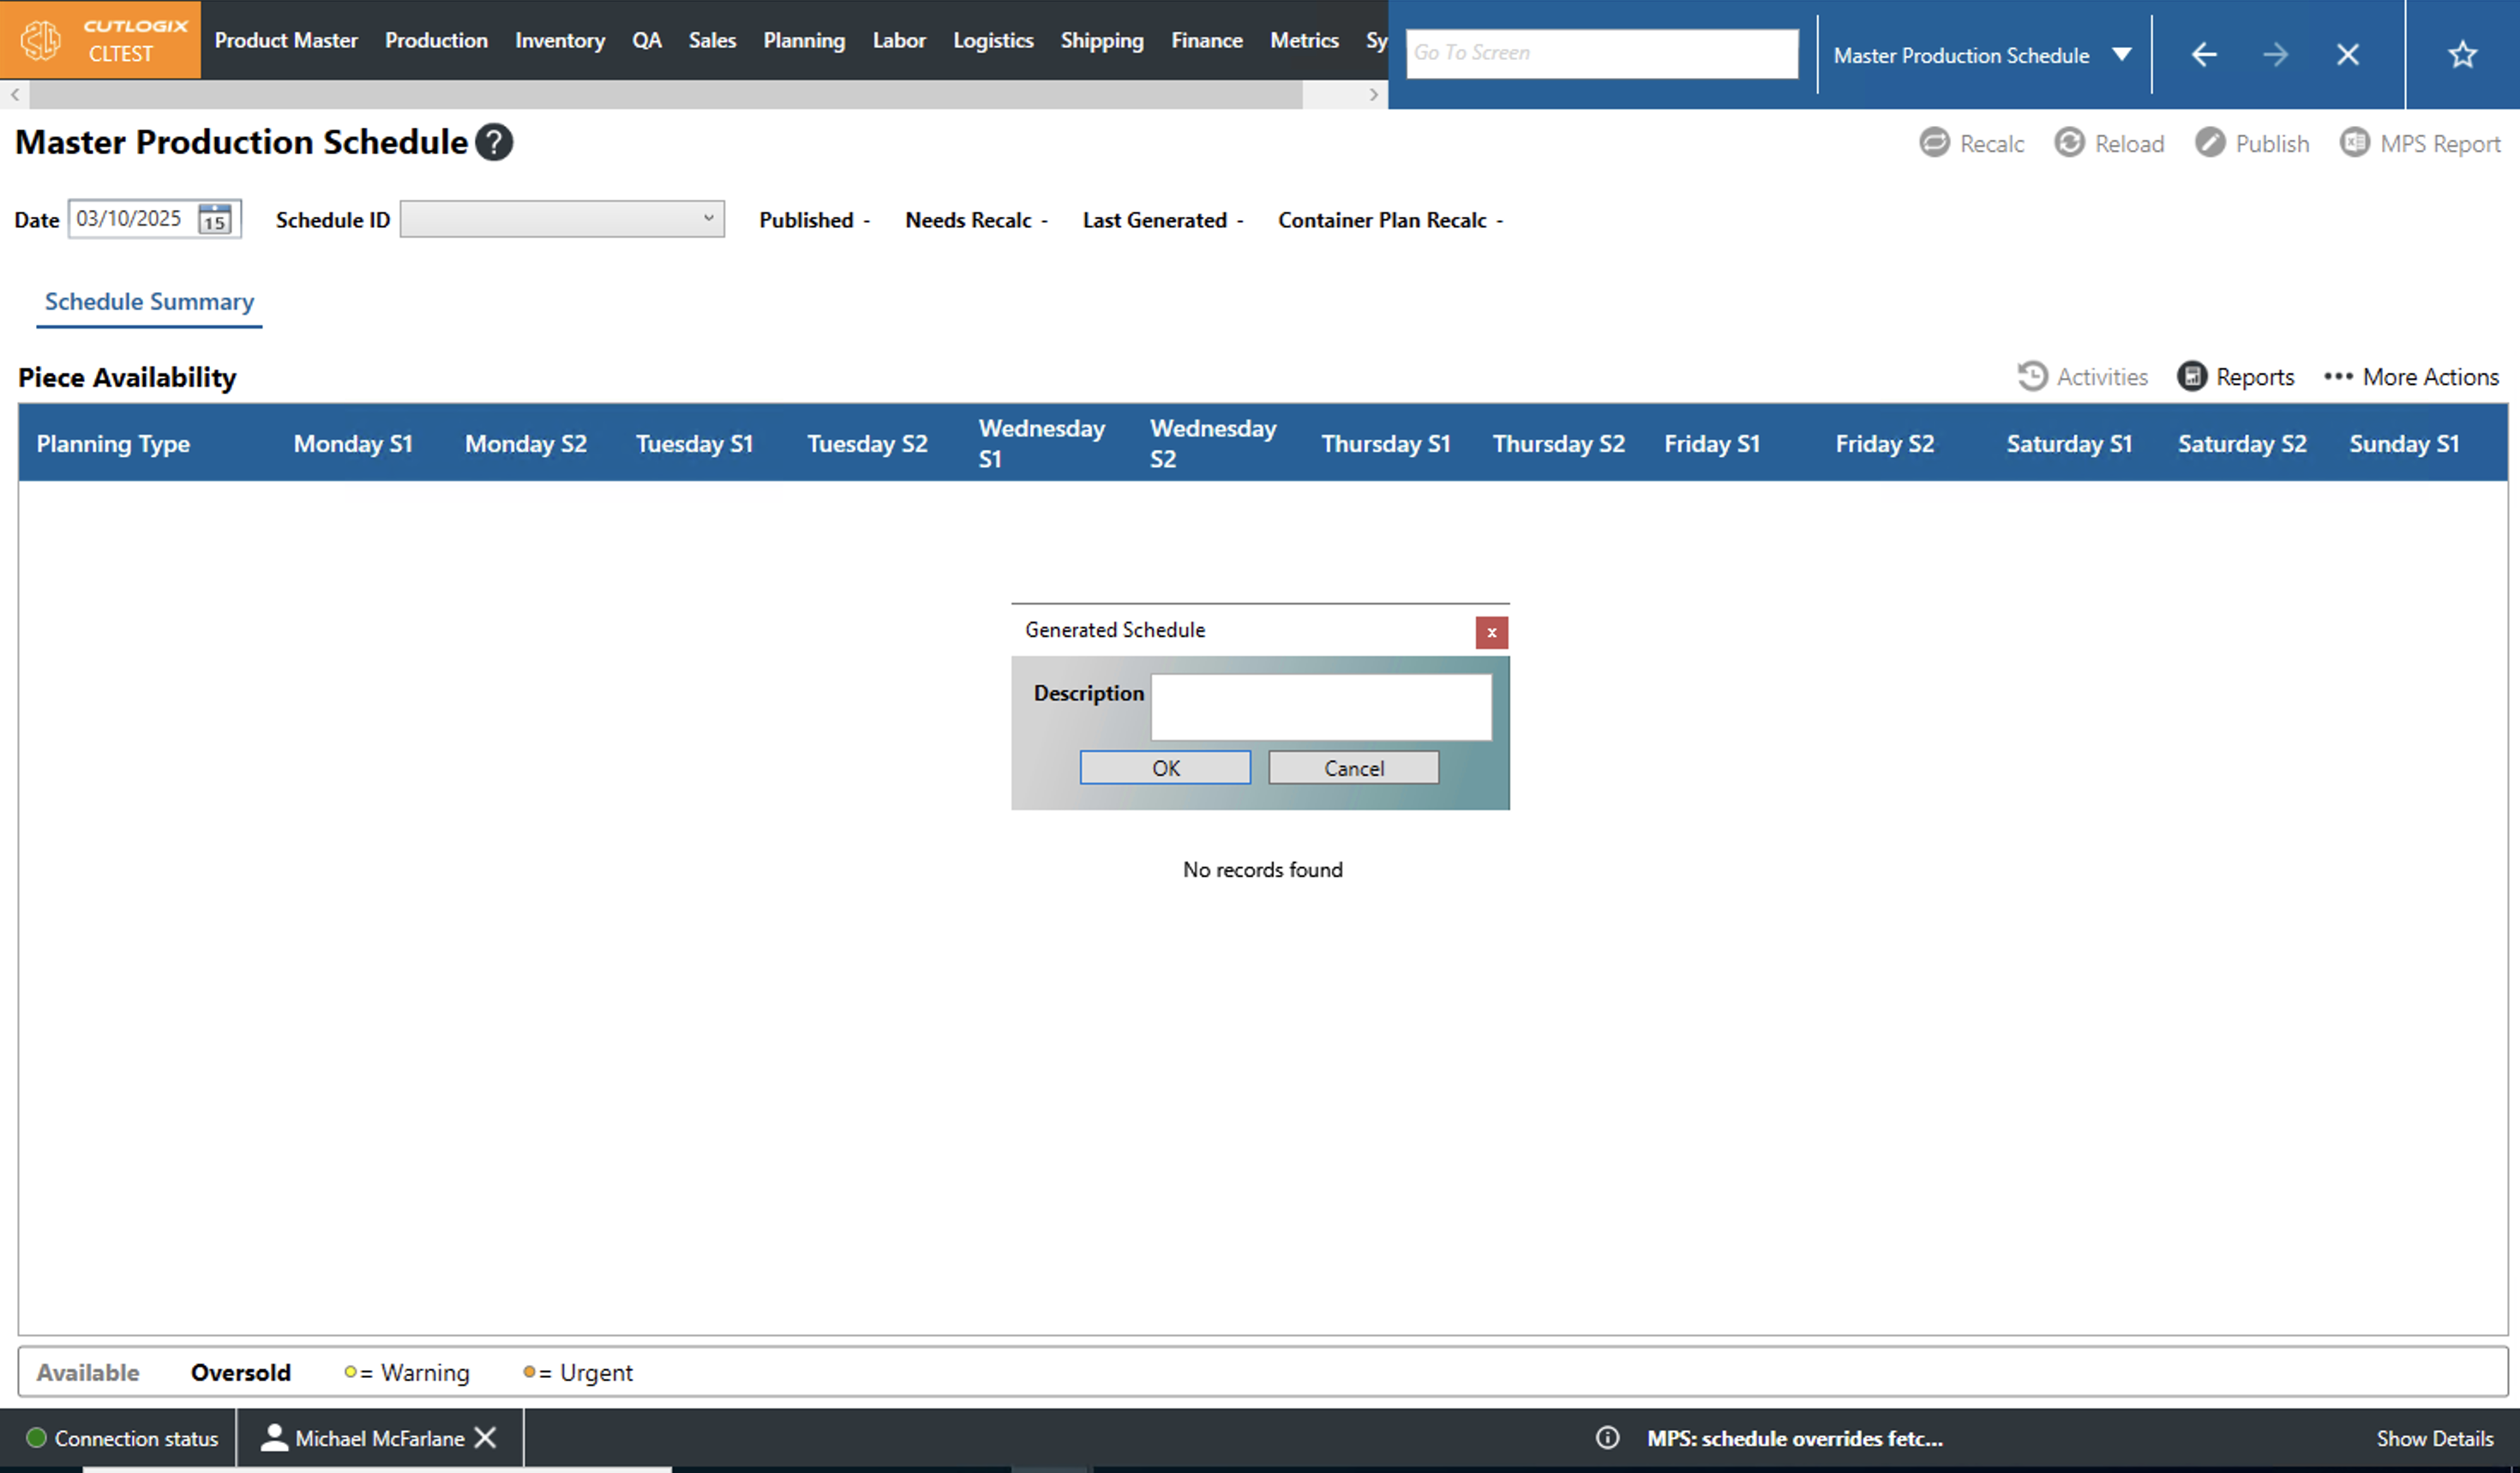
Step 4: The MPS will calculate a new schedule for you named what you entered as the description. After the new schedule is finished calculating, it will automatically be selected and displayed.
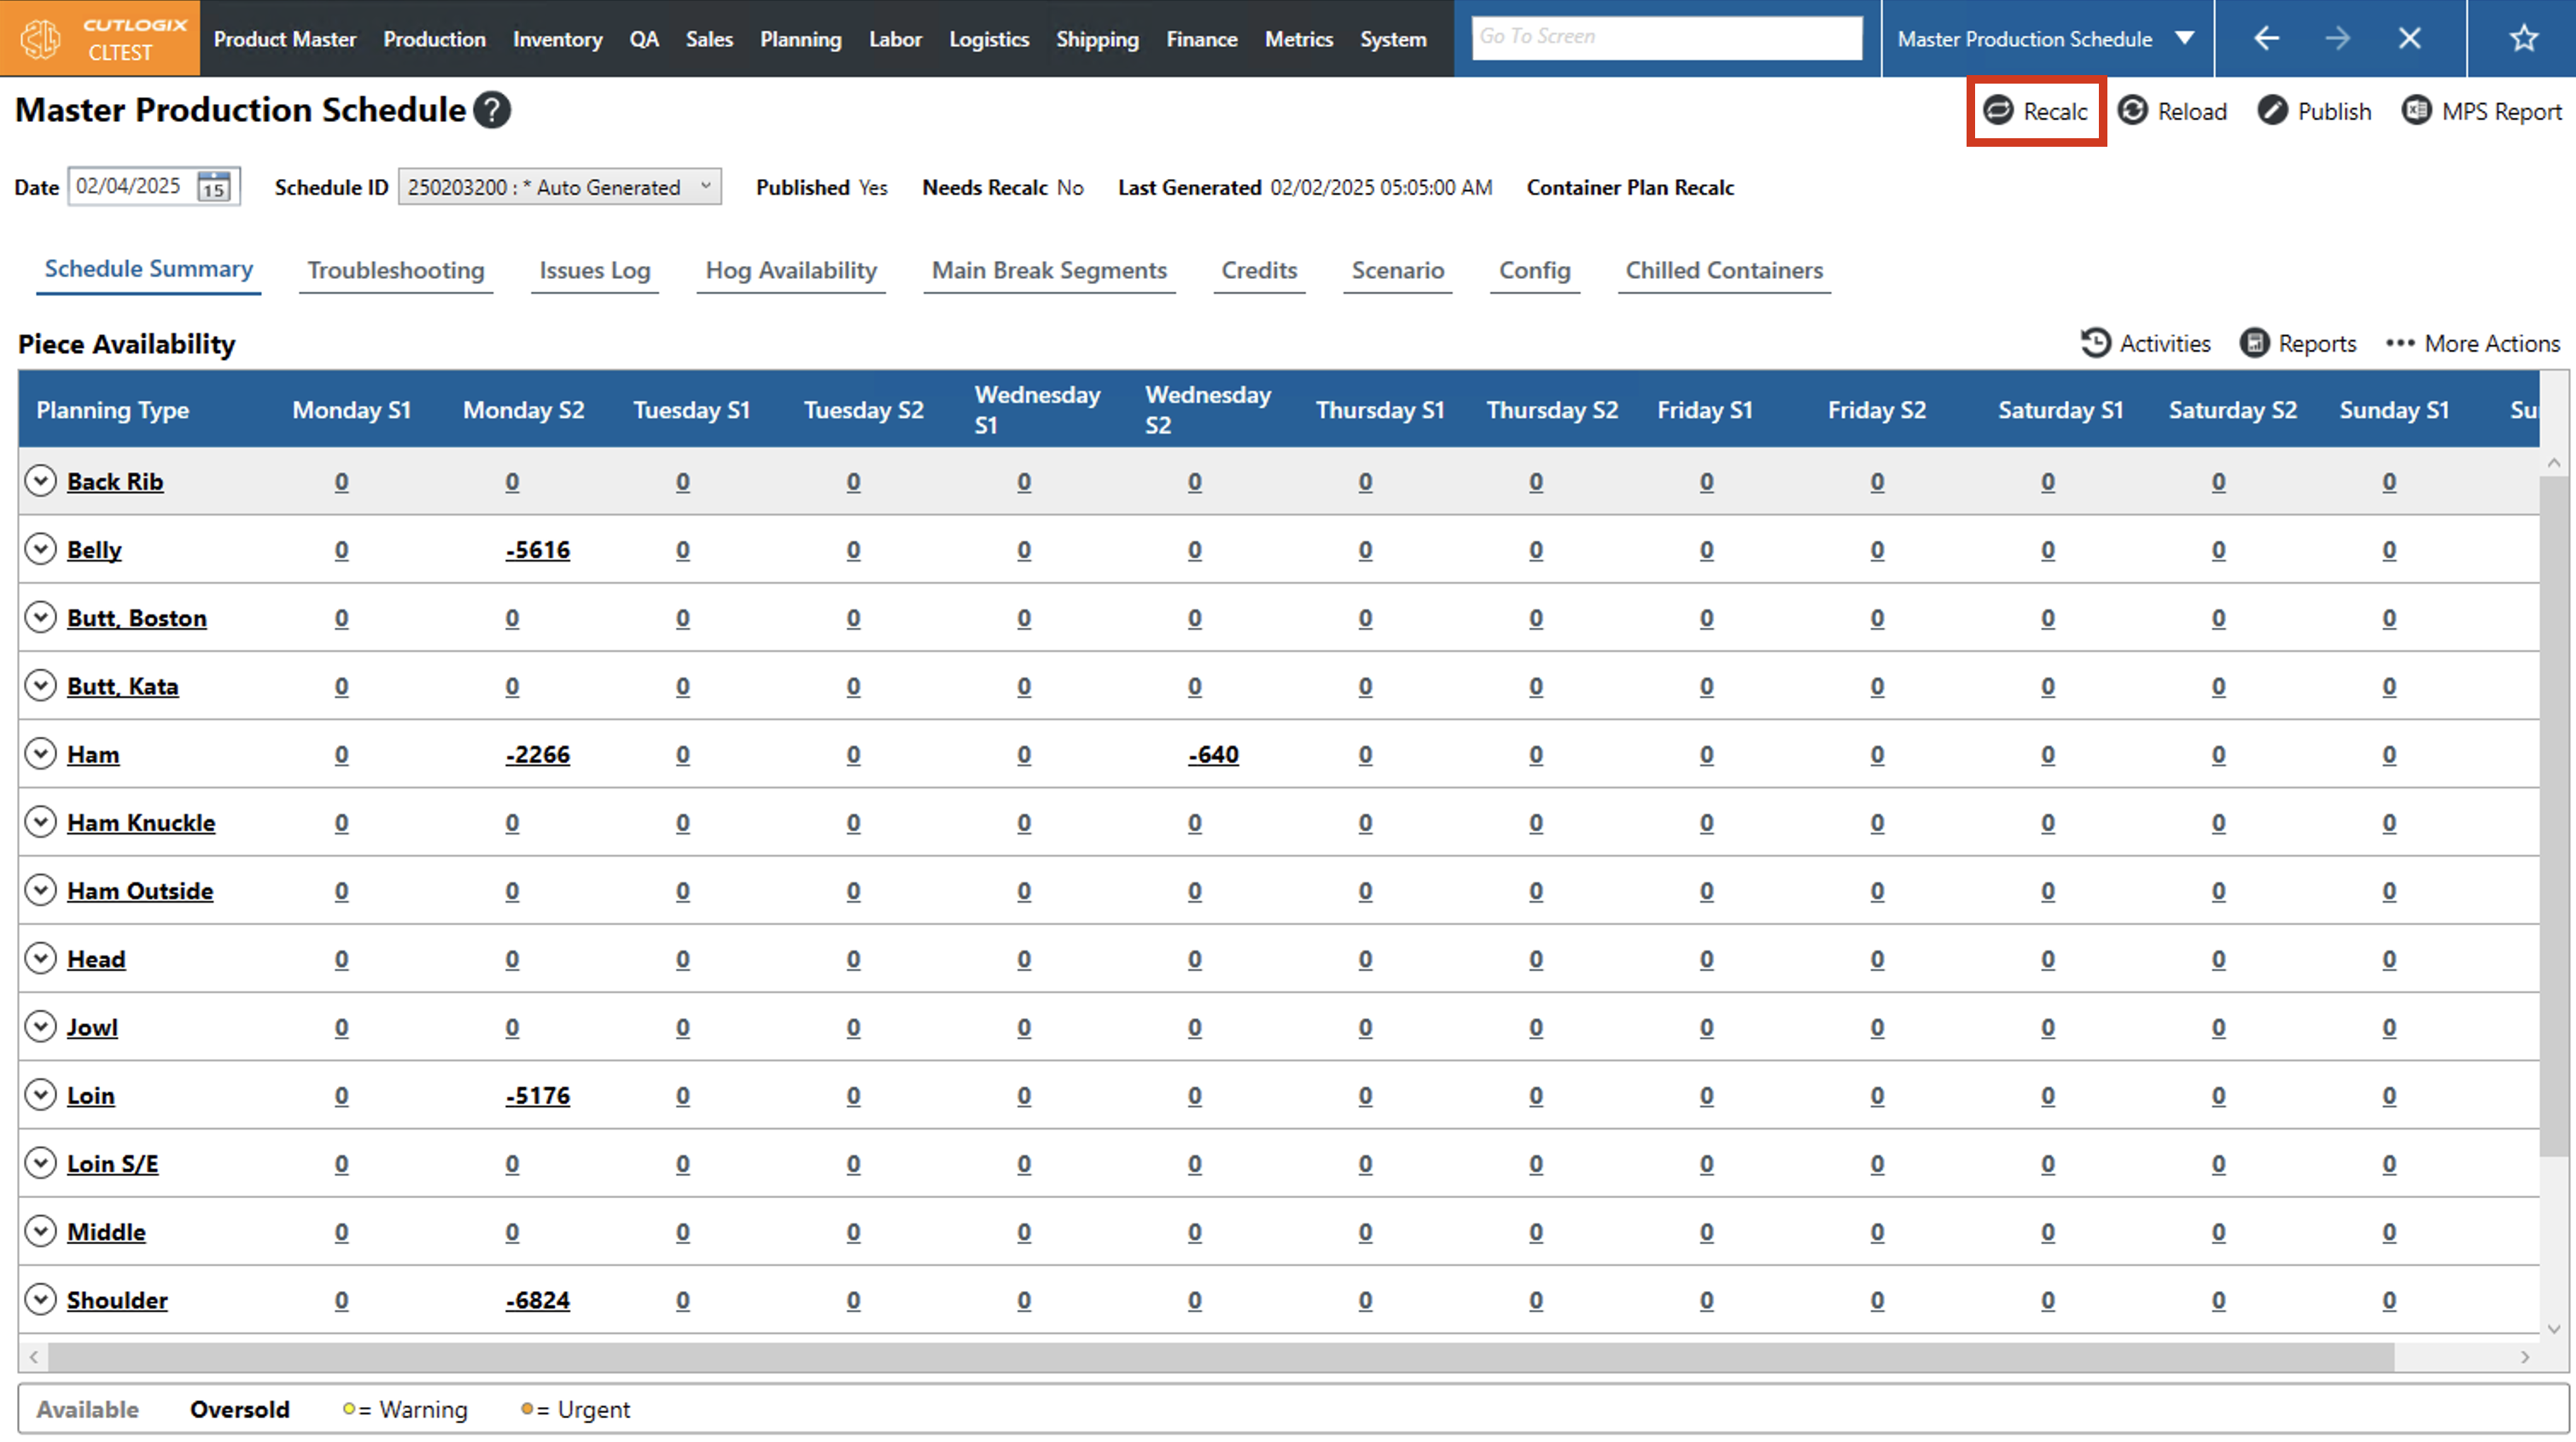
How to Recalculate the Production Plan
Demo An automatic recalc (for shift 1) is done by CutLogix at 4:40am CST each business day to ensure that the planning system has up-to-date information to plan production based off of. Recalcs can also be manually triggered from the "Master Production Schedule" screen.
For example, if the expected hogs didn't all arrive at the plant, if Shift 2 from the previous day wasn't able to produce what was planned, if orders changed or were added a recalc should be done to ensure that the planning system is considering all of those factors when making the production plan for the next shift. The closer the plan is recalculated to the start of the shift, the more accurate it will be.
Step 1: Navigate to the "Master Production Schedule" page (Under the Planning menu → Master Production Schedule) and select a date and schedule ID (see these steps above).
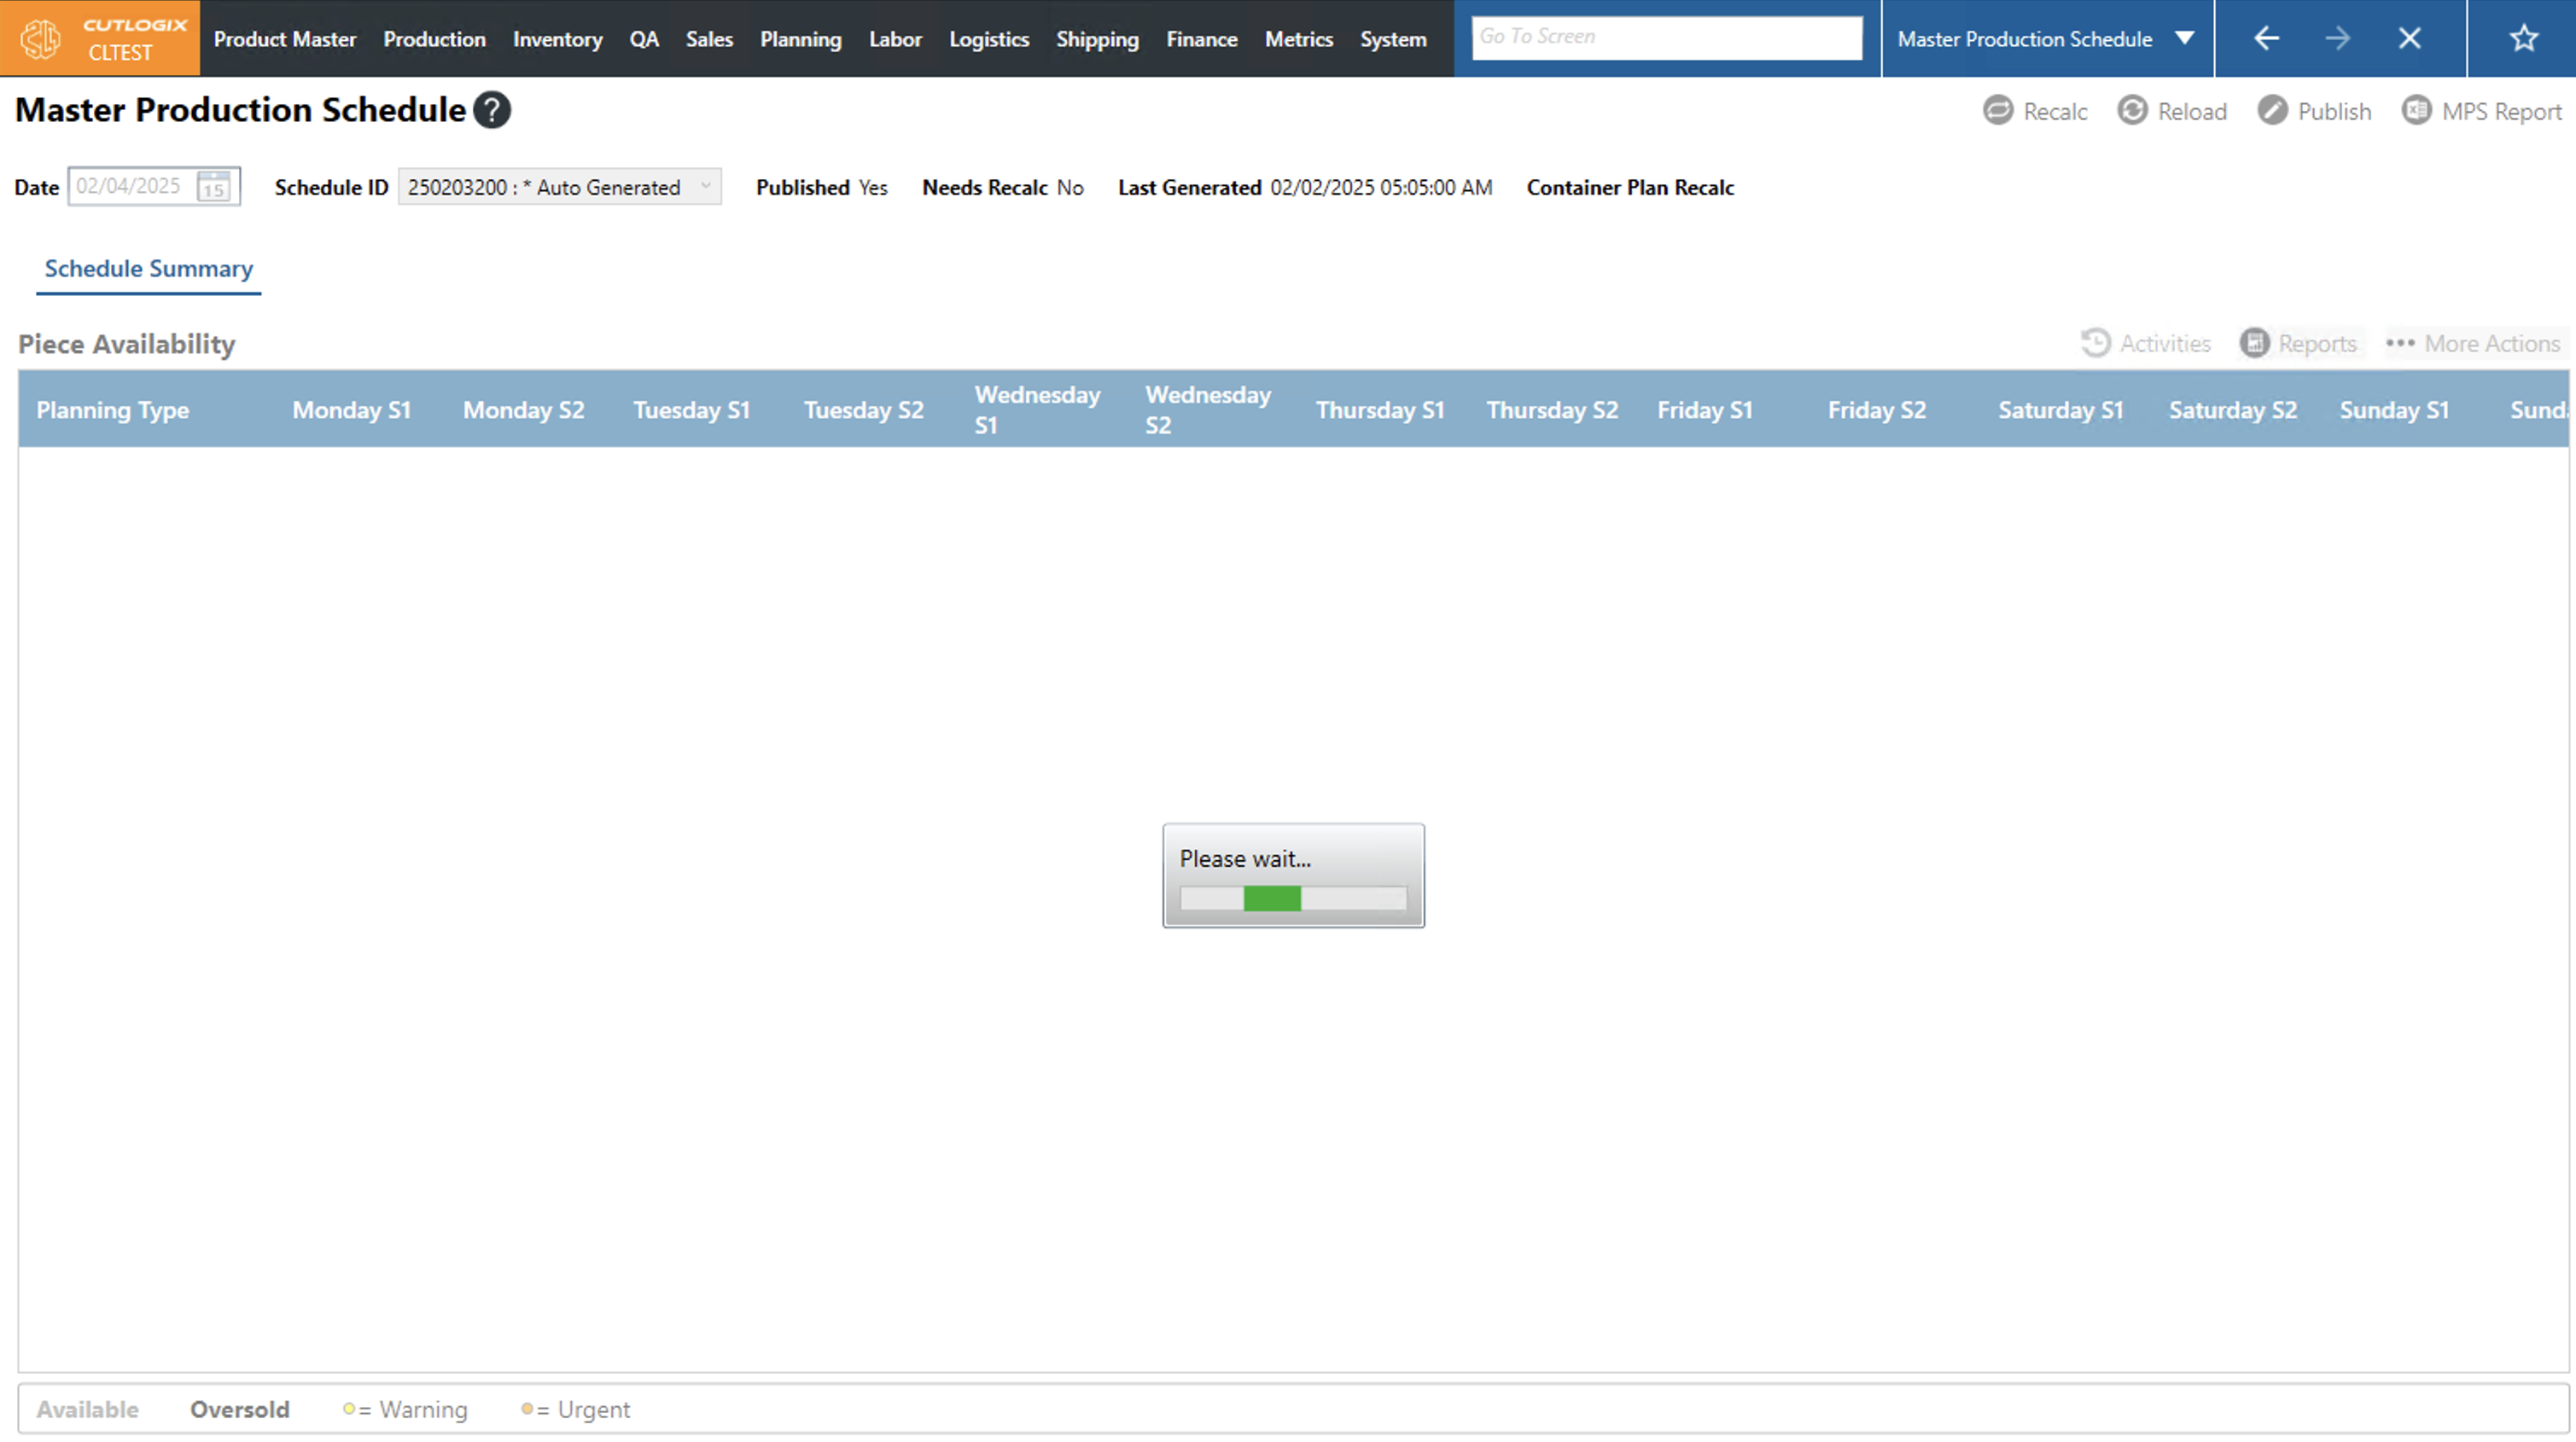
Step 2: Click the "Recalc" button near the top right corner.
Step 3: The system will show a loading indicator while the recalc is happening.
Step 4: After the recalc is completed a message will appear to let you know that the schedule has been recalculated. It also informs you that the published schedule has been recalced since it was last published. It will need to be published to be available to everyone. Click "OK" to close this dialog.
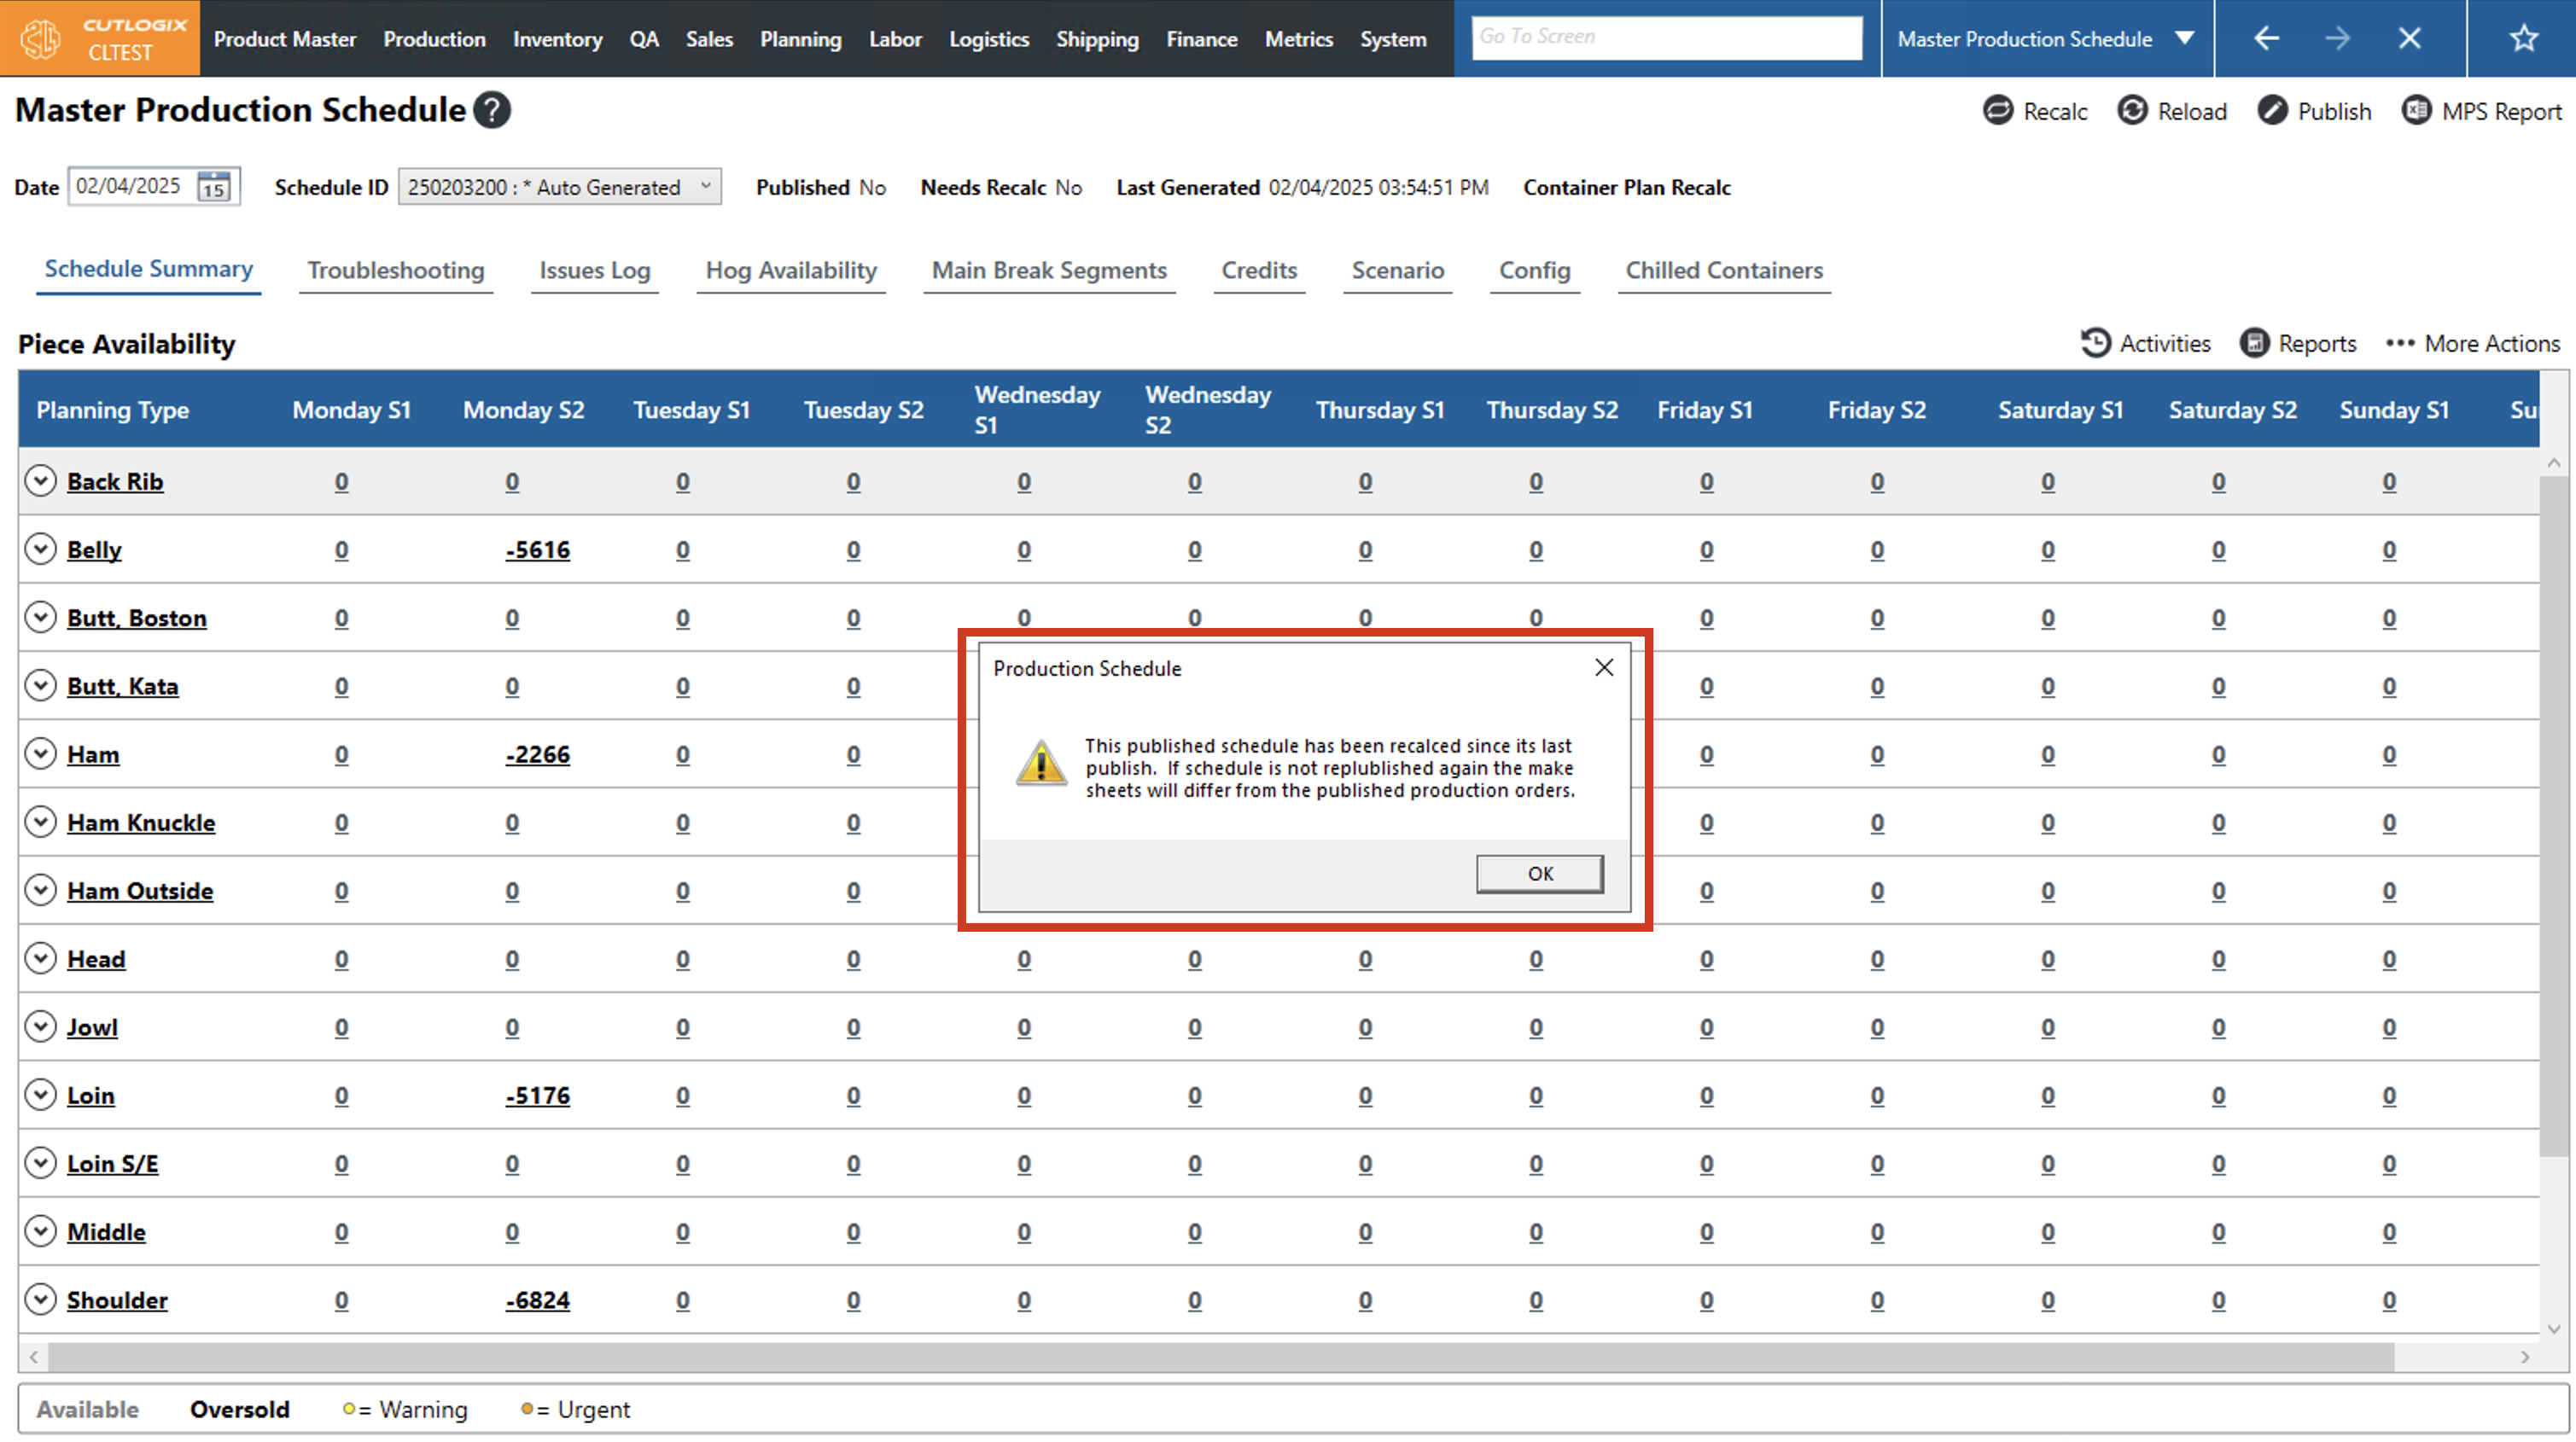
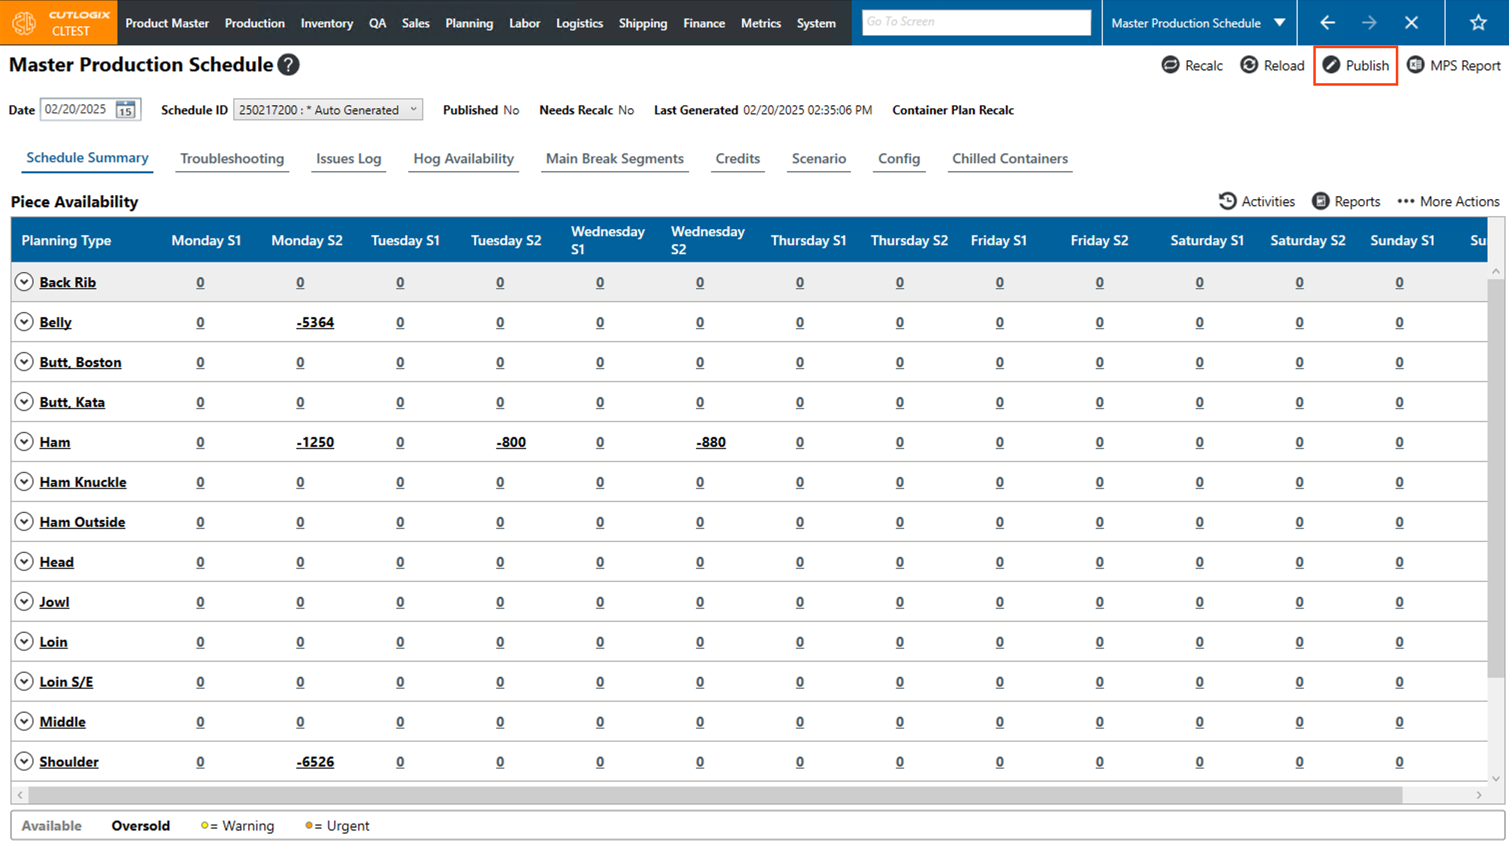
Step 5: If you want to make the recalced version of the plan available to everyone, click "Publish" in the top right corner to publish the recalced production plan.
How to View the Activities Log for the Current Week's Schedule
DemoStep 1: Navigate to the "Master Production Schedule" page (Under the Planning menu → Master Production Schedule) and select a date and schedule ID (see these steps above).
Step 2: Click on the "Activities" button.

Step 3: This will open a dialog called "Activities Log". On this page you can see all the changes that have been made to the schedule. Each change records the date it happened, the user who made the change, the activity that they did (Ex. Recalc, Publish) and a description of what they did.
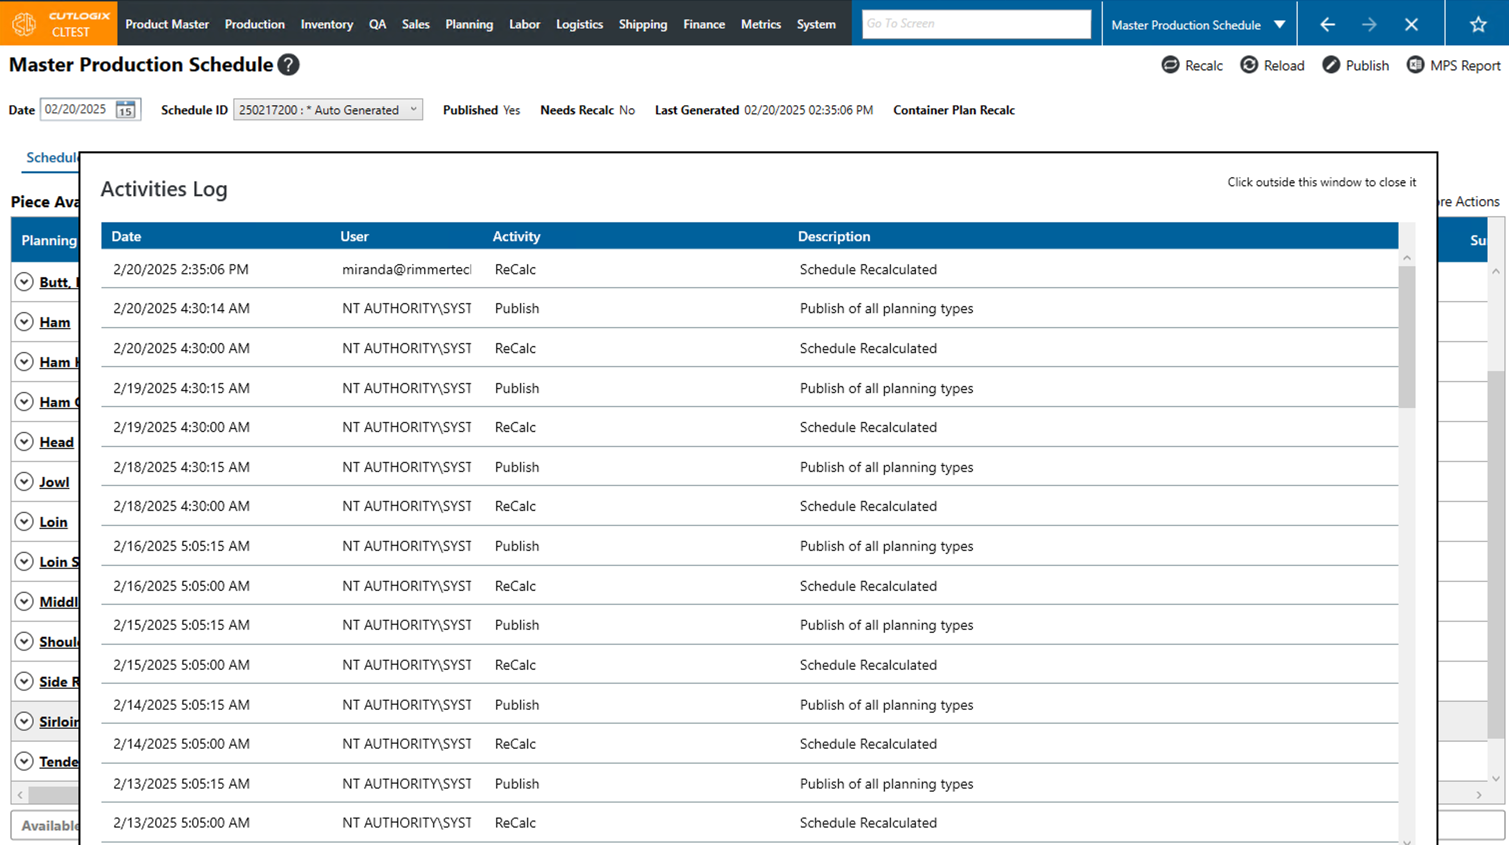
Step 4: To exit/close the activities log, click anywhere outside the dialog and it will close, then return you to the MPS screen.
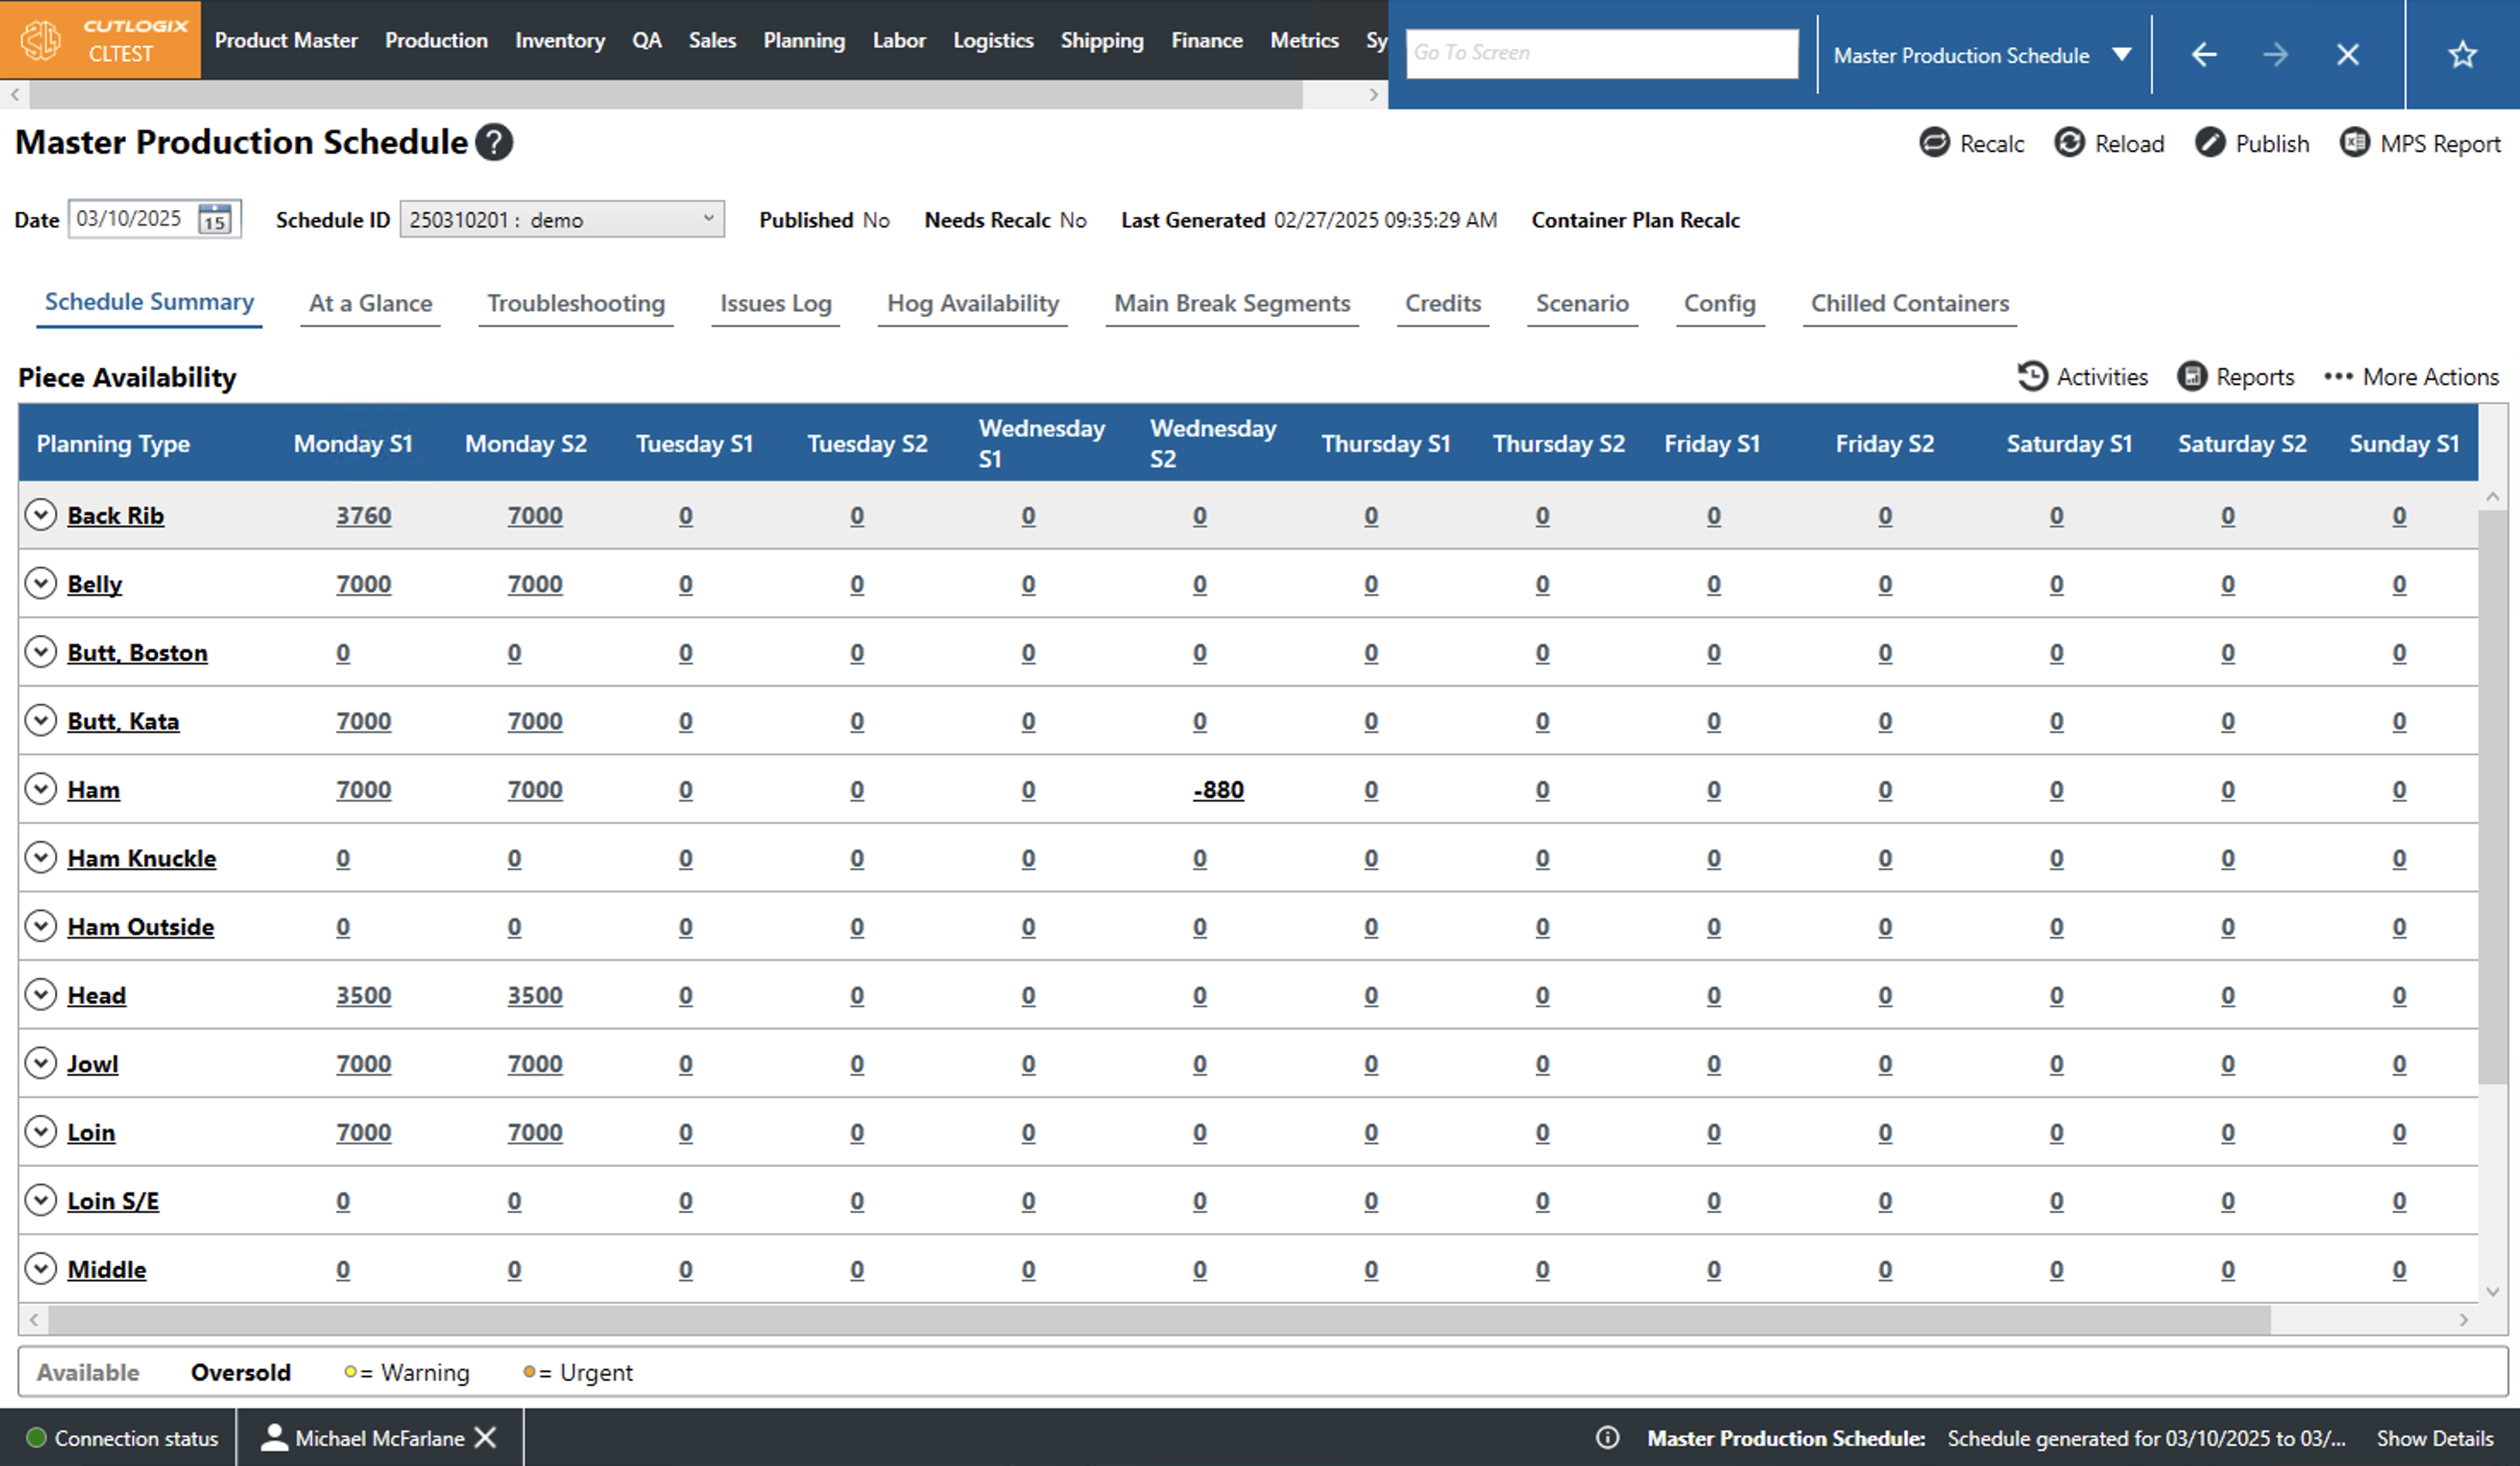
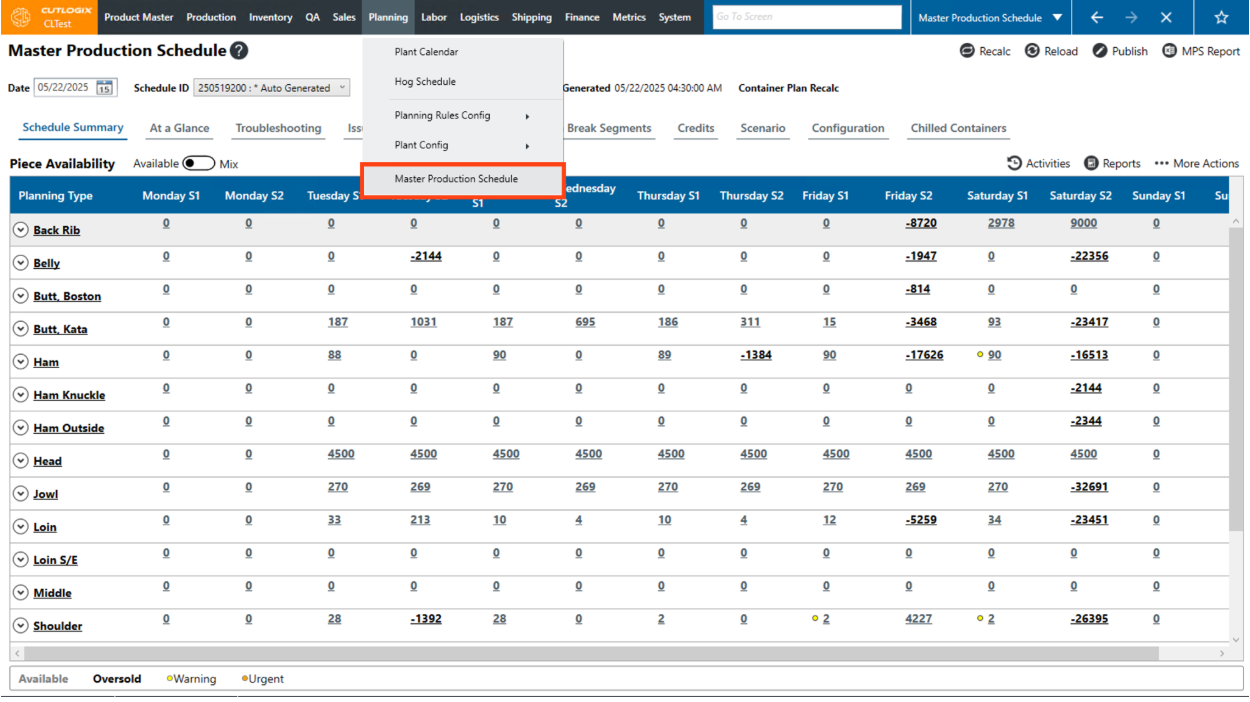
How to View Demand by Planning Type for the Selected Schedule
DemoStep 1: Navigate to the "Master Production Schedule" page (Under the Planning menu → Master Production Schedule) and select a date and schedule ID (see these steps above).
Step 2: On the "Schedule Summary" tab, click on the planning type that you want to view the demand of for the week. (Ex. "Ham")
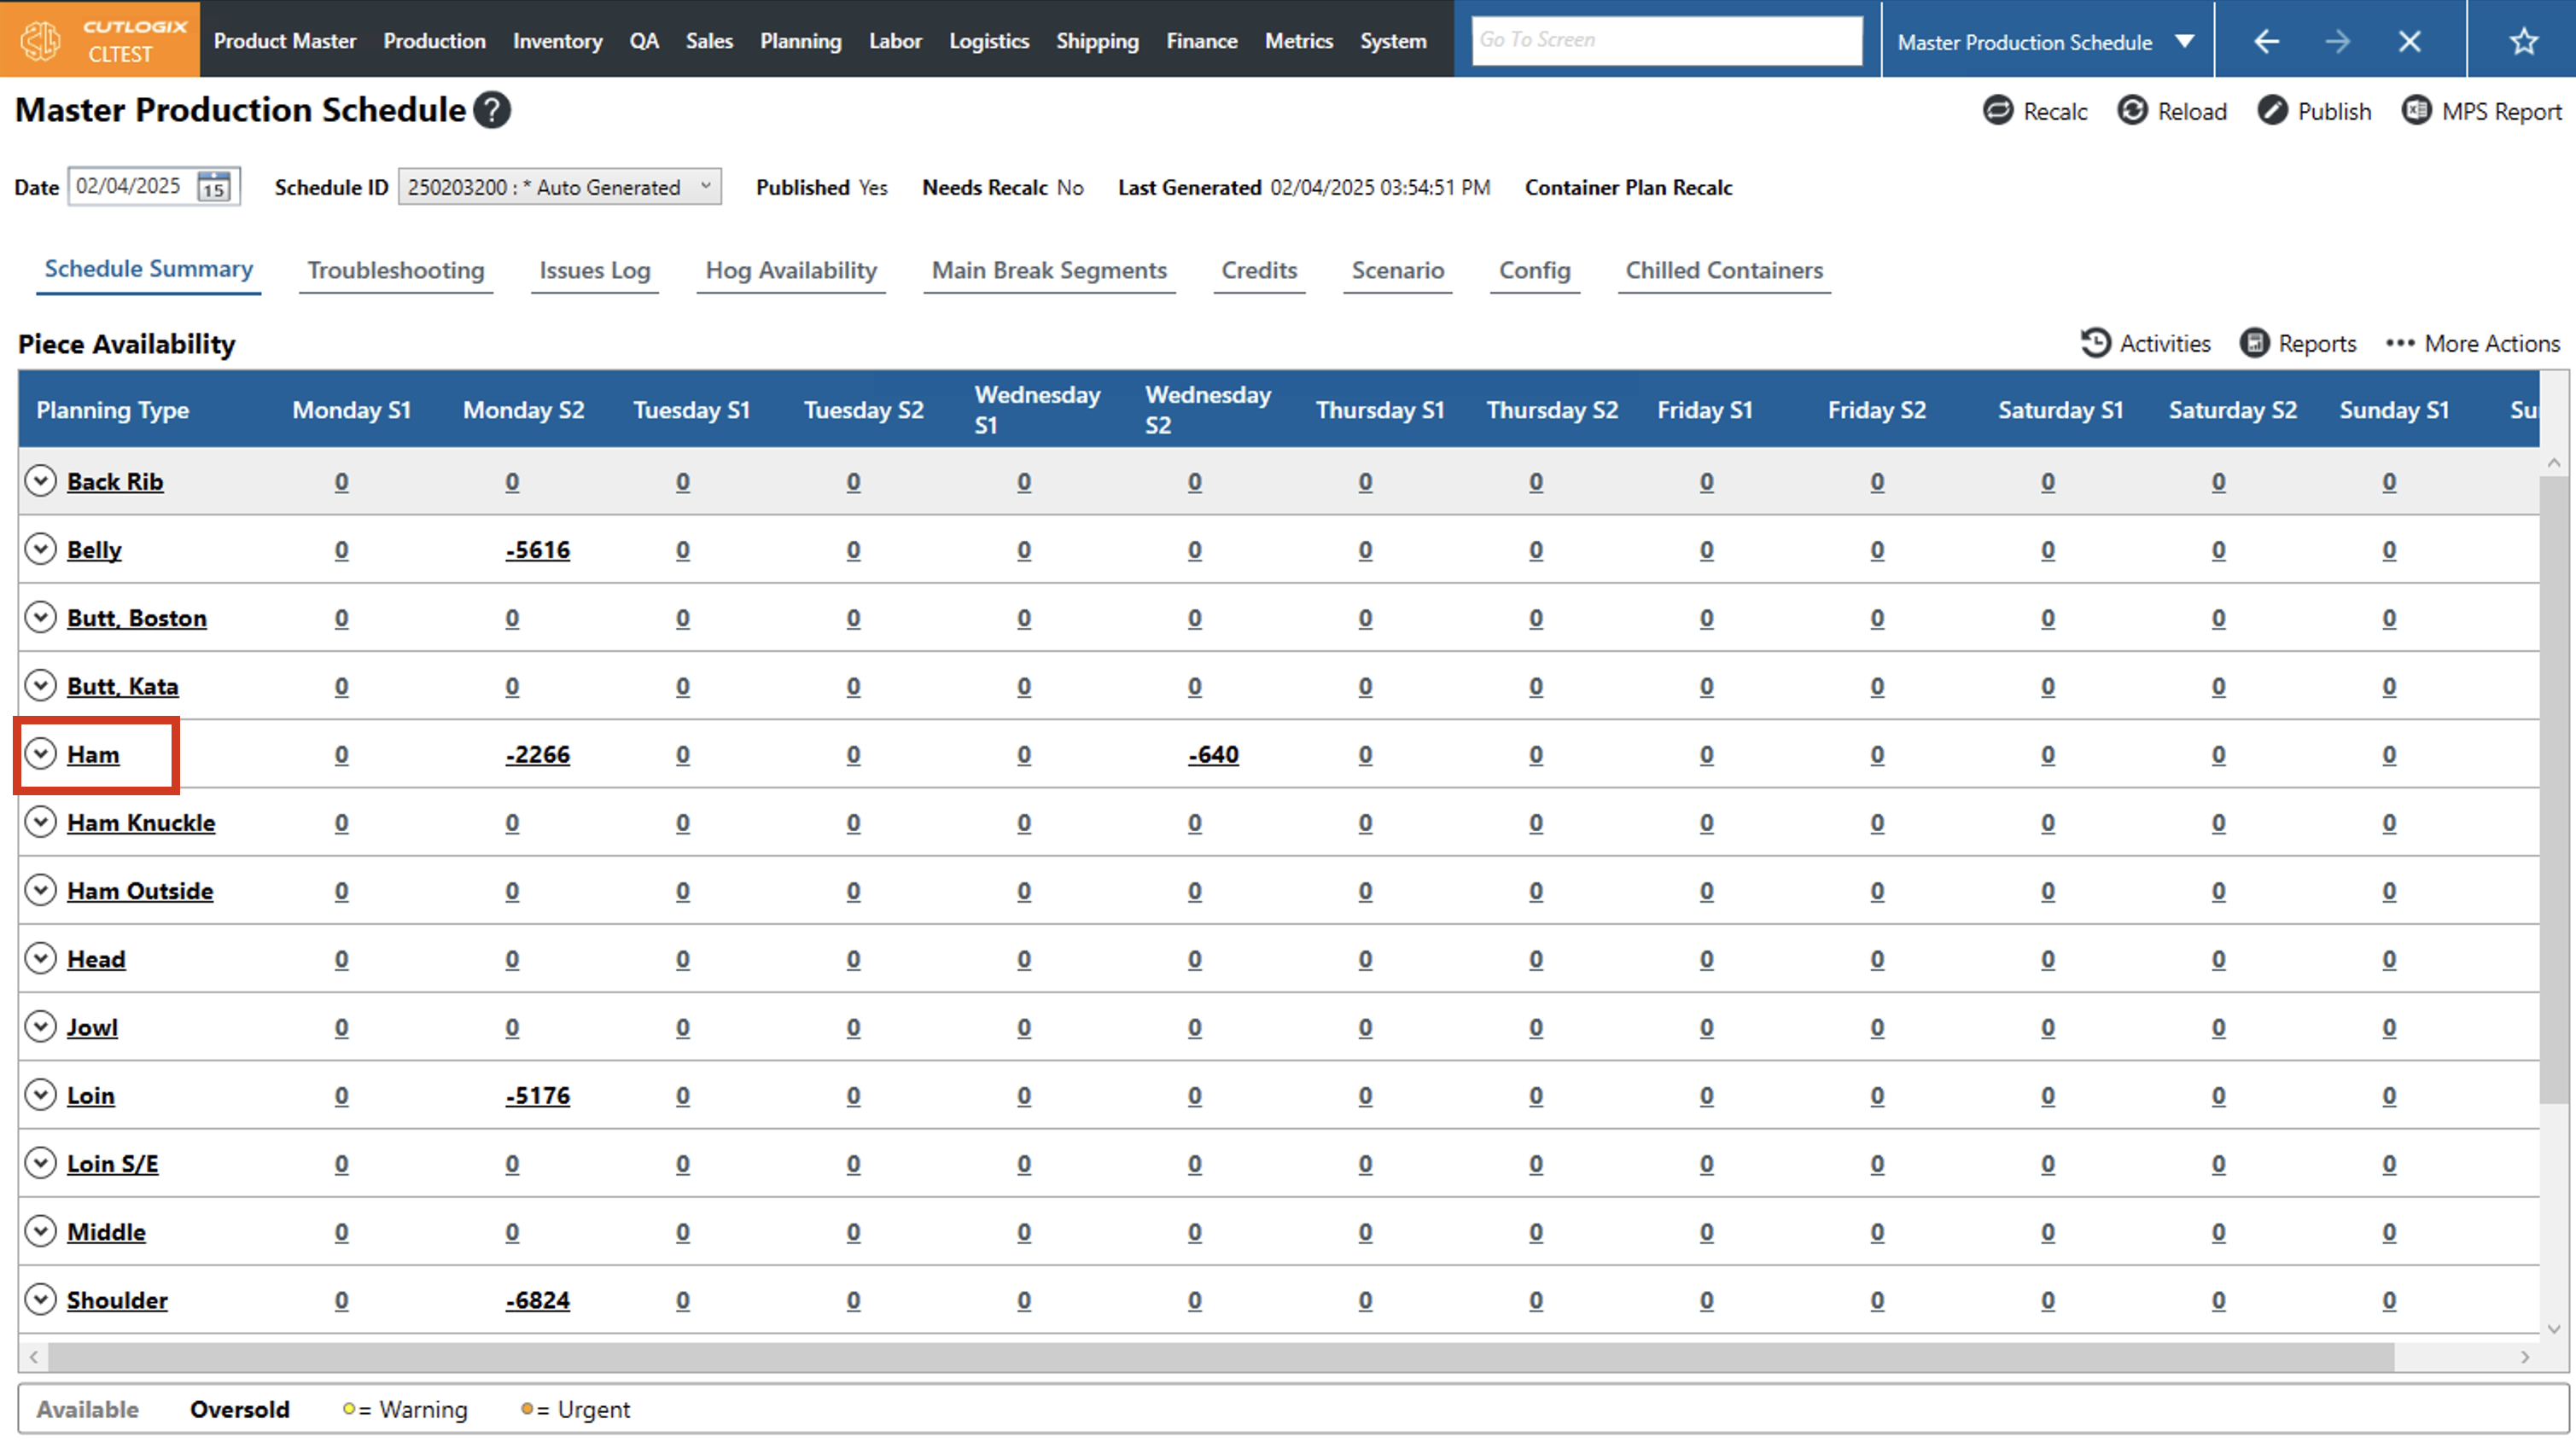
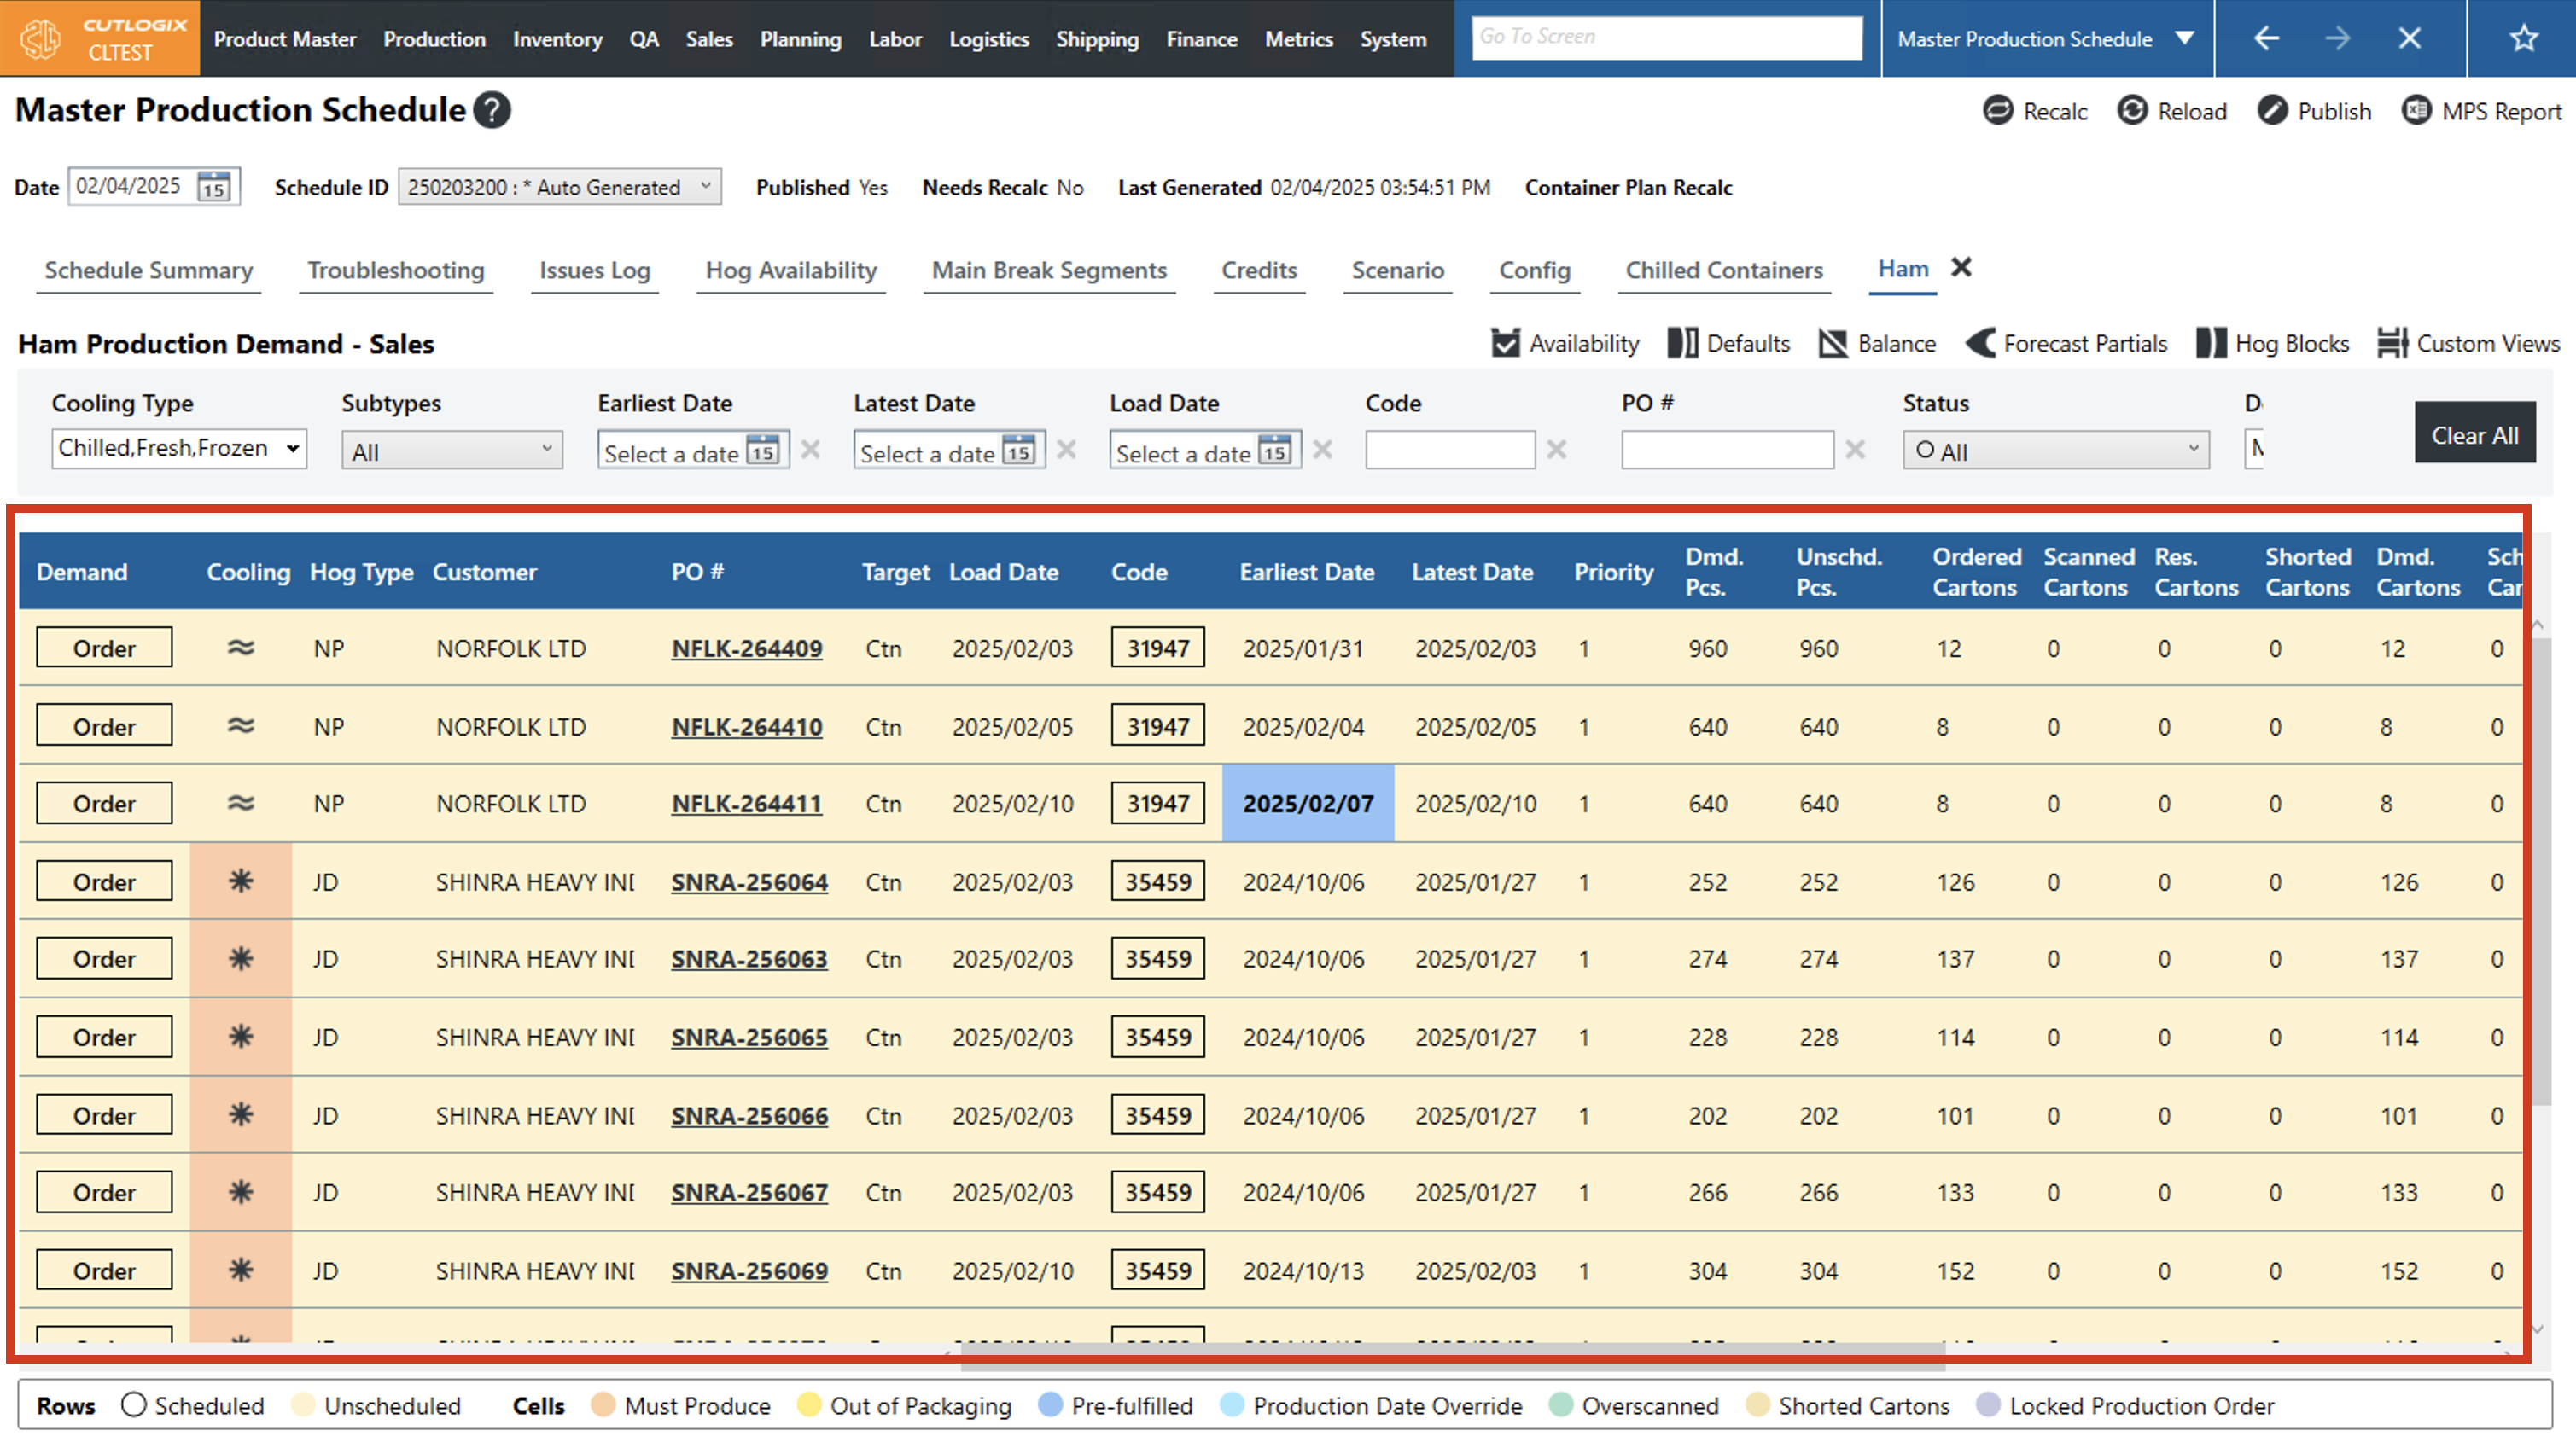
Step 3: A new tab will open on the screen with the title of the planning type you selected (In this example it's called "Ham").
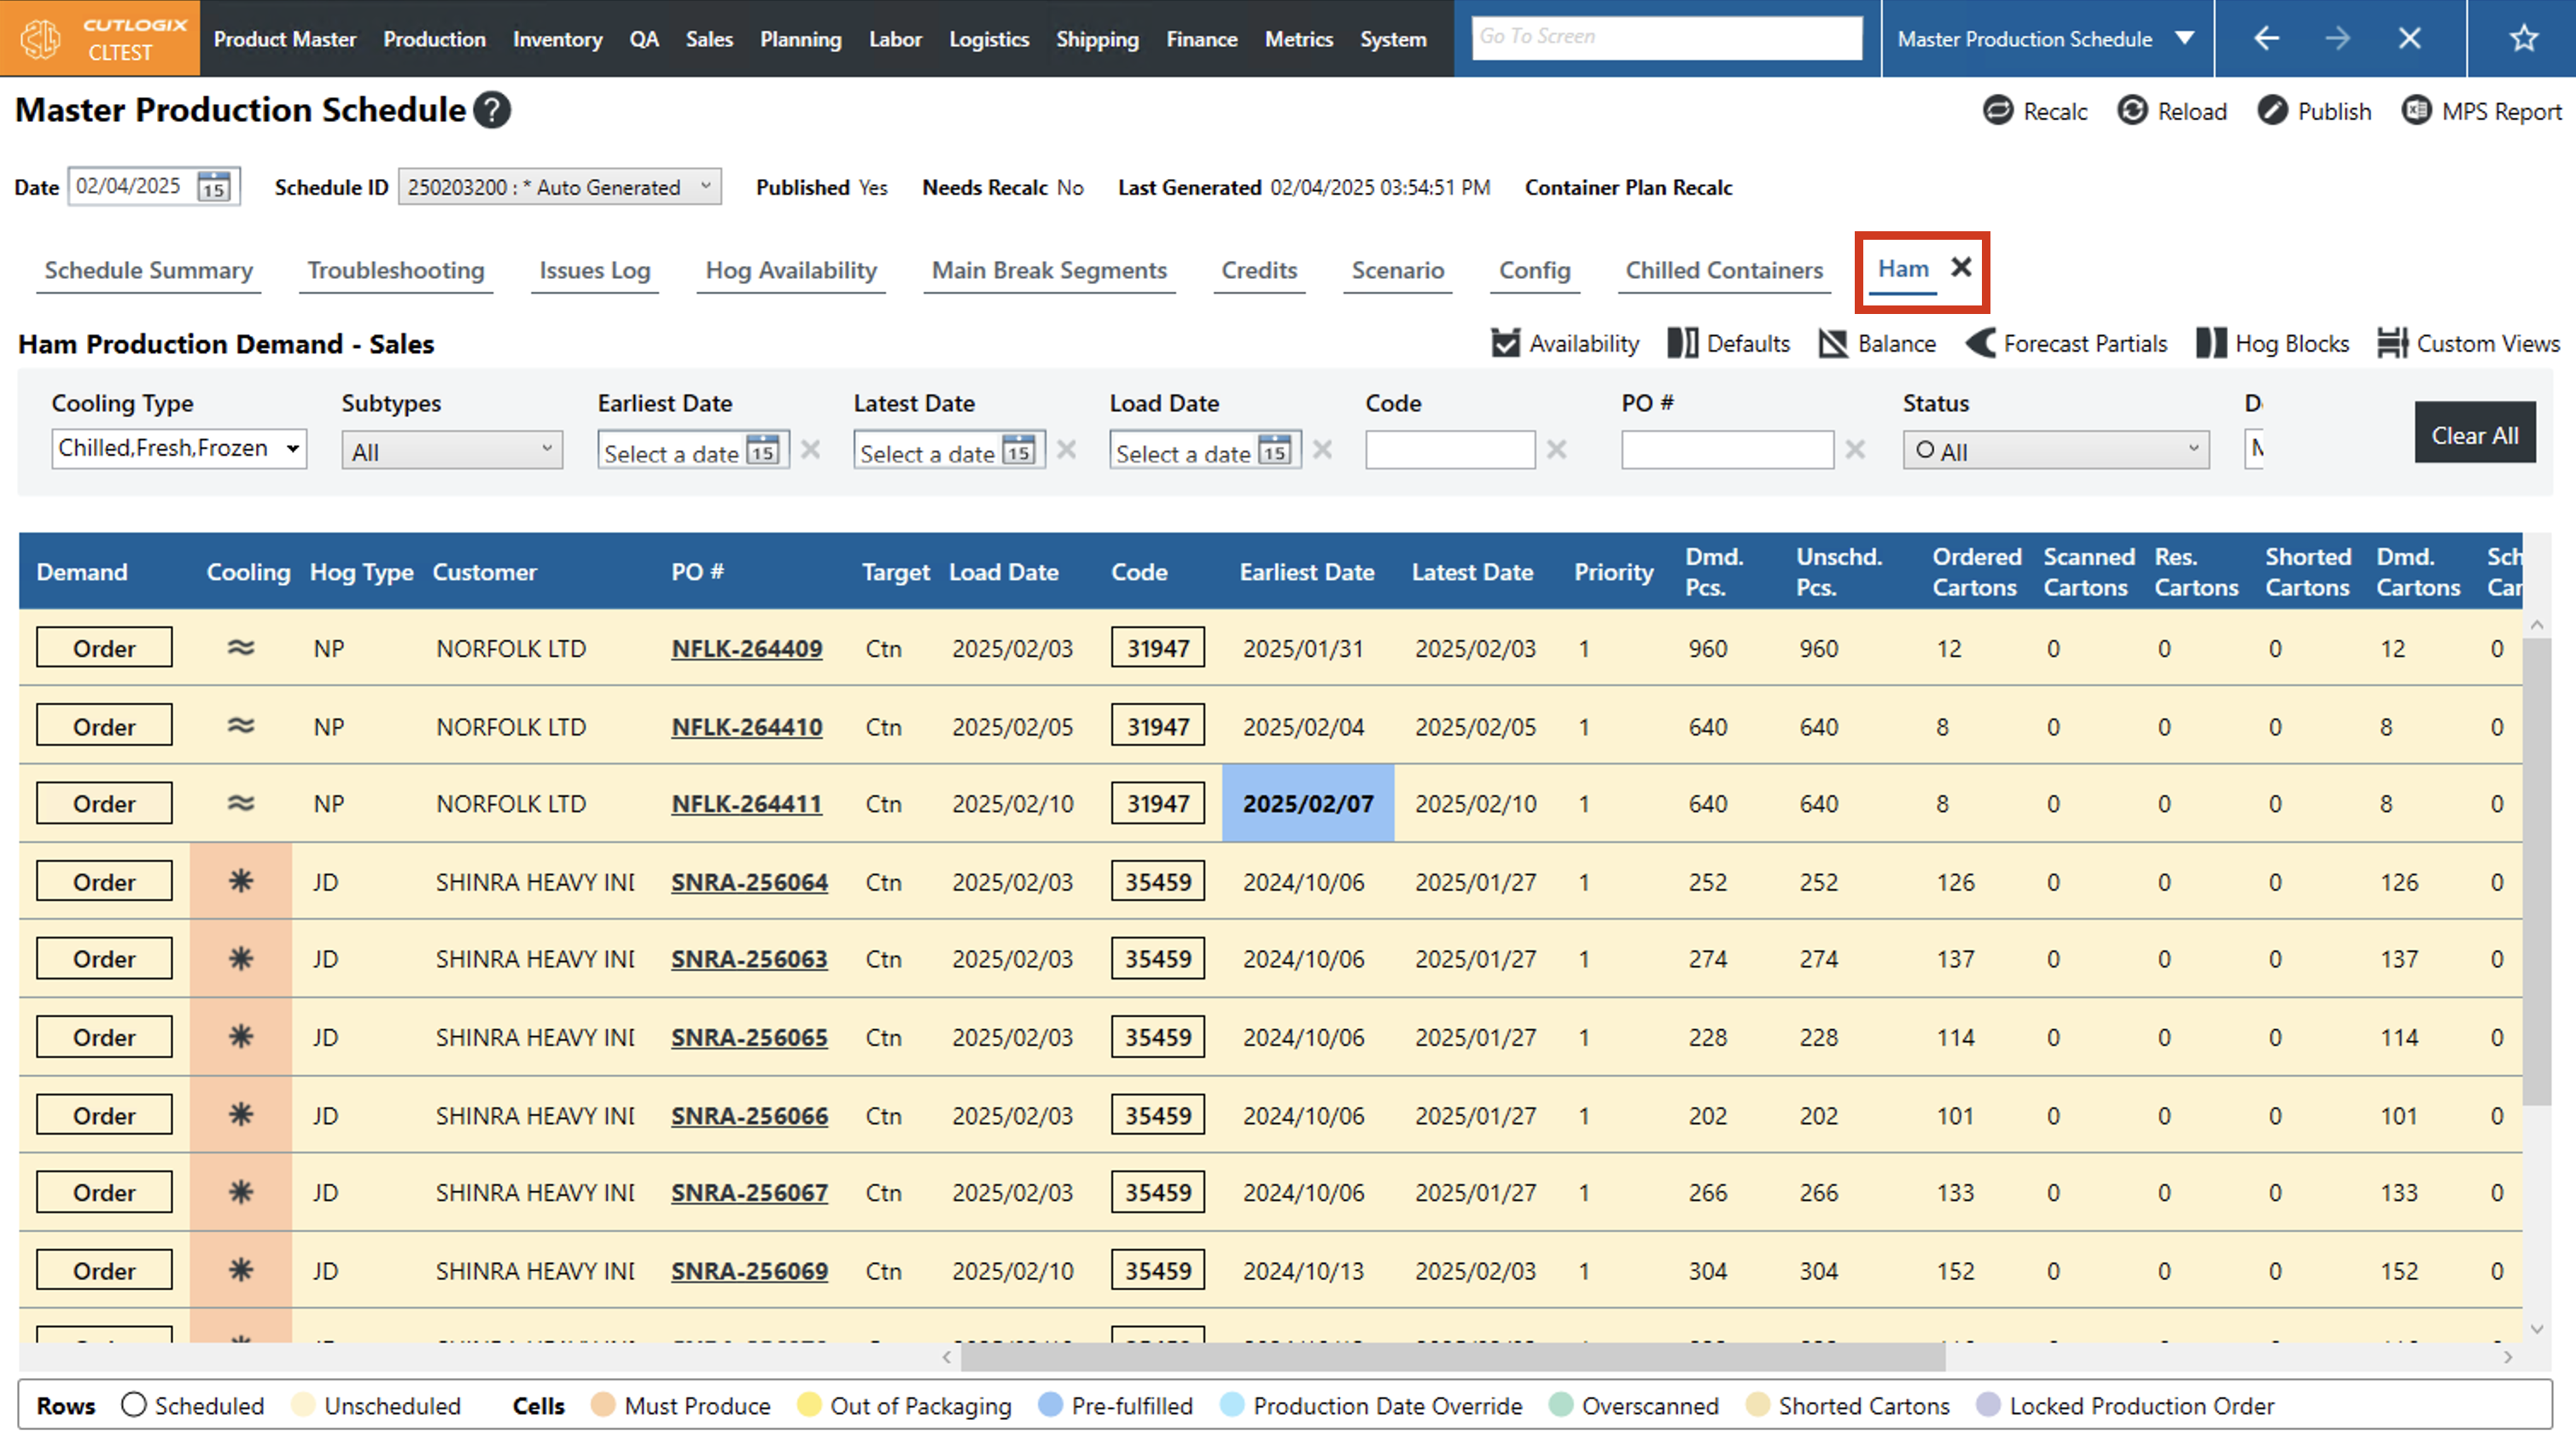
Step 4: In this tab you'll see all the demand for that planning type. You can filter through the demand using the filters at the top of the page. Some of the ways you can filter is by cooling type, sub-type (planning type), PO# and more. The data columns on this page are as follows:
• Demand: This lists the type of the demand. Typically, this will say customer orders, an order for product of a single cooling type that fits on a single load, or sales reservation. A sales reservation is often used to either reserve production capacity in the plant for un-finalized orders or to record orders for chilled product that are too large to fit on a single load. Clicking on the demand type will open the details page for the associated reservation/order.
• Cooling: The cooling type indicates the temperature and shipping practices that will be used when keeping or shipping a type of product (Fresh, Frozen or Chilled).
• Hog Type: This refers to the grade of hog that is scheduled to be used to produce this product. A hog’s grade is determined by how rigorous a genetic and diet program it has undergone. Typically, the more rigorous the program the more valuable the hog.
• Customer: This lists the customer that has placed the order/reservation. Typically, a customer is a company.
• PO#: A purchase order number (PO#), is an identifier assigned to customer orders and sales reservations in CutLogix. In the case of a sales reservation, these are assigned as a part of the process of the reservation being confirmed.
• Target: This field indicates whether the order is trying to meet a specific number of cartons or kg.
• Load Date: This is the date that the demand is planned to be loaded and shipped from the plant.
• Code: This is a unique identifier for the product in CutLogix. Users can search for this product on the Product Master > Product Master List screen.
• Earliest/Latest Date: These dates list the first and last dates that the product can be produced. These dates are more relevant to chilled and frozen products as they require specific amounts of cooling and freezing time after being processed before they can be shipped. However, they also have maximum chilling and freezing times which is why they cannot simply be produced at the earliest possible time and then left until their load date.
• Priority: This is the scheduling priority assigned to this line item. The lower the priority the more the planning system will prioritize scheduling it.
• Dmd. Pcs.: The demand pieces column shows how many pieces of the product need to be produced to fulfill this demand. Sometimes a product will have multiple pieces per carton. This can be viewed and set on the Product Master > Product Master List screen.
• Unschd. Pcs.: The unscheduled pieces column shows how many of the total demand pieces are not scheduled to be made on the current product schedule.
• Ordered Cartons: This shows the total number of cartons that have been ordered for this line item.
• Scanned Cartons: A scanned carton is one that has been added to the Manufacturing Execution System (MES). In other words, the inventory management system considers that carton to be loaded onto that order once scanned.
• Res Cartons:
• Shorted Cartons: Shorted cartons are those that the plant has intentionally not loaded onto the order. Typically, this happens when extraneous circumstances have made it infeasible to complete the order.
• Dmd. Cartons: Demand Cartons lists the total number of cartons that need to be produced to fulfill this demand.
• Sched. Cartons.: This is the number of cartons from the total for this line item that have been scheduled for production.
How to View Unscheduled Demand
DemoStep 1: Navigate to the "Master Production Schedule" page (Under the Planning menu → Master Production Schedule) and select a date and schedule ID (see these steps above).
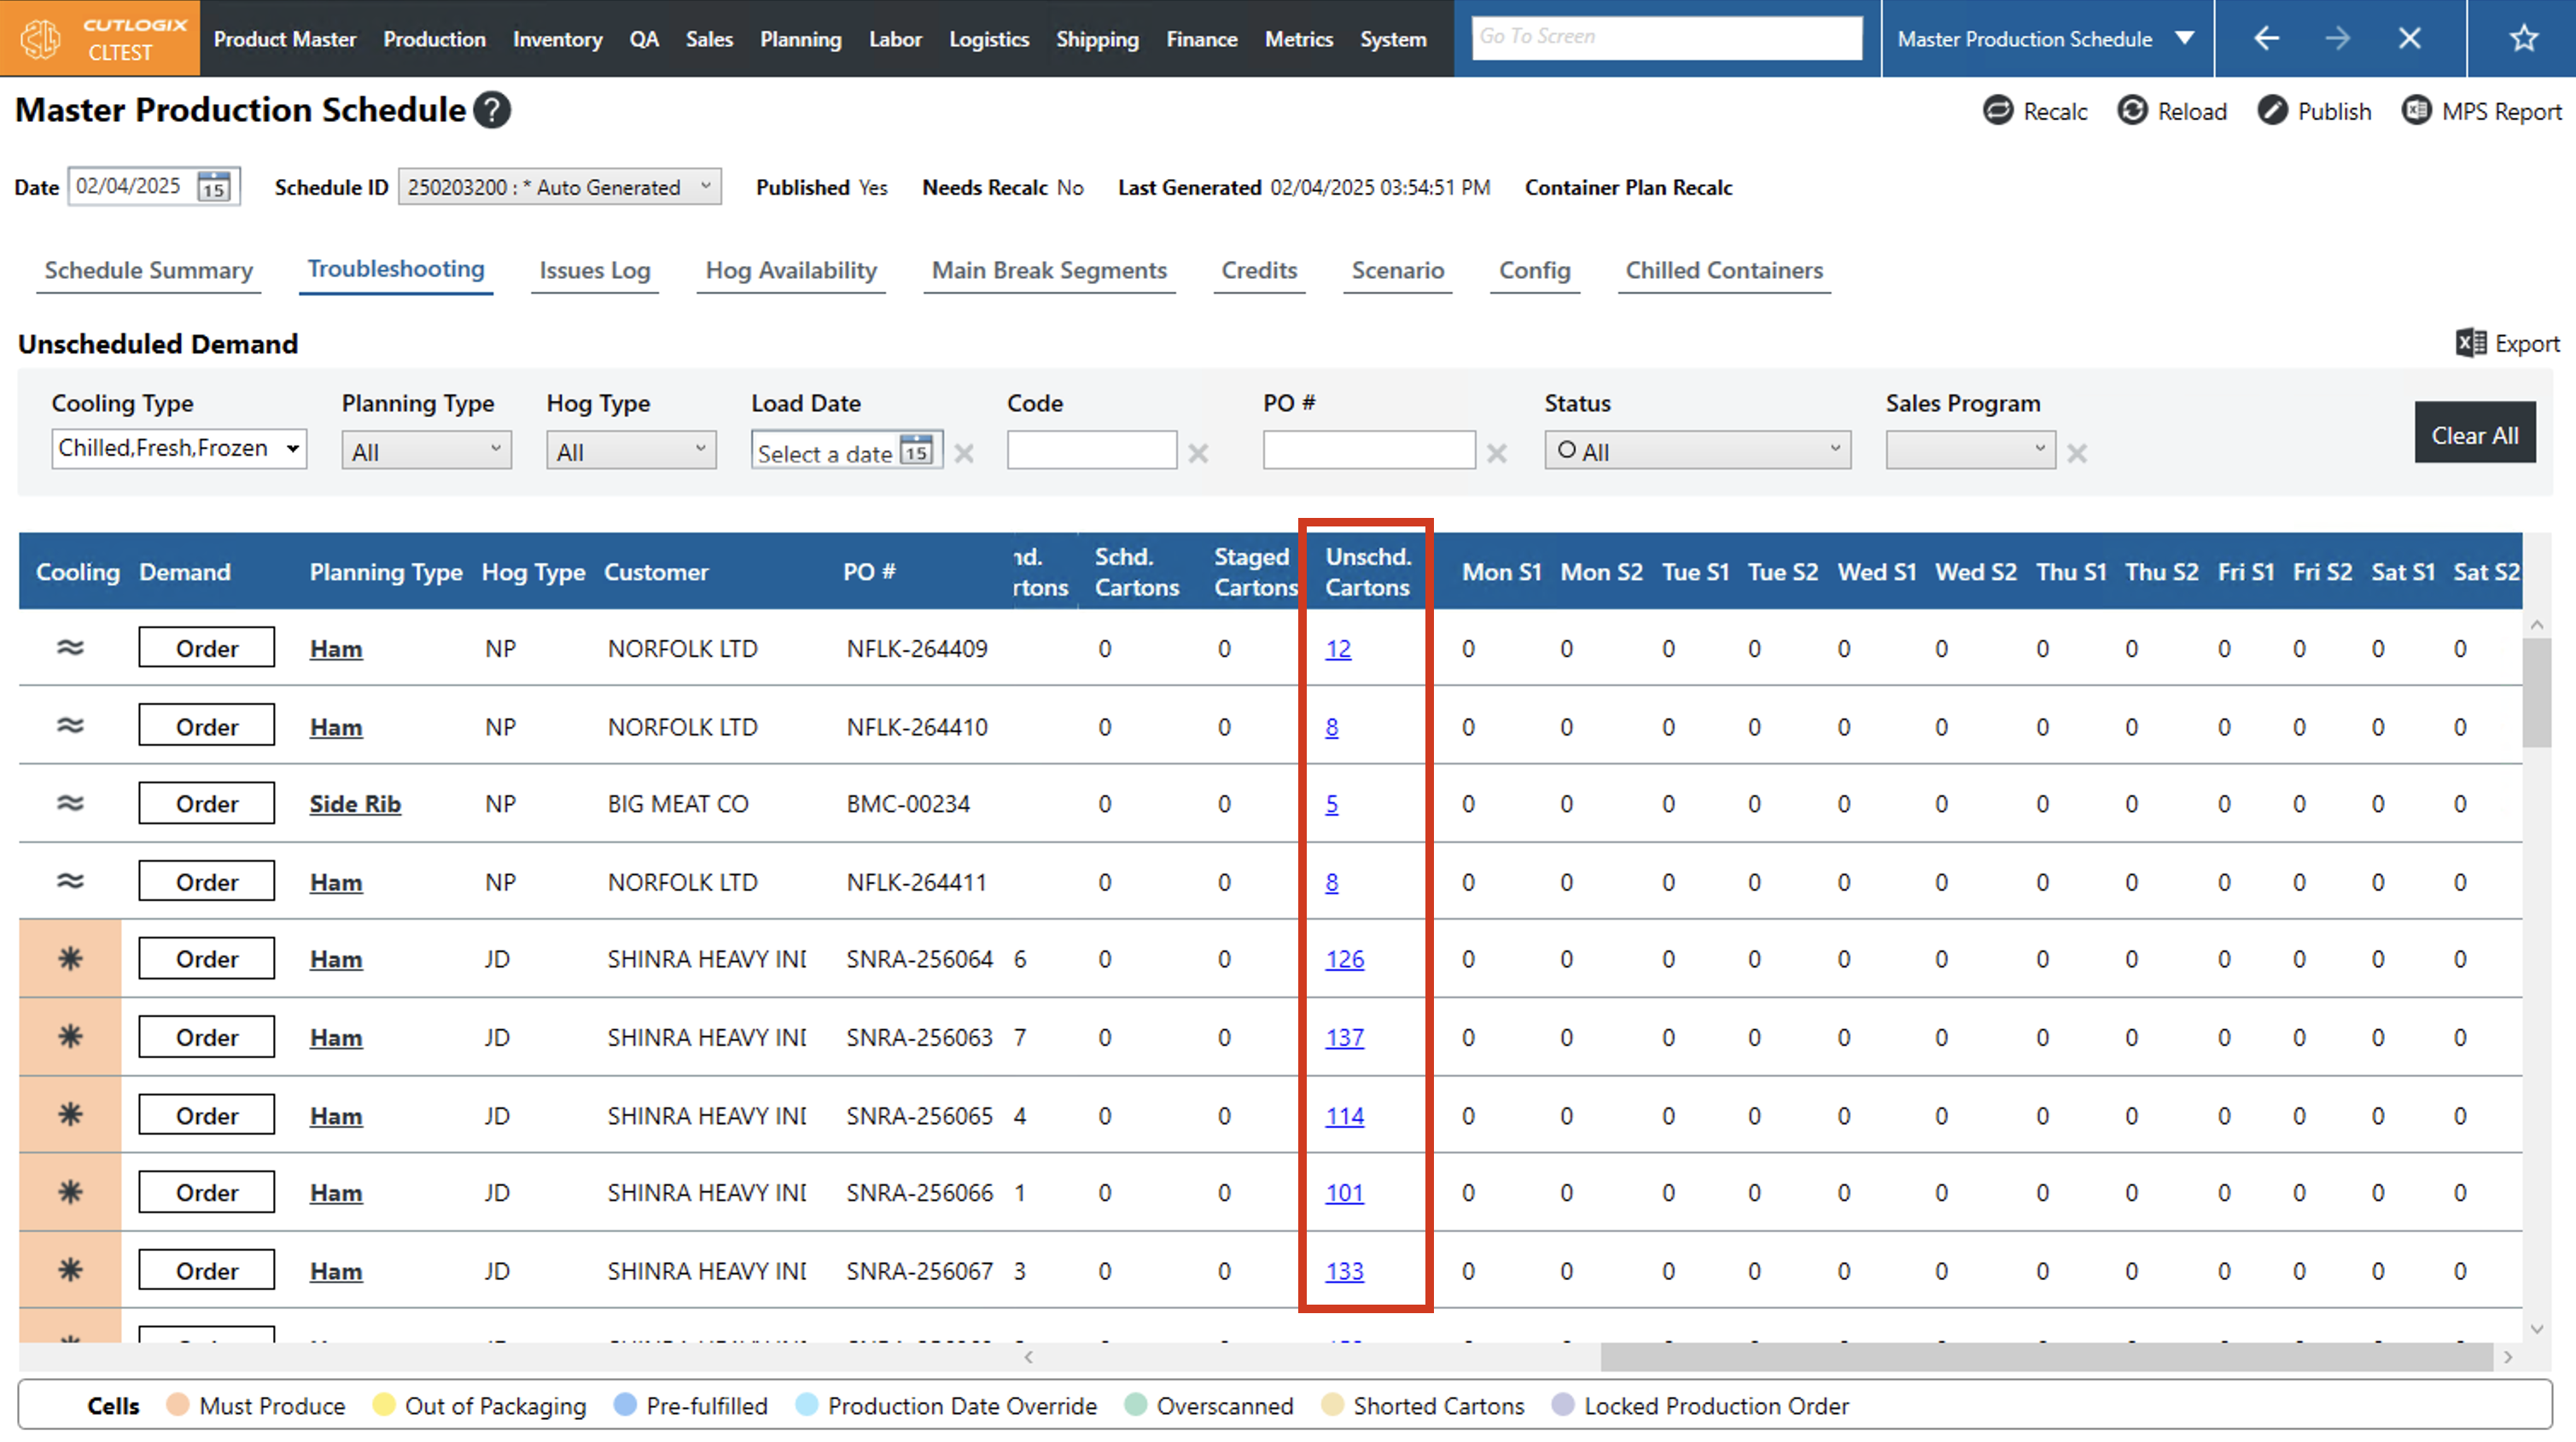
Step 2: Click on the "Troubleshooting" tab.

Step 3: This shows a list of all orders/reservations with unscheduled demand. At the top of the page you can filter the list by cooling type, planning type, hog type, PO# and more.
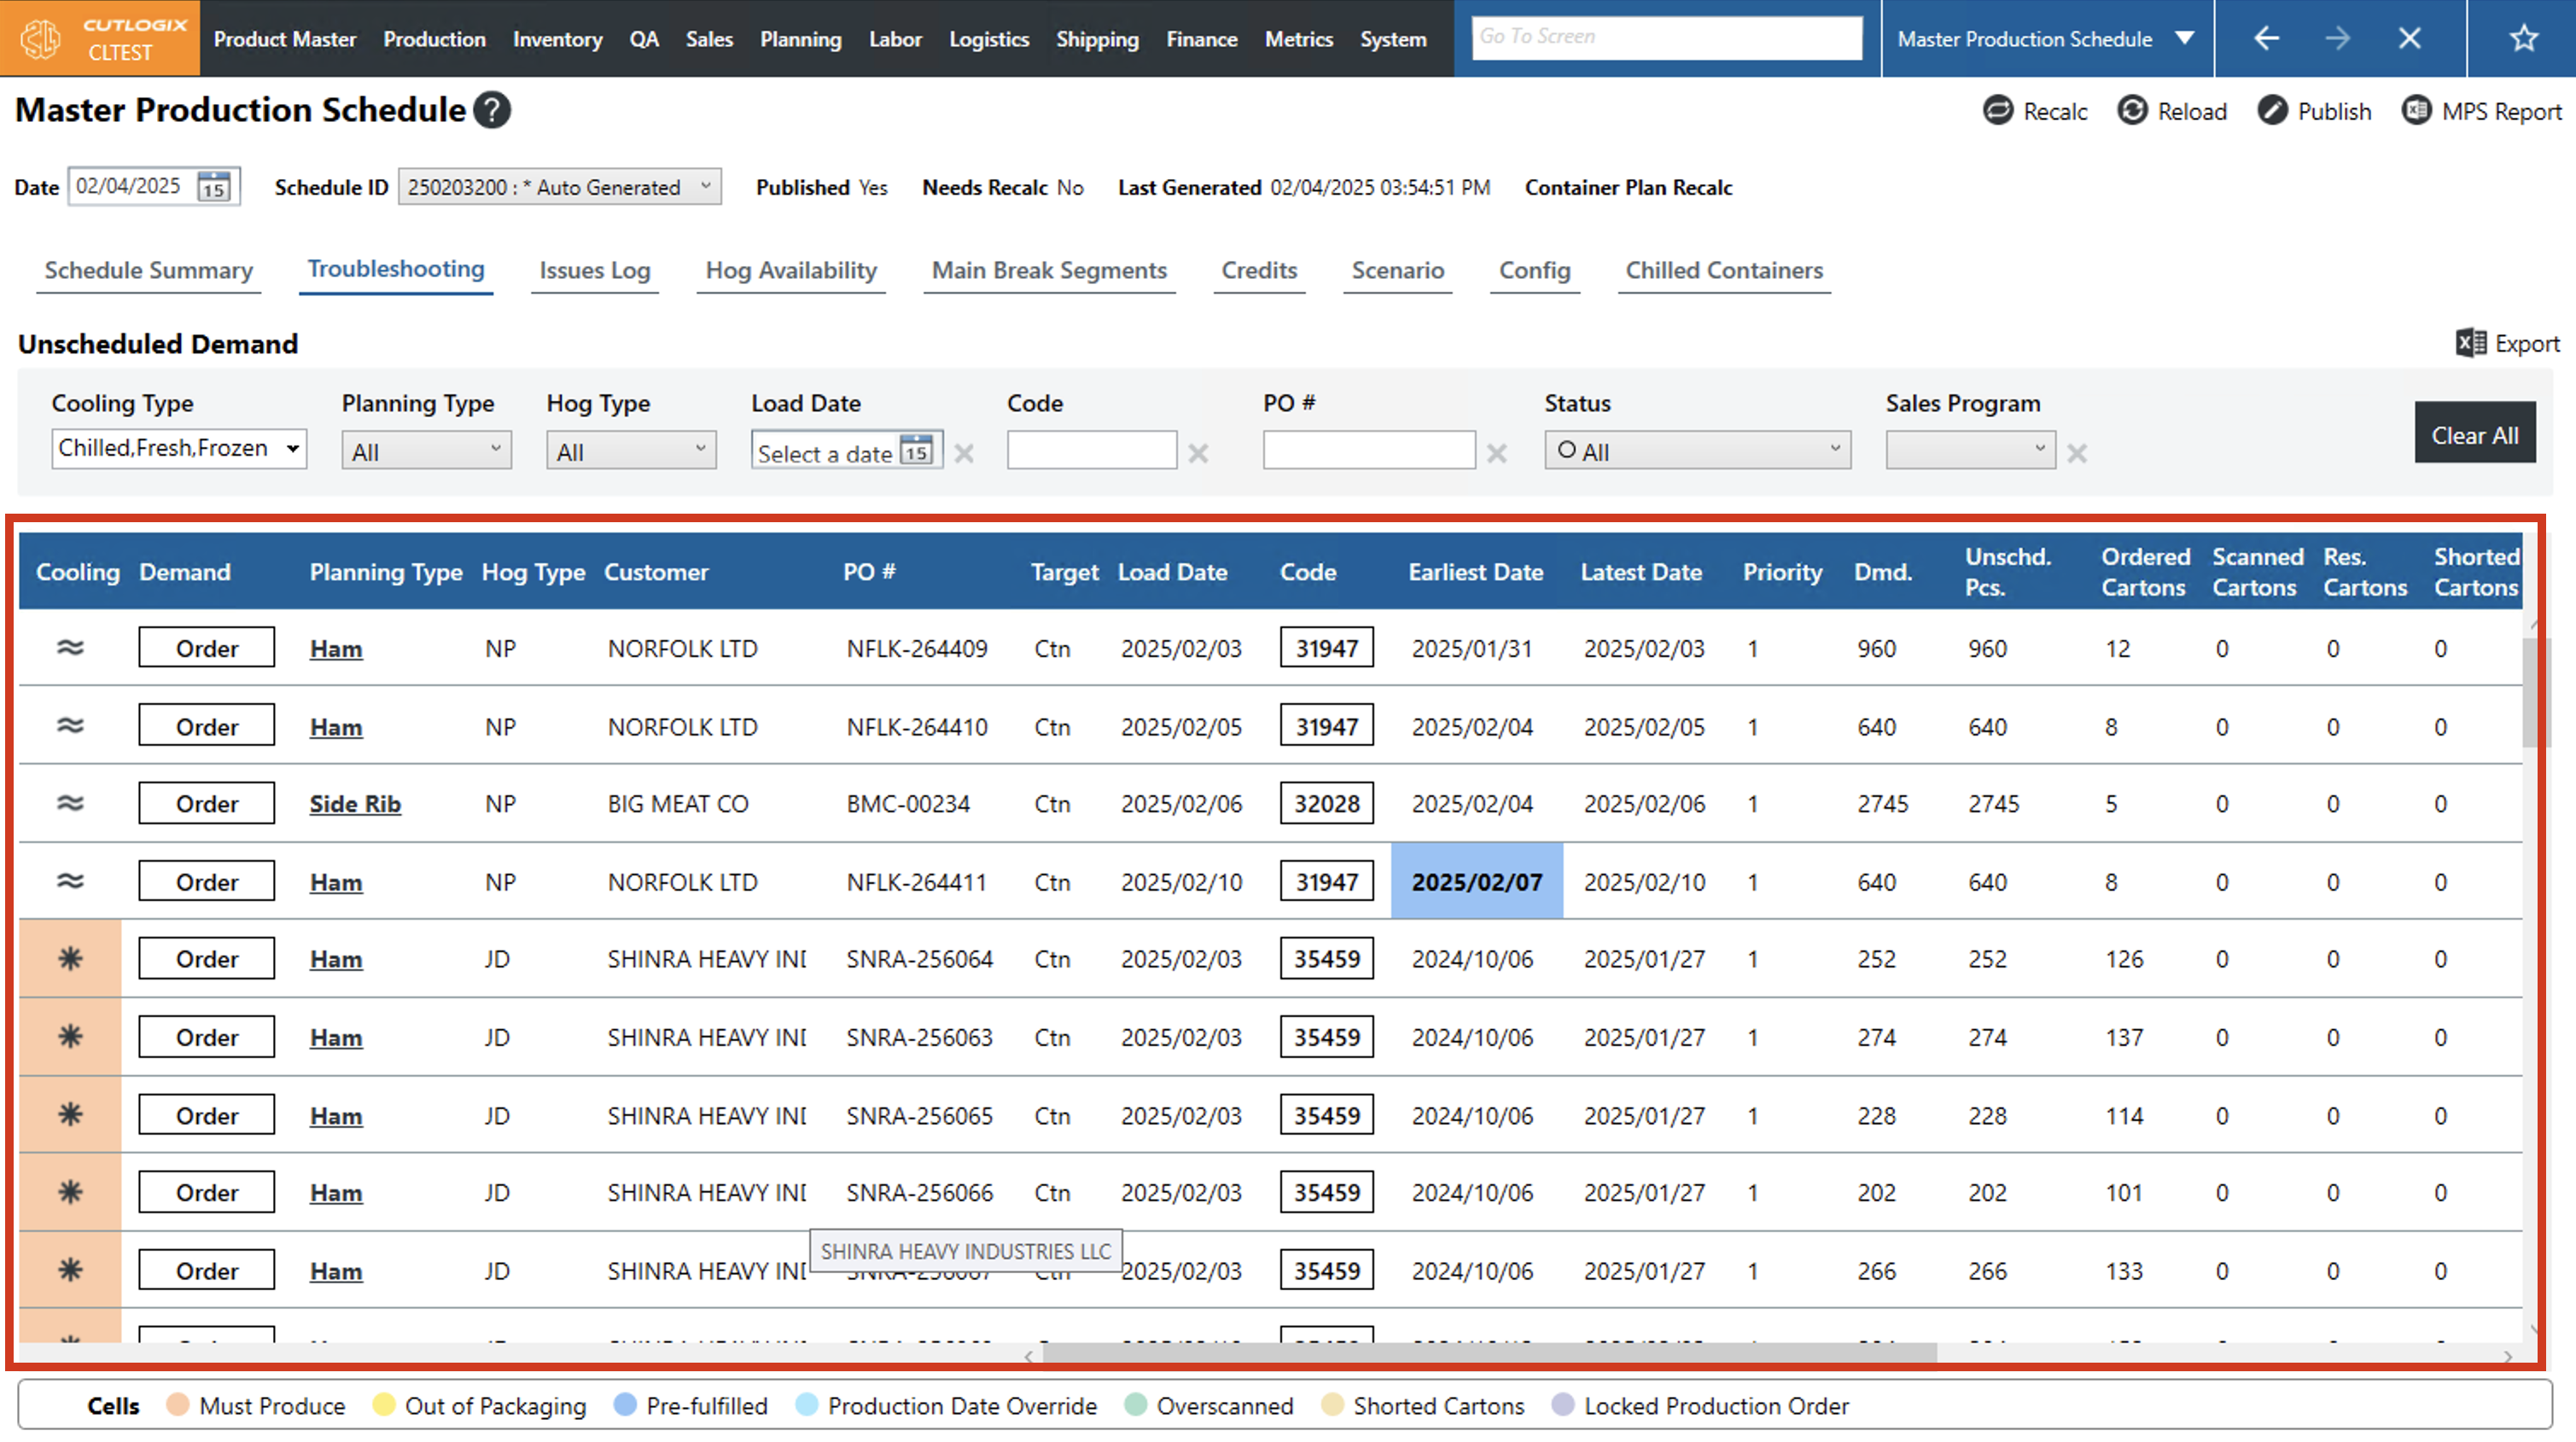
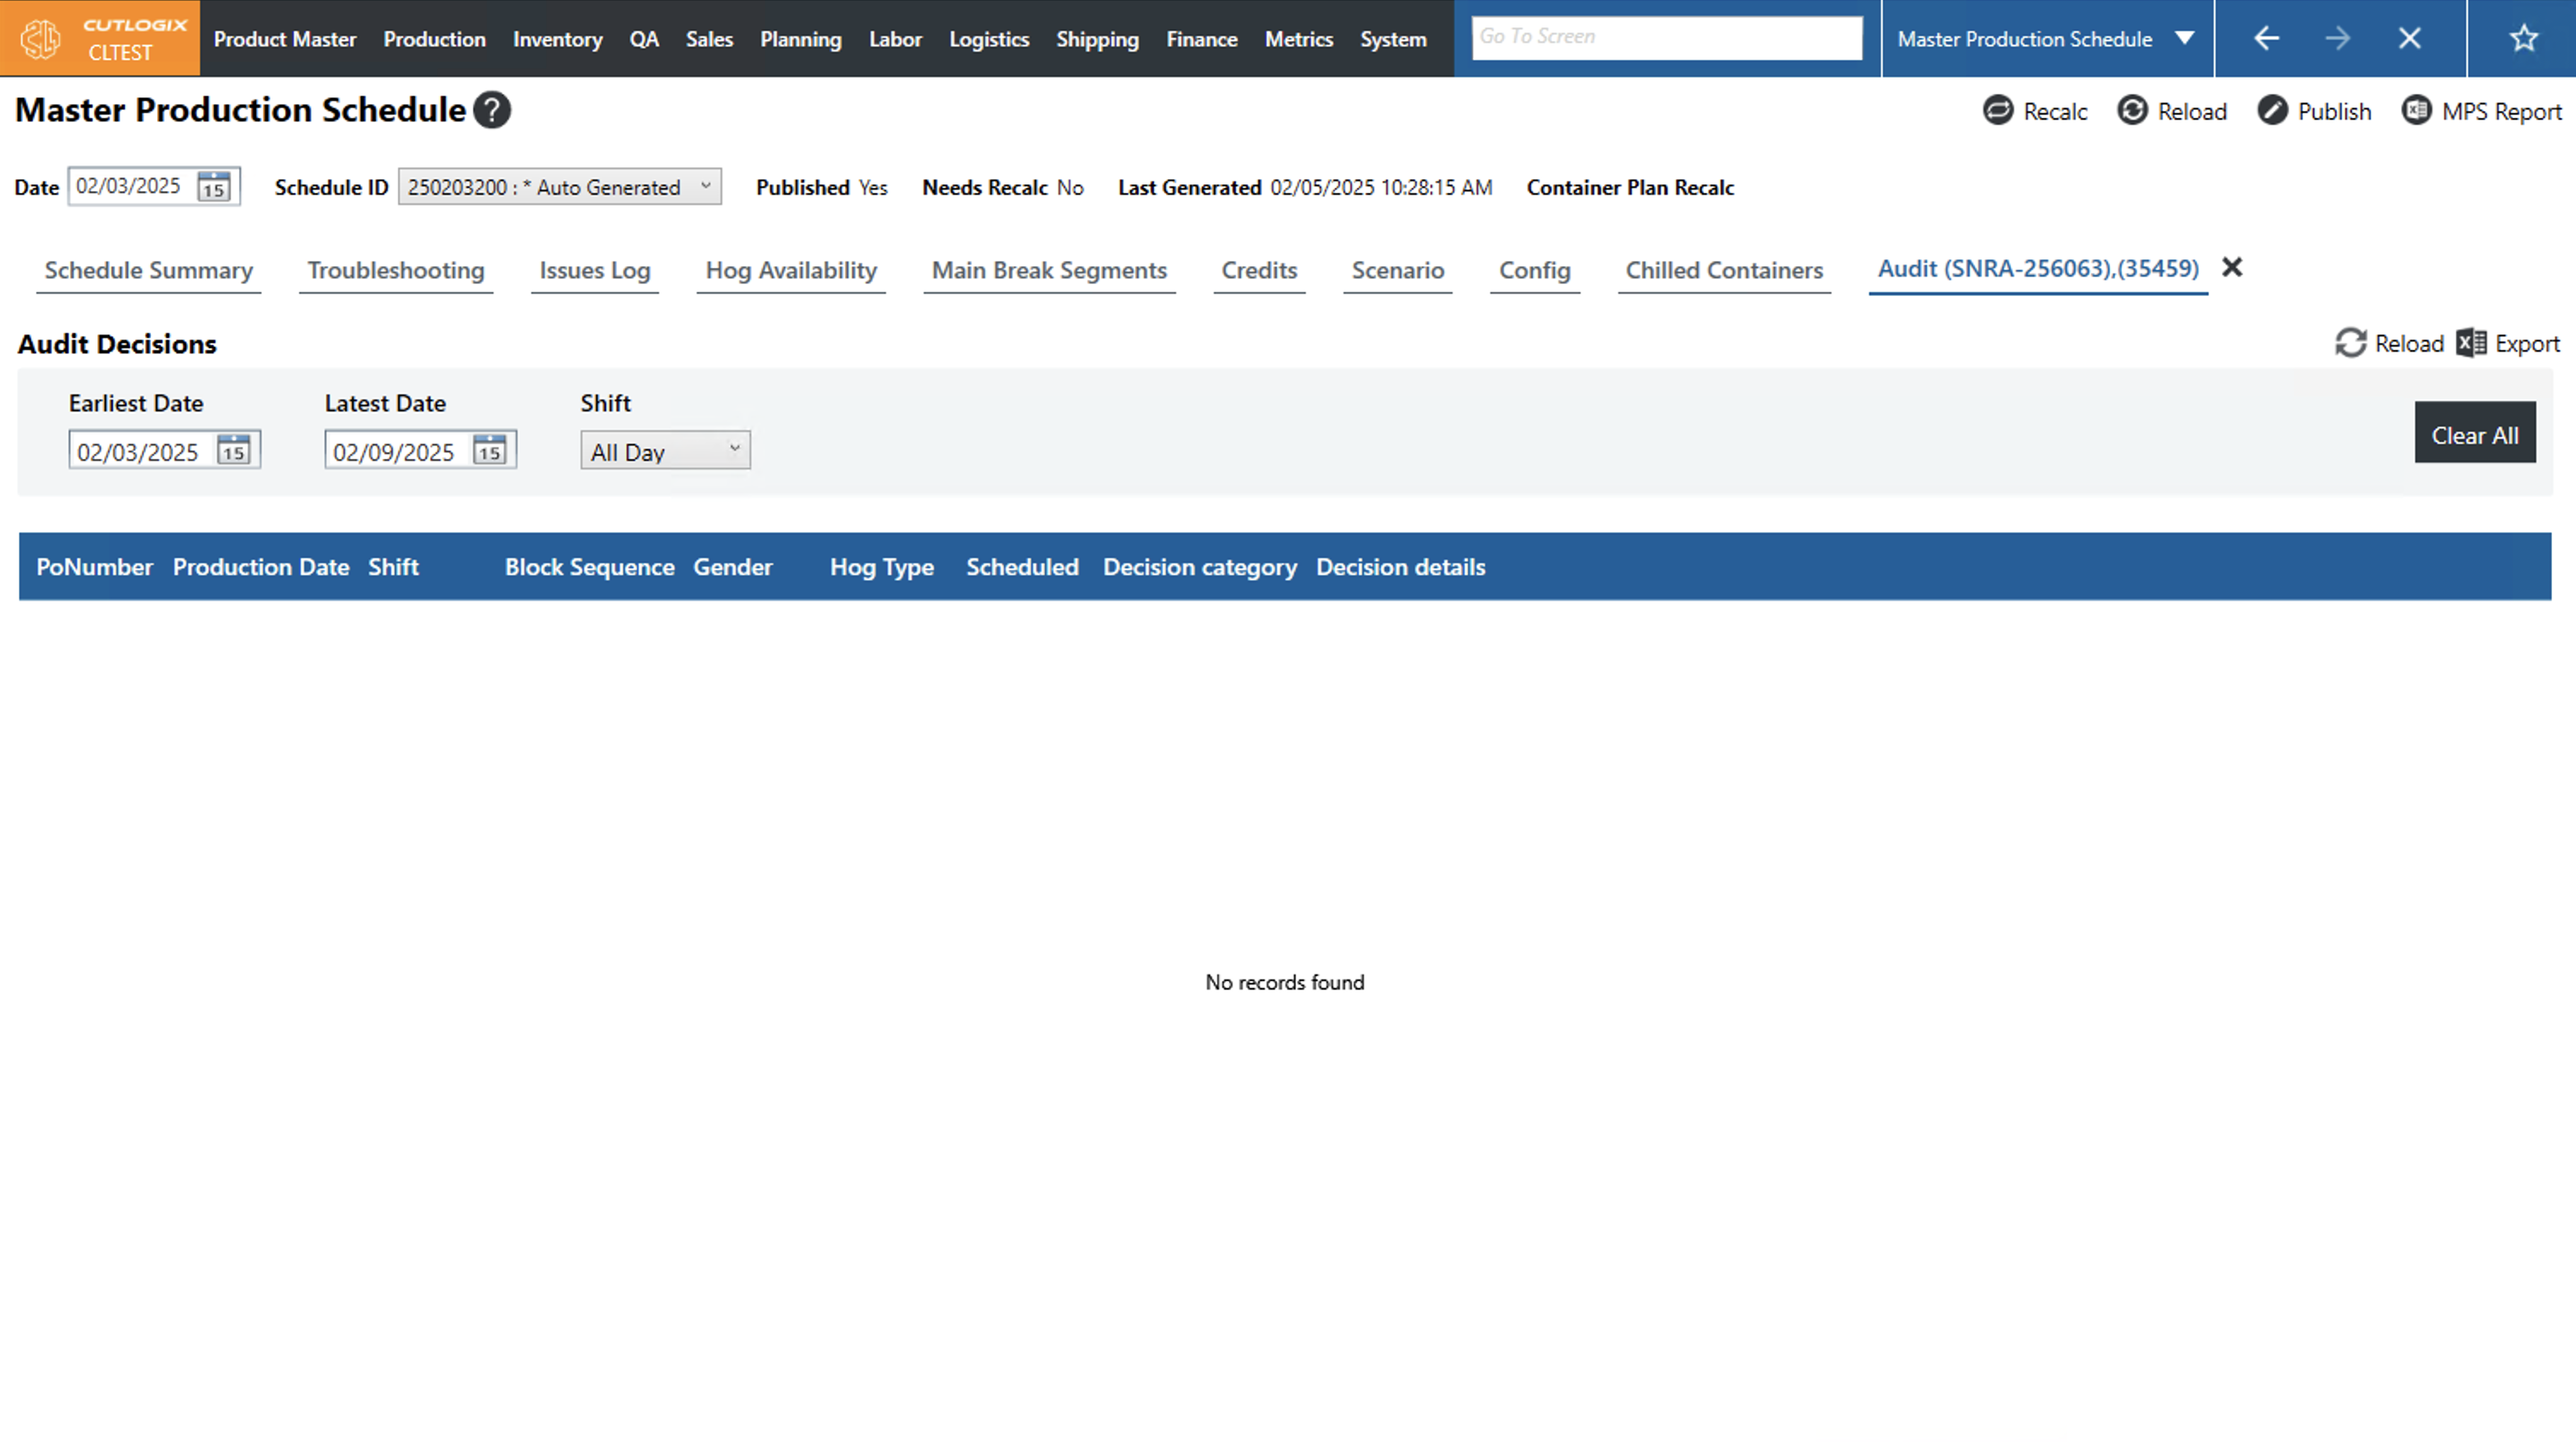
Step 4: Further information as to why a demand record wasn't scheduled can be found by clicking the hyperlinked number under the "Unscheduled Cartons" column for the record that you're looking at.
Step 5: This opens up an audit page where you can view further detailed information on specifically why production for that demand was not scheduled.
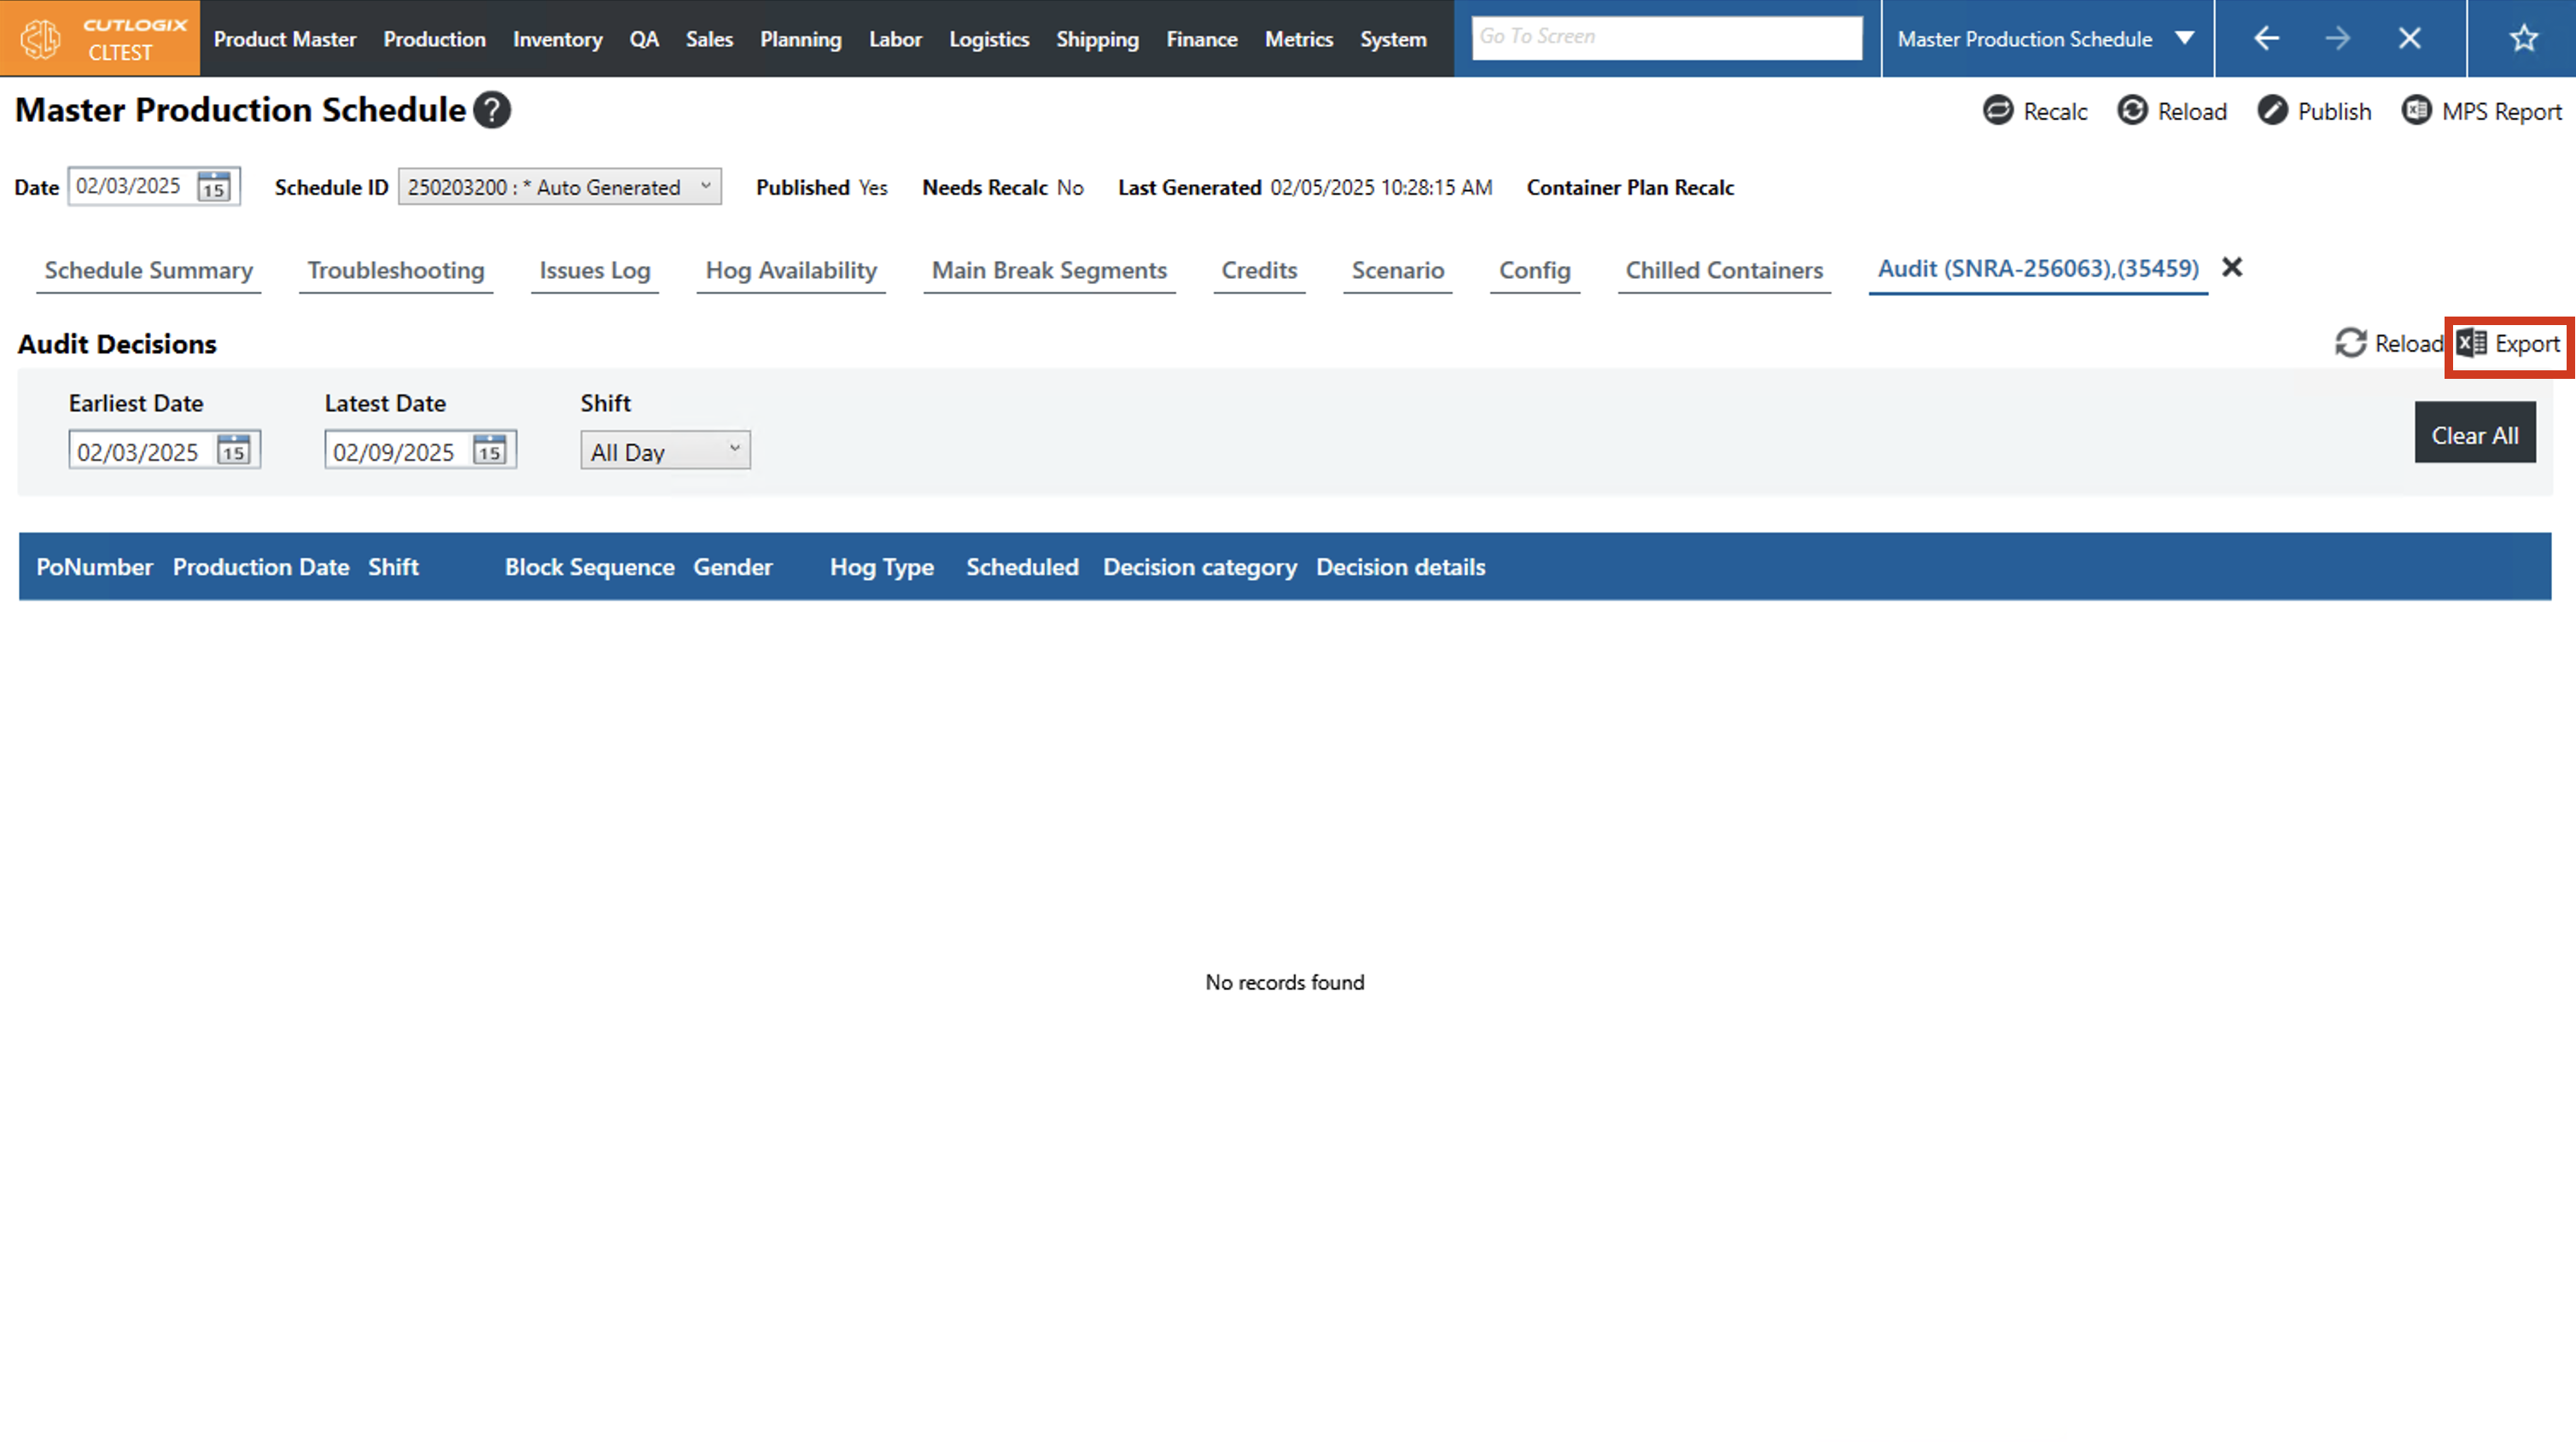
Step 6: This information can also be downloaded in Excel format by clicking the "Export" button in the top right corner of the page.
How to View Planning Issues in the MPS
DemoStep 1: Navigate to the "Master Production Schedule" page (Under the Planning menu → Master Production Schedule) and select a date and schedule ID (see these steps above).
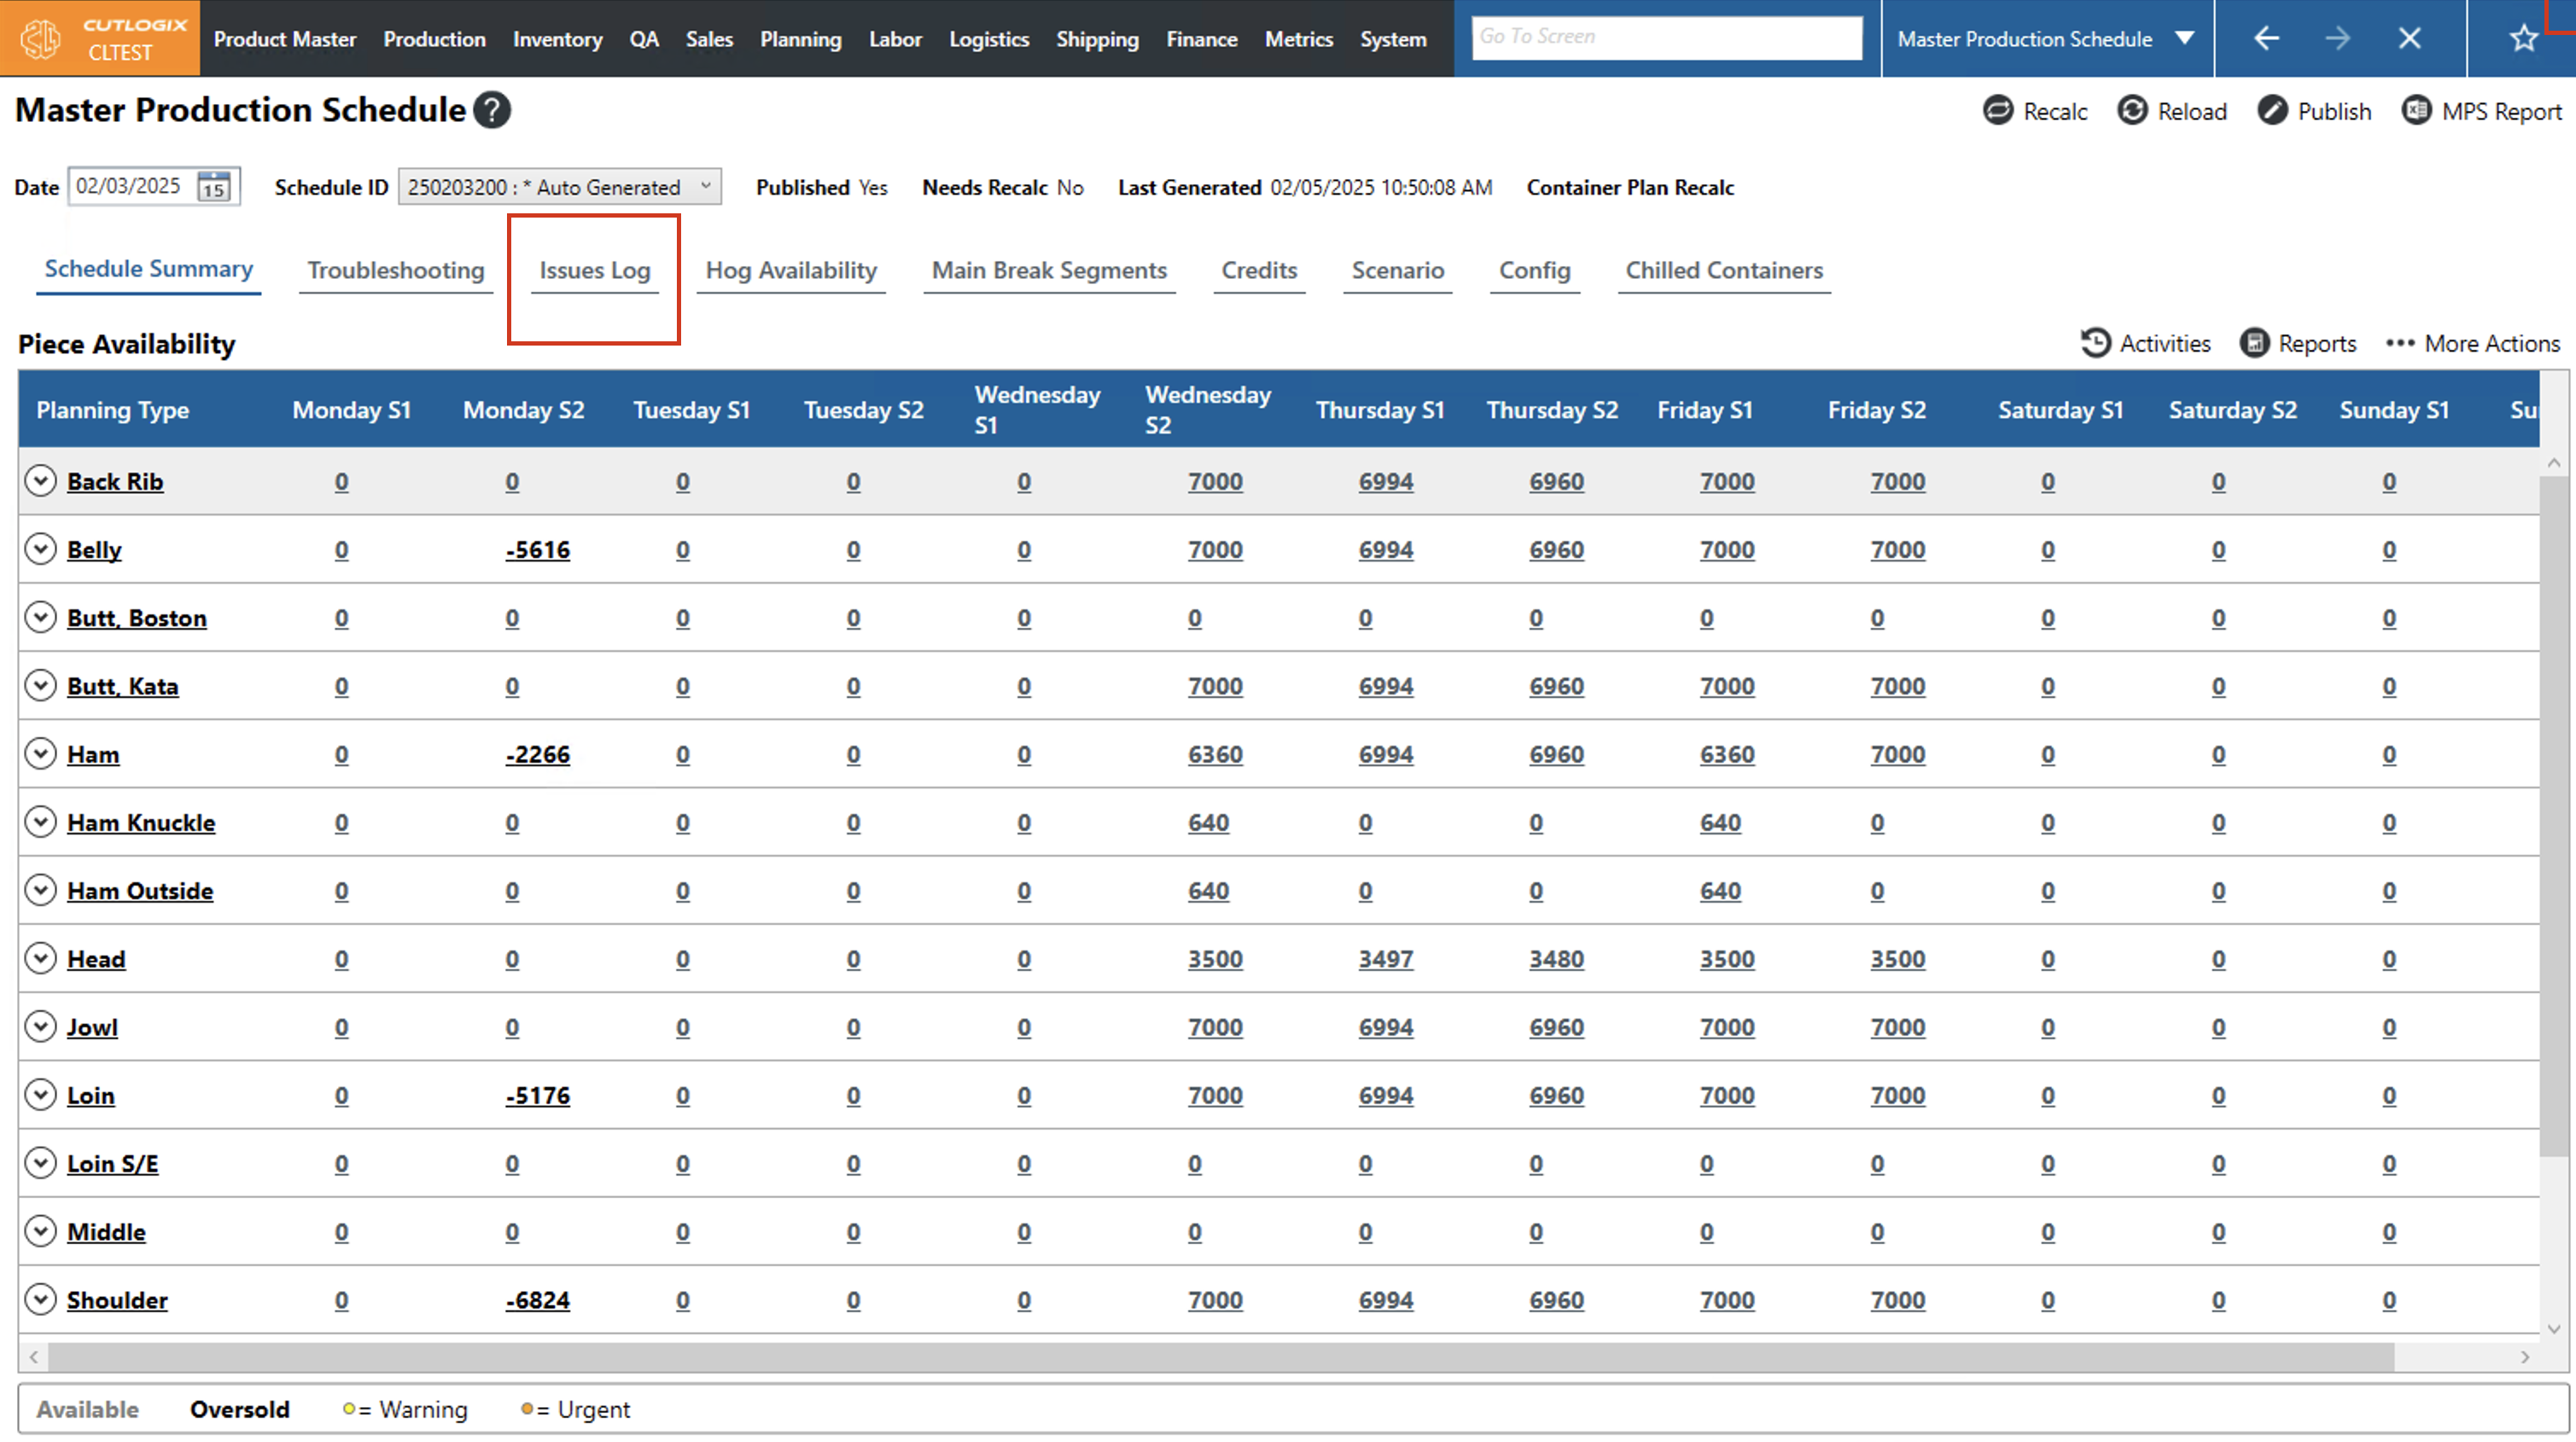
Step 2: Click on the "Issues Log" tab.
Step 3: A list of all the issues that the MPS encountered while creating the plan for the selected week appears. Here you can see the severity of the issue, the type, the scheduled date, shift, planning type, hog block, a detailed description of the issue & more.
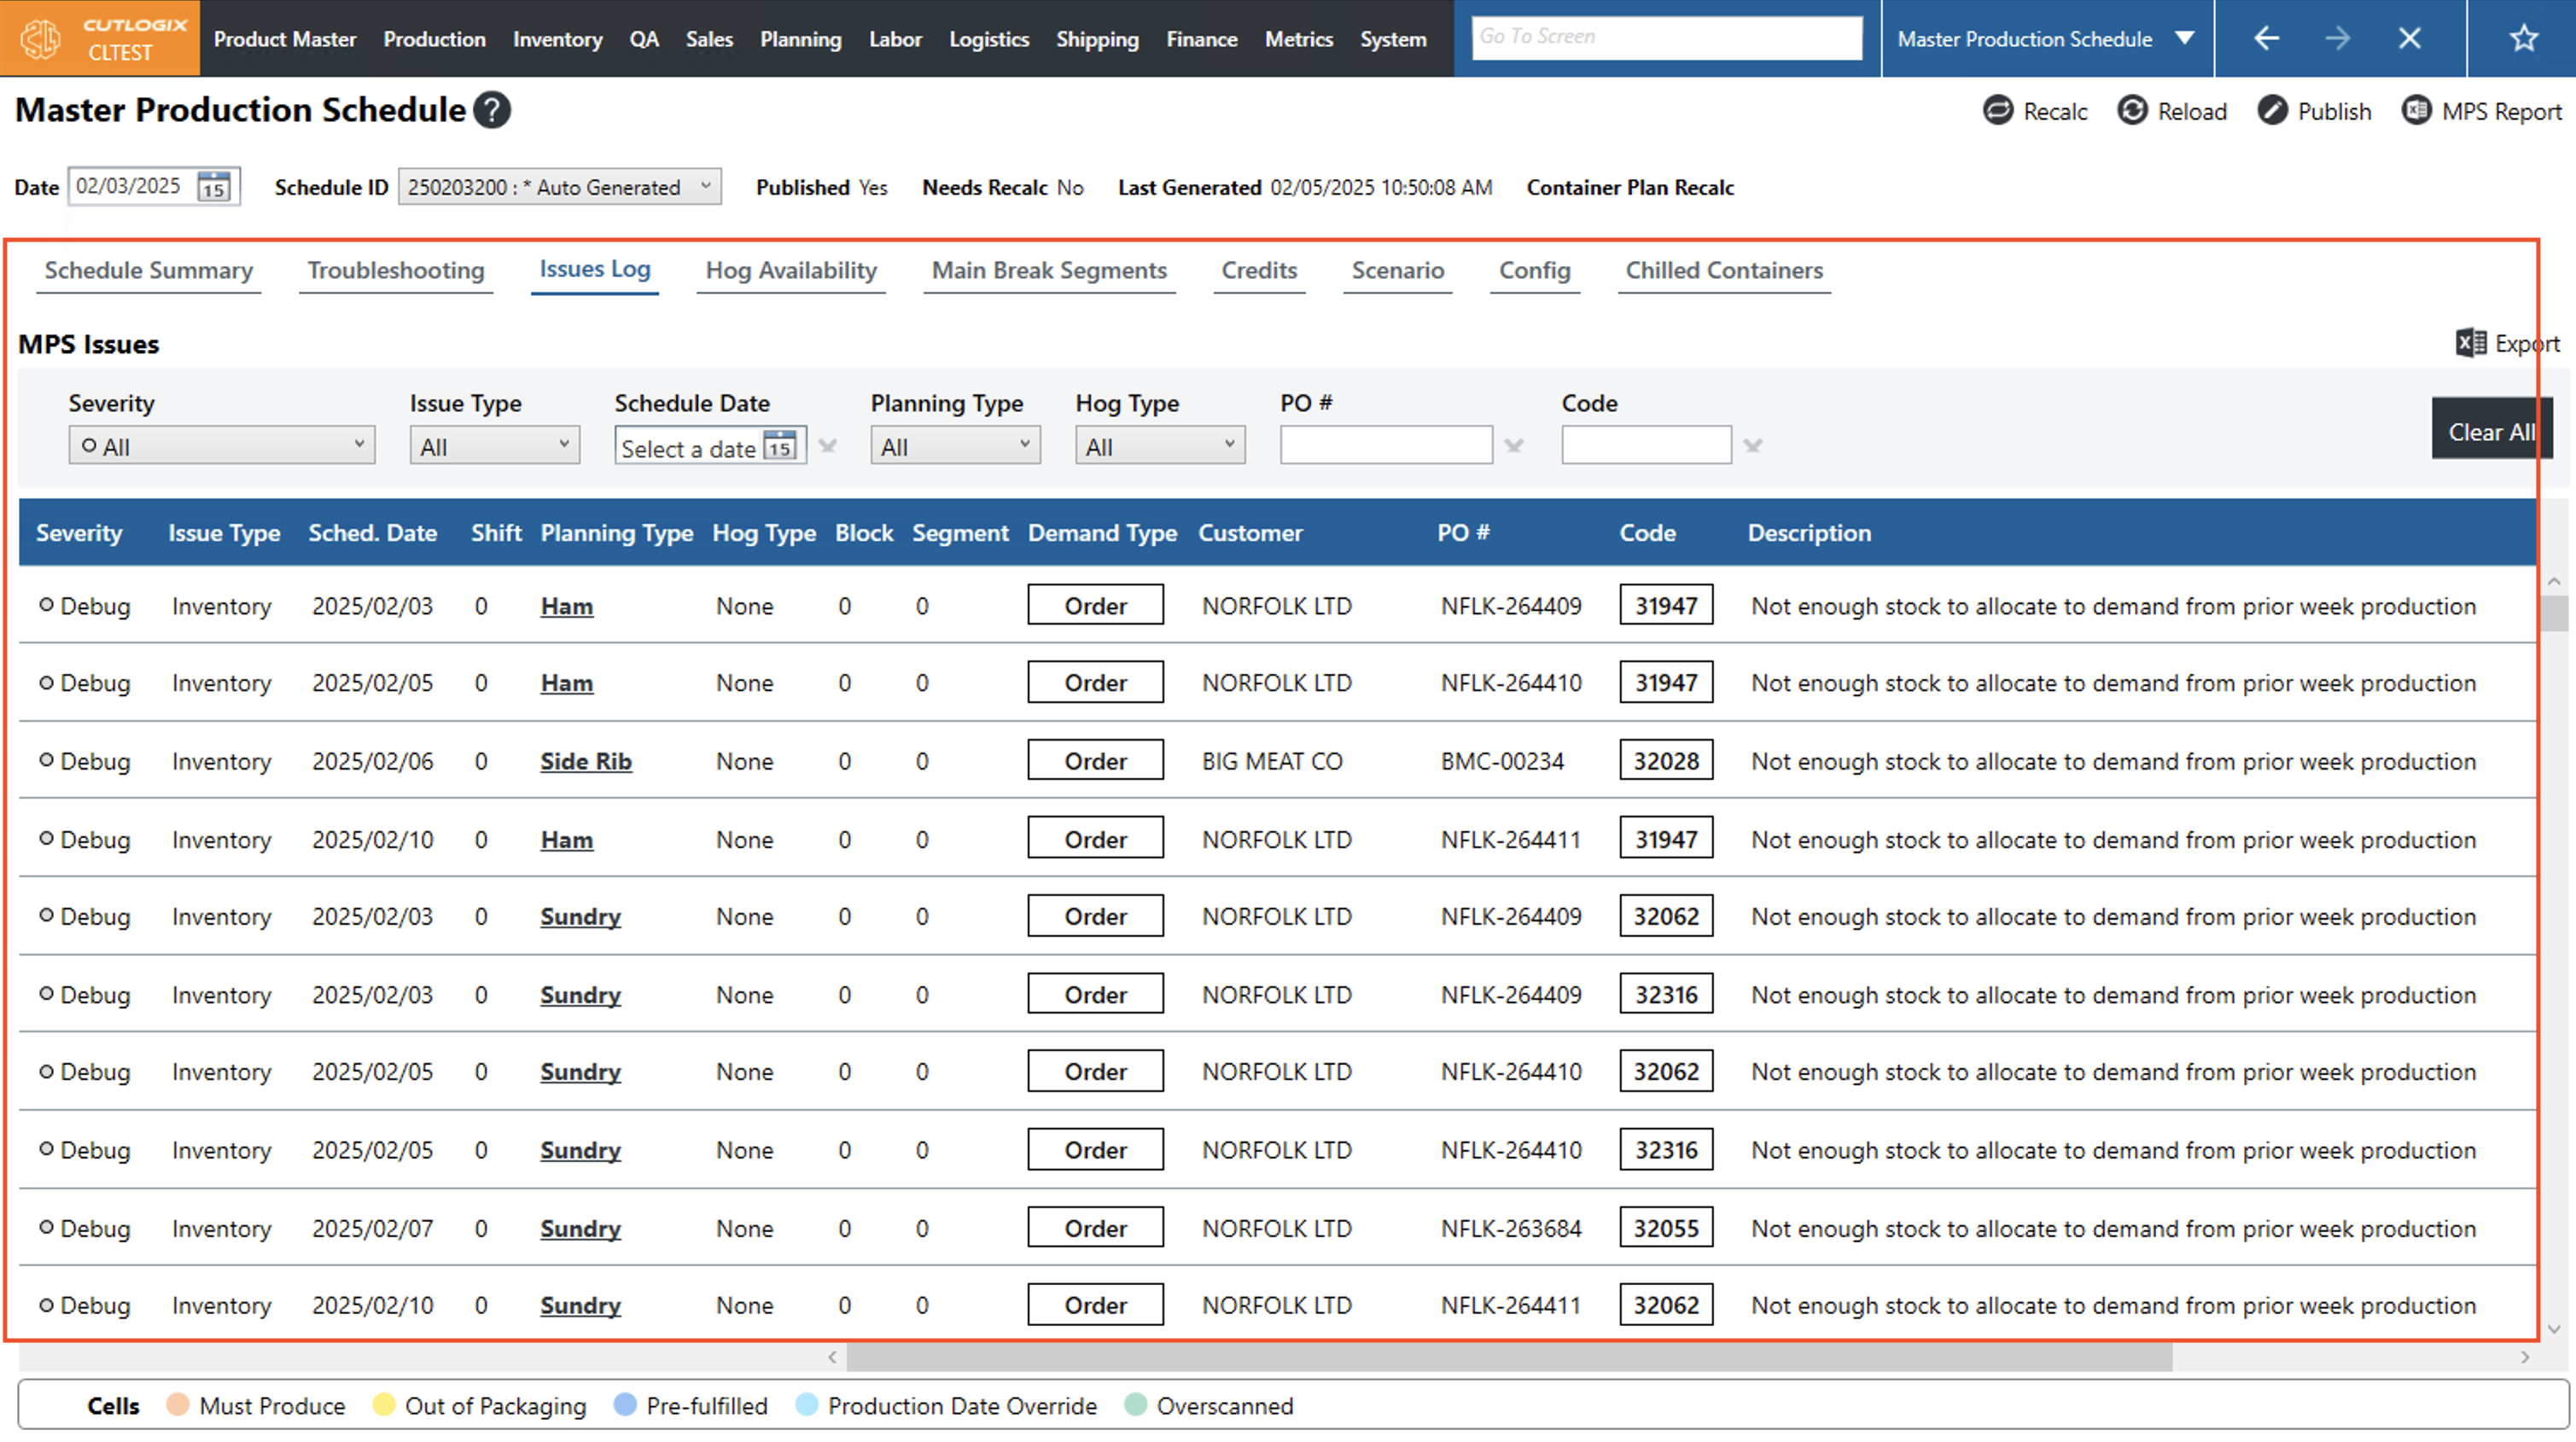
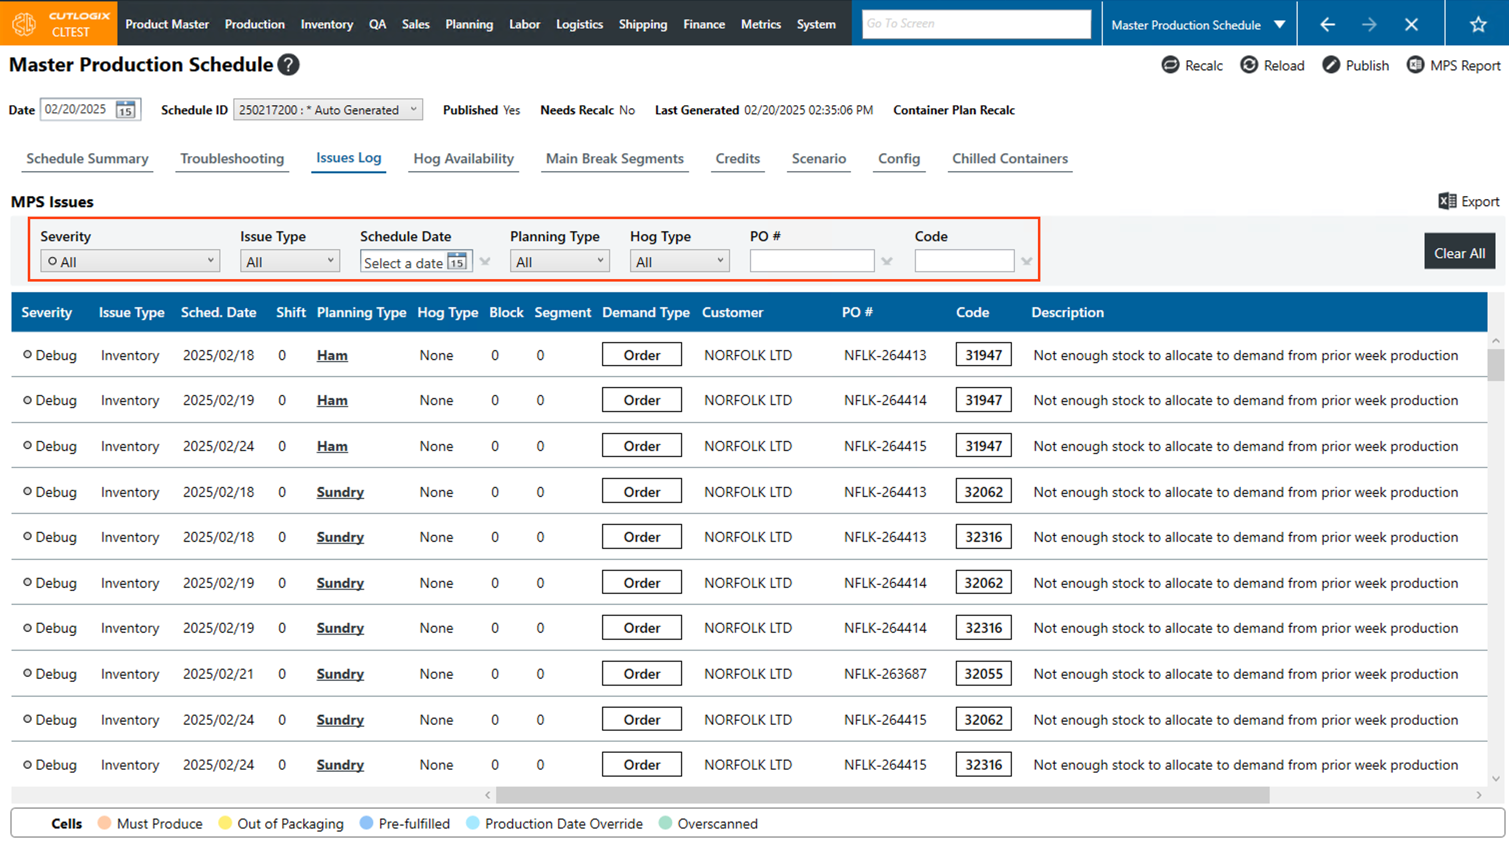
Step 4: At the top of the issues list table there are several filters that you can use to search the issues list. You can filter by severity, issue type, schedule date, planning type, hog type, PO # and code. As you use the filters the issue list will only show issues that match the filters that you've applied. To clear the applied filters, click the "Clear All" button on the right side of the page.
How to Override Hog Blocks for the Week
DemoStep 1: Navigate to the "Master Production Schedule" page (Under the Planning menu → Master Production Schedule) and select a date and schedule ID (see these steps above).
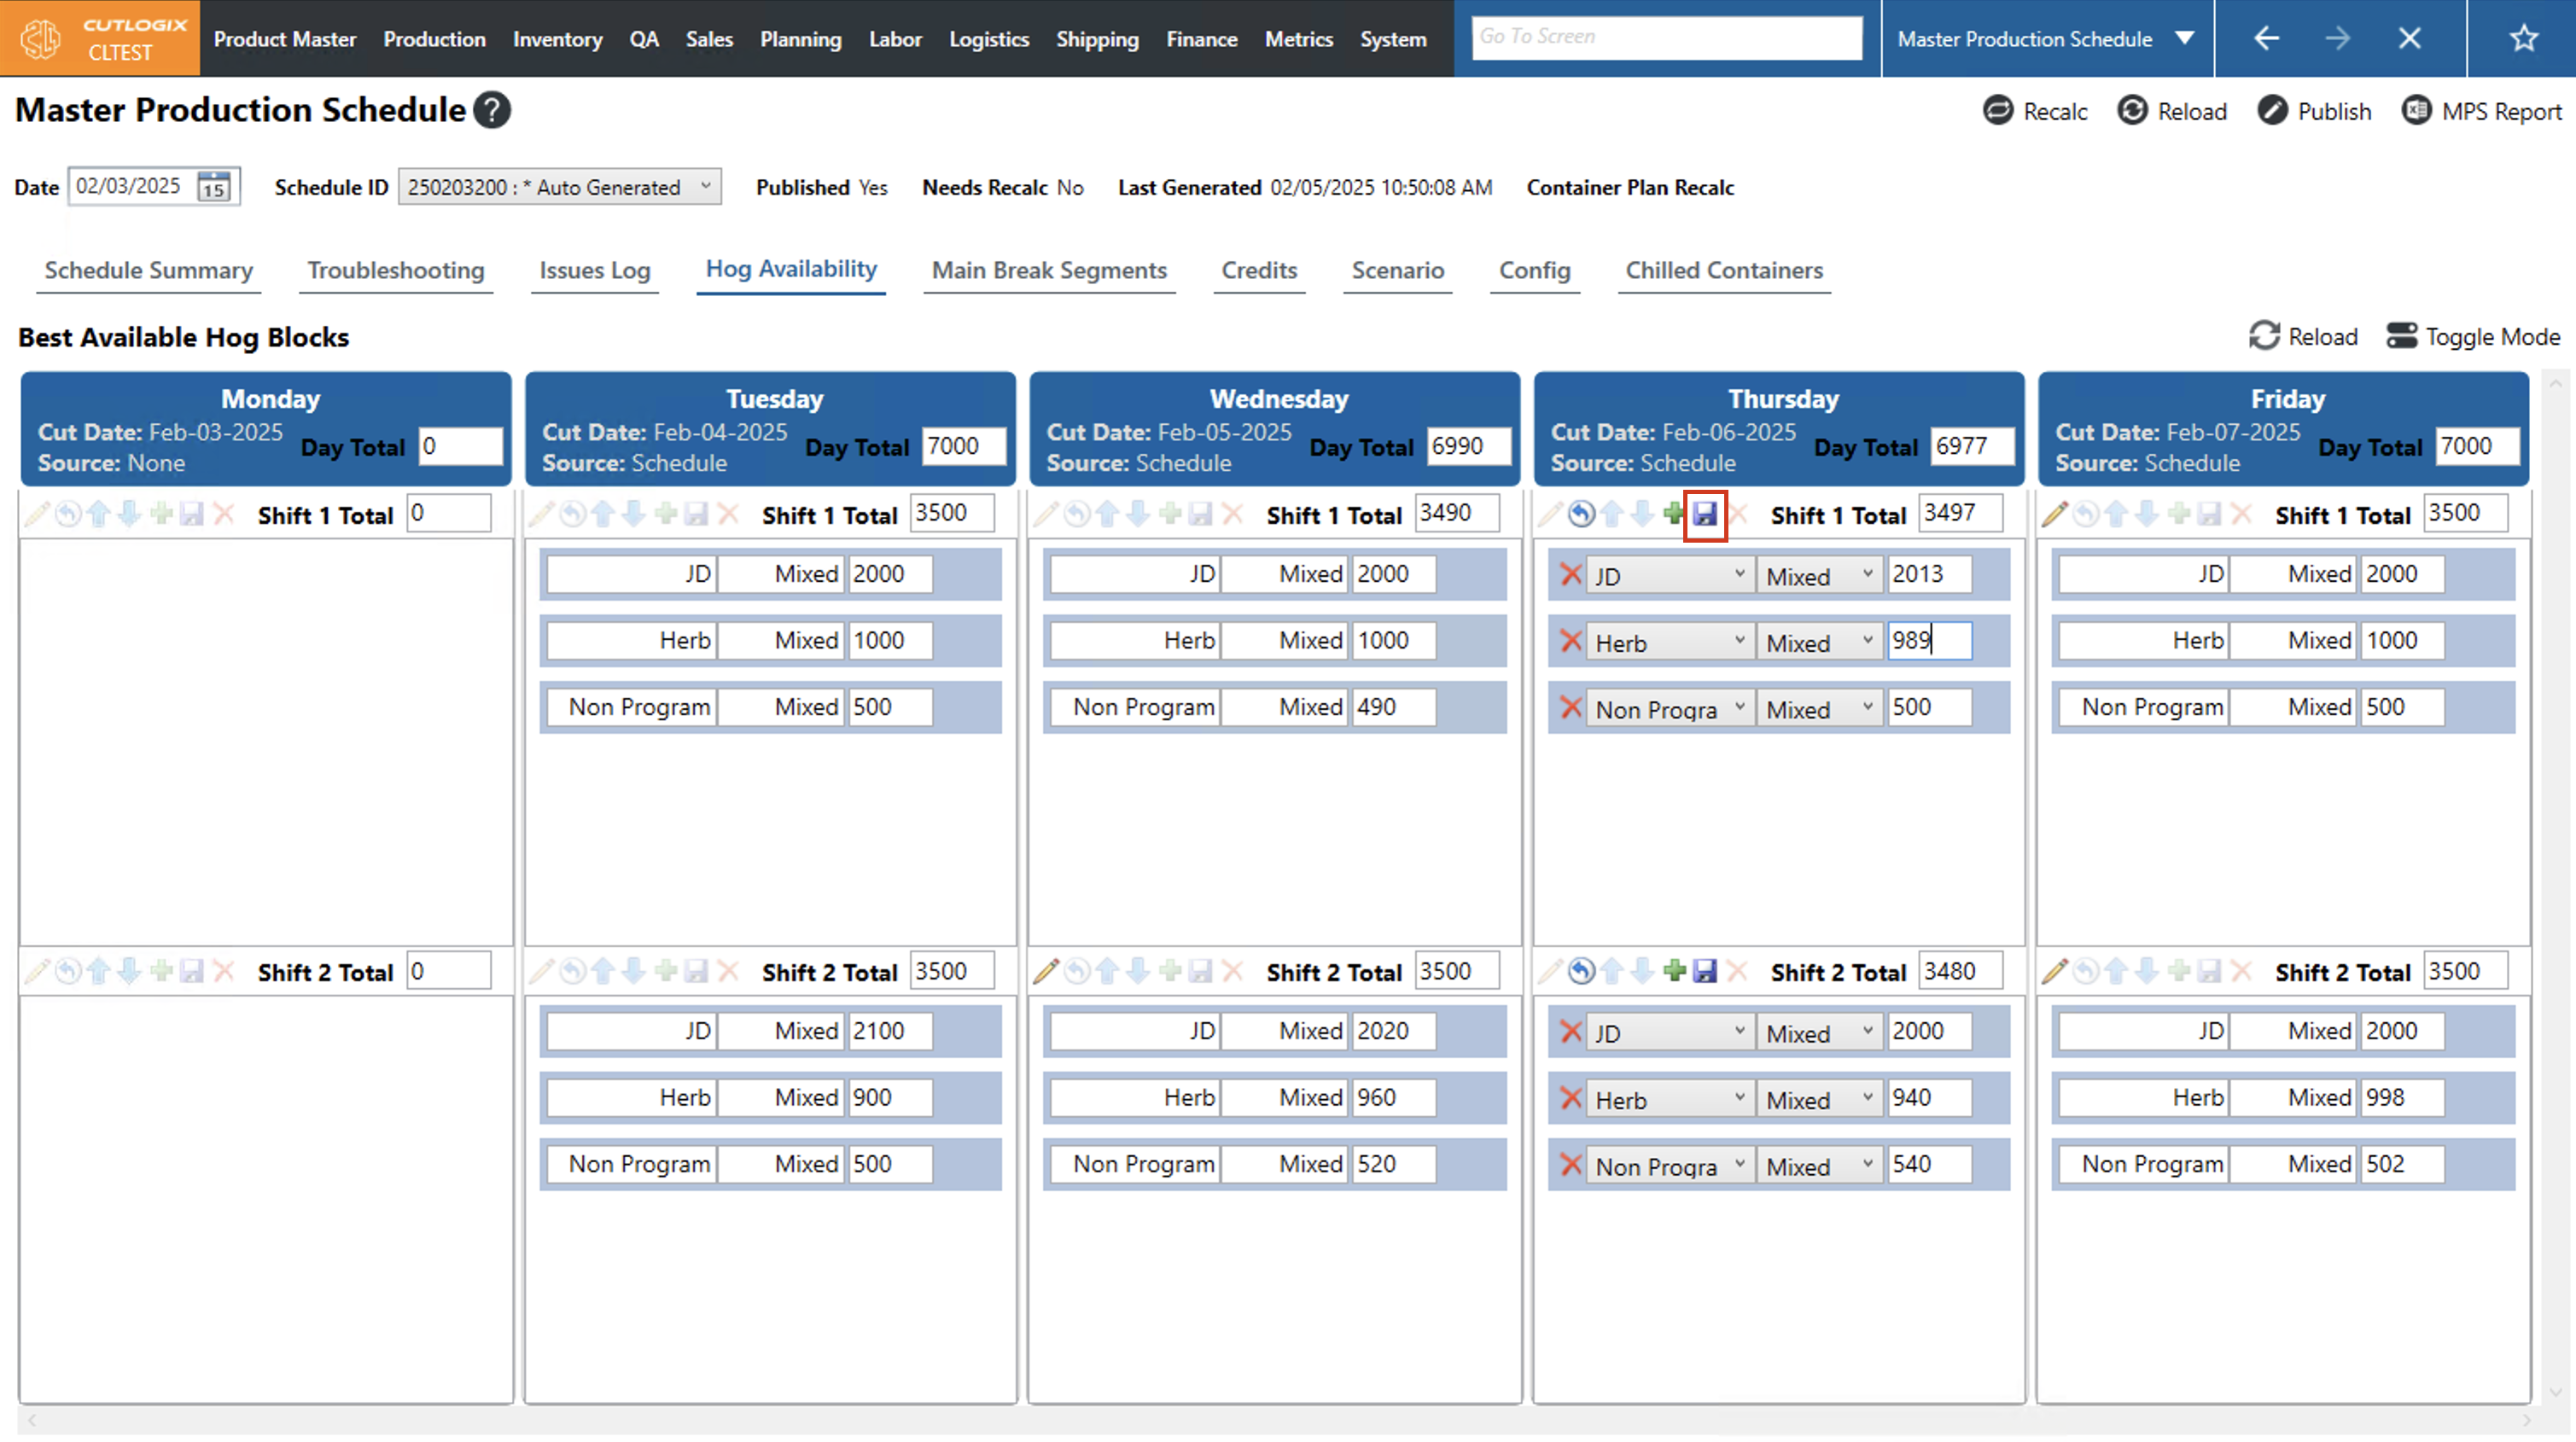
Step 2: Click on the "Hog Availability" tab to view the hog blocks. On the hog blocks screen, click the "Toggle Mode" button.
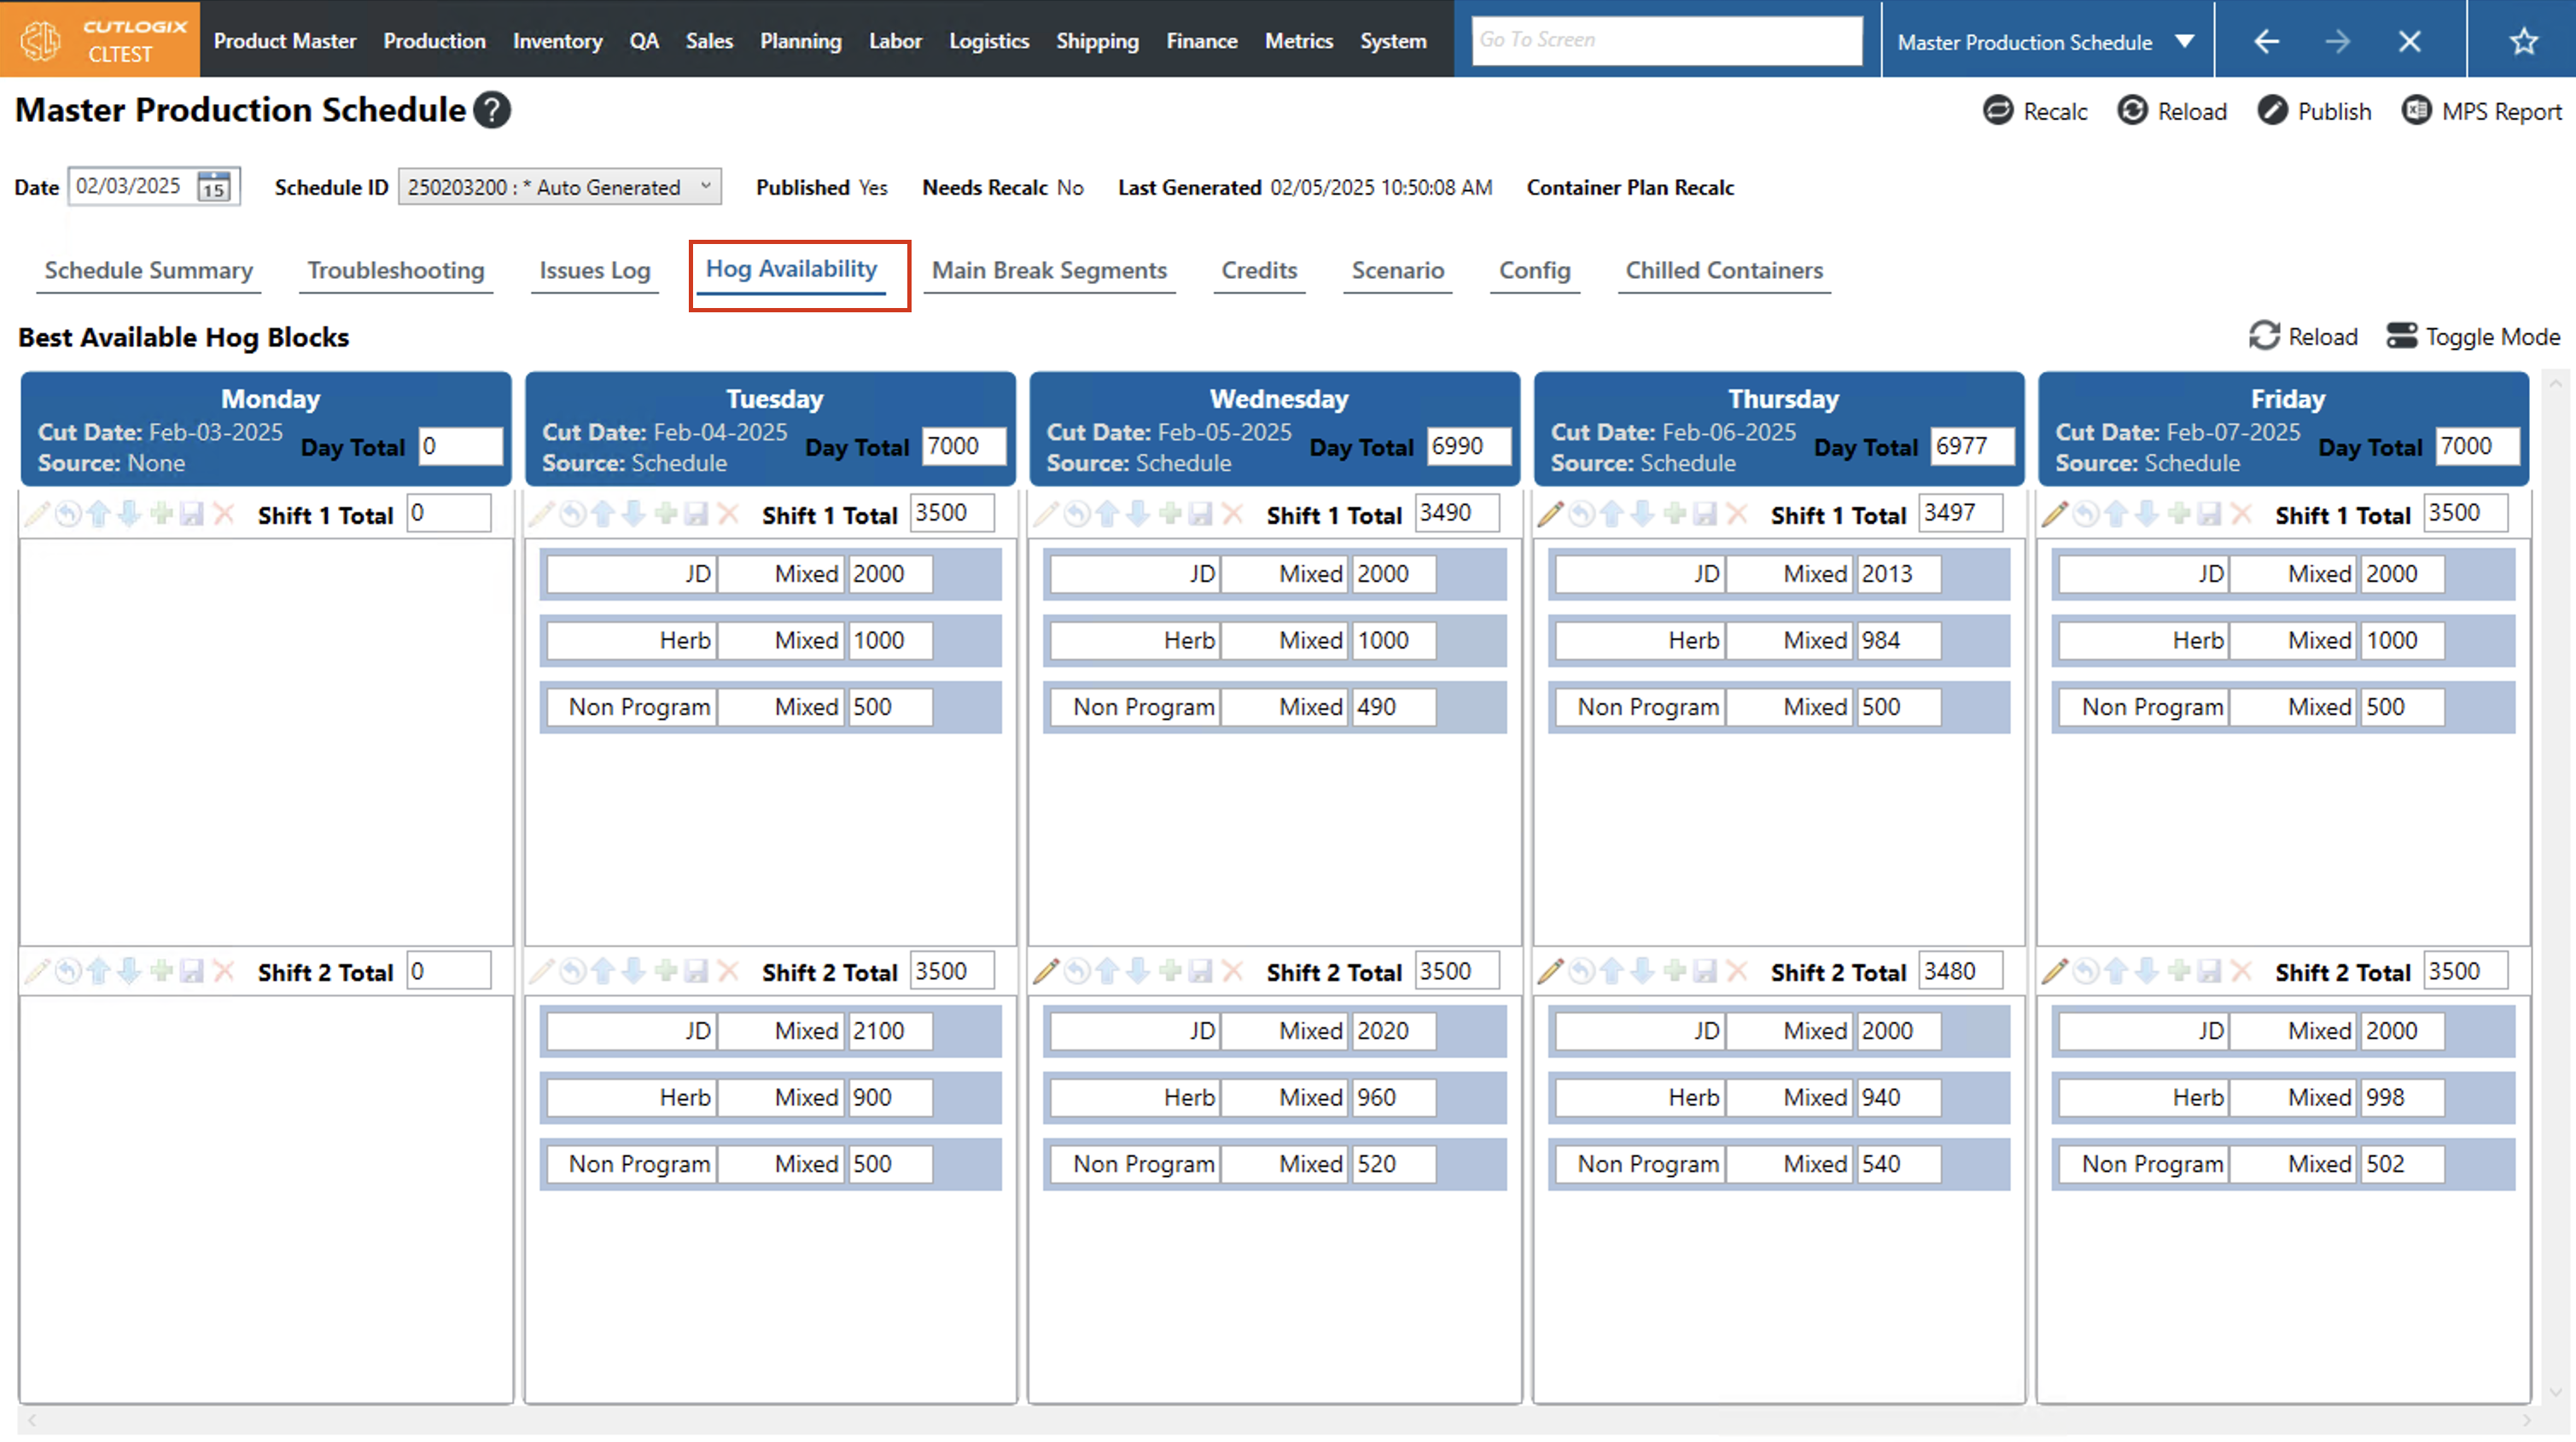
Step 3: Locate the hog block that you want to edit (they are split up by day of the week and shift), then click the "Edit" button on the one that you want to edit. (The edit button is only enabled if the shift is upcoming and has not already started).

Step 4: Now you can make the necessary edits to the hog blocks. You can remove records by clicking the "X" button beside a record, add records using the "+" button and modify the hog type, gender and quantity on each record. To move records up or down in the list, click on the record you want to move, then click on one of the blue up or down arrows to move that record around in the list.
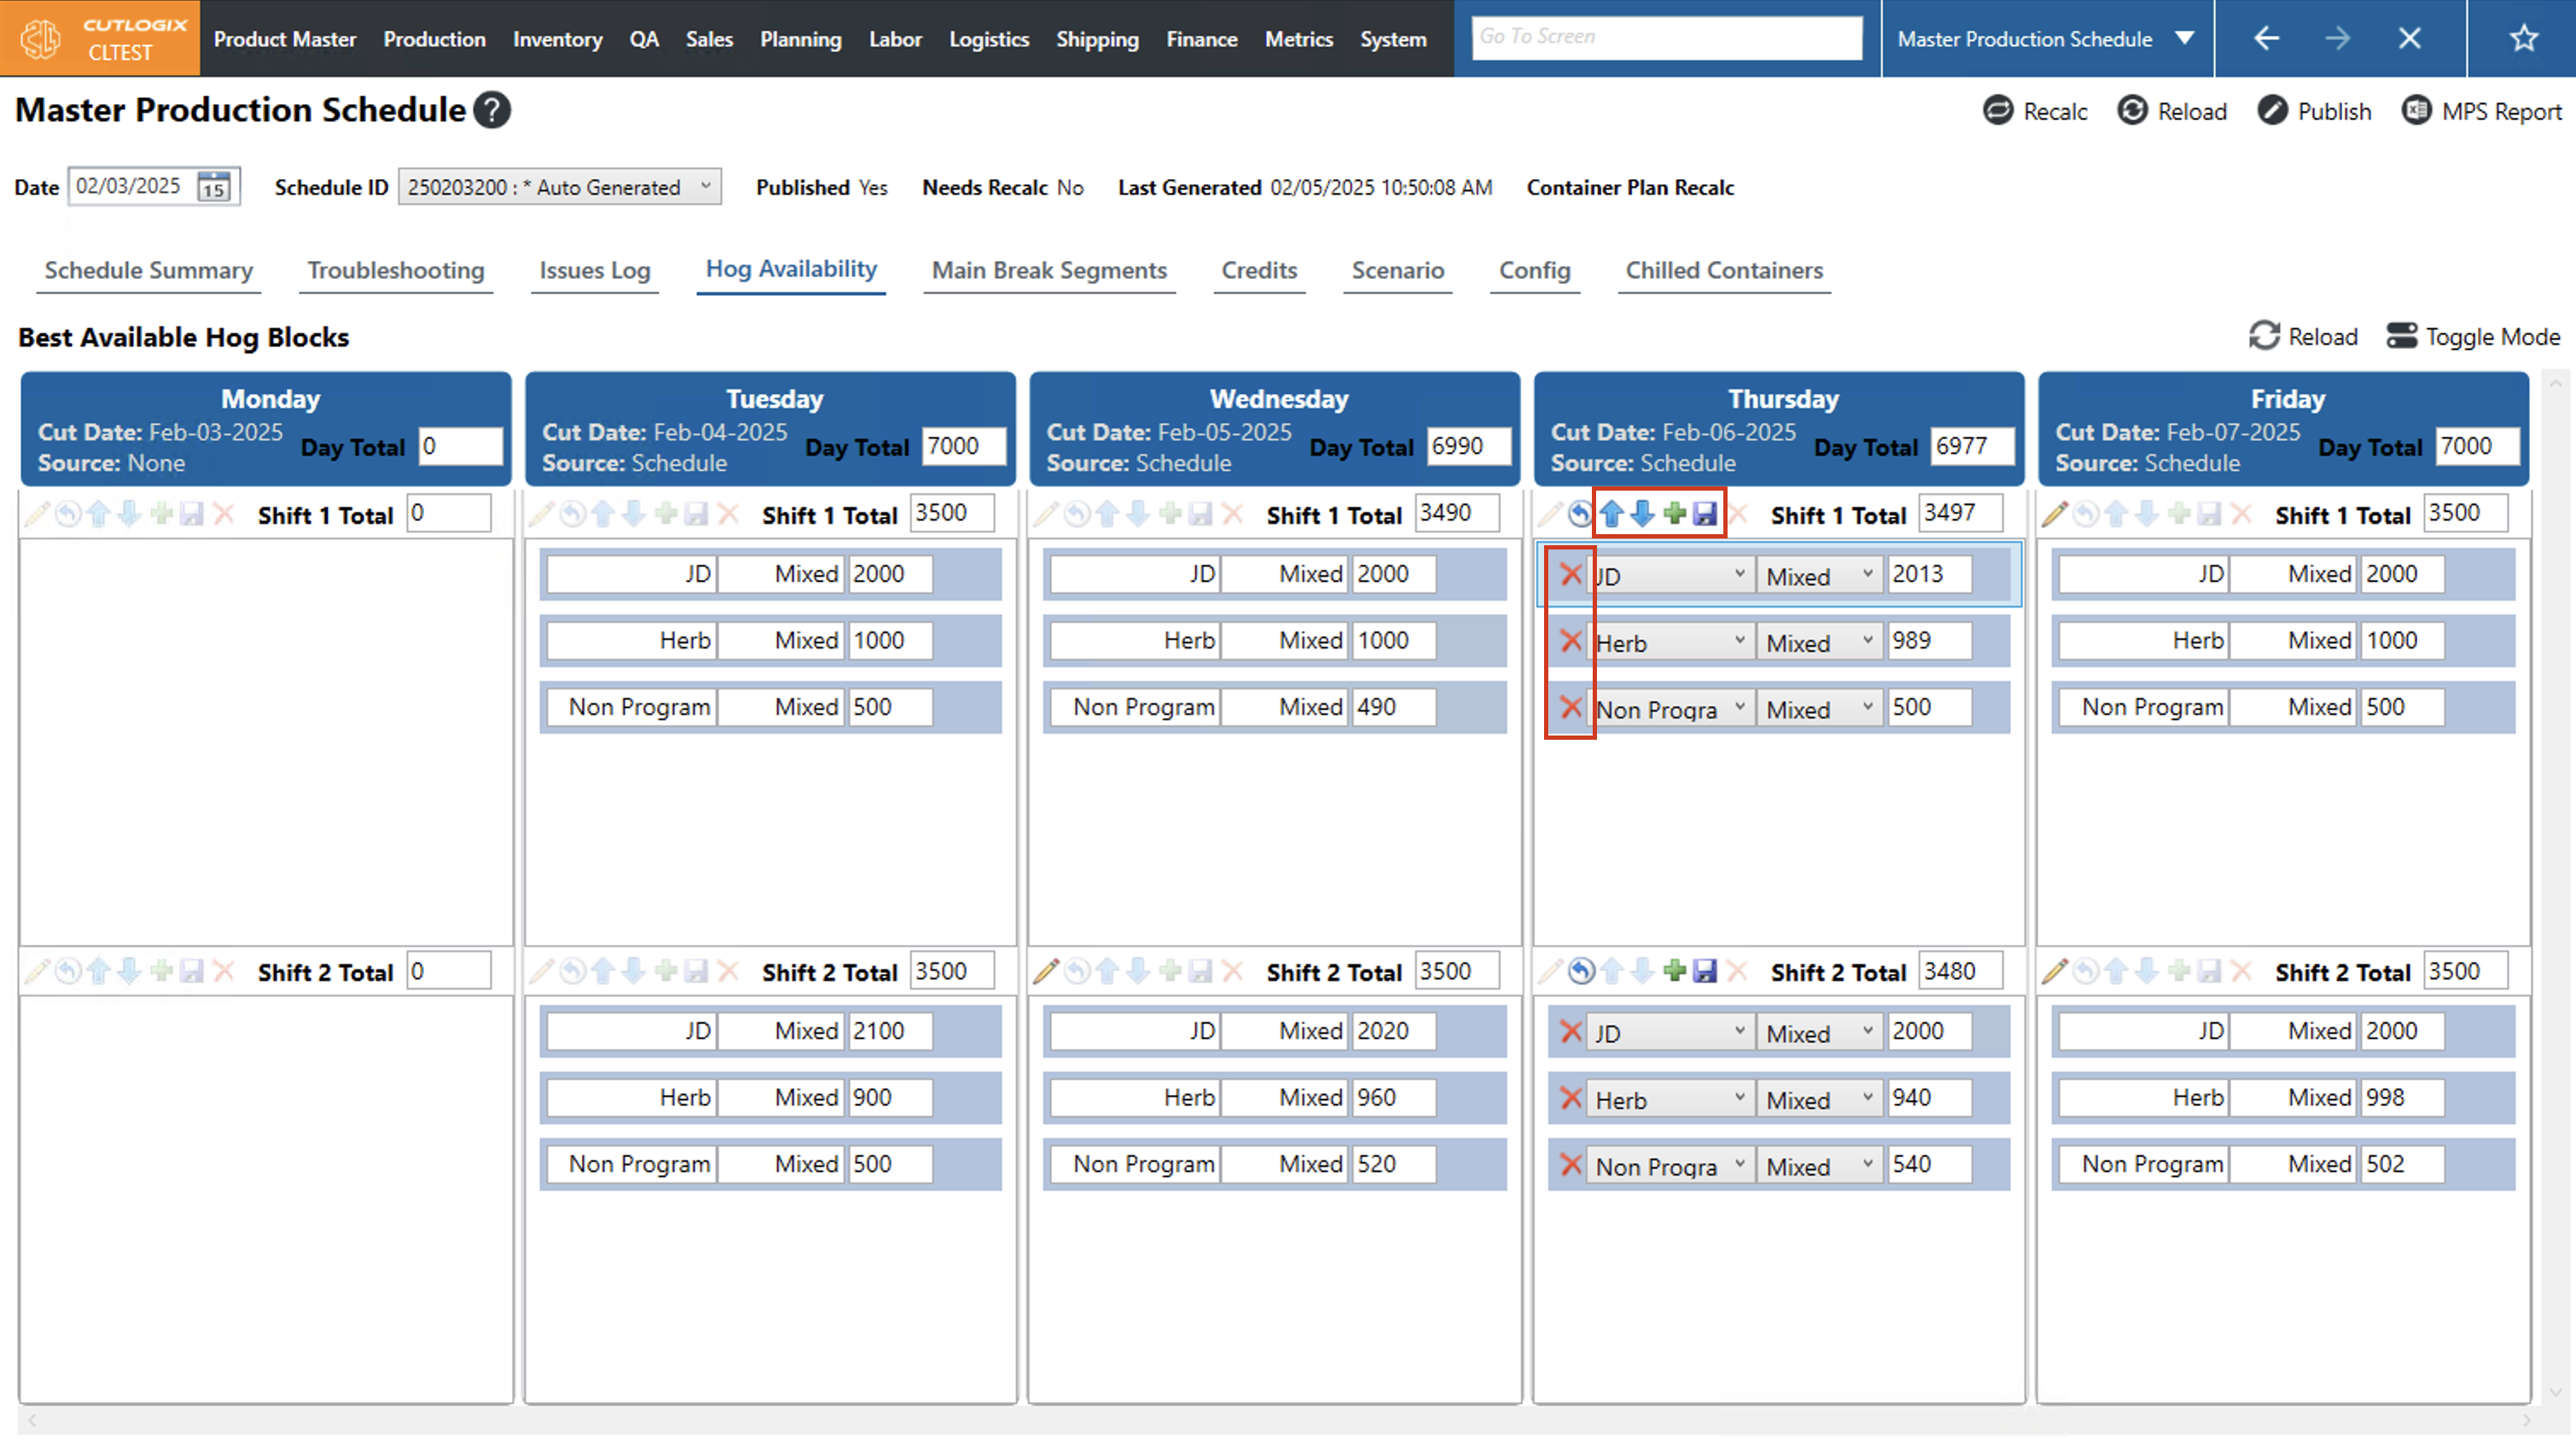
Step 5: To save your changes, click the "Save" icon. If you don't want to save your changes, clicking the "Undo" button will revert any changes you've made, and they will not be saved. If you've modified hog quantities, the shift total and the day total will be updated according to your changes upon saving.
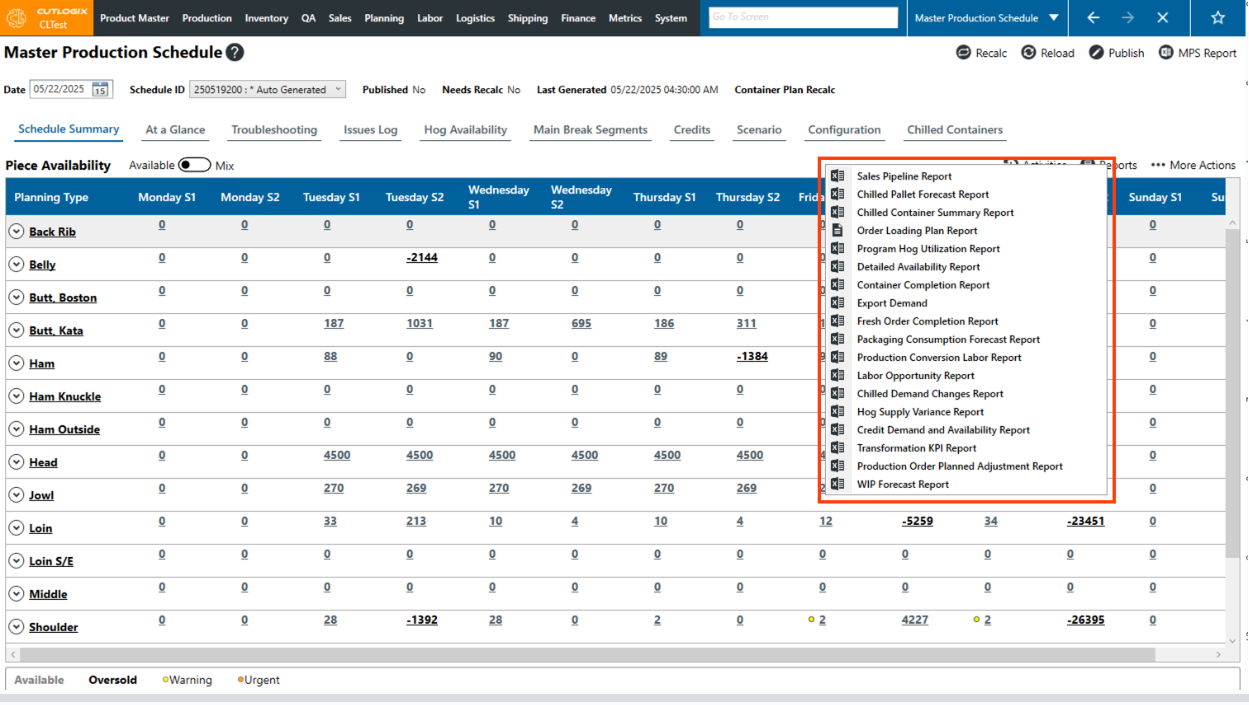
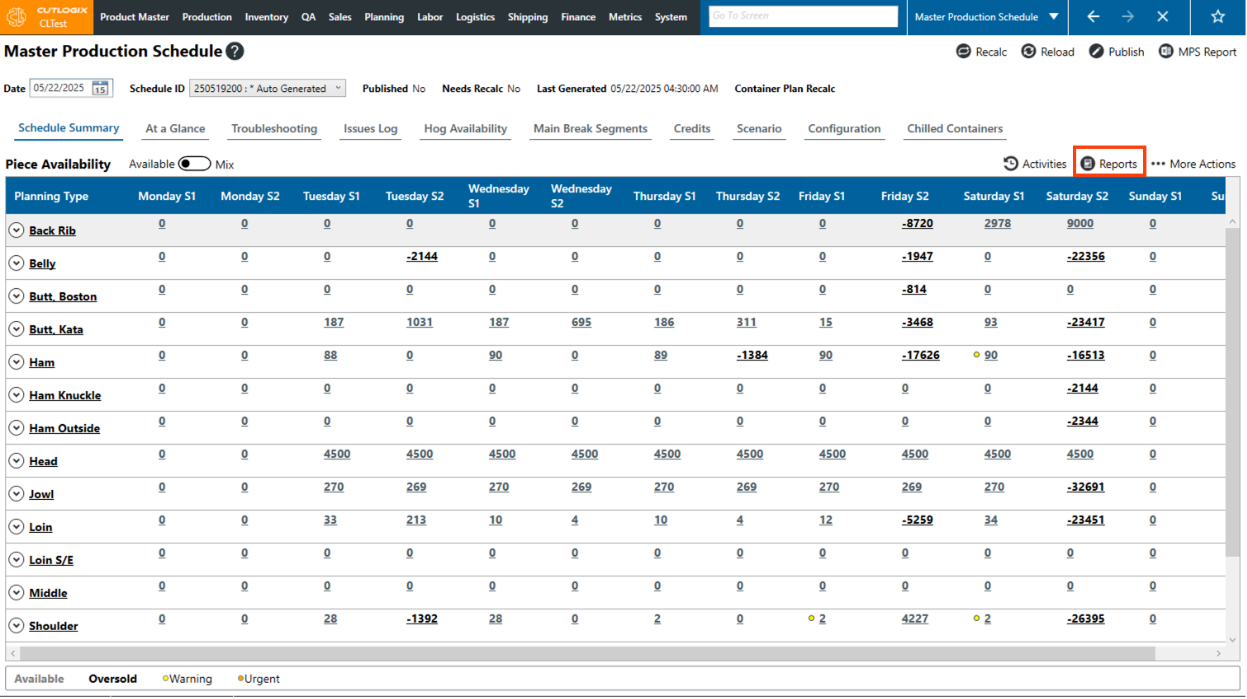
How to Generate Reports in the MPS
DemoStep 1: Navigate to the "Master Production Schedule" page (Under the Planning menu → Master Production Schedule).
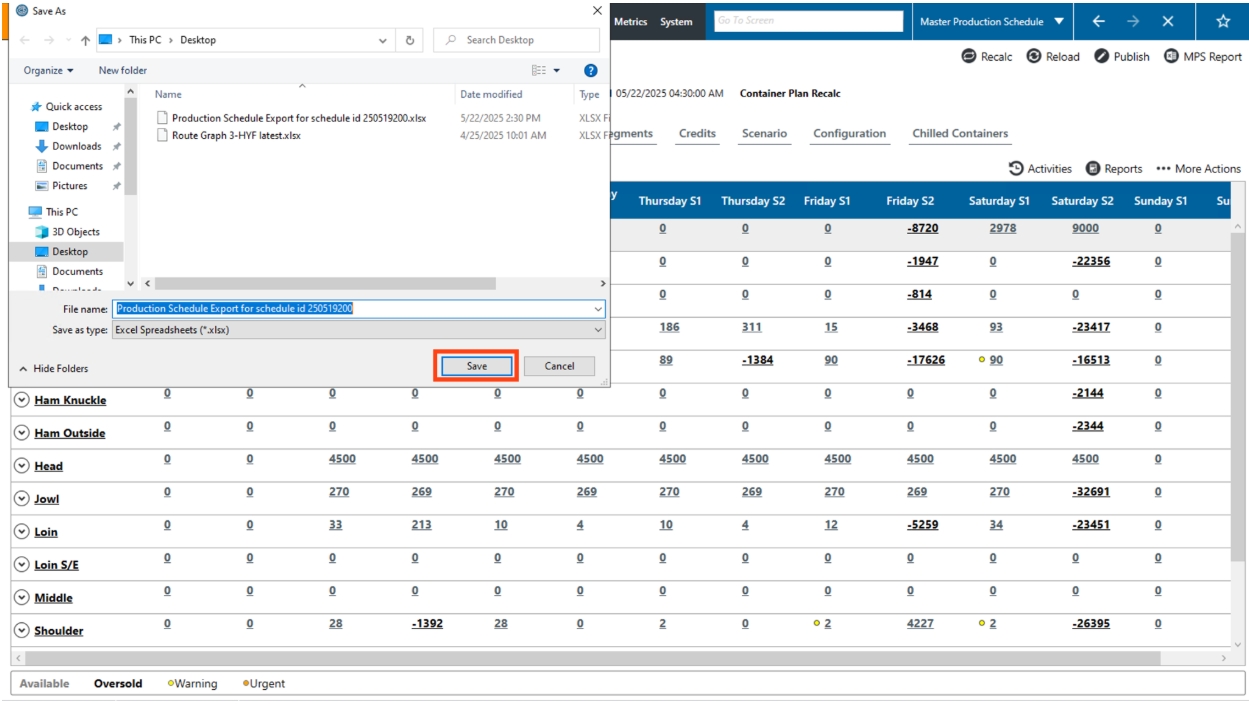
Step 2: There are two ways to download reports in the MPS. First we’ll look at the “MPS Report”, which is an excel version of the generated production schedule. To download this report, click the “MPS Report” button in the top right corner of the screen.

Step 3: A dialog will appear where you can specify where on your computer that you want to save the report to and the name you want to give the file. Once you’ve completed this, click the “Save” button.
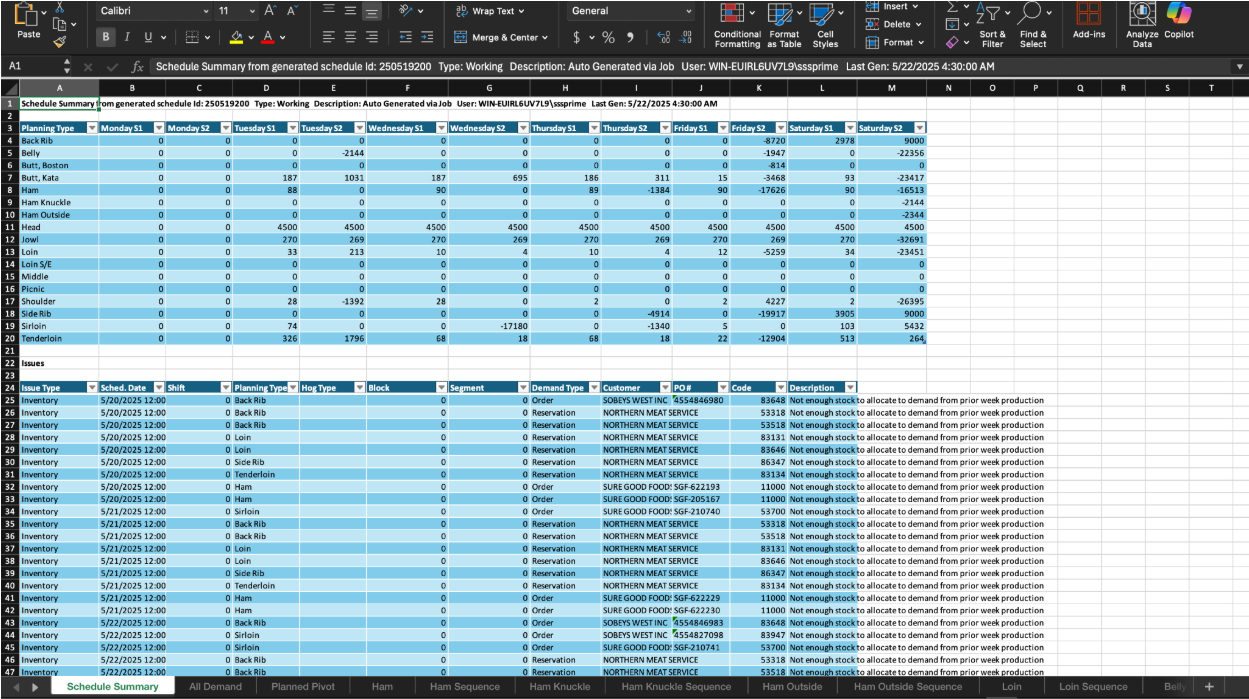
Step 4: The file will now be saved to your computer in the specified location from the previous step. Locate the file on your computer and open it. (Note: You will need to have Excel installed on your computer in order to open the file). The file will display all of the information found on the MPS screen in CutLogix for the selected schedule.
Step 5: The other reports available on the MPS screen can be accessed from the “Reports” menu on the MPS screen (Under the Planning menu → Master Production Schedule).
Step 6: The following reports can all be downloaded from this menu. They will all open the same as the previous one, you will need to specify where you want to save it and can modify the filename if necessary and can then open them in excel