Cannot Produce Constraints Tasks
How to Add Cannot Produce Constraints
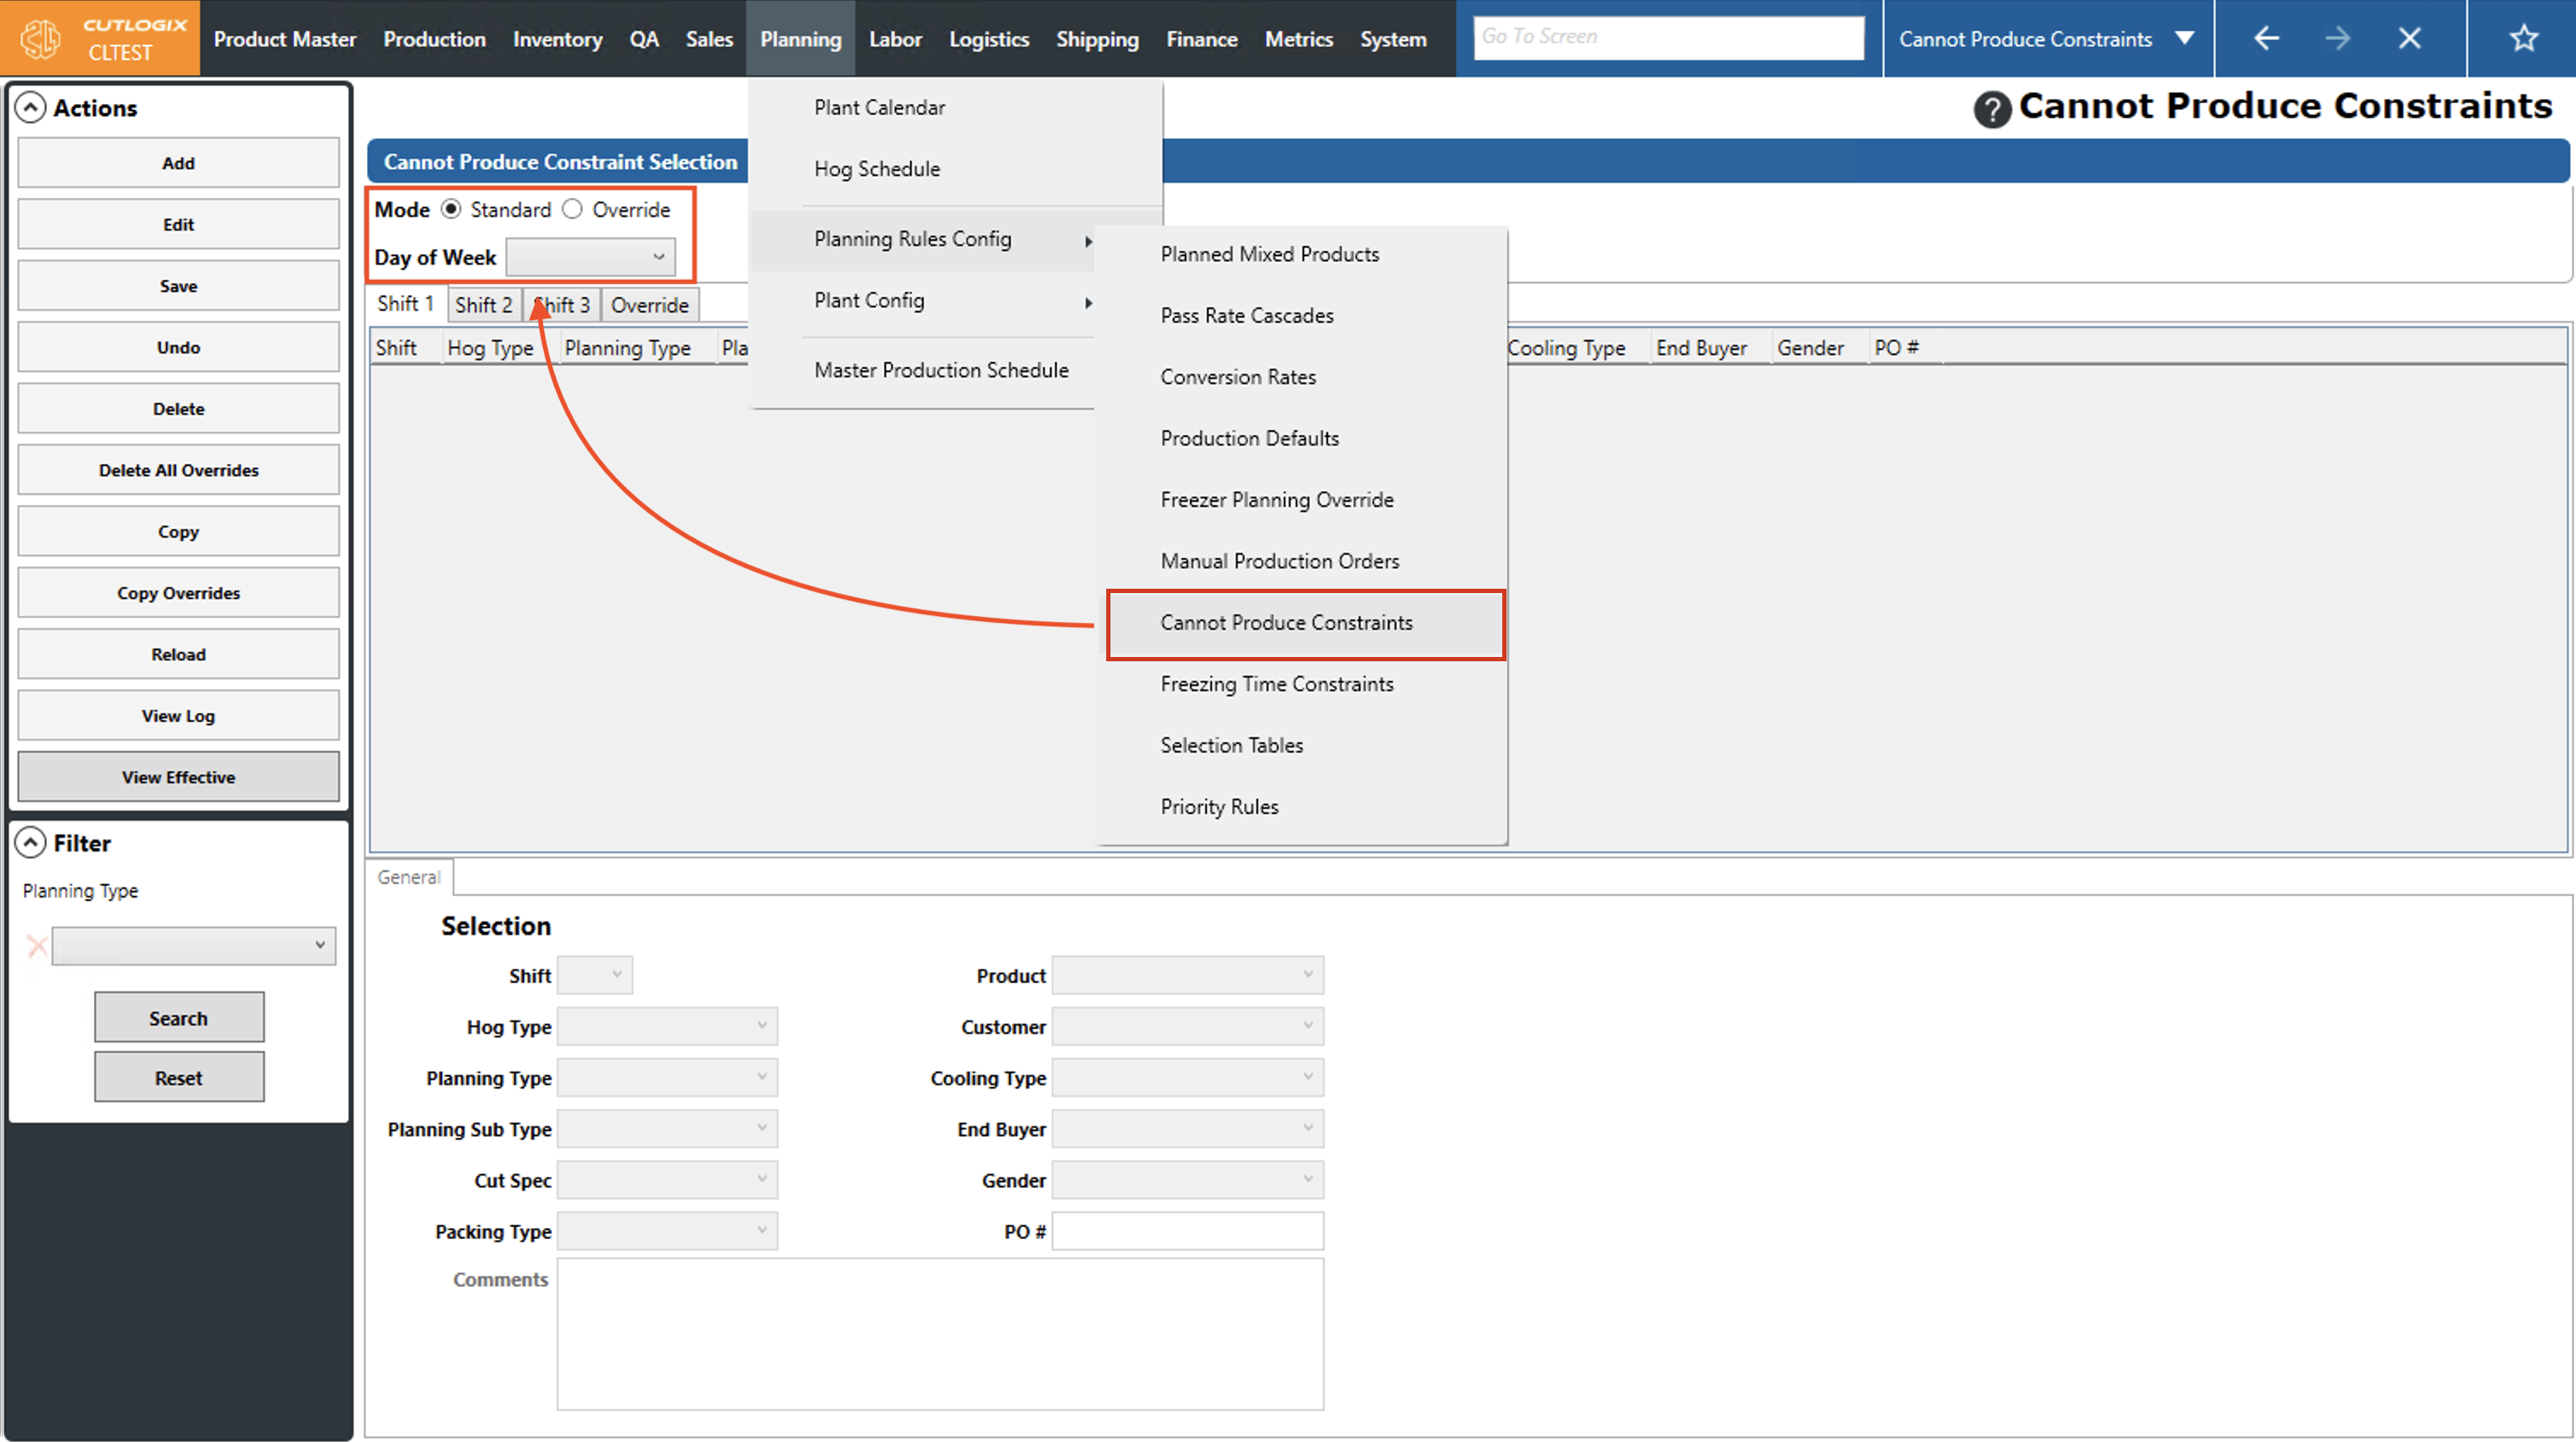
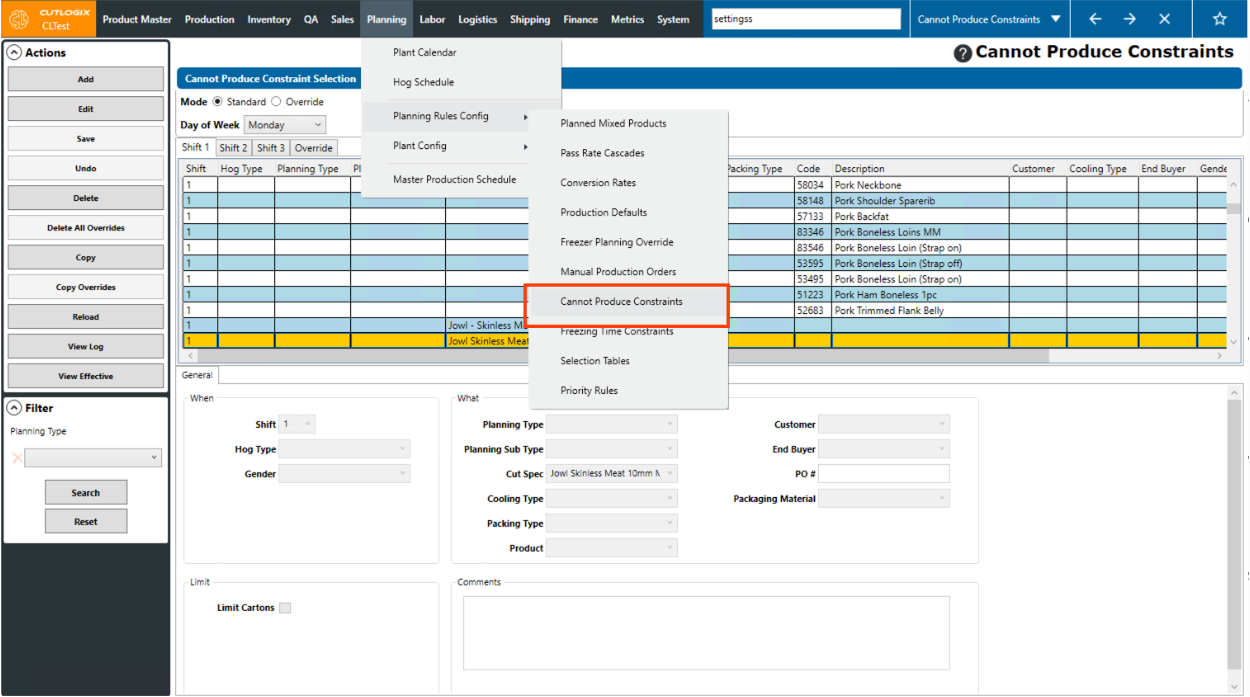
DemoStep 1: Navigate to the "Cannot Produce Constraints" page (Under the Planning menu → Planning Rules Config → Cannot Produce Constraints). Select the day of the week that you want to add a cannot produce constraint for from the "Day of Week" dropdown list and choose the corresponding shift tab that you want to add the constraint to.
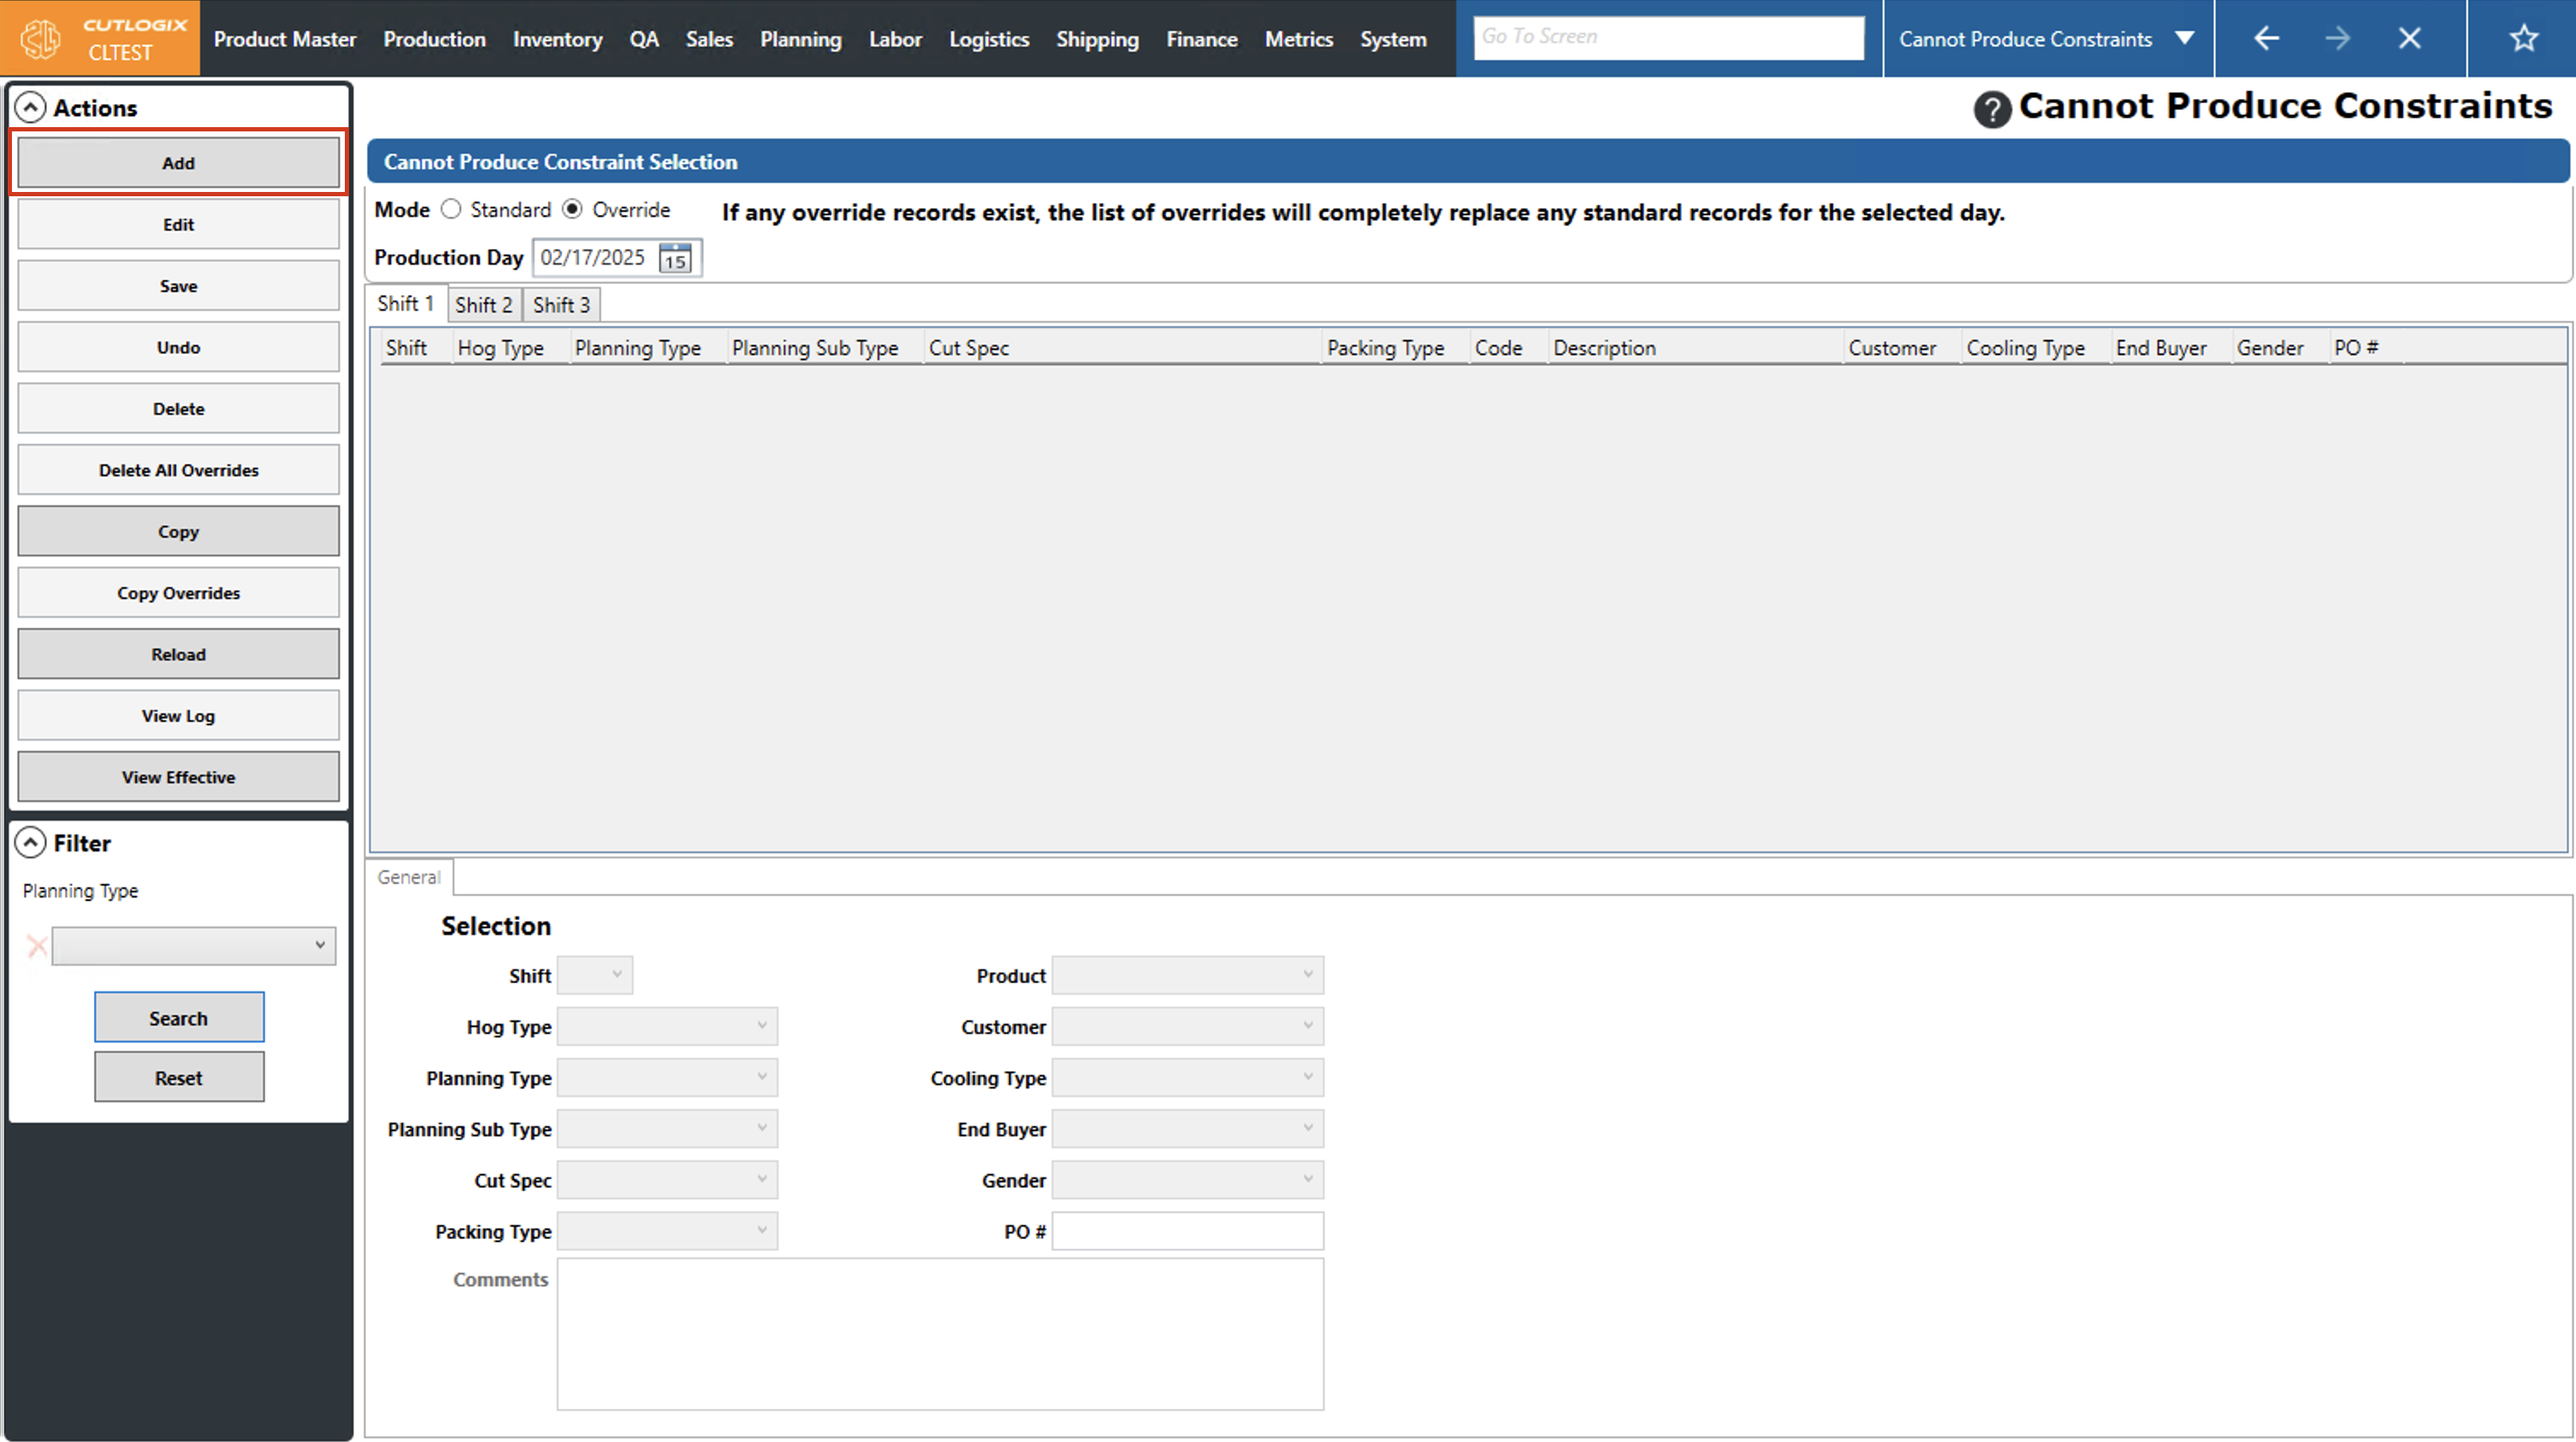
Step 2: Click the "Add" button in the Actions Panel.
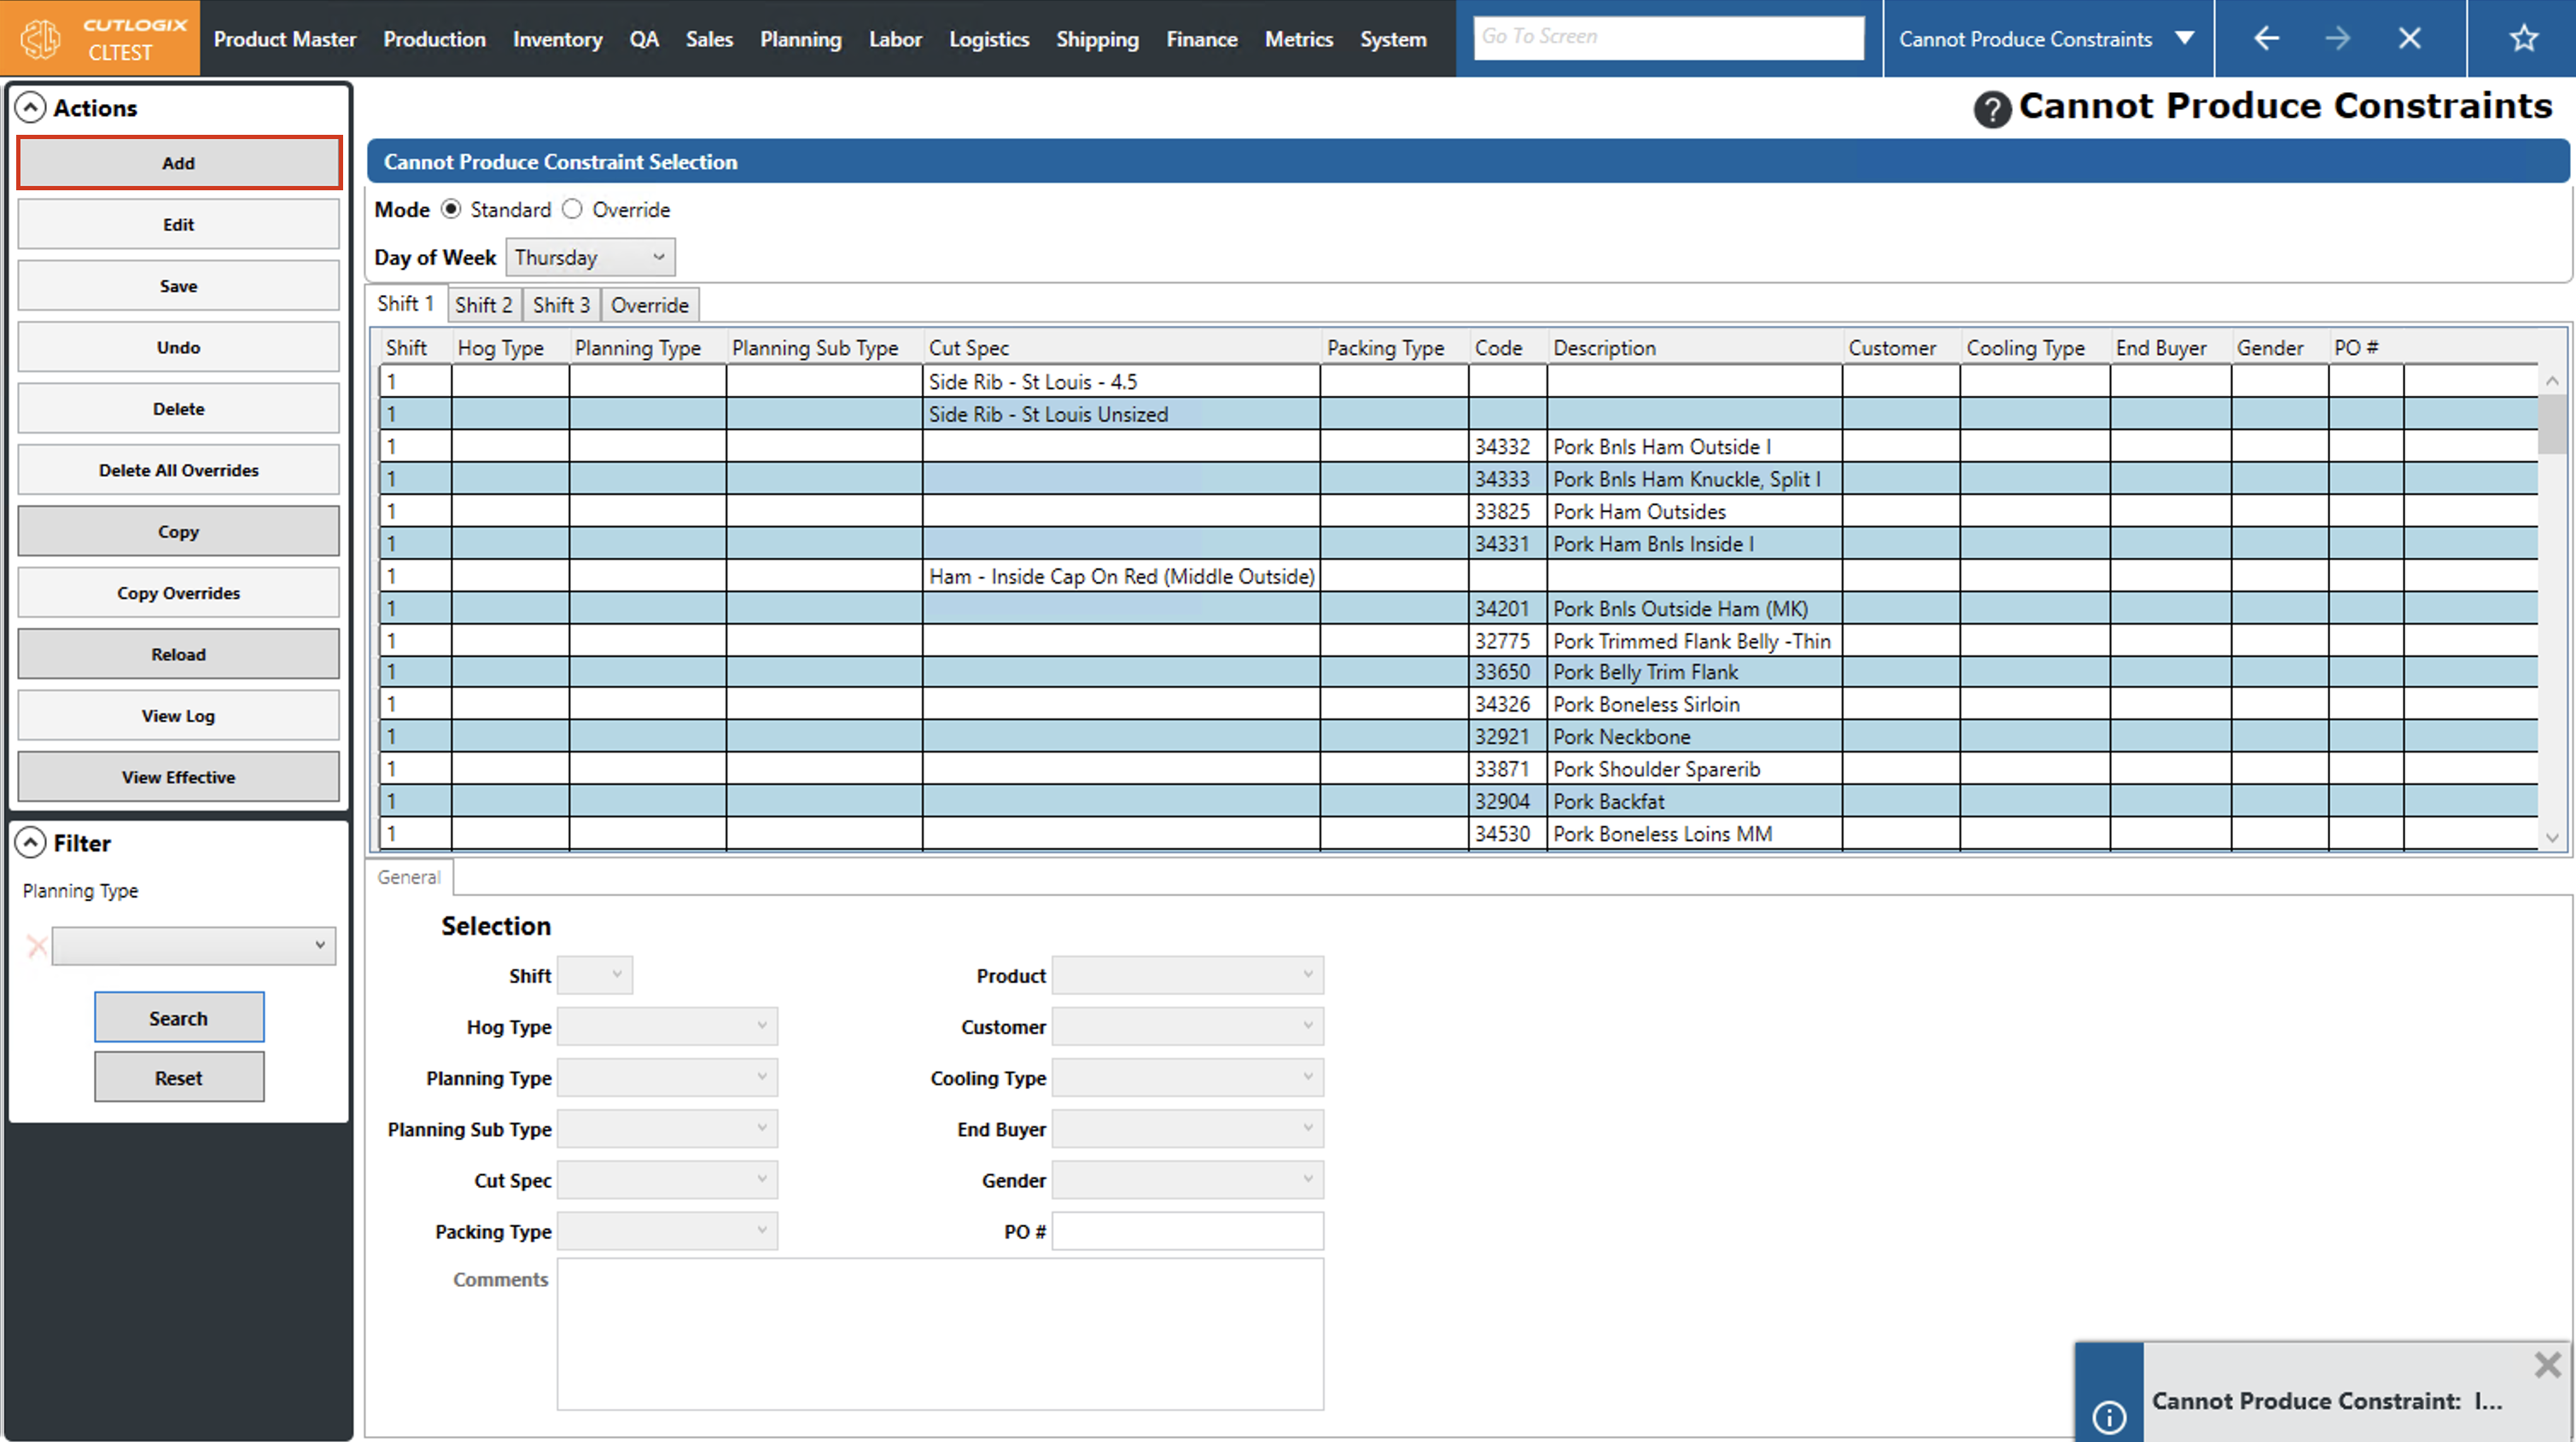
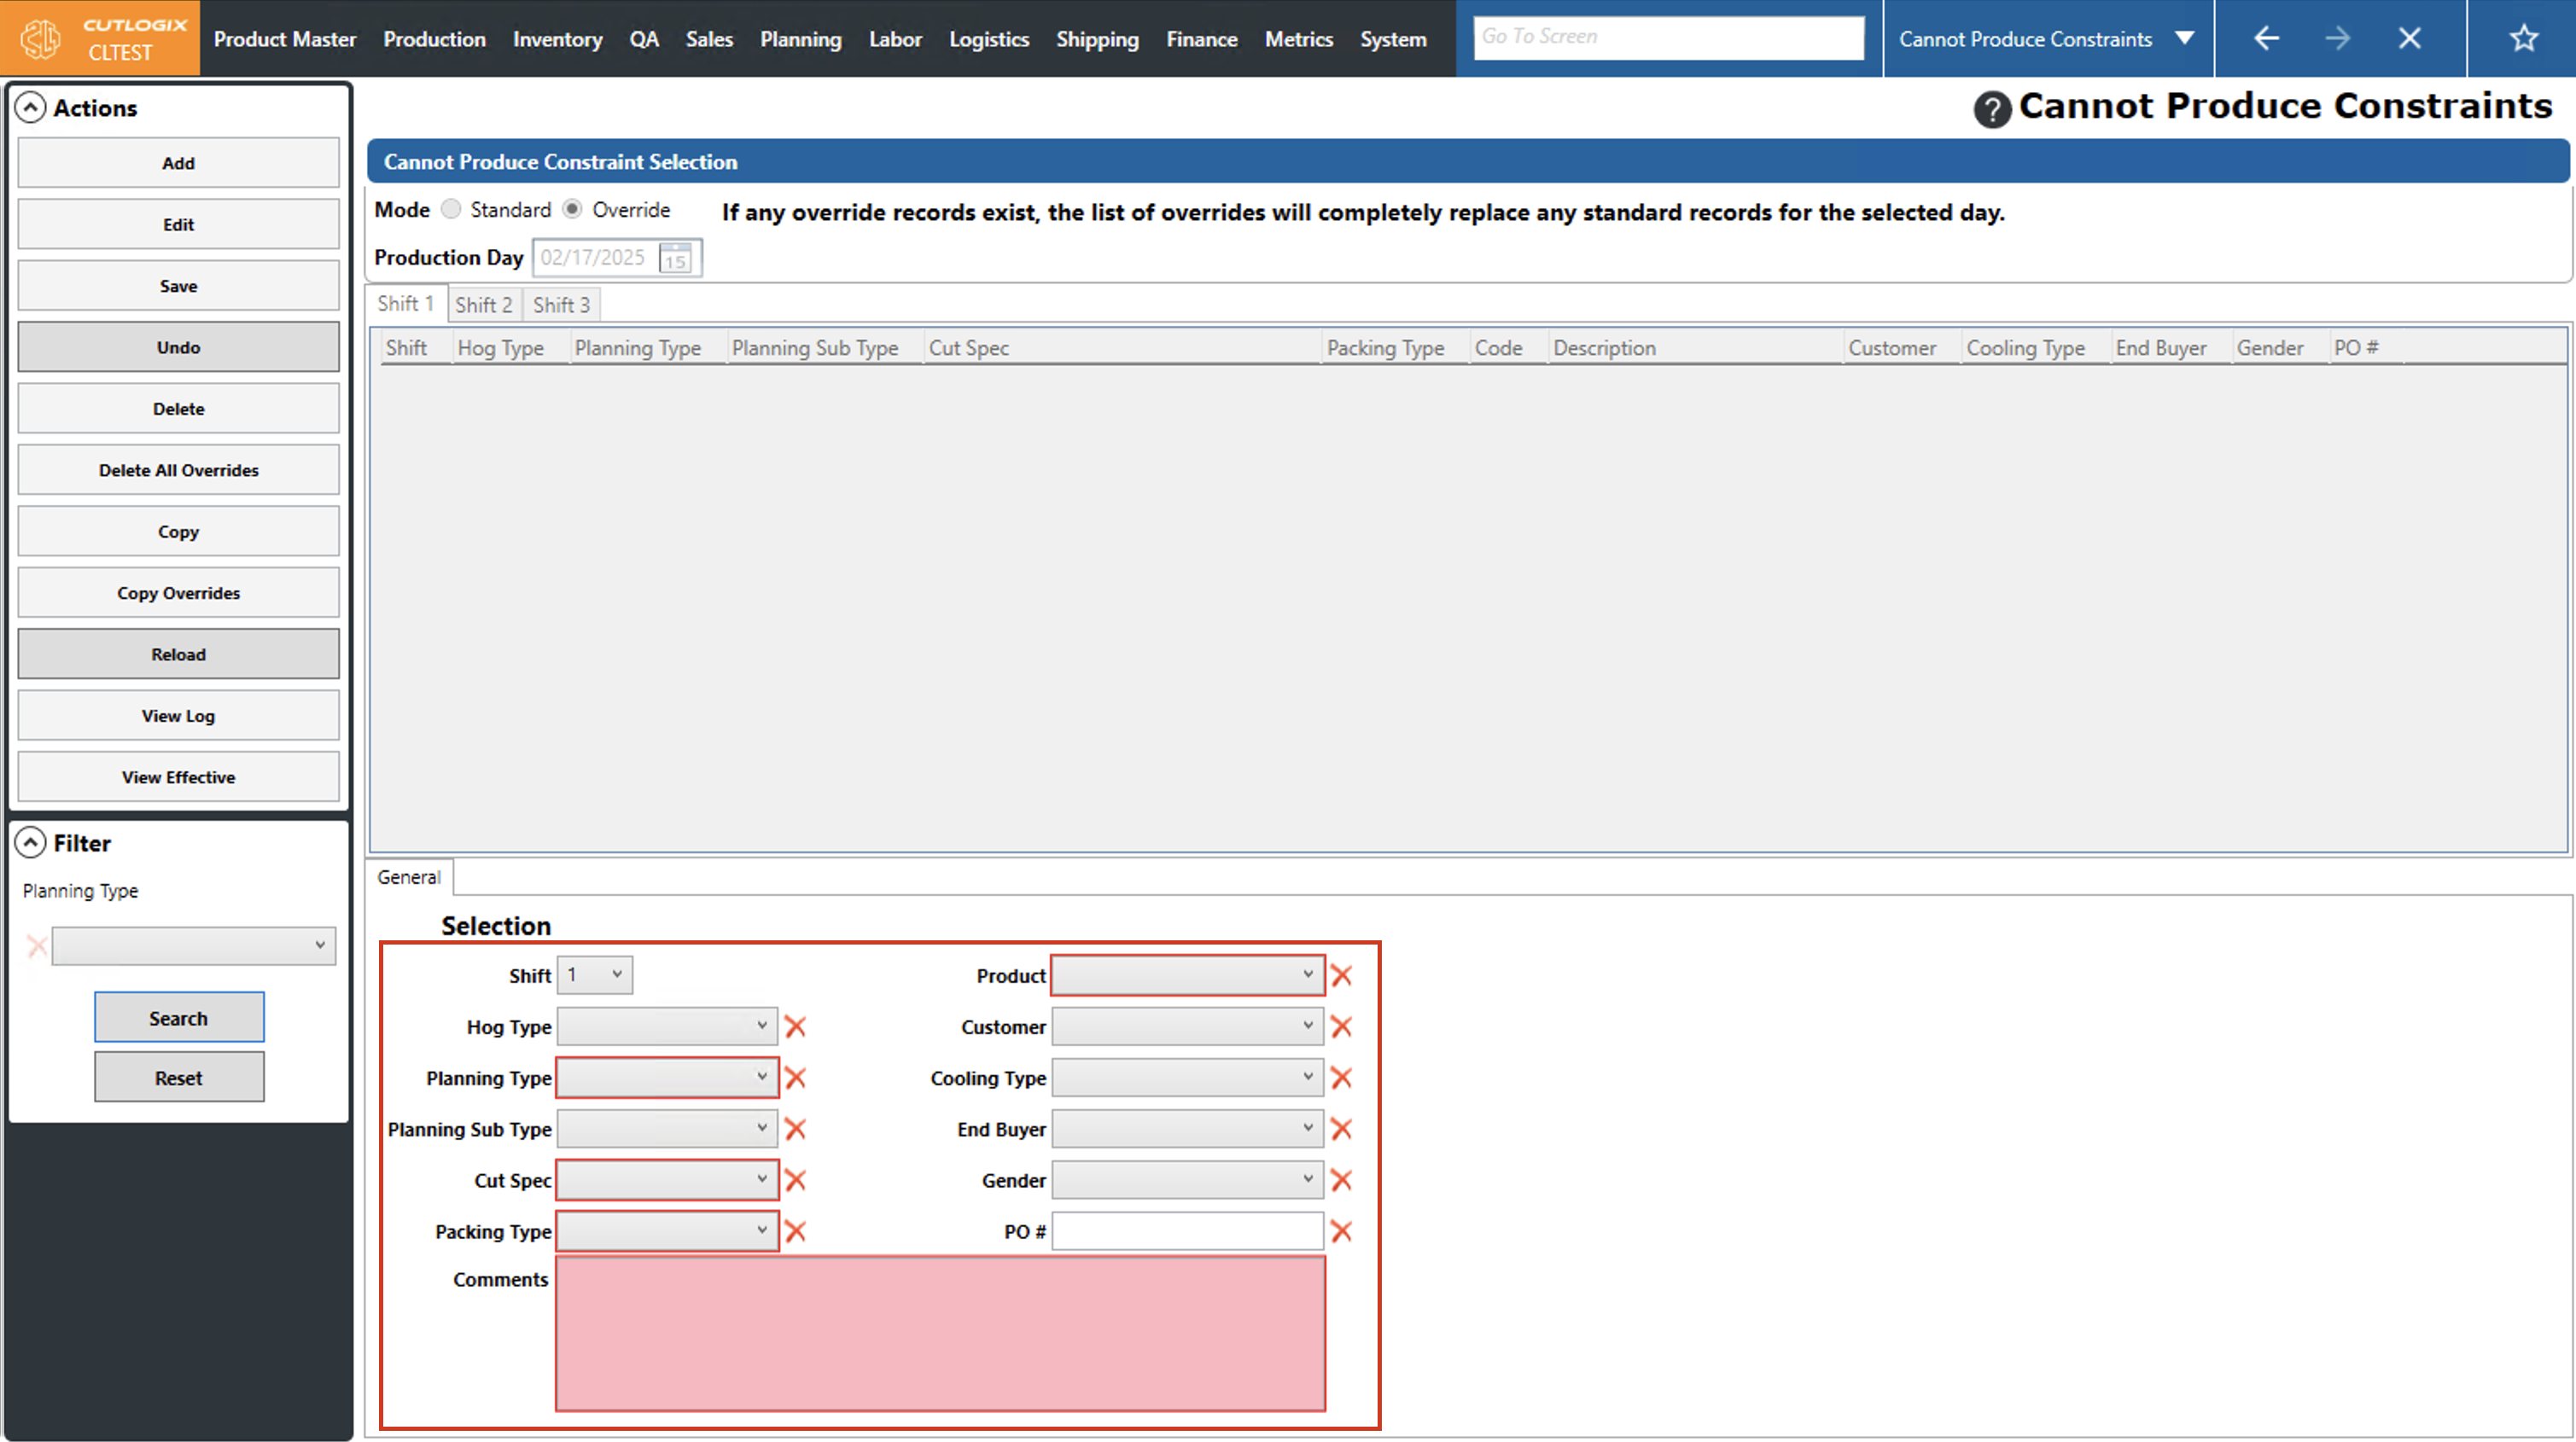
Step 3: Several fields will appear at the bottom of the page where you can add details about the cannot produce constraint. Fields highlighted in red are required and must be filled out before the new cannot produce constraint can be saved. The required fields are as follows, note that once one of the required fields is filled out, the rest are optional besides the comments.
• Planning Type: The planning type that cannot be produced.
• Cut Spec: The cut spec that cannot be produced.
• Packing Type: The packing type of products that cannot be produced.
• Product: The product that cannot be produced.
• Comments: A comment explaining the reason for the cannot produce constraint.
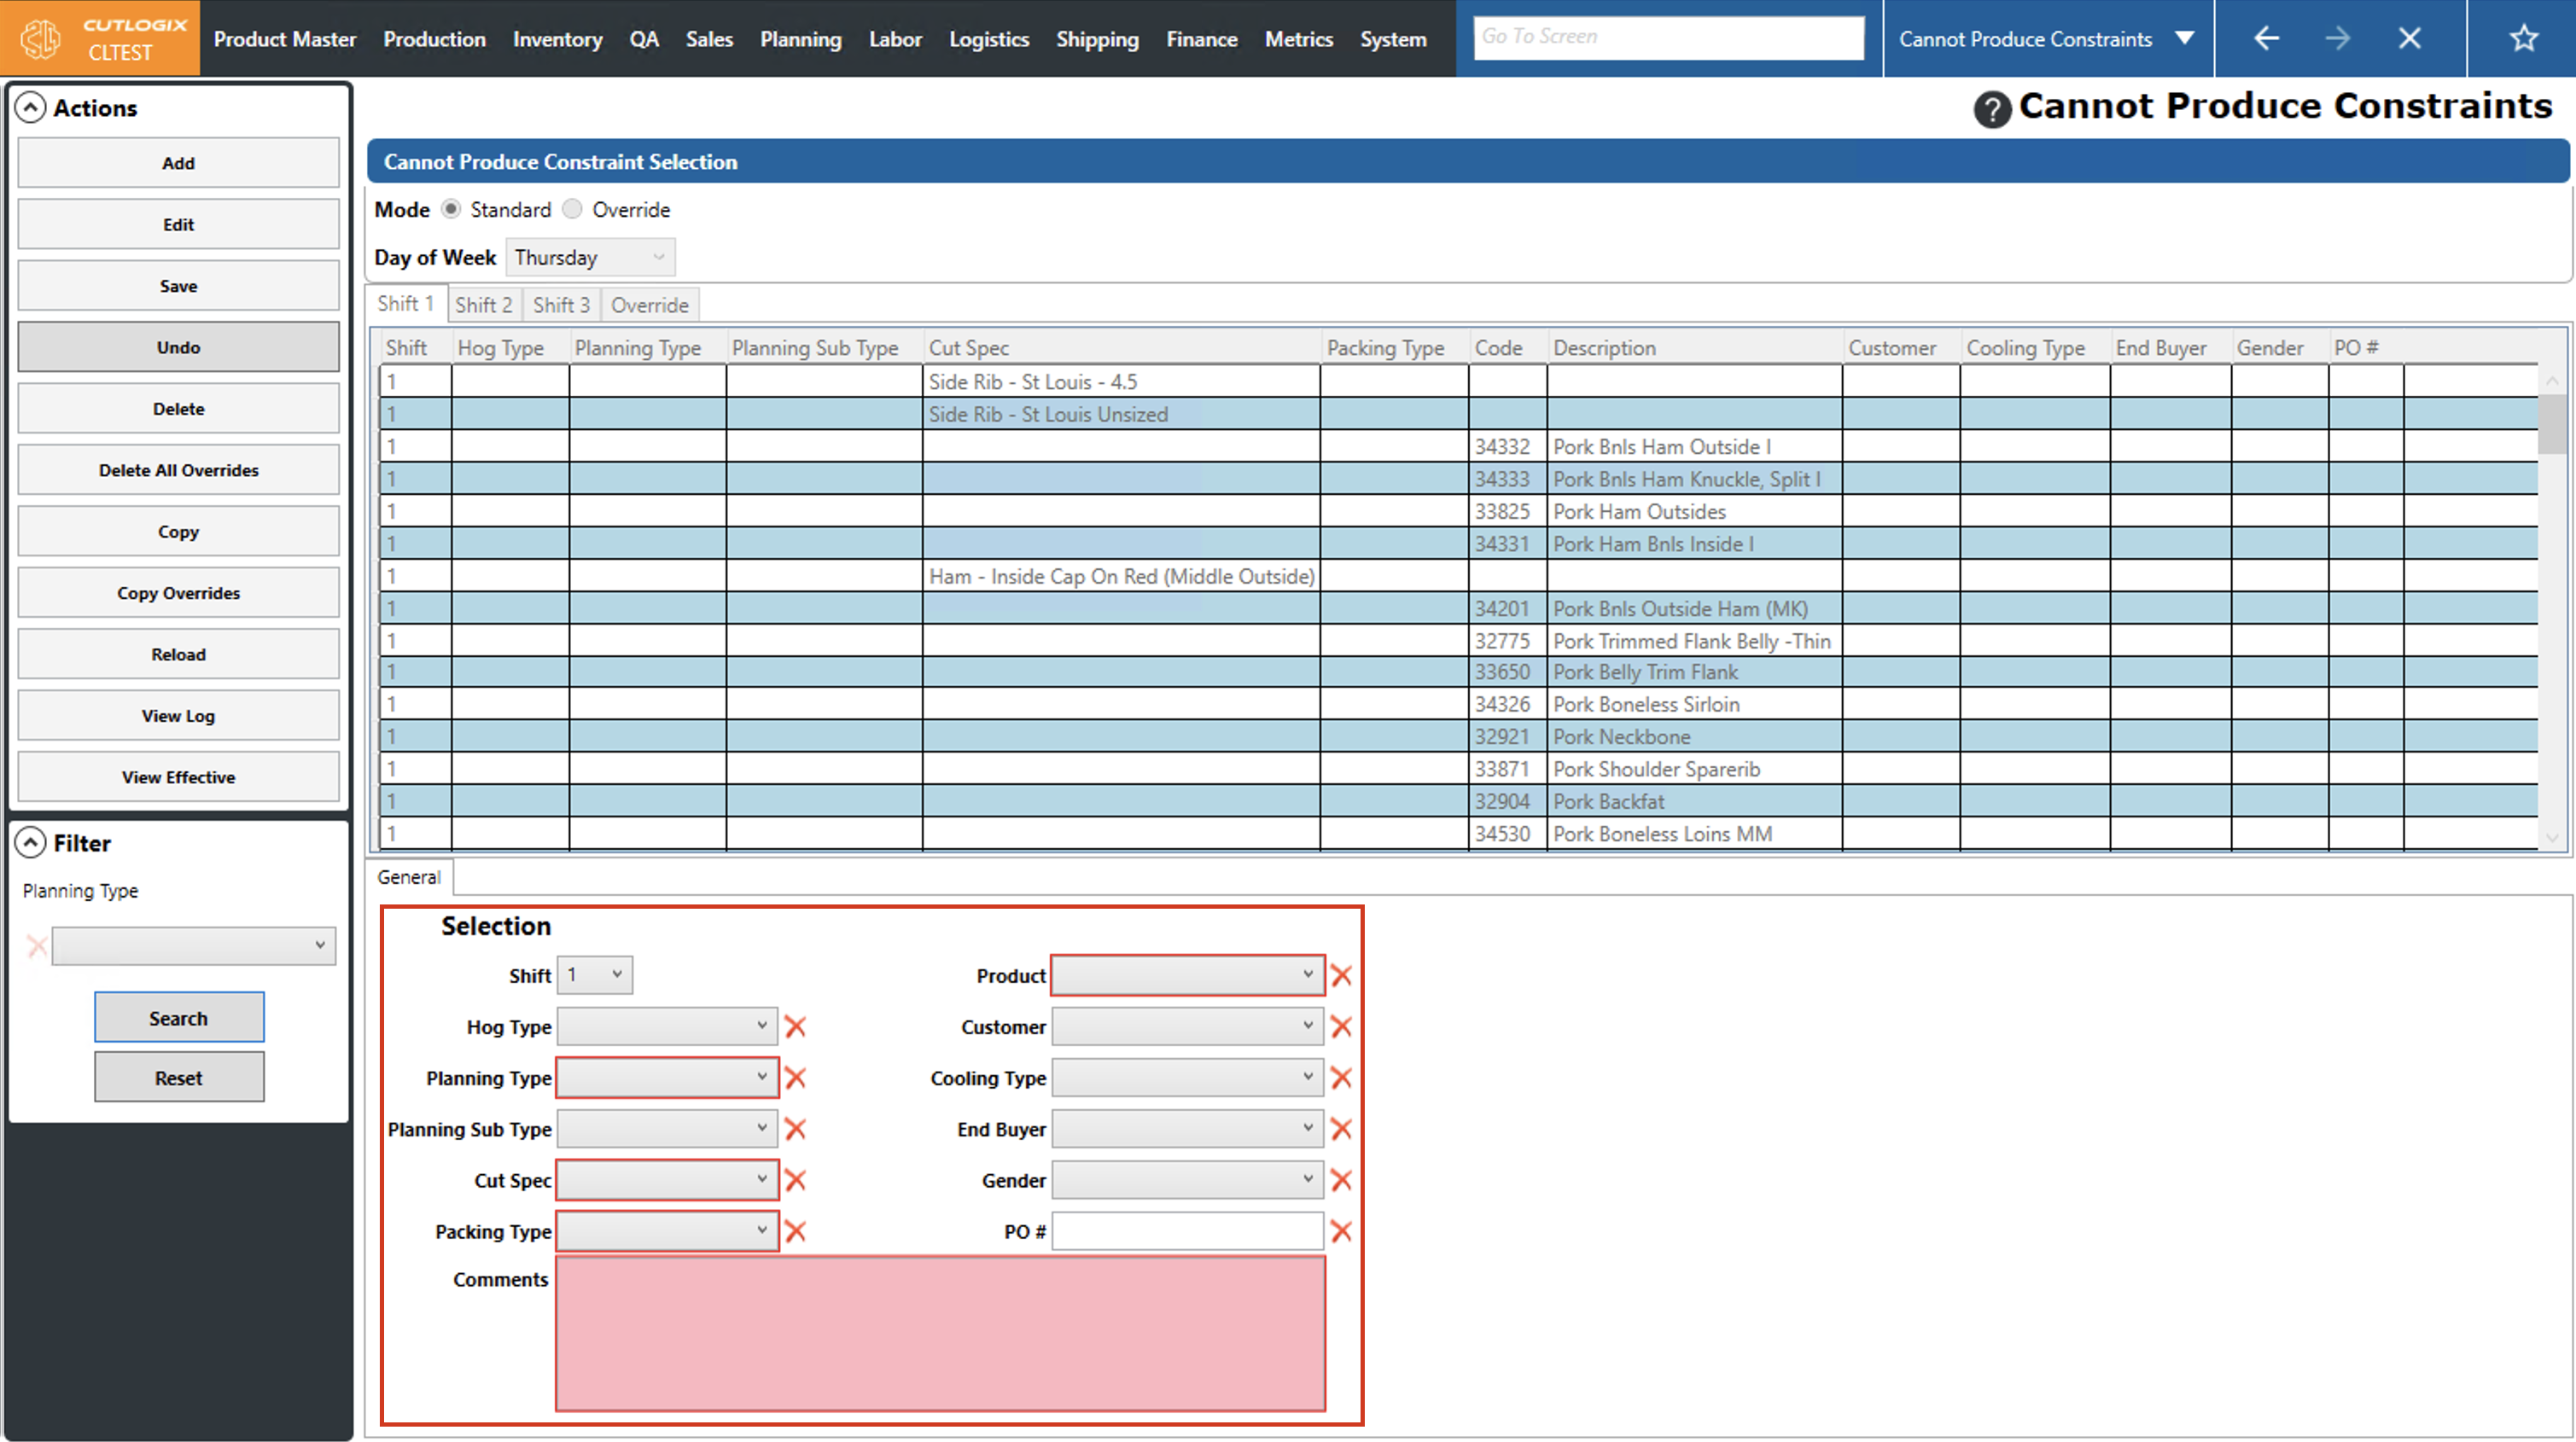
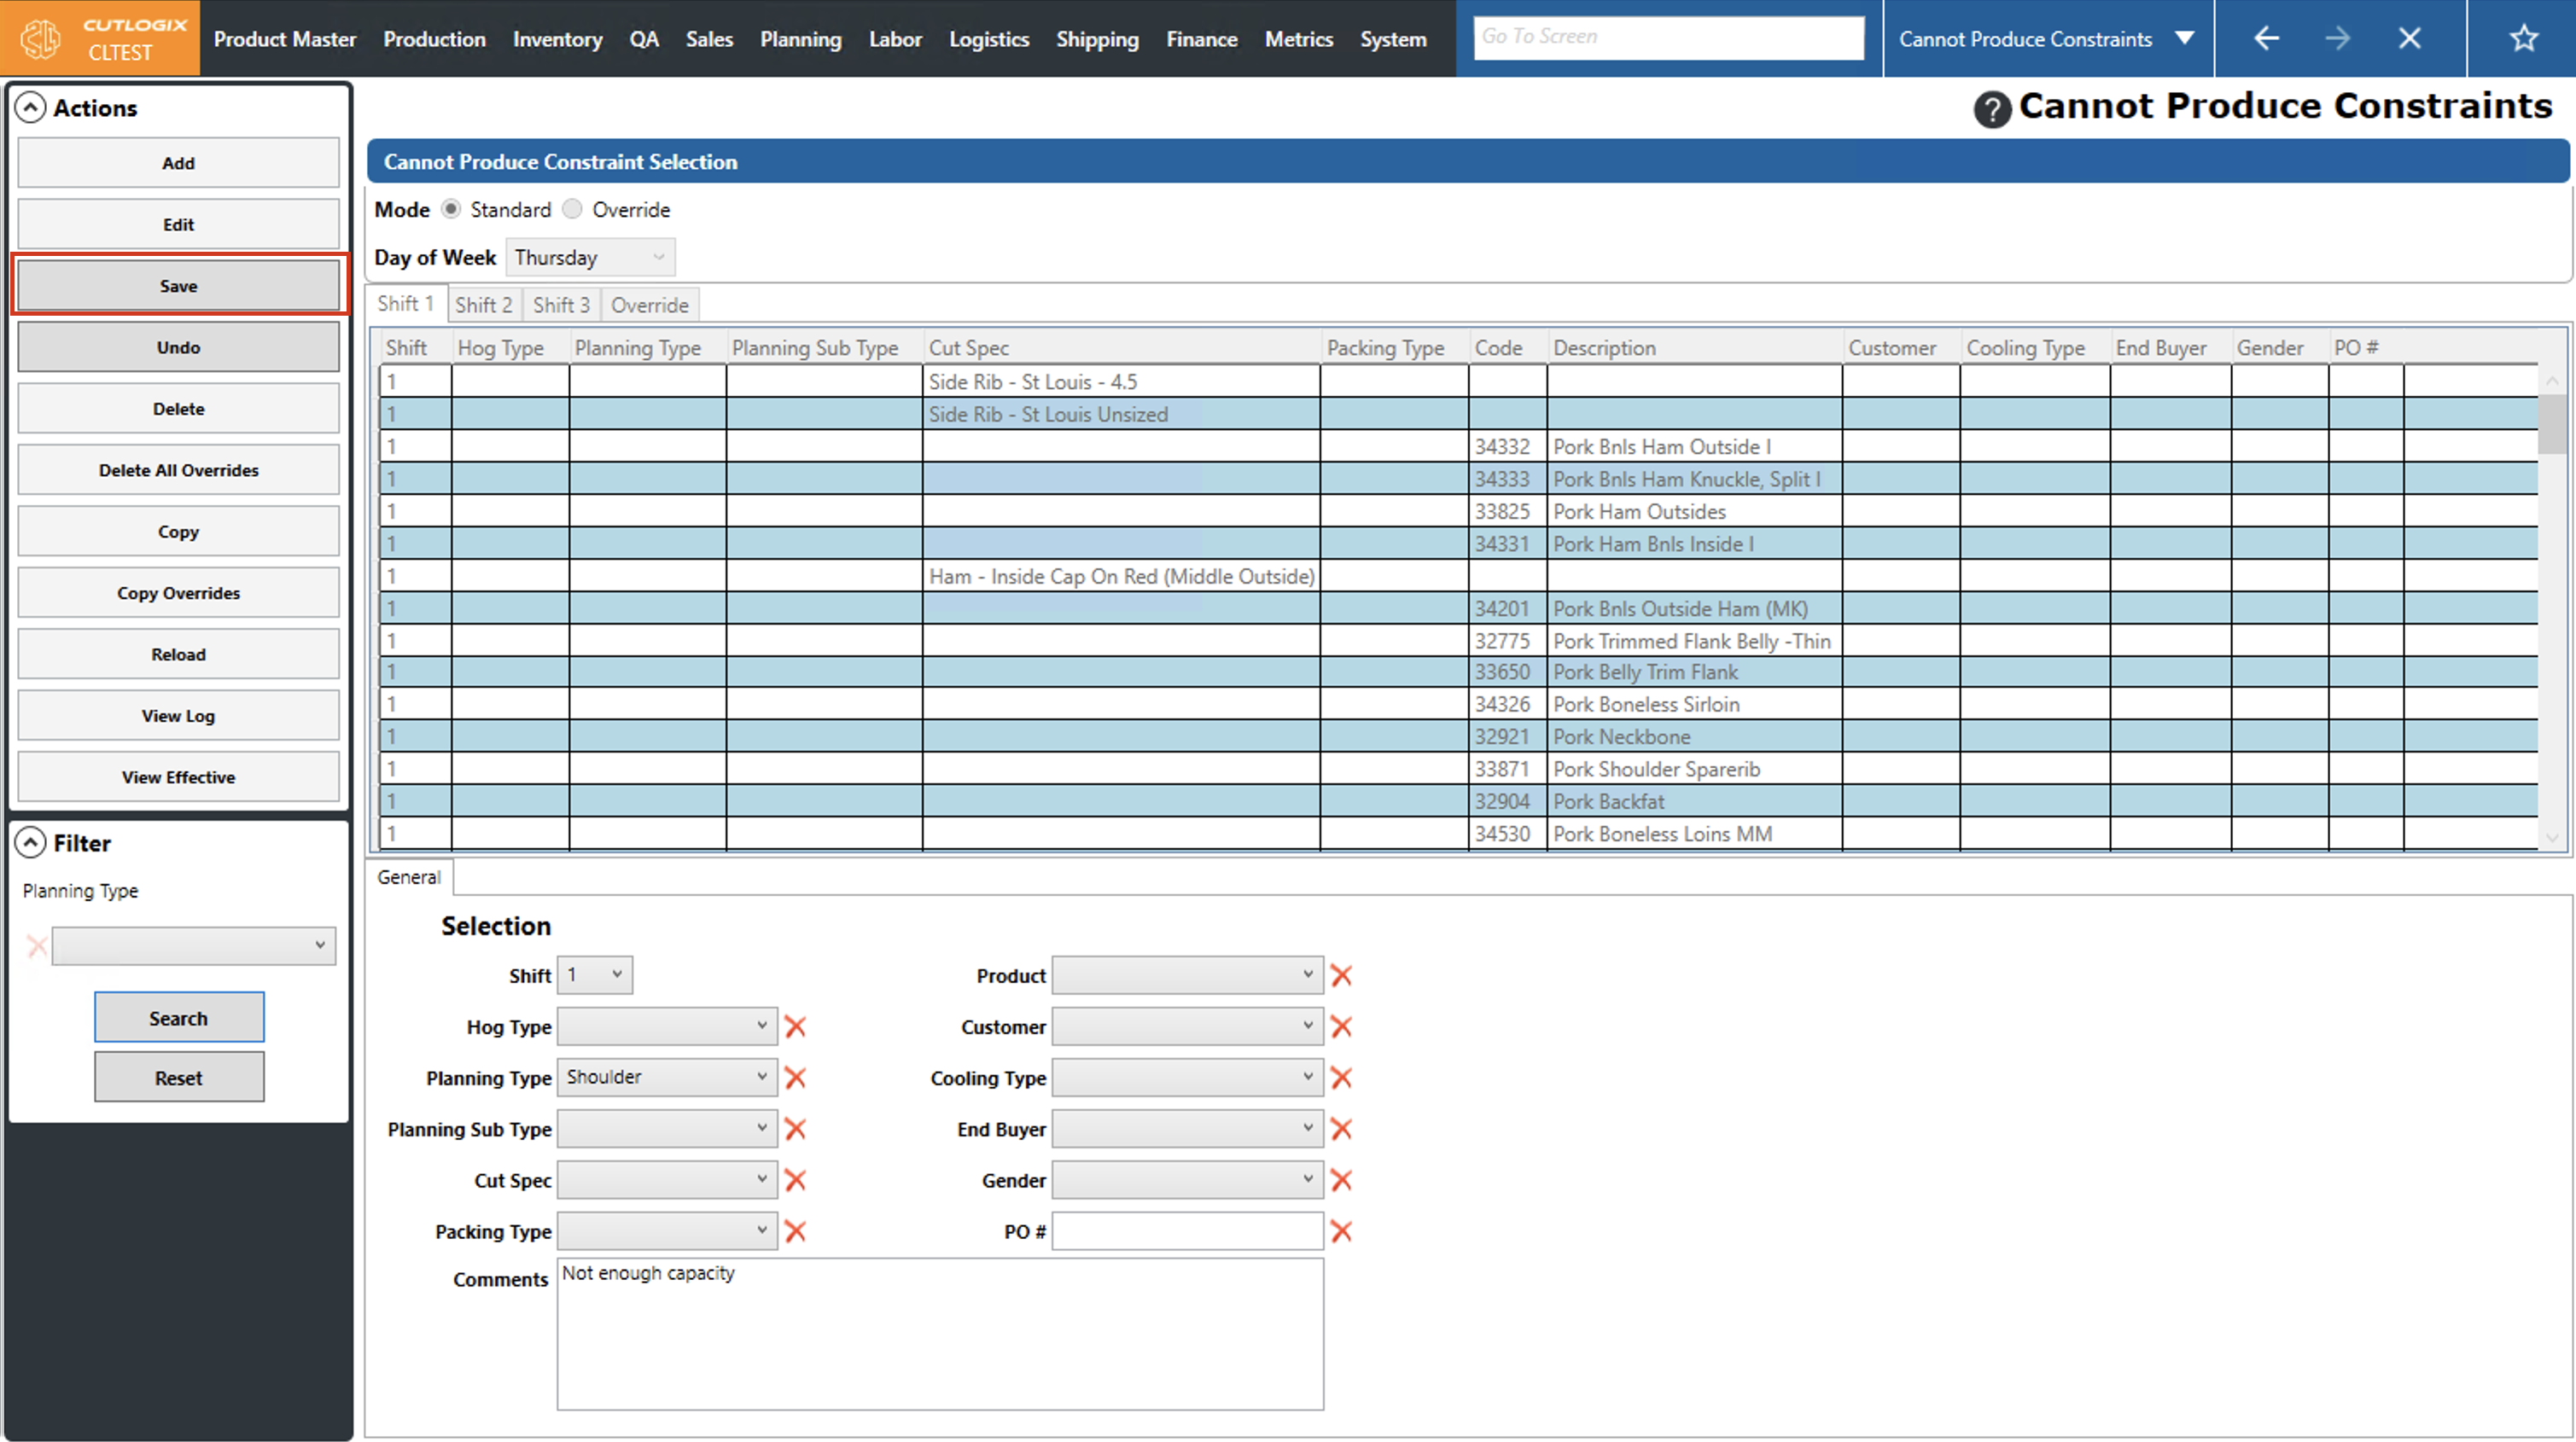
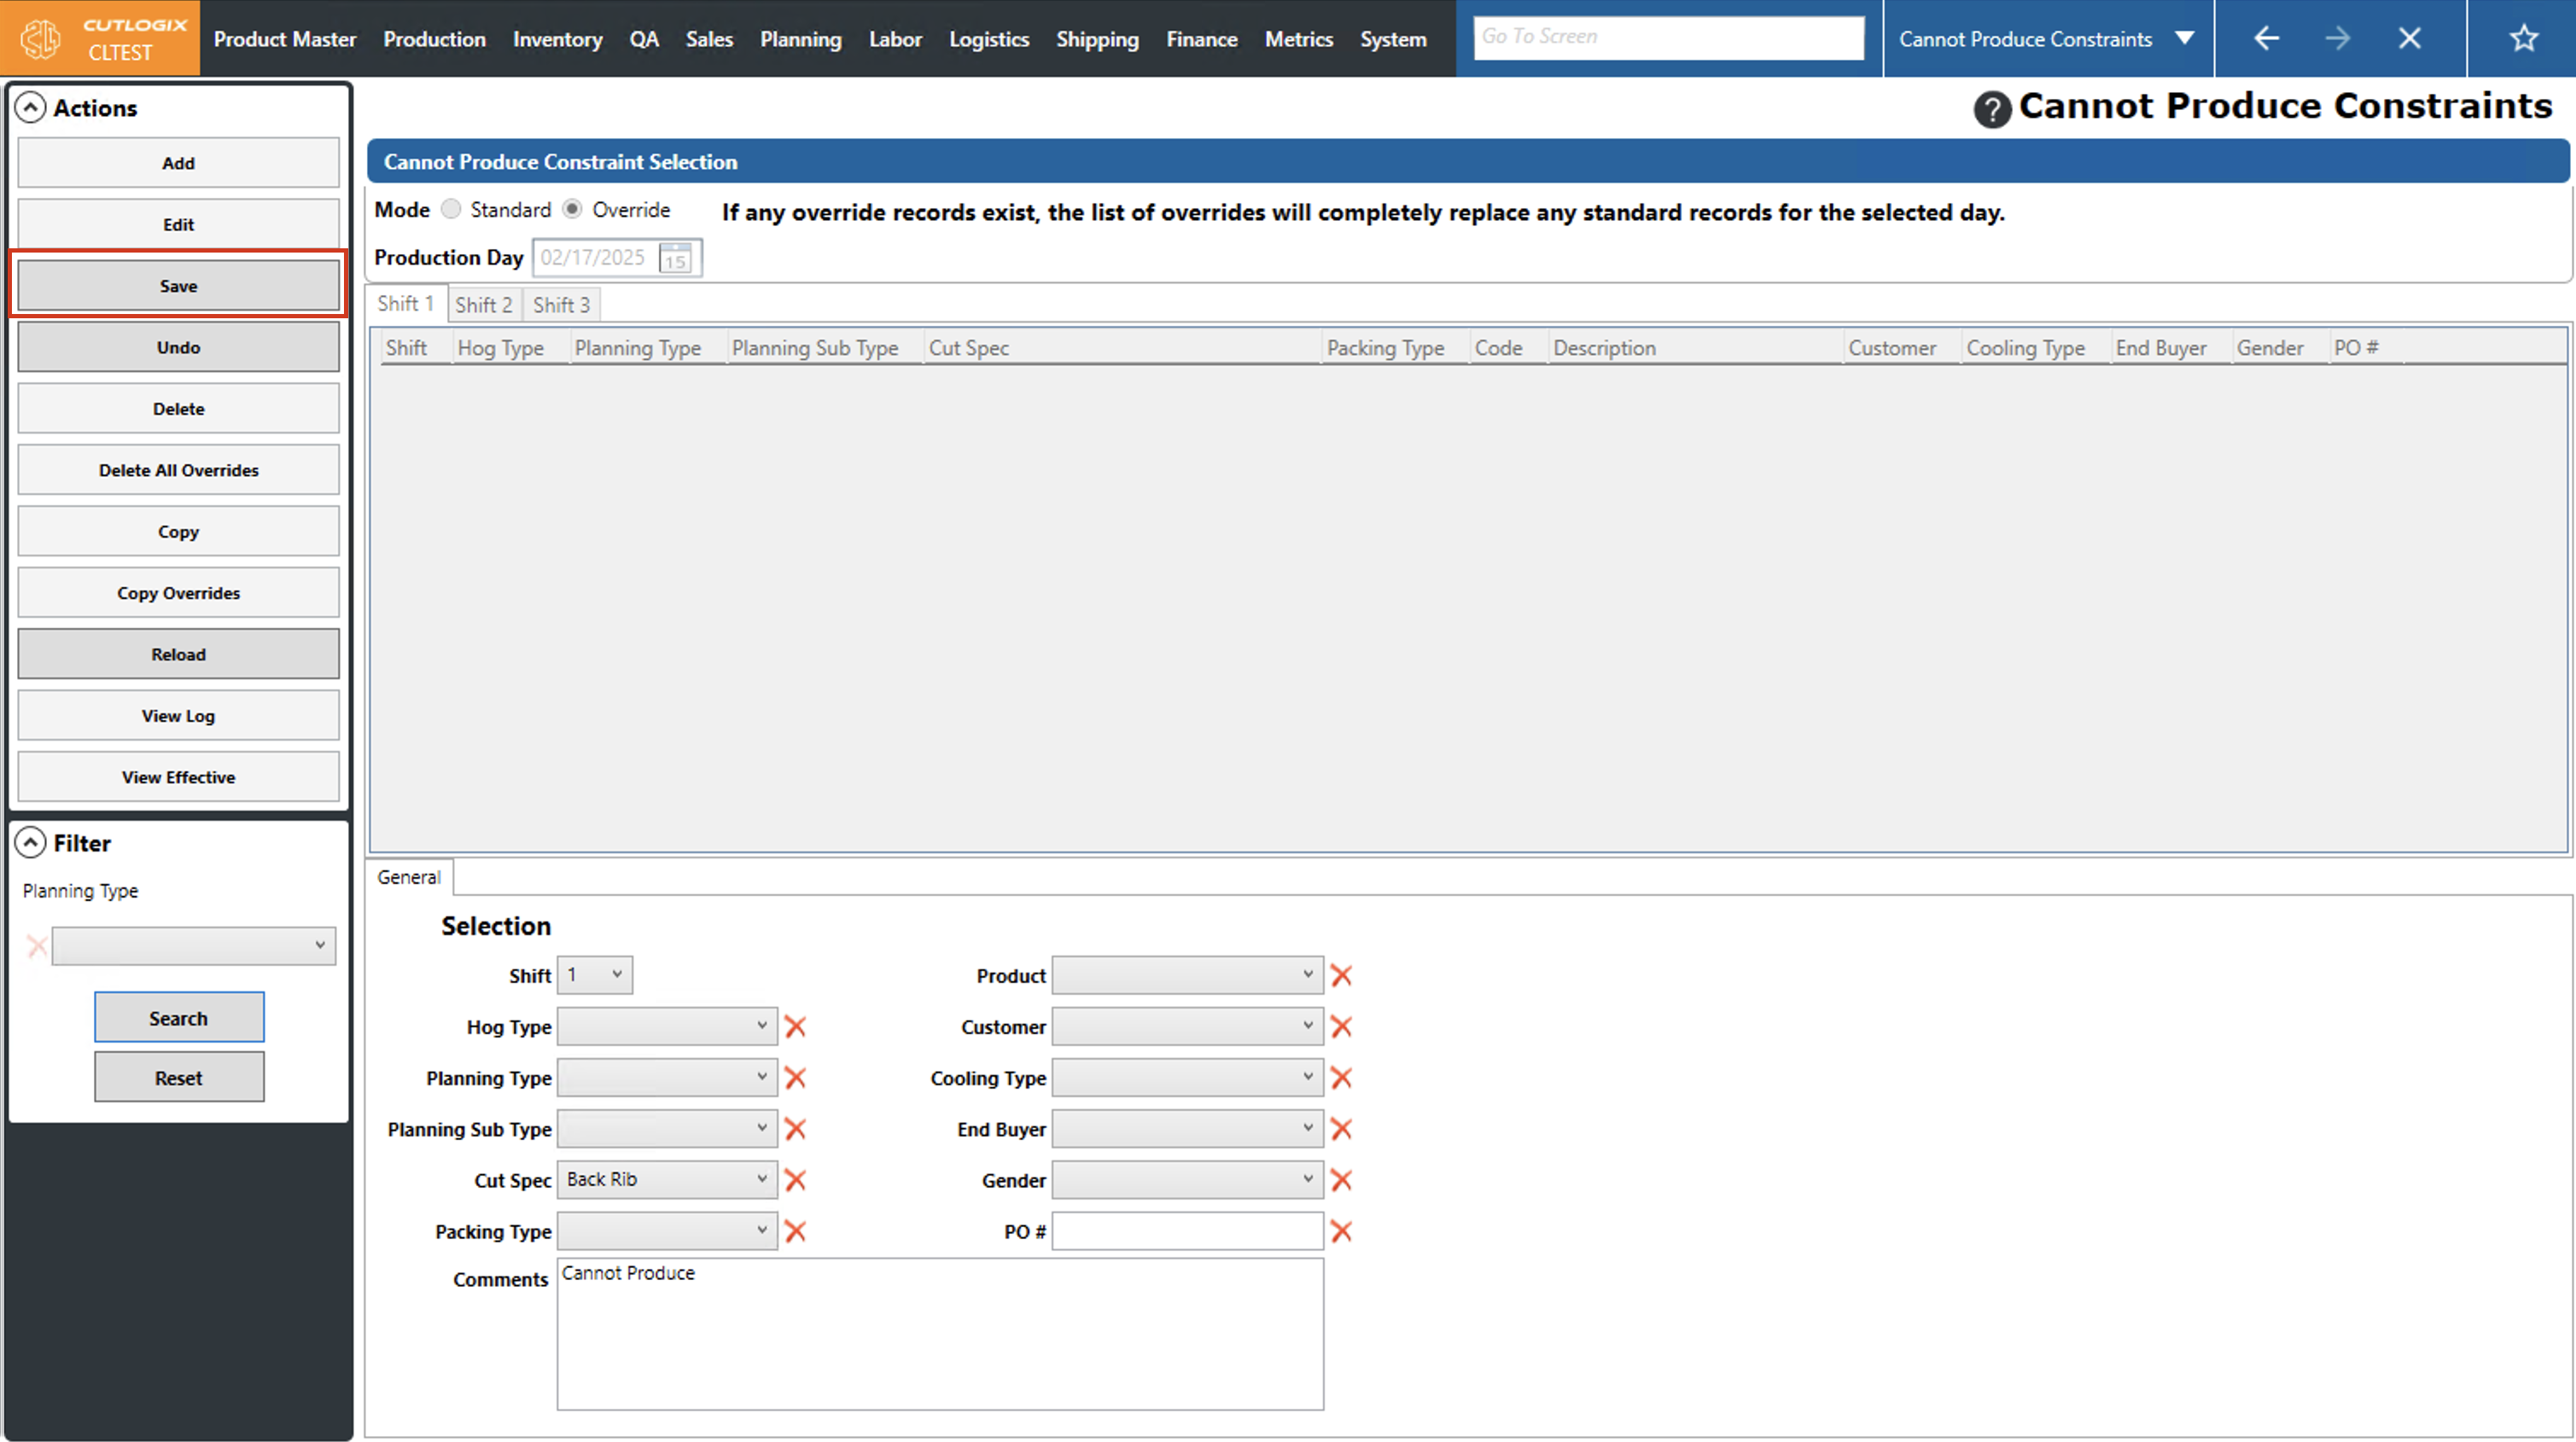
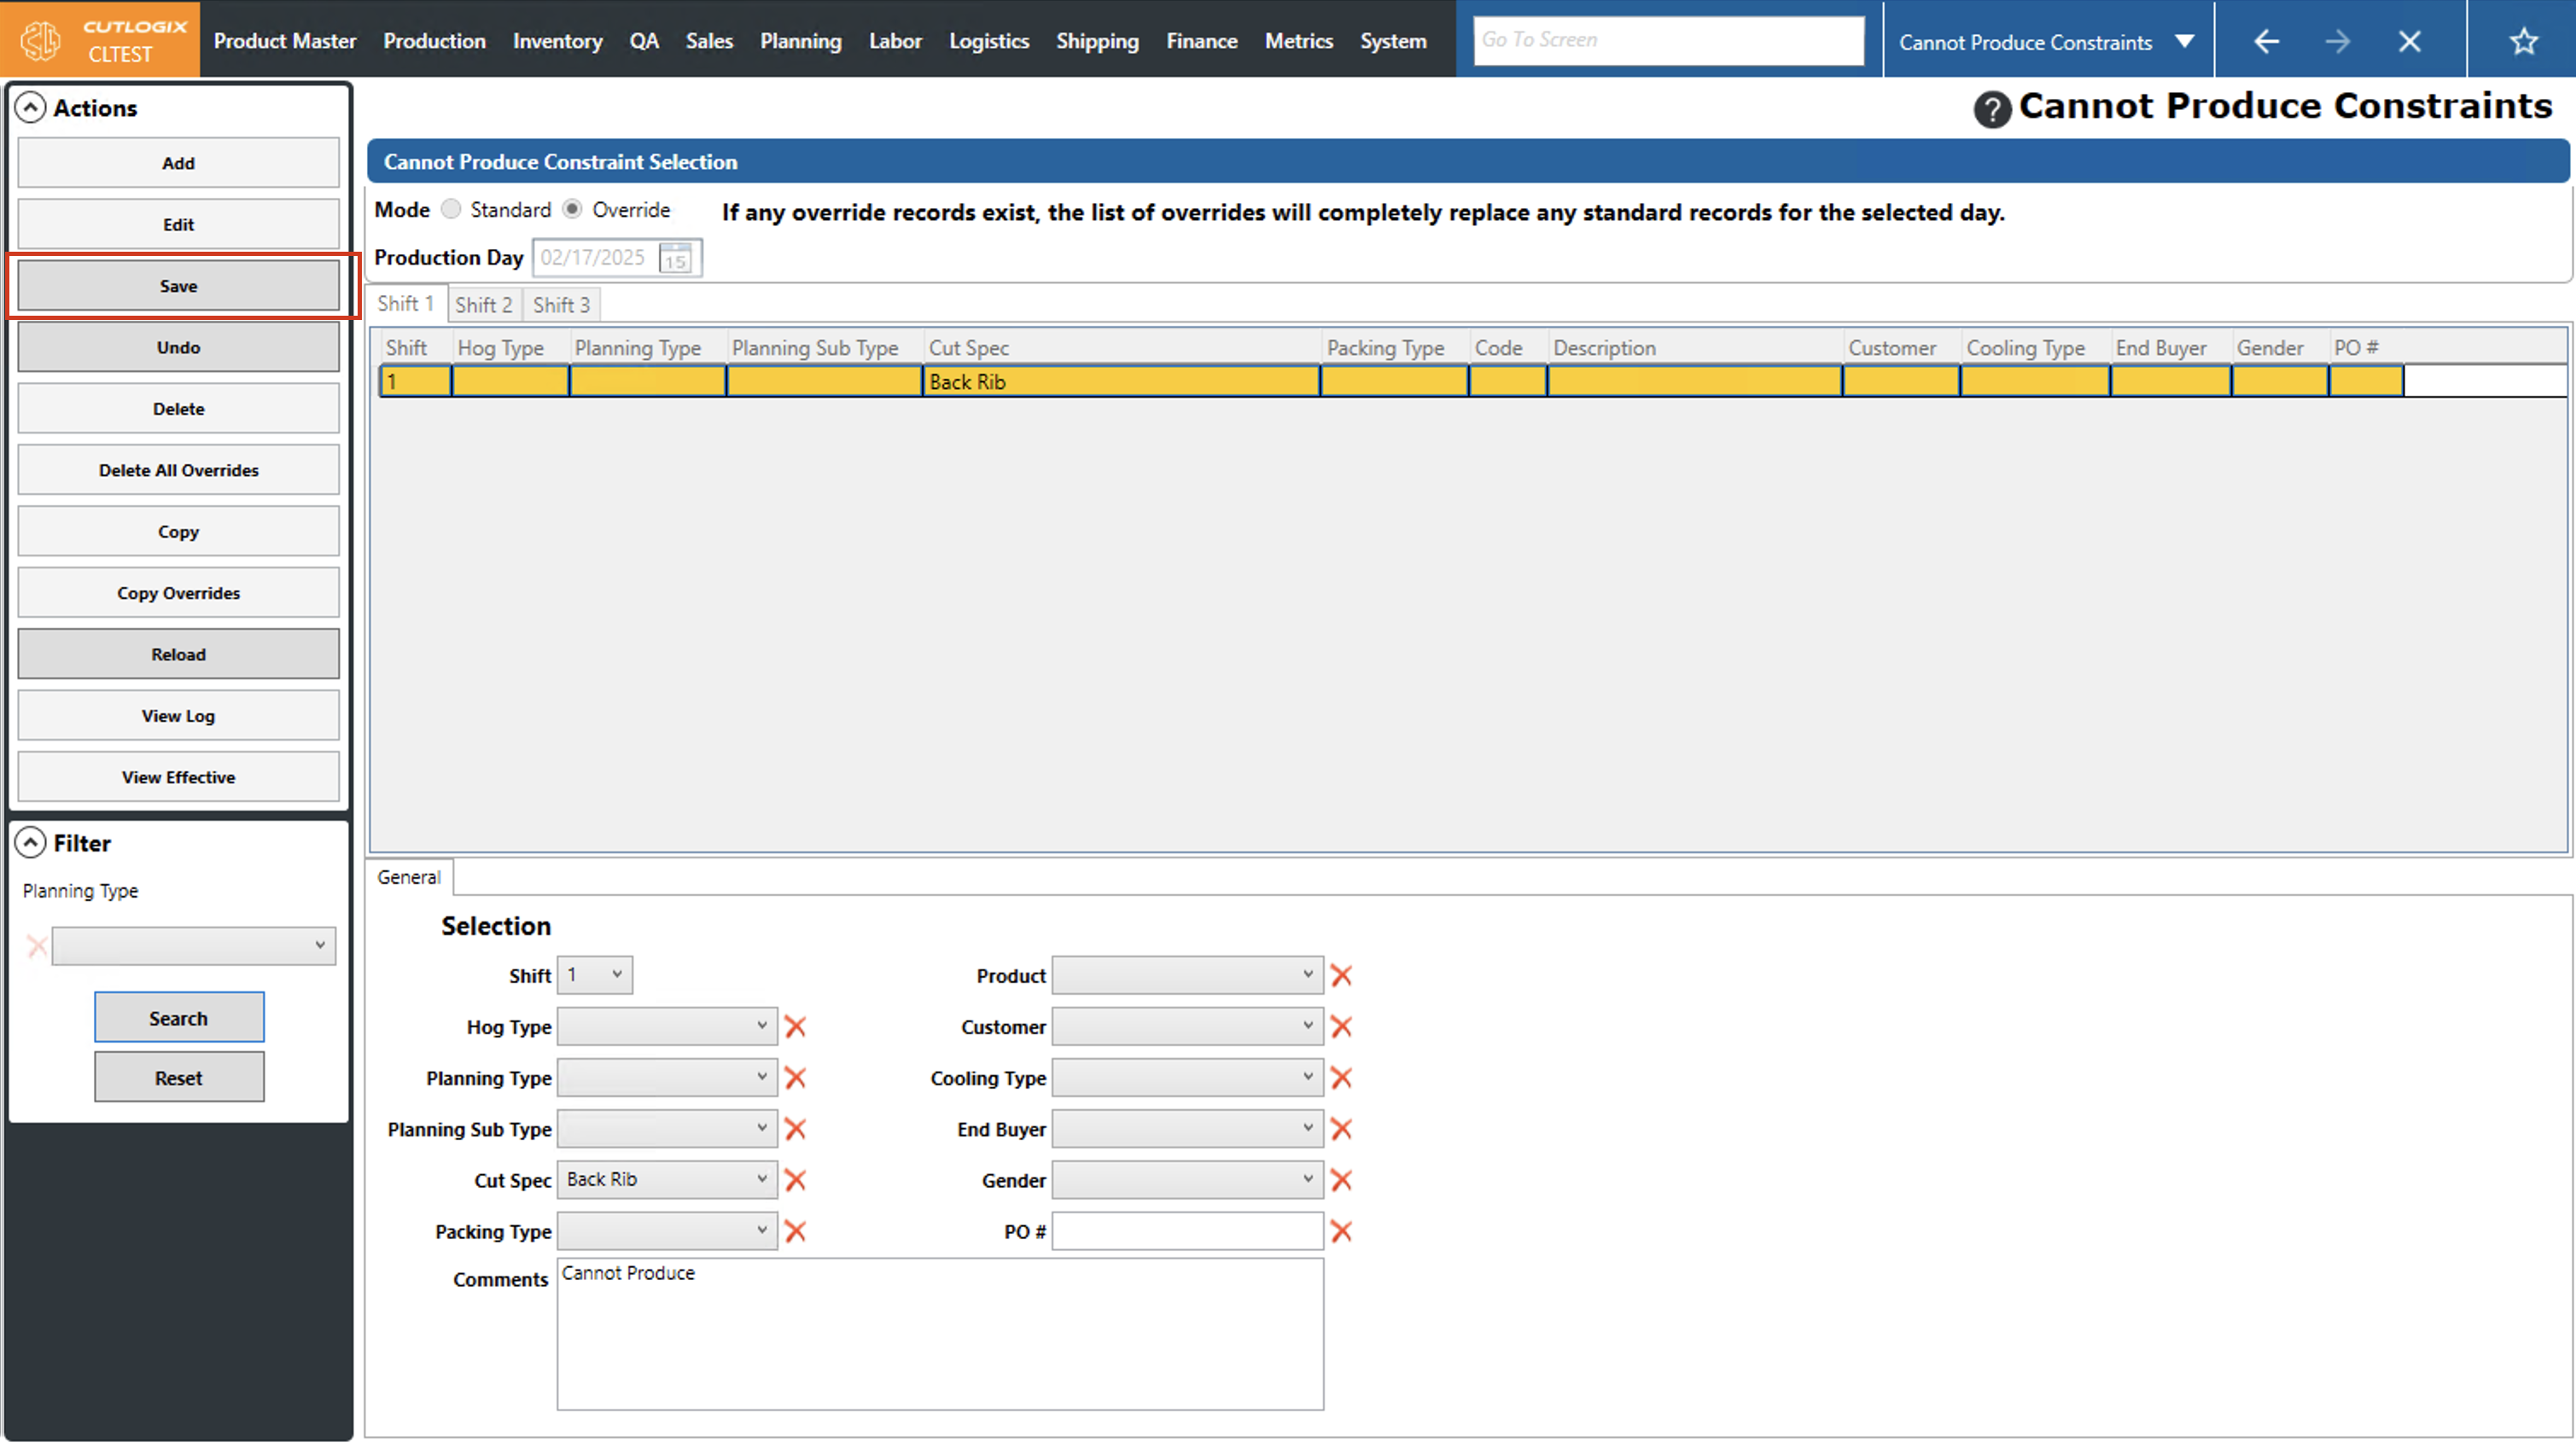
Step 4: Once all the required information has been added to the cannot produce constraint, click "Save" in the Actions Panel to save it. If you don't want to save the new cannot produce constraint, clicking "Undo" in the Actions Panel will discard it, and it won't be saved.
How to Edit Cannot Produce Constraints
DemoStep 1: Navigate to the "Cannot Produce Constraints" page (Under the Planning menu → Planning Rules Config → Cannot Produce Constraints). Select the day of the week that you want to modify a cannot produce constraint for from the "Day of Week" dropdown list and choose the corresponding shift tab that has the constraint that you want to modify.
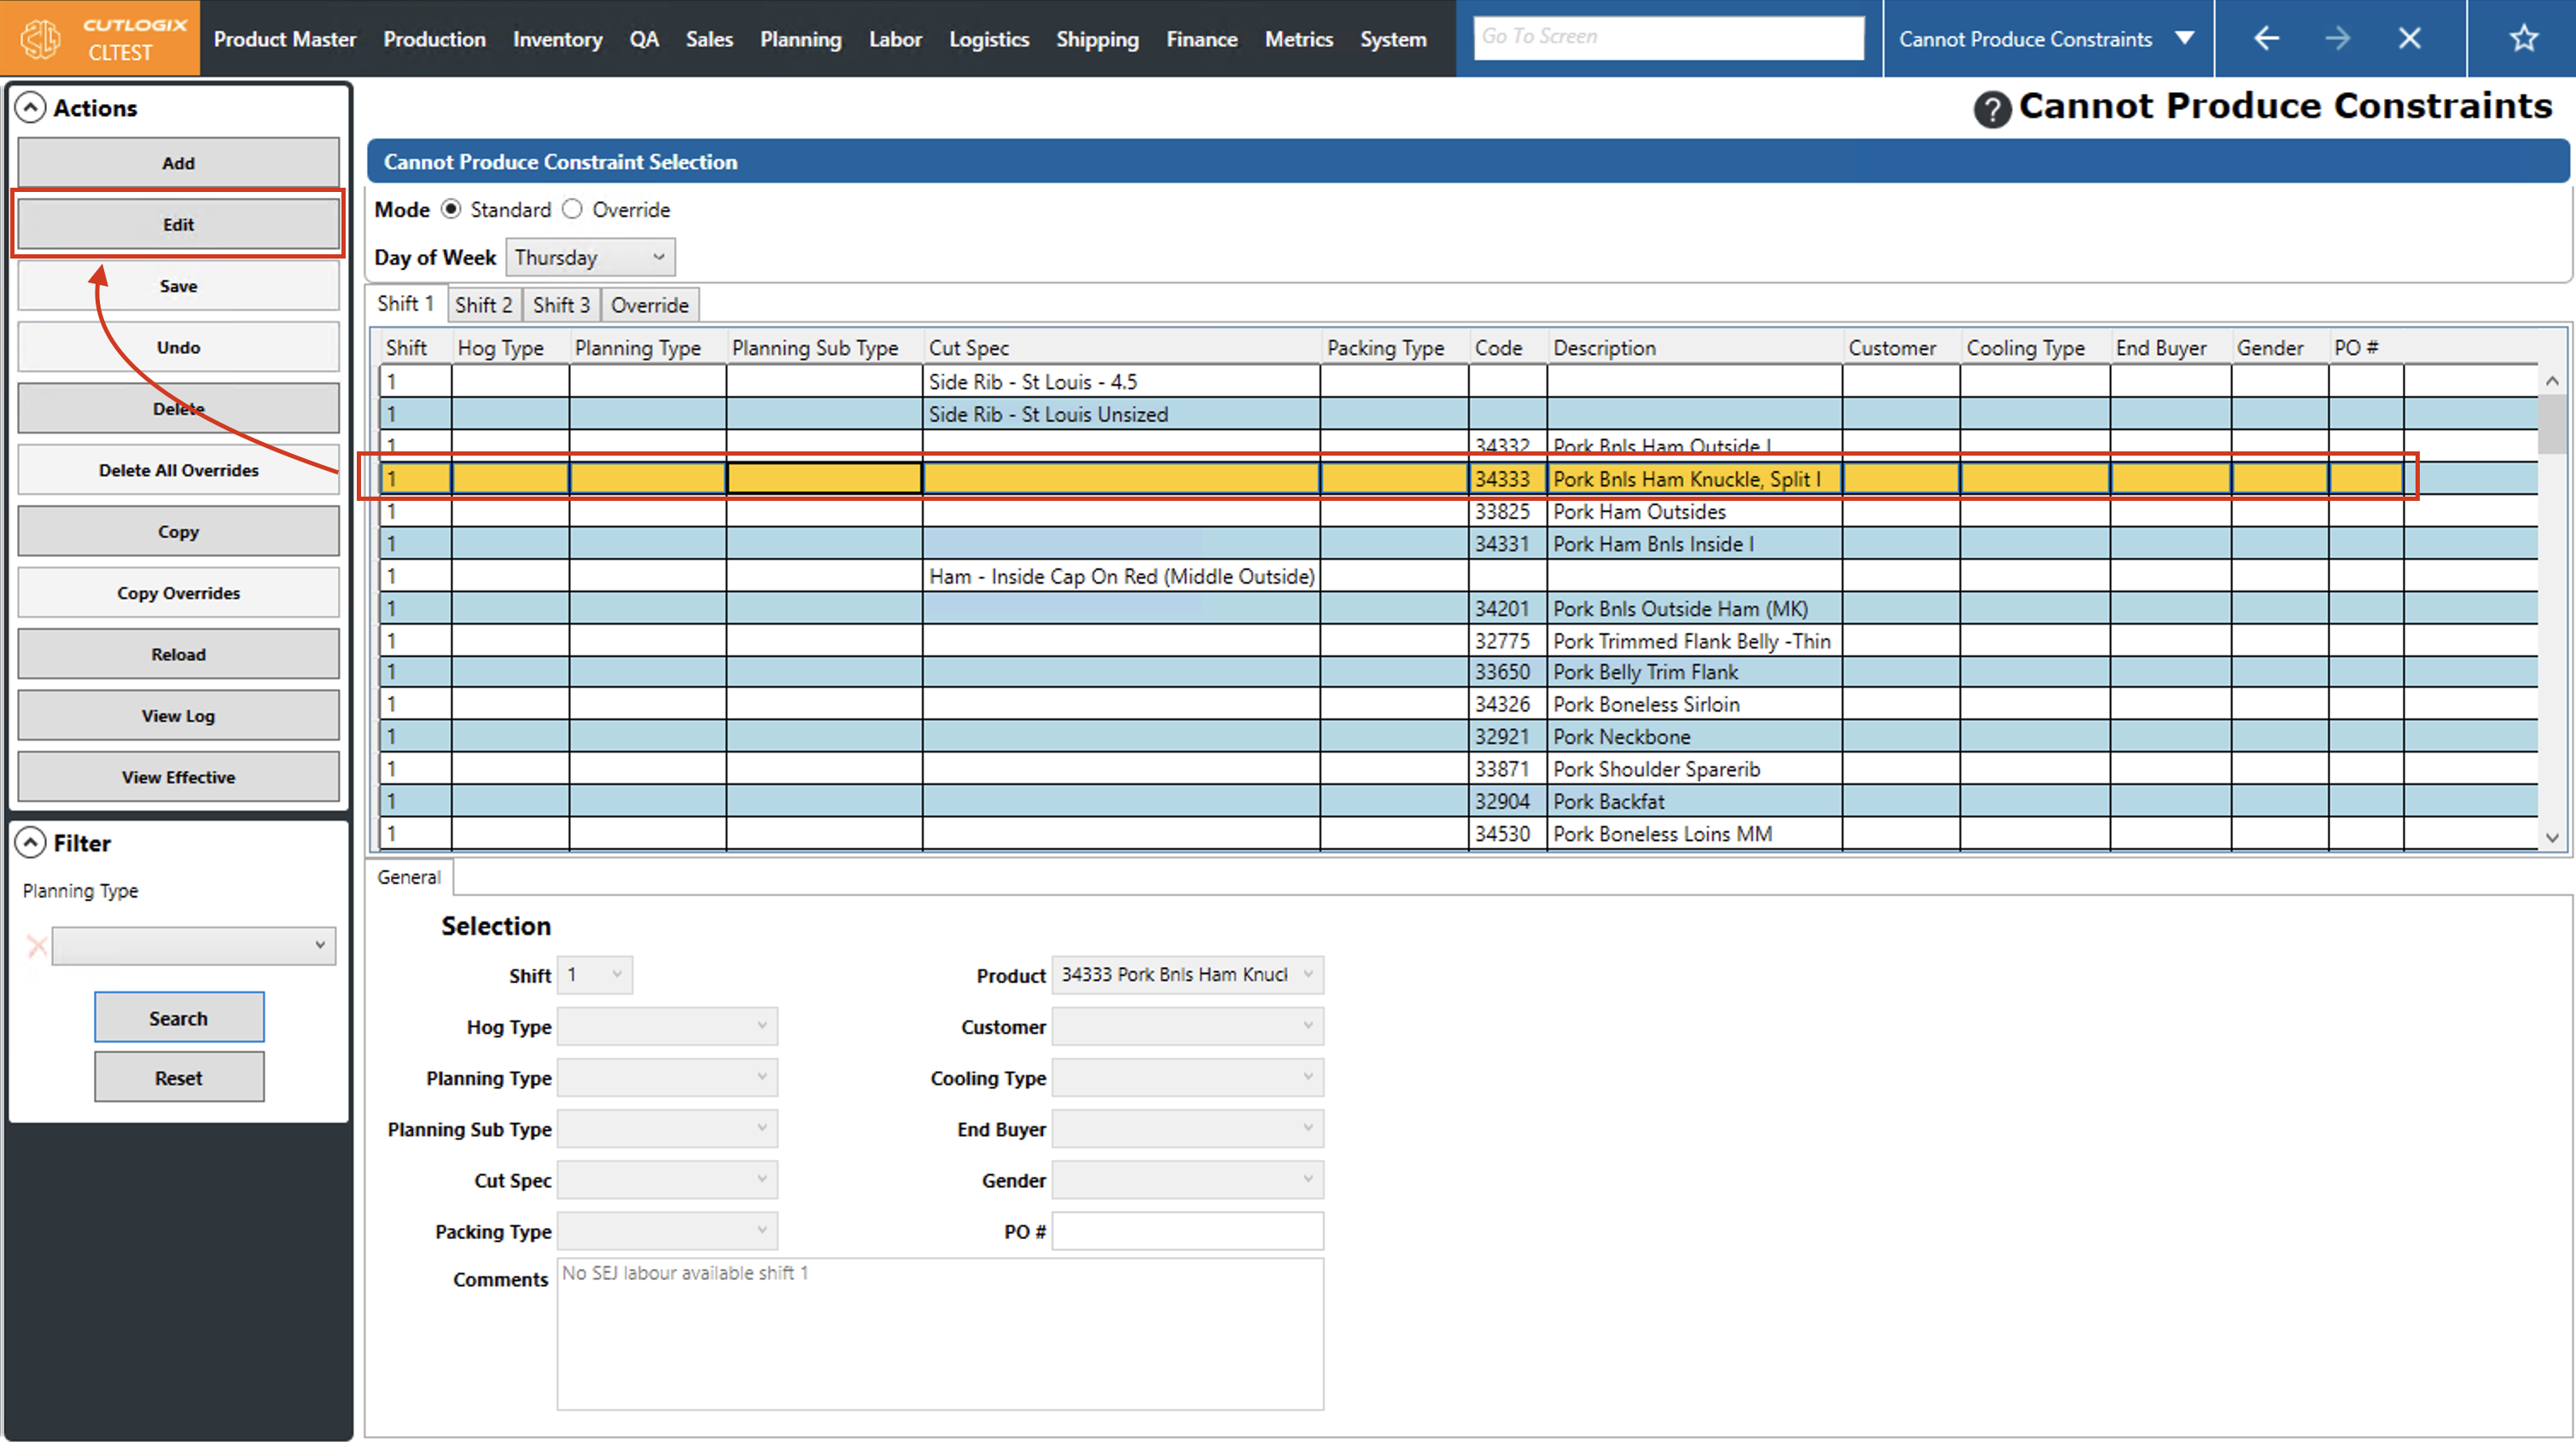
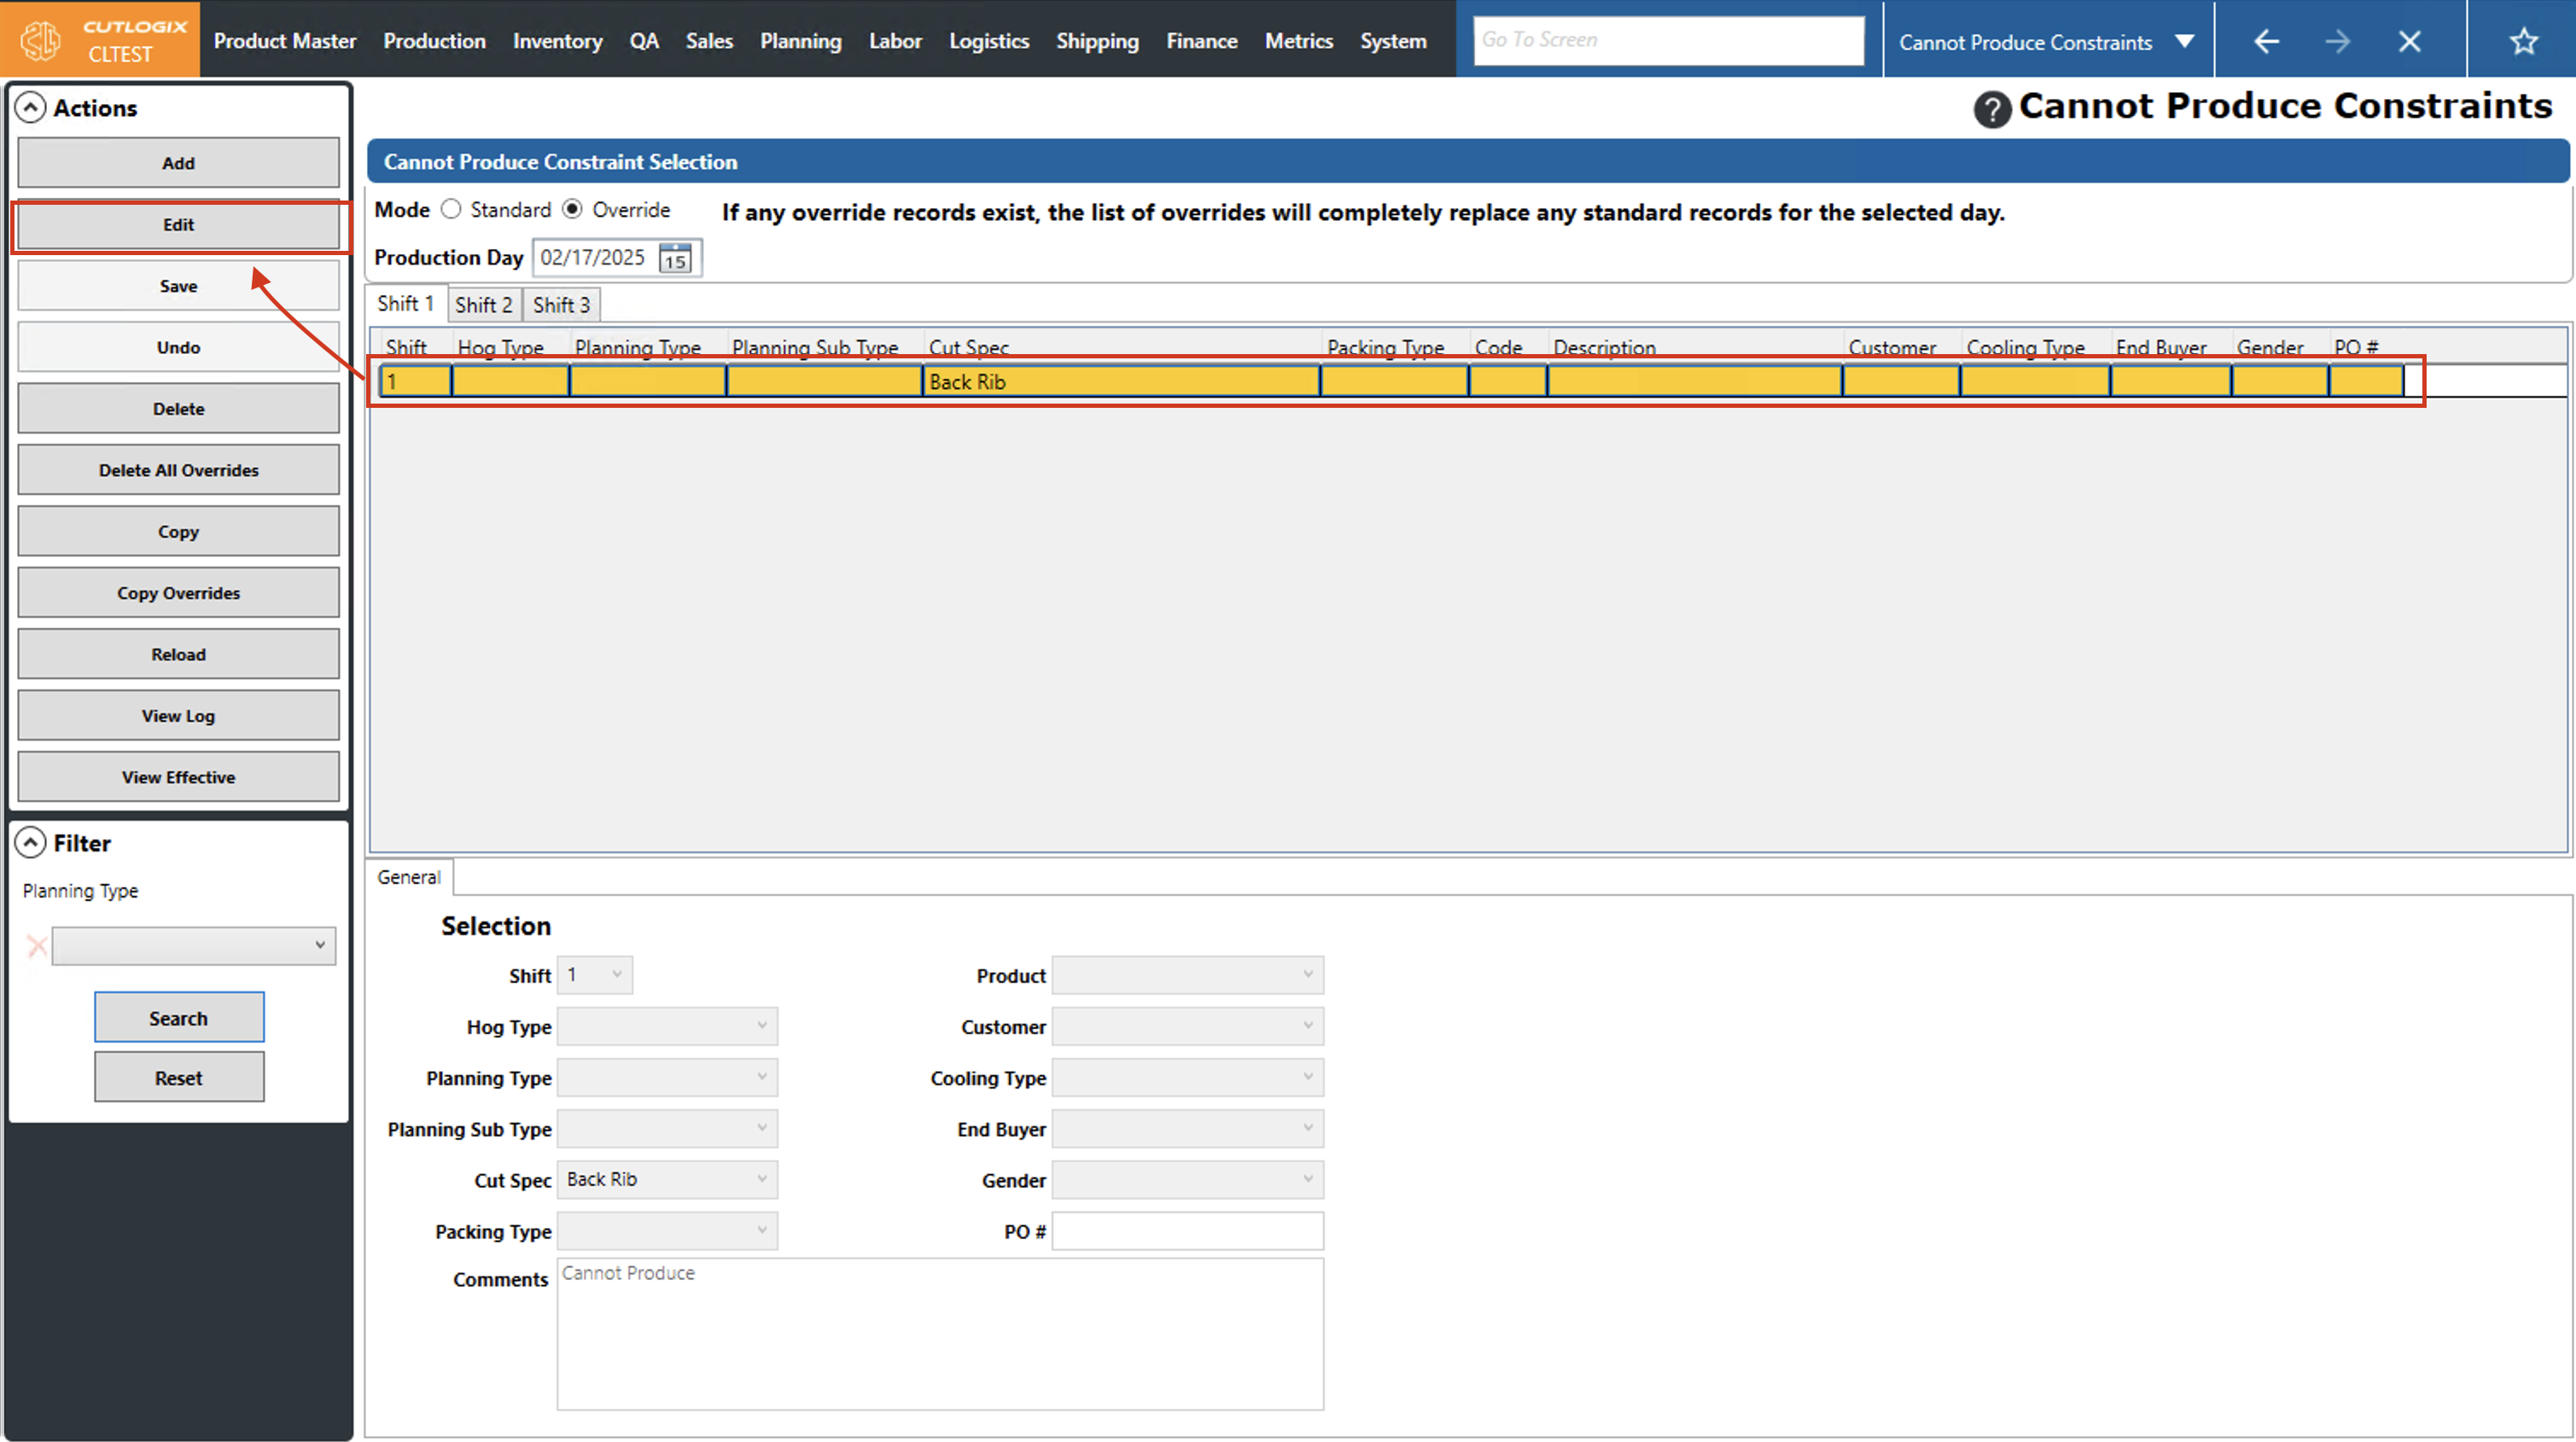
Step 2: Click on the cannot produce constraint that you want to modify (it will be highlighted in orange once it's selected), then click the "Edit" button in the Actions Panel.
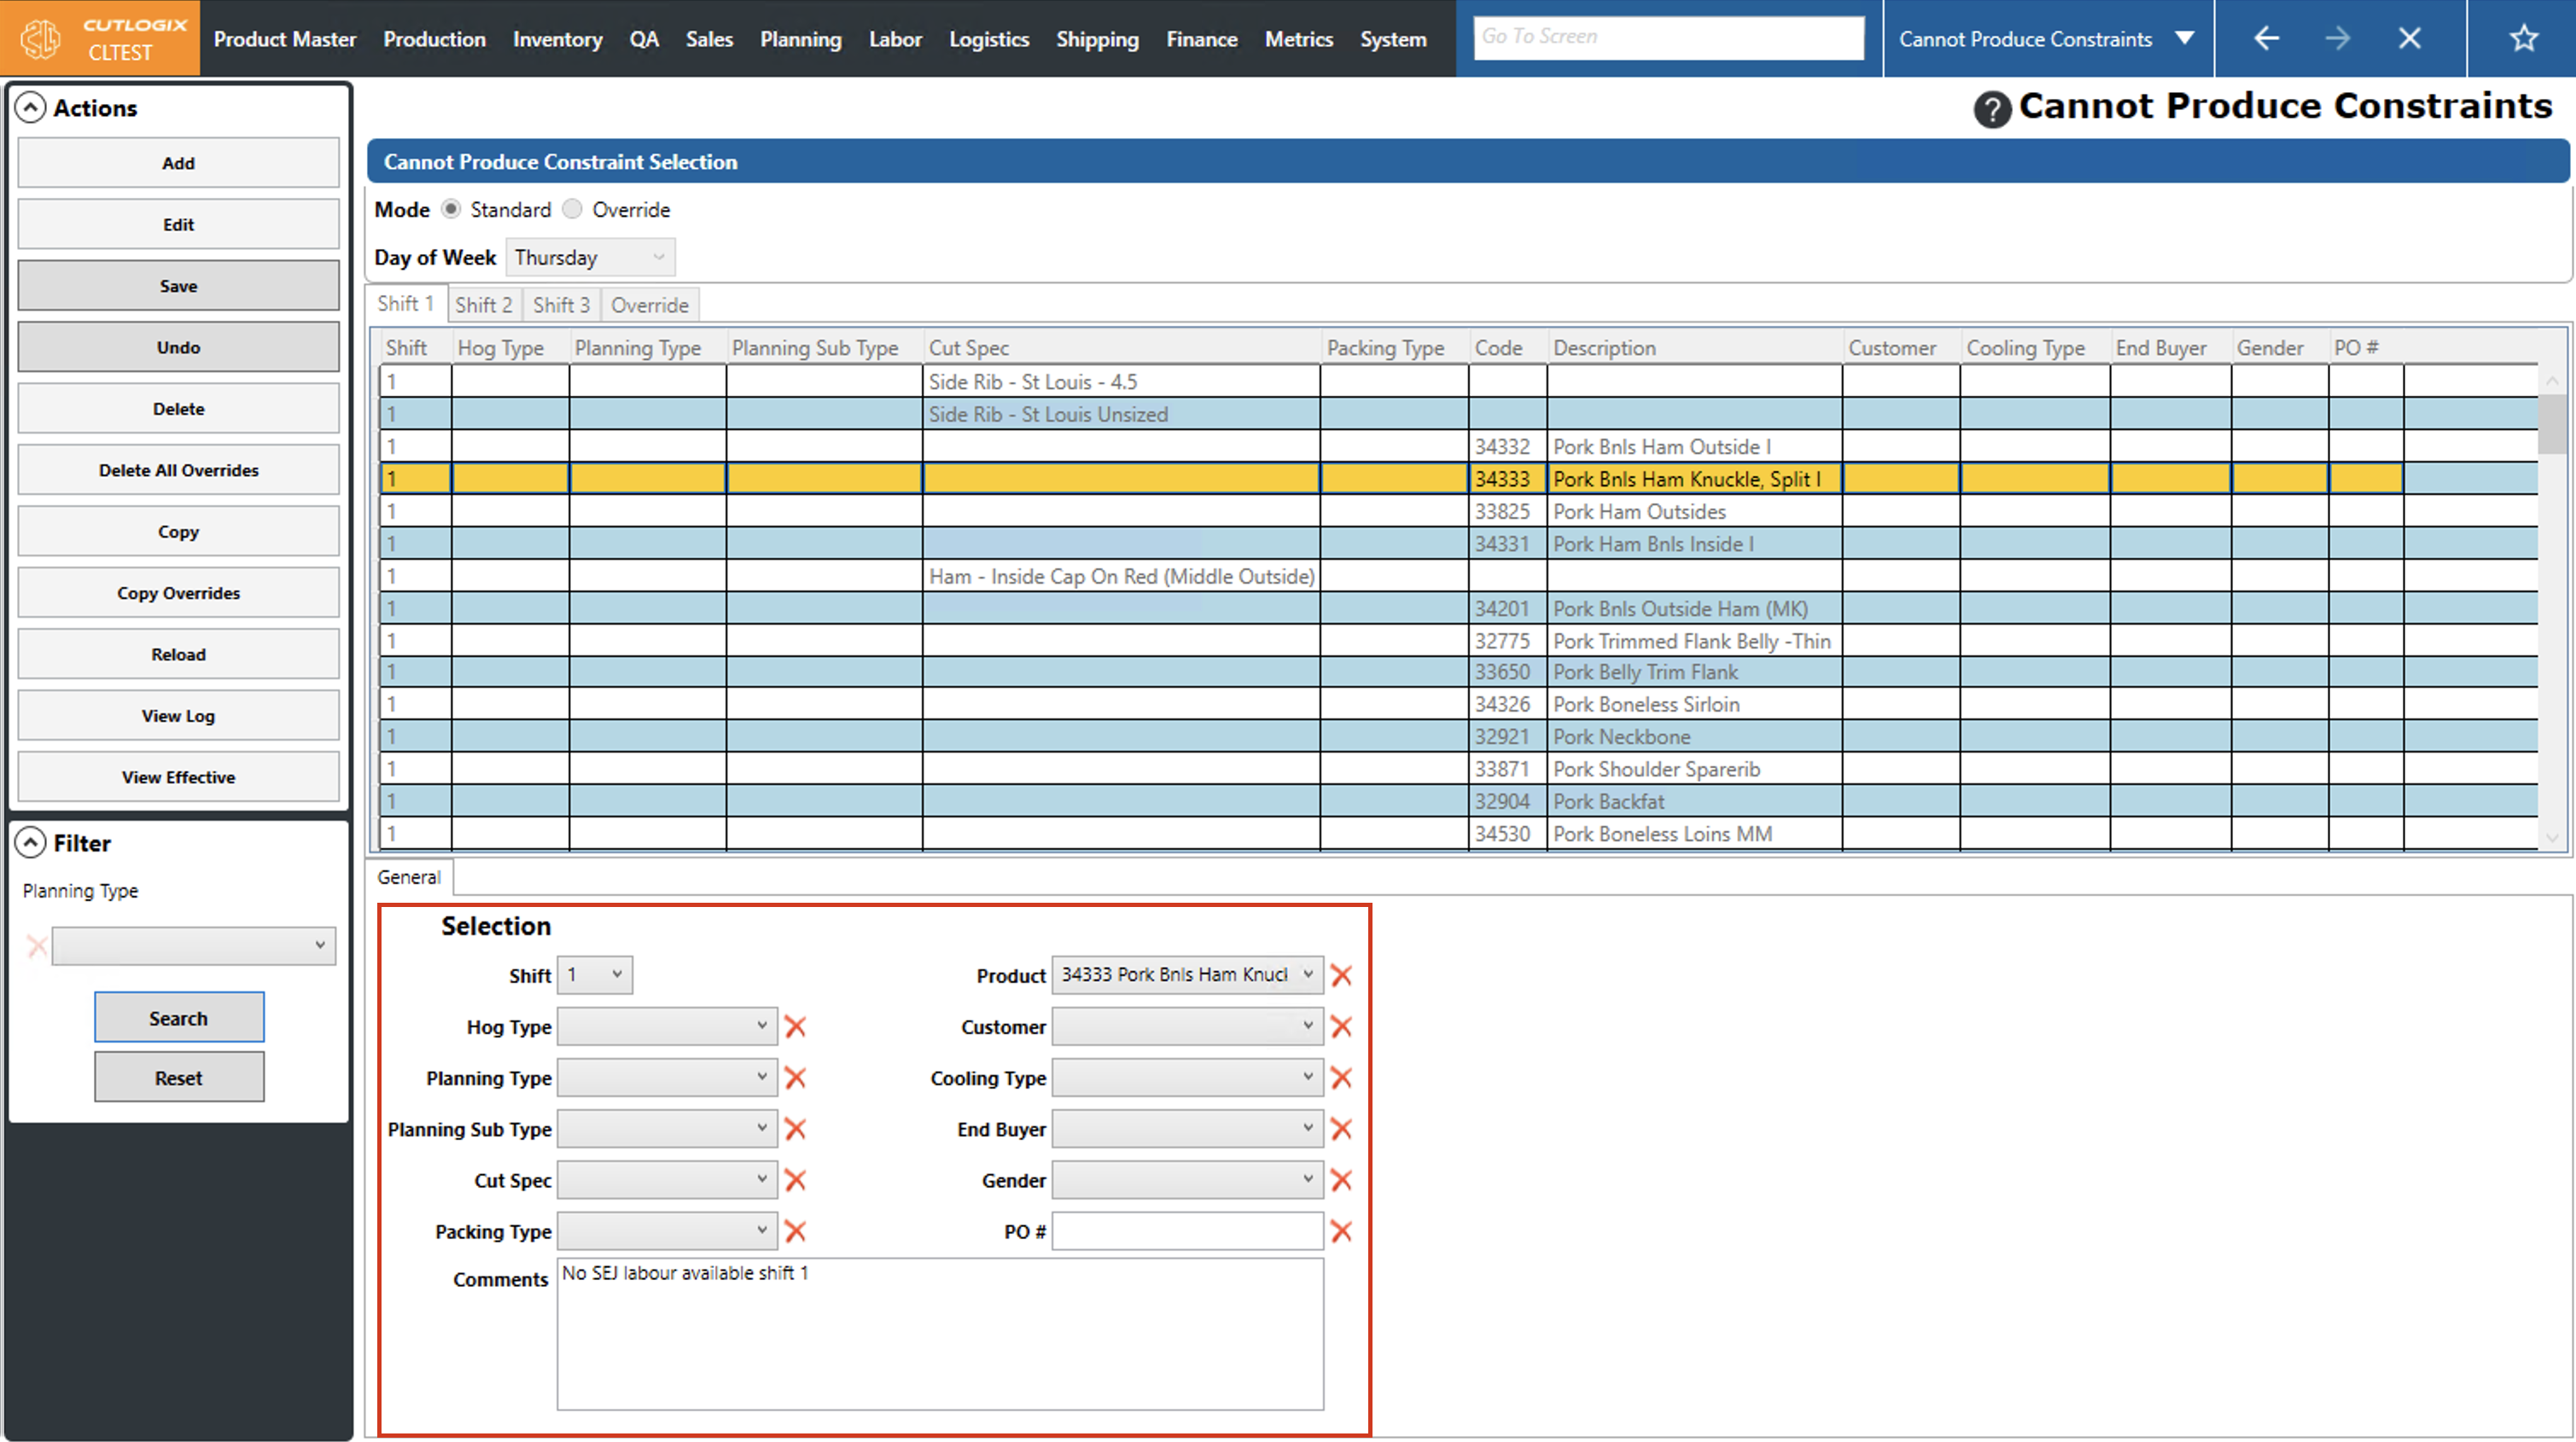
Step 3: Several fields will appear at the bottom of the page with all the information about the selected cannot produce constraint in them. Here you can make any necessary changes to the constraint that are needed.
Step 4: Once all the necessary changes have been made, click "Save" in the Actions Panel to save the changes to the cannot produce constraint. If you don't want to save your changes, clicking "Undo" will discard the changes.

How to Add Cannot Produce Overrides
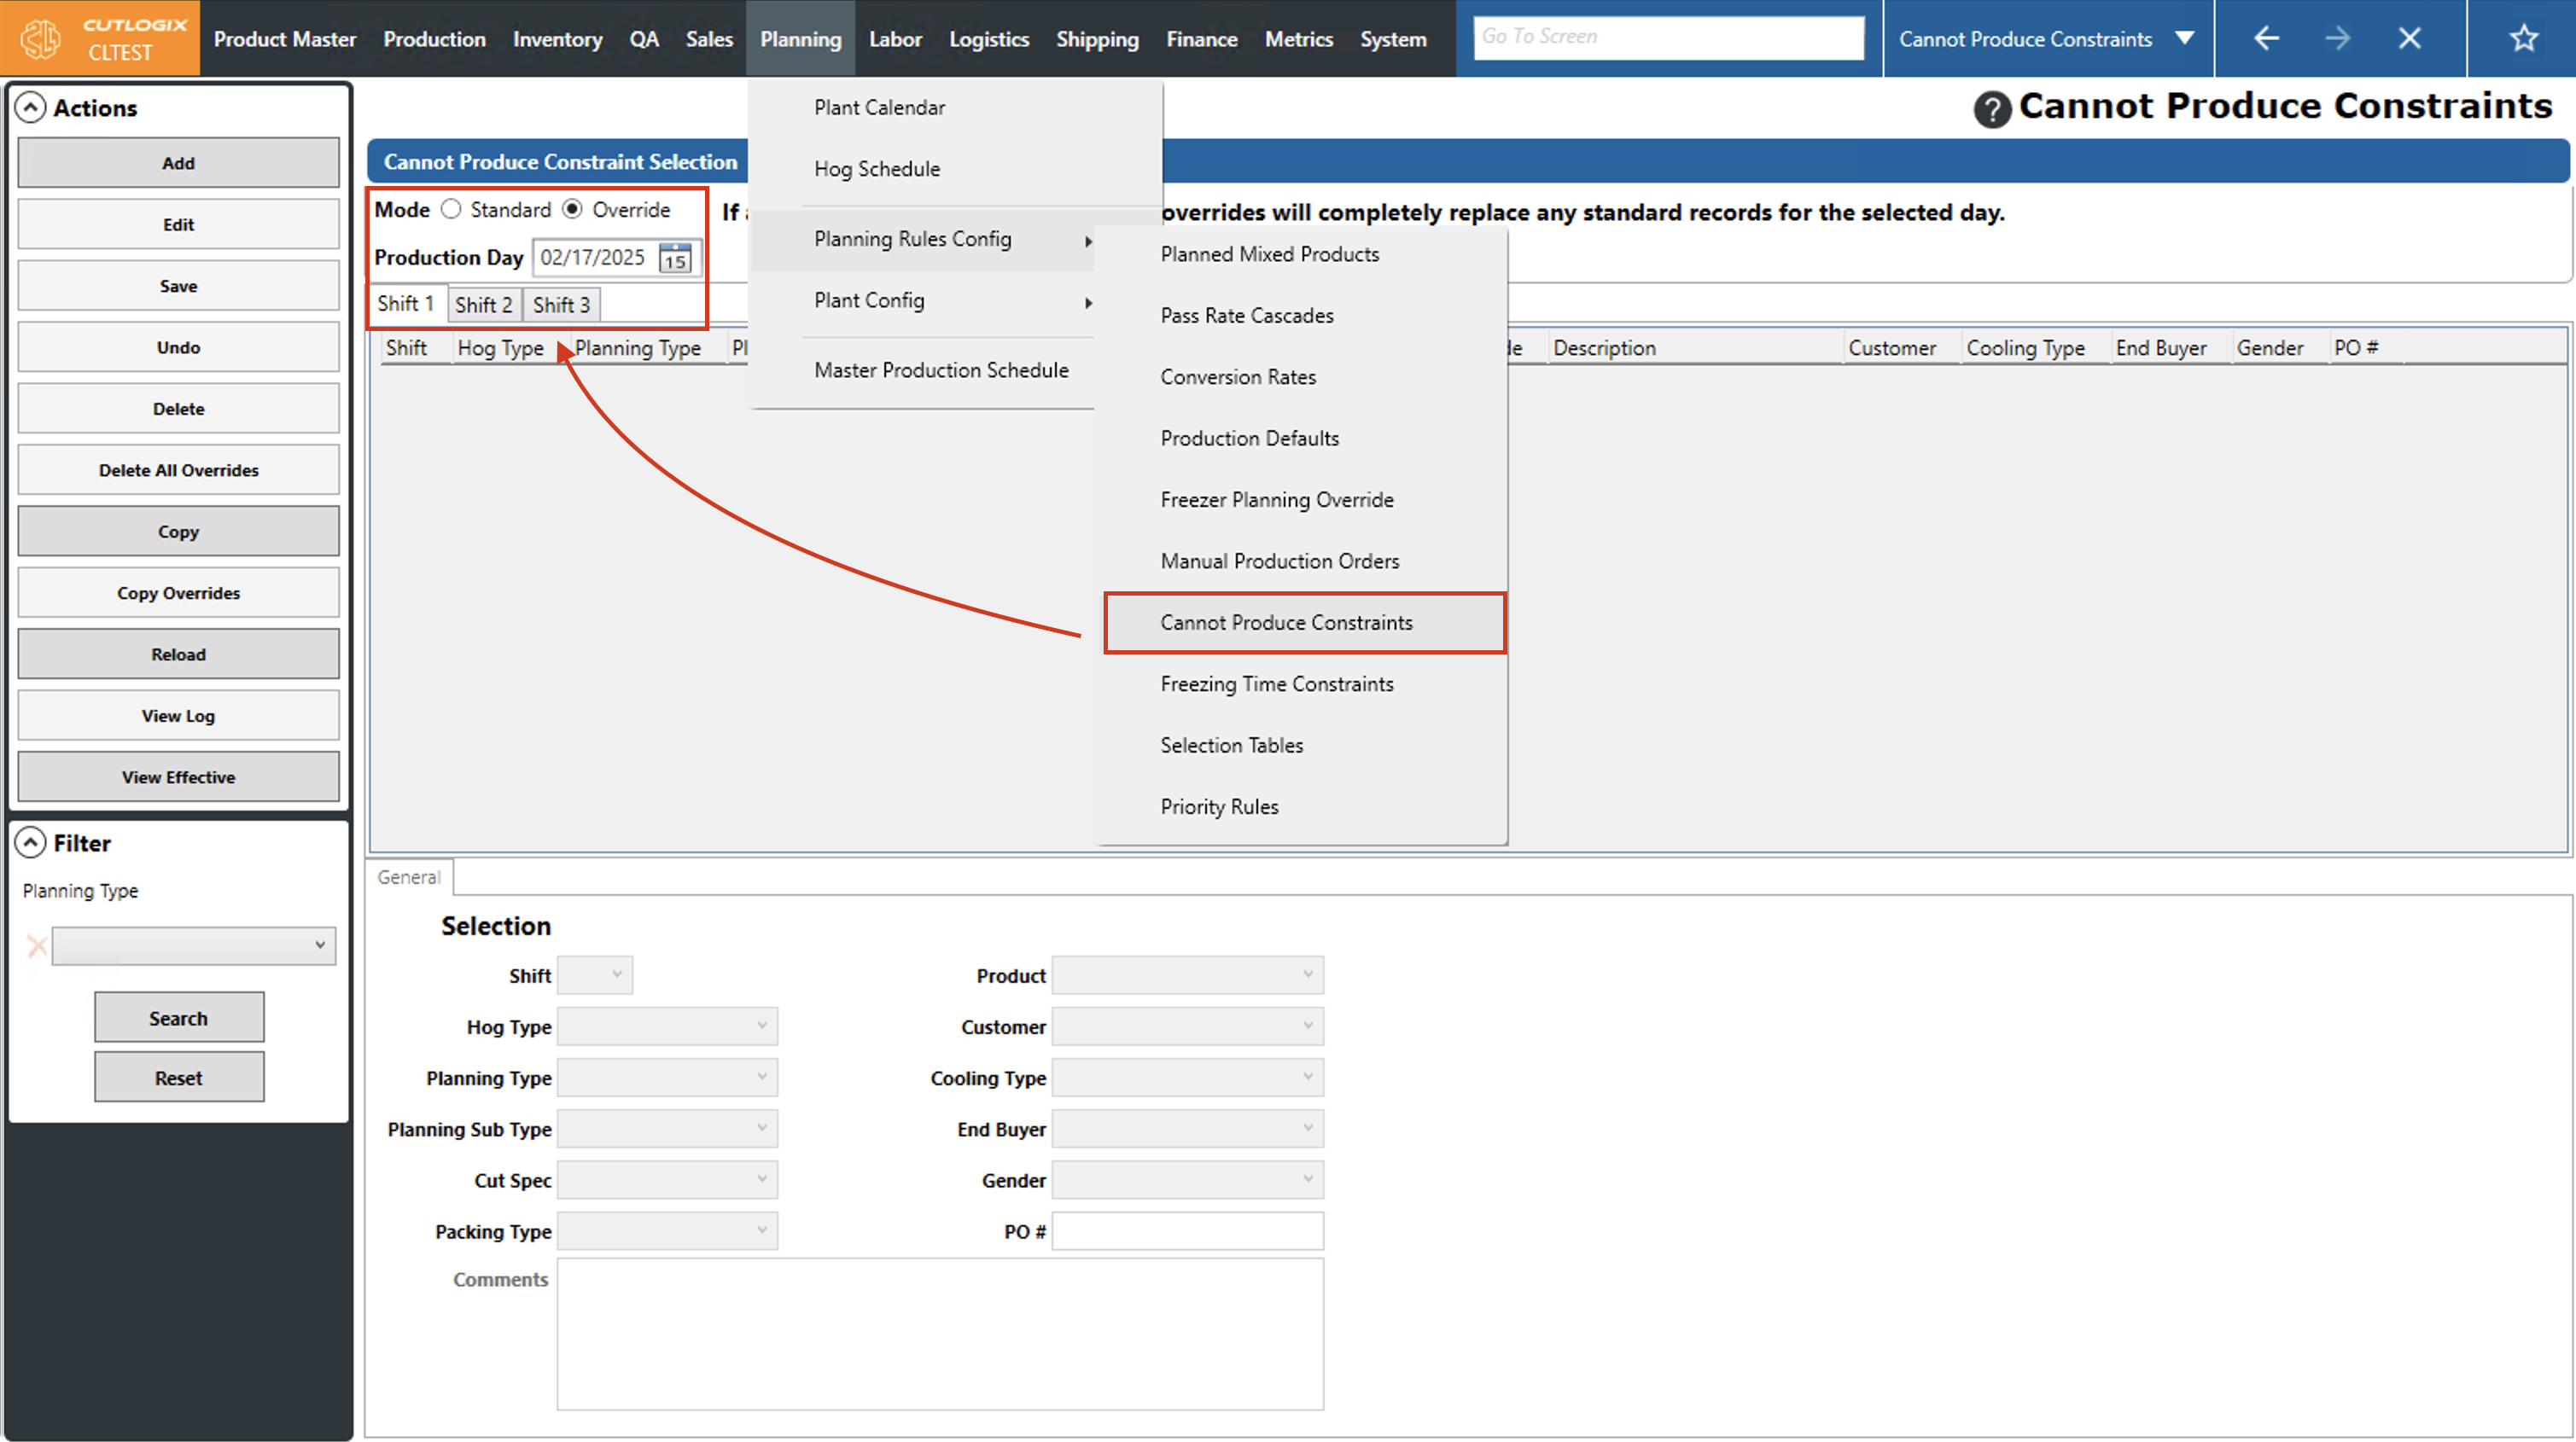
DemoStep 1: Navigate to the "Cannot Produce Constraints" page (Under the Planning menu → Planning Rules Config → Cannot Produce Constraints), then click on the "Override" option and choose a production date using the datepicker and the shift using the shift tabs.
Step 2: Click the "Add" button in the Actions Panel to add a cannot produce constraint override to the selected day.
Step 3: Several fields will appear at the bottom of the page where you can add details about the cannot produce constraint override. Fields highlighted in red are required and must be filled out before the new cannot produce constraint override can be saved. The required fields are as follows, note that once one of the required fields is filled out, the rest are optional besides the comments.
• Planning Type: The planning type that cannot be produced.
• Cut Spec: The cut spec that cannot be produced.
• Packing Type: The packing type of products that cannot be produced.
• Product: The product that cannot be produced.
• Comments: A comment explaining the reason for the cannot produce constraint.
Step 4: Once all the required information has been added to the cannot produce constraint override, click "Save" in the Actions Panel to save it. If you don't want to save the new cannot produce constraint override, clicking "Undo" in the Actions Panel will discard it, and it won't be saved. Once saved it will appear in the list of overrides on the day and shift that it was added to.
How to Edit Cannot Produce Overrides
DemoStep 1: Navigate to the "Cannot Produce Constraints" page (Under the Planning menu → Planning Rules Config → Cannot Produce Constraints), then click on the "Override" option and choose a production date using the datepicker and the shift using the shift tabs.
Step 2: Click on the cannot produce constraint override that you want to modify (it will be highlighted in orange once selected), then click the "Edit" button.
Step 3: Several fields will appear at the bottom of the page with all the information about the selected cannot produce constraint override in them. Here you can make any necessary changes to the constraint that are needed.

Step 4: Once all the necessary changes have been made, click "Save" in the Actions Panel to save the changes to the cannot produce constraint override. If you don't want to save your changes, clicking "Undo" will discard the changes.
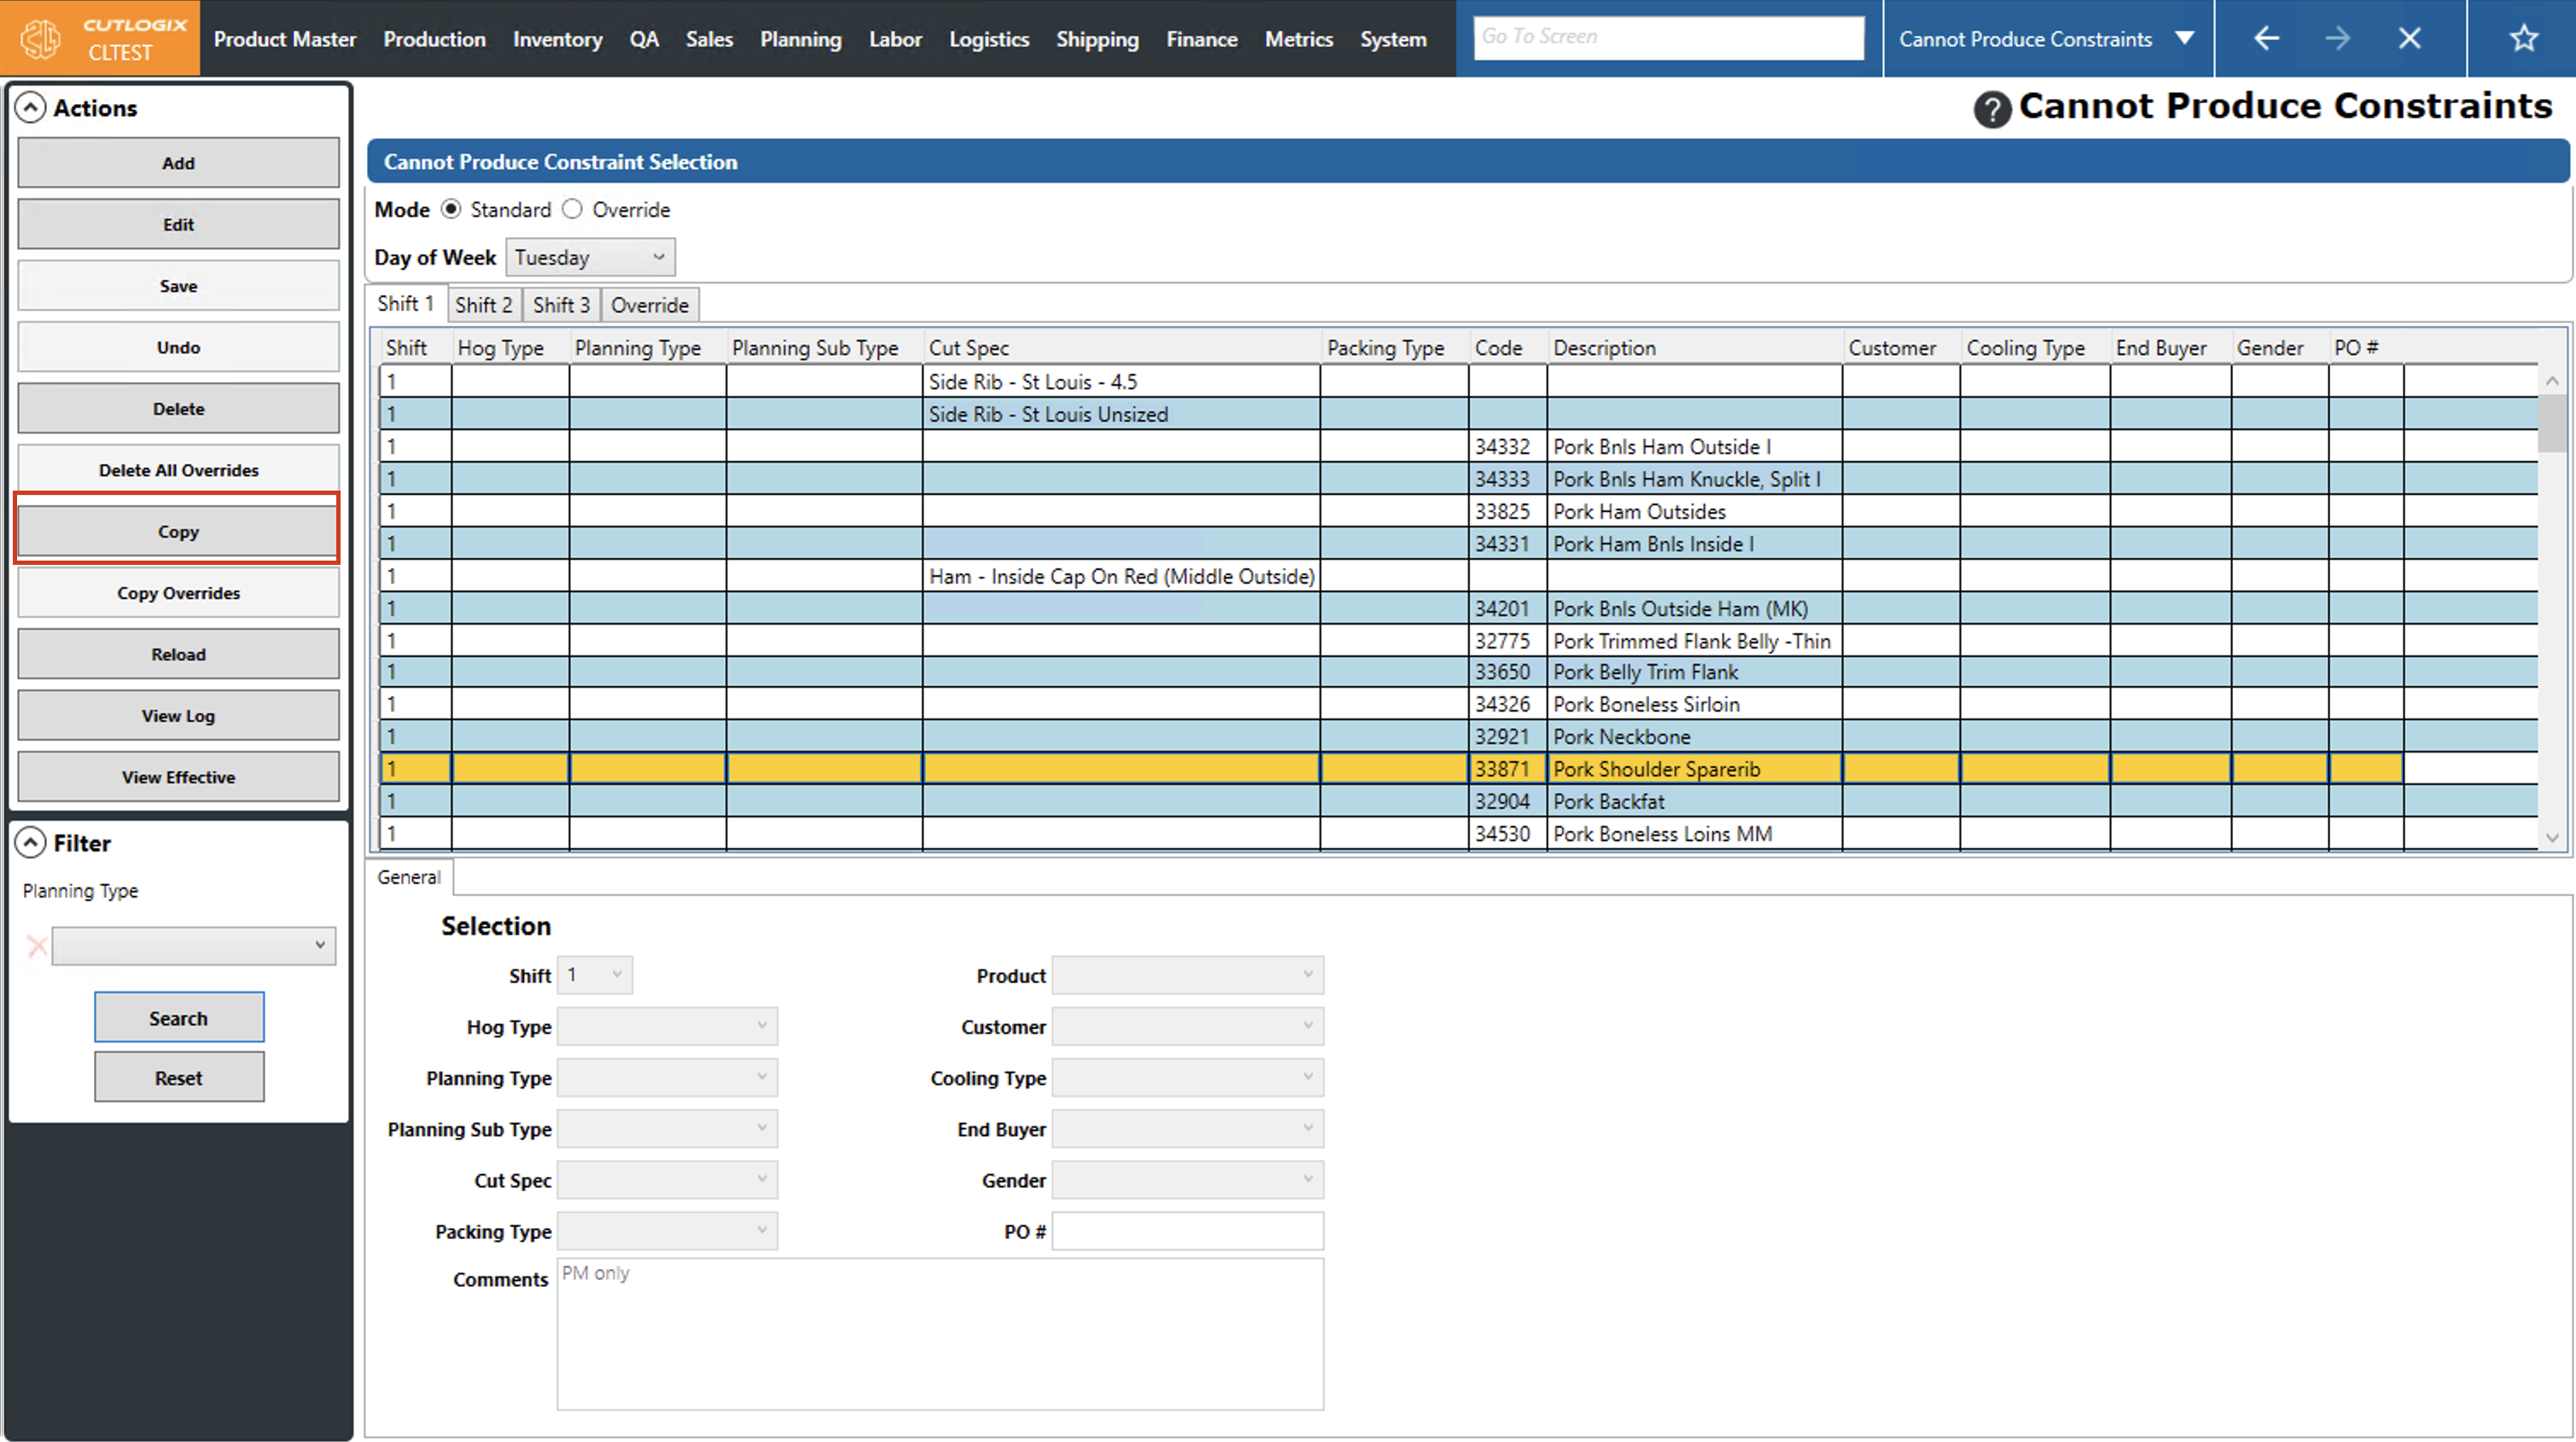
How to Copy Cannot Produce Constraints
DemoStep 1: Navigate to the "Cannot Produce Constraints" page (Under the Planning menu → Planning Rules Config → Cannot Produce Constraints). Select the day of the week that you would like to copy to another day using the "Day of Week" drop-down list.
Step 2: Click the "Copy" button in the Actions Panel.
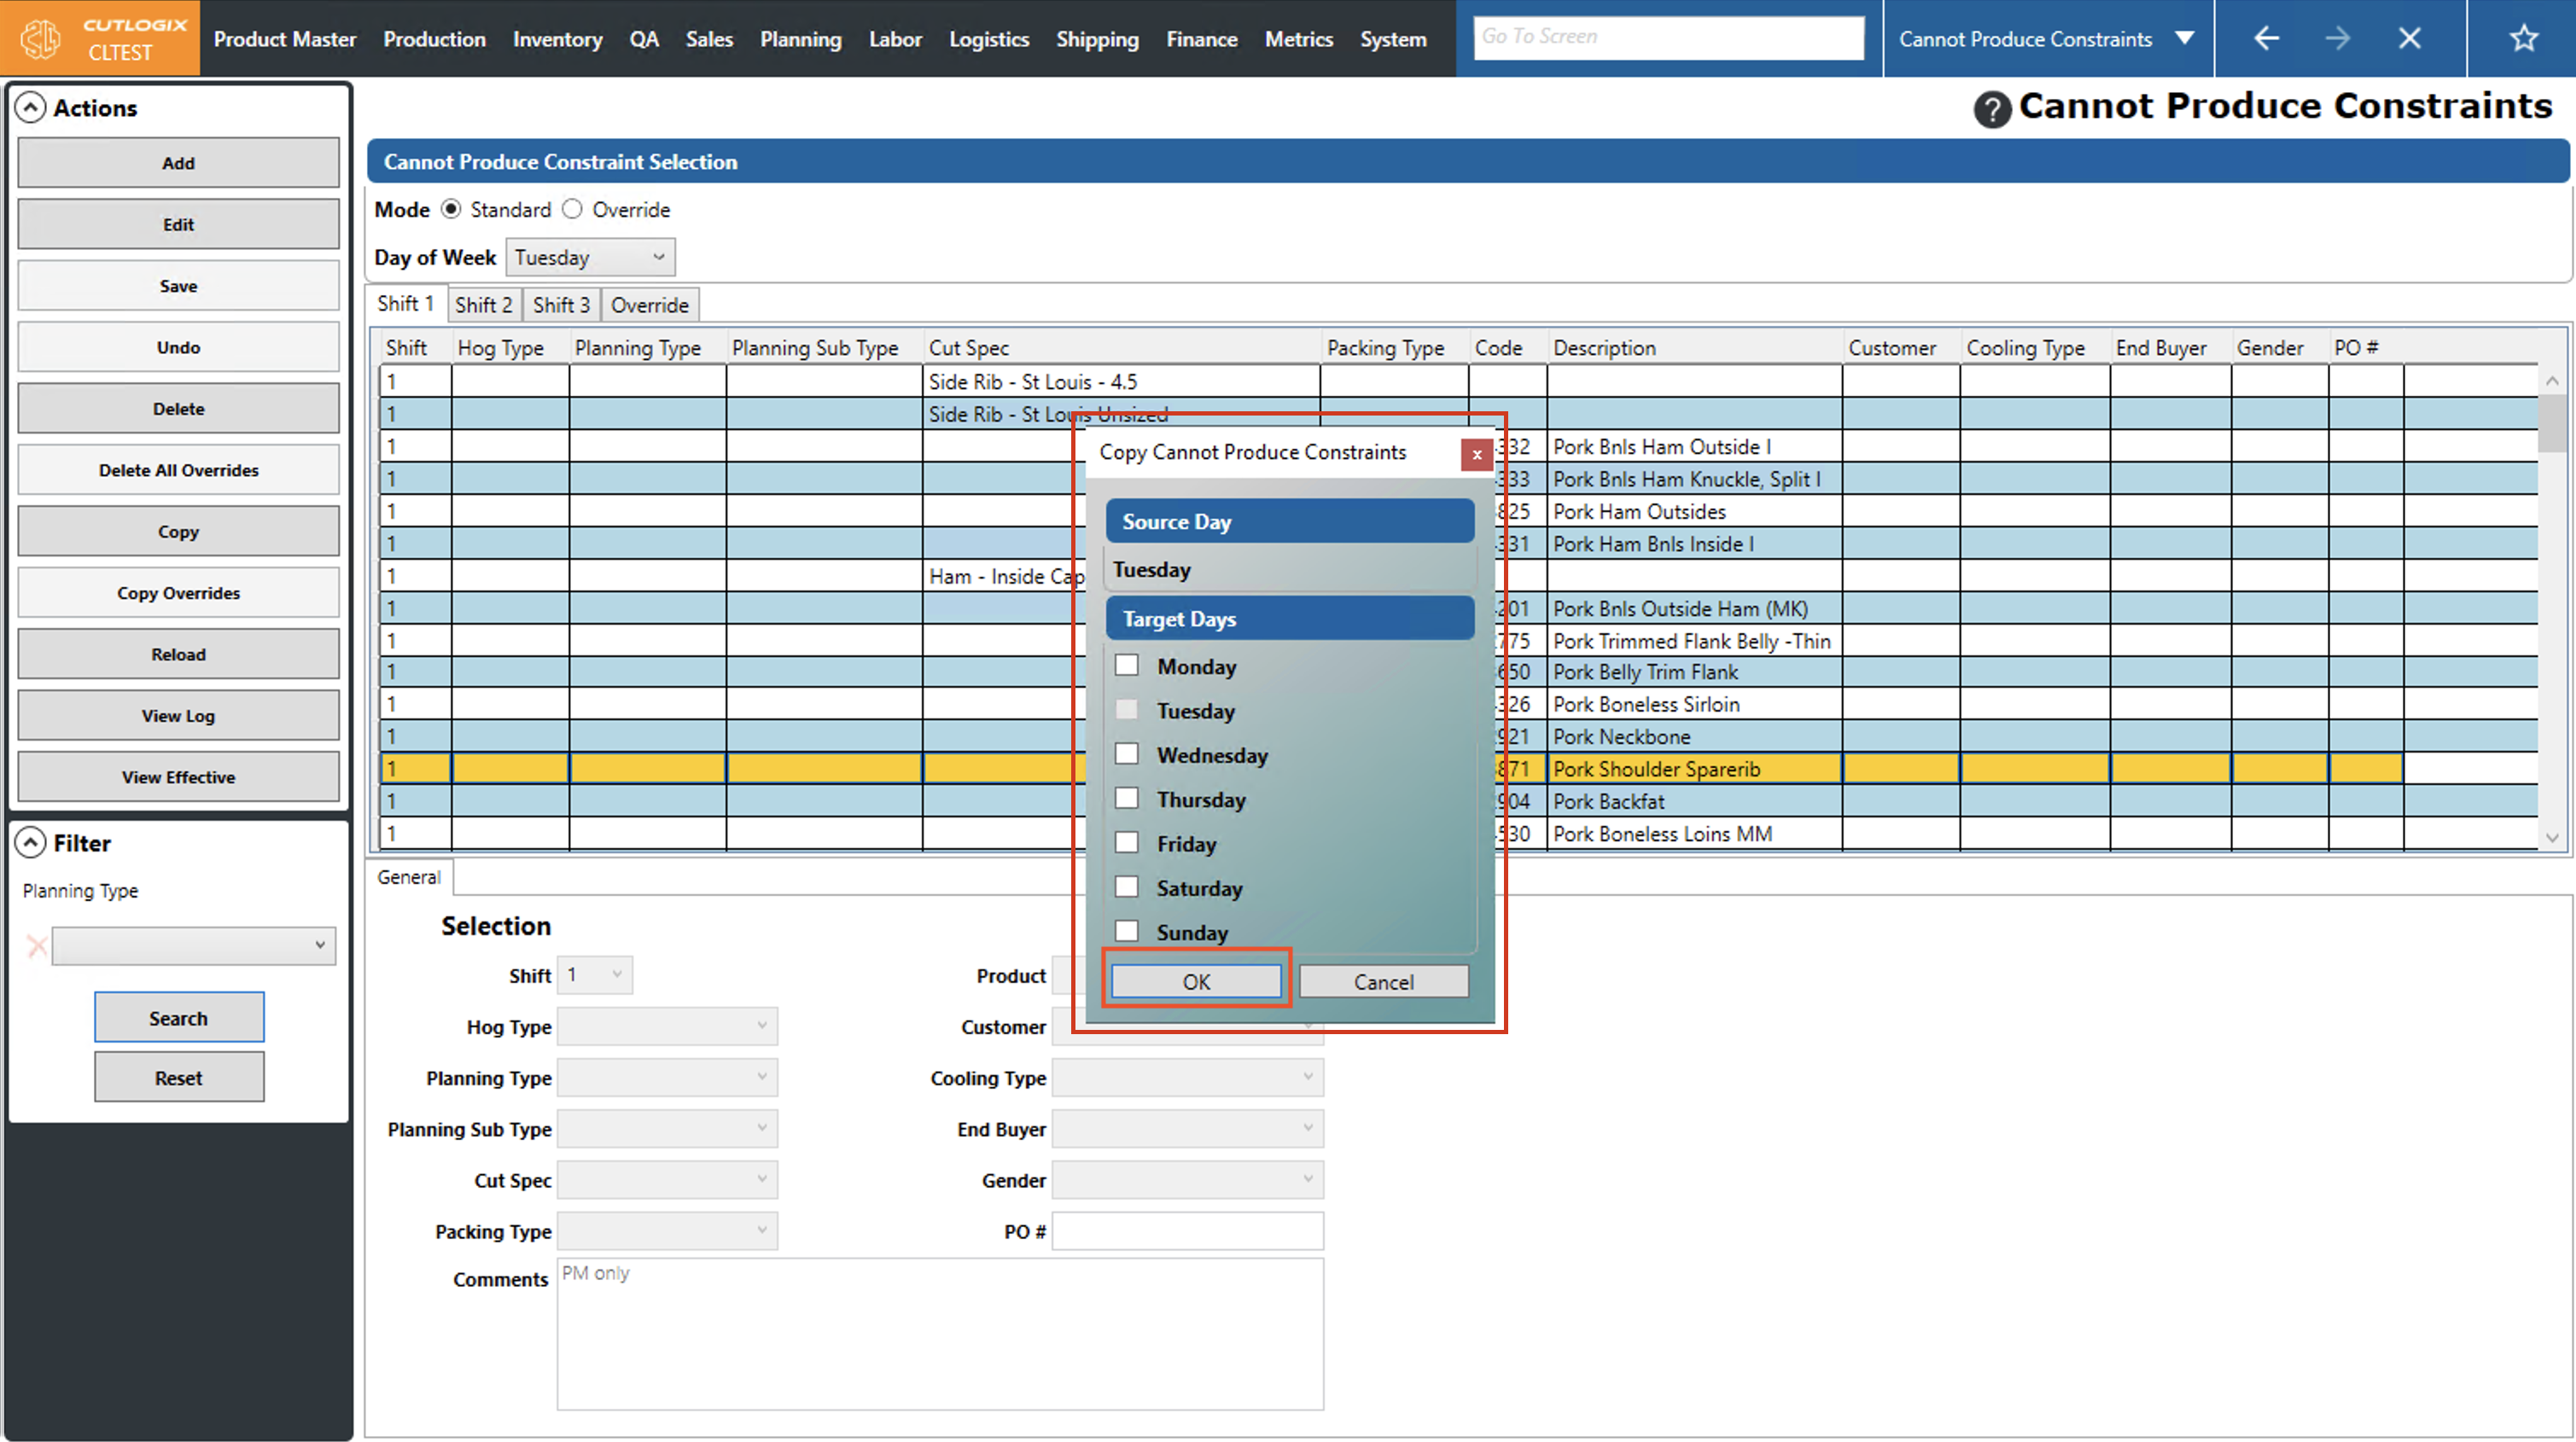
Step 3: A dialog will appear that shows the source day that you have chosen to copy and a list of days (Targets) that you can copy the cannot produce constraints to. Using the checkboxes beside the list of target days, check off the days that you want to copy the cannot produce constraints to. Once all the days have been selected that you want to copy to, click "OK" to complete the copying of the cannot produce constraints. If you don't want to copy the cannot produce constraints, clicking "Cancel" will close the dialog and the constraints will not be copied.
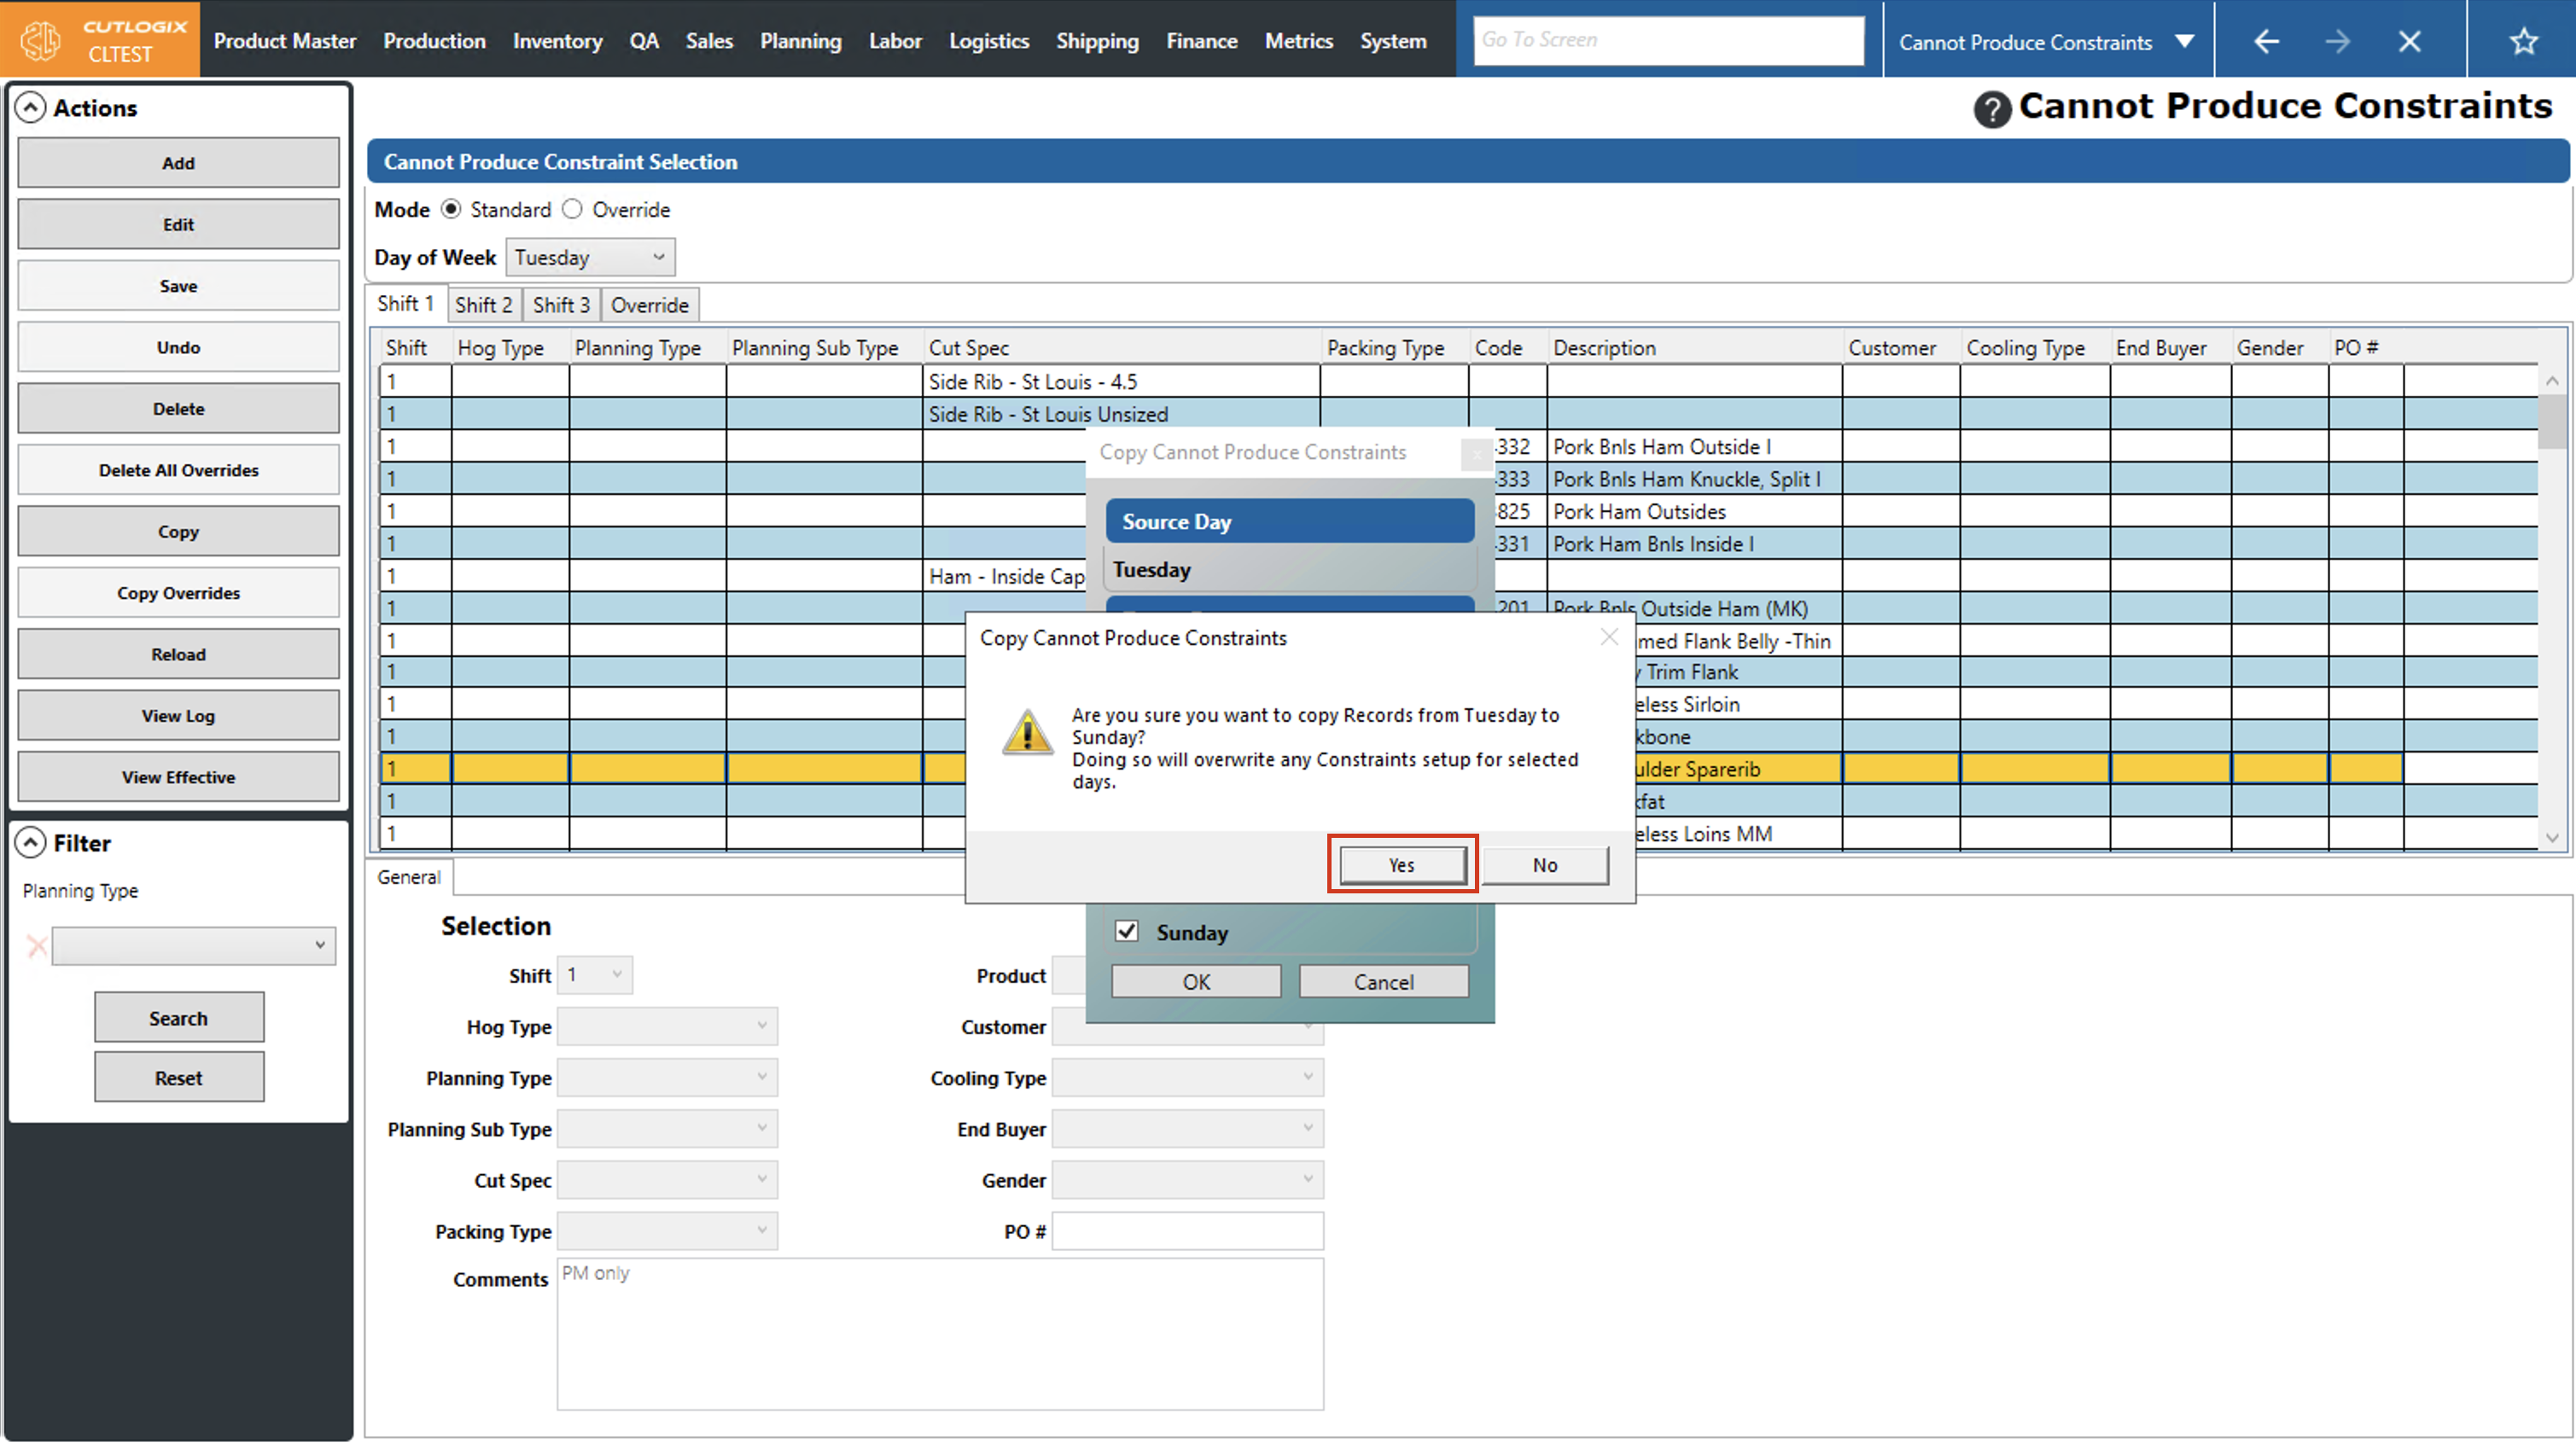
Step 4: After clicking "OK," a confirmation dialog will appear. It will ask if you're sure that you want to copy records from the source day to the target day as well as say that doing so will override any constraints setup for the target day. Click "OK", if you want to proceed with copying. If you don't want to proceed, click "No" and the dialog will close.
How to Copy Cannot Produce Constraint Overrides
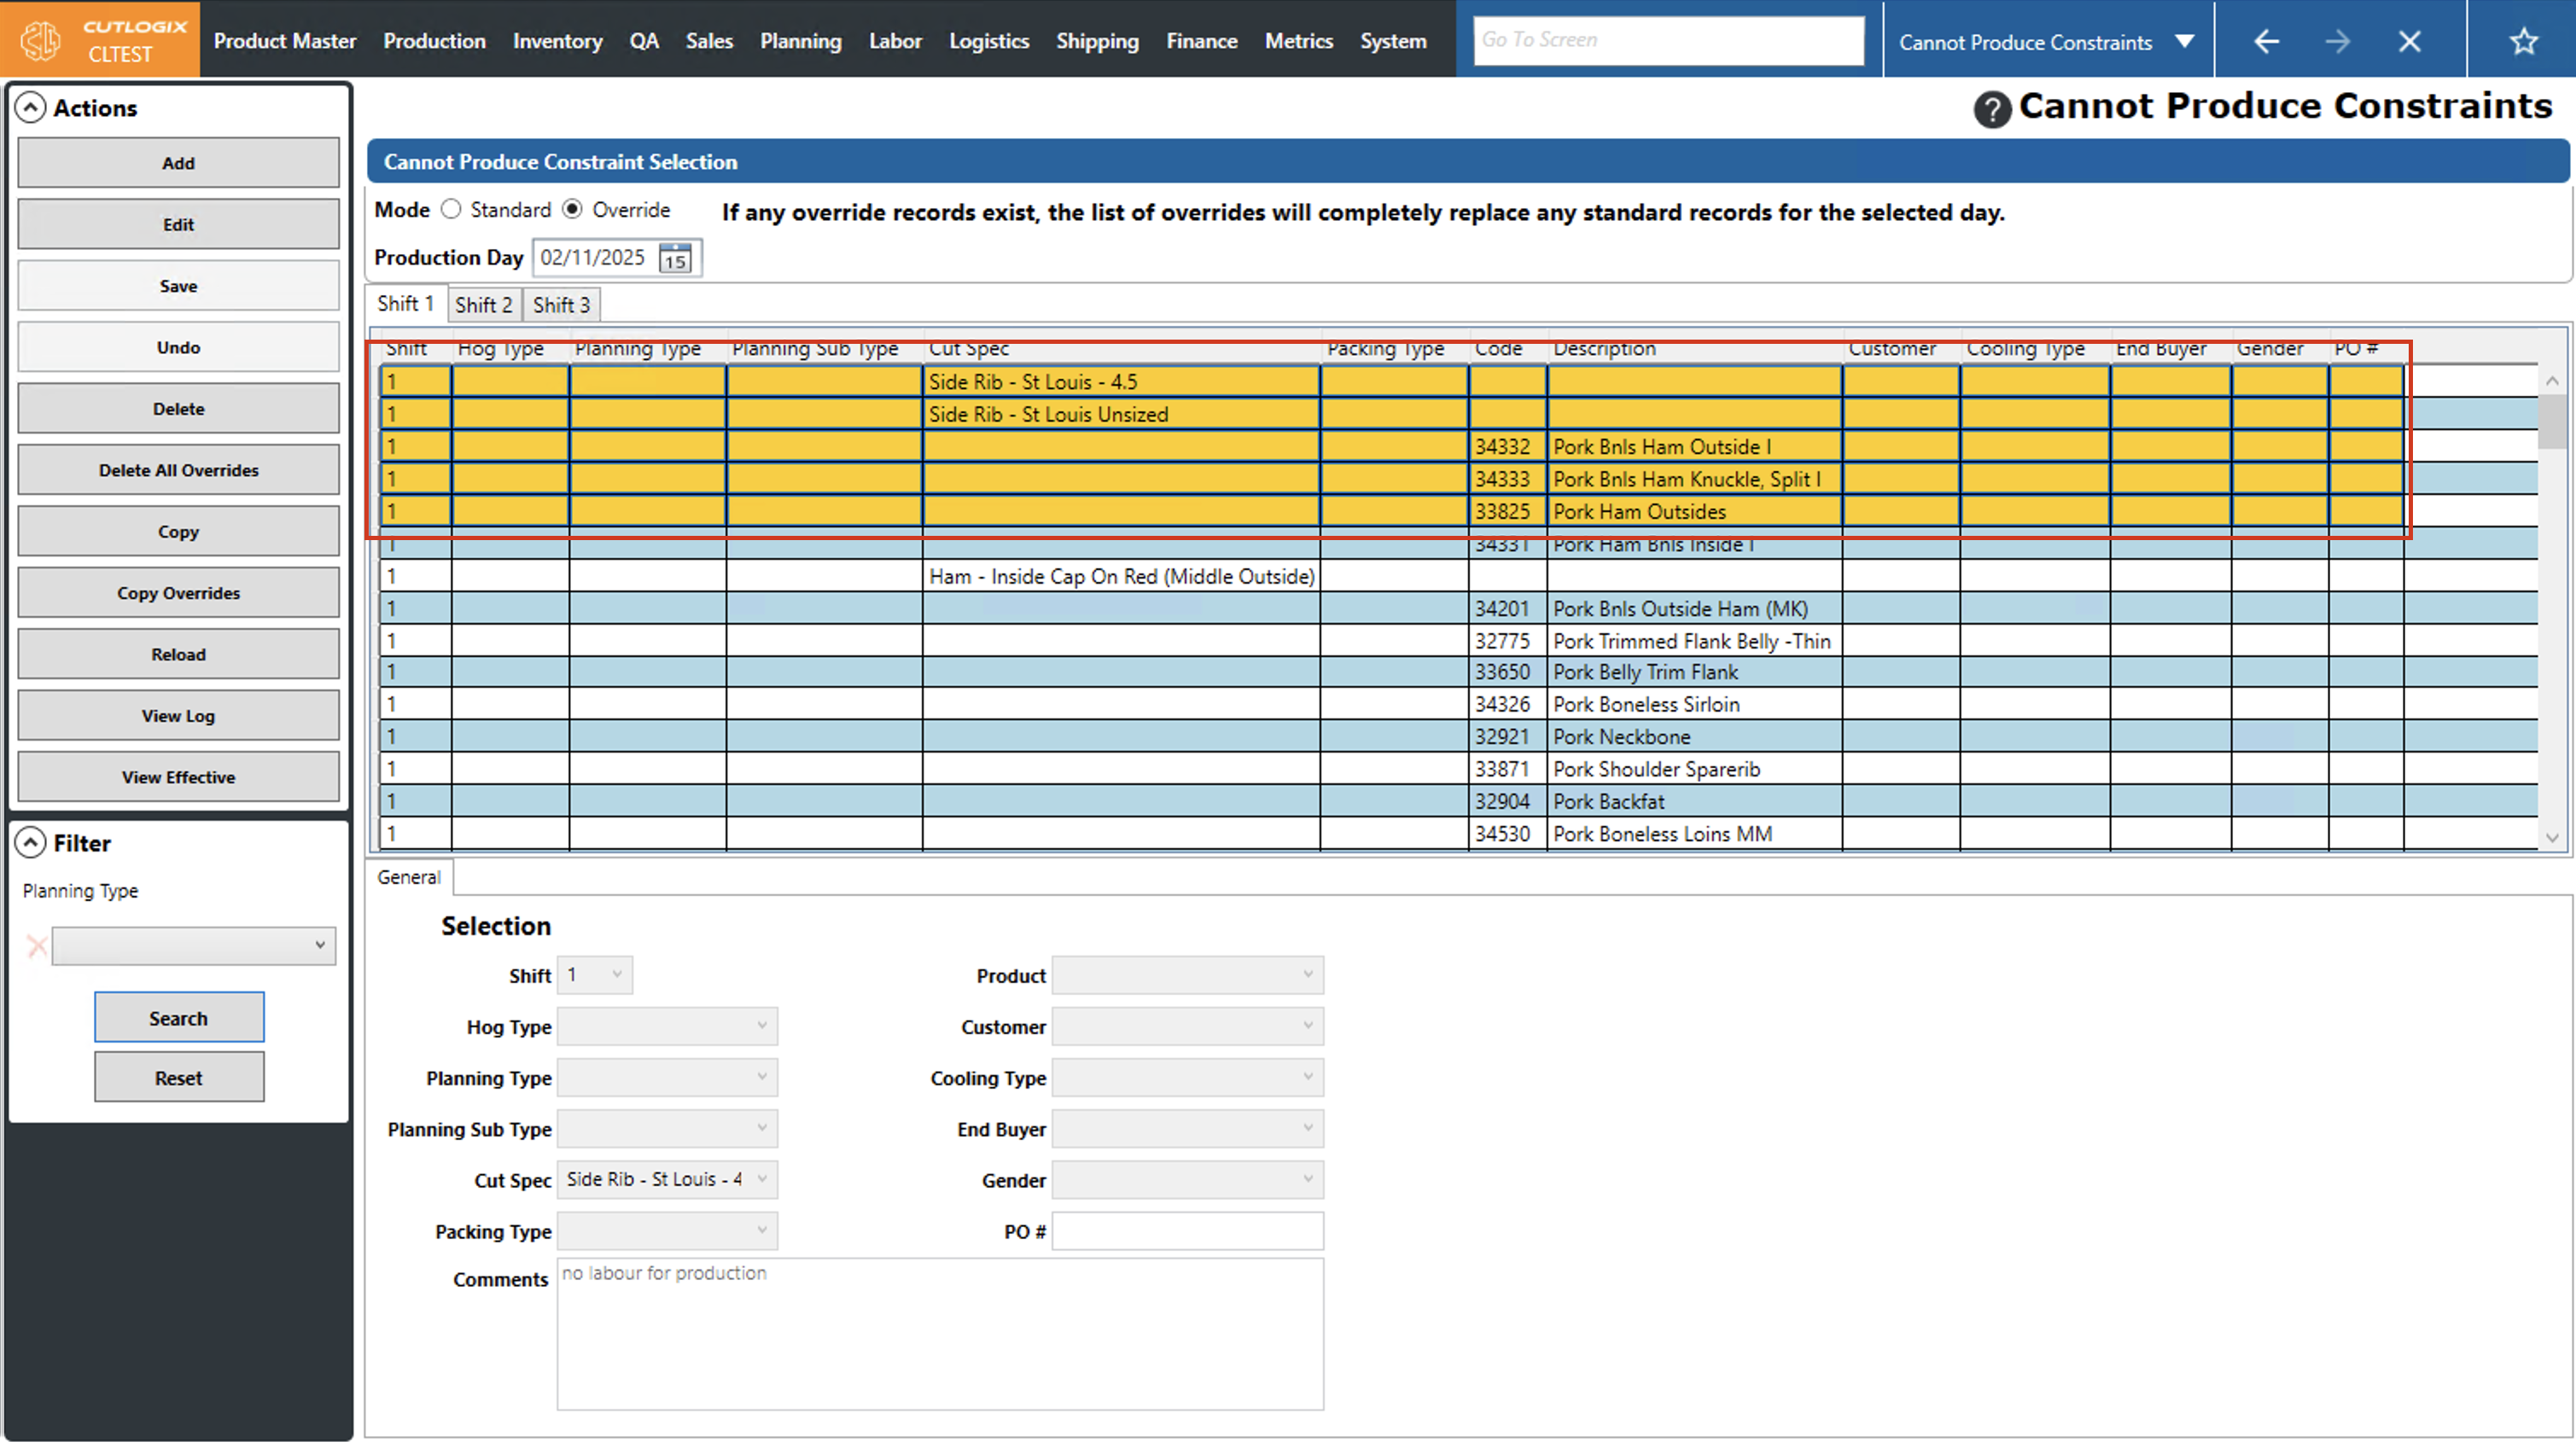
DemoStep 1: Navigate to the "Cannot Produce Constraints" page (Under the Planning menu → Planning Rules Config → Cannot Produce Constraints). Click on the "Override" option, then choose the production day that you want to copy overrides from by using the "Production Day" datepicker (click on the calendar icon).
Step 2: Choose the overrides that you want to copy by clicking on them (they will be highlighted in orange once selected). To select multiple overrides to copy, you can click and drag your cursor over the ones you want to copy, or hold the "CTRL" button and click on each individual override that you want to copy.
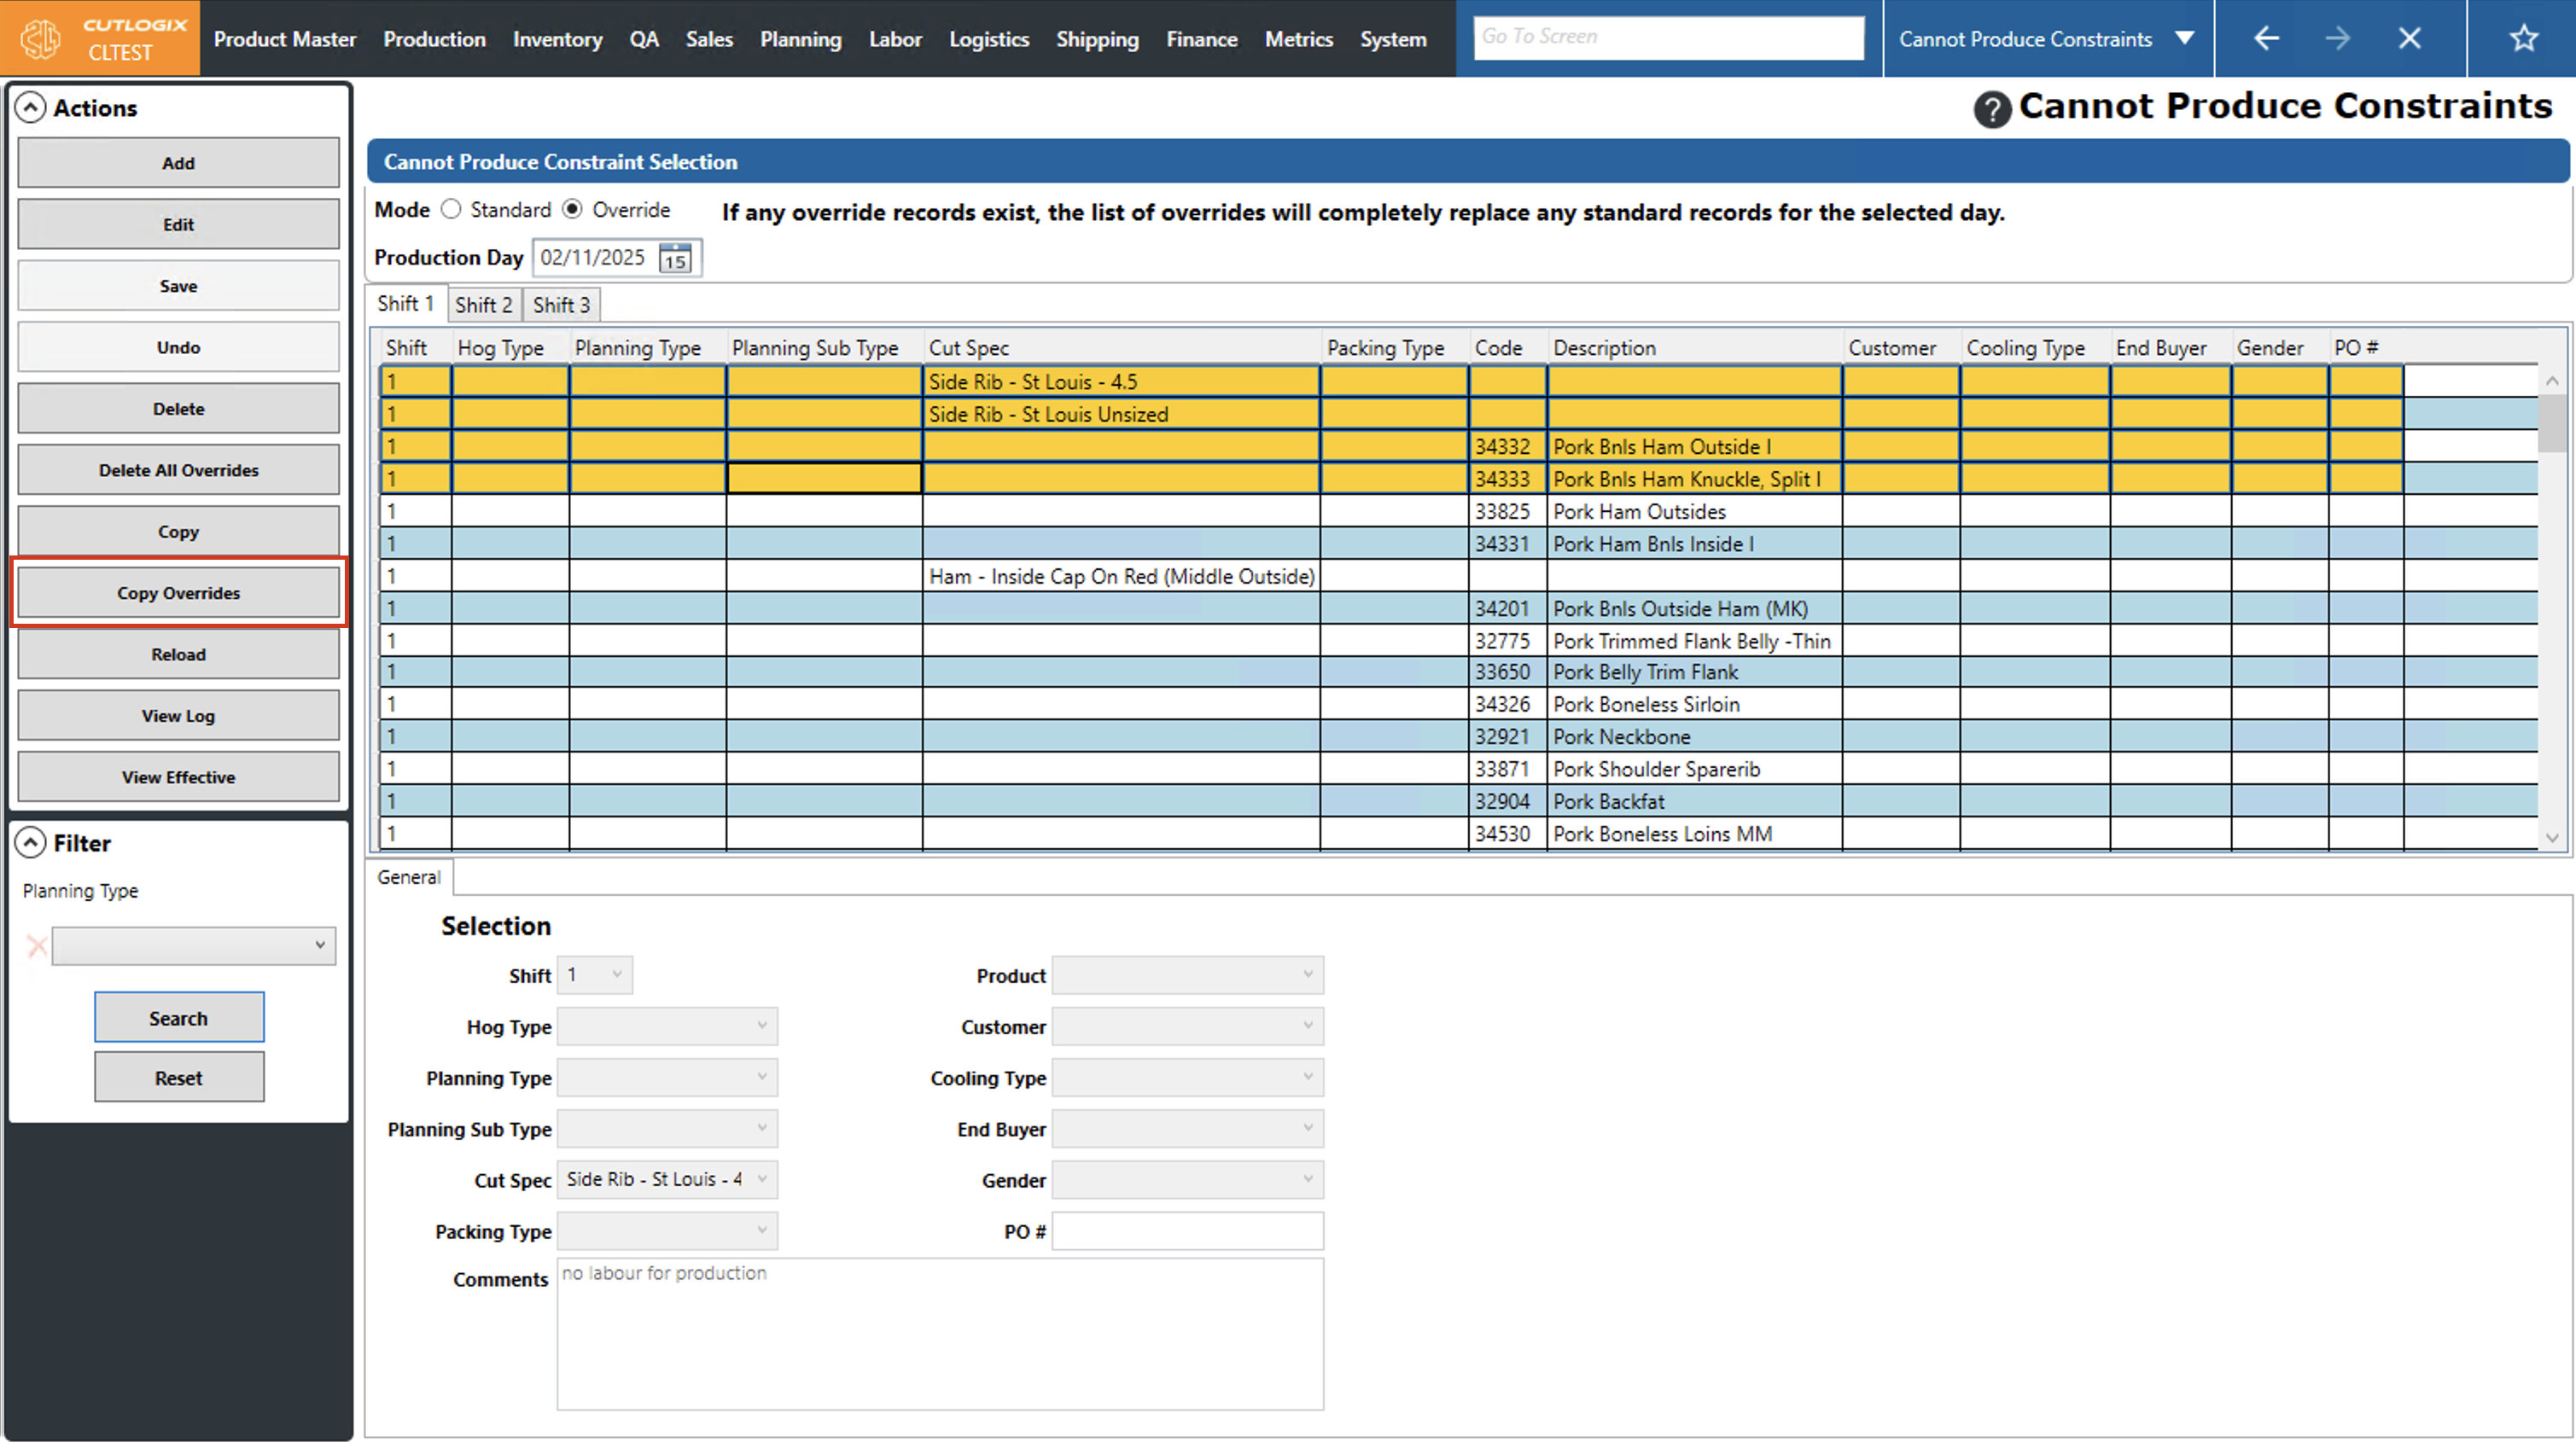
Step 3: Click the "Copy Overrides" button in the Actions Panel.
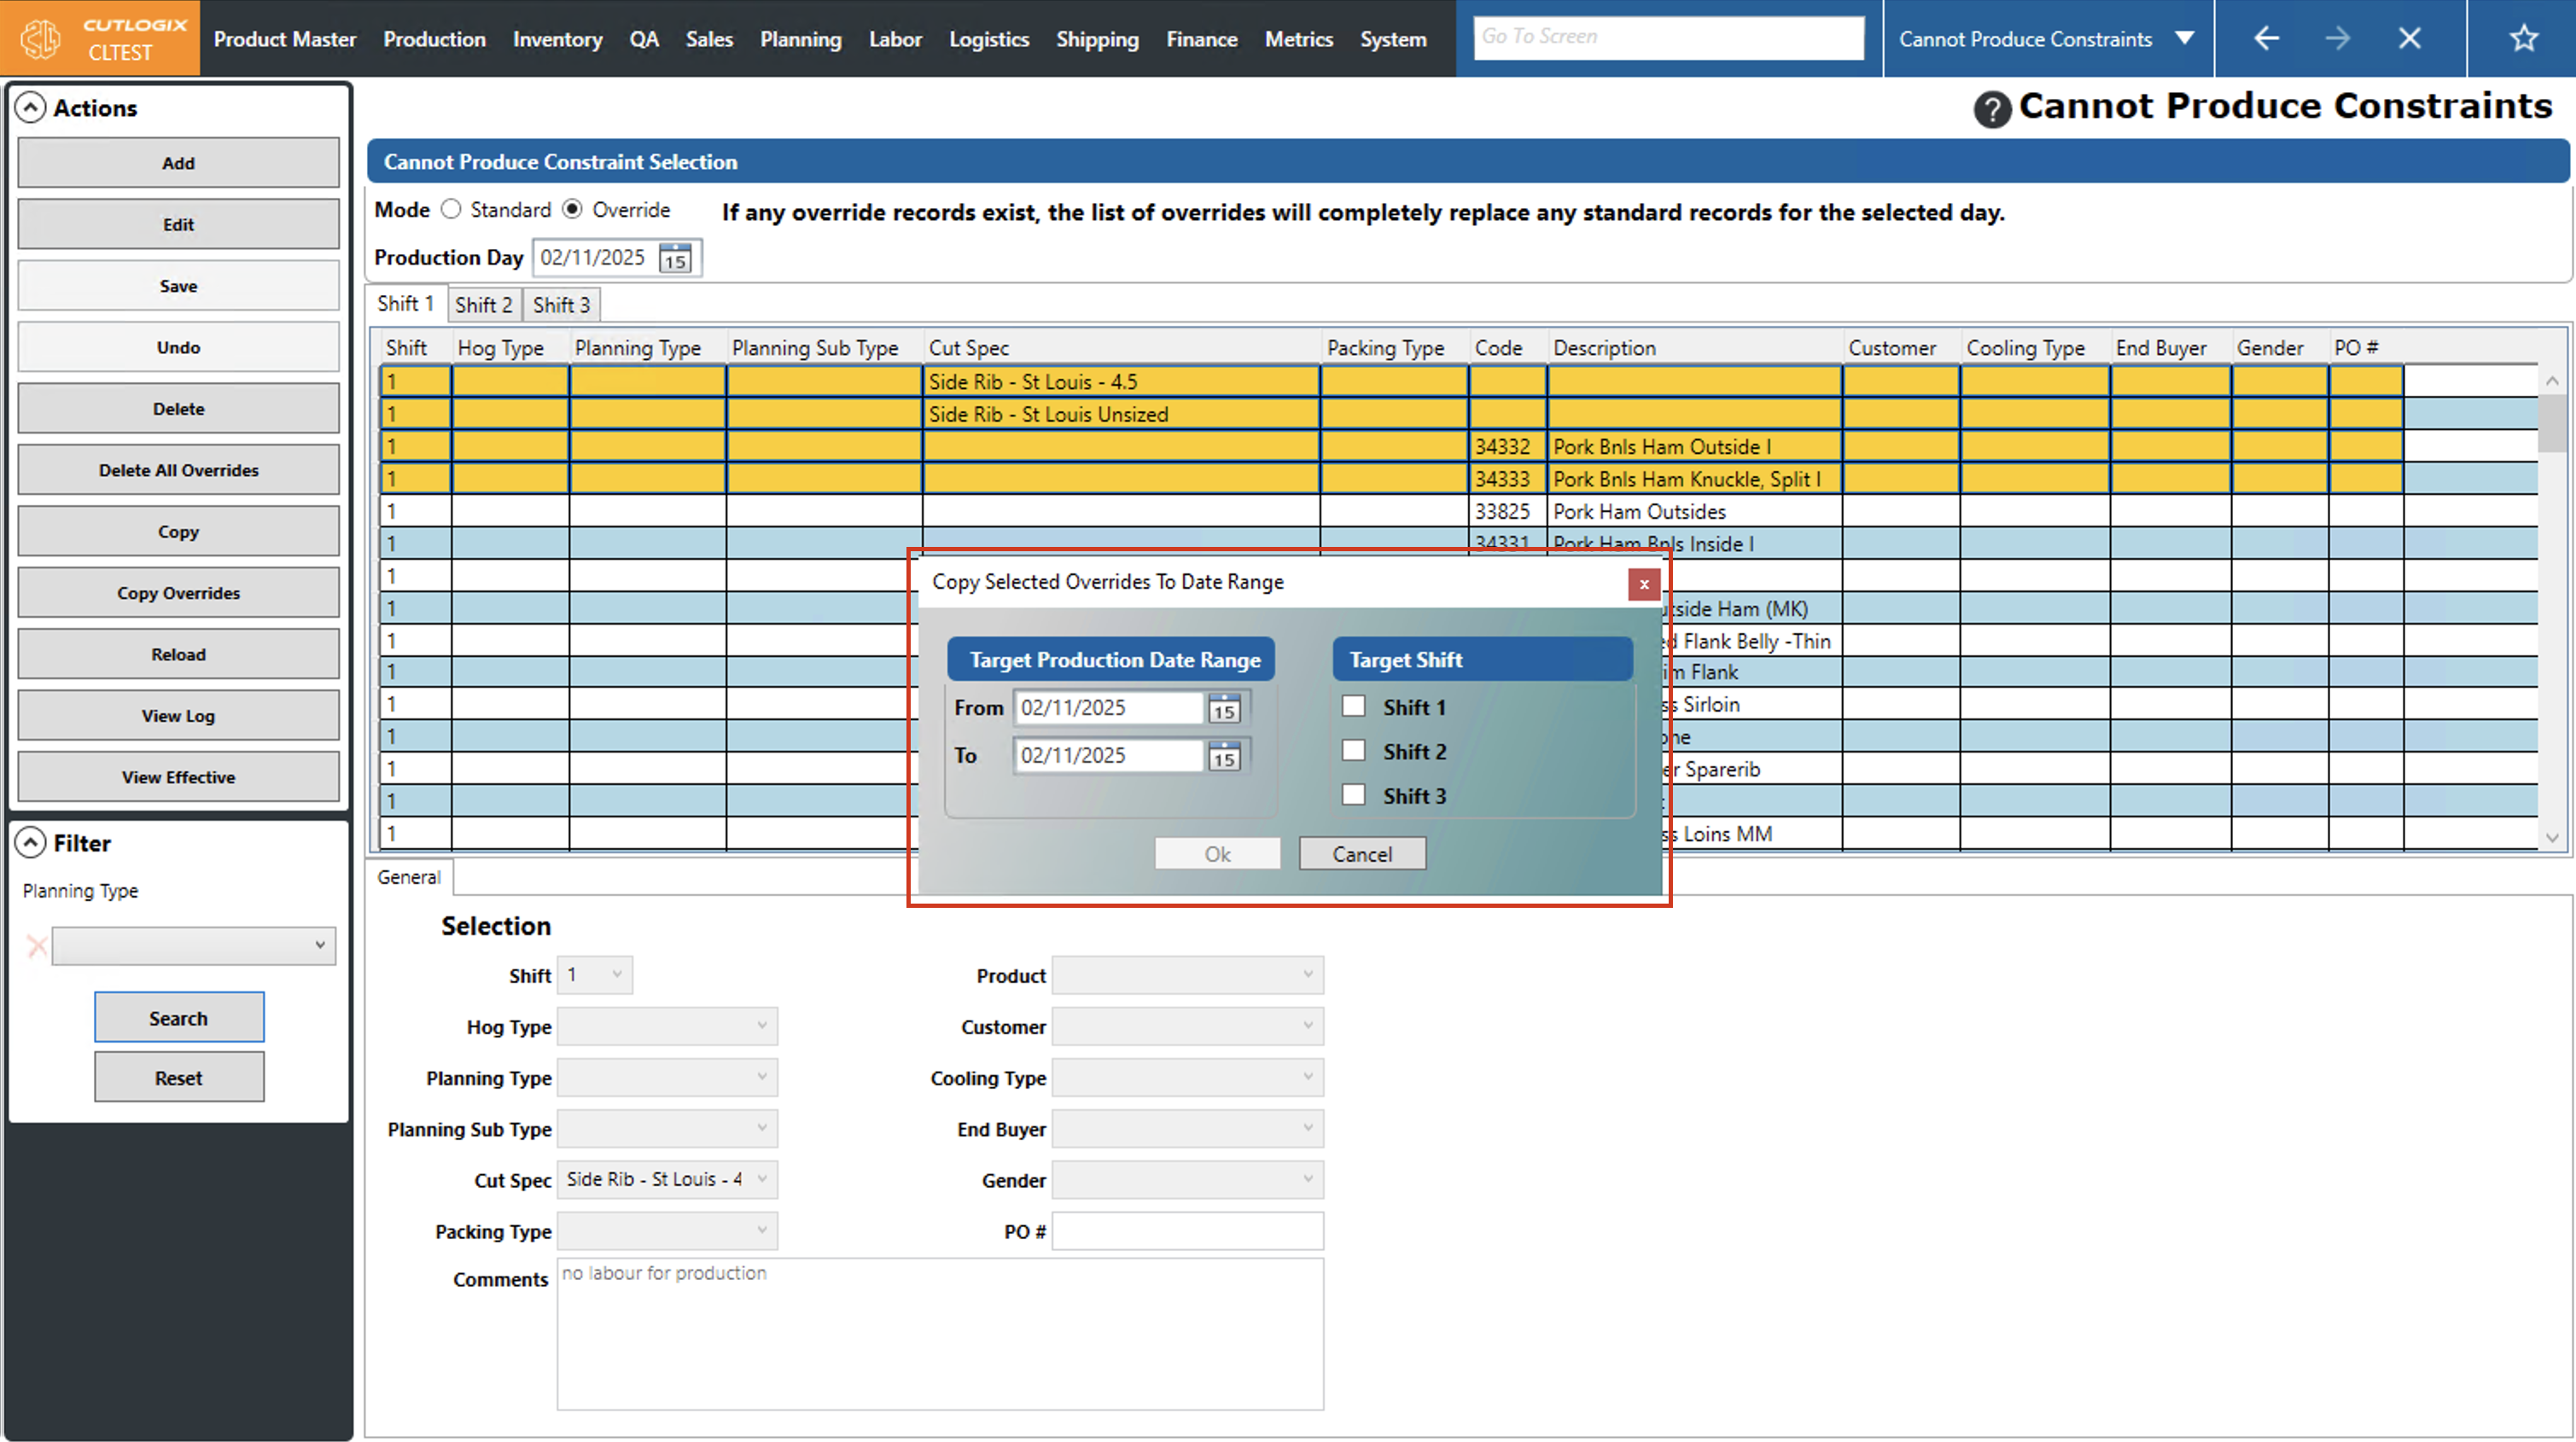
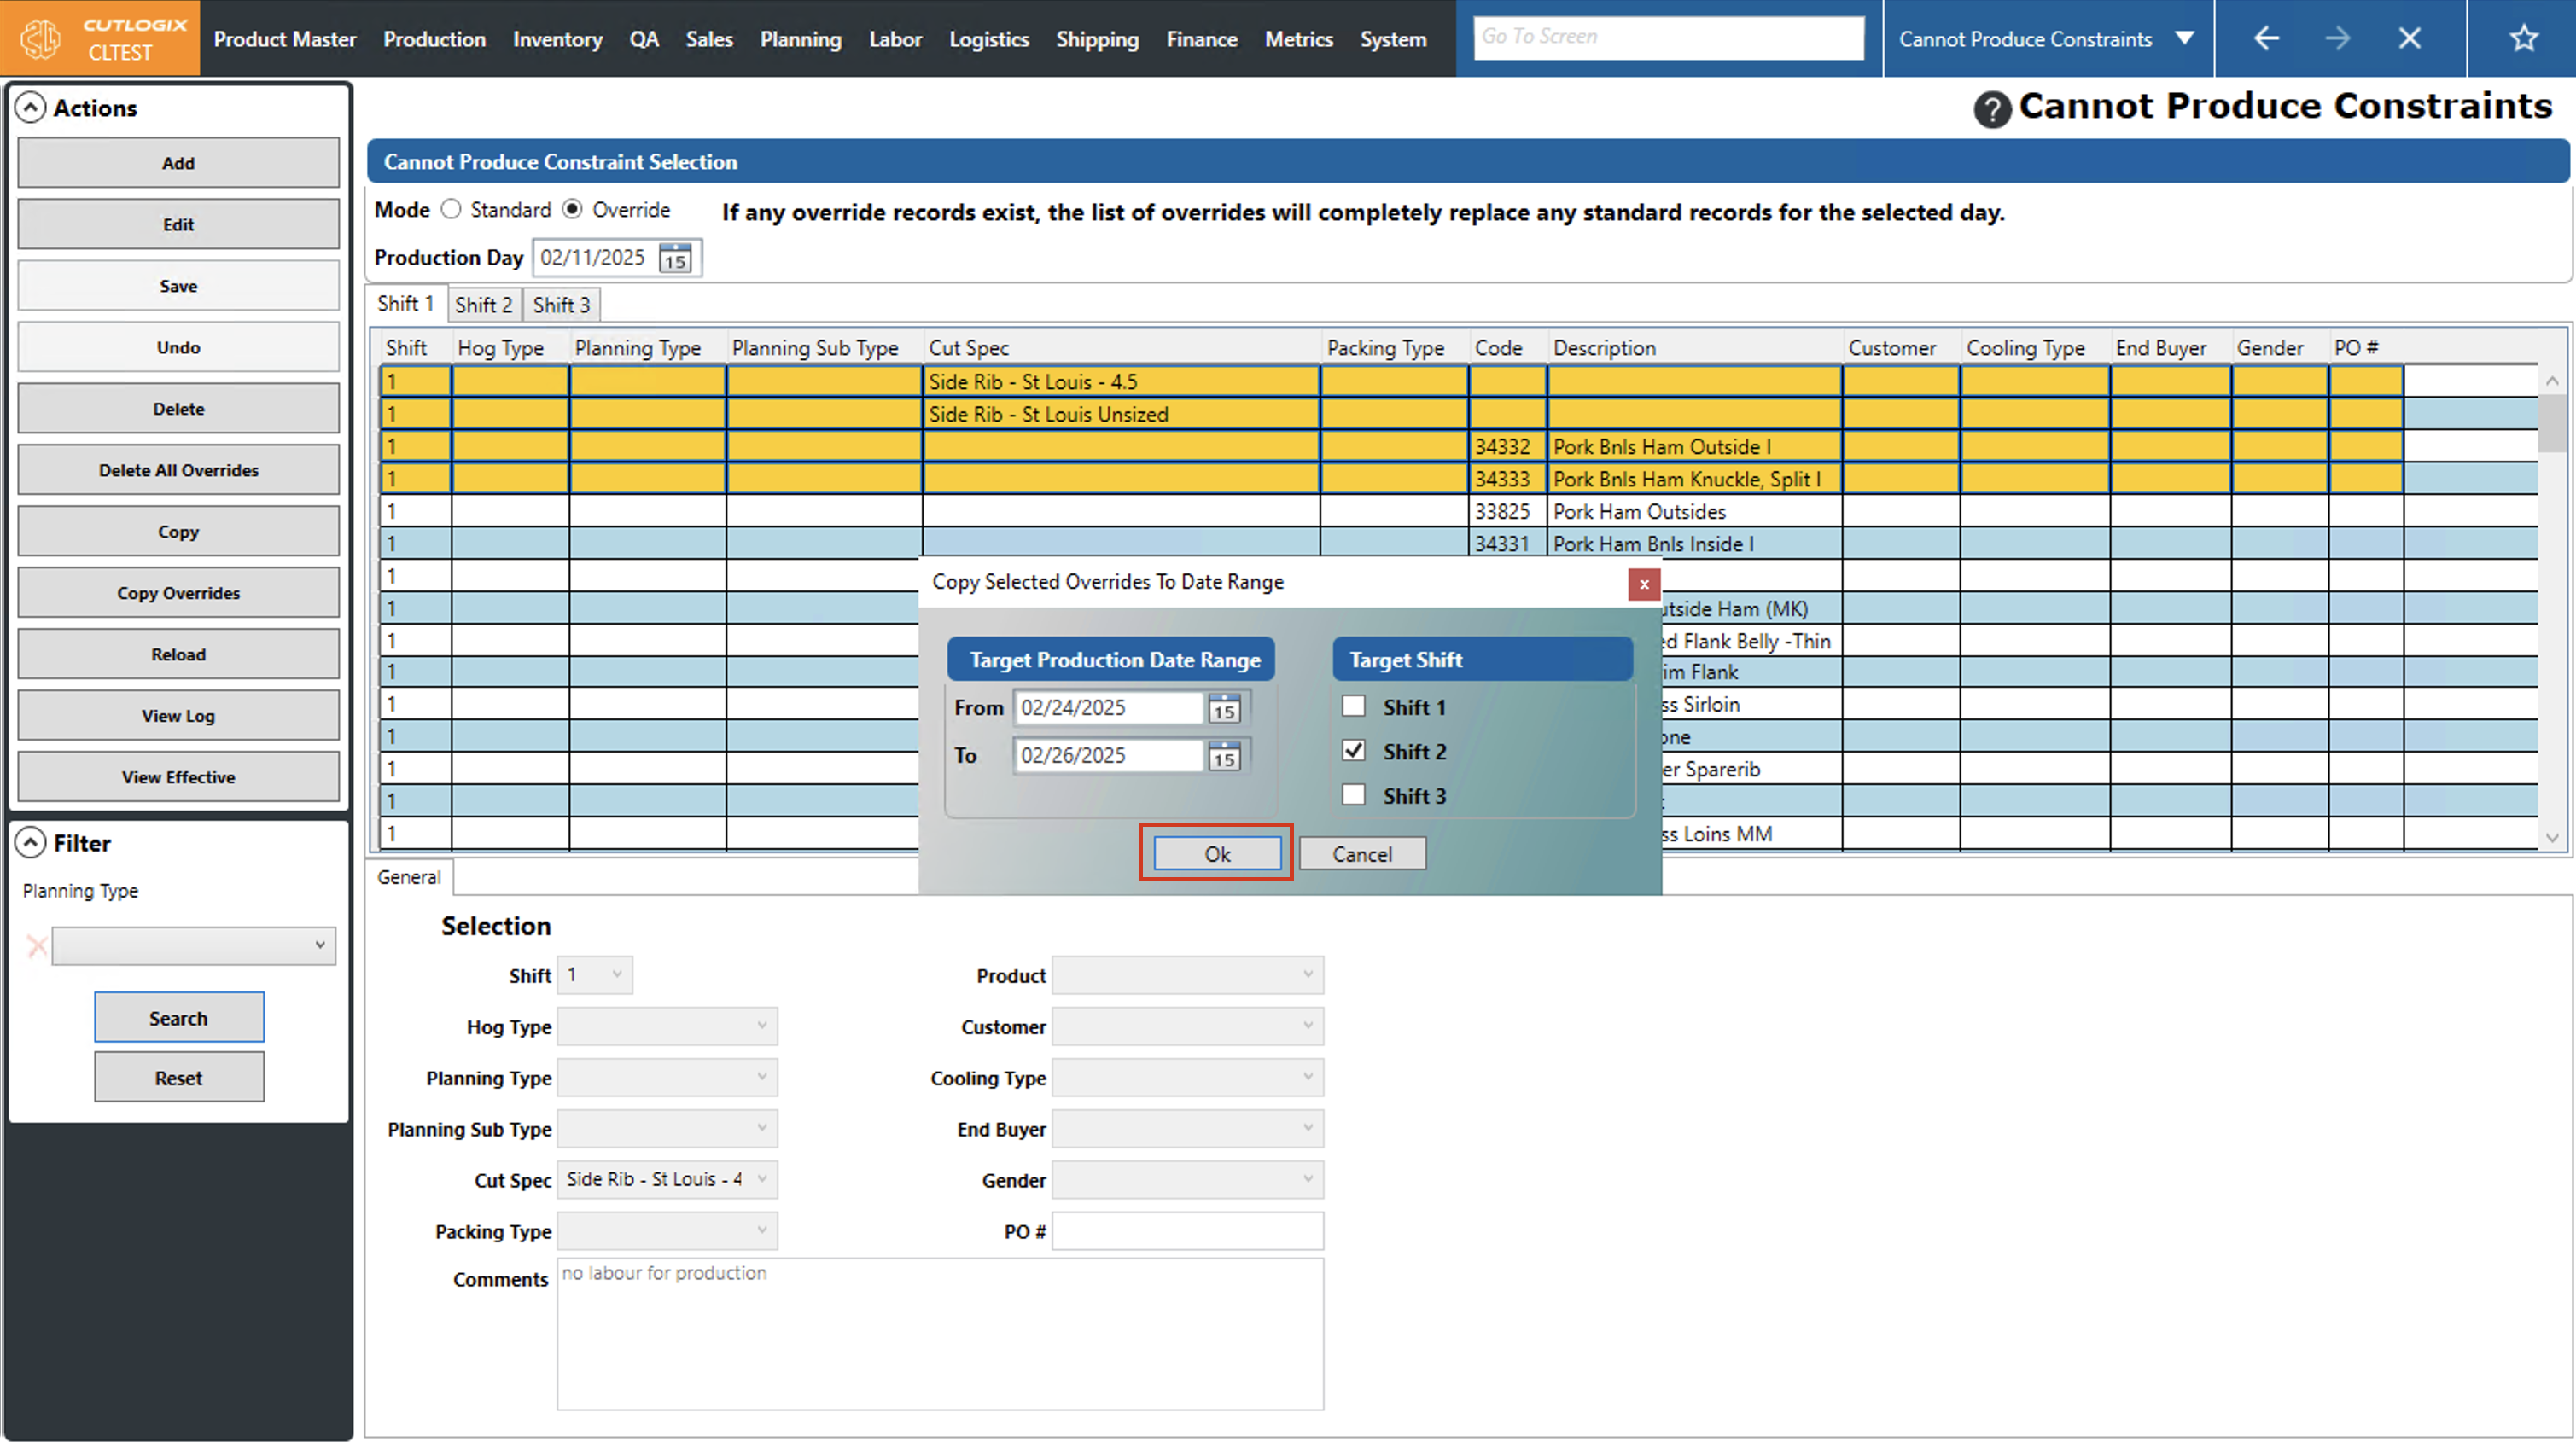
Step 4: A dialog will appear where you can choose the Target Production Date Range and the Target Shifts to copy to. Use the date pickers (by clicking on the calendar icon beside the "From" and "To" dates) to choose the production date range to copy to, then use the checkboxes beside the list of "Target Shifts" to specify which shifts on the selected days to copy the overrides to.
Step 5: Once the target production date range and target shifts have been filled out, click the "OK" button to complete the copying of the override cannot produce constraints. The copied constraints will now appear on the days and shifts that you specified. If you don't want to complete the copying, clicking "Cancel" will exit the dialog and the cannot produce constraint overrides will not be copied.
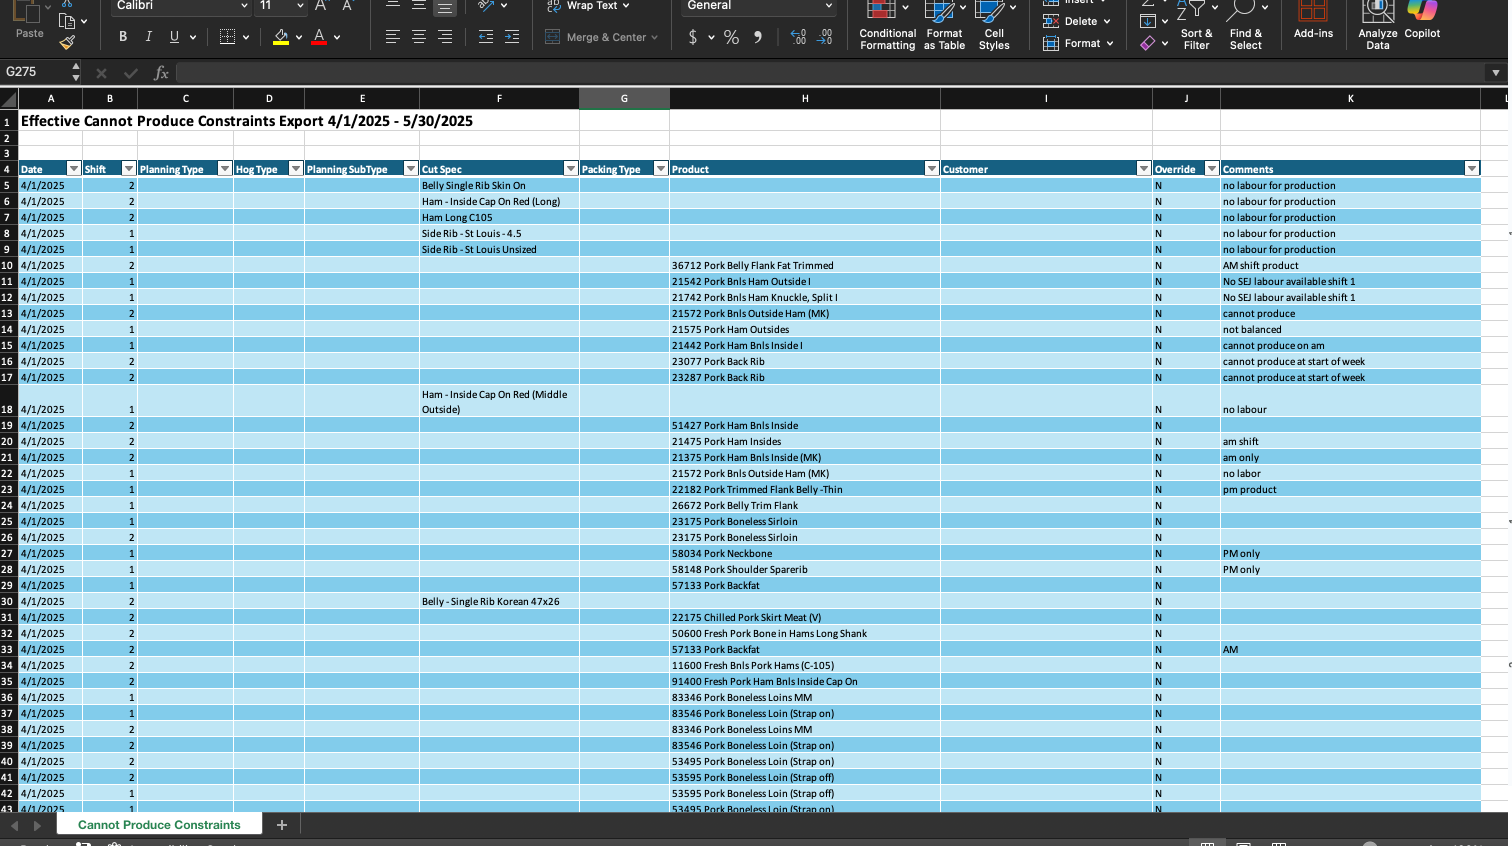
How to Export Cannot Produce Constraints Reports
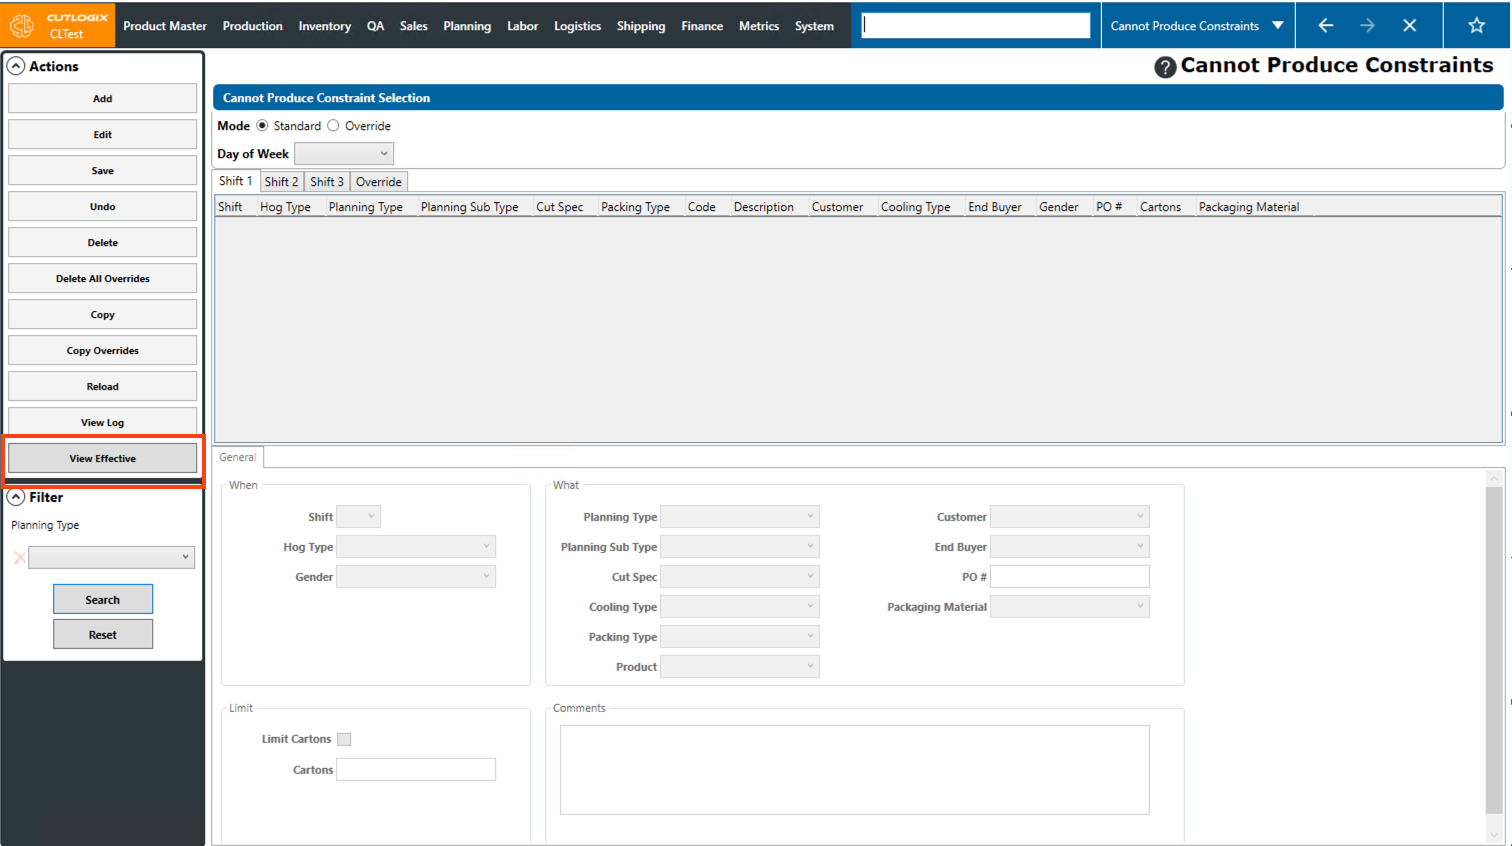
Step 1: Navigate to the "Cannot Produce Constraints" page, located under the Planning menu → Planning Rules Config → Cannot Produce Constraints.
Step 2: Click on the “View Effective” button in the Actions Panel.
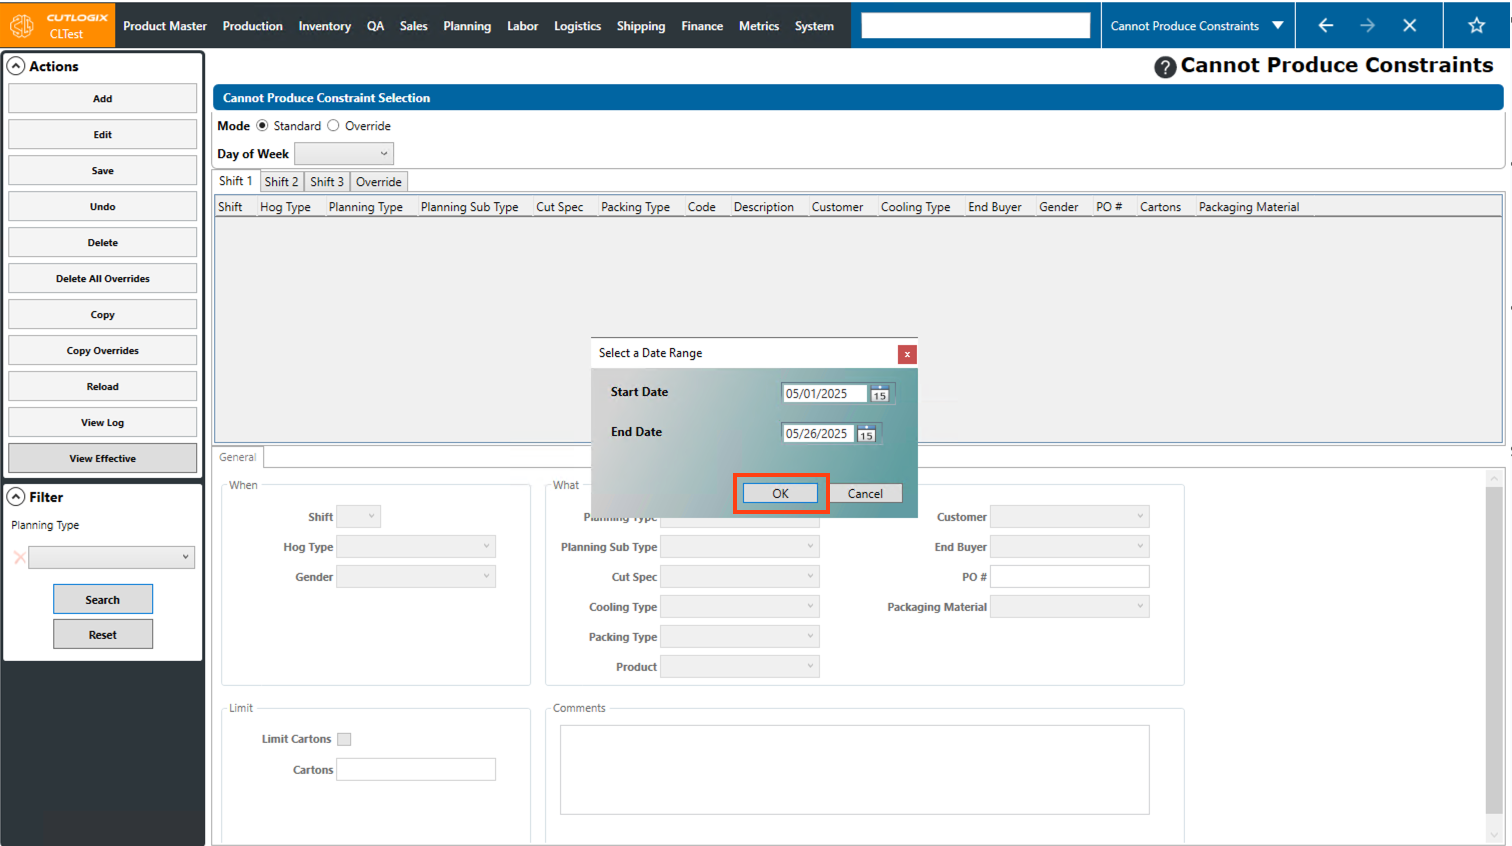
Step 3: A dialog will open where you can specify the start and end dates that you want to view cannot produce constraints for. Click on the calendar icon for both dates, a smal calendar view will then appear and you can choose the appropriate start and end dates. Once you’ve selected both the start date and end date, click the OK button.
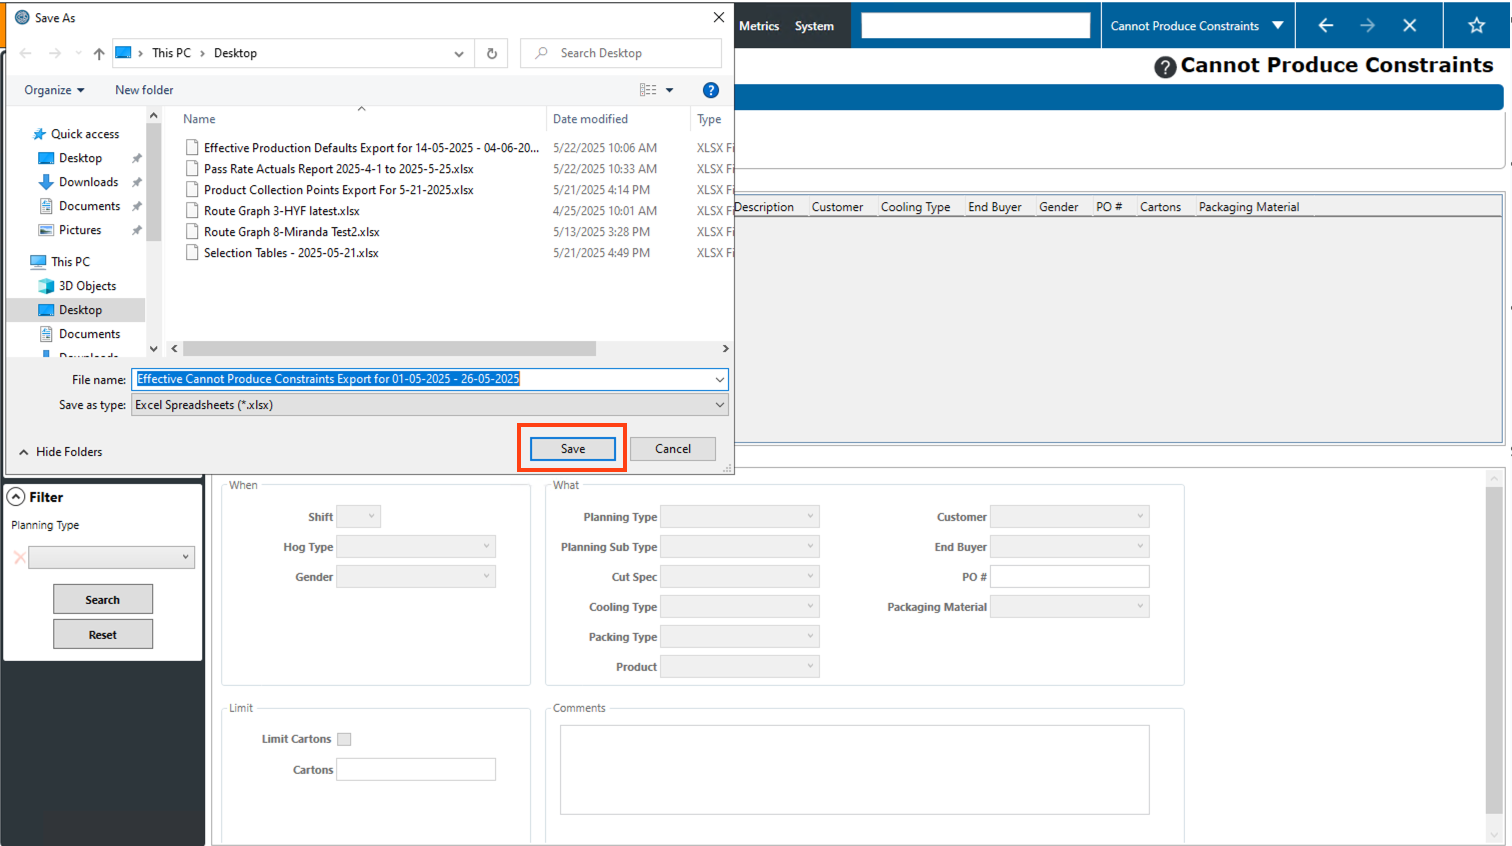
Step 4: A dialog will appear where you can specify where on your computer you want the file to be saved, as well as you can modify the filename that will be on the file. Once you’ve completed those items, clicking “Save” will save the file to your computer.
Step 5: Navigate to the location on your computer where you saved the file and open it. Note: You will need to have excel installed on your computer to open the file. Once open, the file will display a table with all of the cannot produce constraints from within the selected timeframe. The timeframe that the report was generated for will also be displayed at the top of the report.