Downtime and Maintenance Tasks
How to Add Downtime Records
DemoNote: Downtime records can also be created from the "Daily Kill Floor Report" and "Daily Cut Floor Report" pages. Downtime records added on those pages will appear on their respective dates in the "Downtime Records" tab on the "Downtime and Maintenance" page. They are also factored into the data shown on the "Summary" tab on the "Downtime and Maintenance" page.
Step 1: Navigate to the "Production" tab → "Downtime and Maintenance." All existing downtime records are factored into the summary page that you are taken to by default. On this page you can see data such as how many incidents took place within the selected date range (set in filters on the left side), the availability % (minutes of downtime vs how many minutes the plant was running in total), top downtime by equipment, and other metrics.

Step 2: To add a downtime record, click on the "Downtime Records" tab.

Step 3: Click the "Add" button in the Actions panel.

Step 4: This will open a new tab to enter the downtime record information on. Required fields are highlighted in red and must be entered to save the new downtime record. They are as follows:
• Duration: The duration the downtime lasted in minutes.
• Reason 1: The primary reason that downtime occurred, selectable from the dropdown list.
• Reason 2: The secondary reason that downtime occurred, selectable from the dropdown list. This field becomes required after Reason 1 is added.
• Explanation: This is where a comment explaining the downtime needs to be added.
There are also some fields that are pre-populated such as the following:
• Production Date: This is automatically set to the current date, but can be changed if needed by using the datepicker beside it.
• Start Time & End Time: The start time defaults to the time that the add downtime record button was clicked on to create the downtime record, this can be modified as needed. The End time is automatically set by the start time and the duration (start time + duration) and cannot be manually modified.
• Shift: This defaults to Shift 1 automatically, but can be changed if necessary.
• Location: This defaults to "Cut Floor", but can be modified if needed using the dropdown menu.
• Process Area: This will default to "Main Break" but can be modified if necessary.

Step 5: Once all the required information has been entered, click the "Save" button in the Actions panel to save the new downtime record.

Step 6: The new downtime record will be saved and visible on the "Downtime Records" tab.

How to Edit Downtime Records
DemoStep 1: Navigate to the "Production" tab → "Downtime and Maintenance," then open the "Downtime Records" tab.
Step 2: Double-click on the downtime record that you want to edit. This will open a new tab for the selected downtime record.

Step 3: Click the "Edit" button in the Actions panel. This will enable editing the fields on the downtime record. Make any necessary changes to the record, then click the "Save" button in the actions panel to save the changes. If you don't want to save the changes, click the "Undo" button. This will revert any changes that you made to the downtime record and will display the information for it that was last saved.


How to Add Downtime Records in CutLogix Mobile
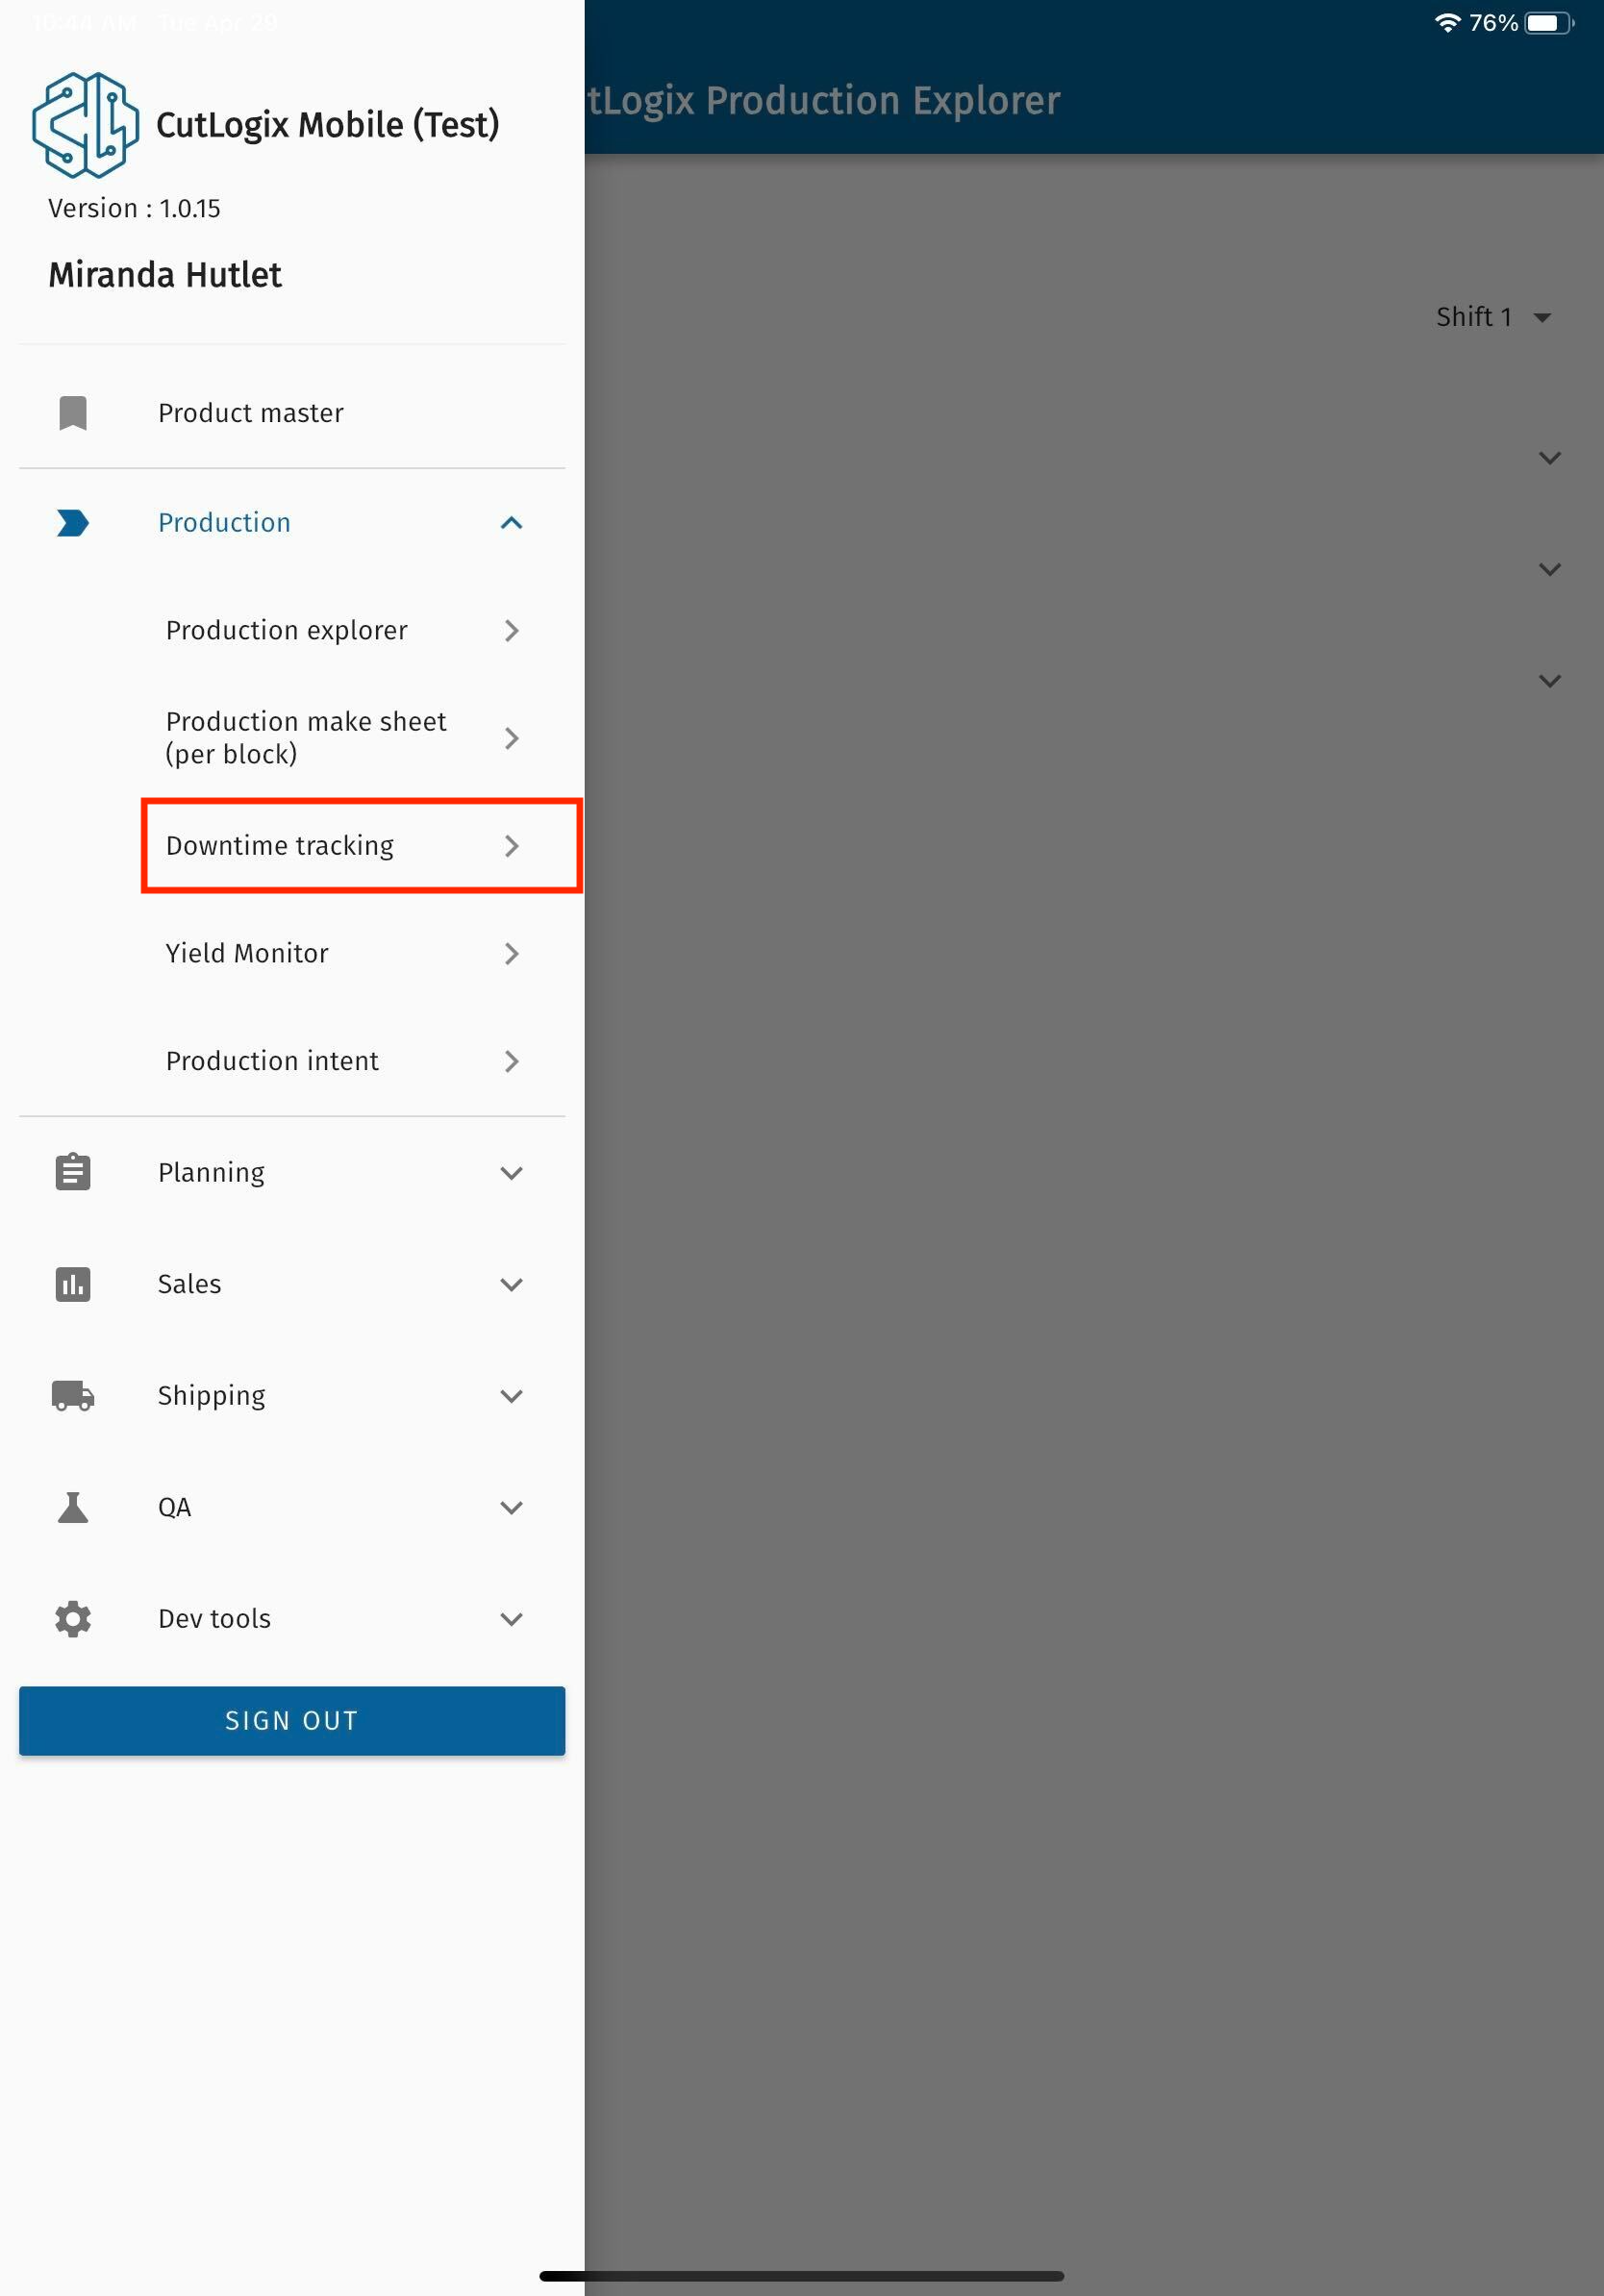
DemoStep 1: In CutLogix mobile, open the “Production” menu and click on the “Downtime Tracking” option in the menu.
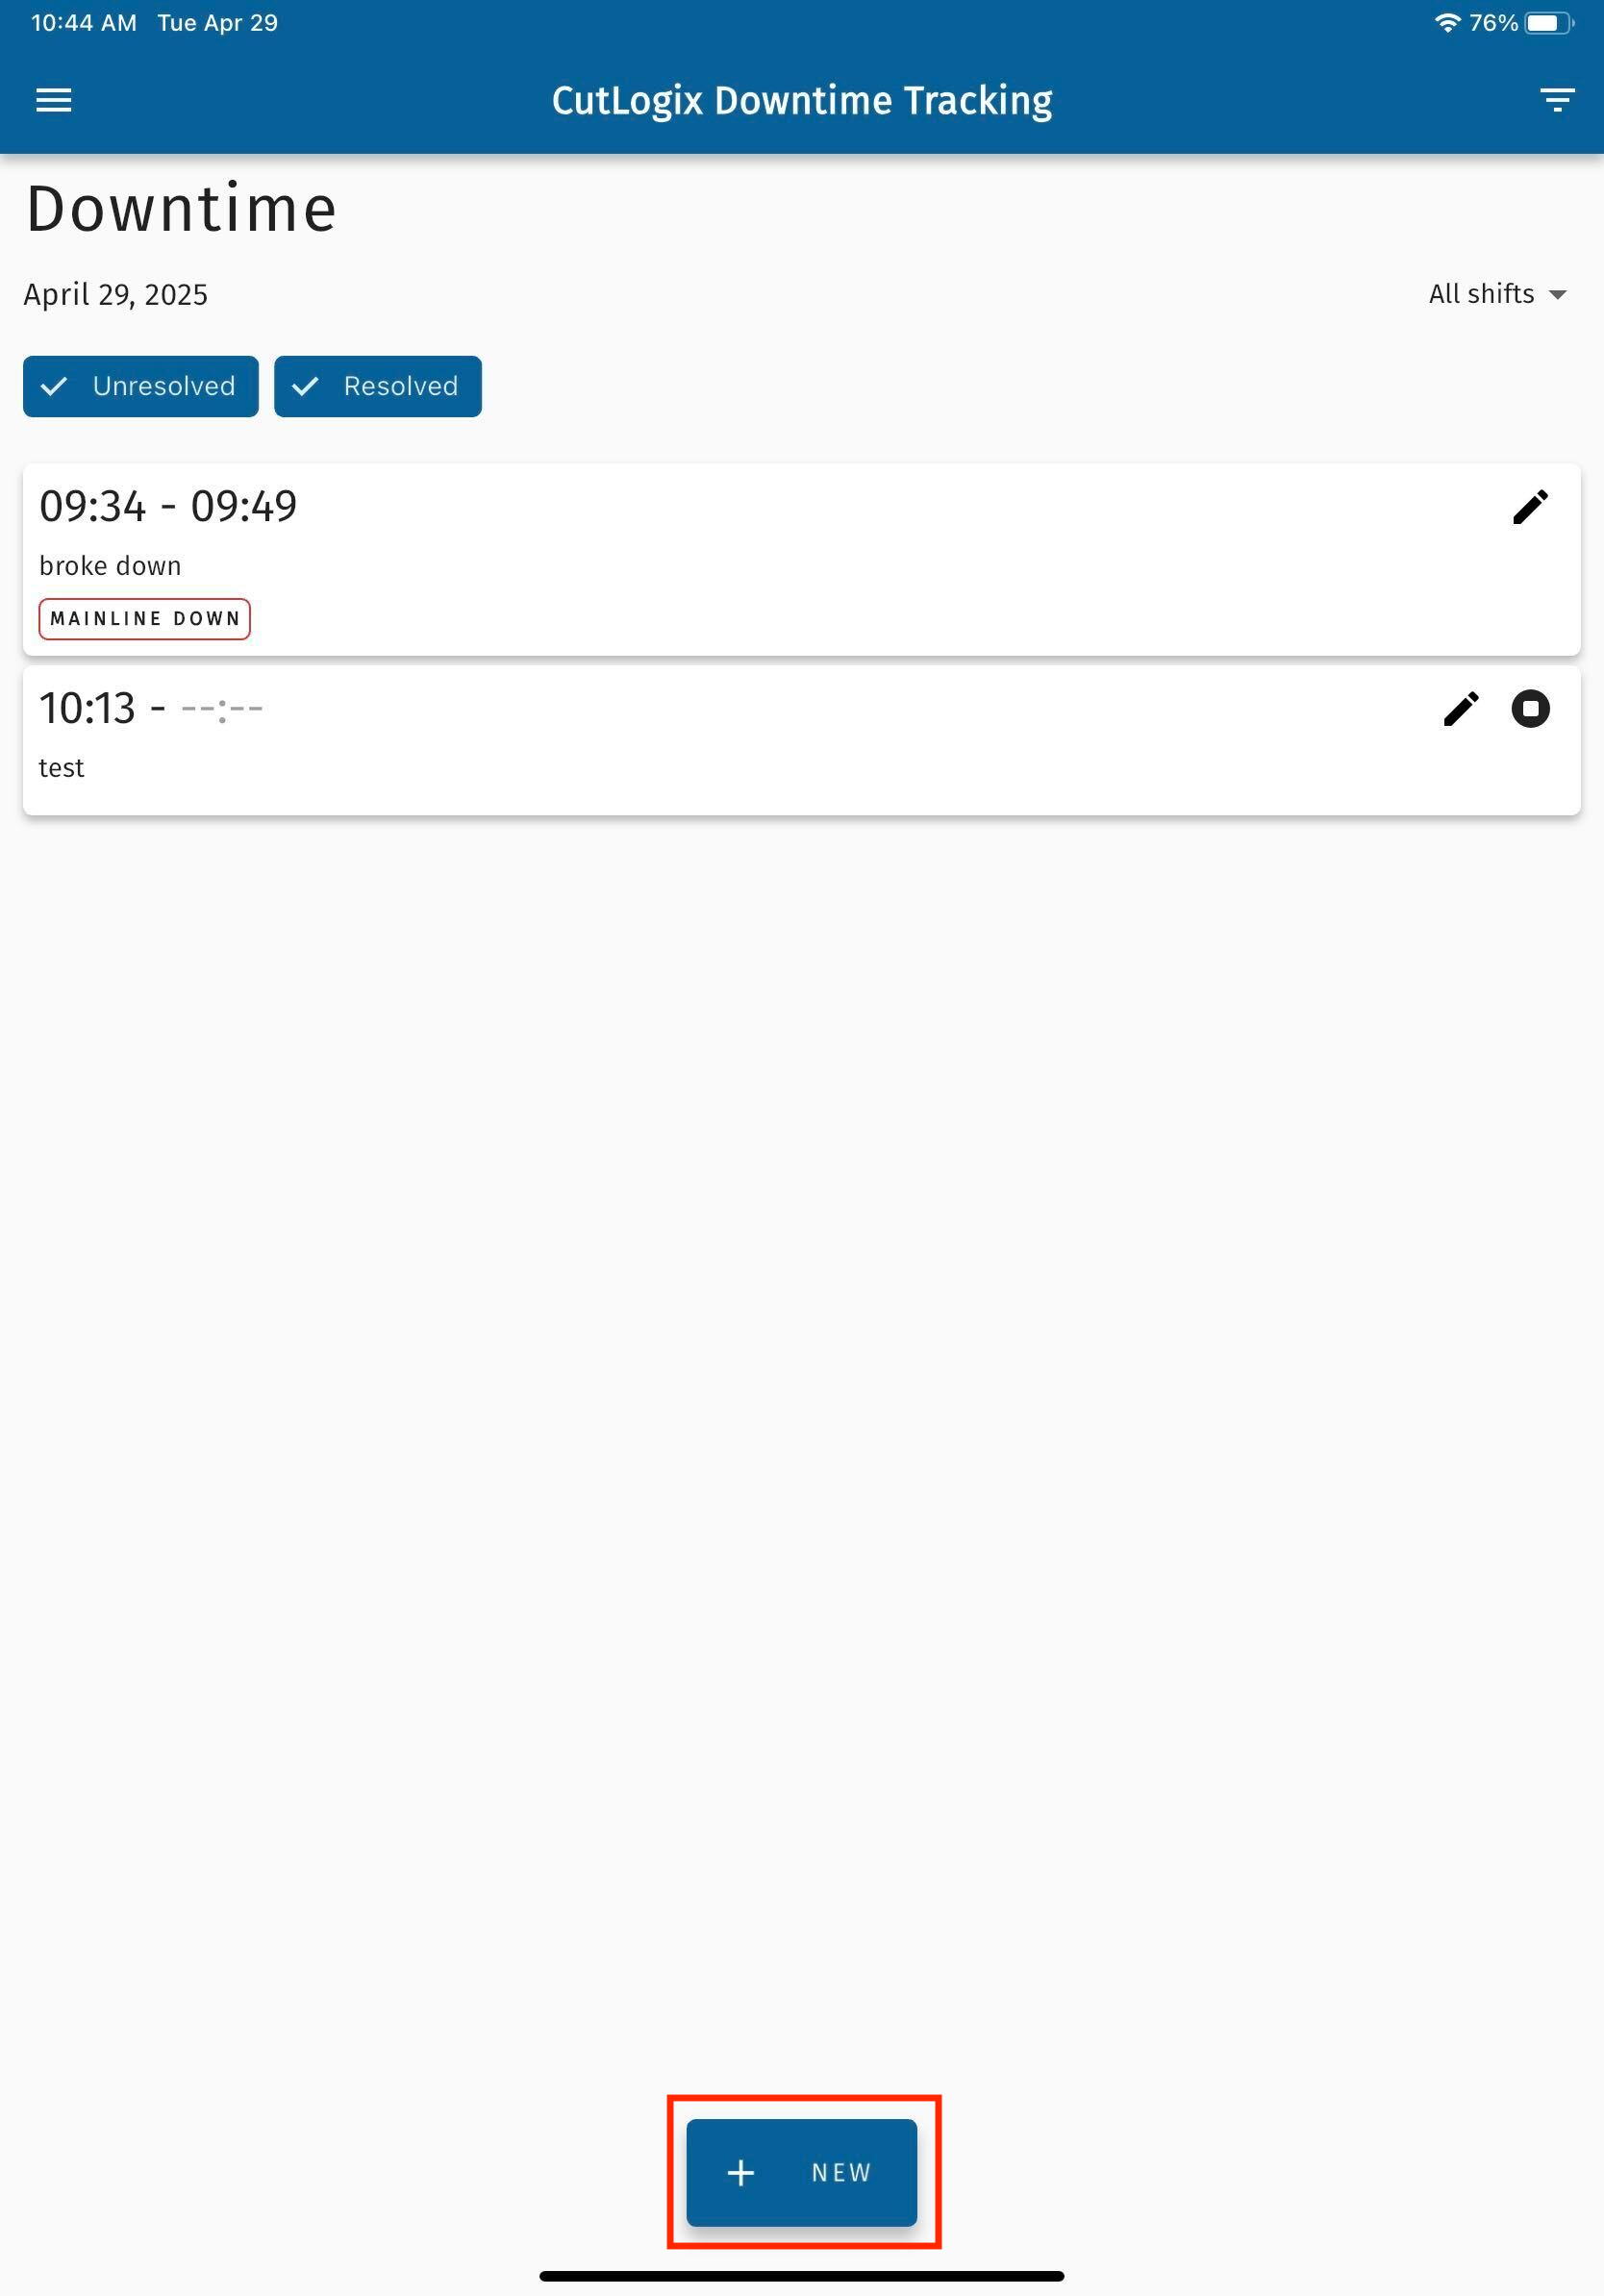
Step 2: Next, click on the “+ New” button to begin creating the new downtime entry.
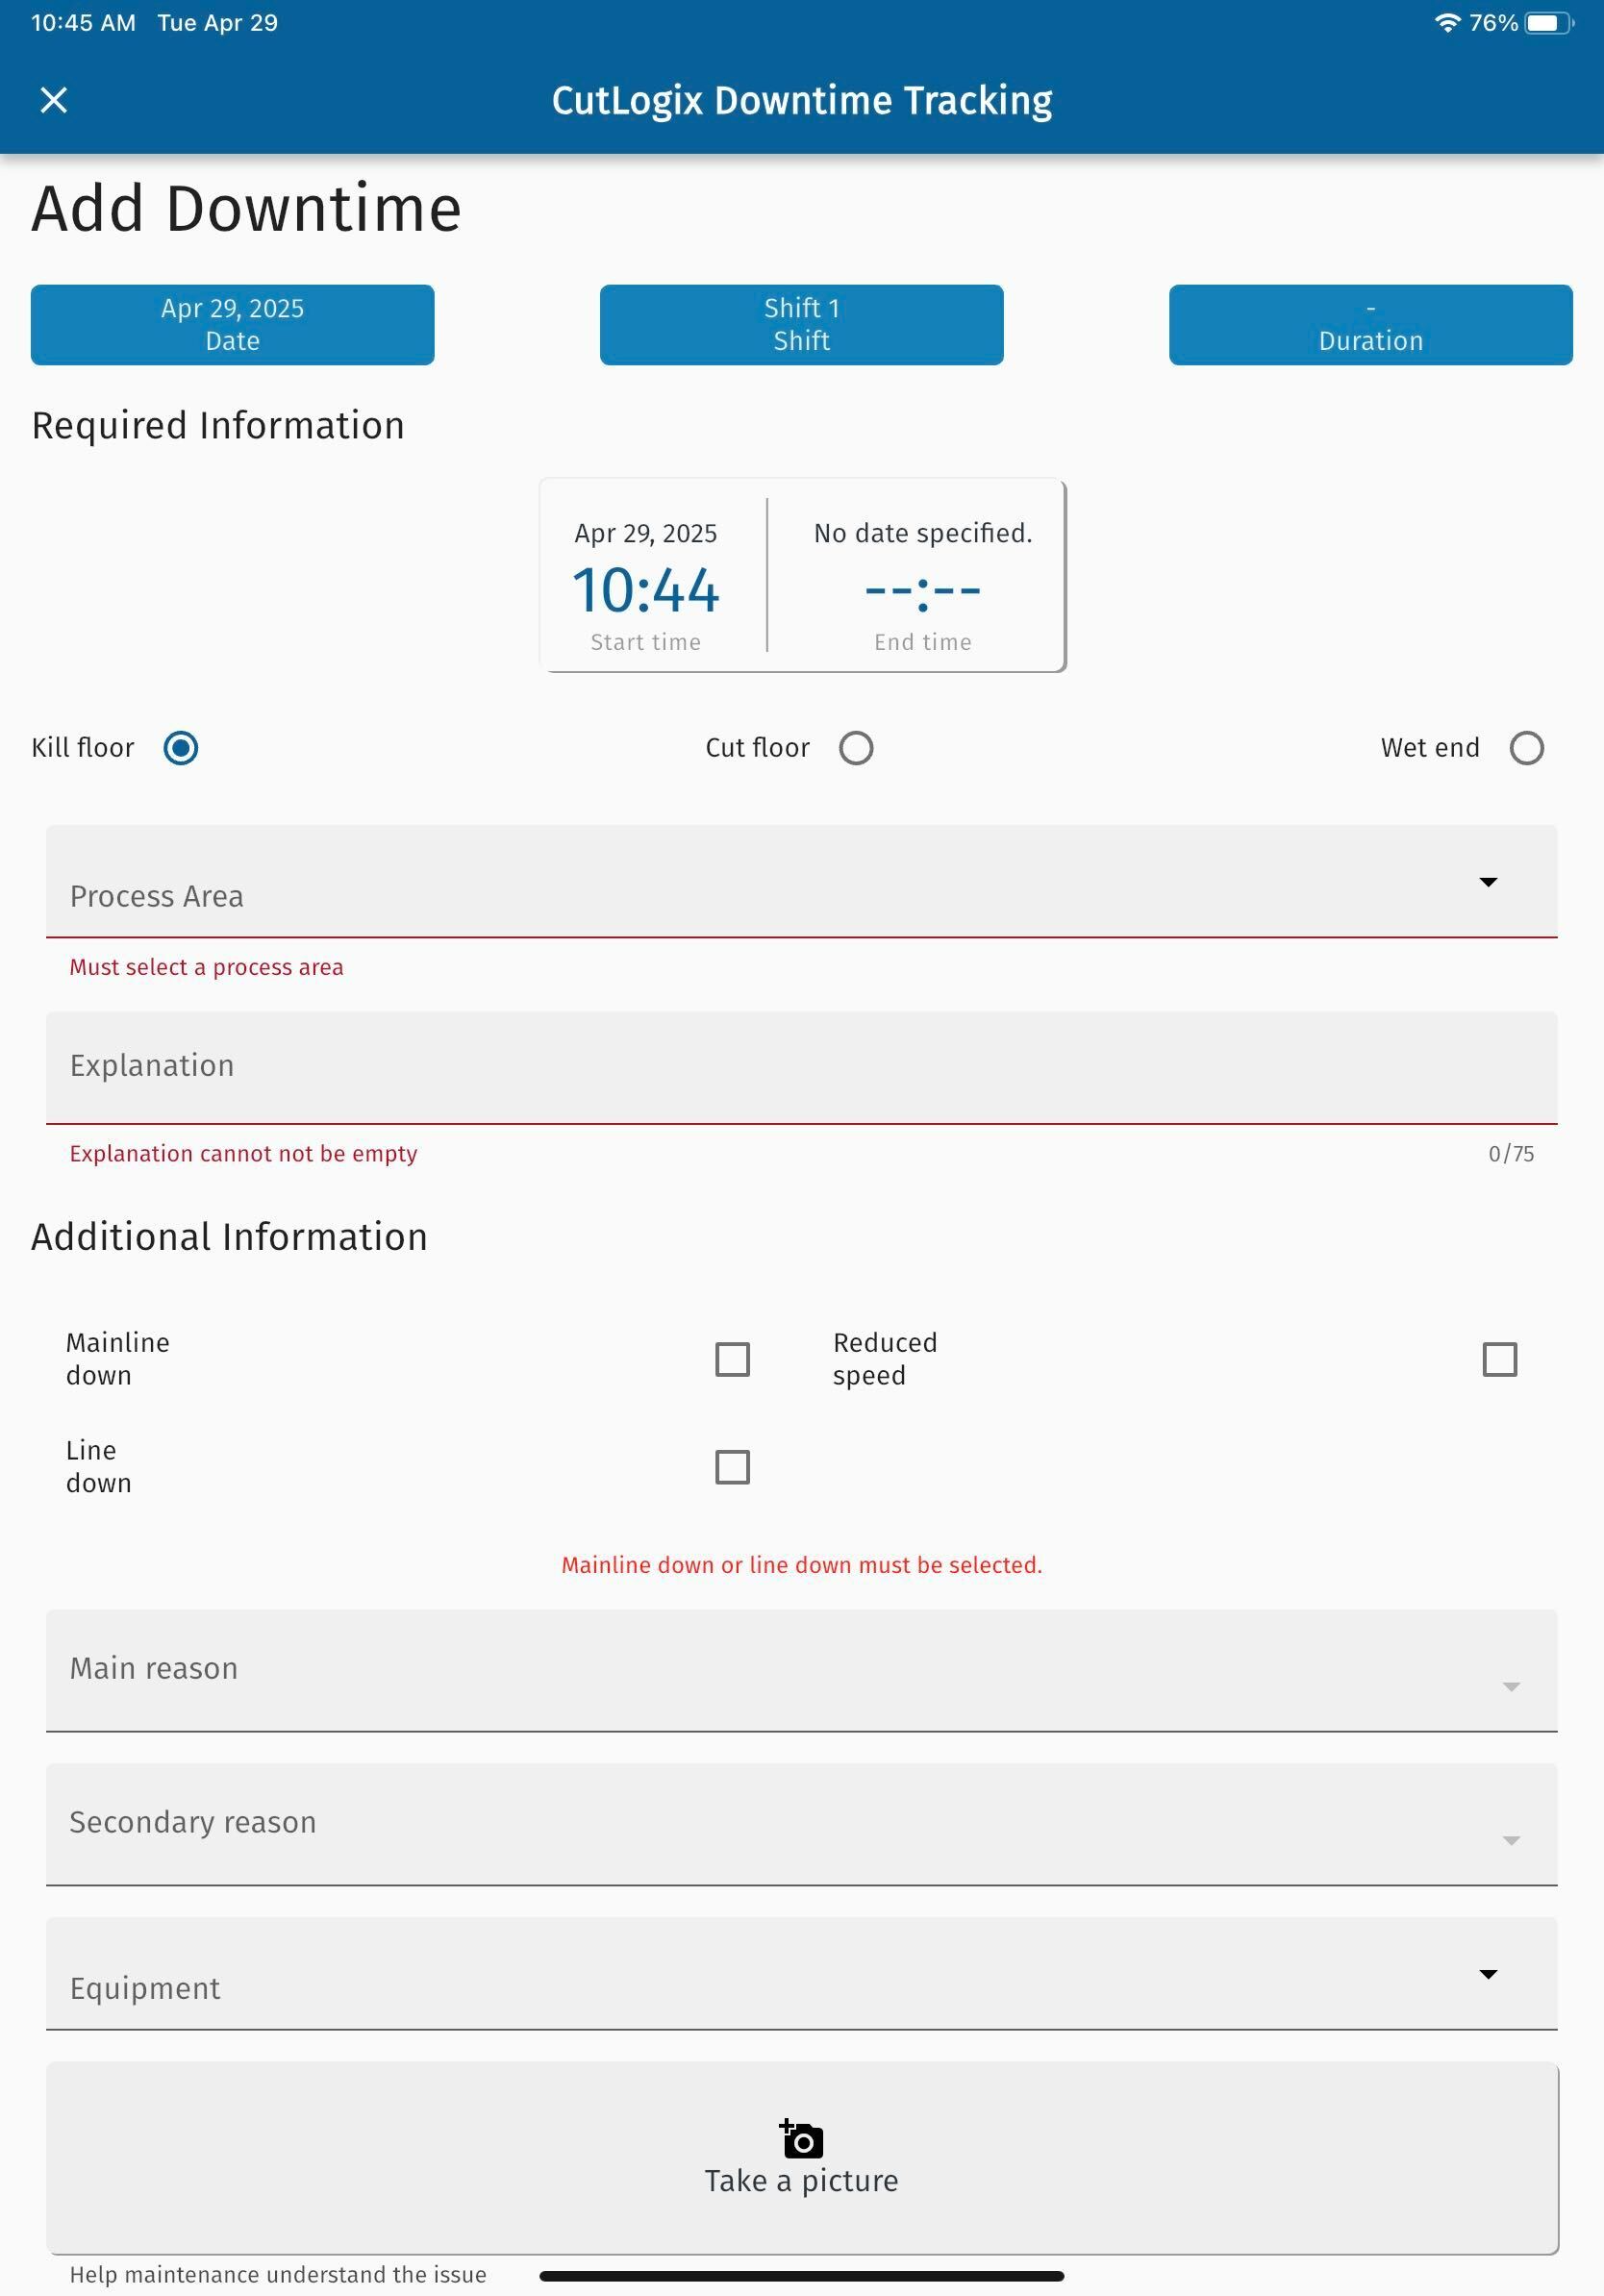
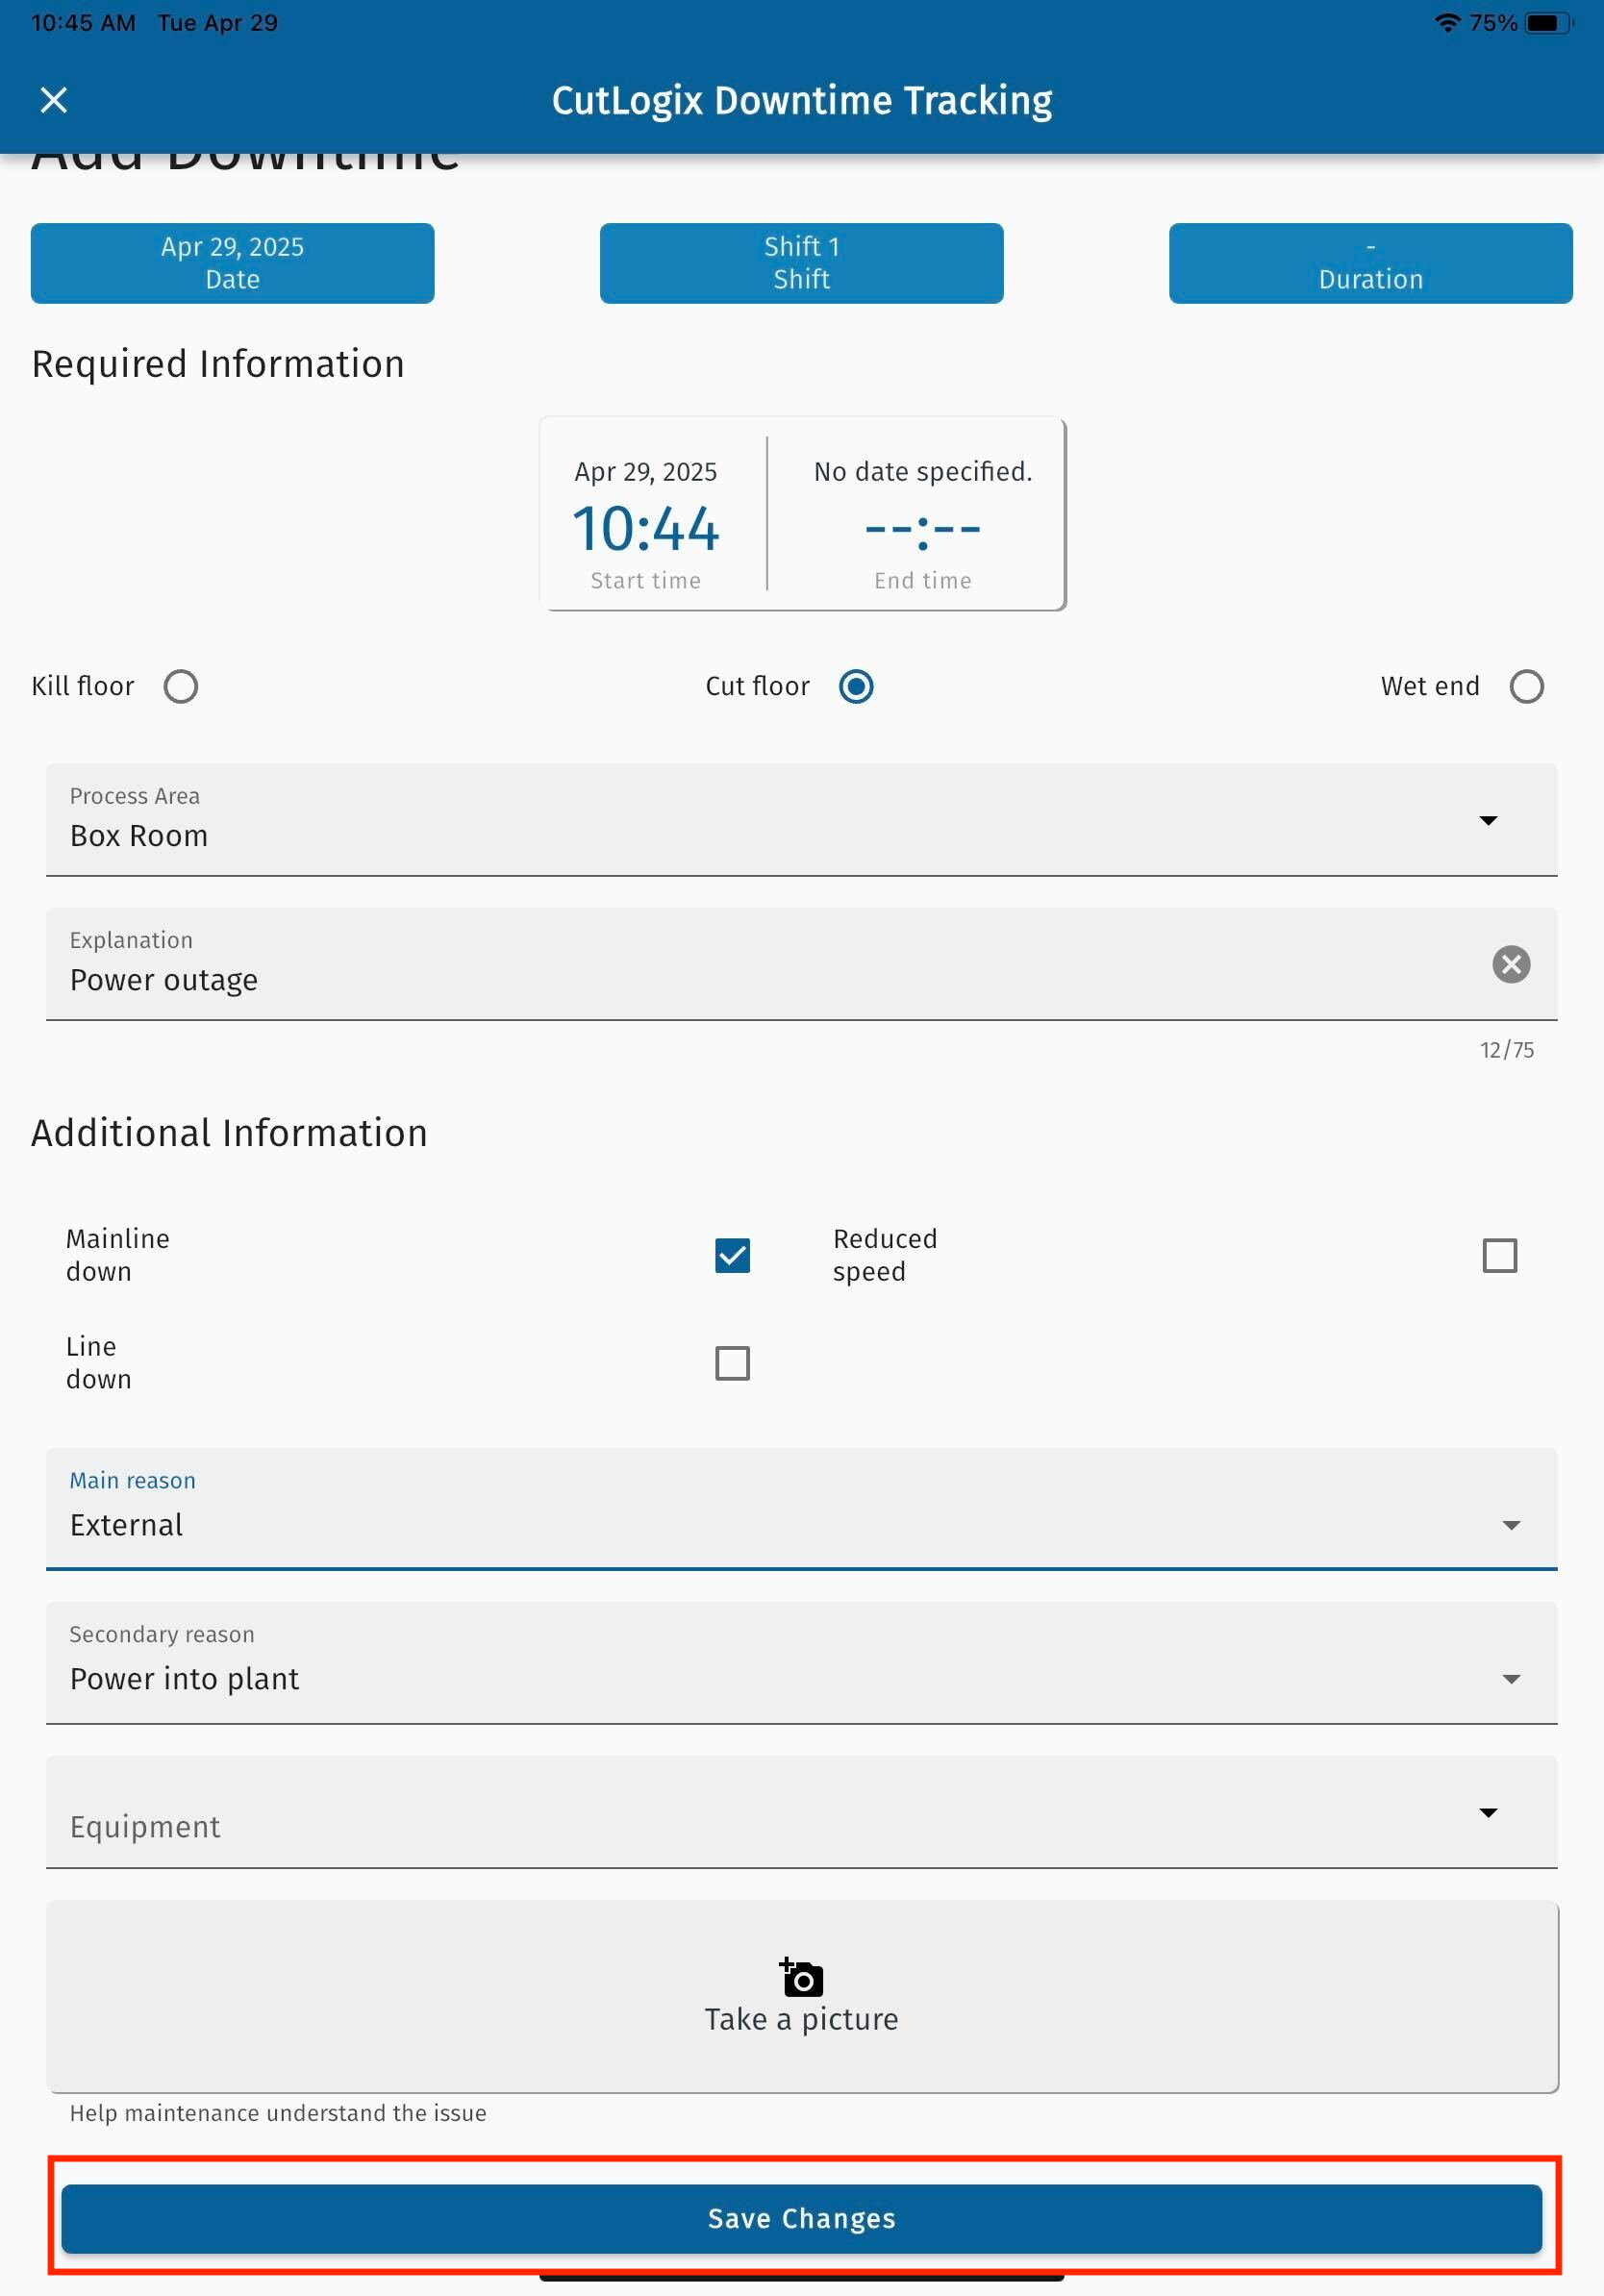
Step 3: A screen will then appear where you can enter information about the new downtime record. Fields that are underlined in red are required and must be entered, they are as follows:
• Start Time: The time that the downtime started. By default, this will be set to the time that the button to add a new downtime record was clicked, but can be modified by clicking on the set time.
• Kill Floor/Cut Floor/Wet End: The location where the downtime has occurred.
• Process Area: A dropdown list of all the process areas within the selected location where the downtime has occurred.
• Explanation: An input field where the user can type a brief explanation of why the downtime occurred.
• Mainline Down/Line Down: One of these options must be selected in order to save the downtime record. Mainline down indicates that the issue that caused the downtime also caused the main production line to halt. Line down indicates that an individual production line has been halted due to the issue that caused the downtime.
• Main Reason: The primary reason that the downtime occurred. Users select this from the options in the dropdown list.
• Secondary Reason: The secondary reason that the downtime occurred, selected from the options in the dropdown list. This field only becomes required after a main reason has been selected.
Step 4: Once all the information about the new downtime record has been entered, click the “Save Changes” button at the bottom of the page to save the new downtime record.
Step 5: The downtime record will now appear on the Downtime page.
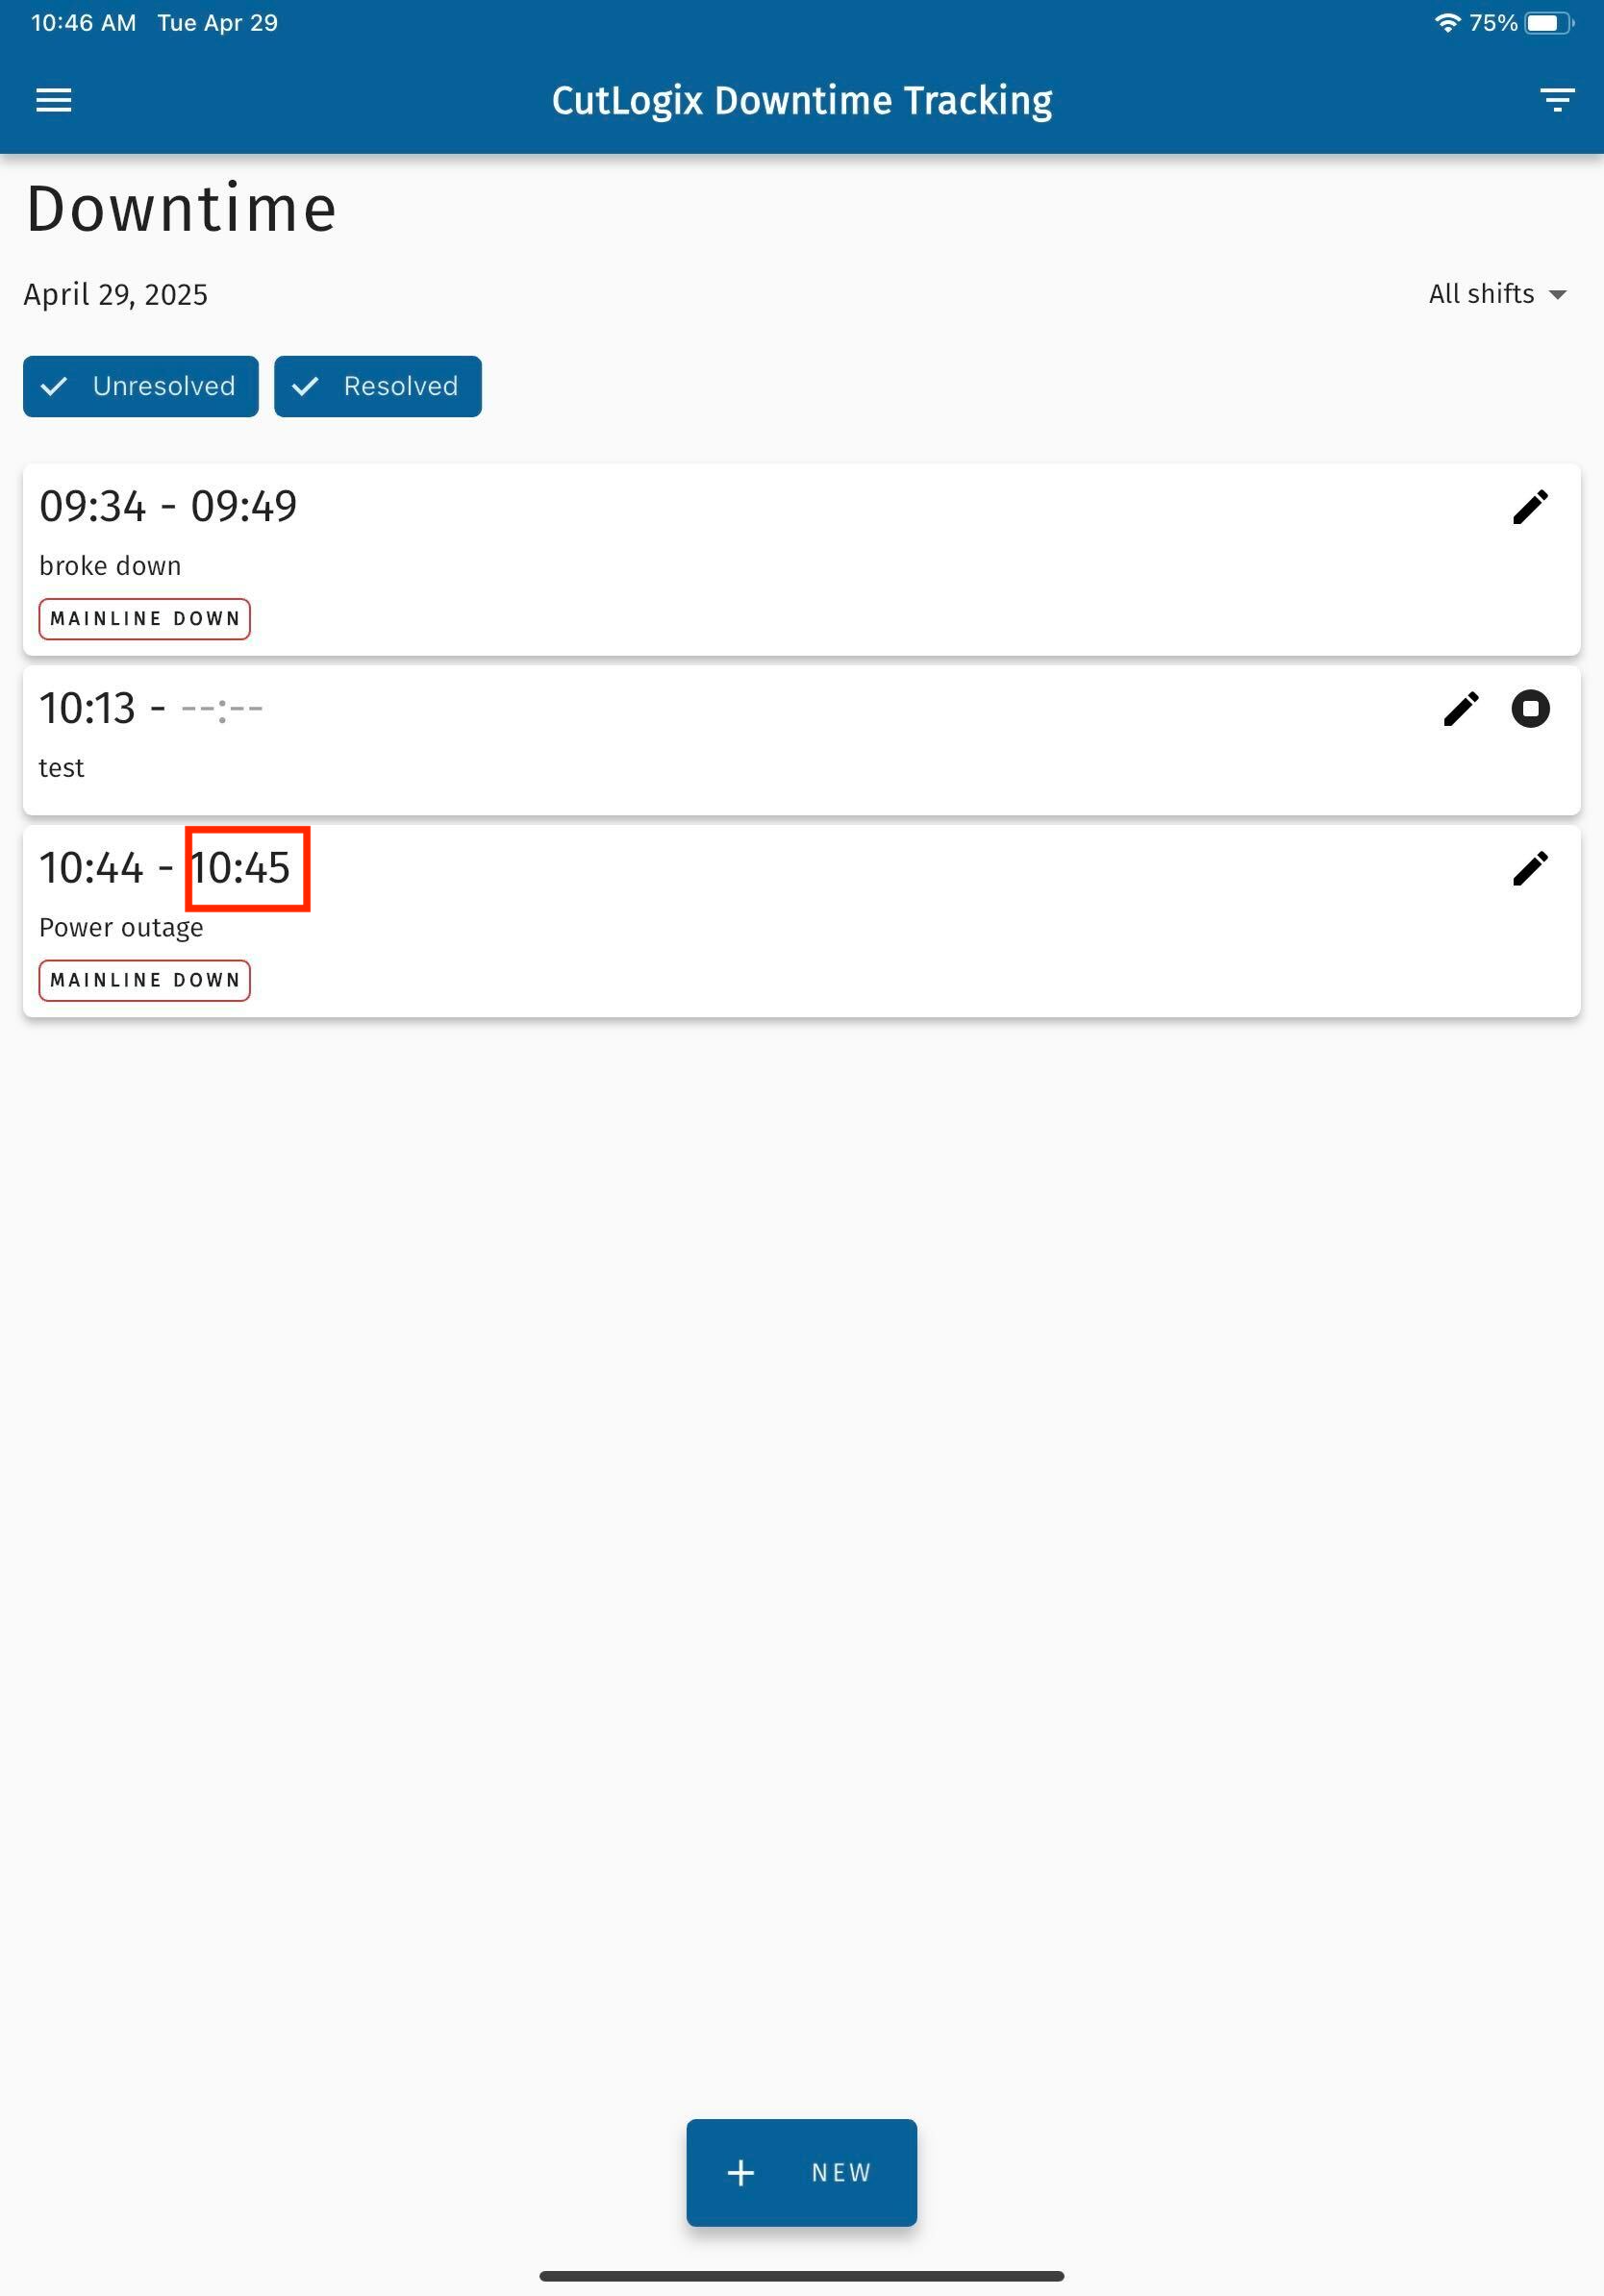
NOTE: When downtime records are created & saved in the CutLogix mobile app, a timer starts for them if no end time was specified on the downtime record. The next step outlines how to stop the timer once the downtime is over.
NOTE: When downtime records are created & saved in the CutLogix mobile app, a timer starts for them if no end time was specified on the downtime record. The next step outlines how to stop the timer once the downtime is over.
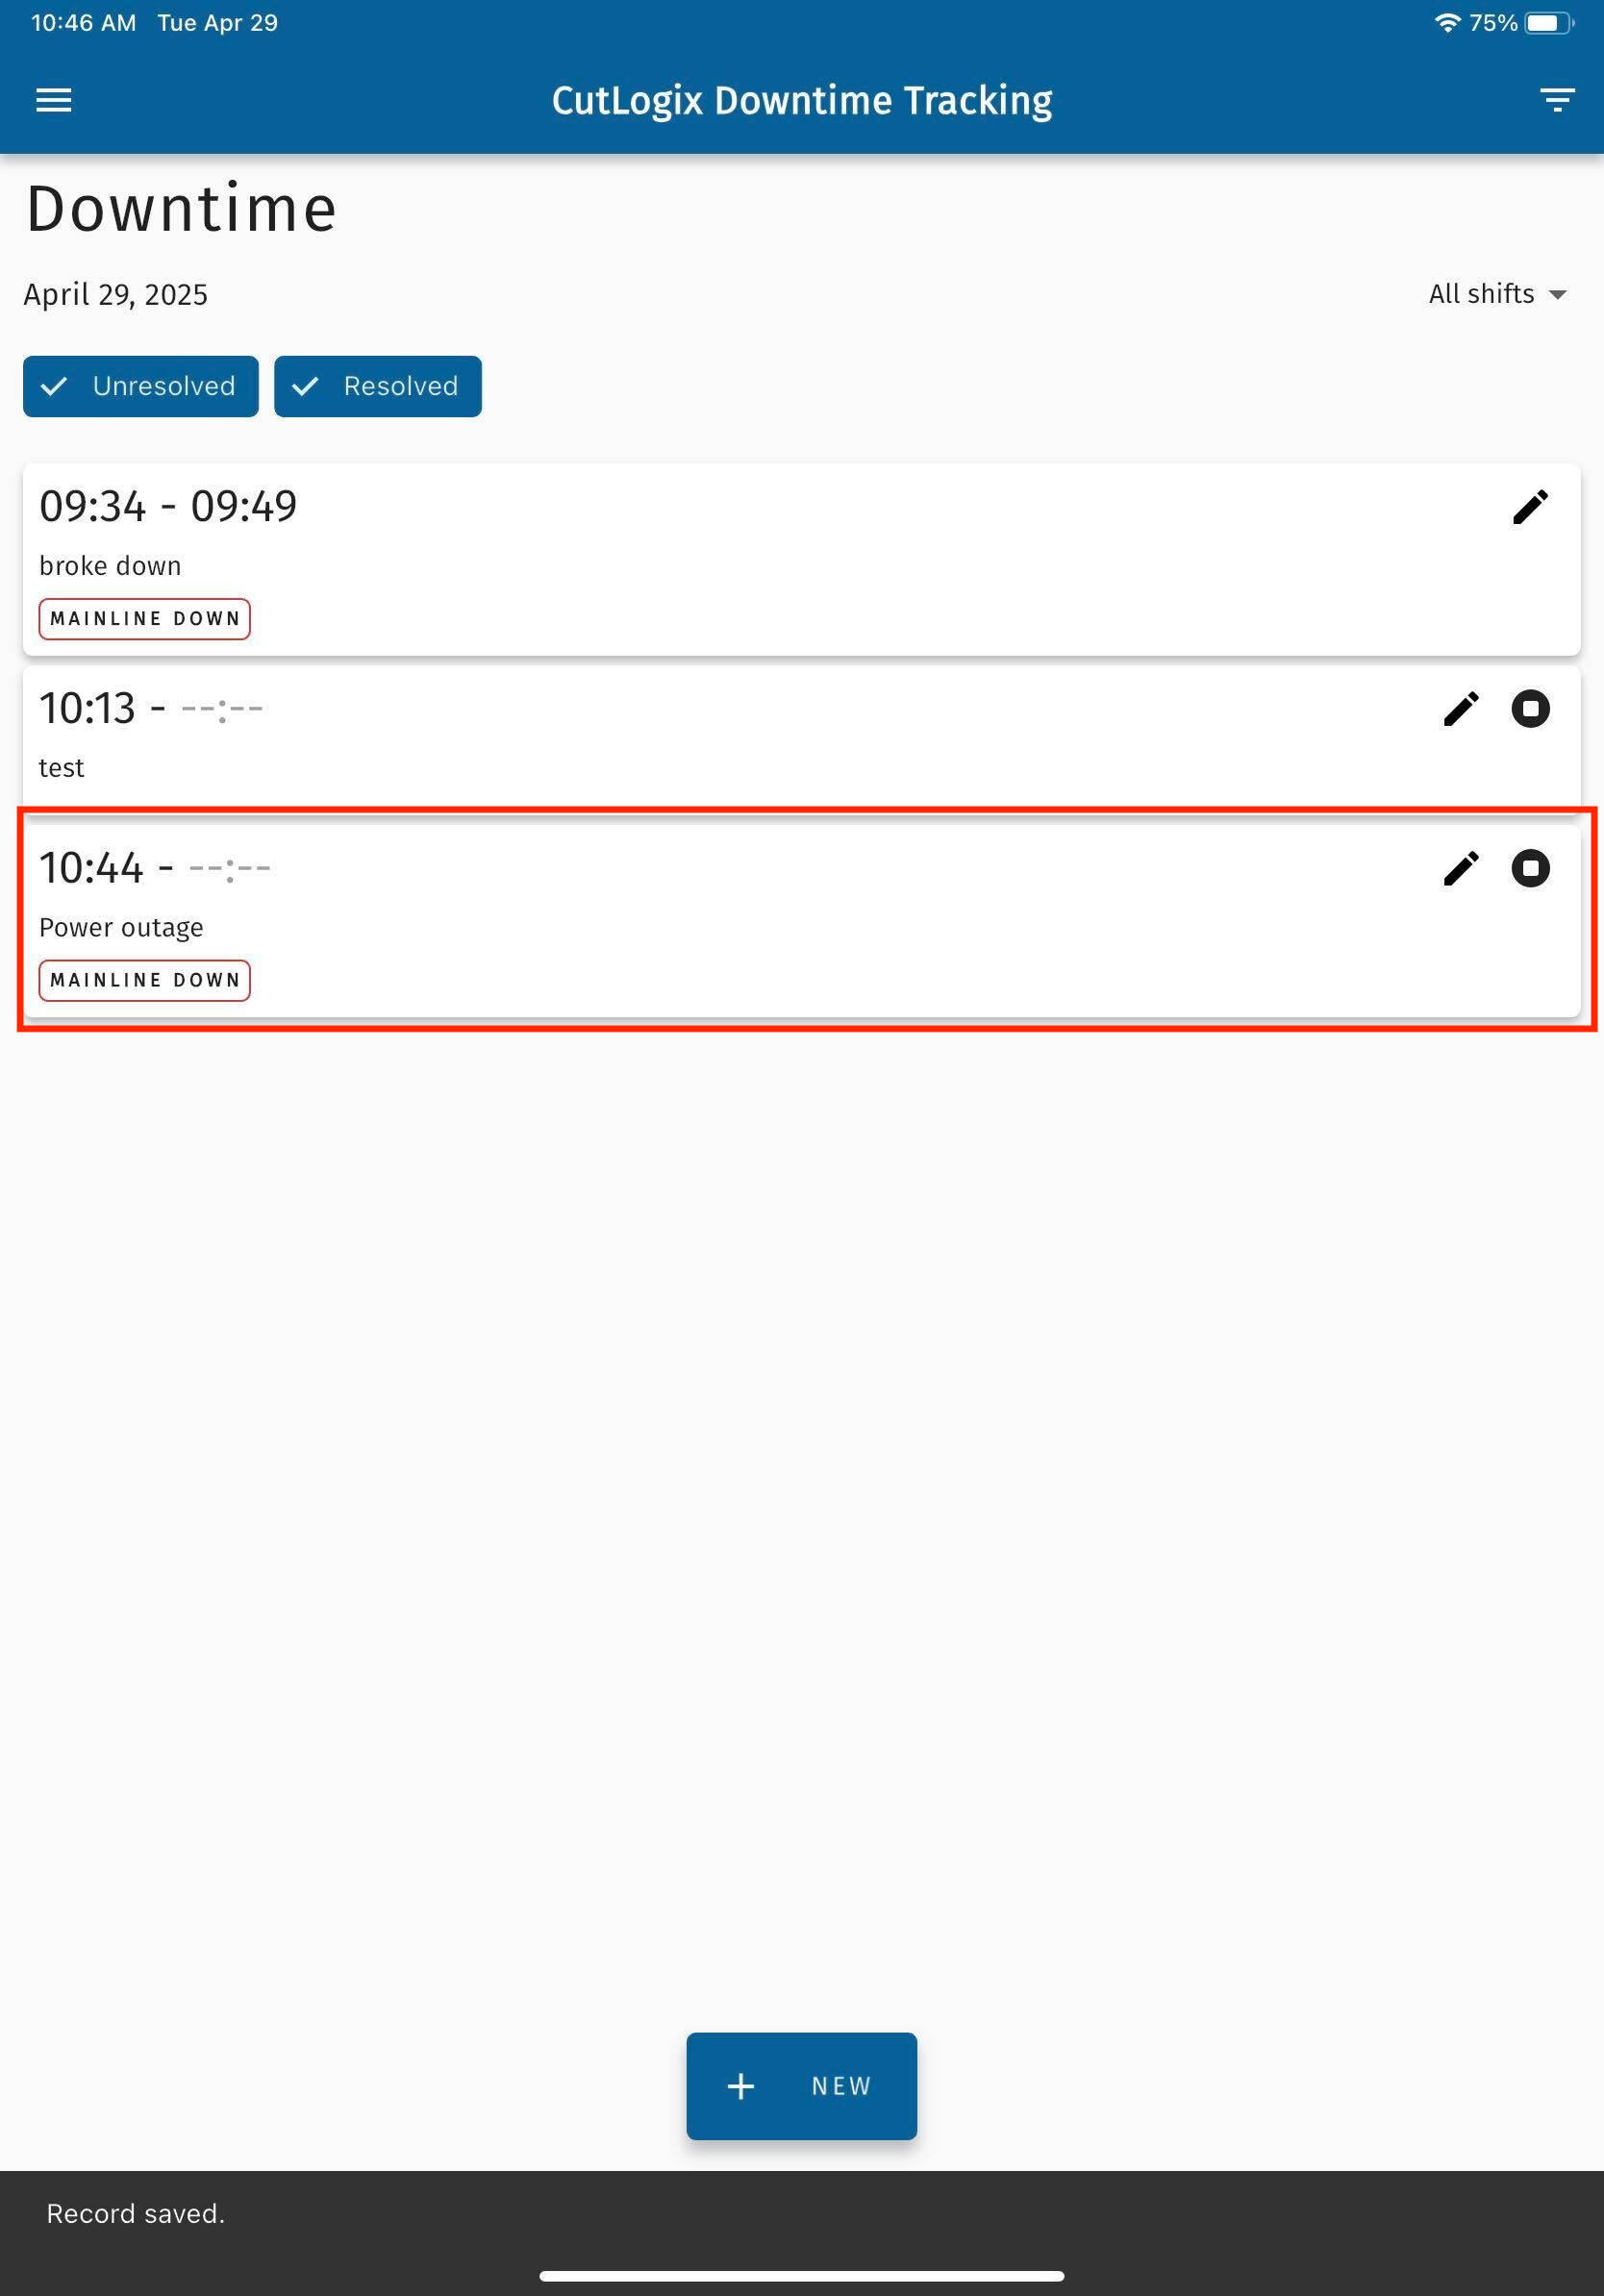
Step 6: On the downtime page, locate the downtime record that you want to stop the timer for, then click the “Stop Timer” button.

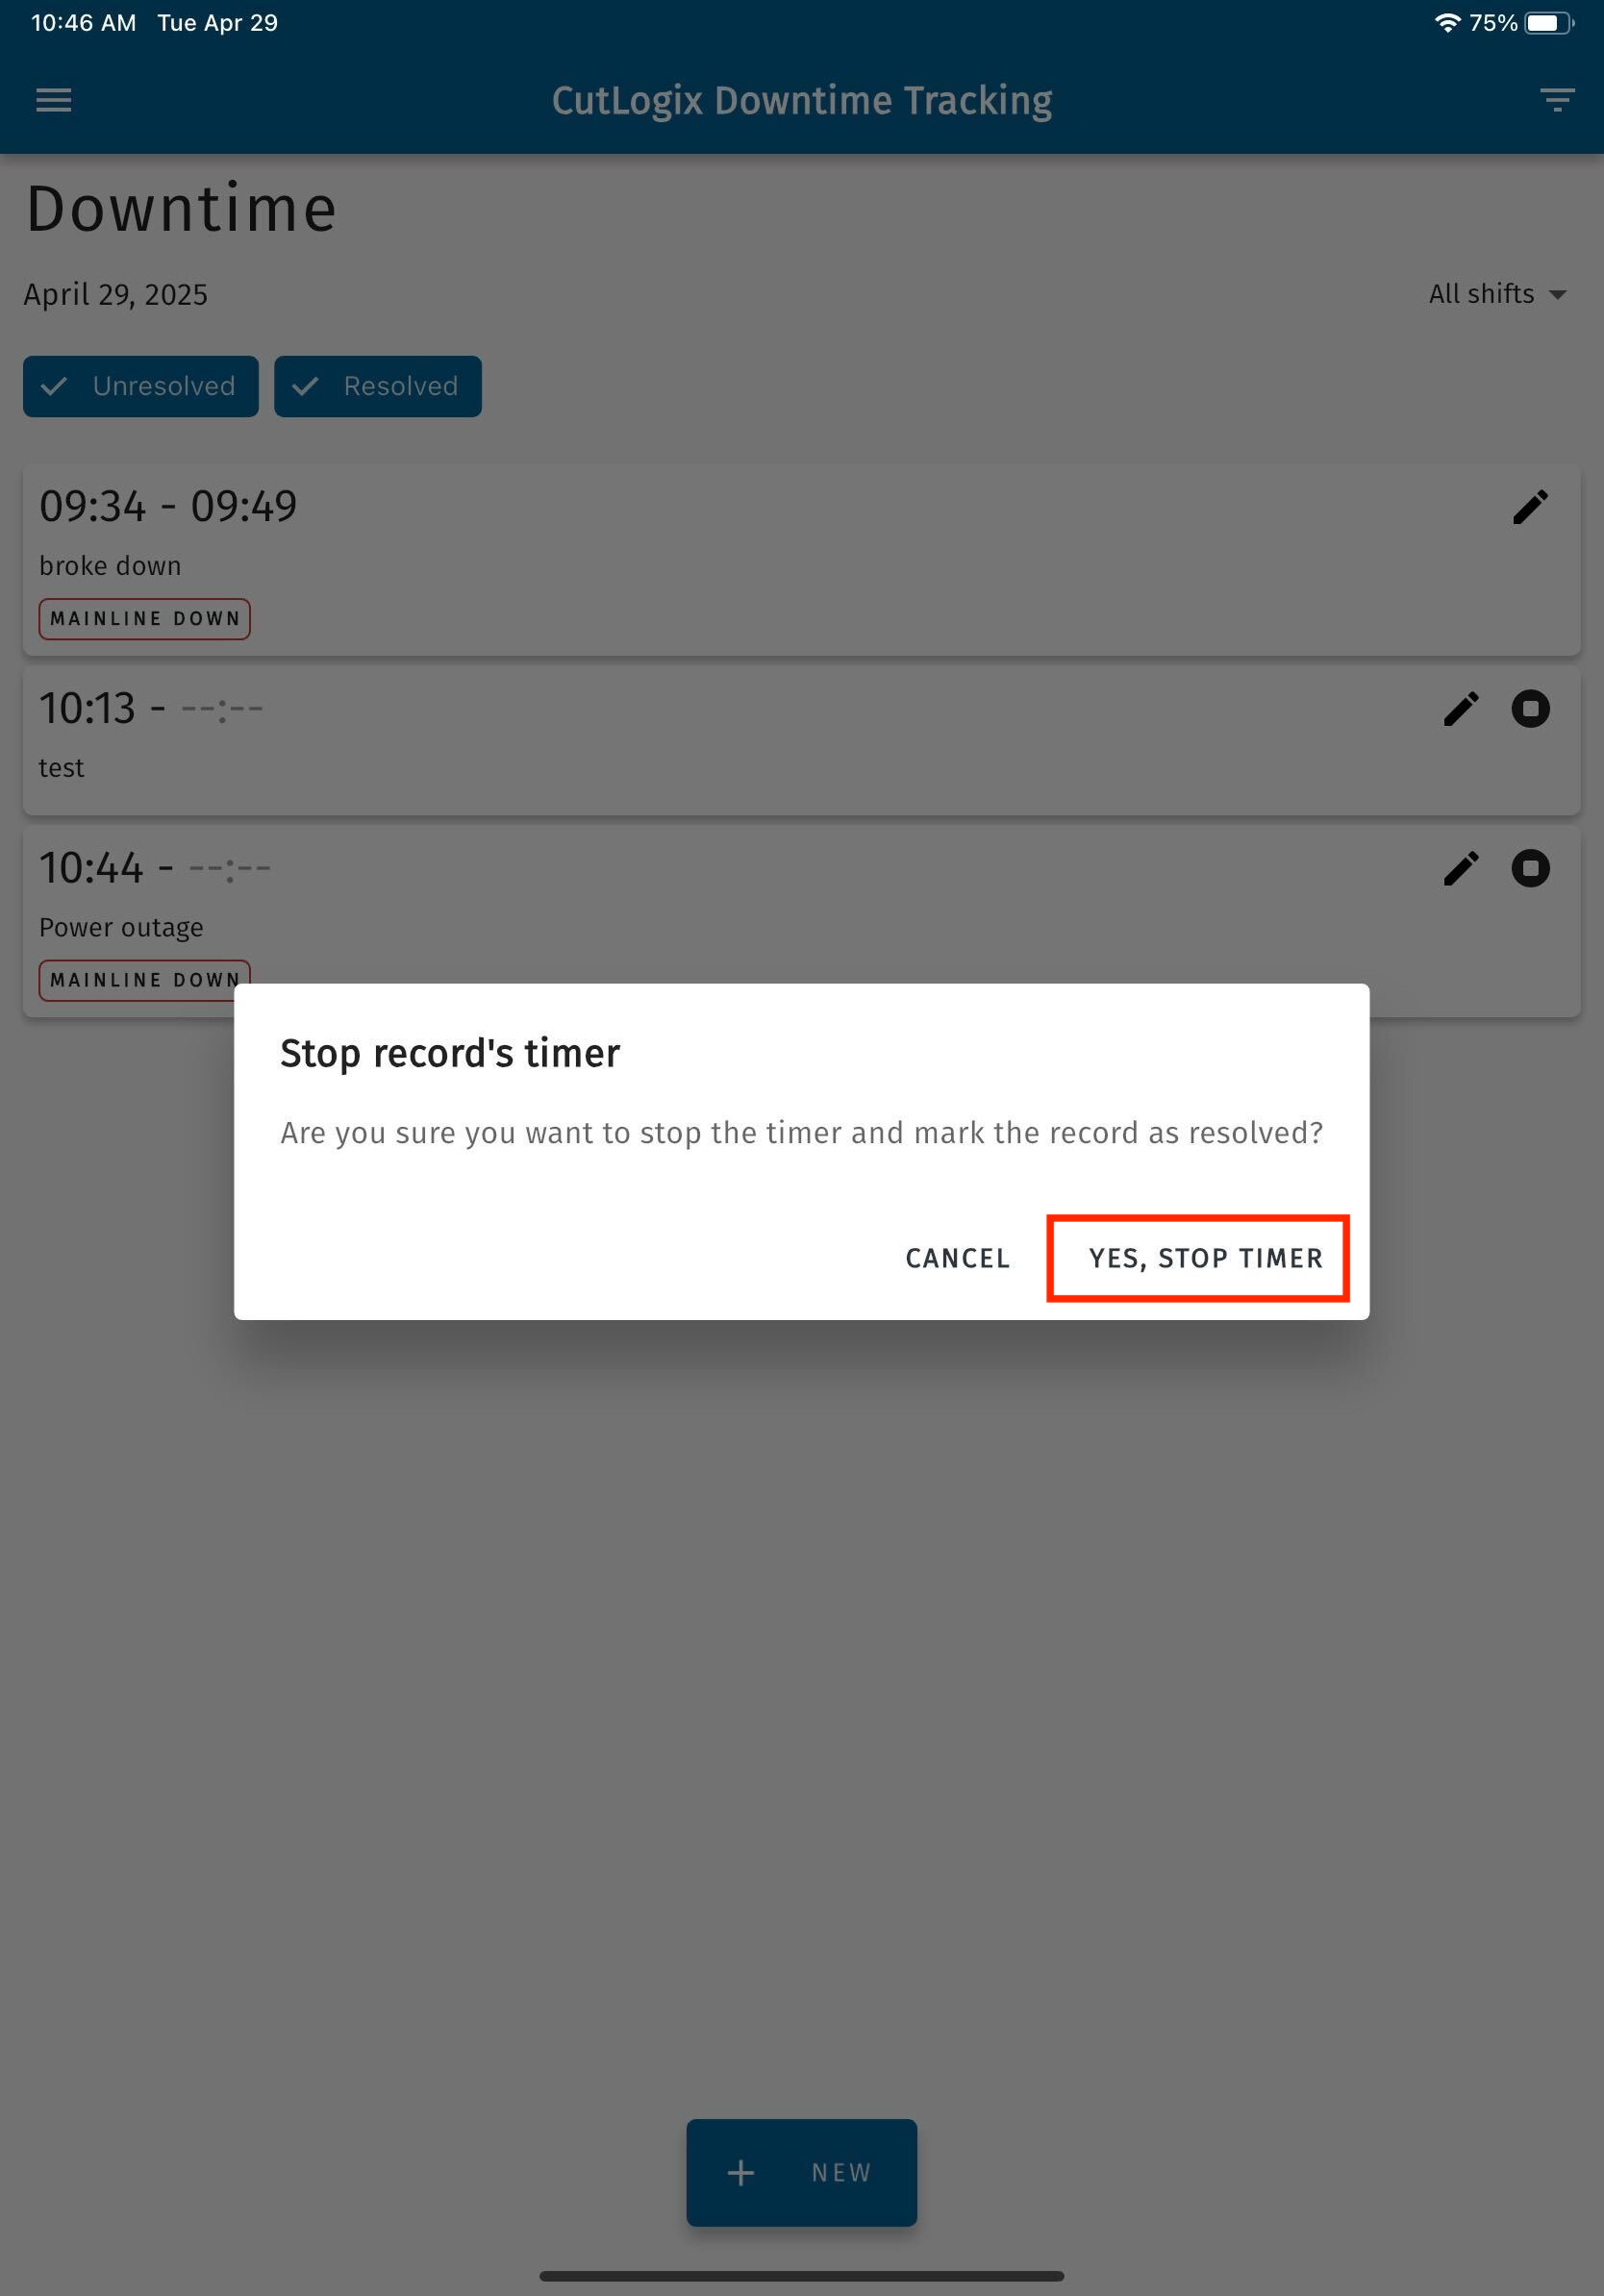
Step 7: A confirmation dialog will appear, asking if you’re sure that you want to stop the timer. Click “Yes, Stop Timer” to stop the timer.
Step 8: On the downtime screen, the downtime record will now have an end time set on it. The end time automatically gets set as the time that the stop timer button was clicked.