Planned Mixed Products Tasks
How to Add default Planned Mixed Product Production
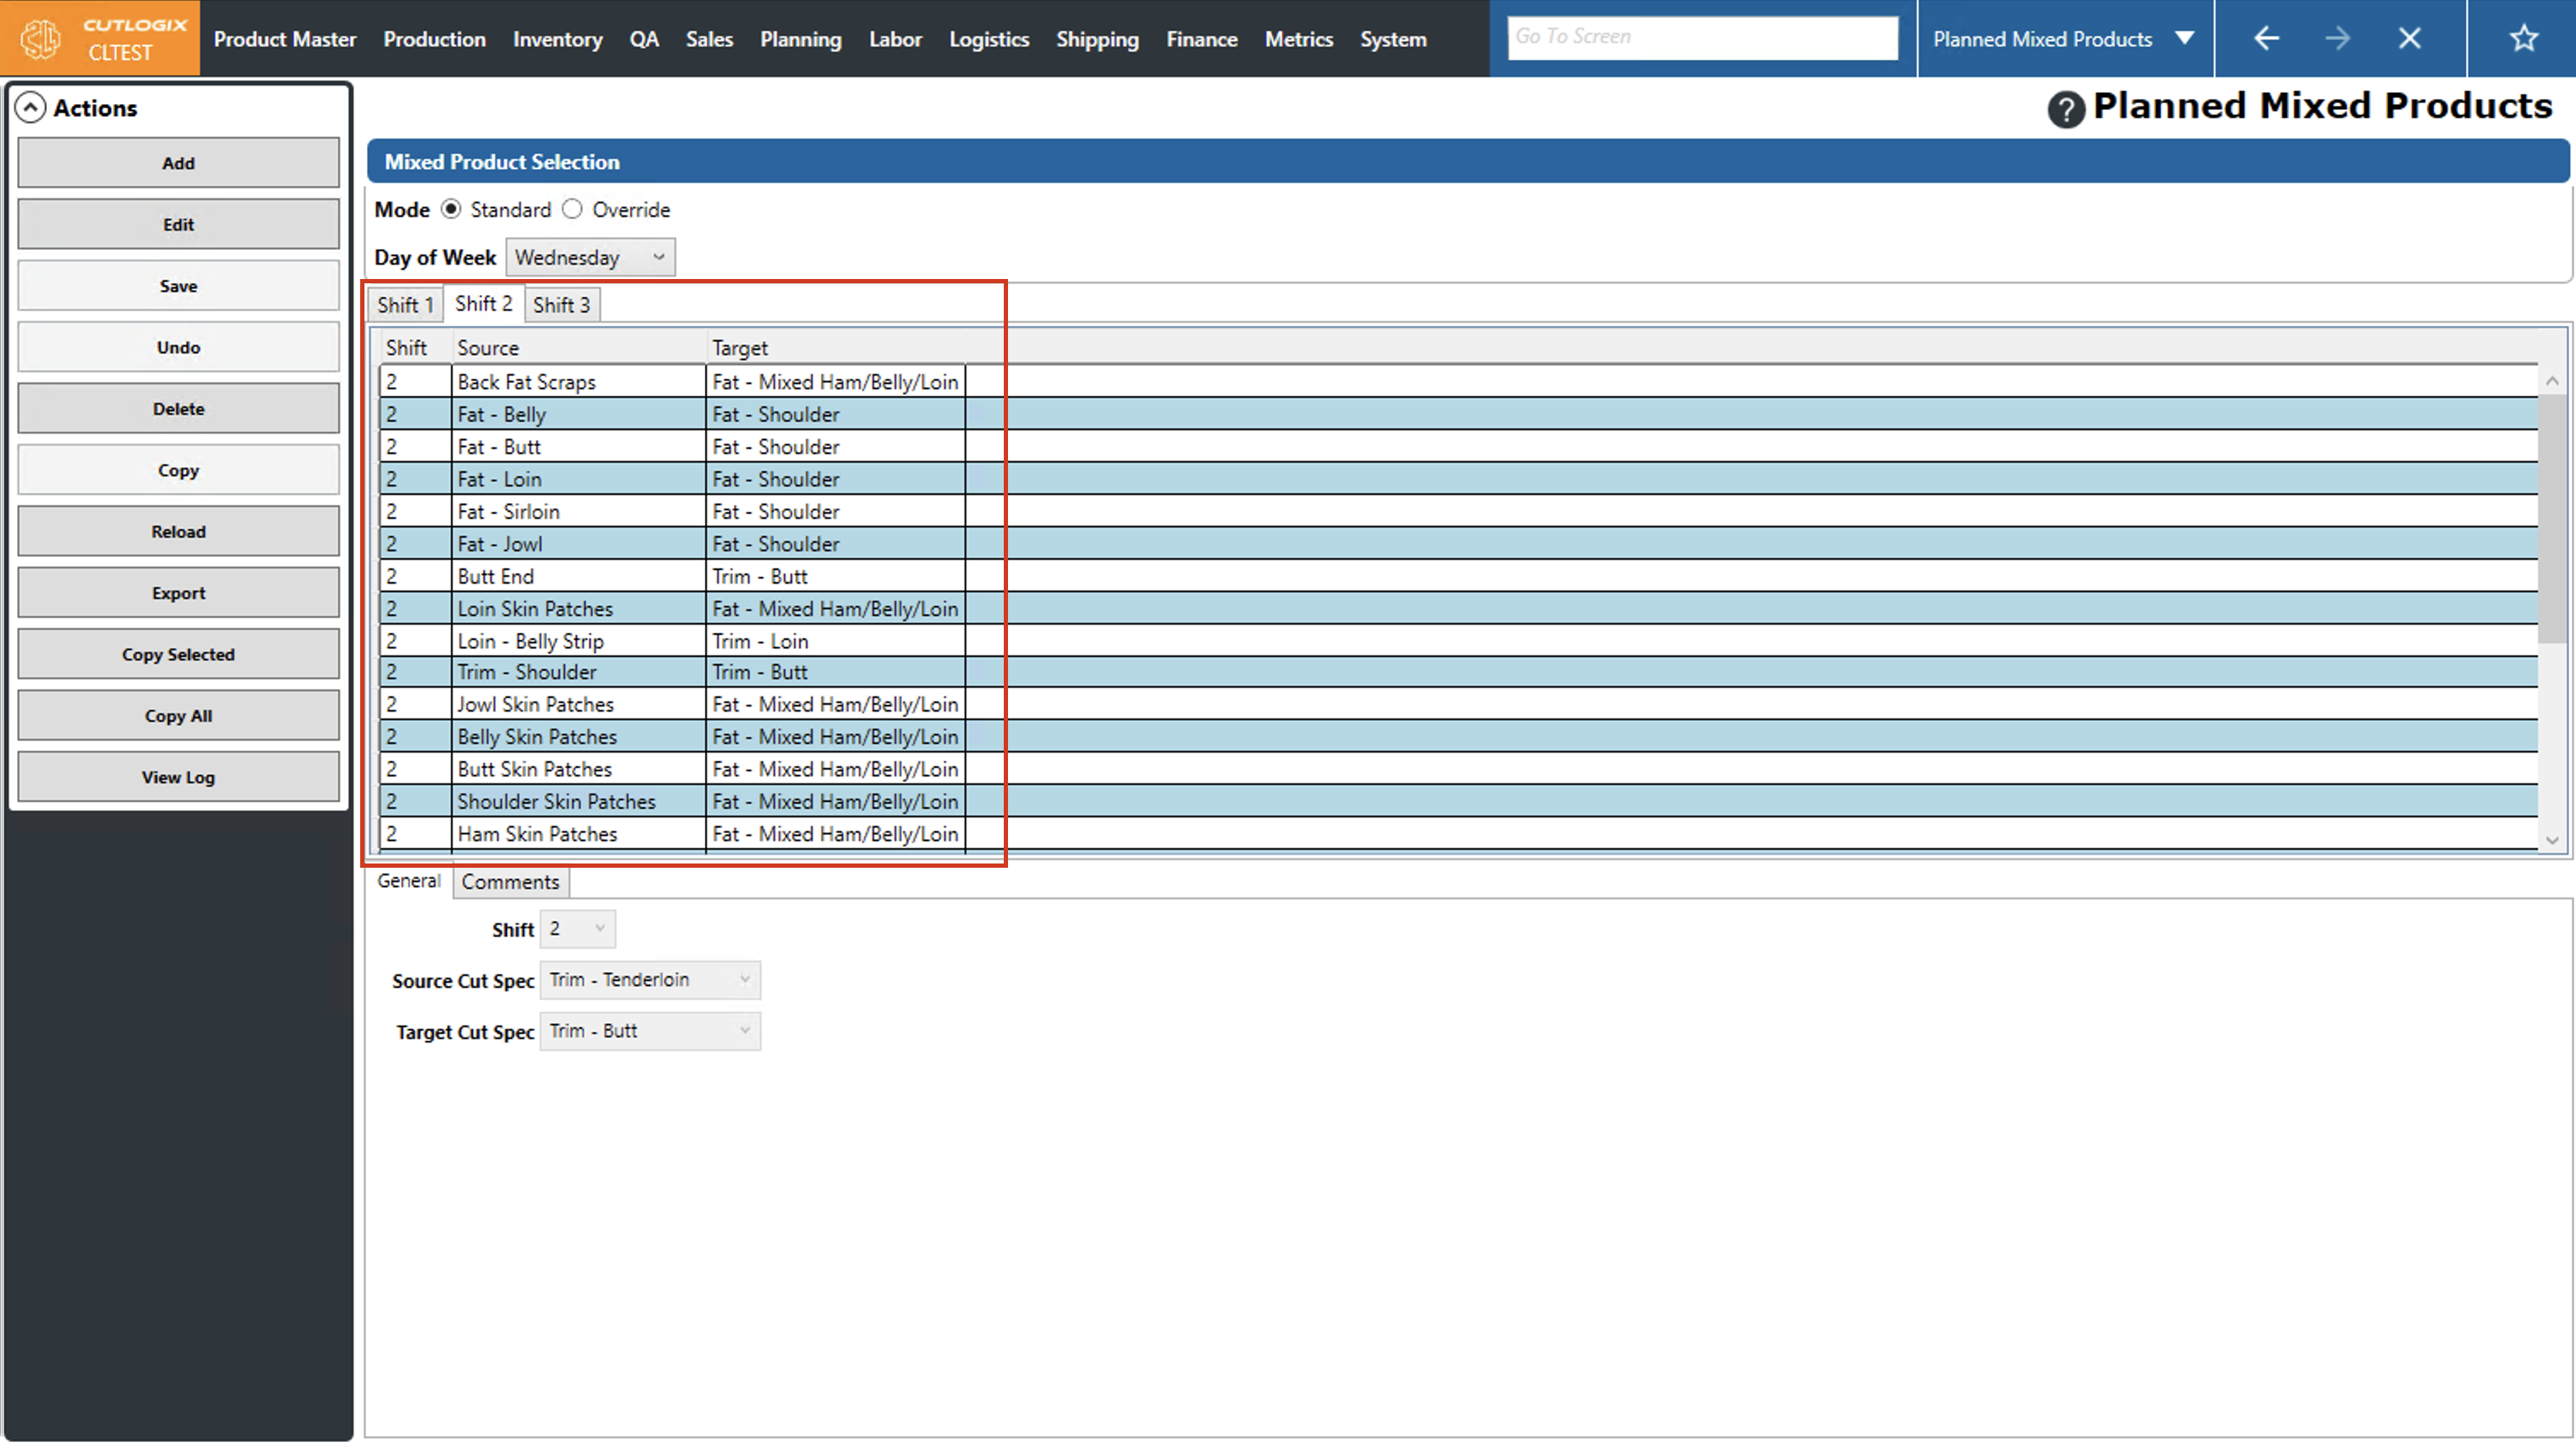
DemoMixed product production enabled one cut spec to be mixed with another cut spec, most often for the purpose of dumping accumulated material with another cut spec to be sold. (The product on the right side of the page is what's actually going to be sold)
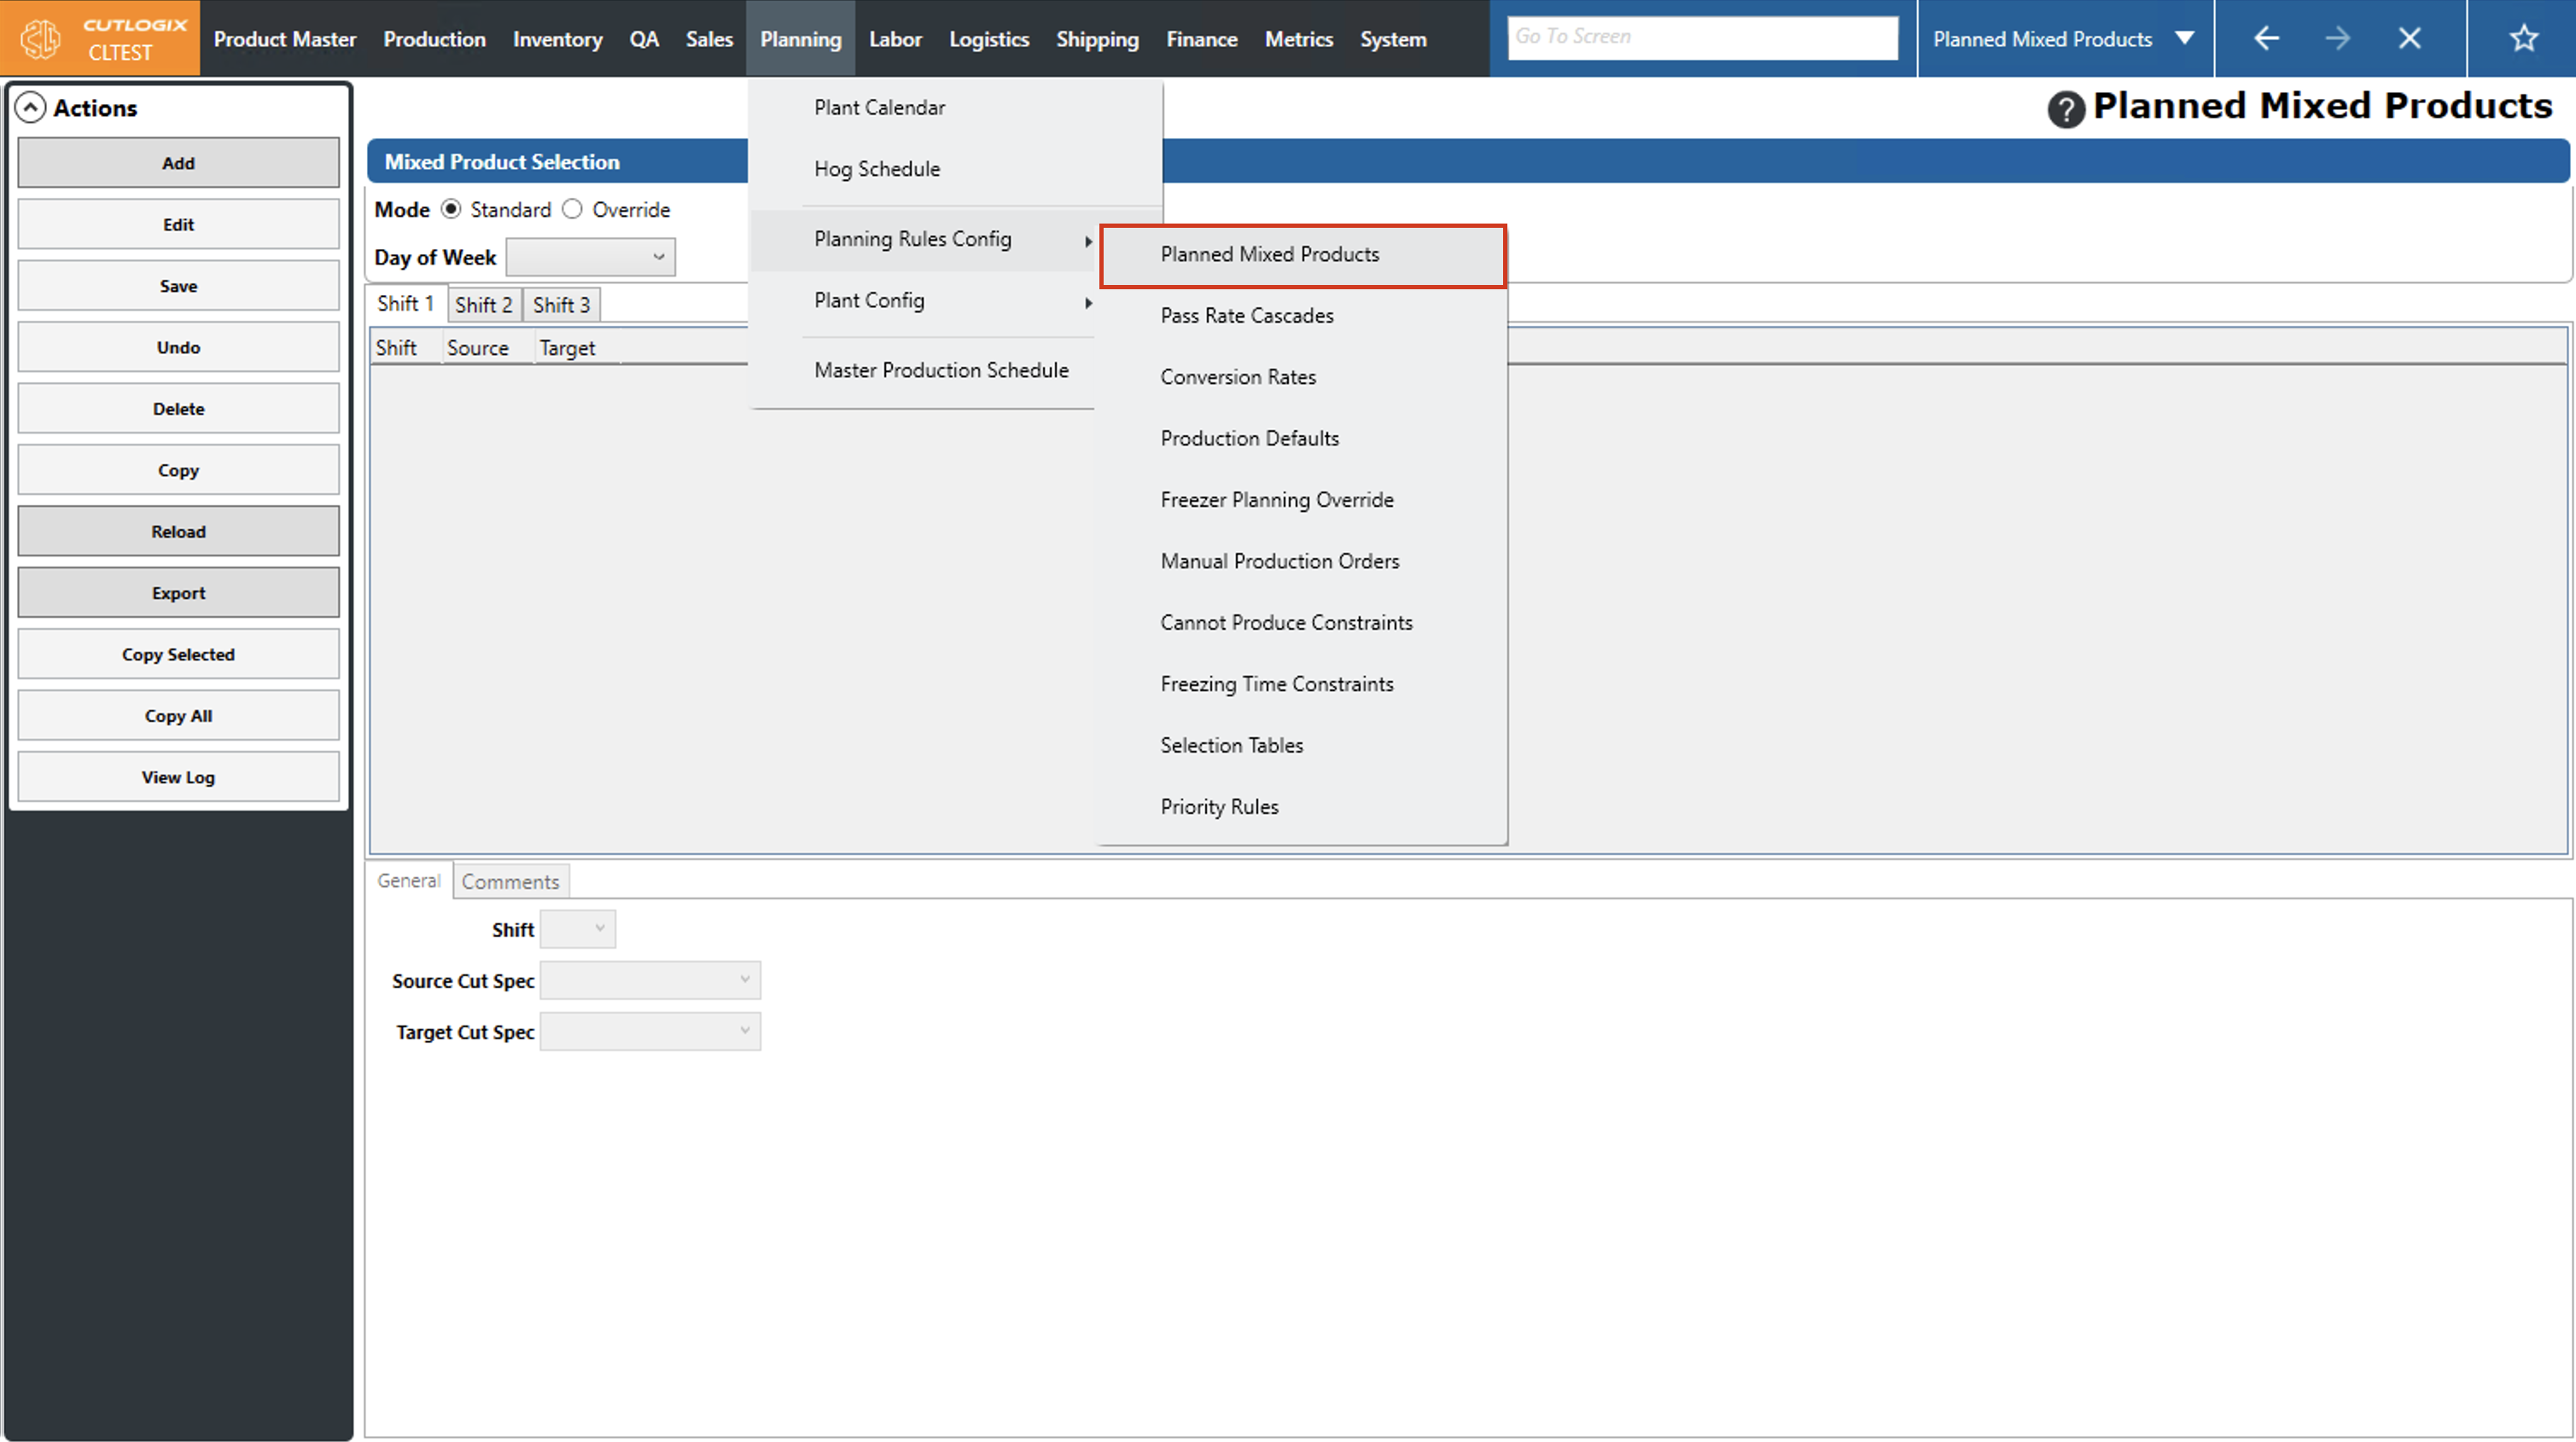
Step 1: Navigate to the "Planned Mixed Products" page (Under the Planning menu → Planning Rules Config → Planned Mixed Products).
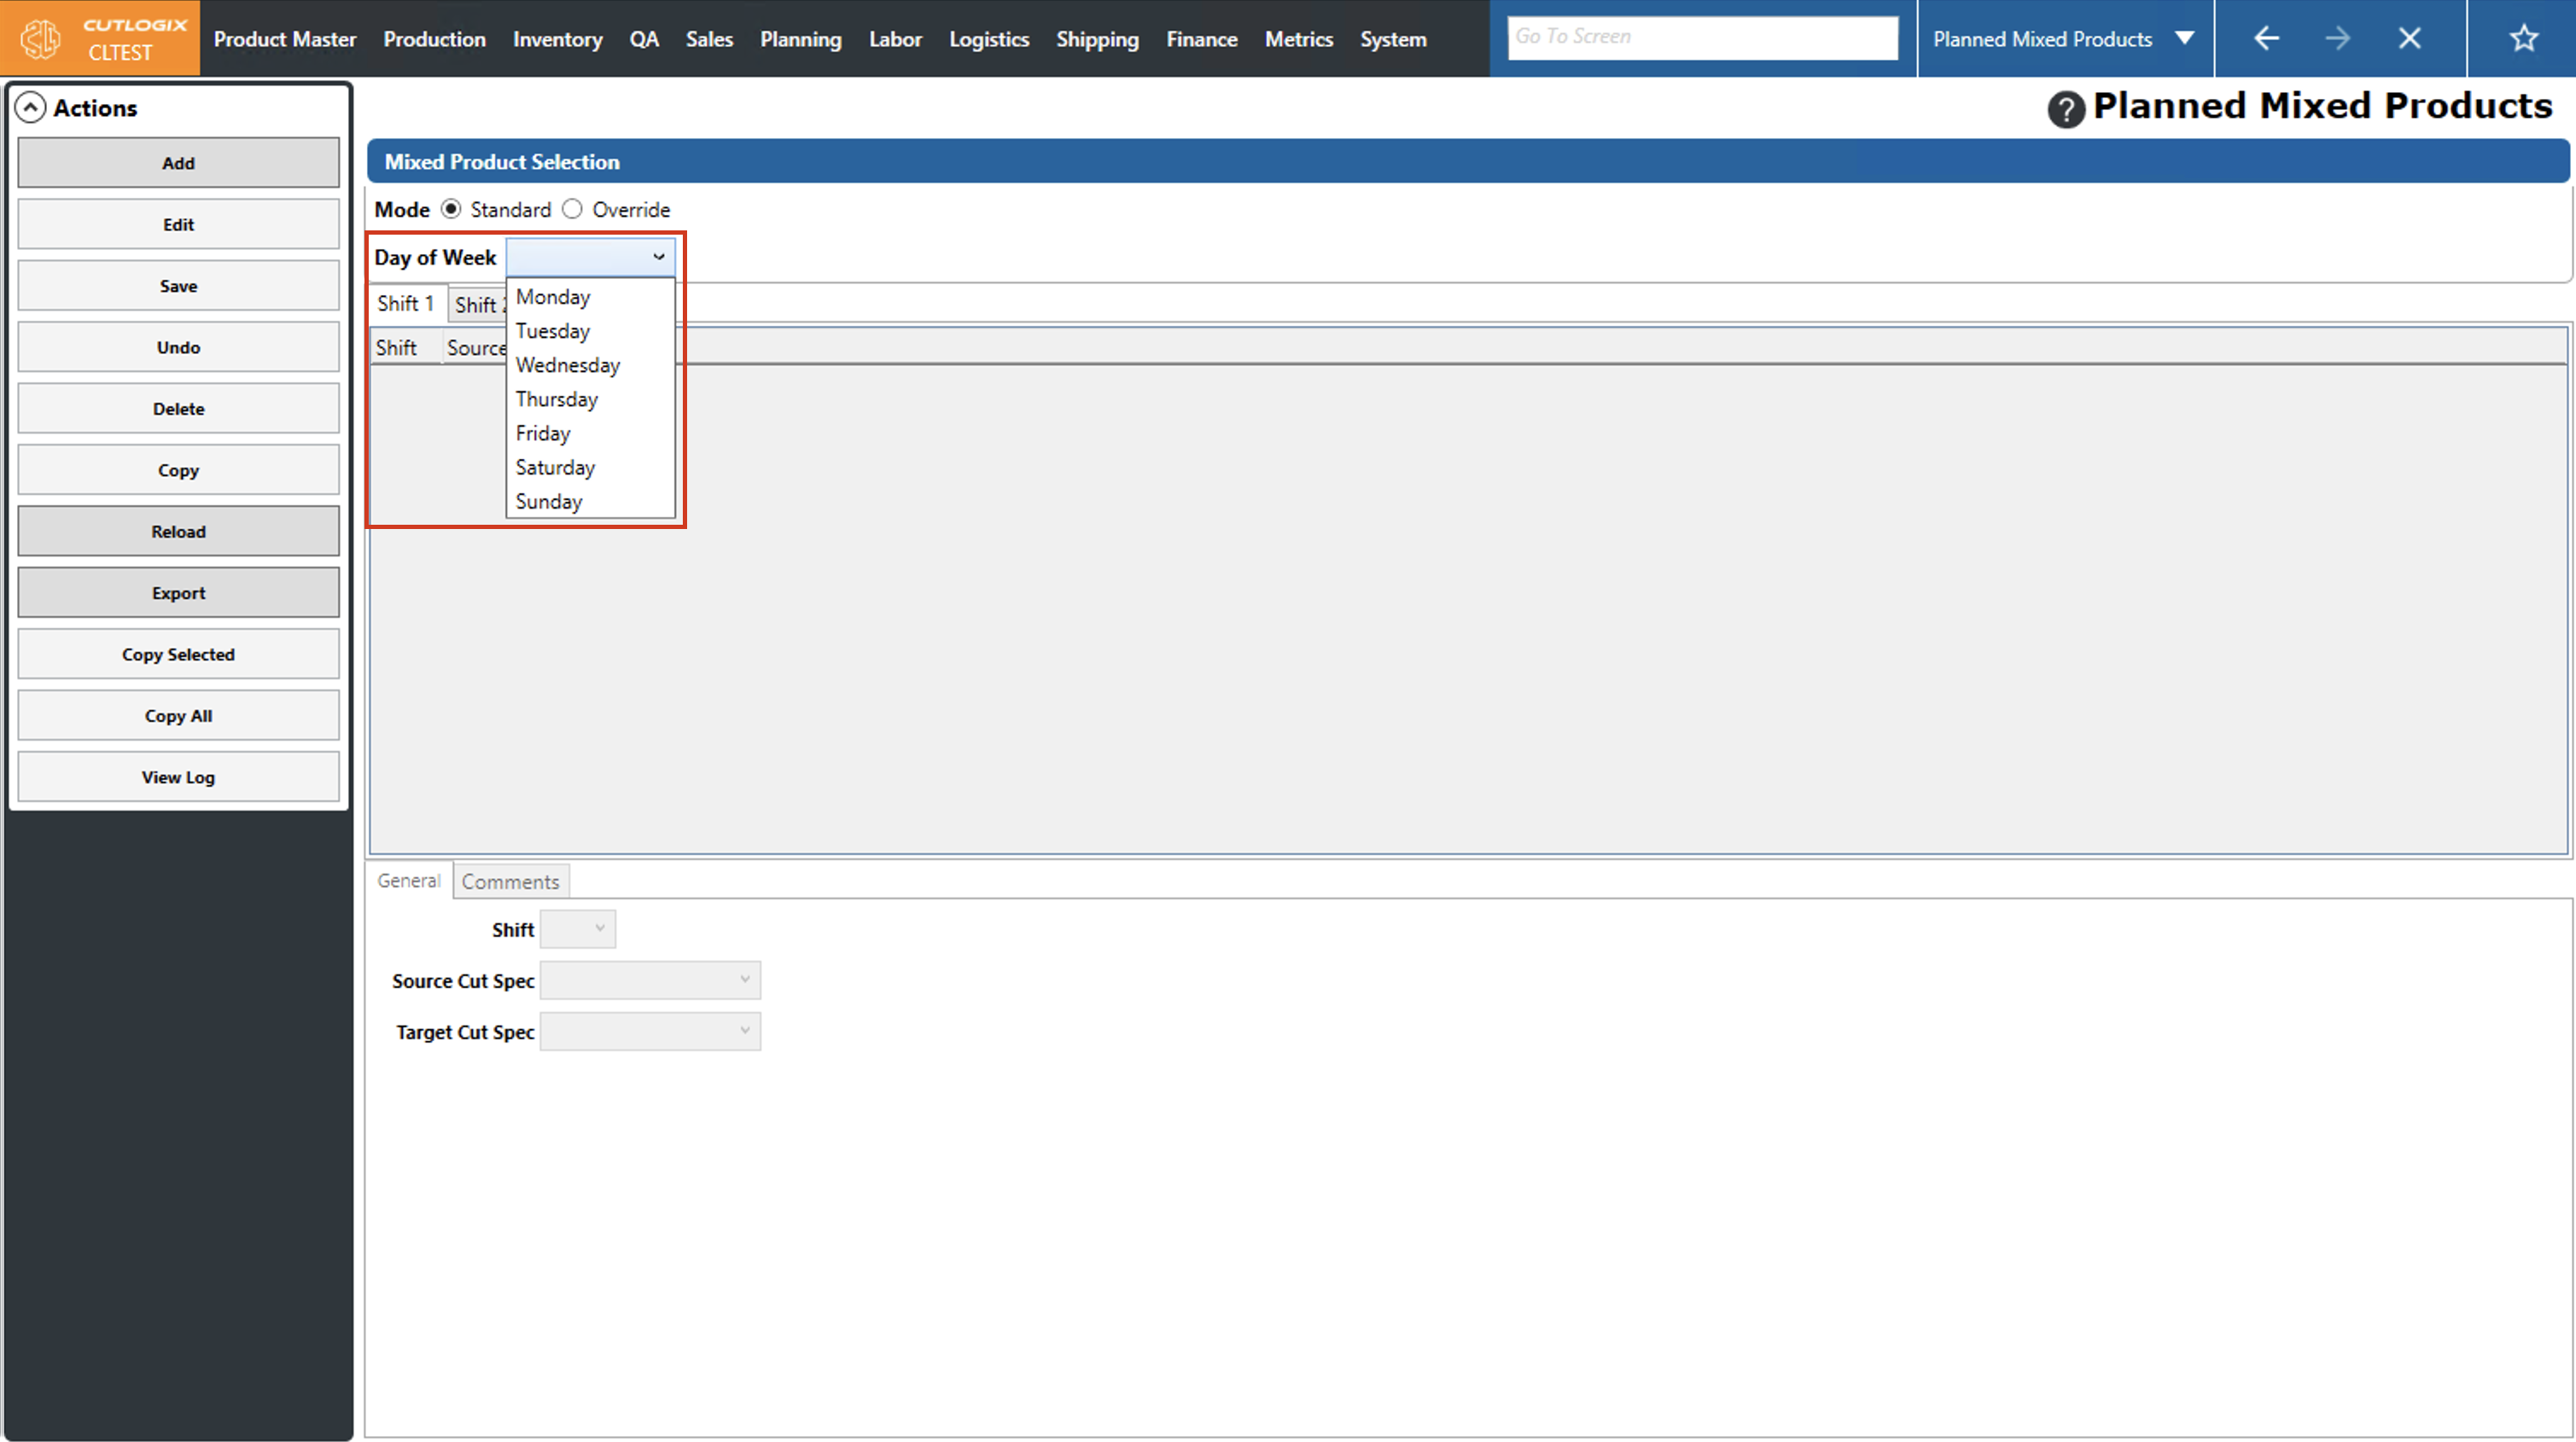
Step 2: Select a day of the week from the dropdown list that you want to add a planned mixed products record for using the "Day of Week" dropdown list.
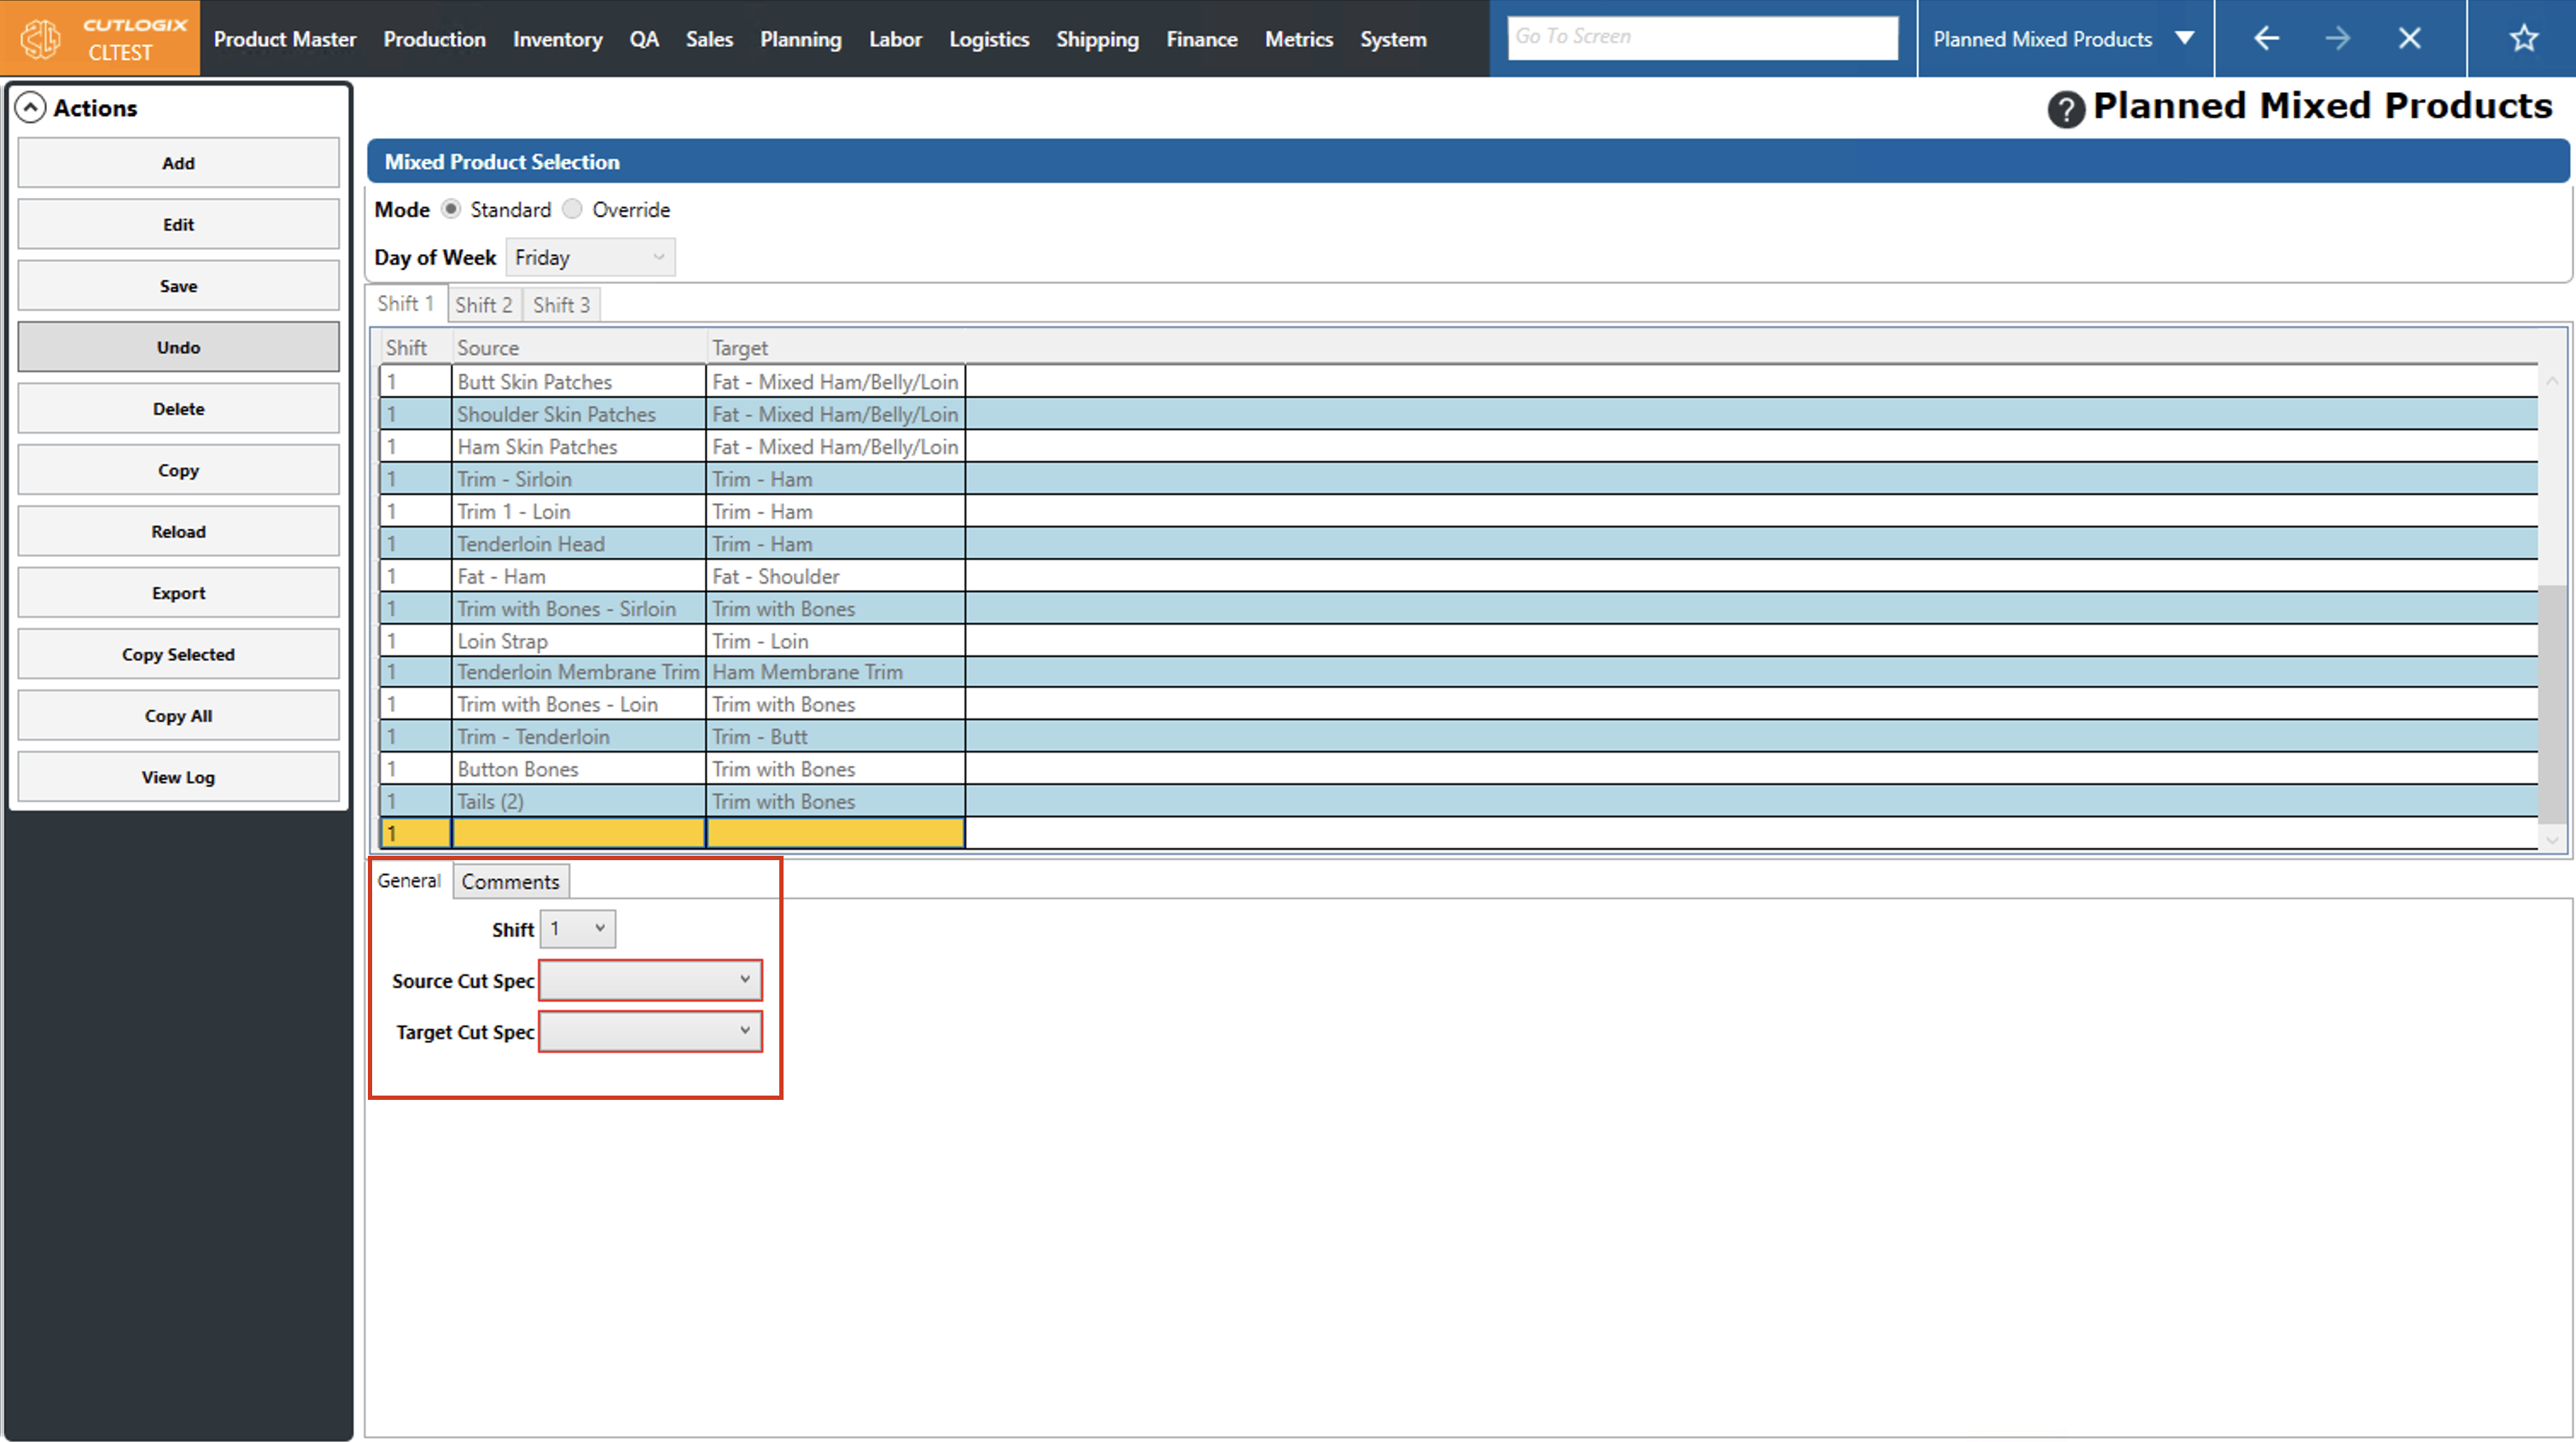
Step 3: Click the "Add" button in the actions panel.
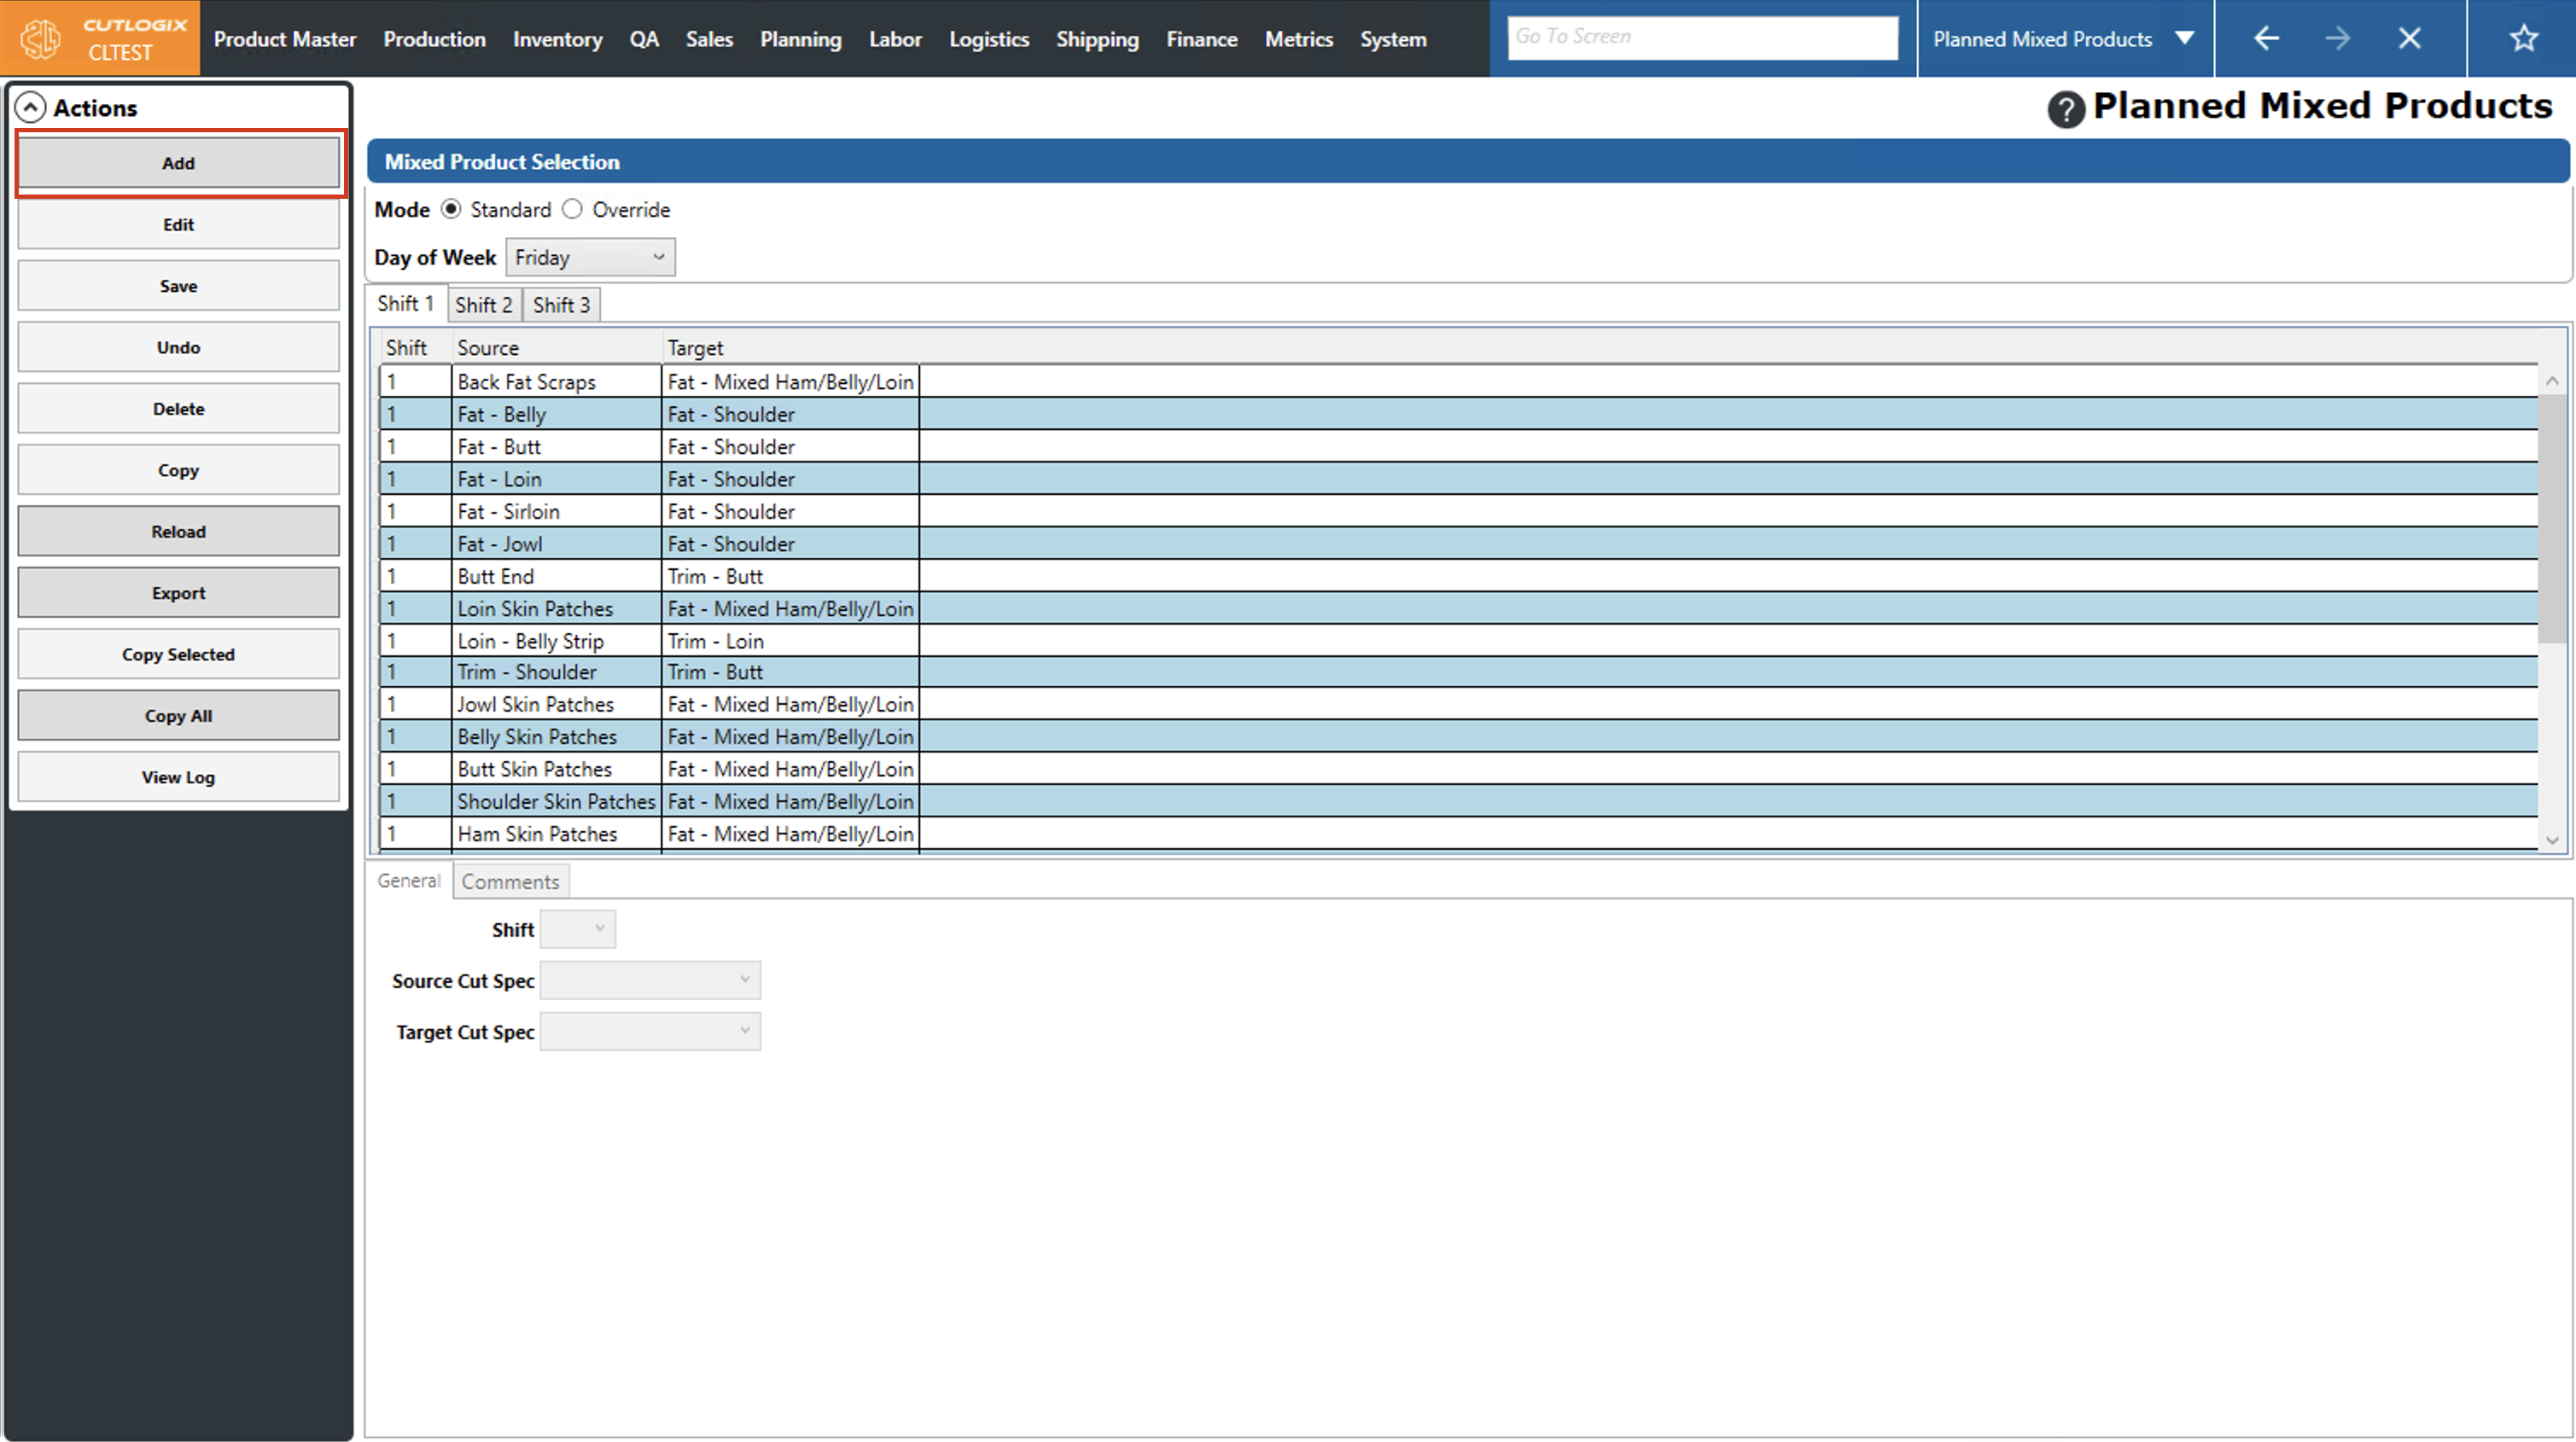
Step 4: This opens some temporary tabs at the bottom of the screen where information about the mixed product can be entered. Choose the shift (using the dropdown list) that the planned mixed product should be added to, select a source cut spec from the dropdown list, then select a target cut spec from the remaining dropdown list. (This means that for the selected shift on the selected day, accumulation of the source cut spec will be combined with and sold as the target cut spec.) You can also add comments regarding the mixed product on the "Comments" tab.
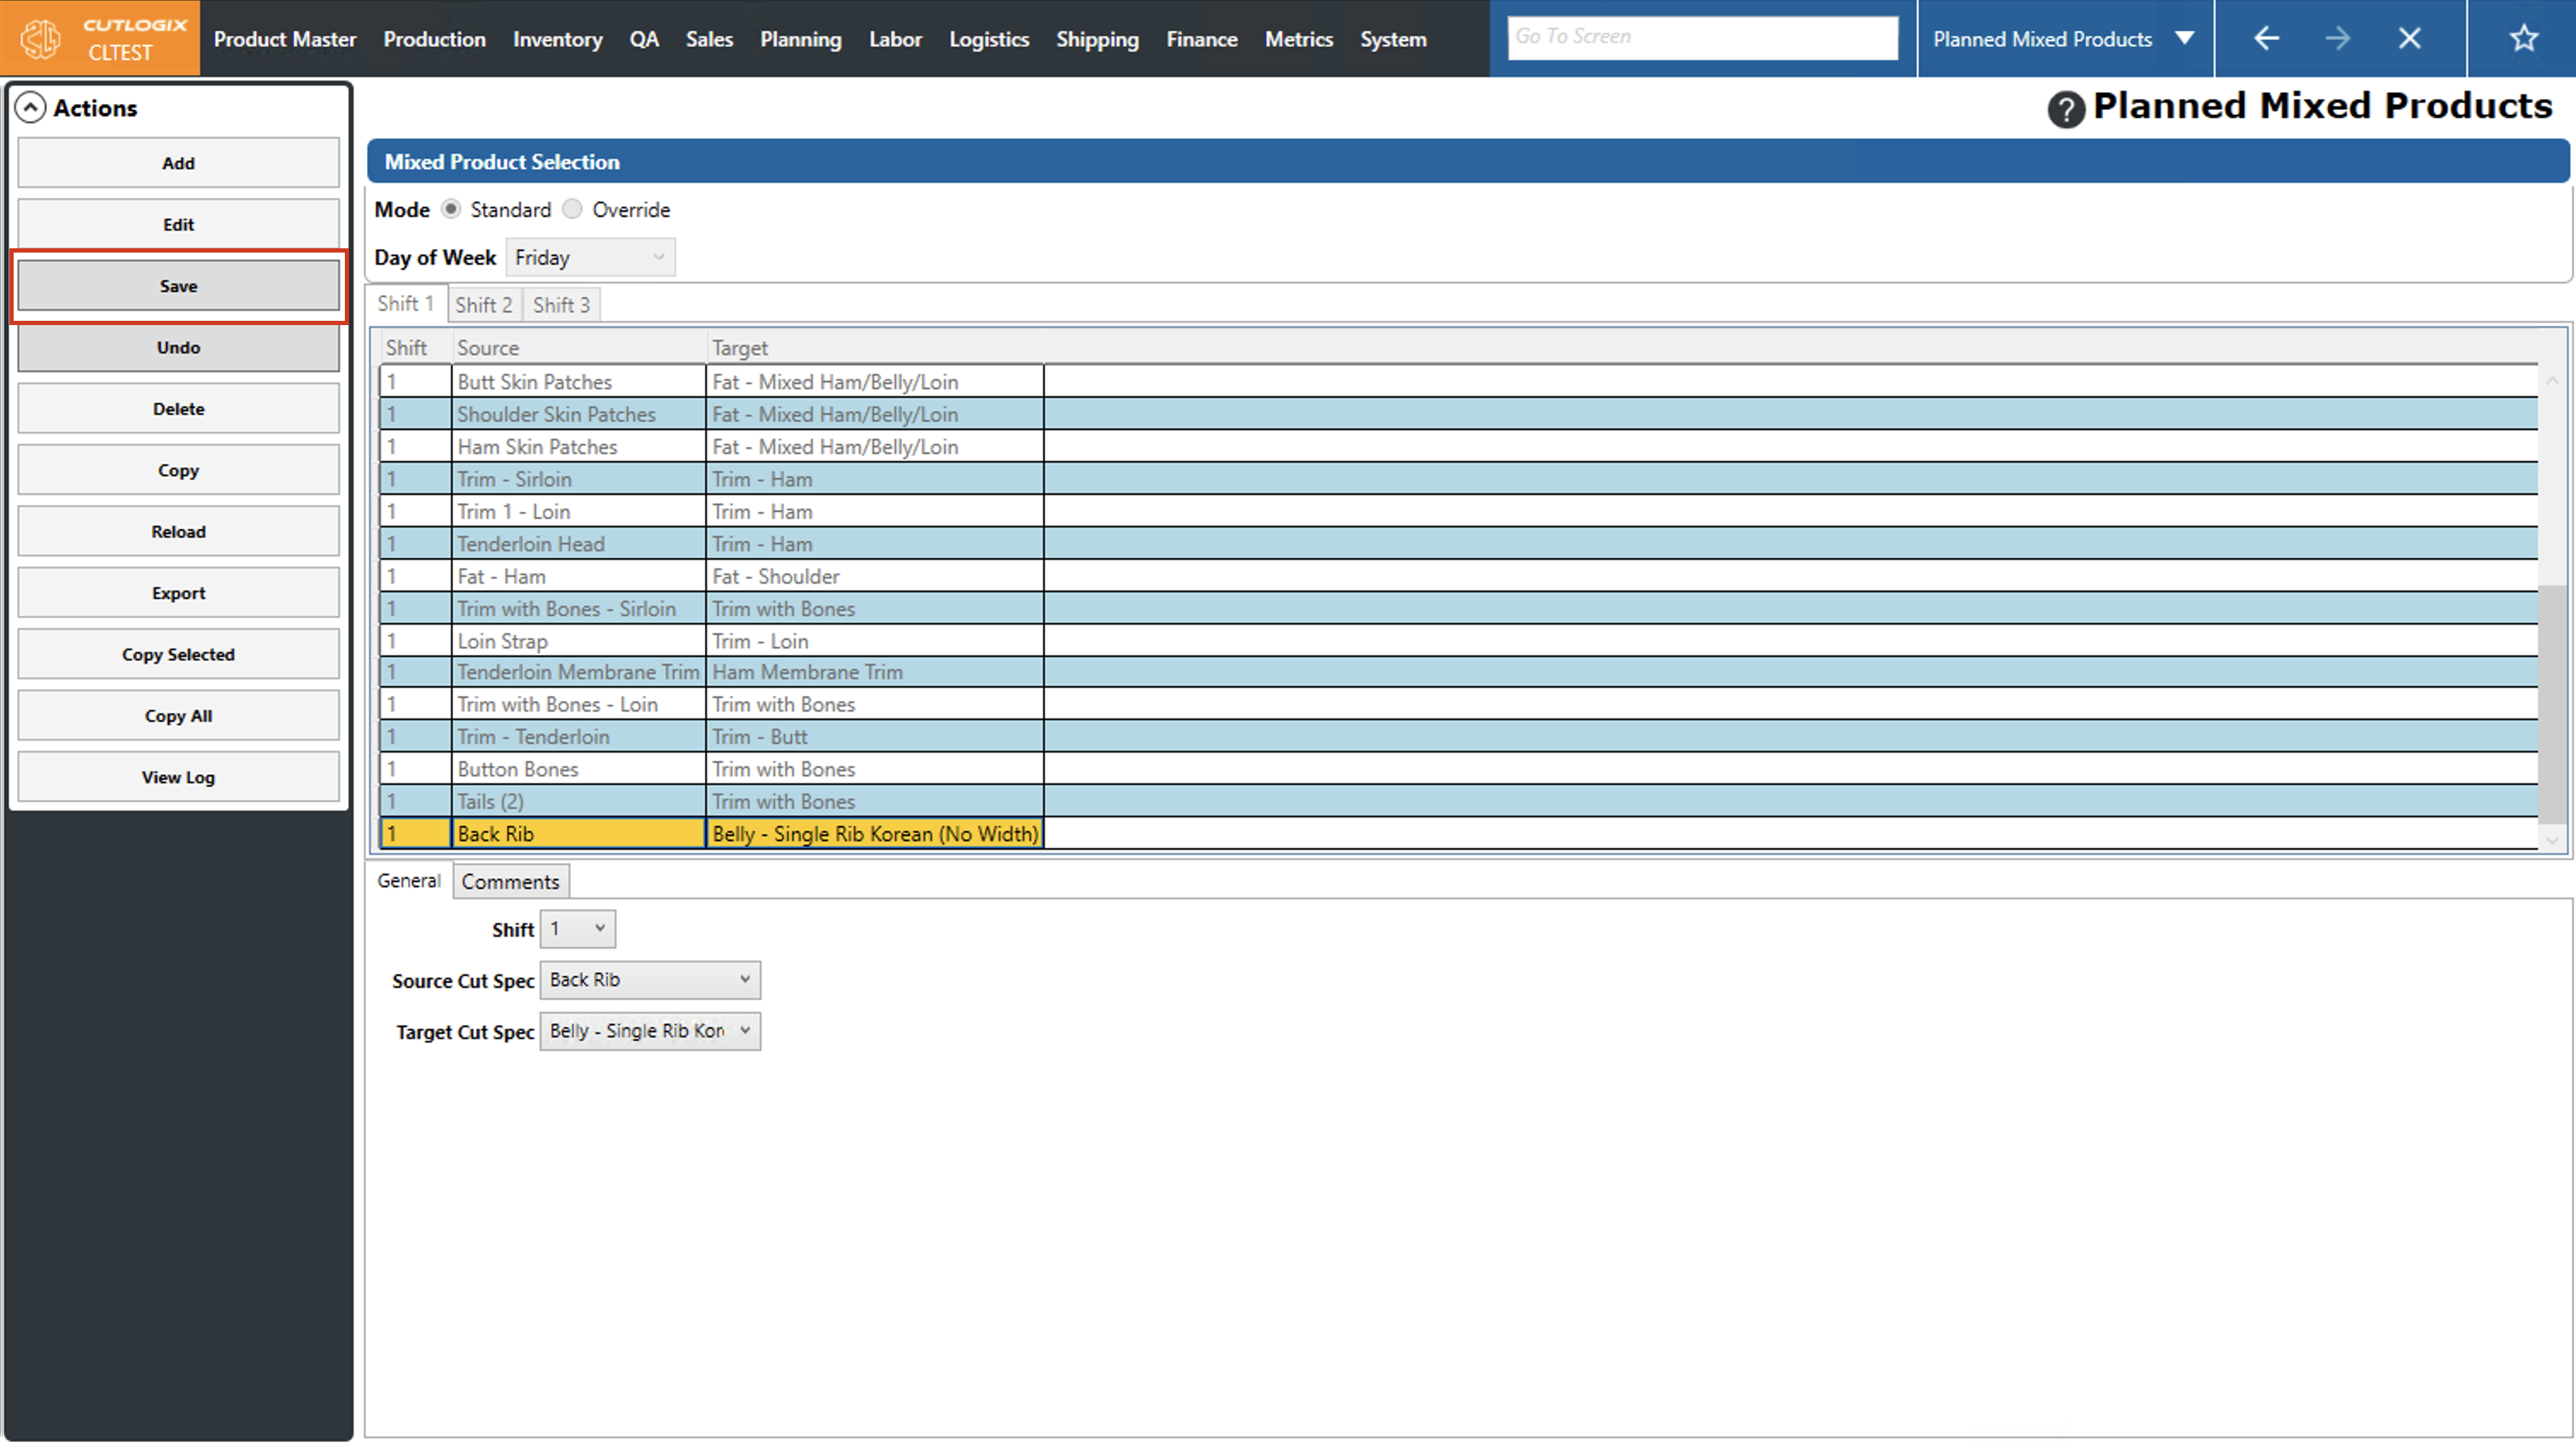
Step 5: To save the mixed product, click "Save" in the actions panel. If you don't wish to save your changes, click the "Undo" button to revert your changes without saving them.
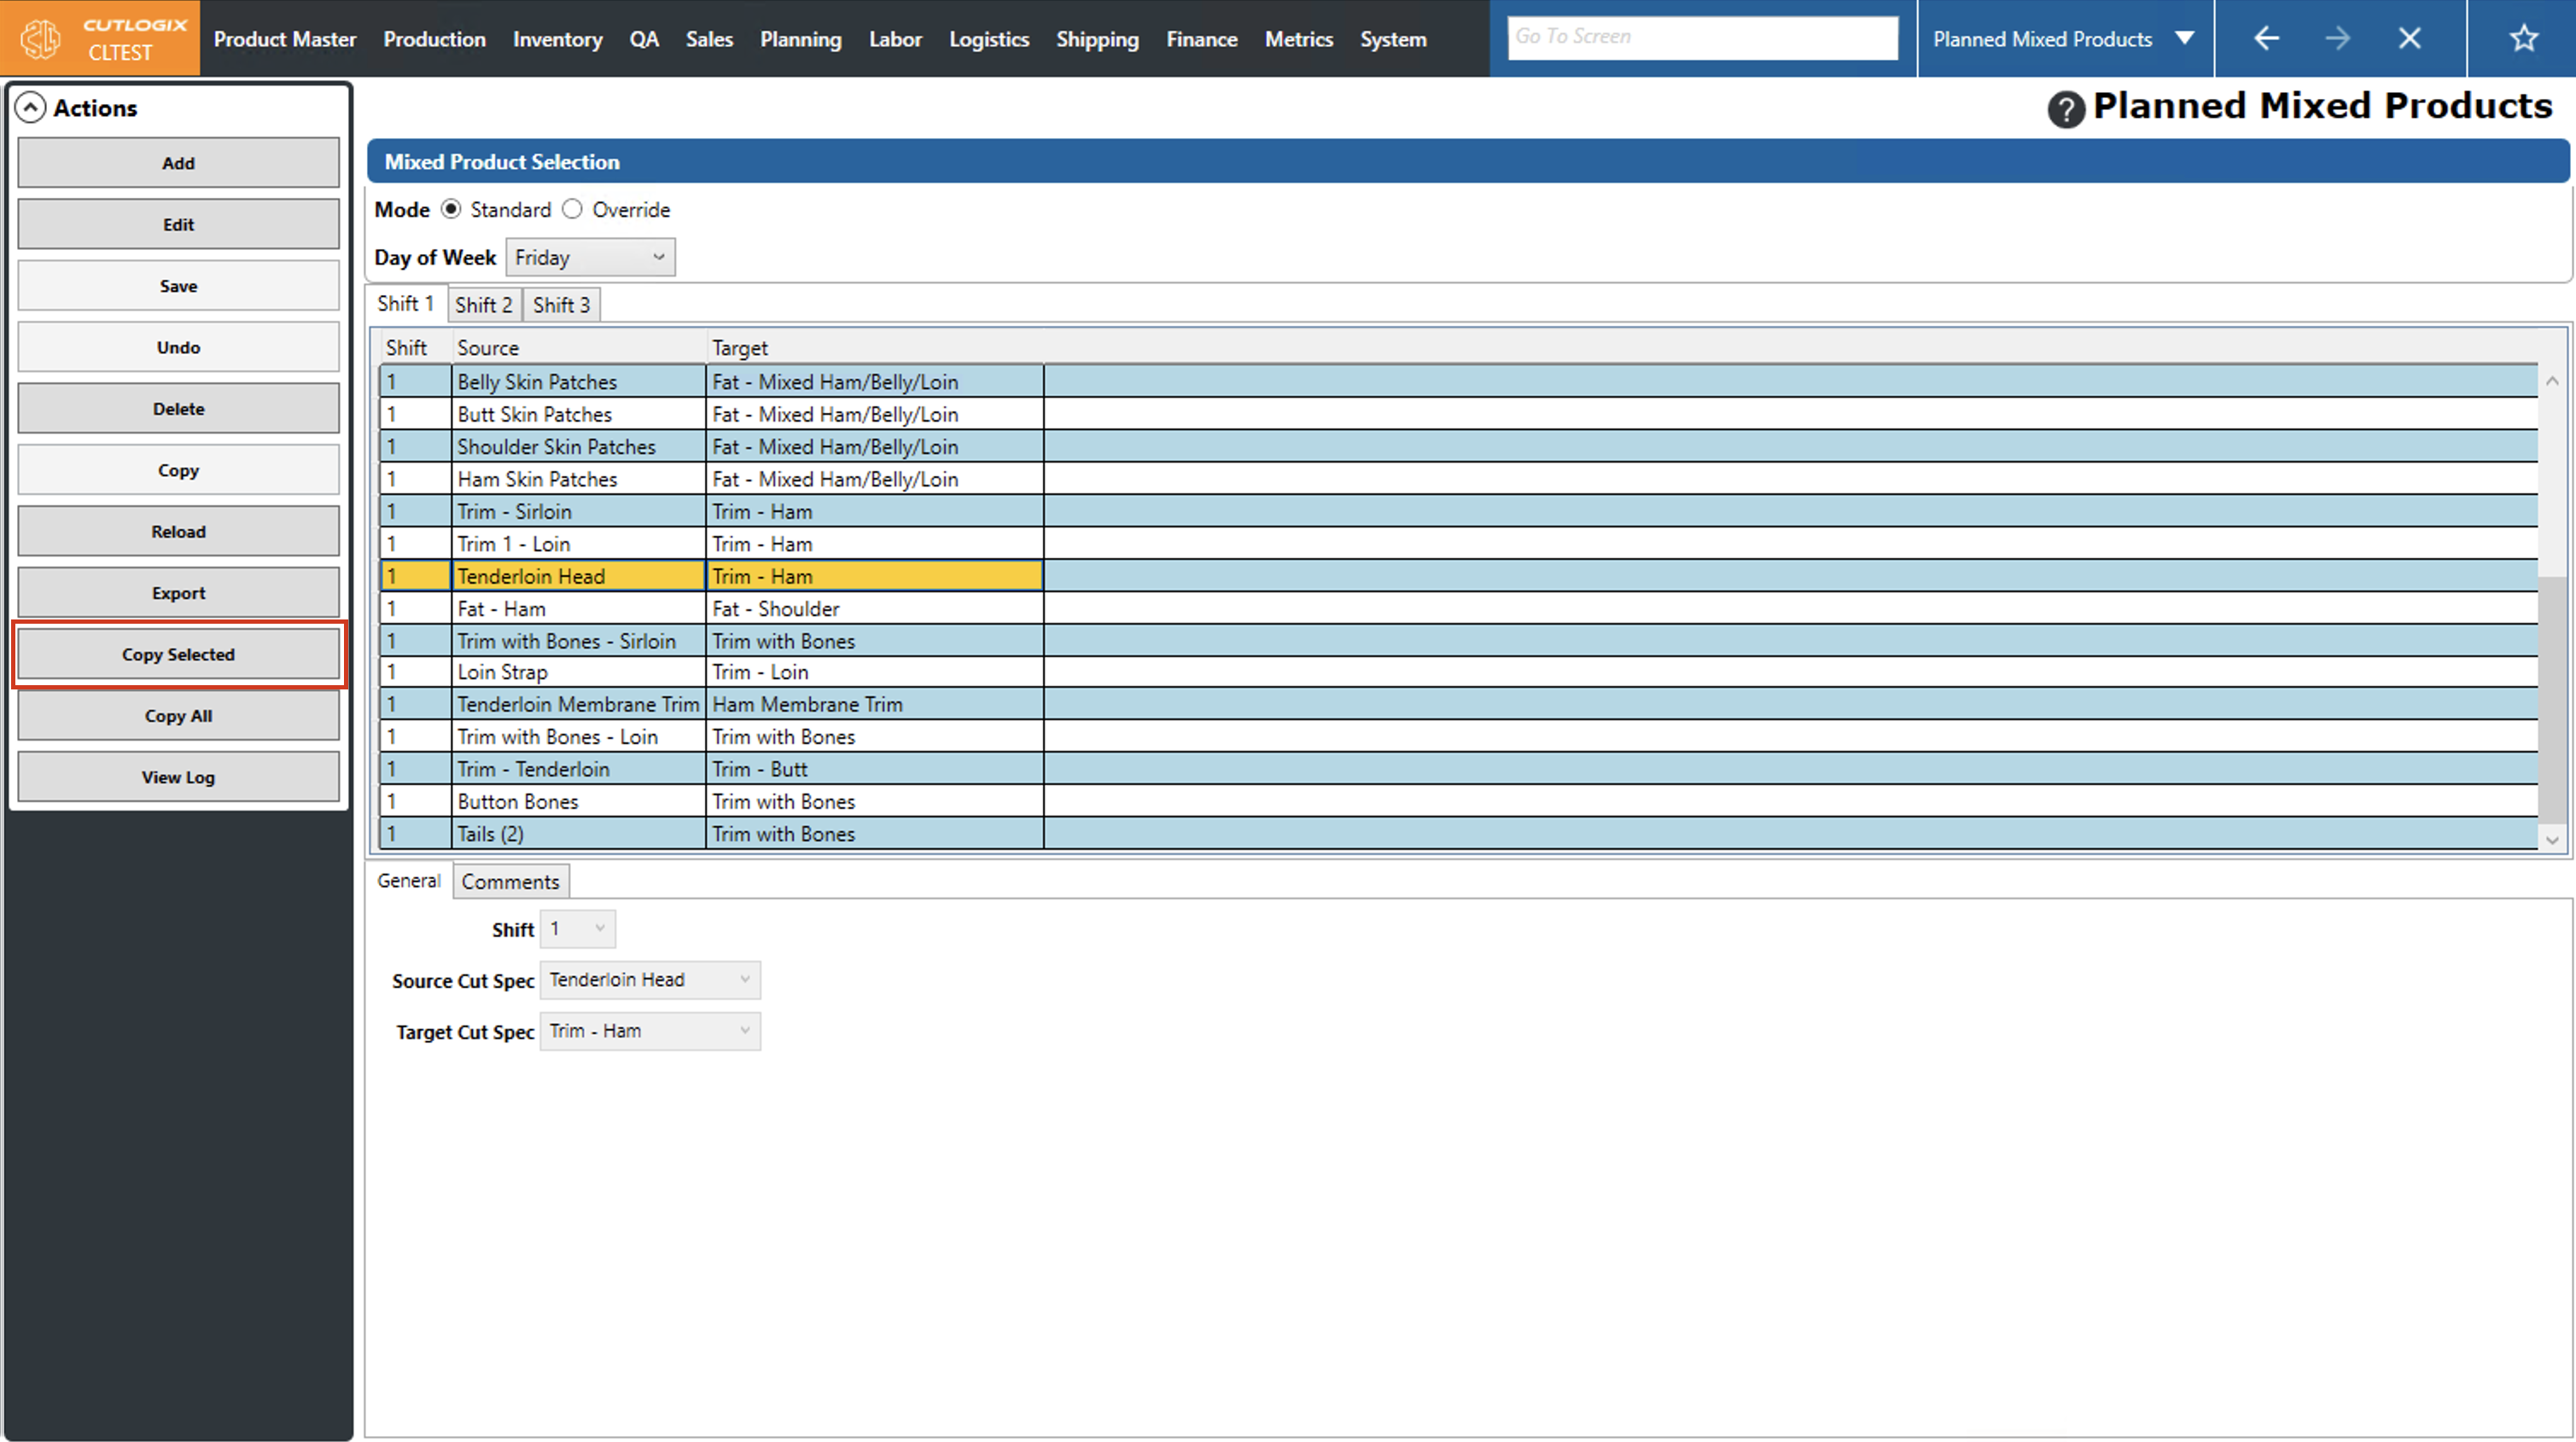
Step 6: You also have the option of copying existing mixed products to different days. To do this, click "Copy Selected" to copy the singular, selected mixed product to a different day/shift or "Copy All" to copy all the mixed products on the selected day to a different day/shift. You'll then be asked which days you want to copy to and the shifts on those days, after selecting at least one day and shift, click "OK" to copy the mixed products.
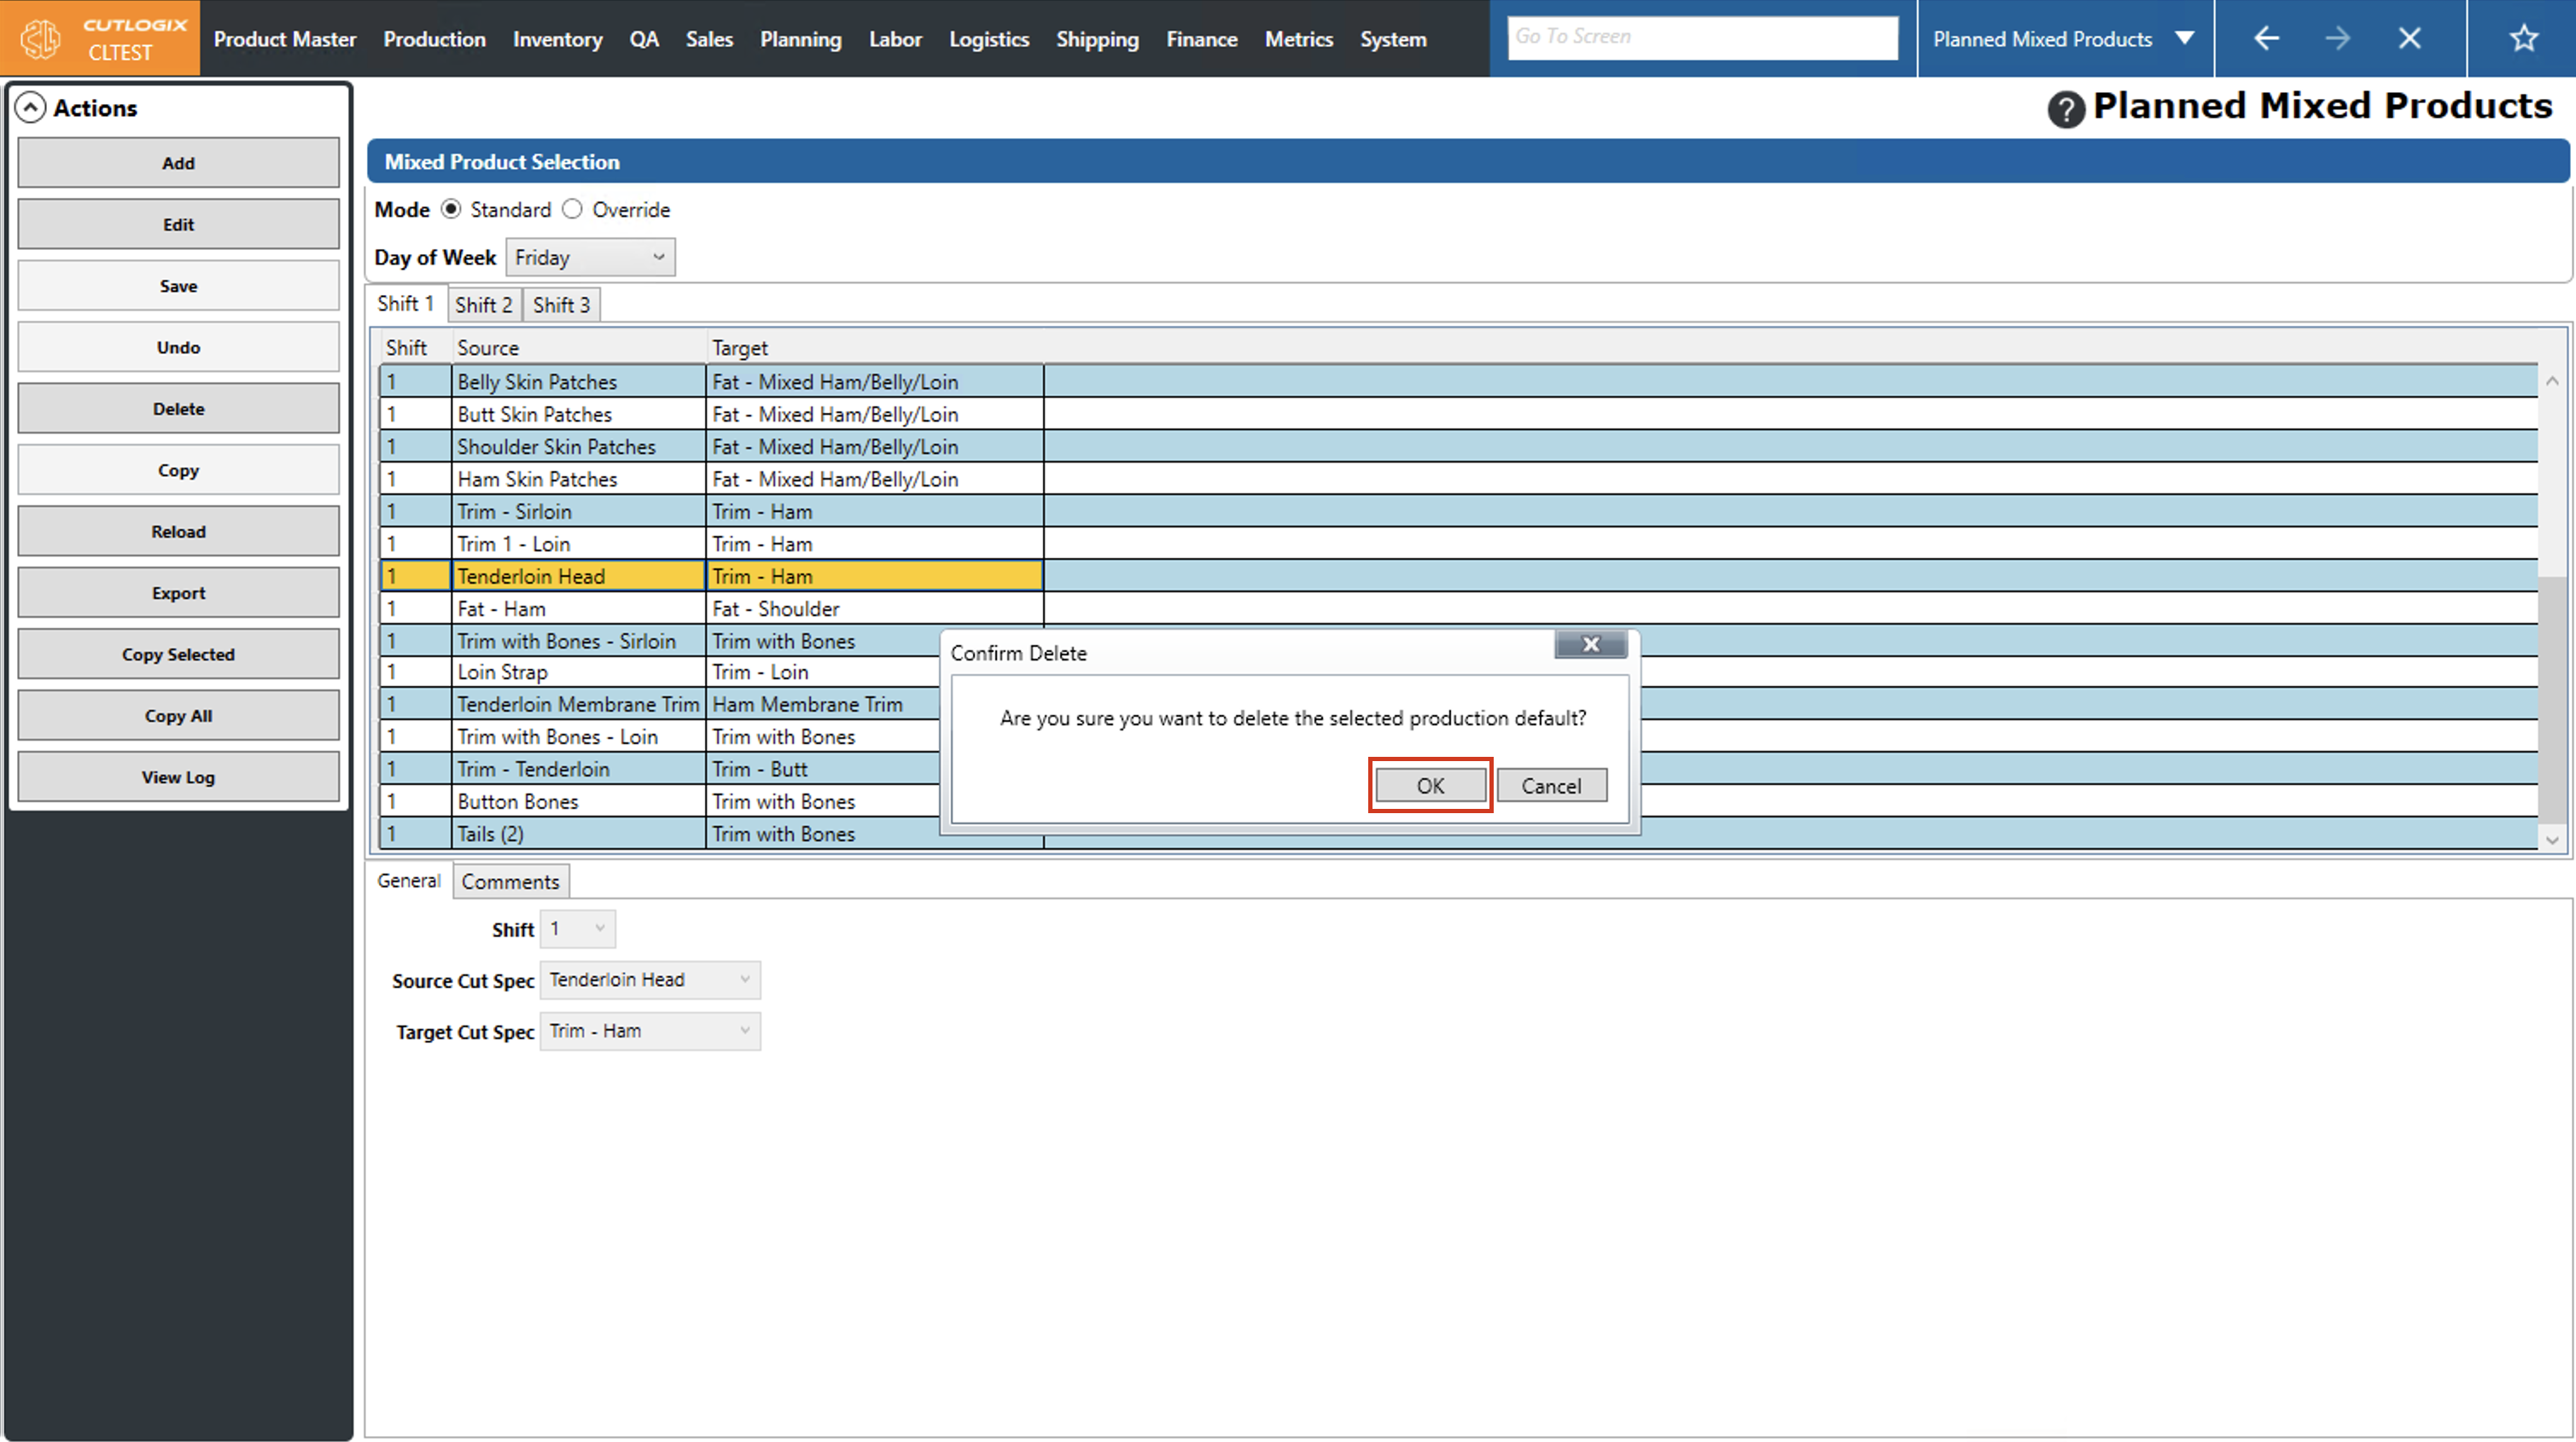
Step 7: To delete mixed products, click on the mixed product that you want to delete (it will be highlighted in orange), then click the "Delete" button in the actions panel.
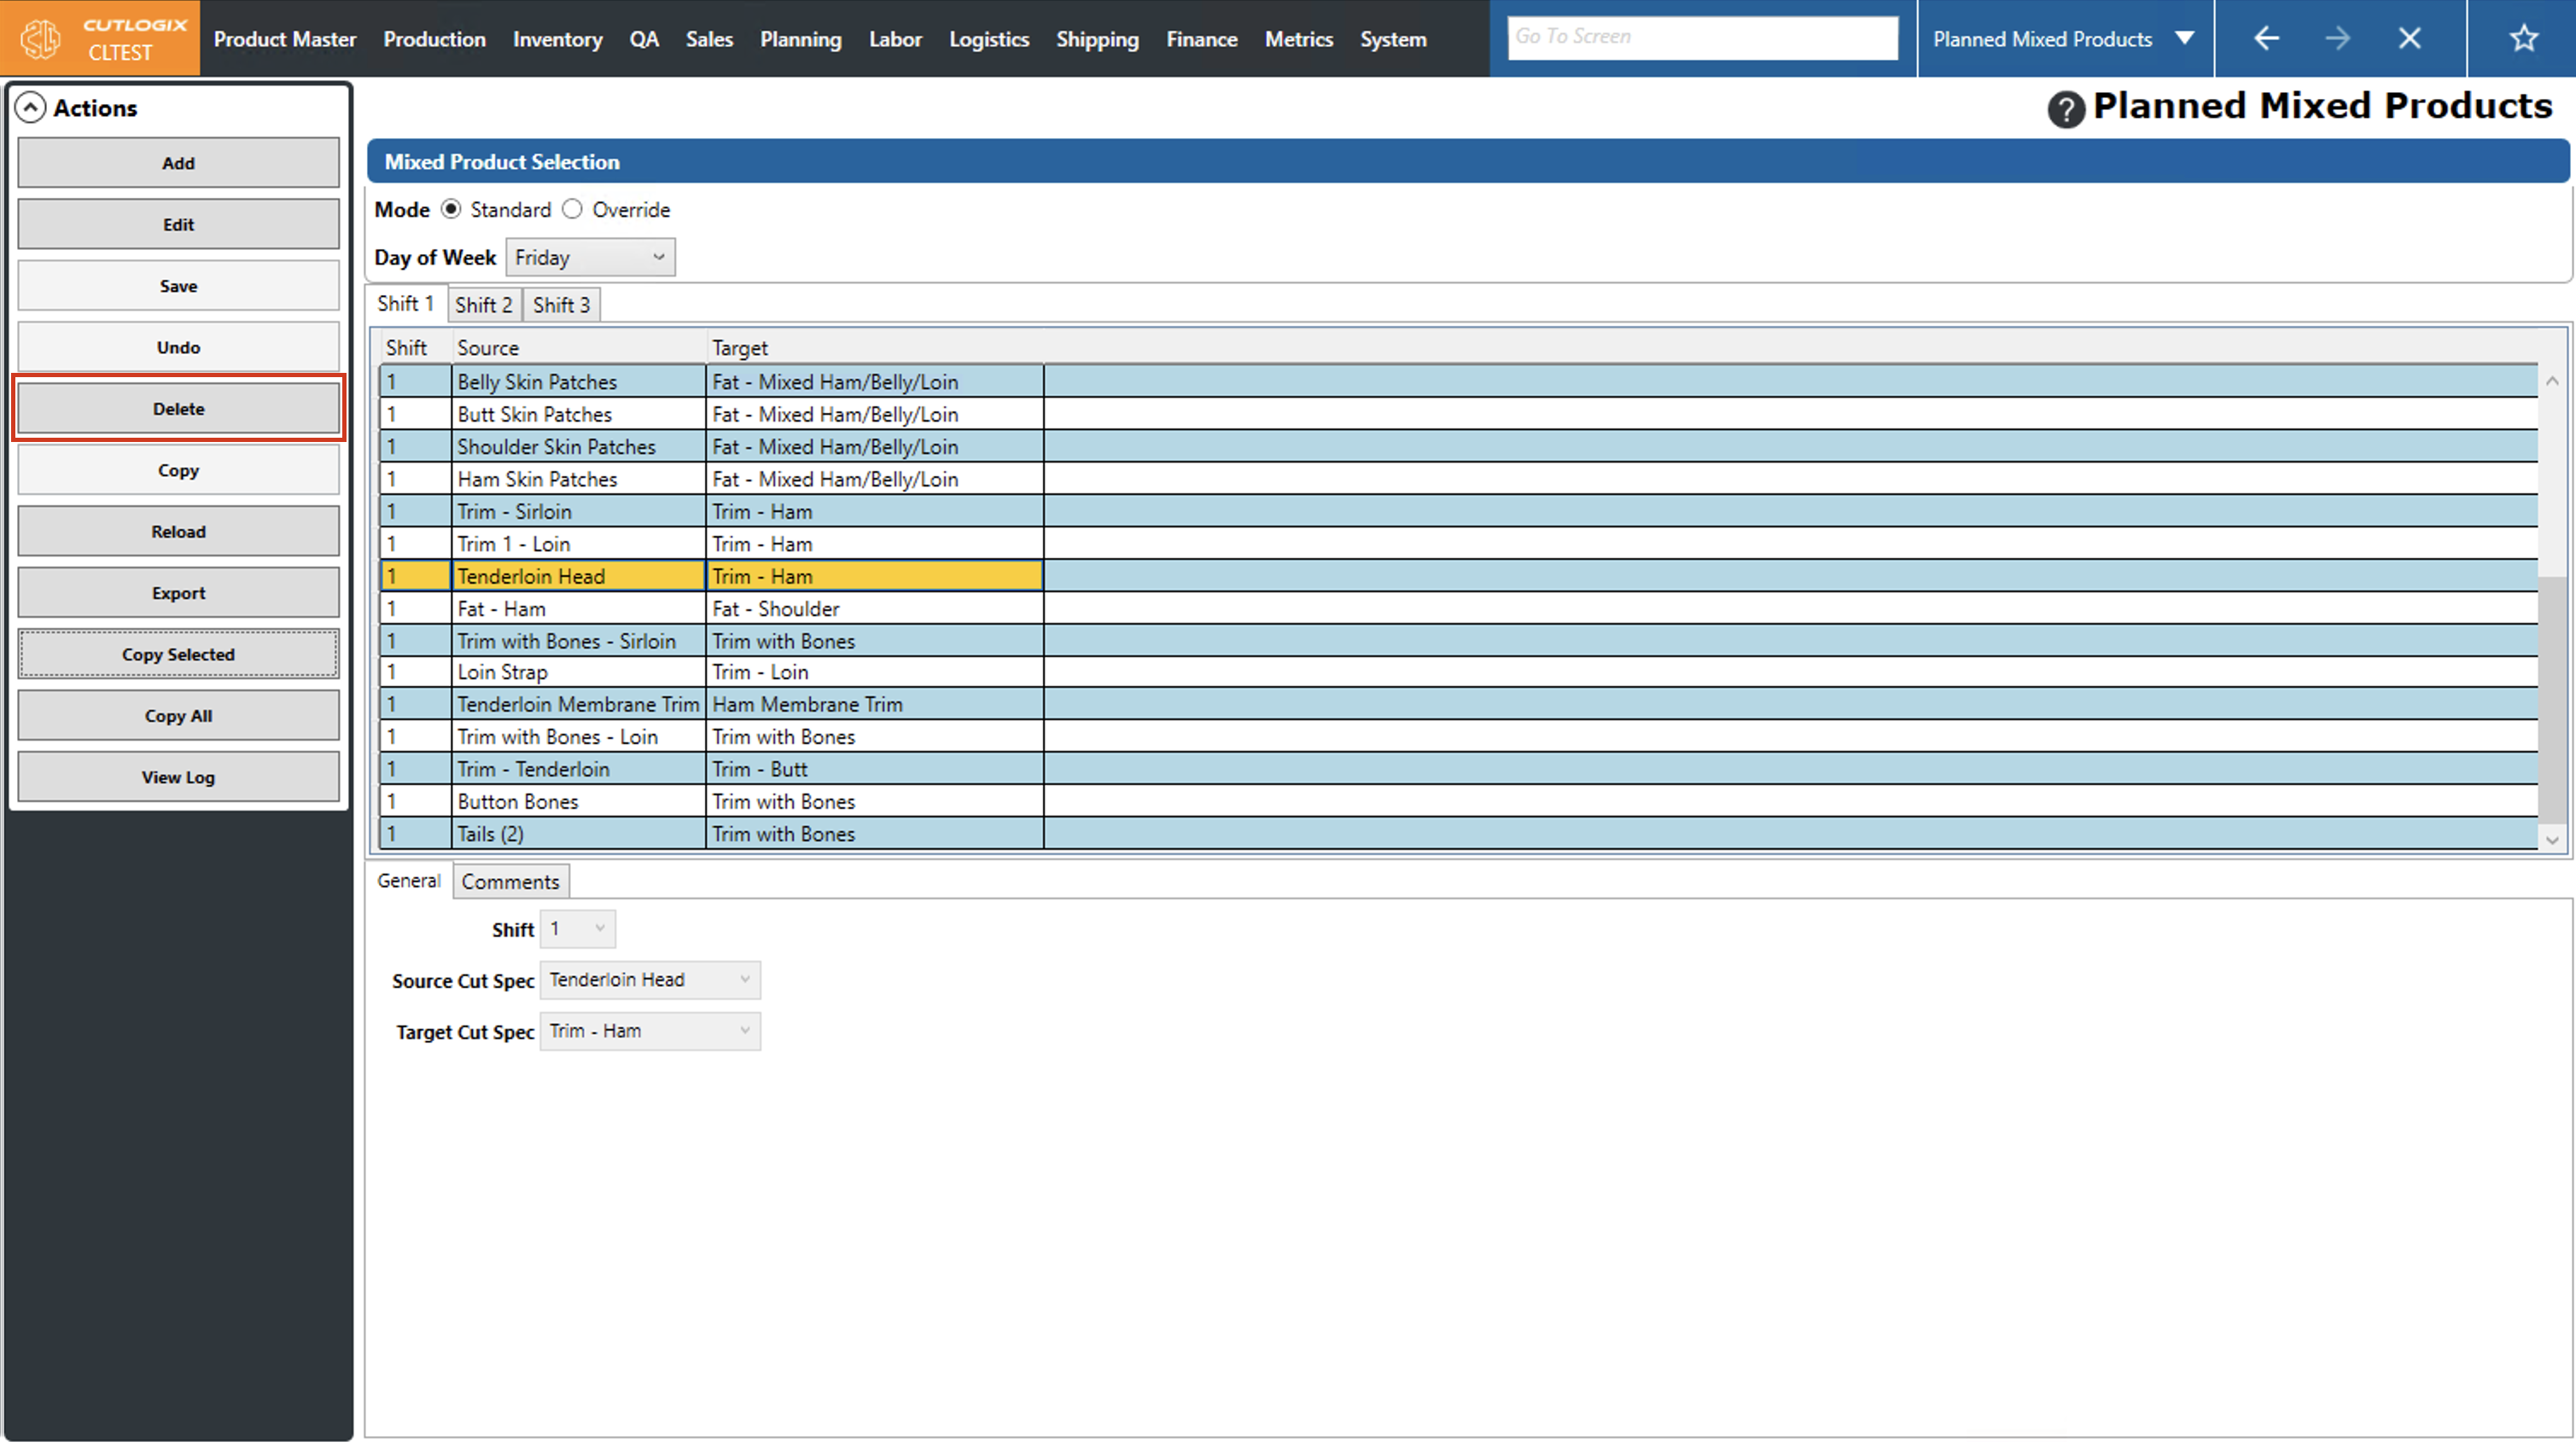
Step 8: A confirmation dialog will appear to ask if you're sure that you want to delete the mixed product, click "OK" to delete it, or click "Cancel" if you don't want to delete it and the dialog will close.
How to Add Planned Mixed Product Overrides
DemoOverriding mixed product production allows you to change the planned mixed products configuration so that it will only be in effect for a specific day.
Step 1: Navigate to the "Planned Mixed Products" page (Under the Planning menu → Planning Rules Config → Planned Mixed Products).
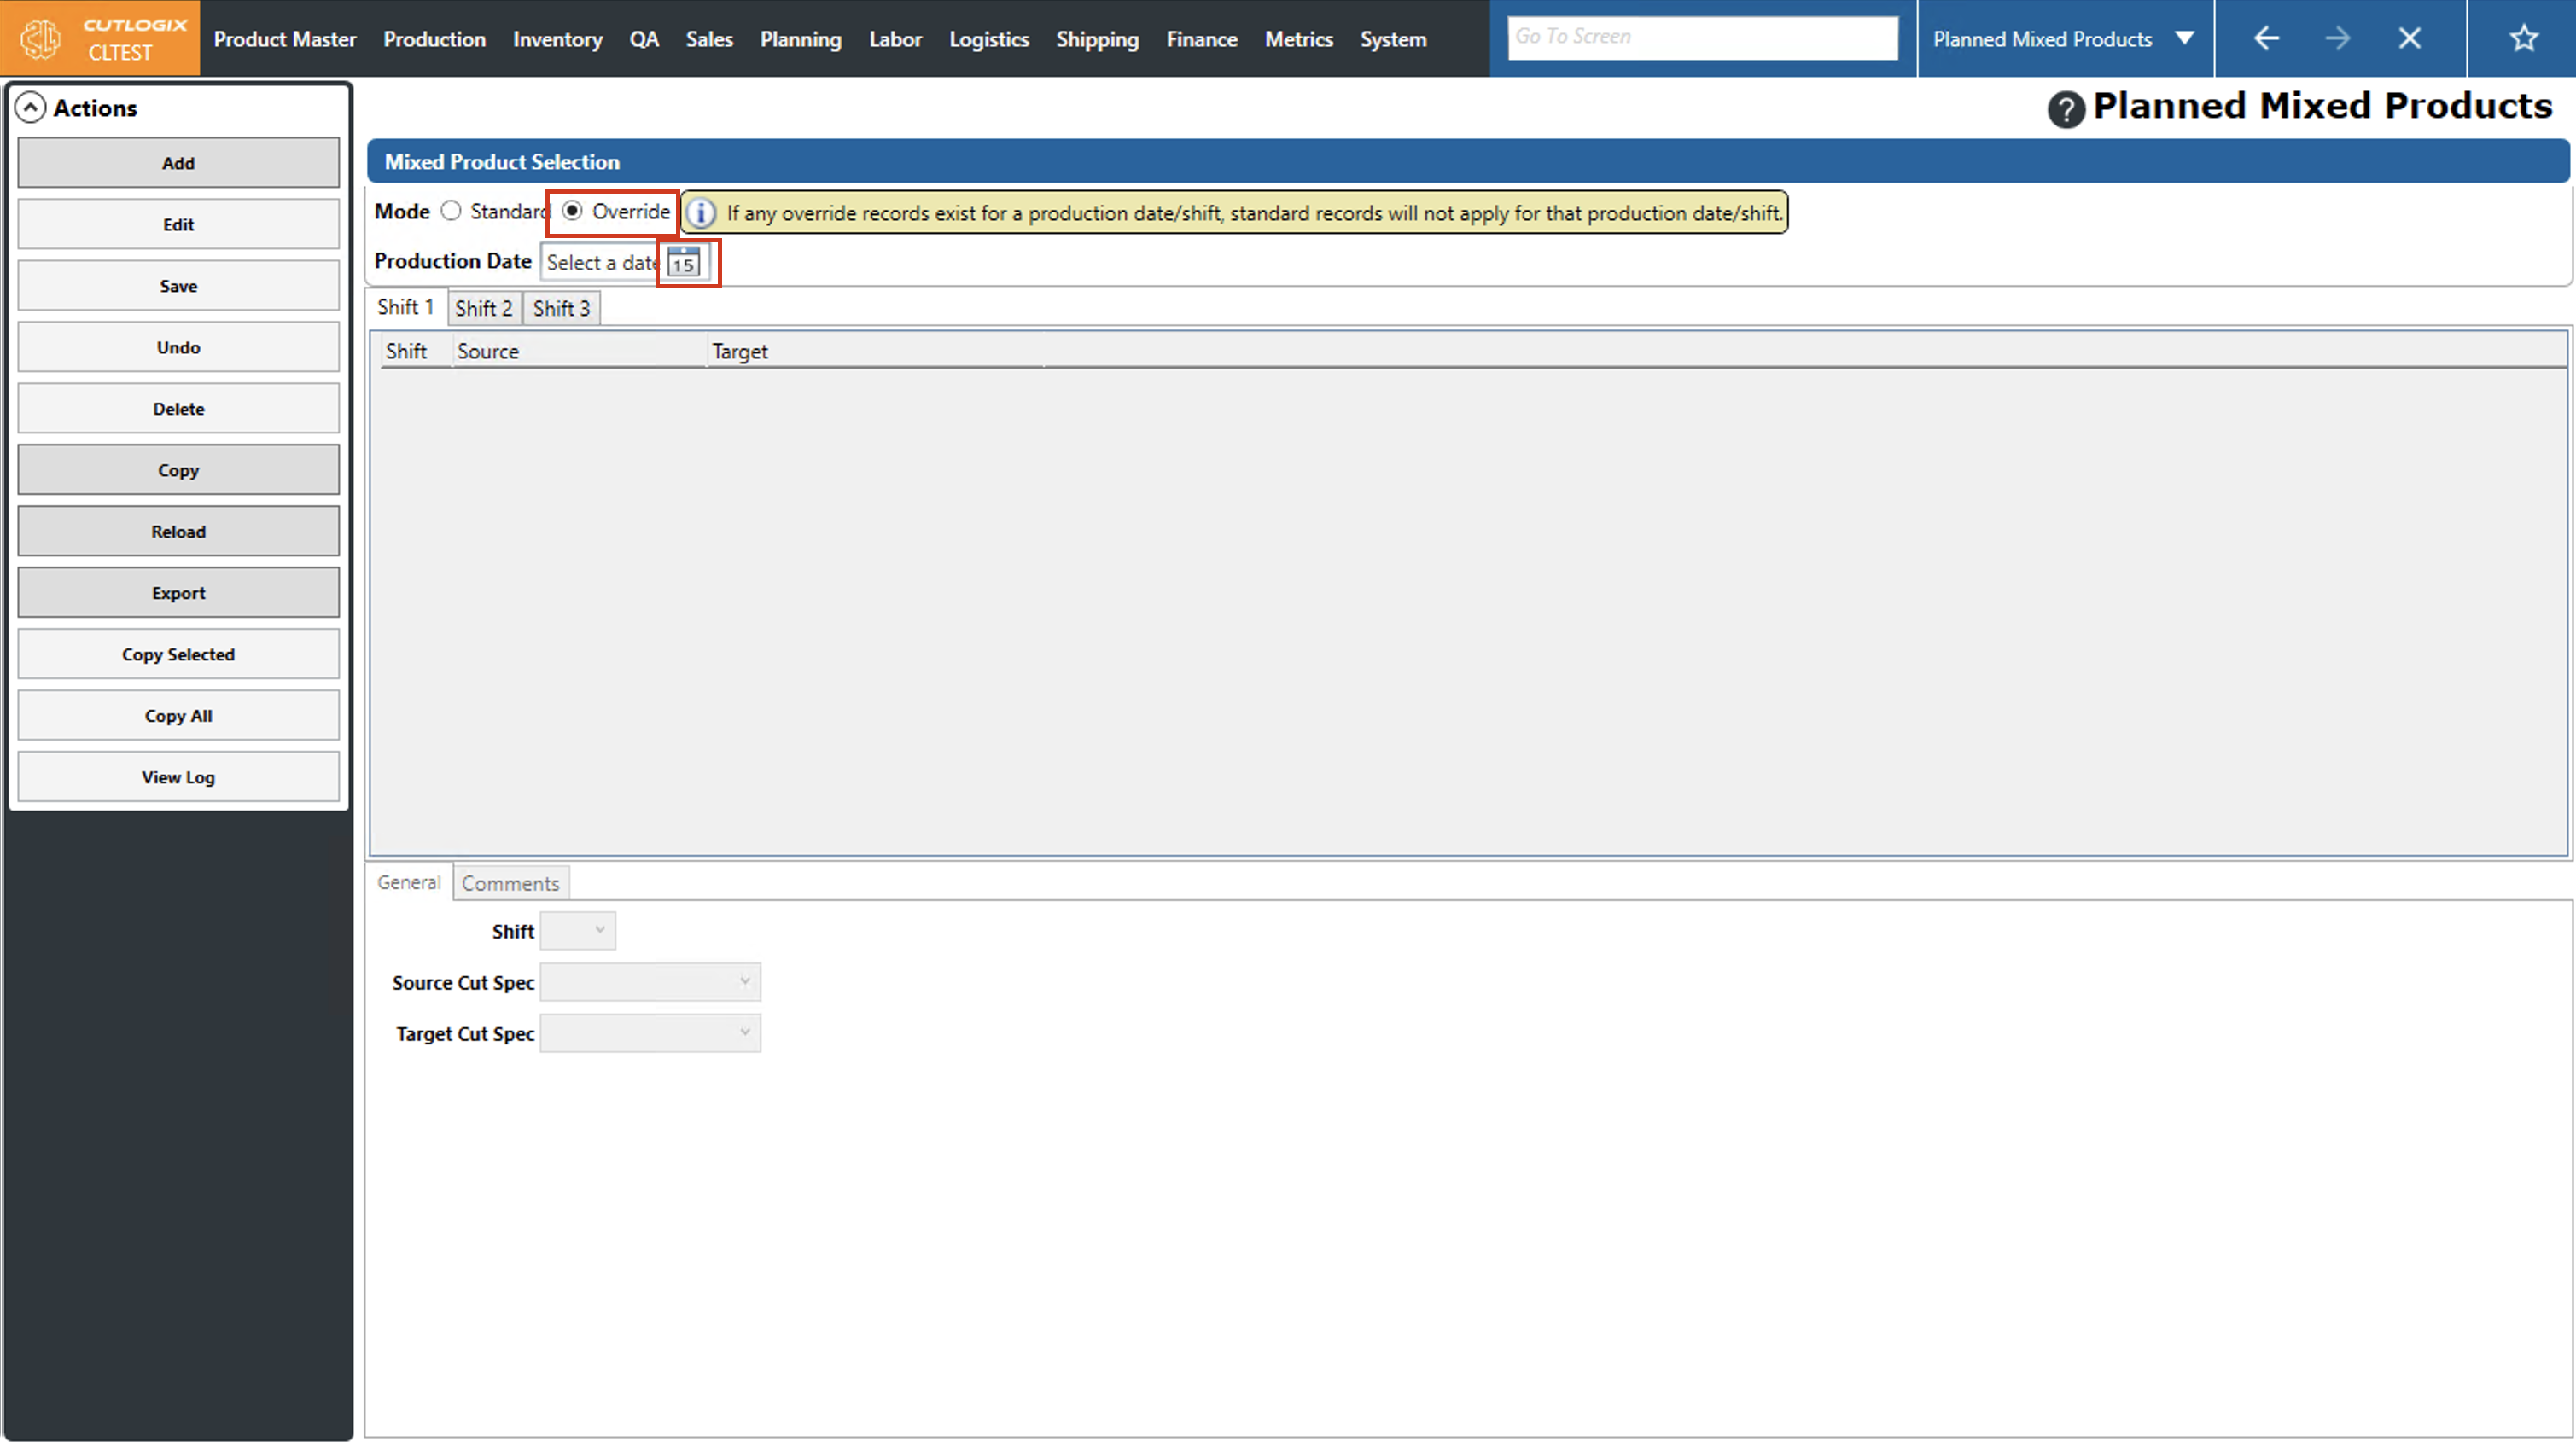
Step 2: Select the "Override" button, then use the datepicker (calendar icon) beside "Production Date)" to select a date to create an override for.
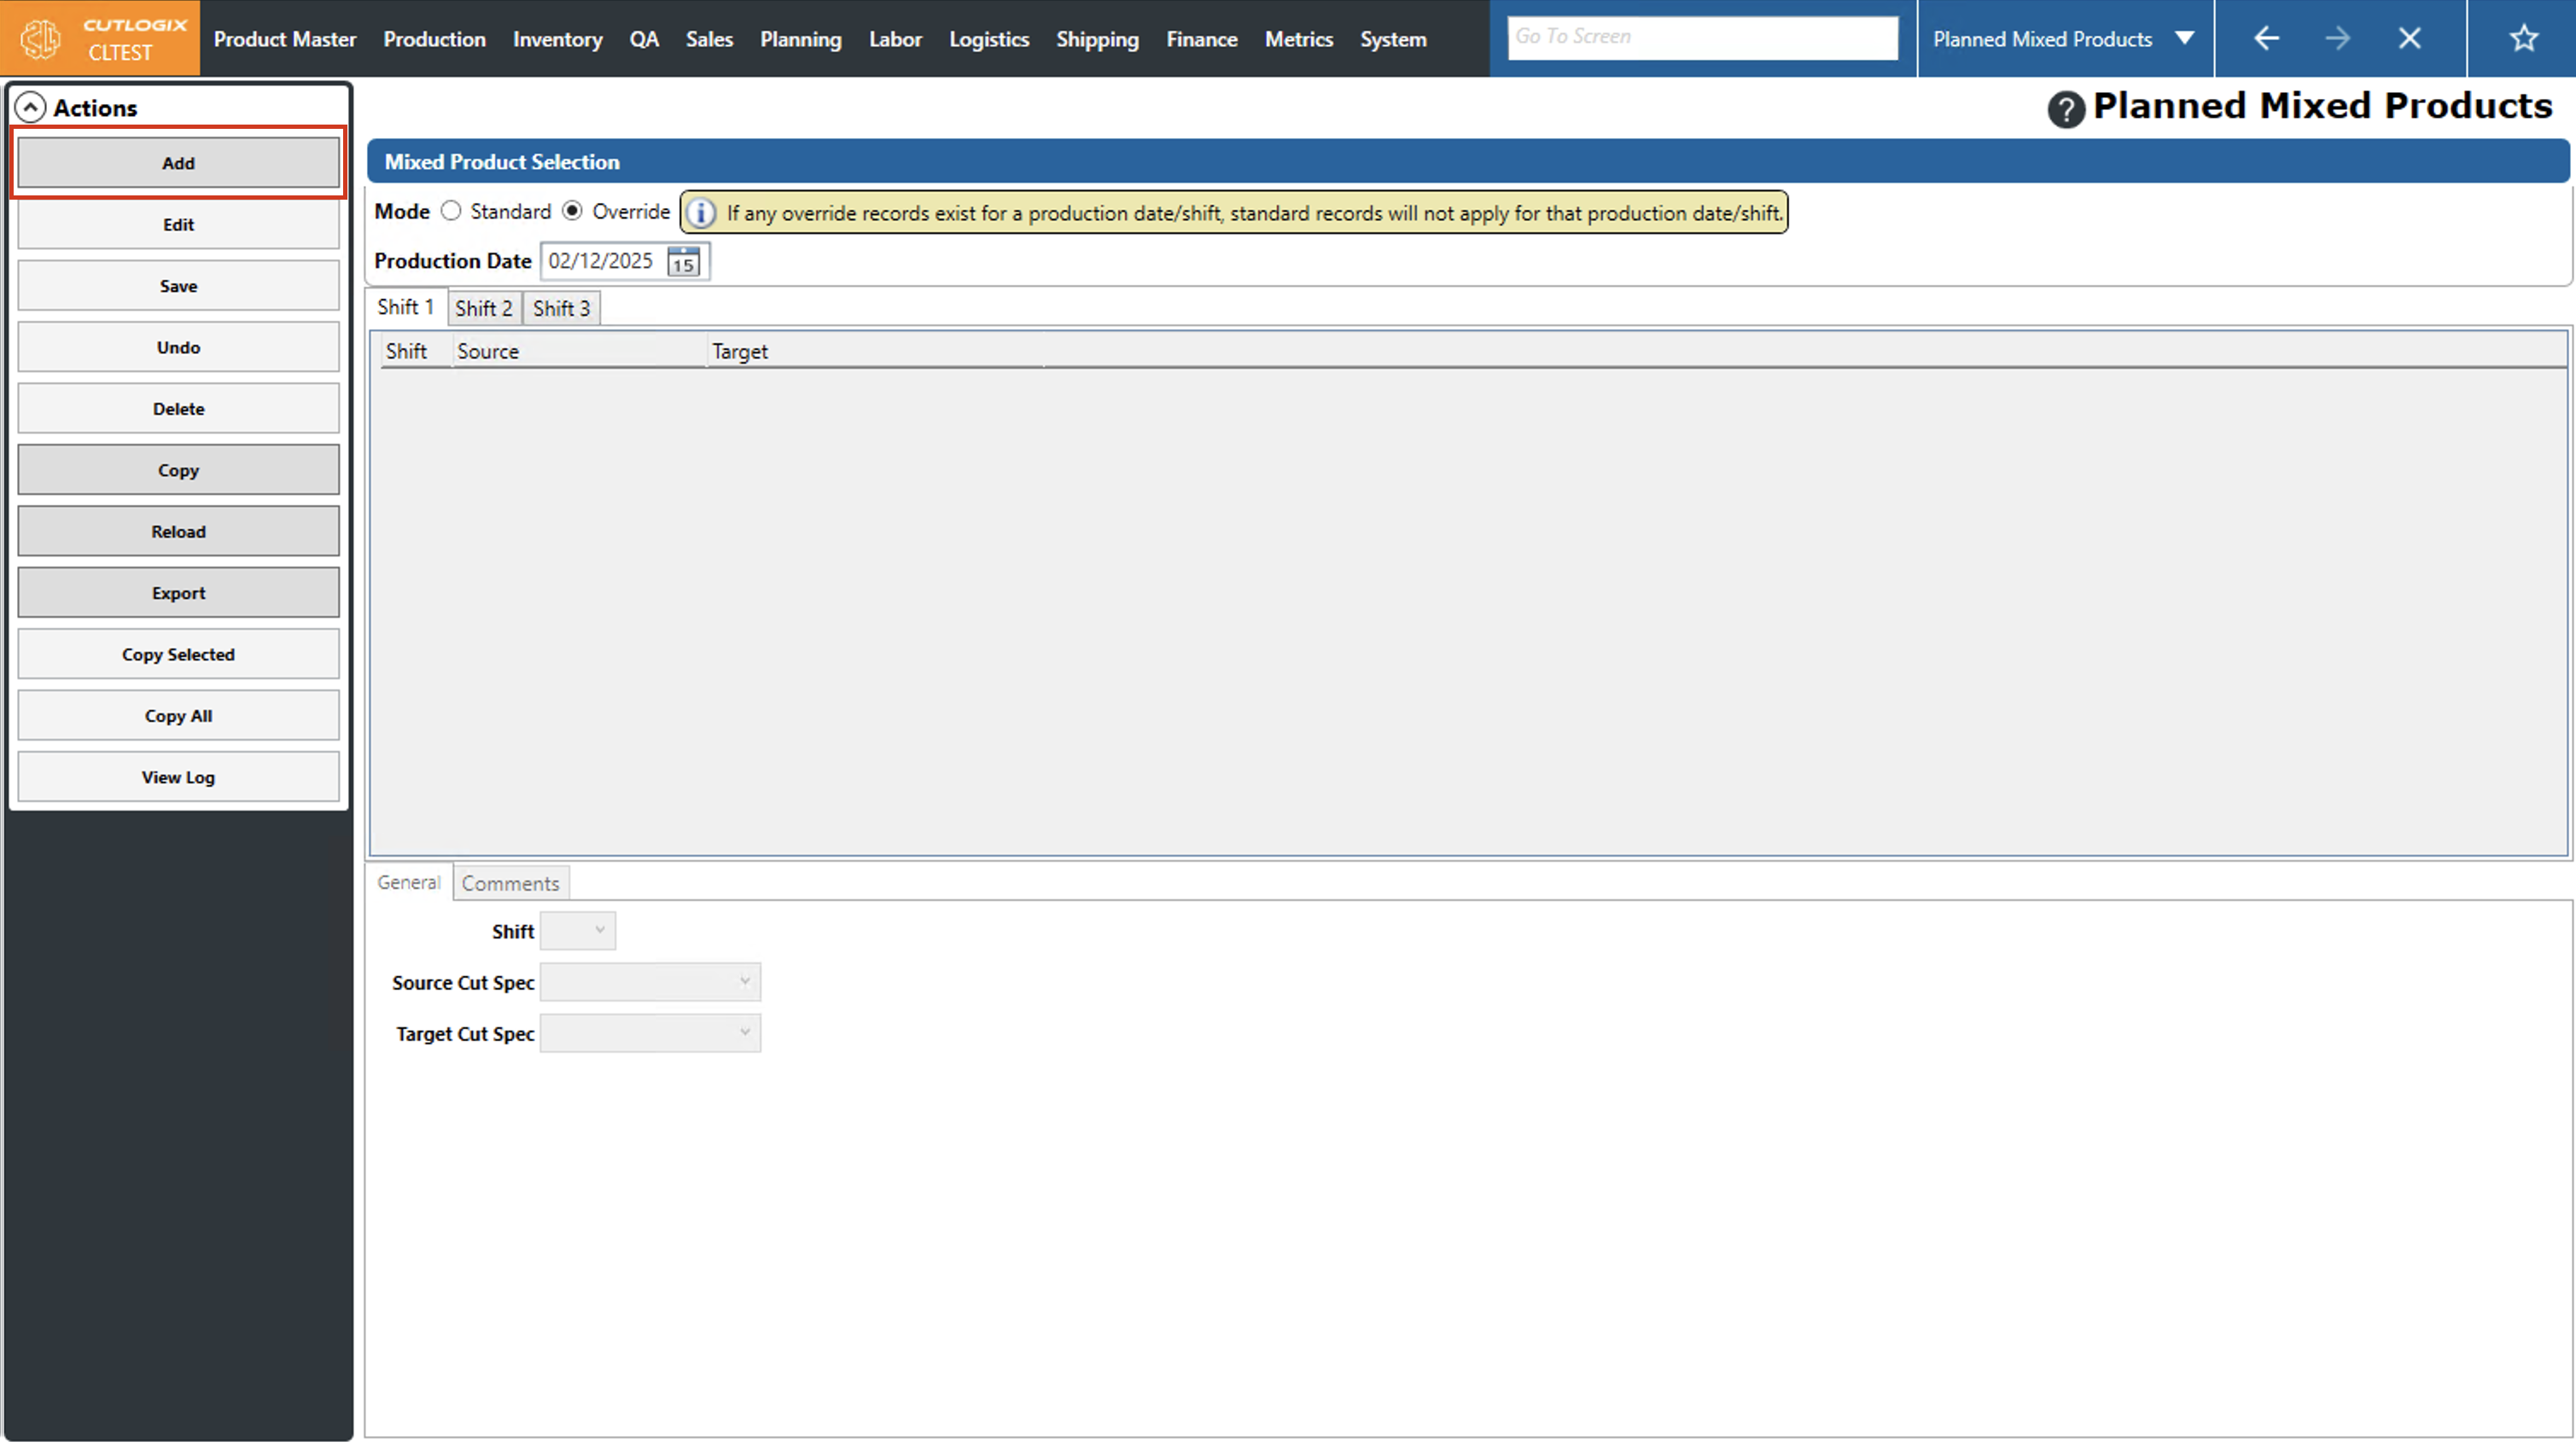
Step 3: Now you can add the mixed products that you want to be created for the selected day by clicking the "Add" button and following the steps above on how to save them.
How to Copy Default Planned Mixed Products to Overrides
Demo When creating overrides, you also have the option to copy the standard mixed products into the override to use as a starting point, then you can make changes as needed to them to apply to the override only.
Step 1: Navigate to the "Planned Mixed Products" page (Under the Planning menu → Planning Rules Config → Planned Mixed Products).
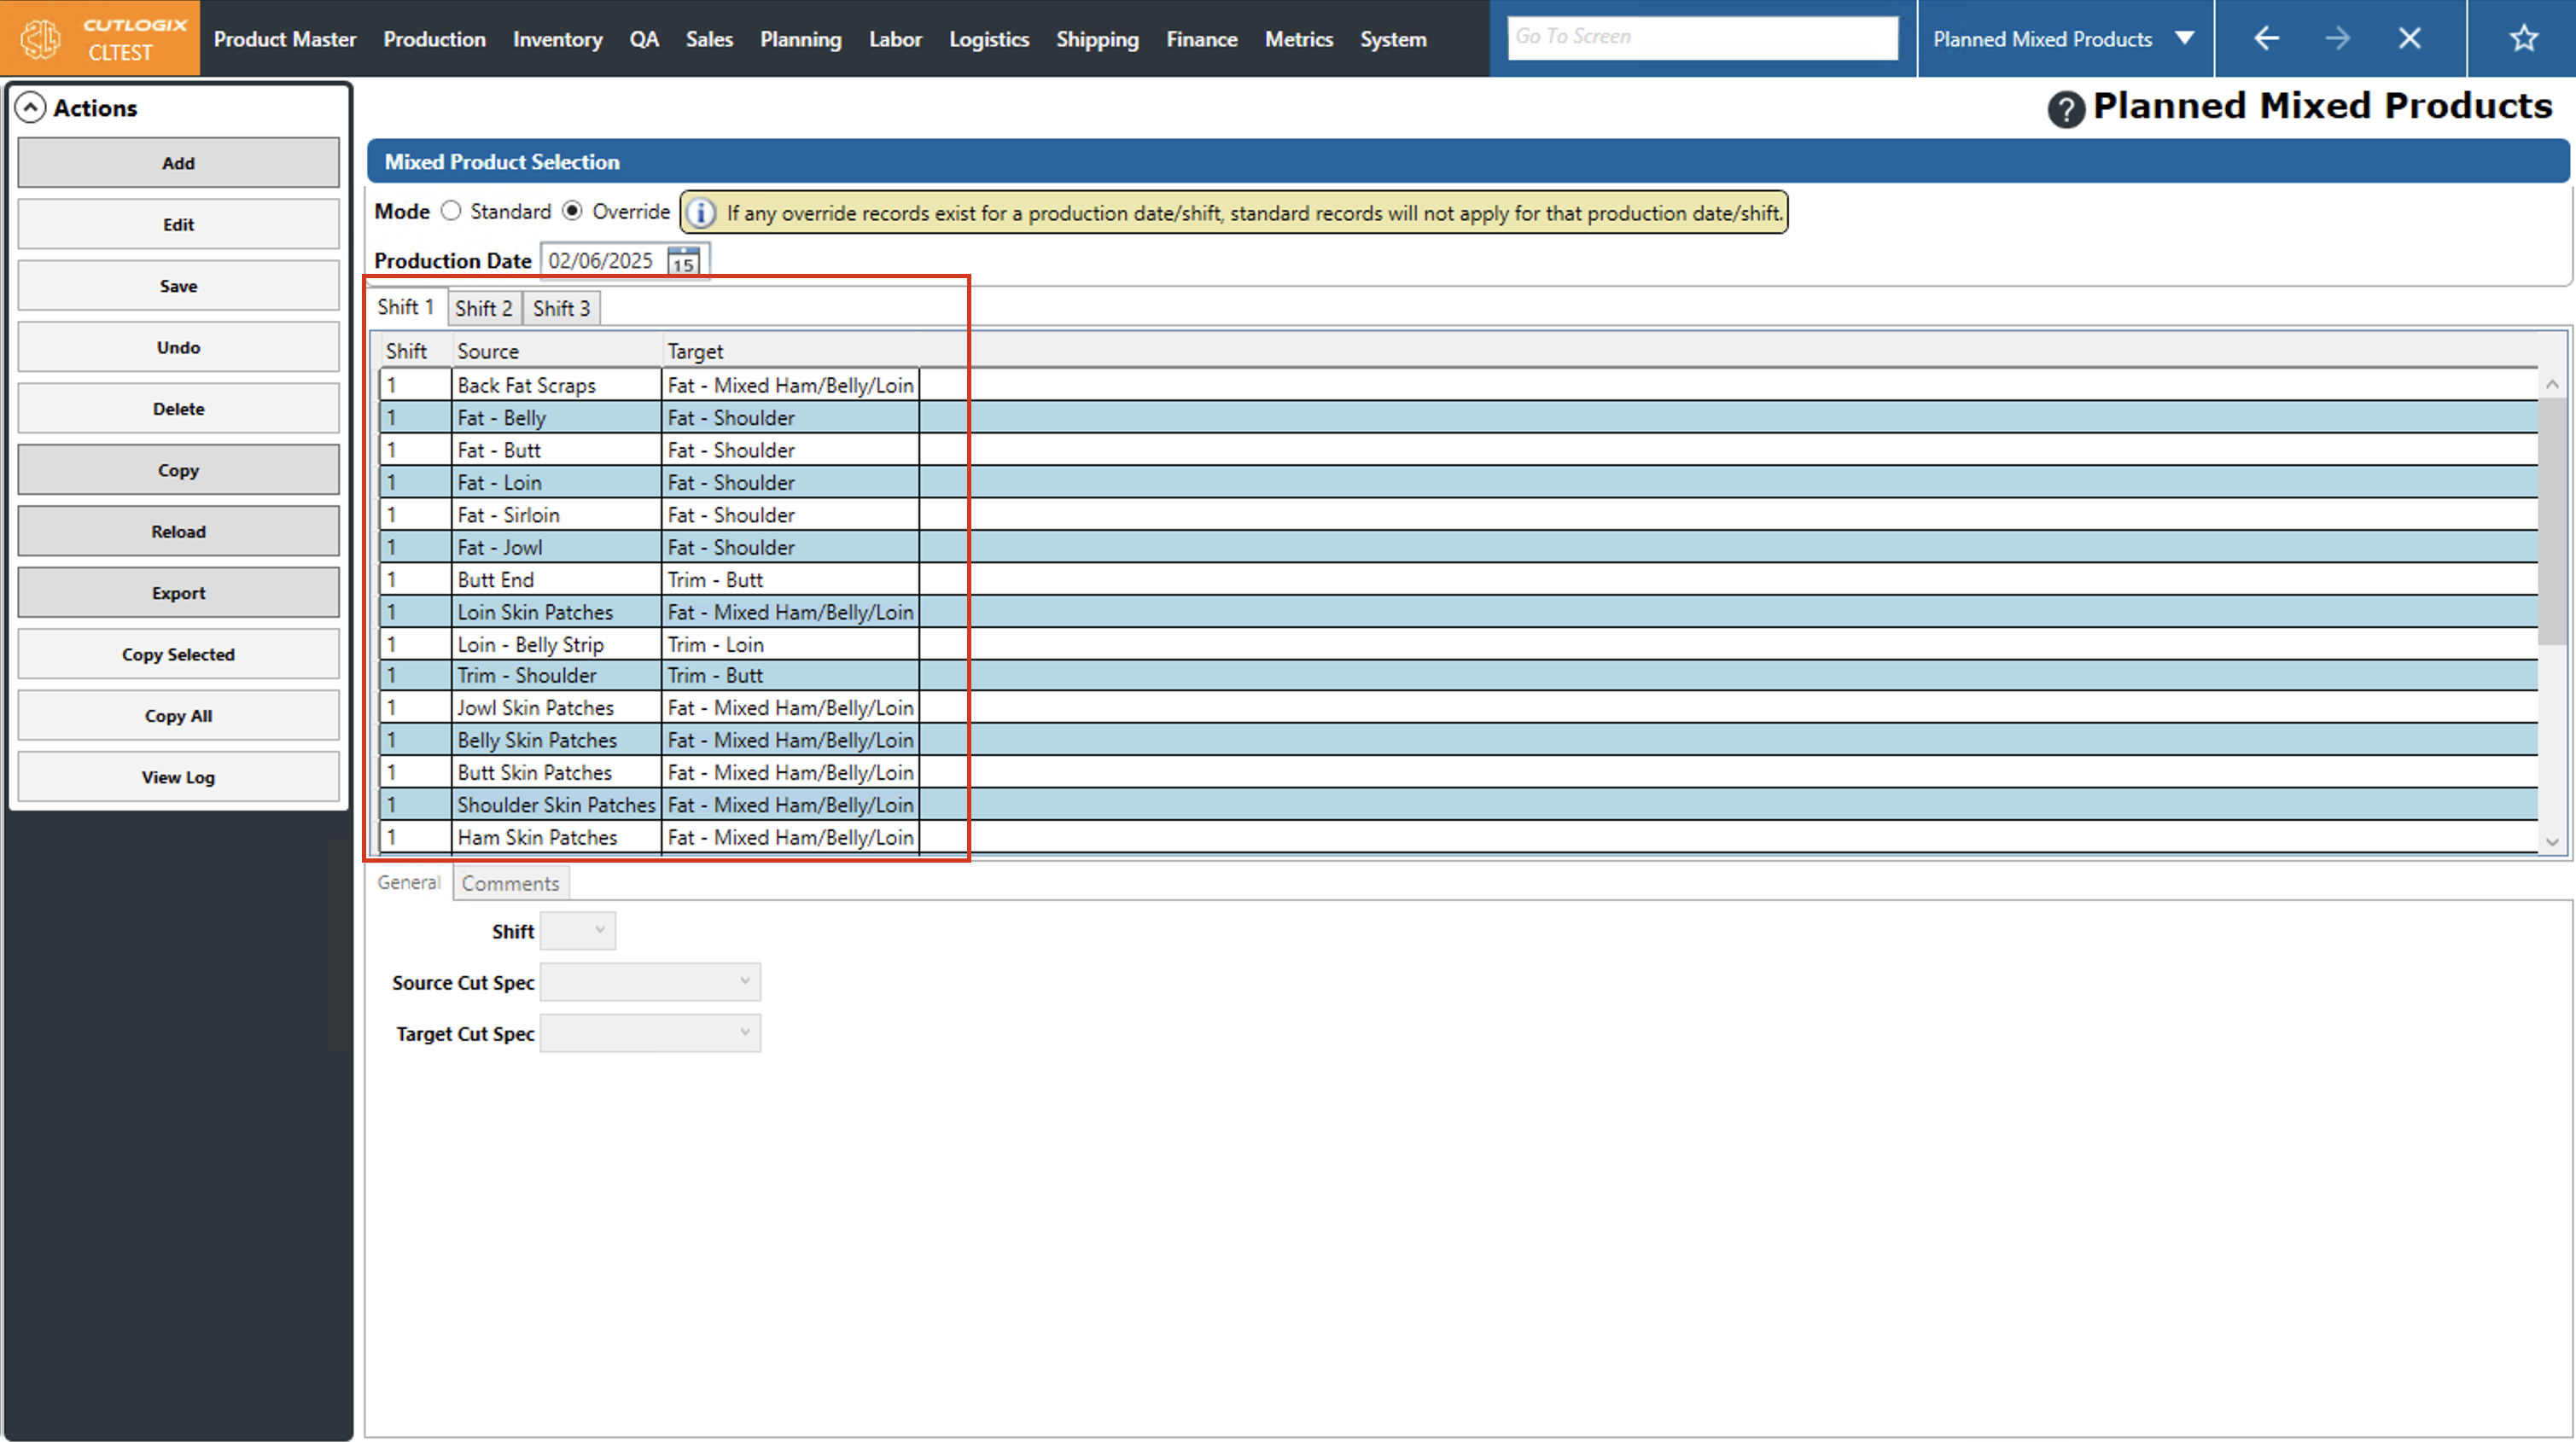
Step 2: Select the "Override" button, then use the datepicker (calendar icon) beside "Production Date)" to select a date to create an override for.
Step 3: Click the "Copy" button in the Actions Panel.

Step 4: Now the list of standard mixed products (from the selected day) will appear in the override. Here you can add/edit/delete them to complete the configuration of the override.
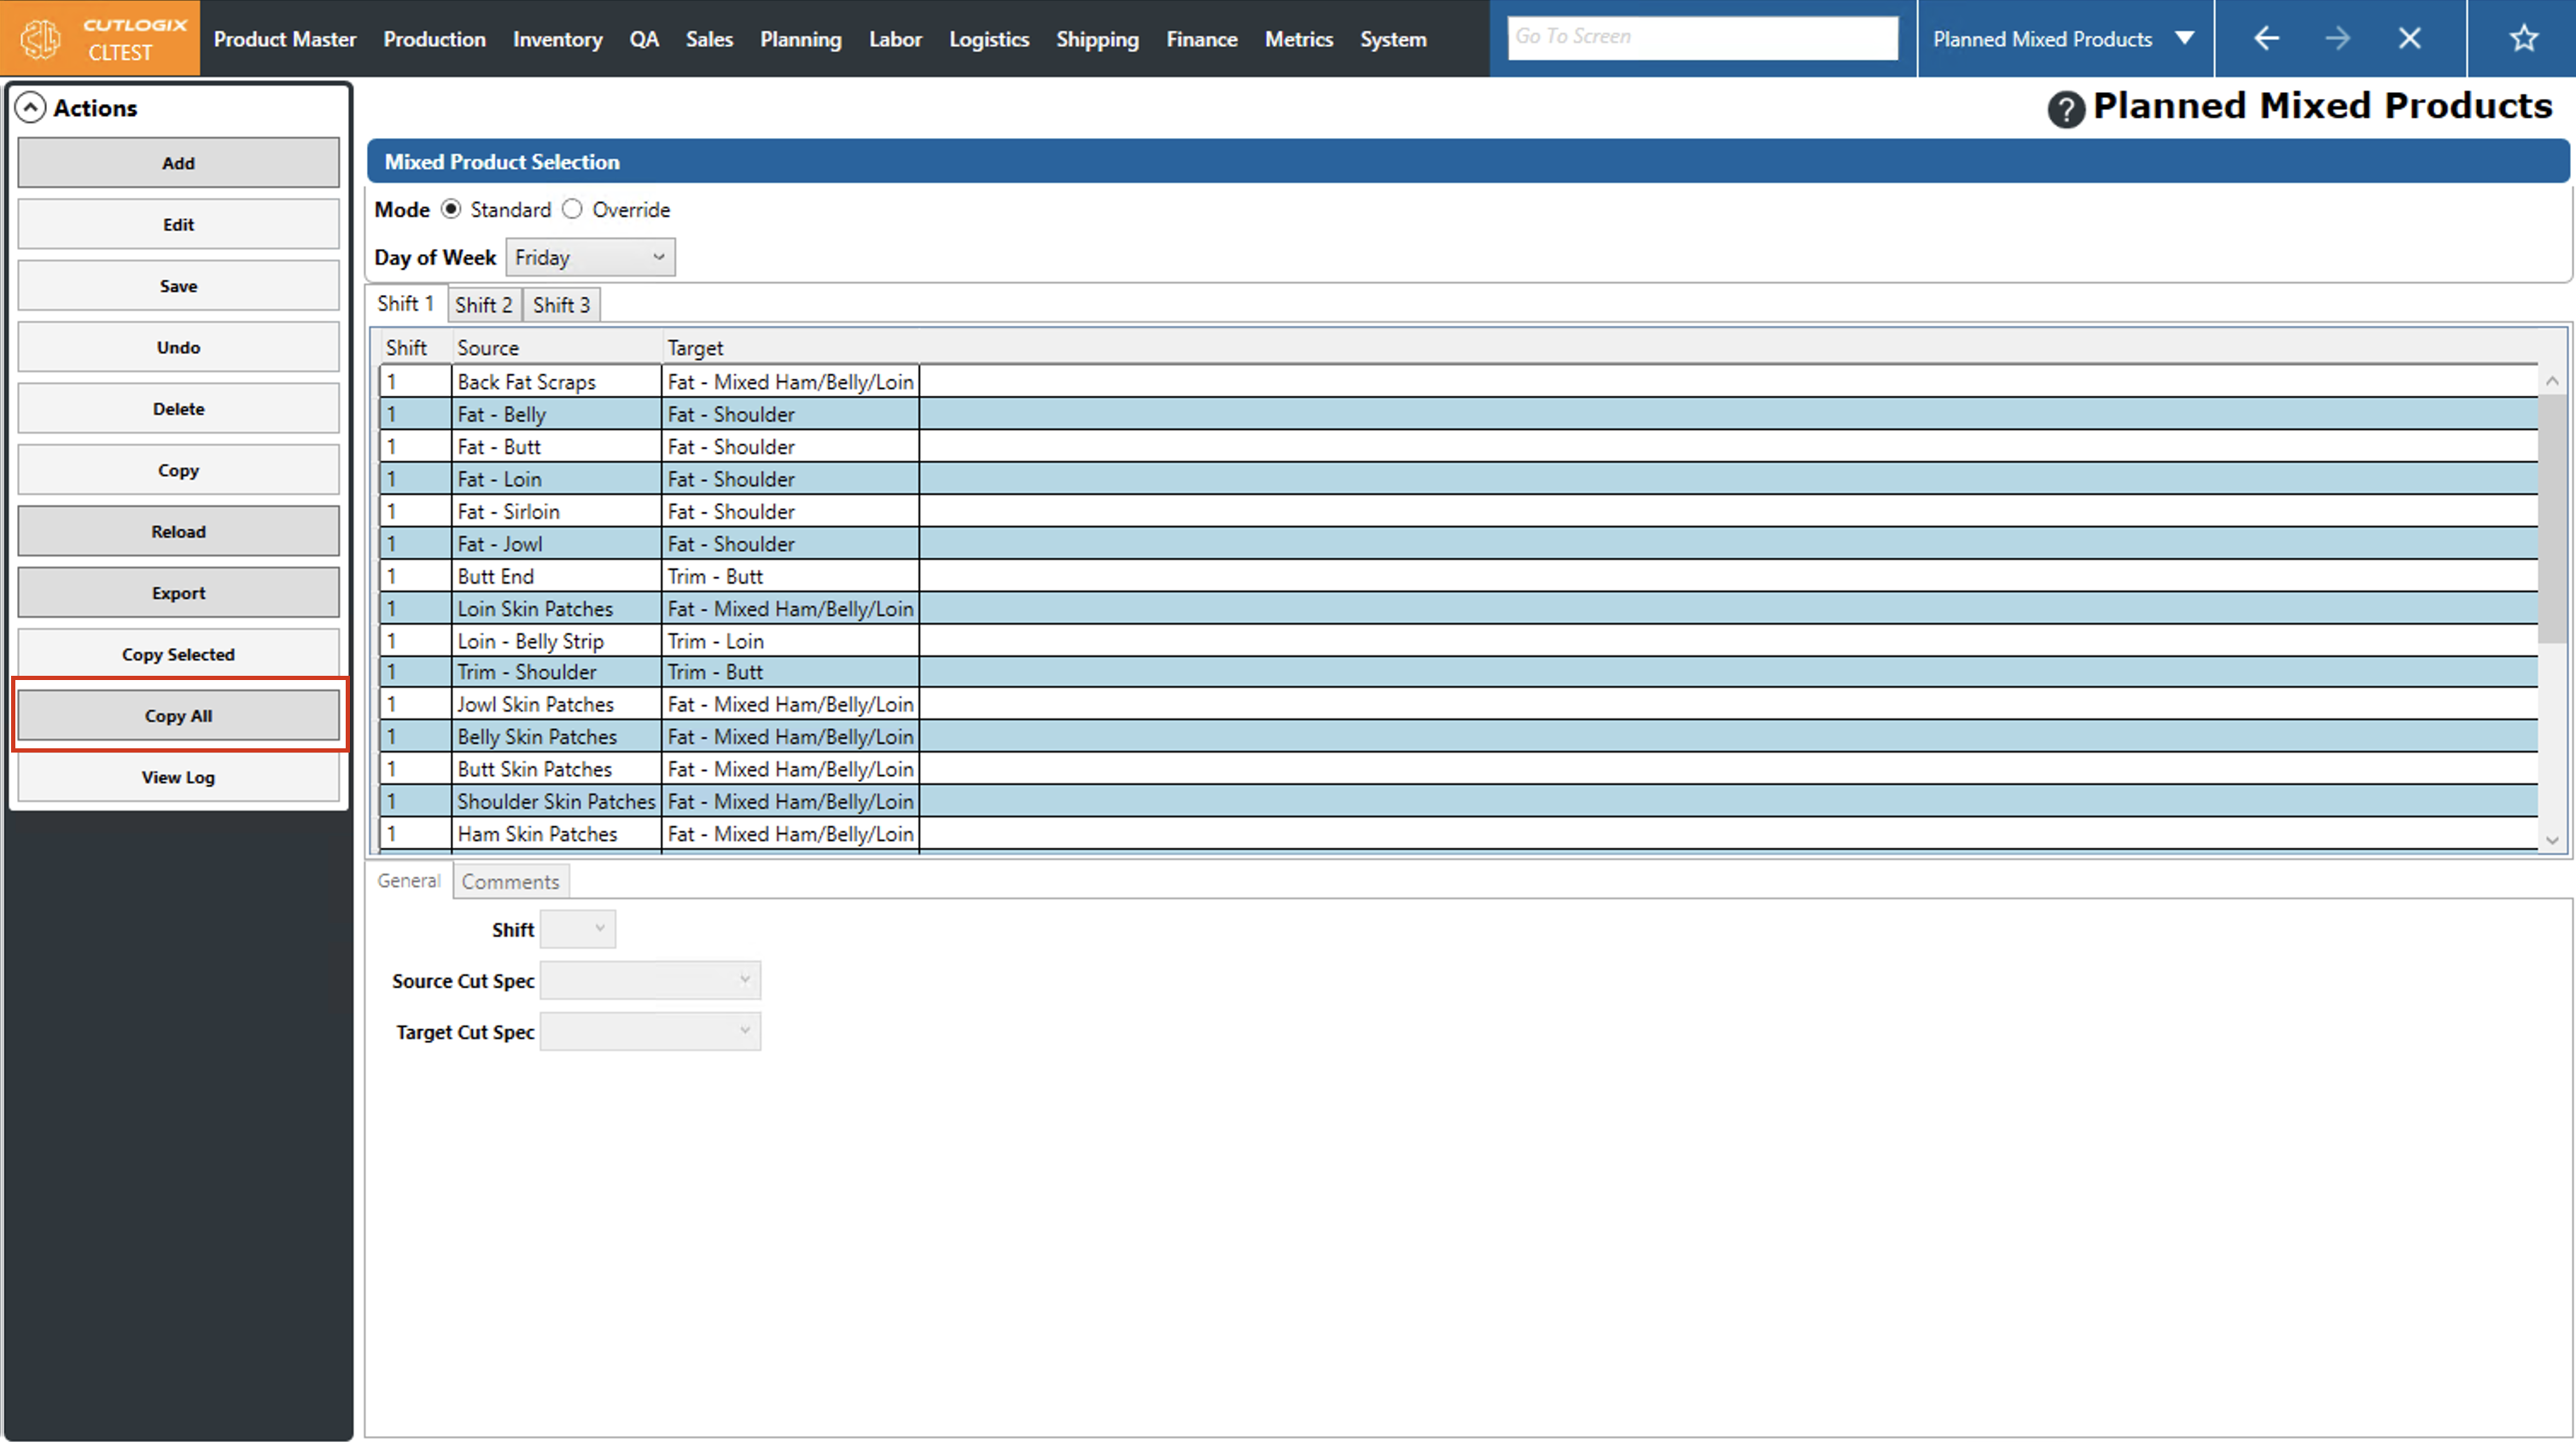
How to Copy All Planned Mixed Products to Other Days of the Week
DemoStep 1: Navigate to the "Planned Mixed Products" page (Under the Planning menu → Planning Rules Config → Planned Mixed Products), then select the day of the week that you want to copy (to other days) using the "Day of Week" dropdown list.
Step 2: Click the "Copy All" button in the actions panel on the left side of the screen.
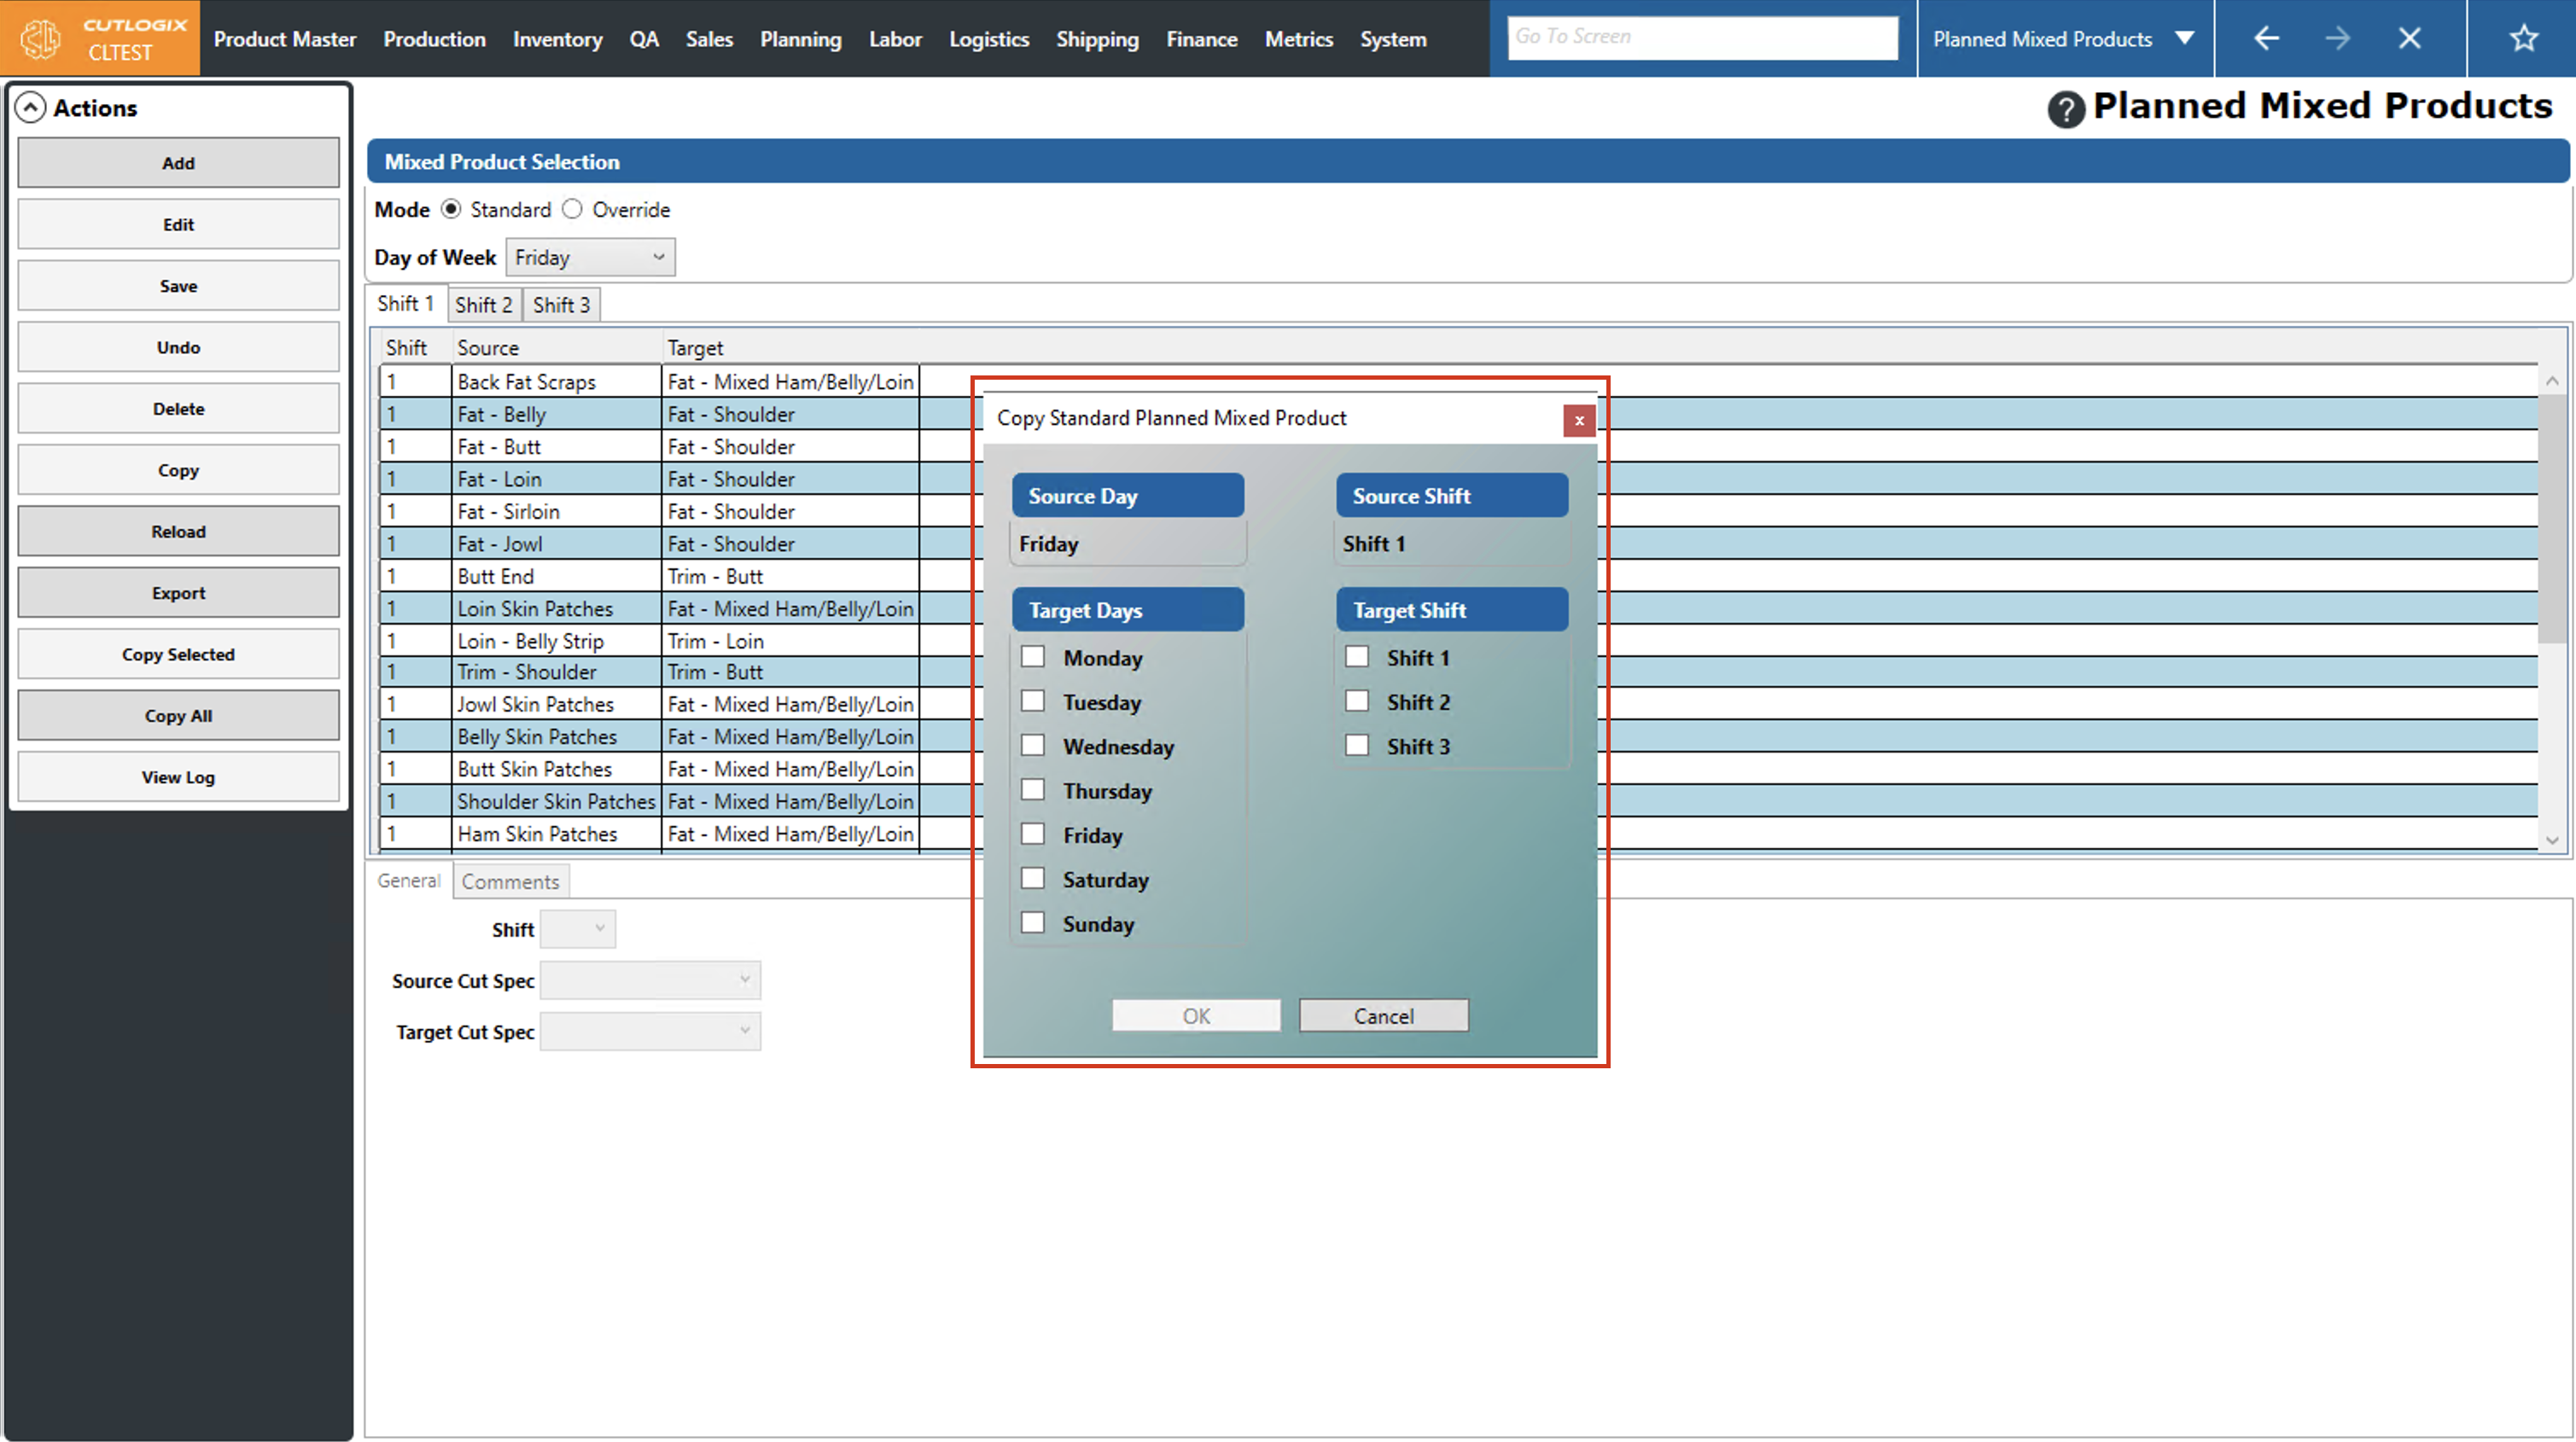
Step 3: A dialog will appear, called "Copy Standard Planned Mixed Product". Here you can see the day you select to copy from as the "Source Day" and you have the option to select "Target Days" (what days you will copy the mixed products to). Check off the days that you want the source day's mixed products to be copied to by using the checkboxes beside them. Next, check off the target shifts for the target days that you want the mixed products copied to.
Step 4: Click "OK" to complete the copying process. If you don't want to proceed with copying, click the "Cancel" button. This will ensure that the planned mixed products will not get copied to any other days.
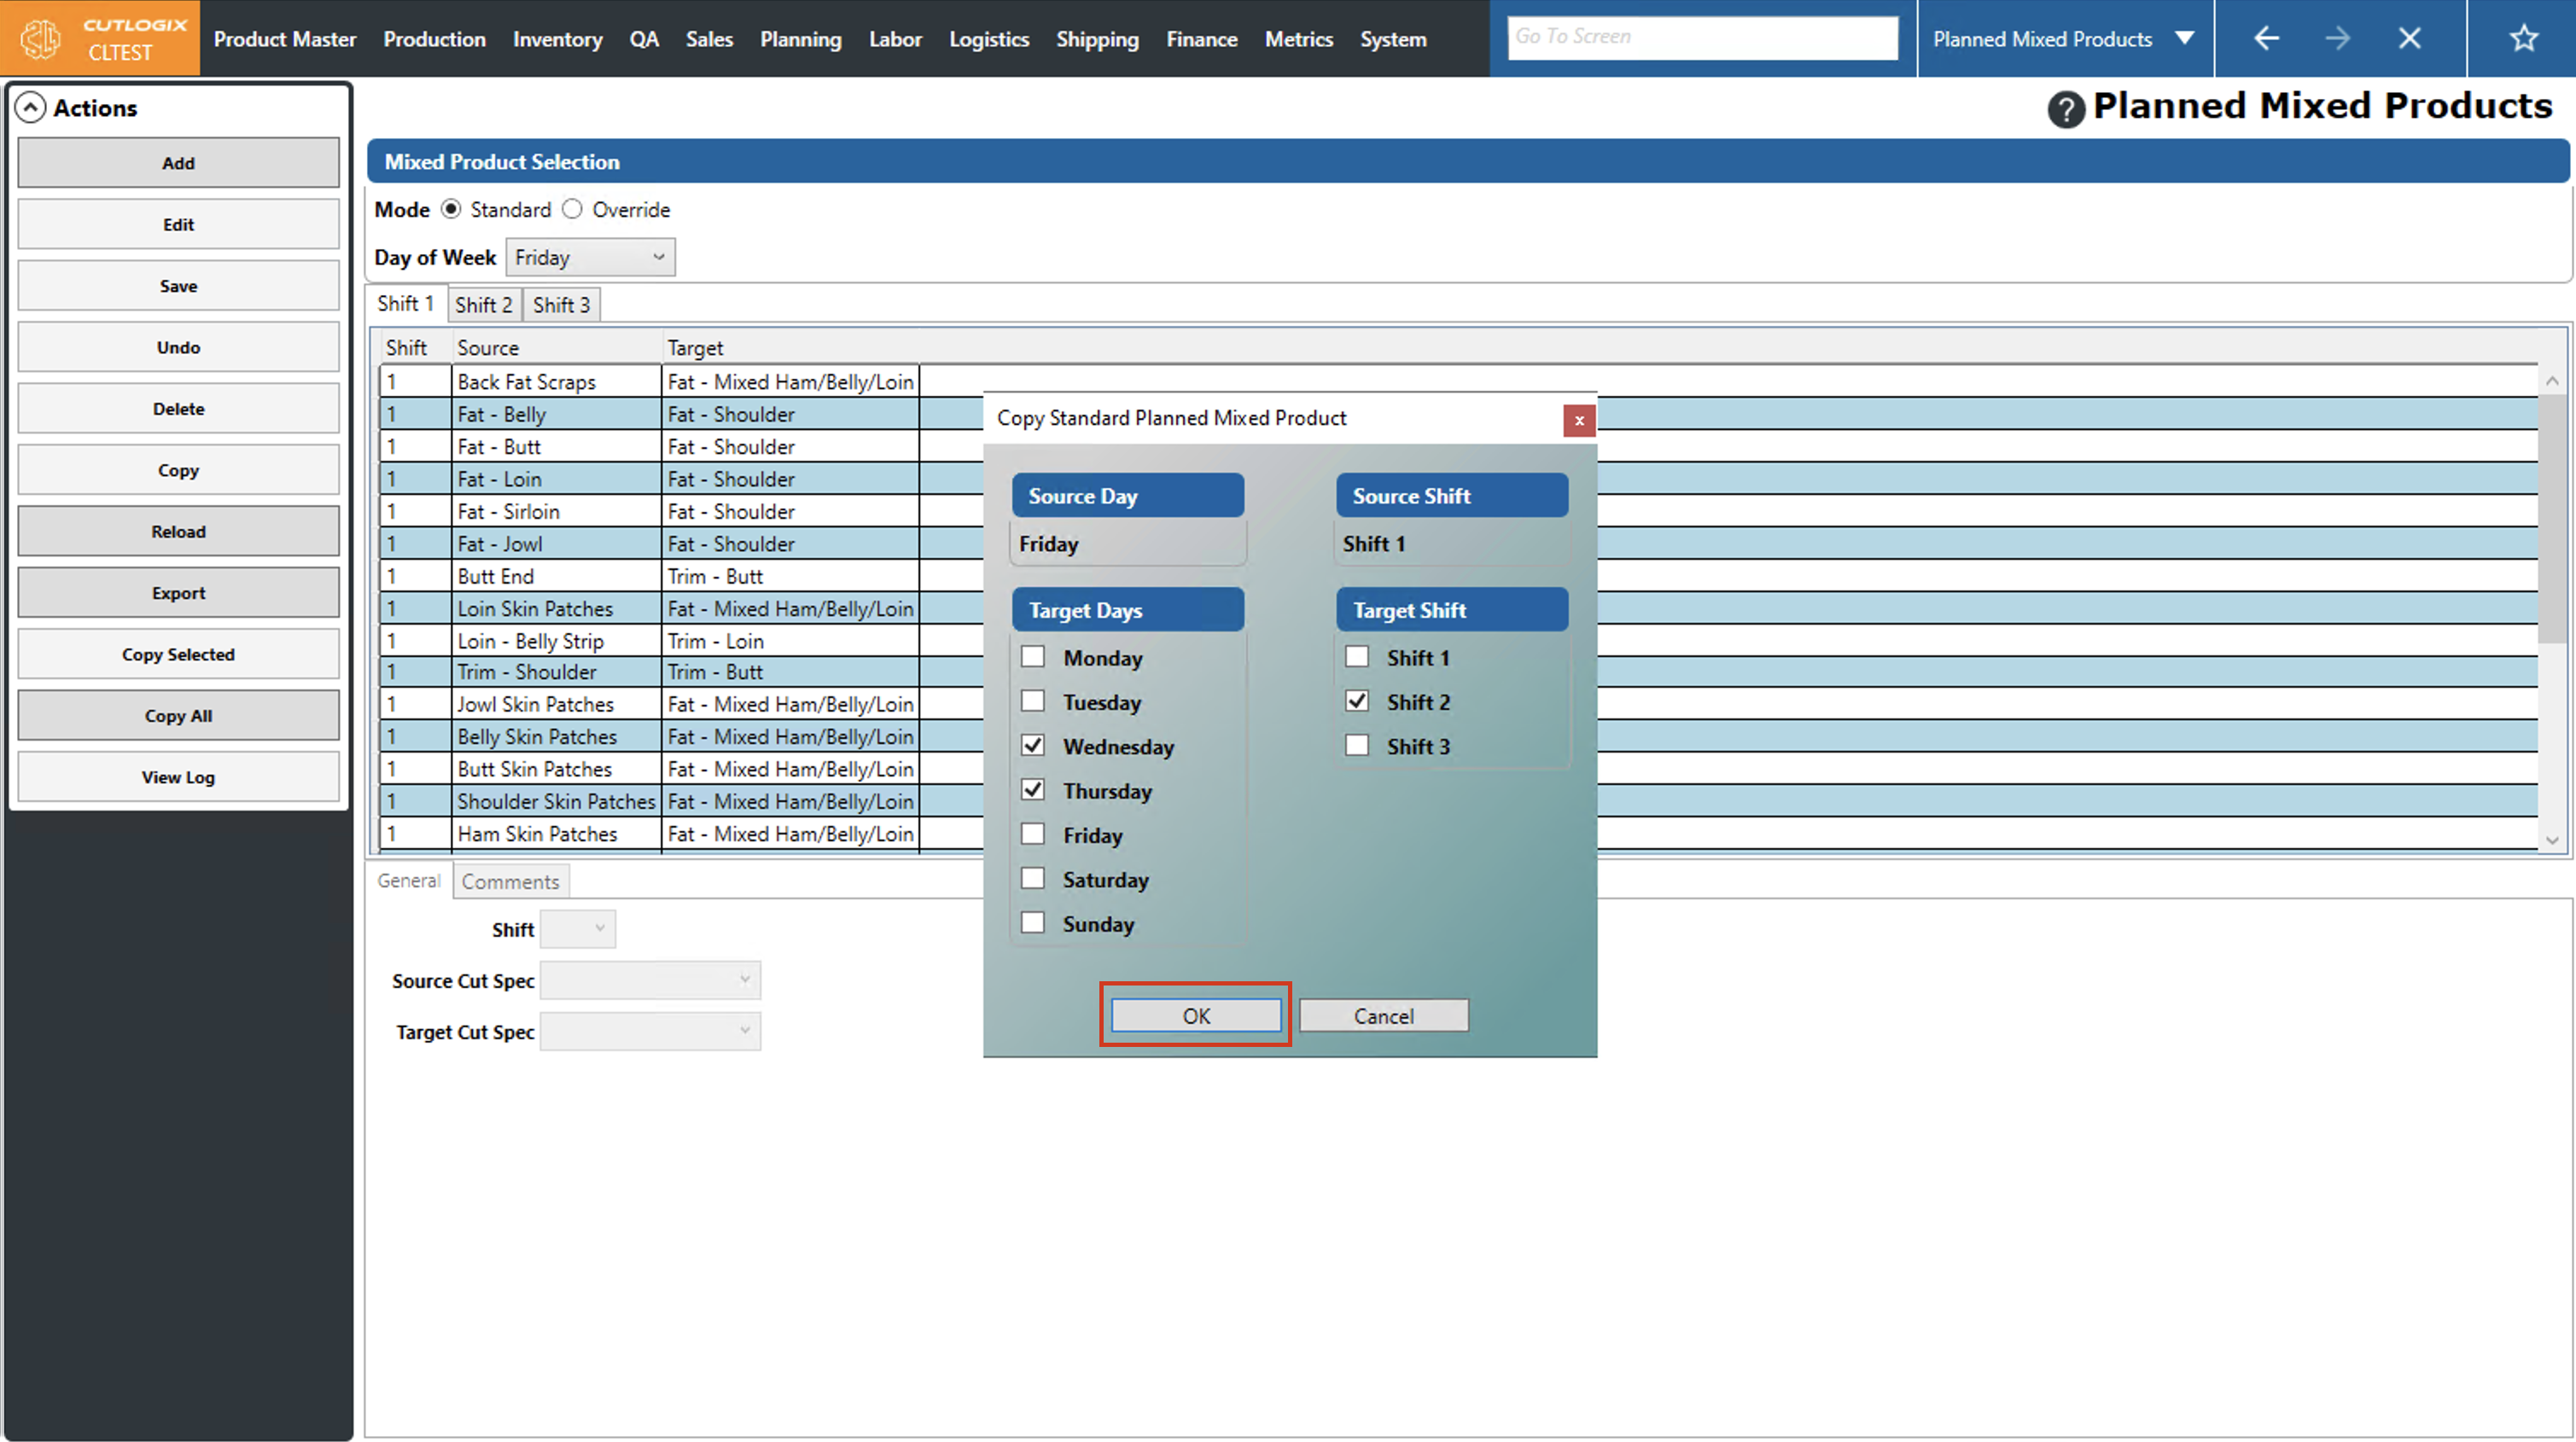
Step 5: After completion, the standard planned mixed products from the source day will be copied to the selected target days and selected shifts.