Offline Processing Areas Tasks
How to Add an Offline Processing Area
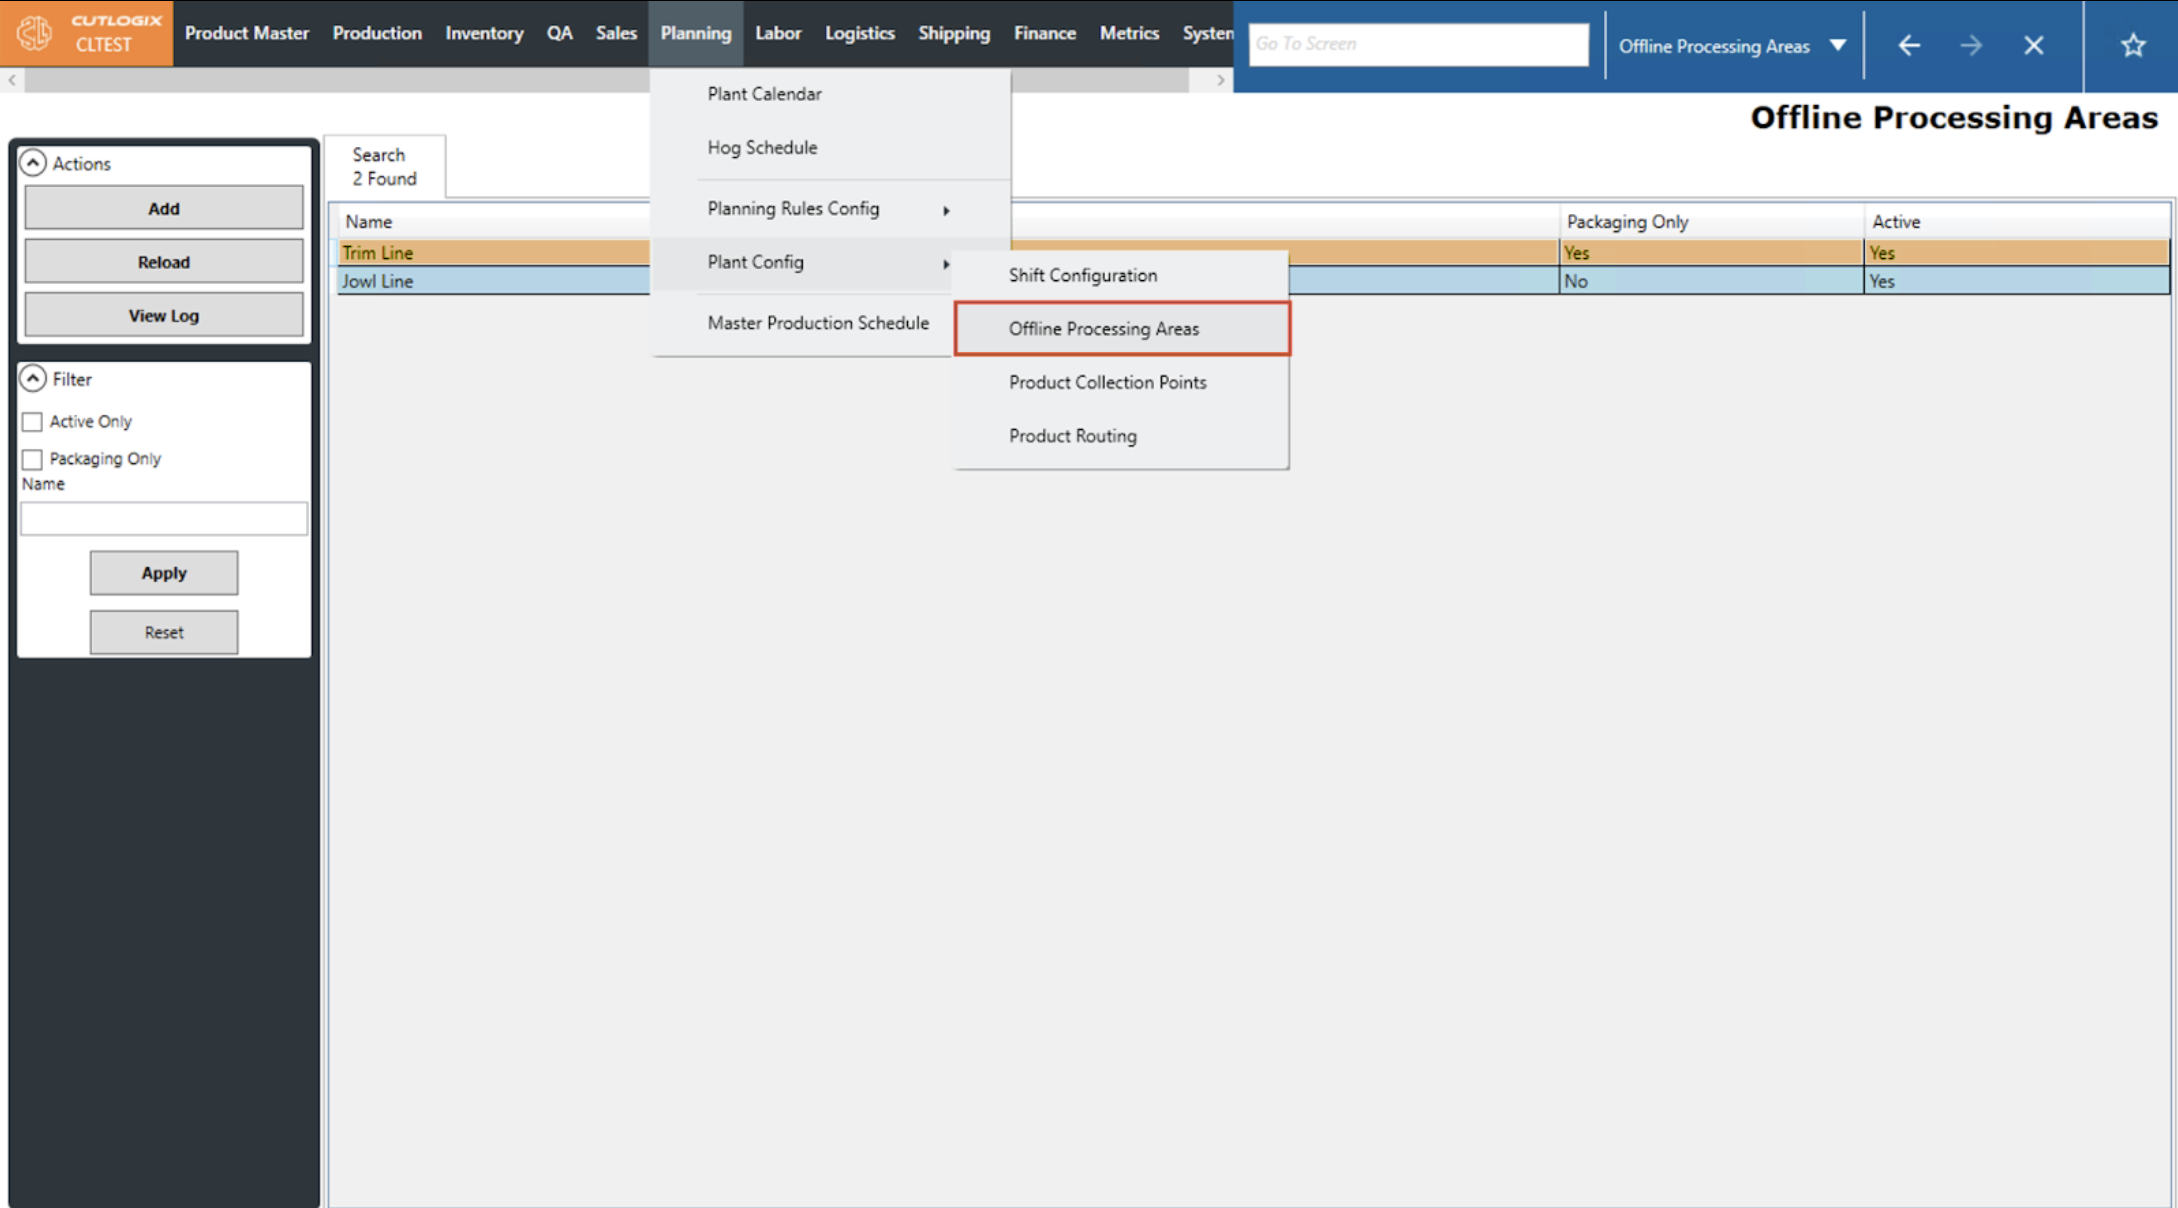
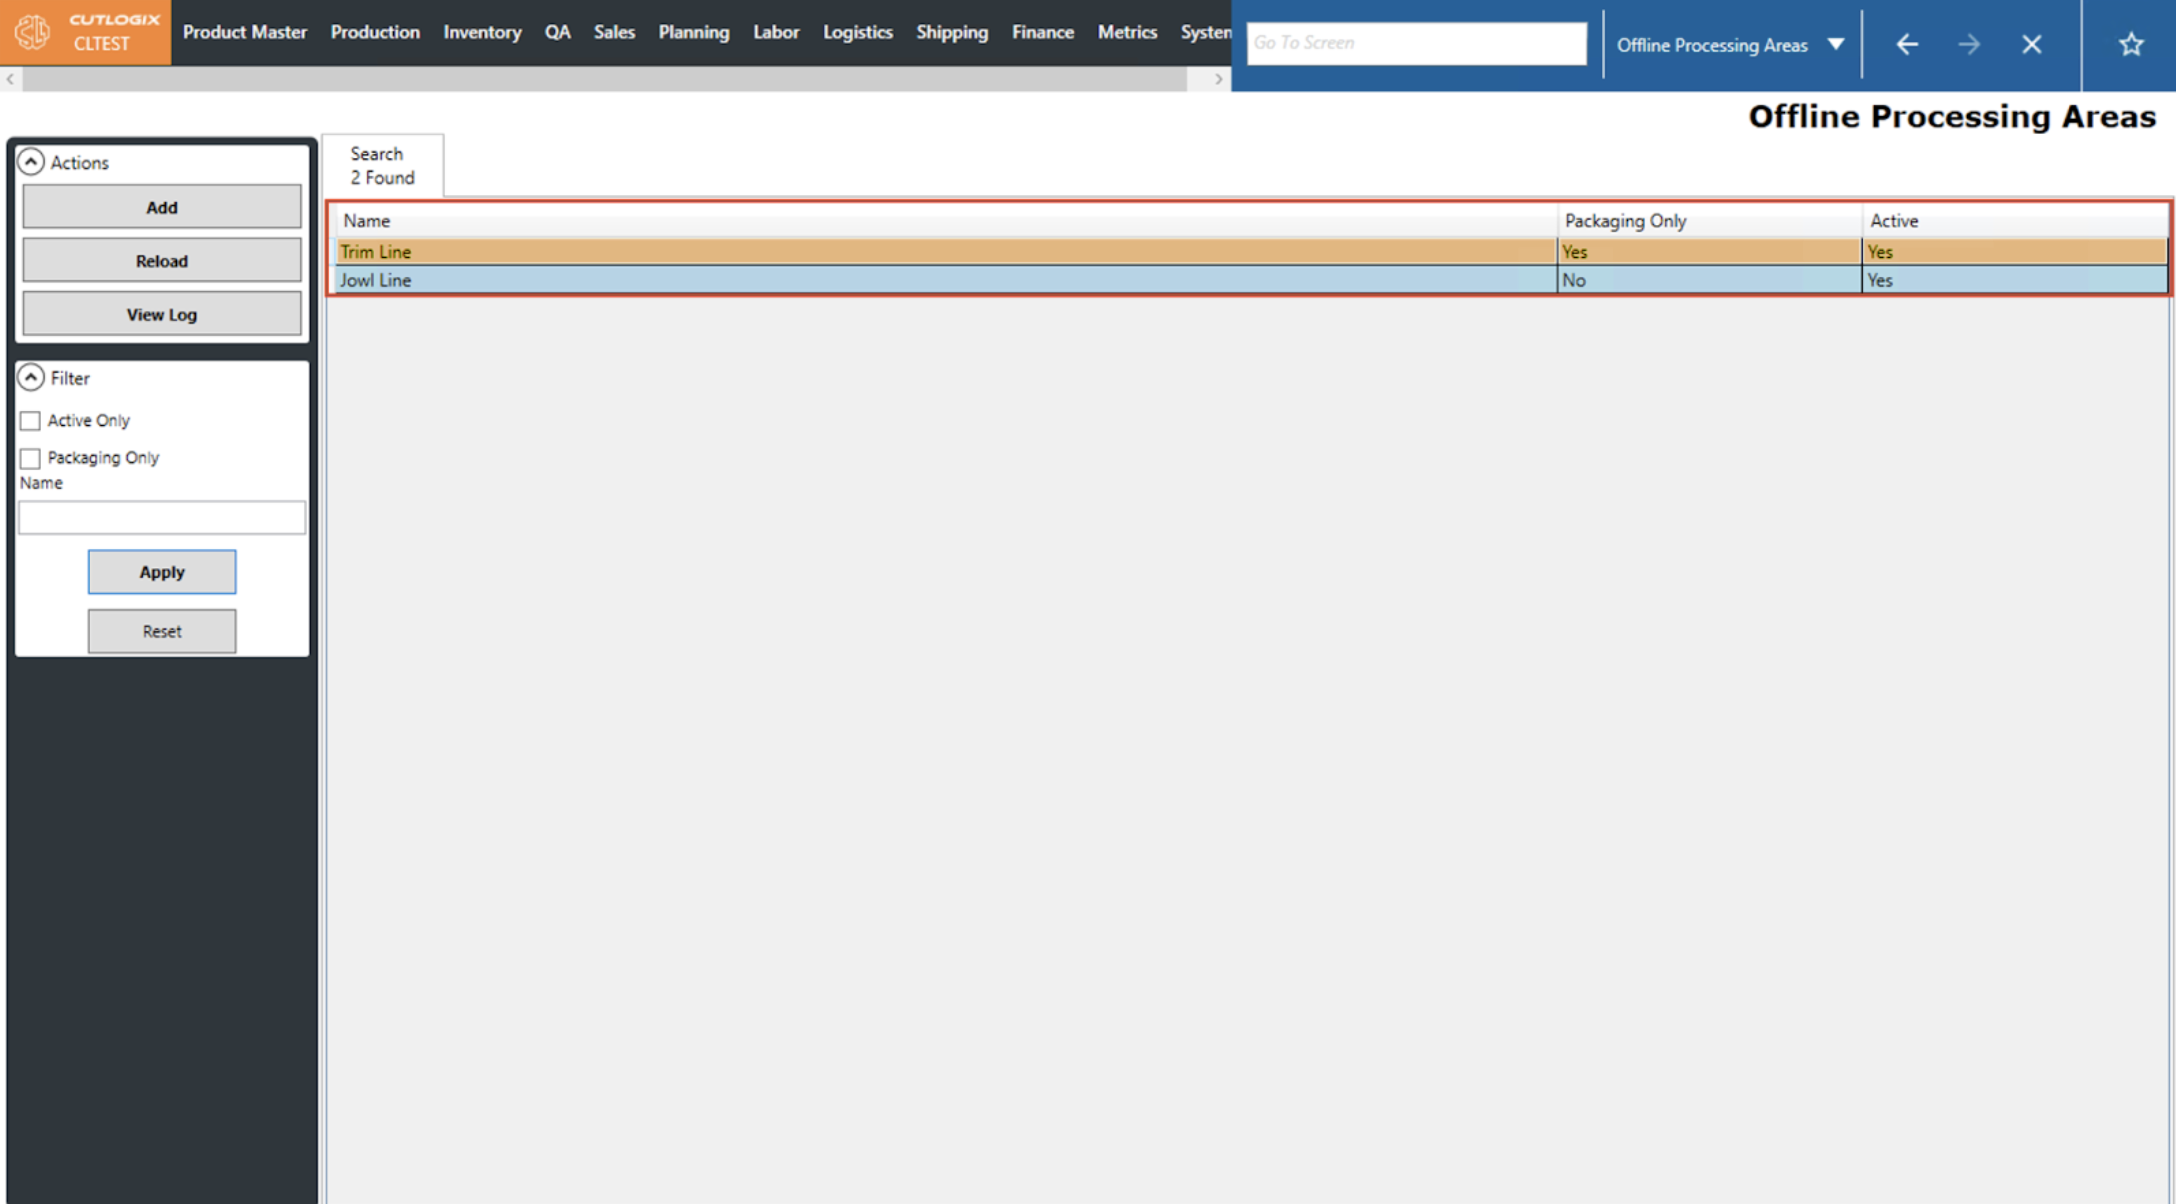
DemoStep 1: Navigate to Planning > Plant Config > Offline Processing Areas.
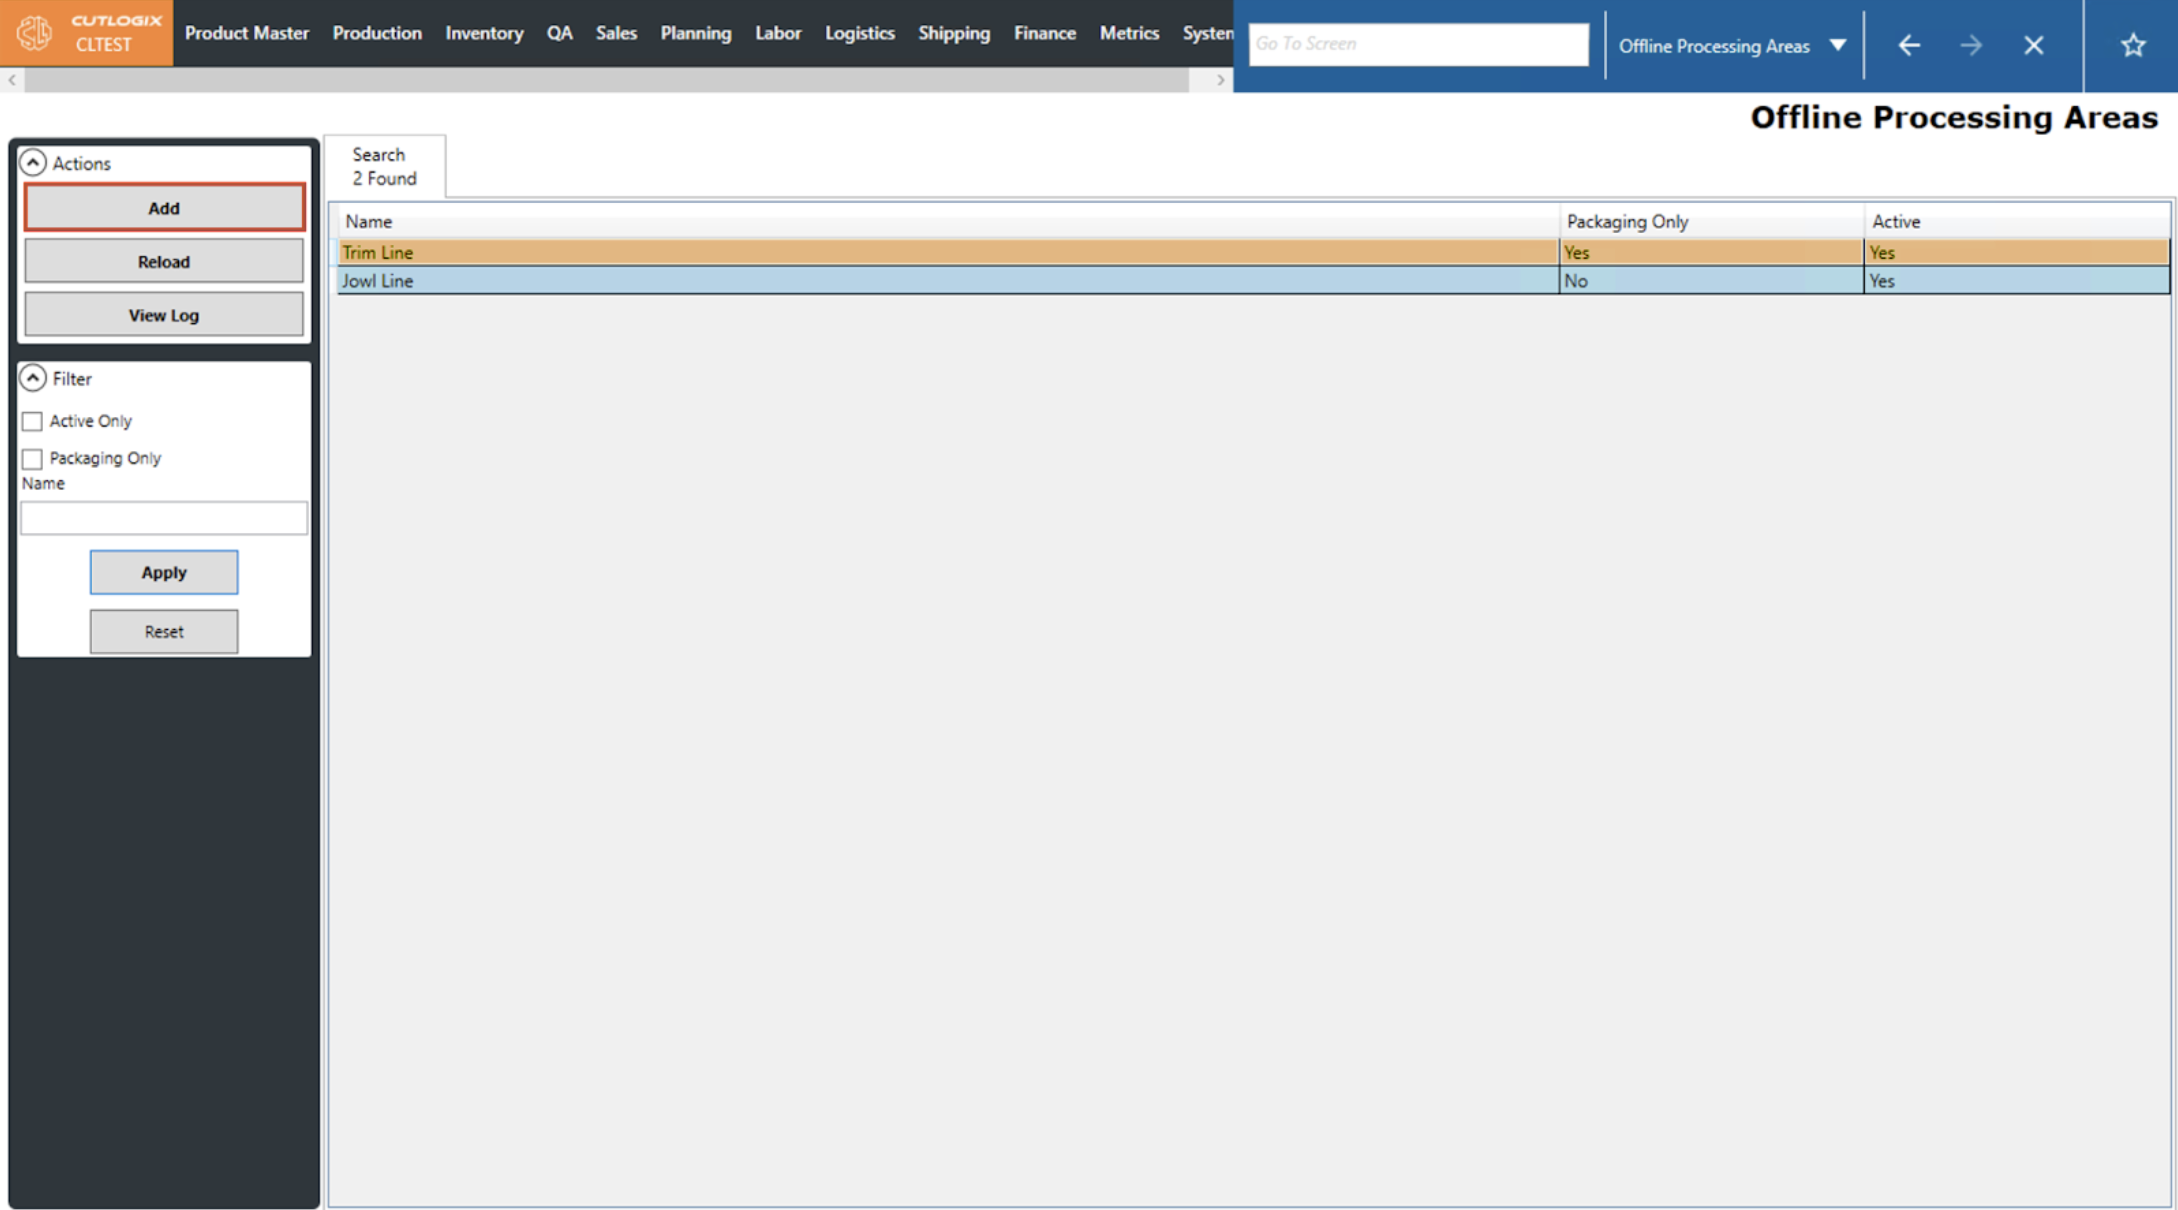
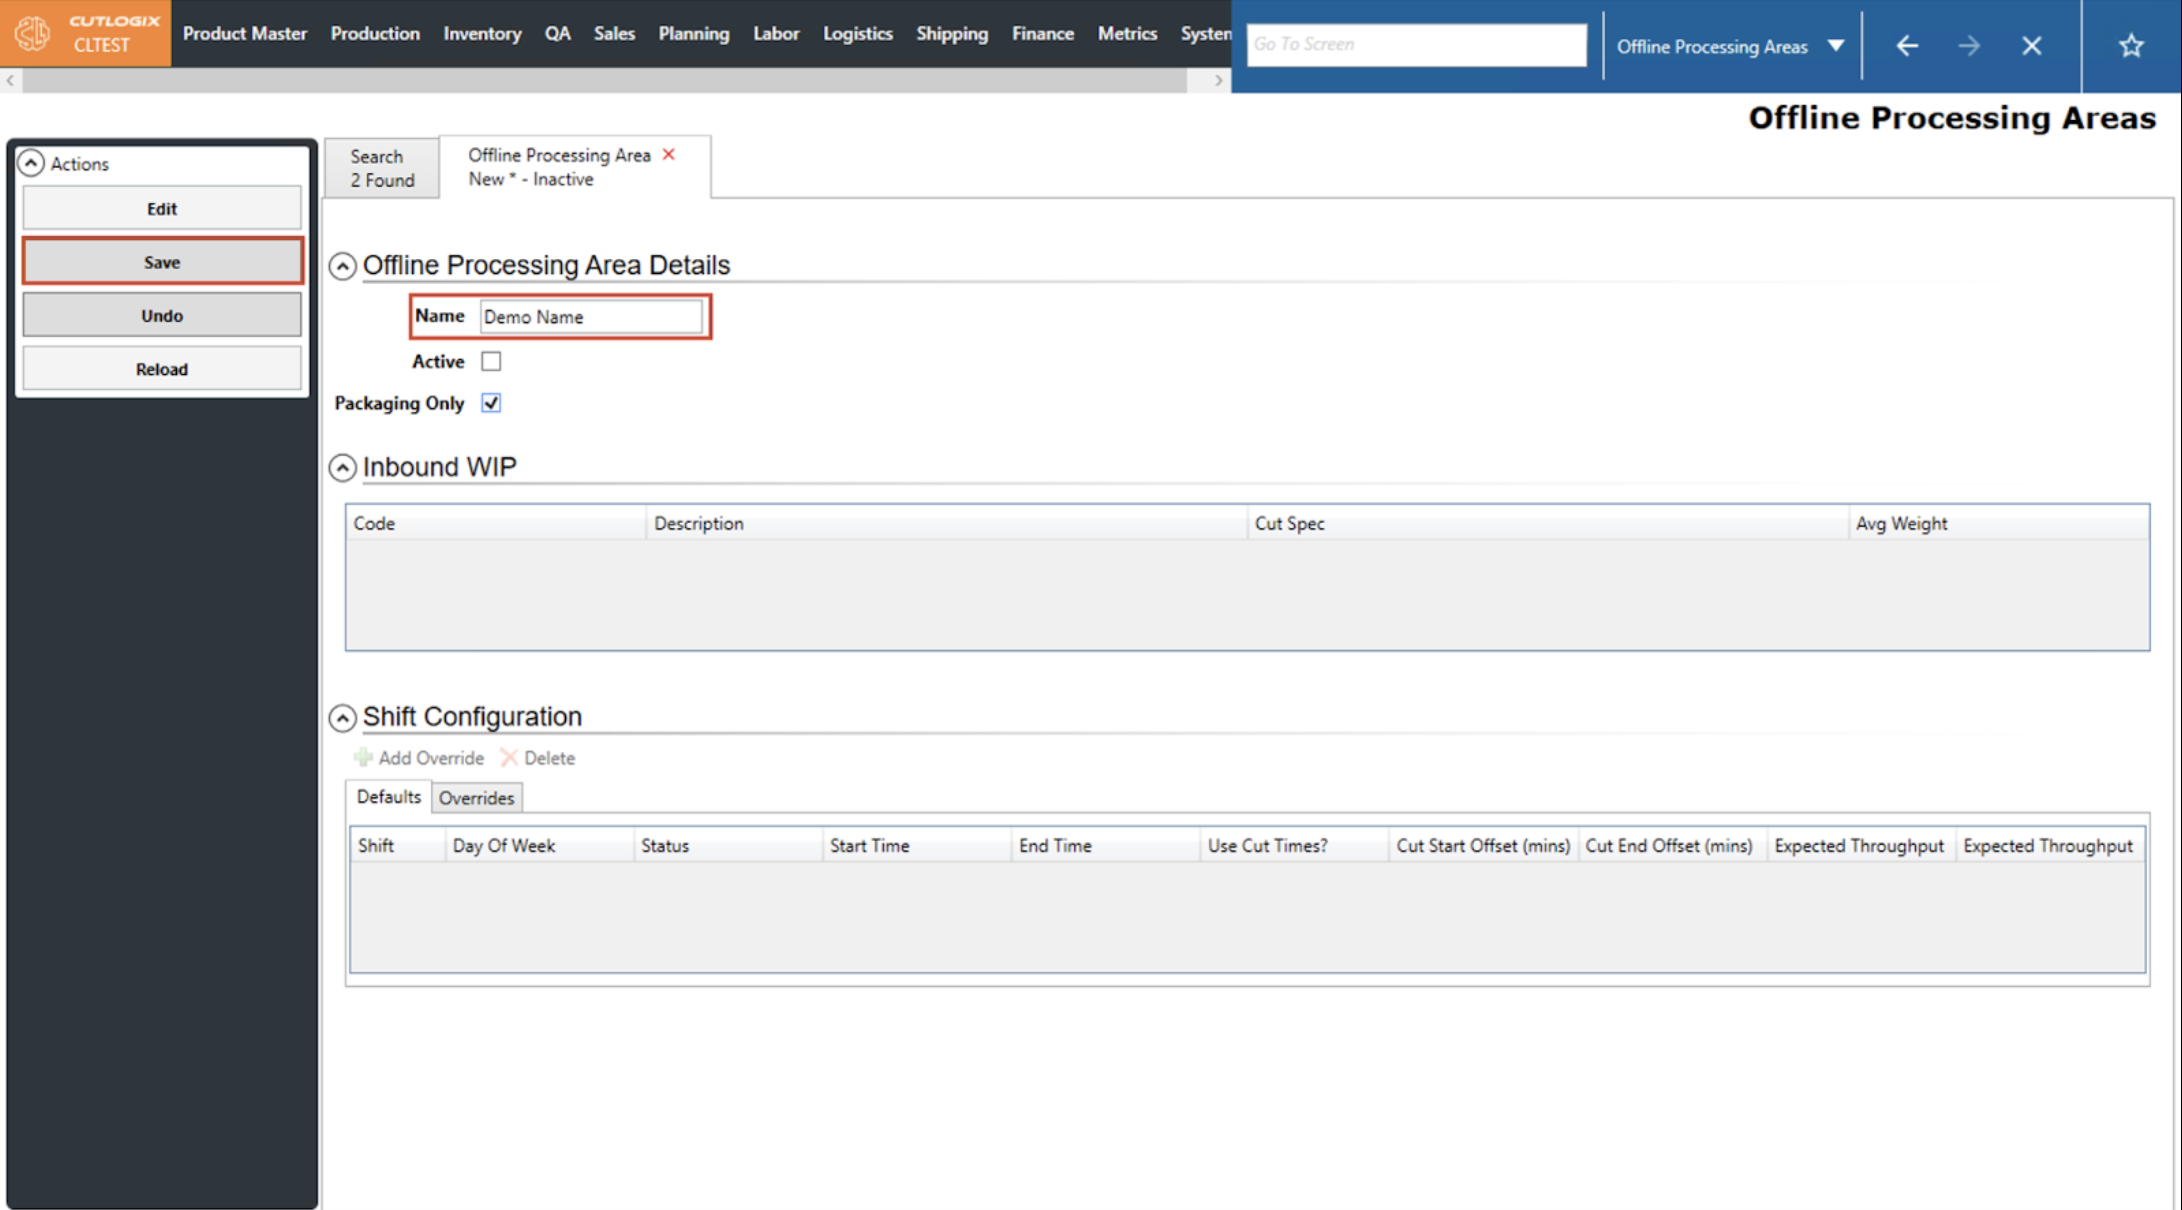
Step 2: Click the ‘Add’ button to open a details tab for the new Offline Processing Area.
Step 3: Once the details tab is open, users can enter the necessary information.

Step 4: If users wish to delete the Offline Processing Area without saving, they can click the ‘Undo’ button.
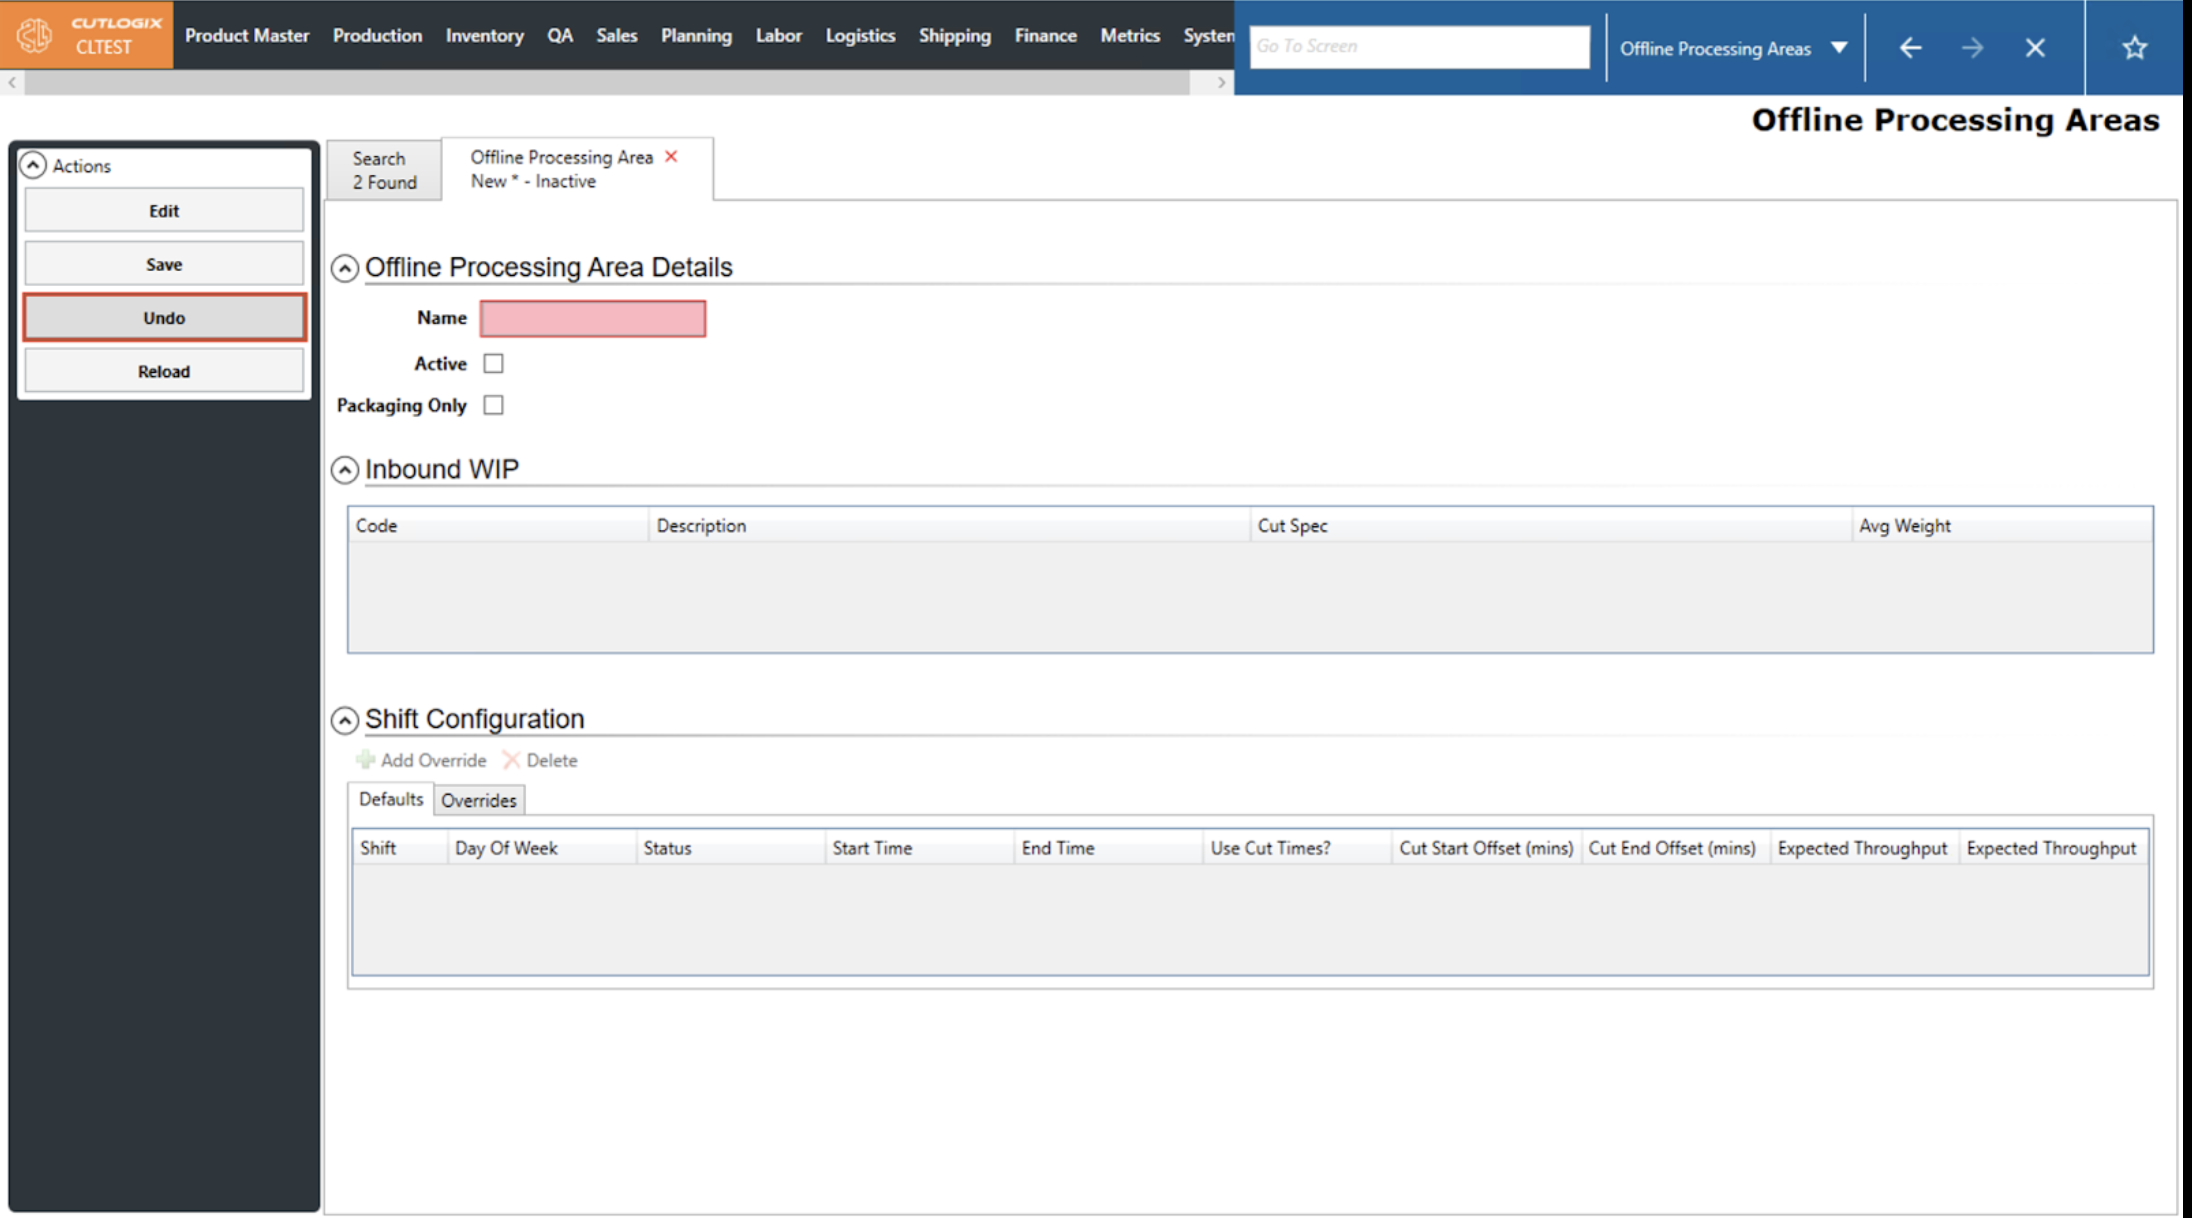
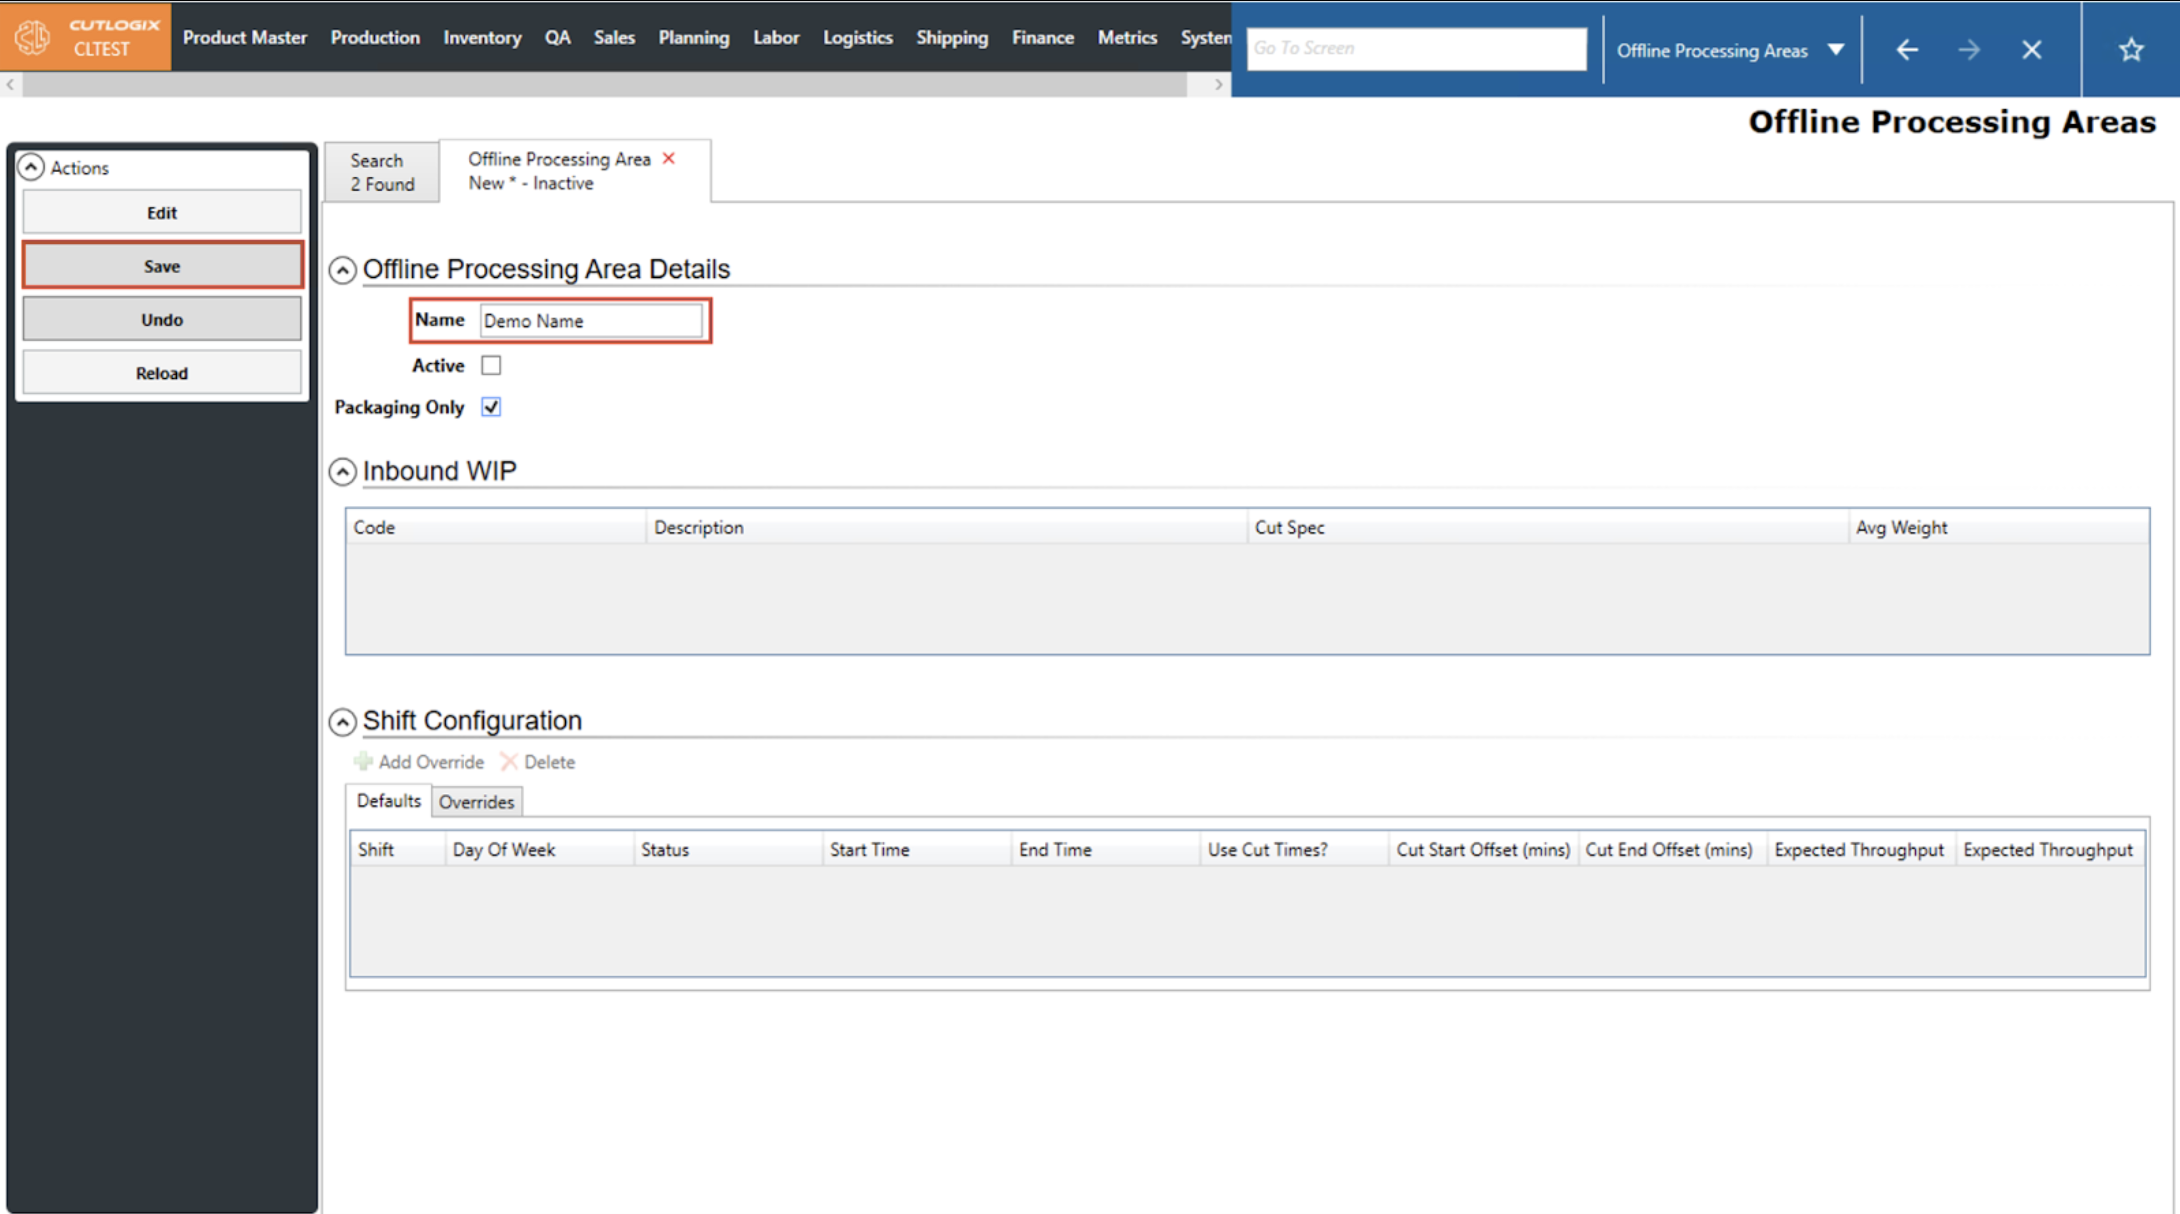
Step 5: If a user wishes to save the new Offline Processing Area then they must fill out the Name field to enable the ‘Save’ button. Once the Name field is filled out, click the ‘Save’ button and the Offline Processing Area will be saved and added to the Search tab.
How to Edit an Offline Processing Area
DemoStep 1: Navigate to Planning > Plant Config > Offline Processing Areas.

Step 2: Double-click an Offline Processing Area in the grid to open its details tab.

Step 3: Once the details tab is open, users must click the ‘Edit’ button in the left ‘Actions’ sidepod to enable data entry. They can now make their desired changes.
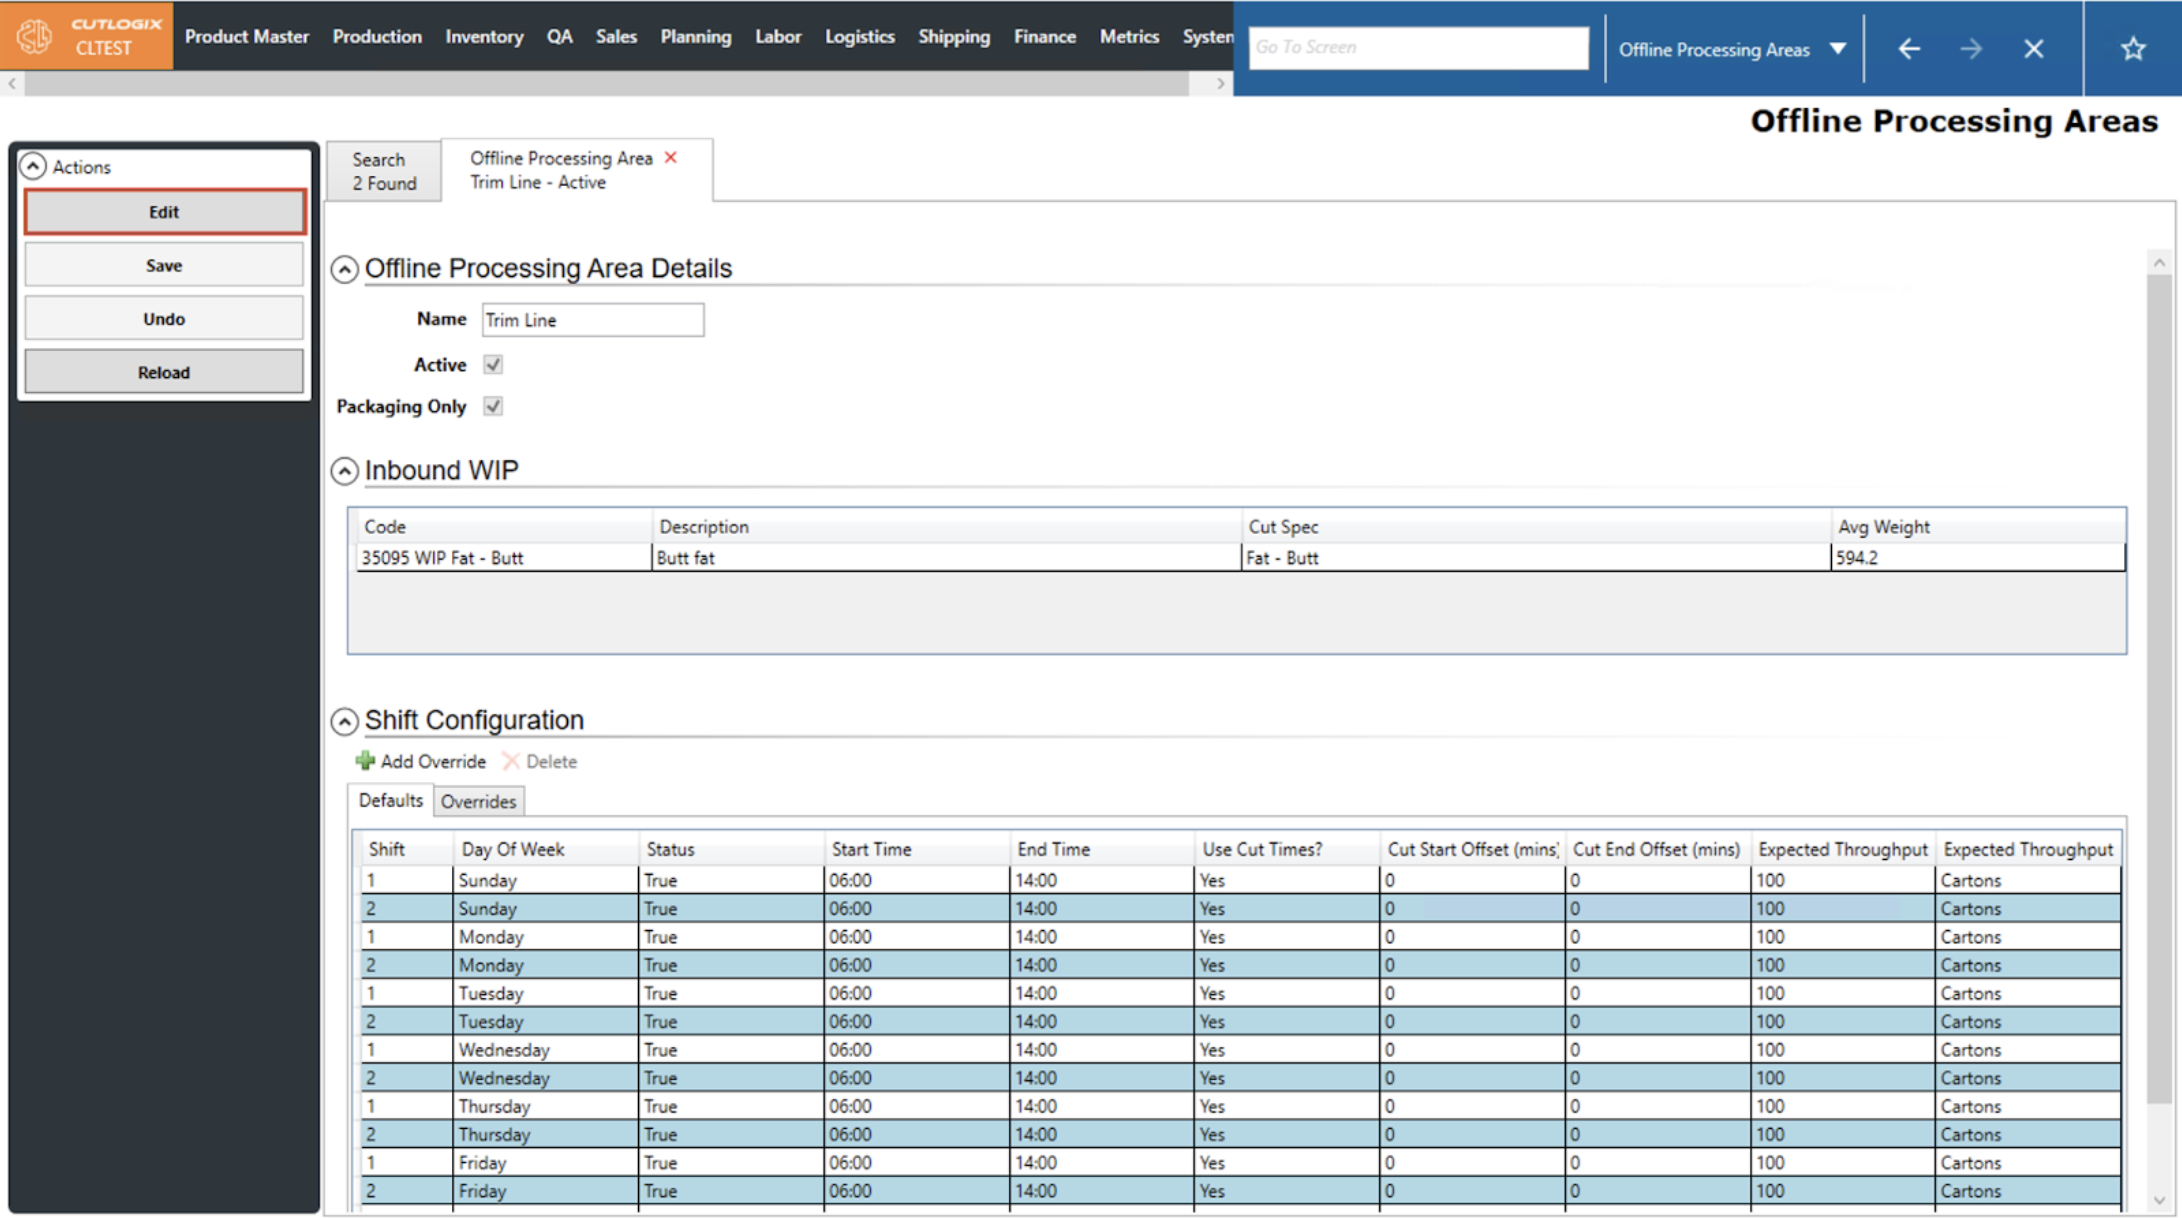
Step 4: If a user wishes to revert their changes back to the Offline Processing Area’s state prior to clicking edit, they can click the ‘Undo’ button.

Step 5: If a user wishes to save their changes then they must ensure that the Name field is still properly filled out to enable the ‘Save’ button. Once the button is enabled, they can click it and the changes made to this Offline Processing Area will be saved.
How to Add a Shift Configuration to an Offline Processing Area
DemoStep 1: After saving a new Offline Processing Area, the default shift configs will be populated with a series of default values. If you are still on the details page after adding a new offline processing area, proceed to step 2.
If you're not on the details page for the offline processing area, open the "Production" menu, then the "Plant Config" menu, then click on "Offline Processing Areas."
If you're not on the details page for the offline processing area, open the "Production" menu, then the "Plant Config" menu, then click on "Offline Processing Areas."

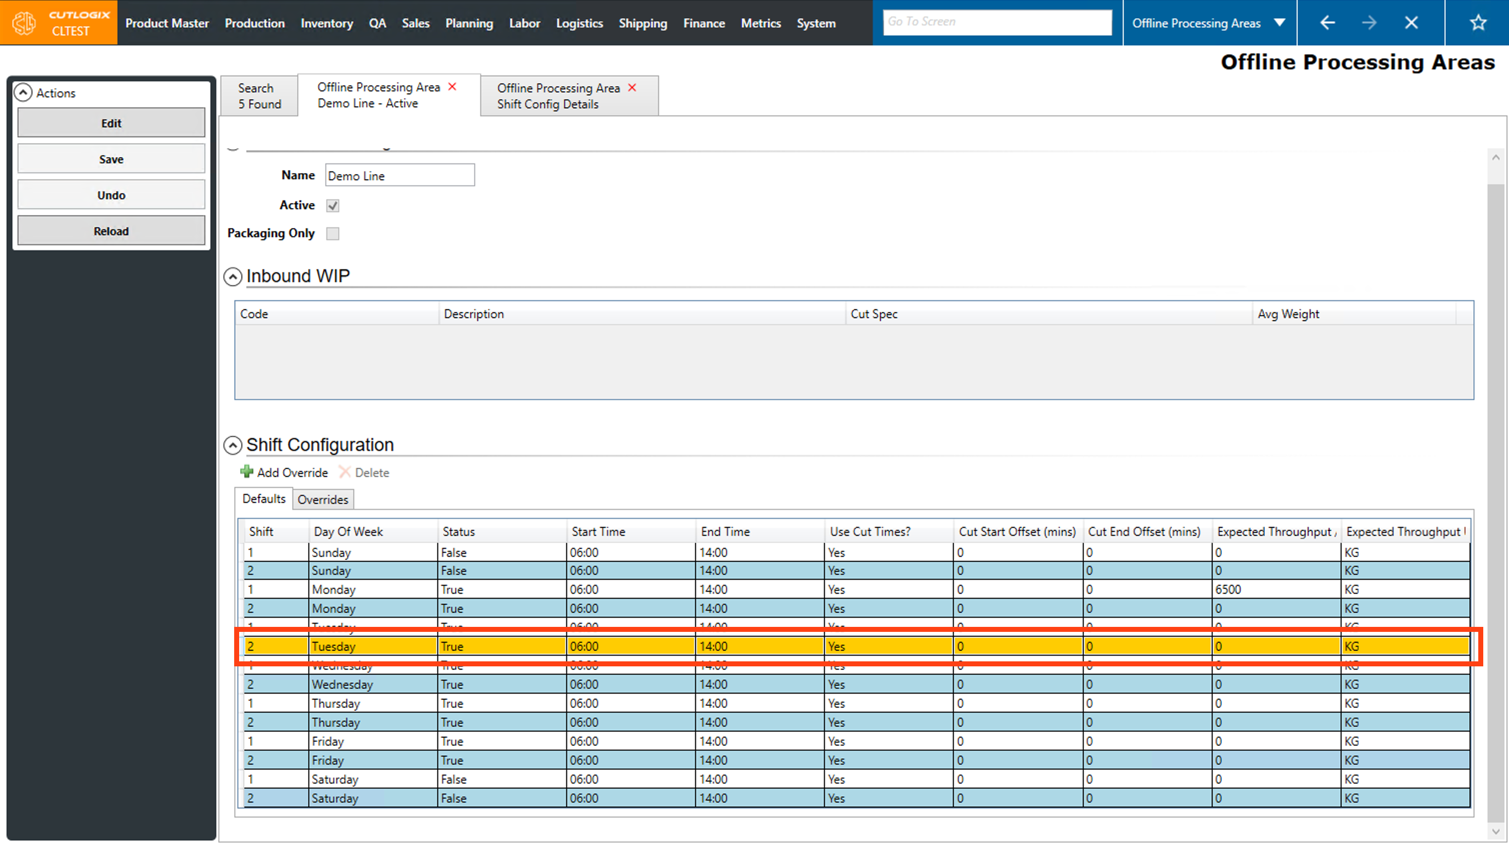
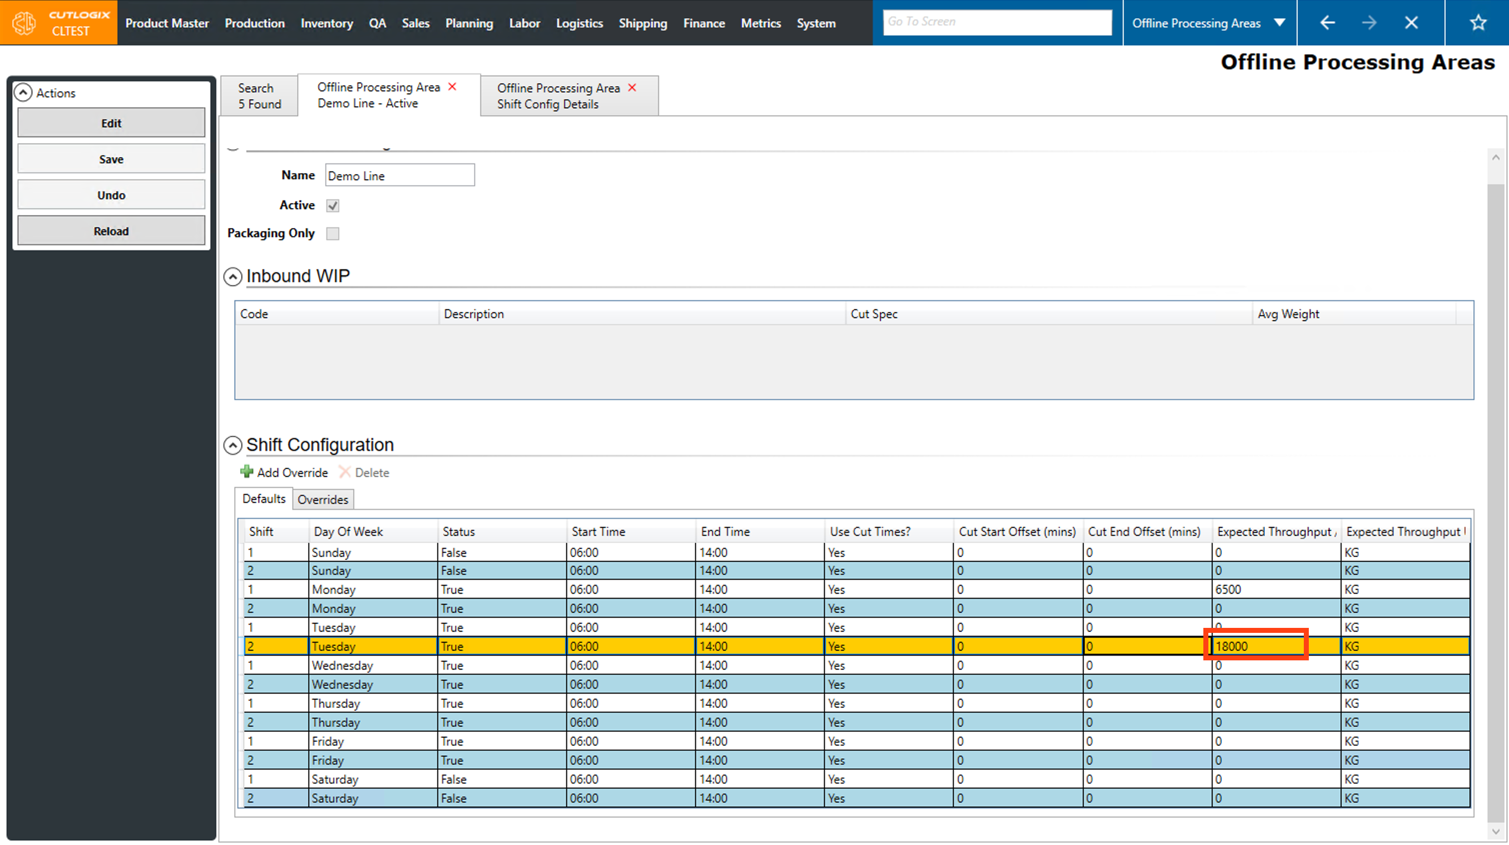
Step 2: When a new offline processing area gets created, default values appear in the "Shift Configuration" table at the bottom of the details page. Double-click on row for the shift that you'd like to edit.
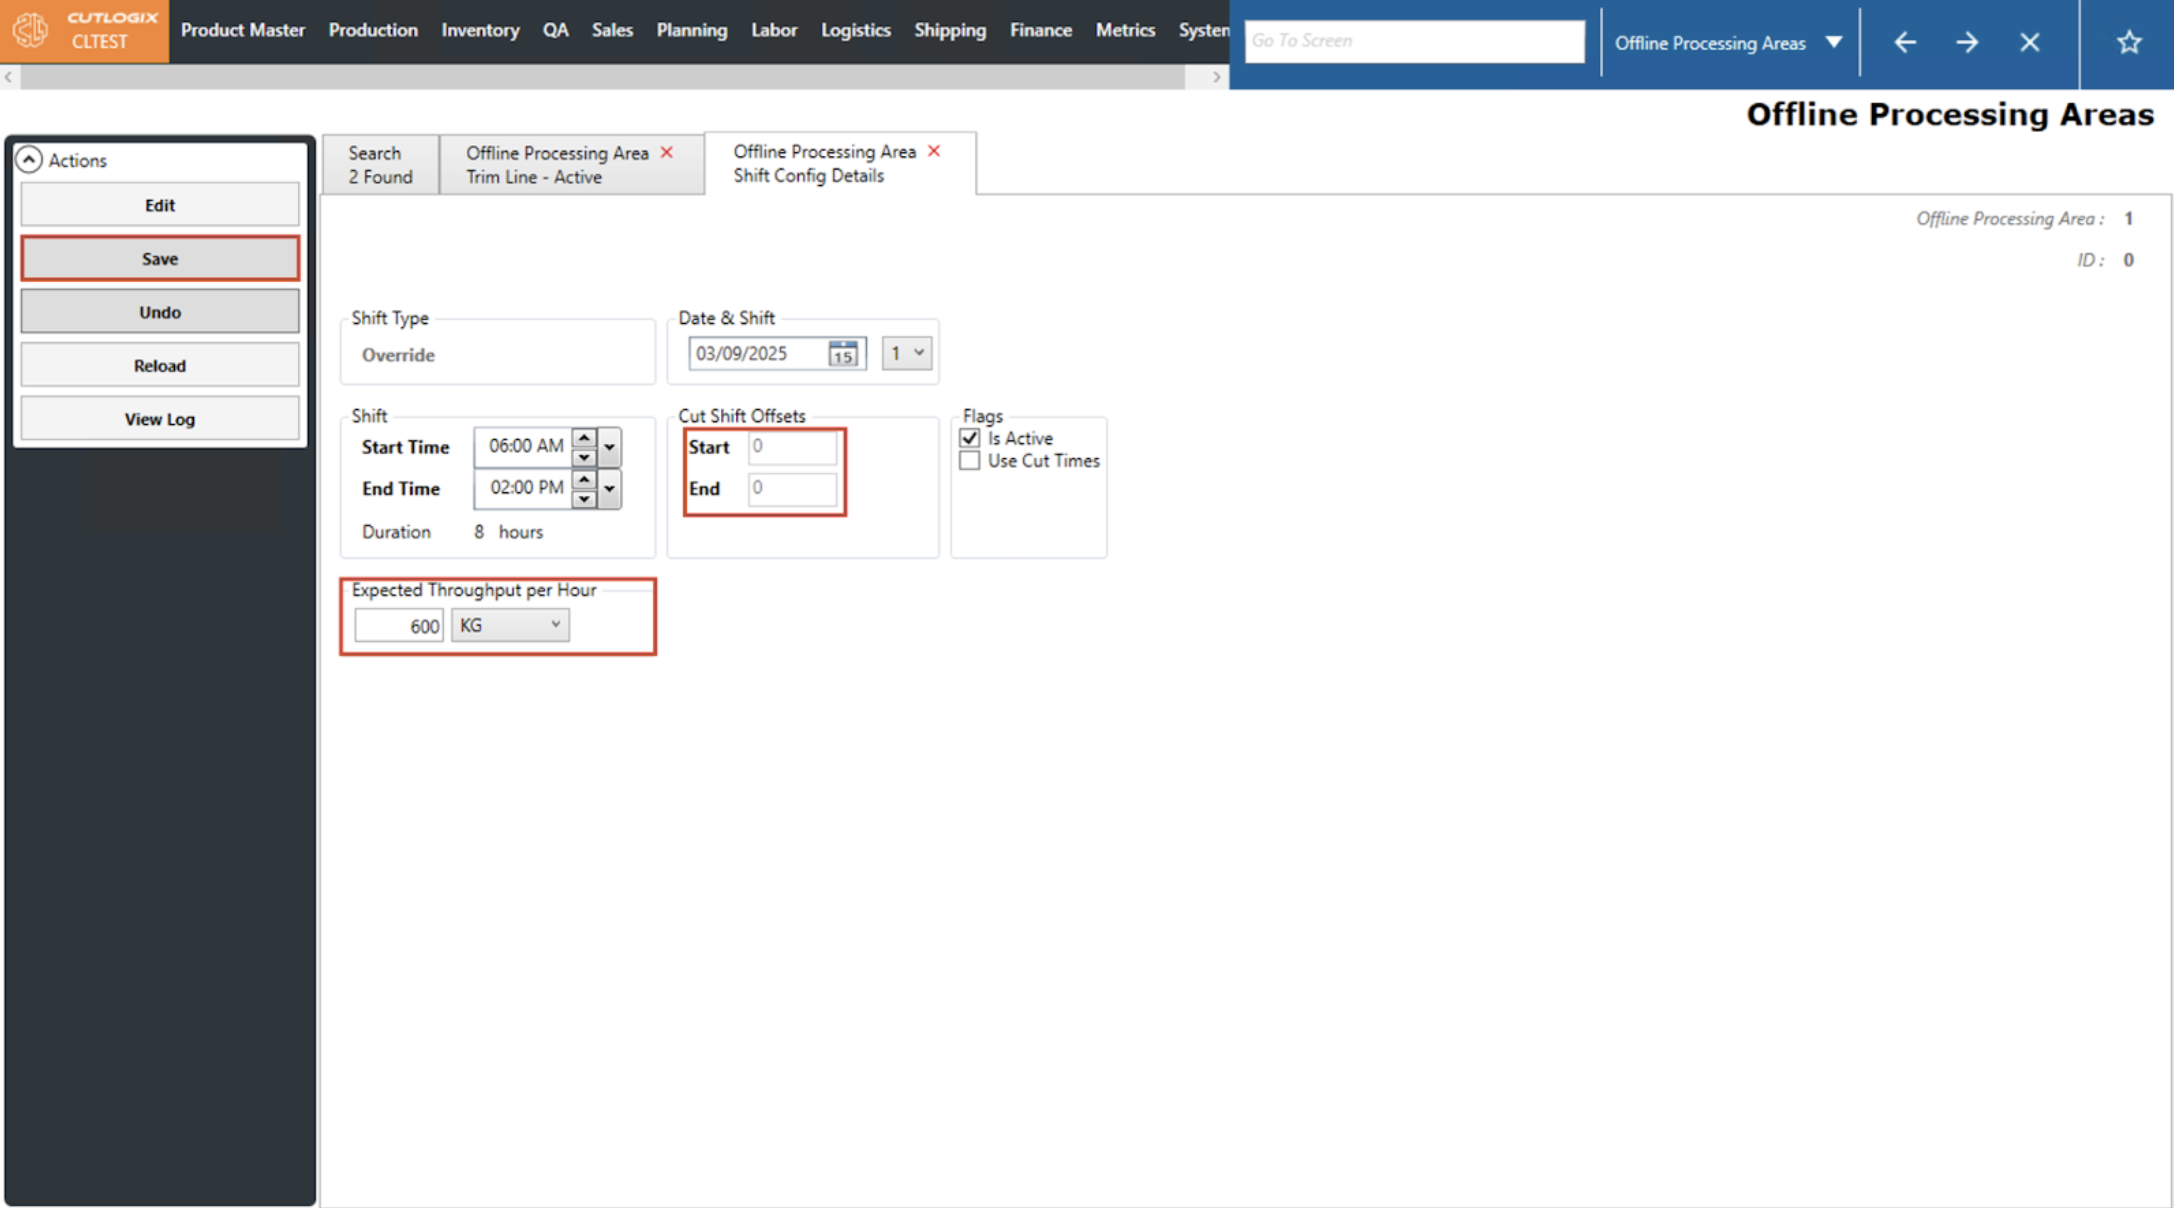
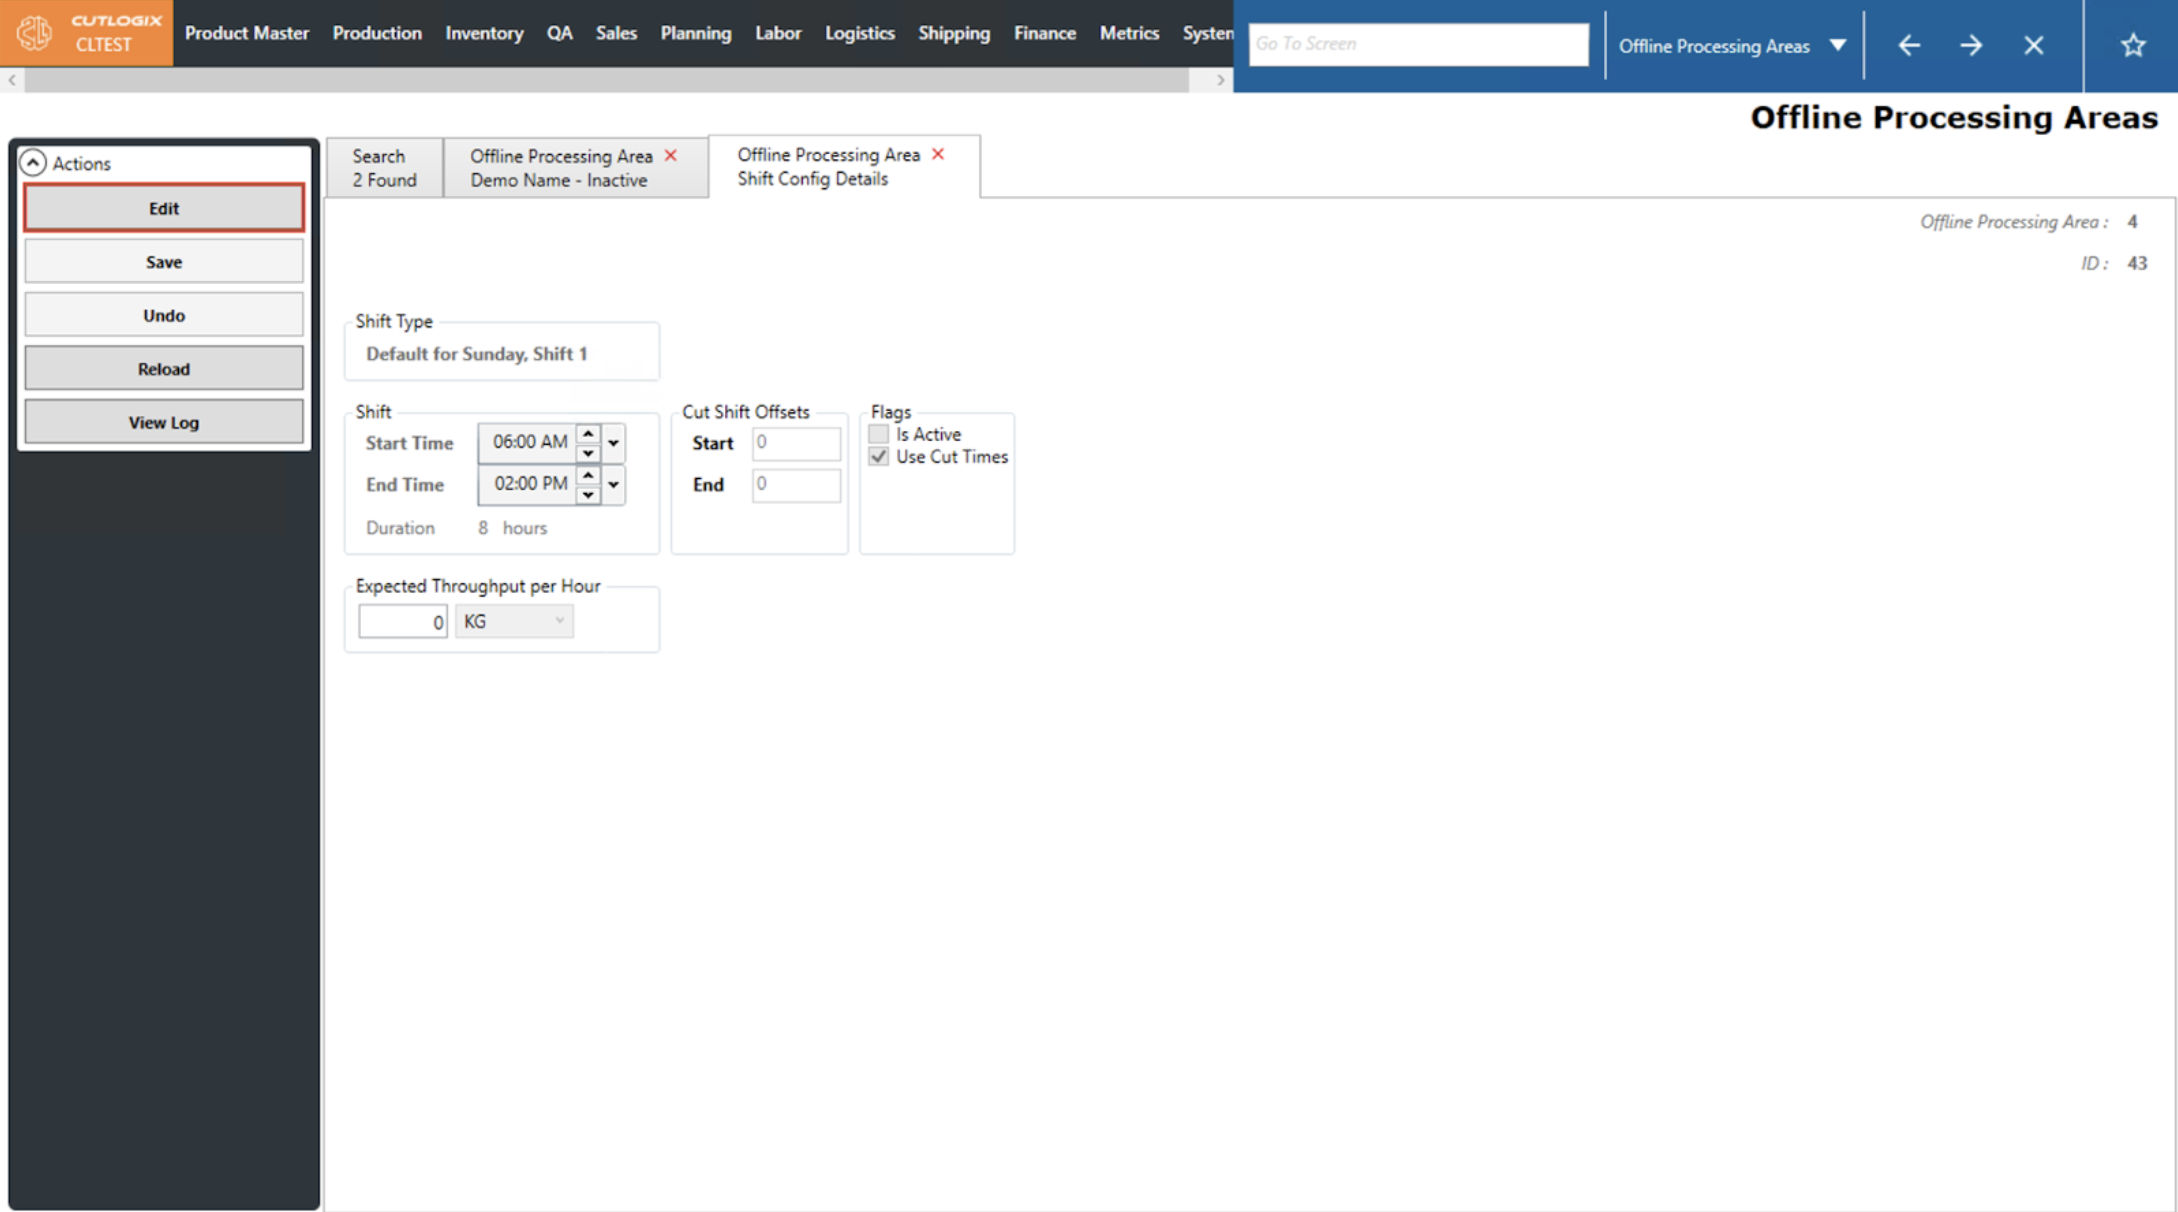
Step 3: A new tab will open with the details page for the shift config. To make changes on this page, click the "Edit" button in the Actions Panel.

Step 4: Now you can make changes to the shift start and end times, cut shift offsets, active/inactive status and expected throughput per hour. Note that the expected throughput per hour must be greater than zero.

Step 5: Once you're finished making edits to shift config details, click the "Save" button in the Actions Panel to save them. If you don't want to save your changes, clicking the "undo" button will discard them, and they will not be saved.
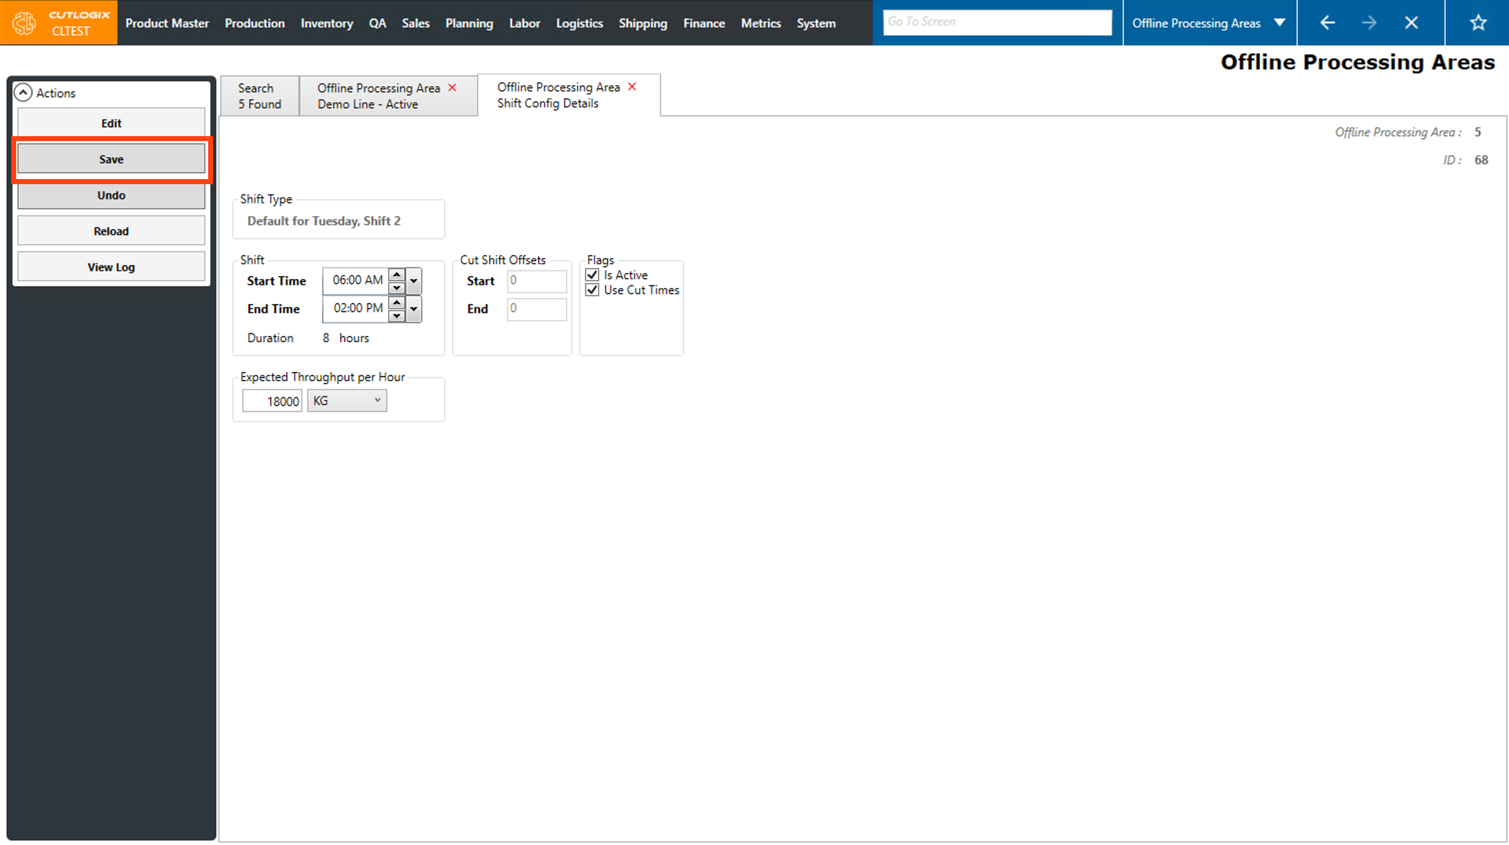
Step 6: Return to the offline processing area details tab, and you'll be able to see the changes reflected in the shift configuration table.
How to Edit a Shift Configuration on an Offline Processing Area
DemoStep 1: Navigate to Planning > Plant Config > Offline Processing Areas and double-click the offline processing area you want to edit to open its details tab.
Step 2: Double-click the desired row in the Shift Configuration data grid section to open that Shift Configuration's details tab.

Step 3: Once the shift config’s details tab is open then click the ‘Edit’ button in the ‘Actions’ sidepod on the left. This will enable data entry and allow users to make their desired changes.
Step 4: If a user wishes to revert the changes back to how the shift config was before ‘Edit’ was clicked then they can click the ‘Undo’ button.

Step 5: If a user wishes to save their changes, they can click the ‘Save’ button. The ‘Save’ button will be enabled so long as the Start, End and Expected Throughput fields have a valid entry, i.e. 0 or a positive integer.

How to Add an Override Shift Config to an Offline Processing Area
DemoStep 1: Navigate to Planning > Plant Config > Offline Processing Areas and double-click the offline processing area you want to edit to open its details tab.

Step 2: Once on the Offline Processing Area’s details tab, click on the ‘Add Override’ button. This will open a details tab for the new Override.

Step 3: On this details tab users can define what they want the override shift configuration to be. Overrides only affect a particular date and shift. Thus, it is important that users set the Date & Shift fields to the desired times.
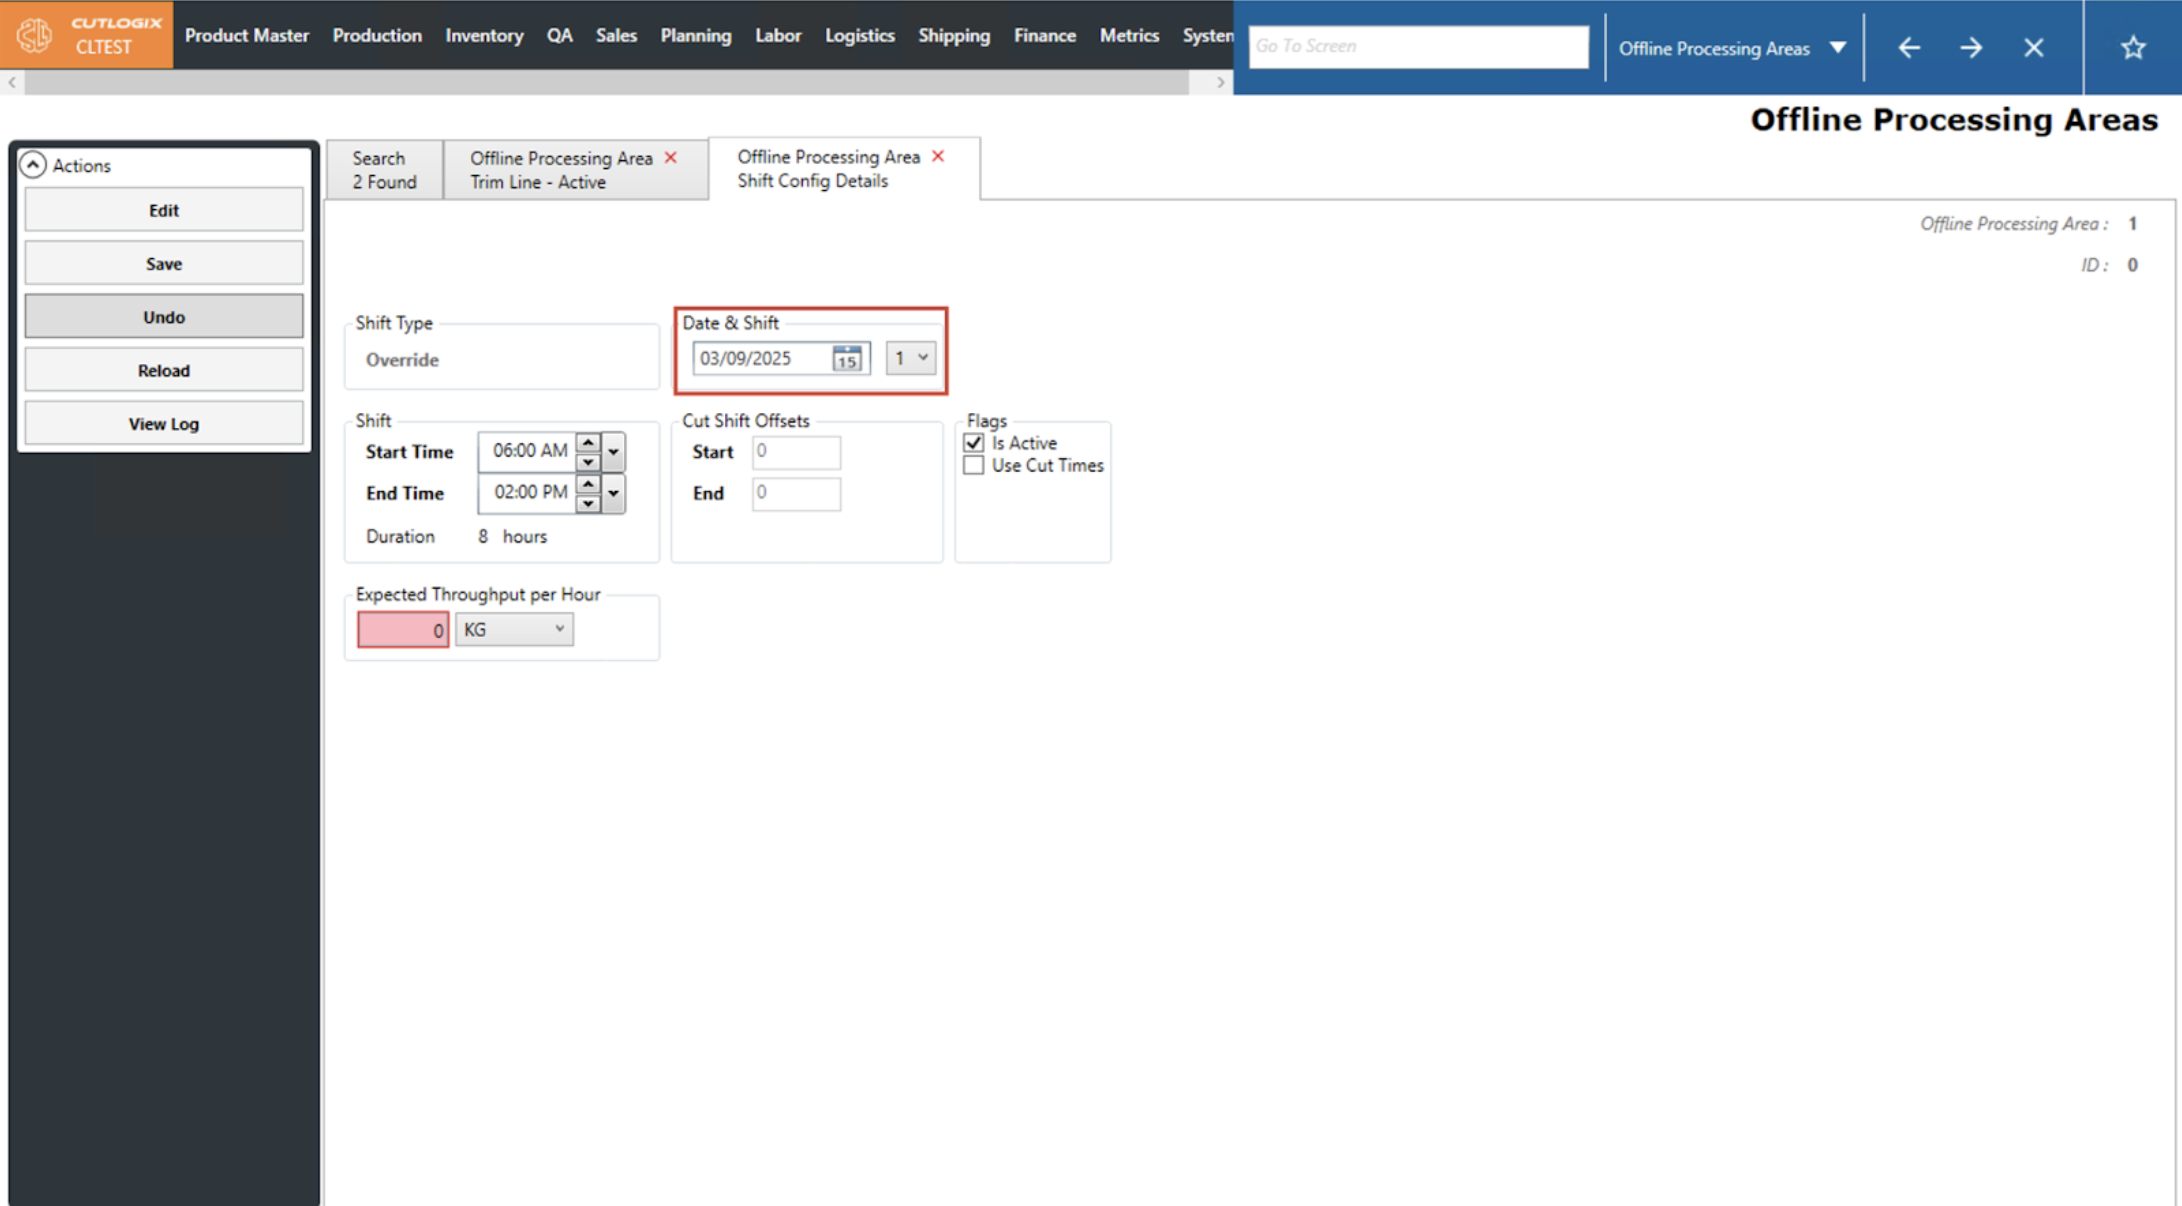
Step 4: If a user wishes to delete the override without saving they can click the ‘Undo’ button.
Step 5: If a user wishes to save their override they must ensure that the throughout is an integer greater than 0 and that, if Use Cut Times is checked, that the Start and End fields contain either 0 or a positive integer.

How to Edit an Override Shift Config on an Offline Processing Area
DemoStep 1: Navigate to Planning > Plant Config > Offline Processing Areas and double-click the offline processing area you want to edit to open its details tab.

Step 2: Once on the Offline Processing Area’s details tab, click on the ‘Overrides’ tab to view the available overrides.
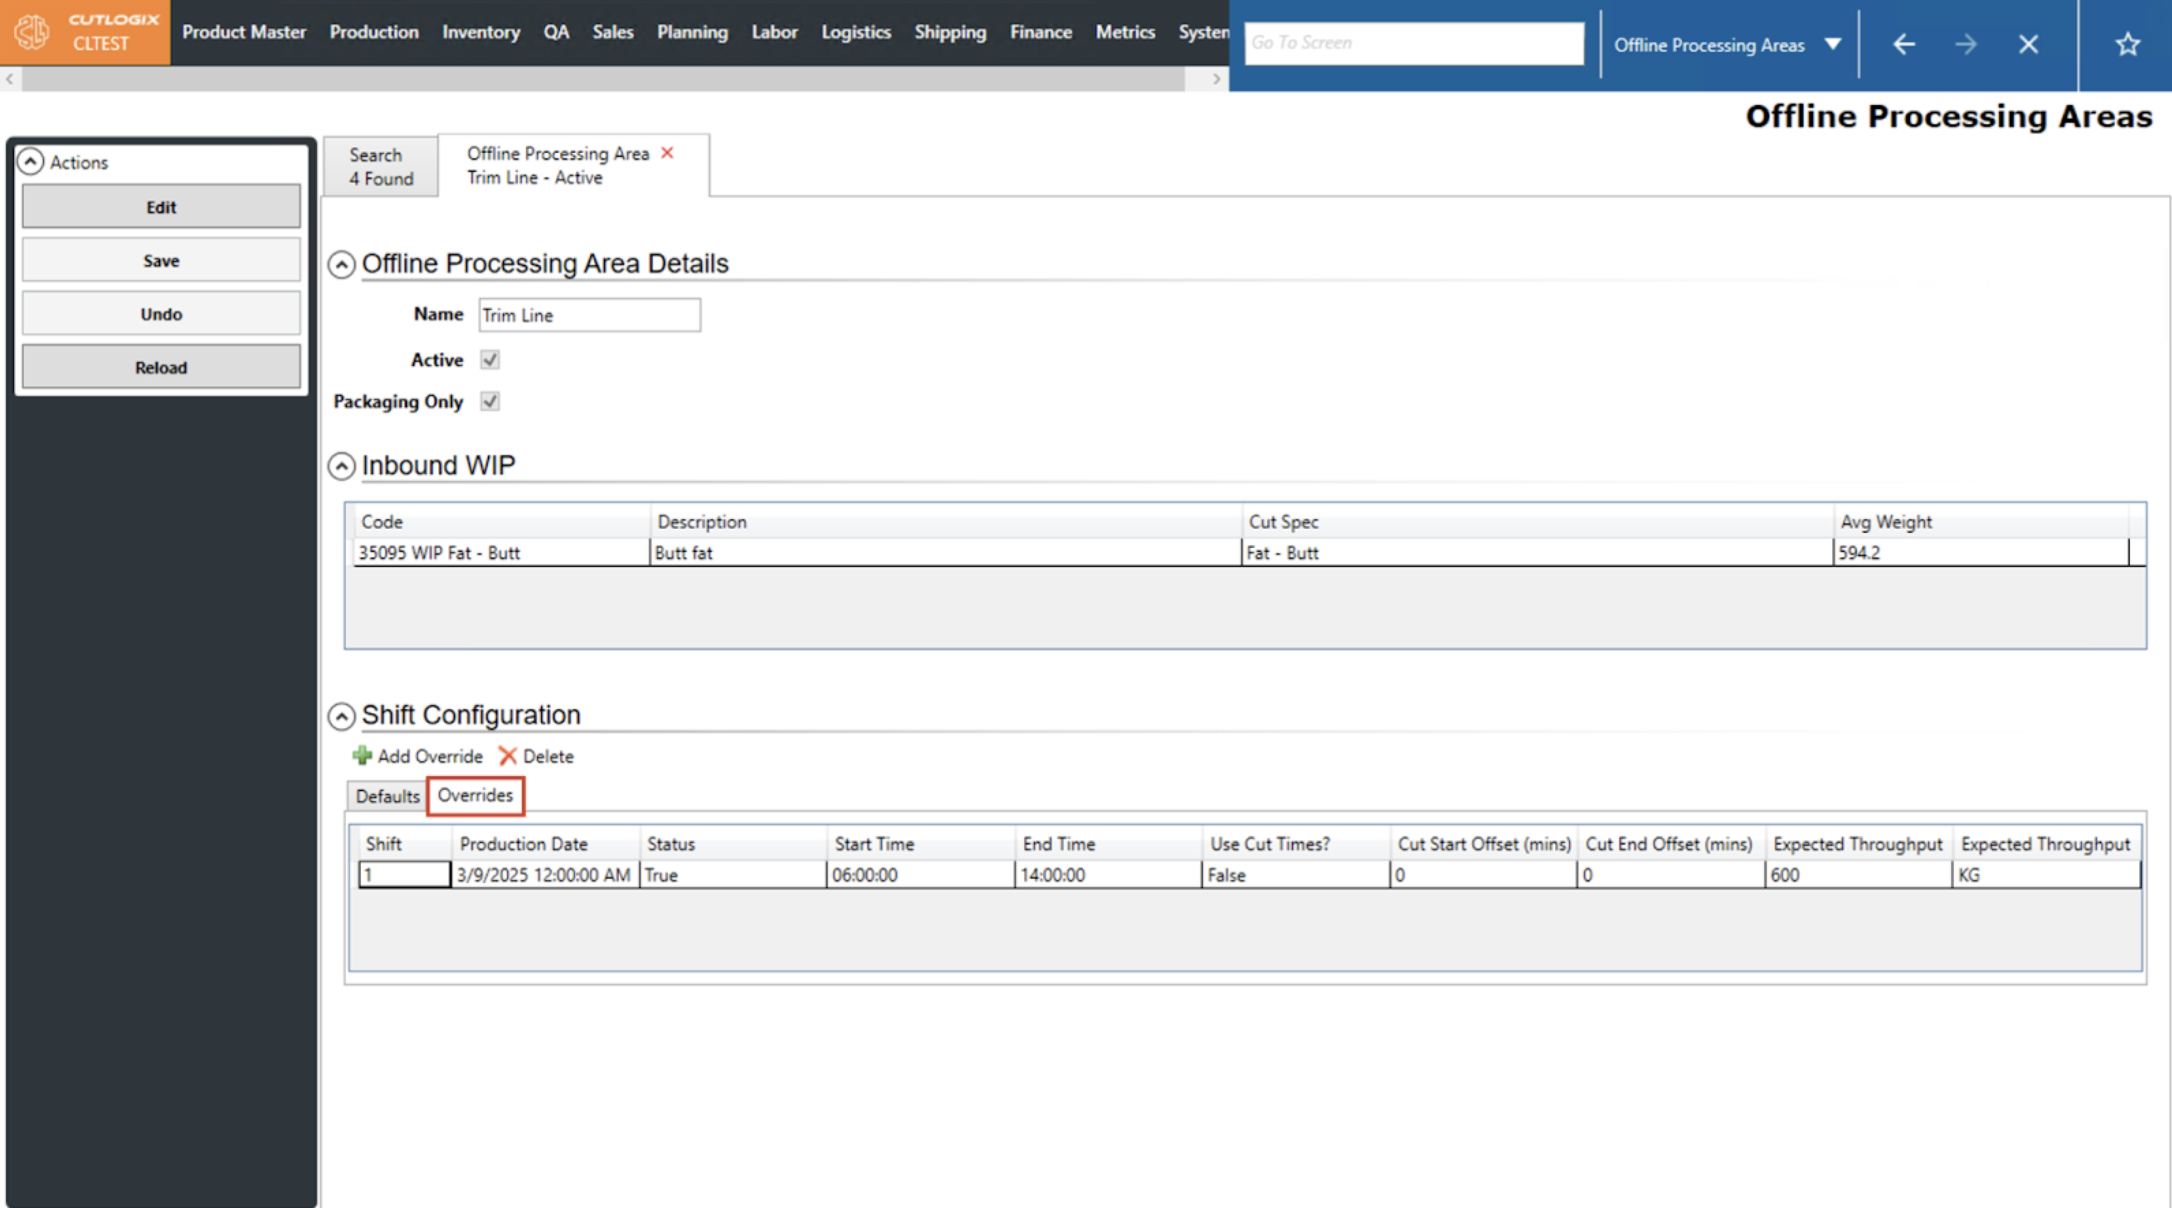
Step 3: Once on the ‘Overrides’ tab, users can double click on the override they want to edit to open its details tab.
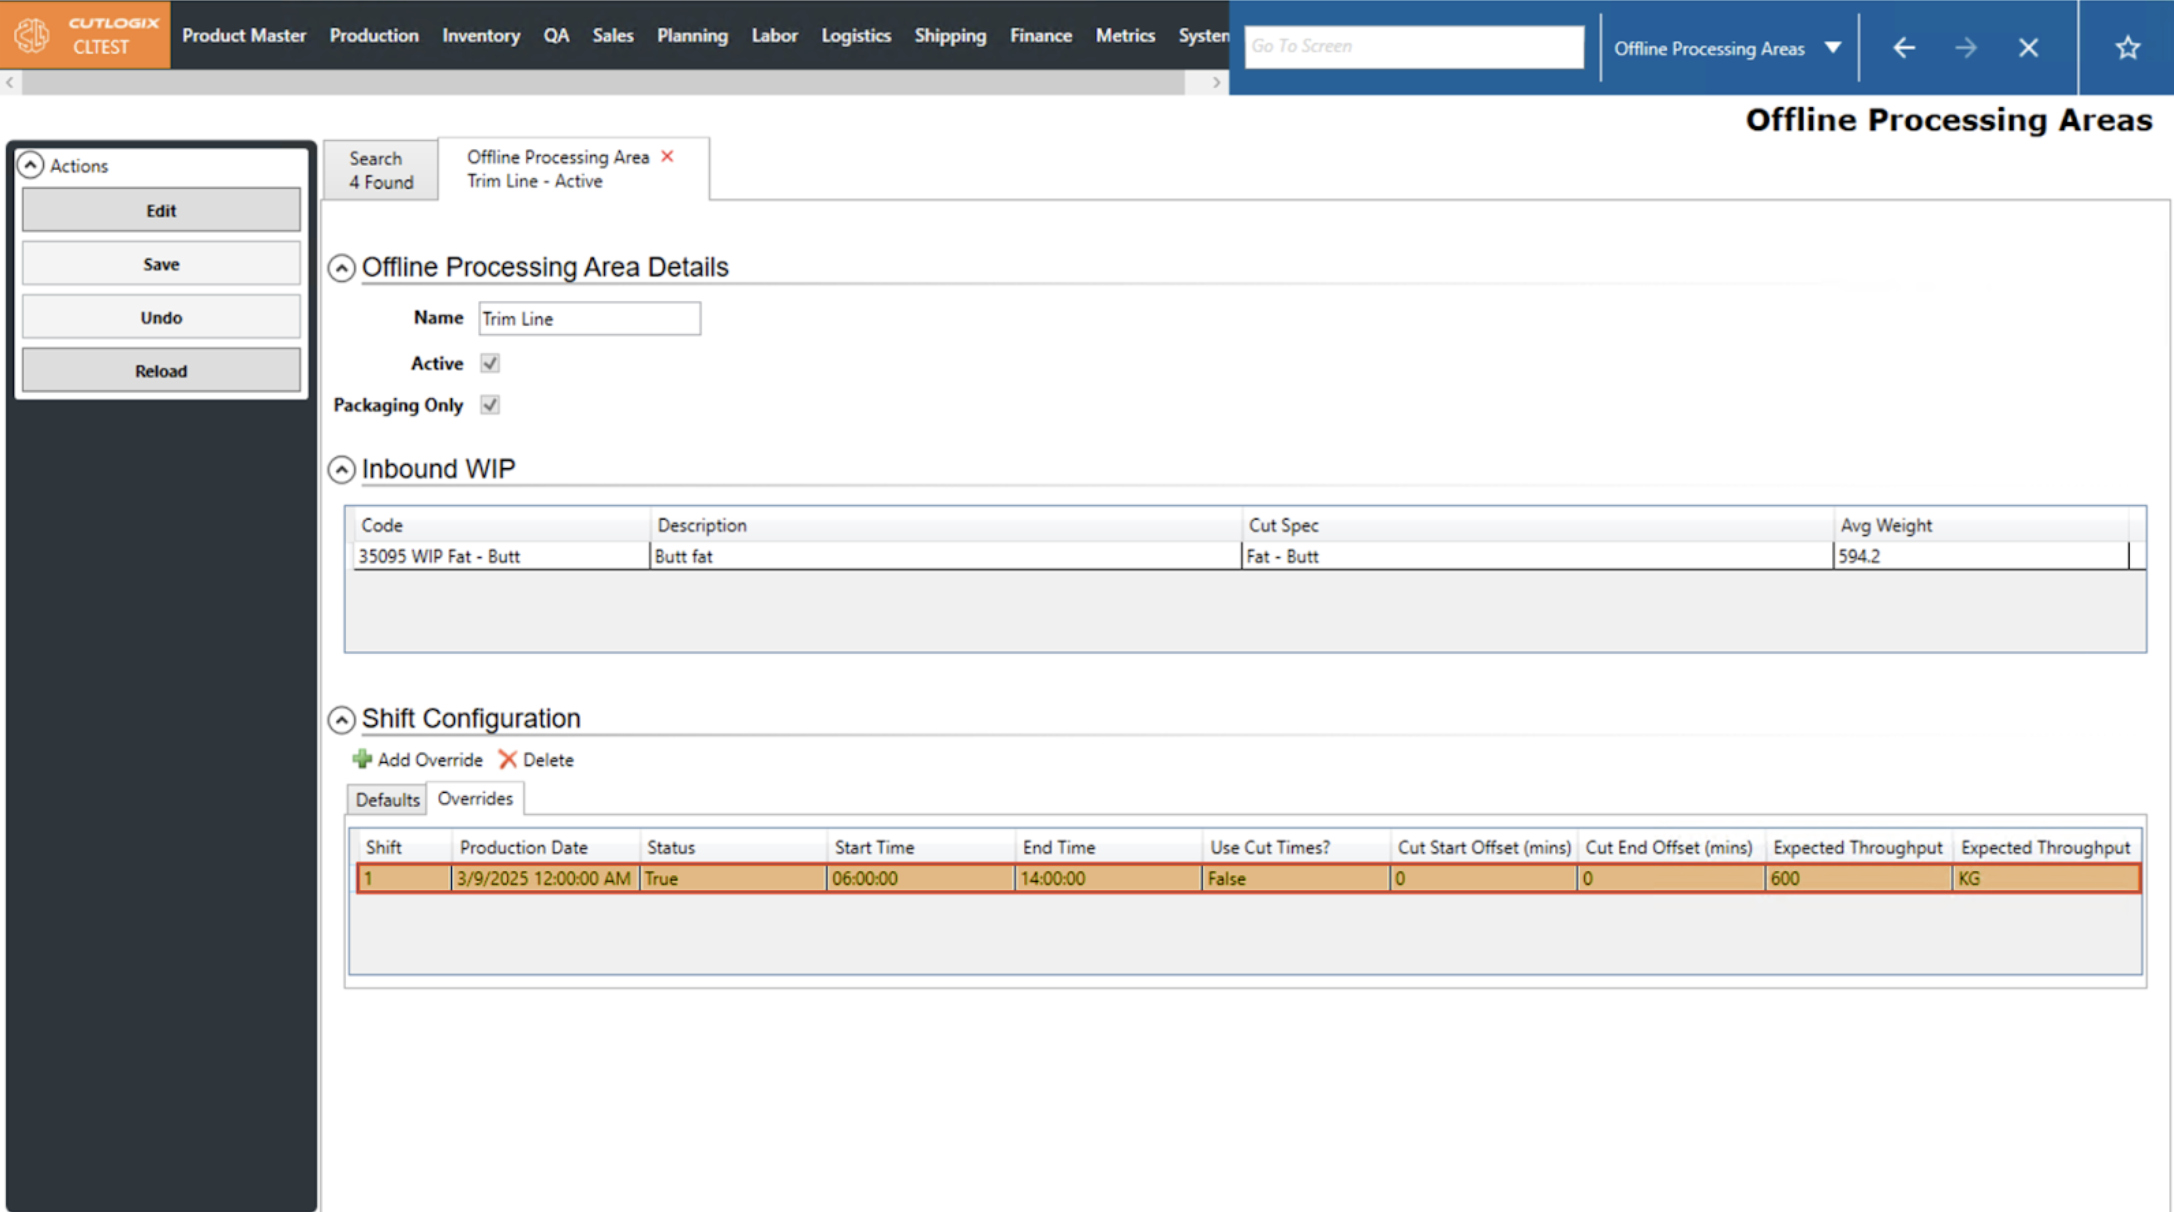
Step 4: Once on the details tab, users can click the ‘Edit’ Button in the ‘Actions’ sidepod on the left to enable data entry. Once ‘Edit’ is clicked, users can make their desired changes to the override. This also allows users to re-use already configured overrides by setting the date and time to one in the future.

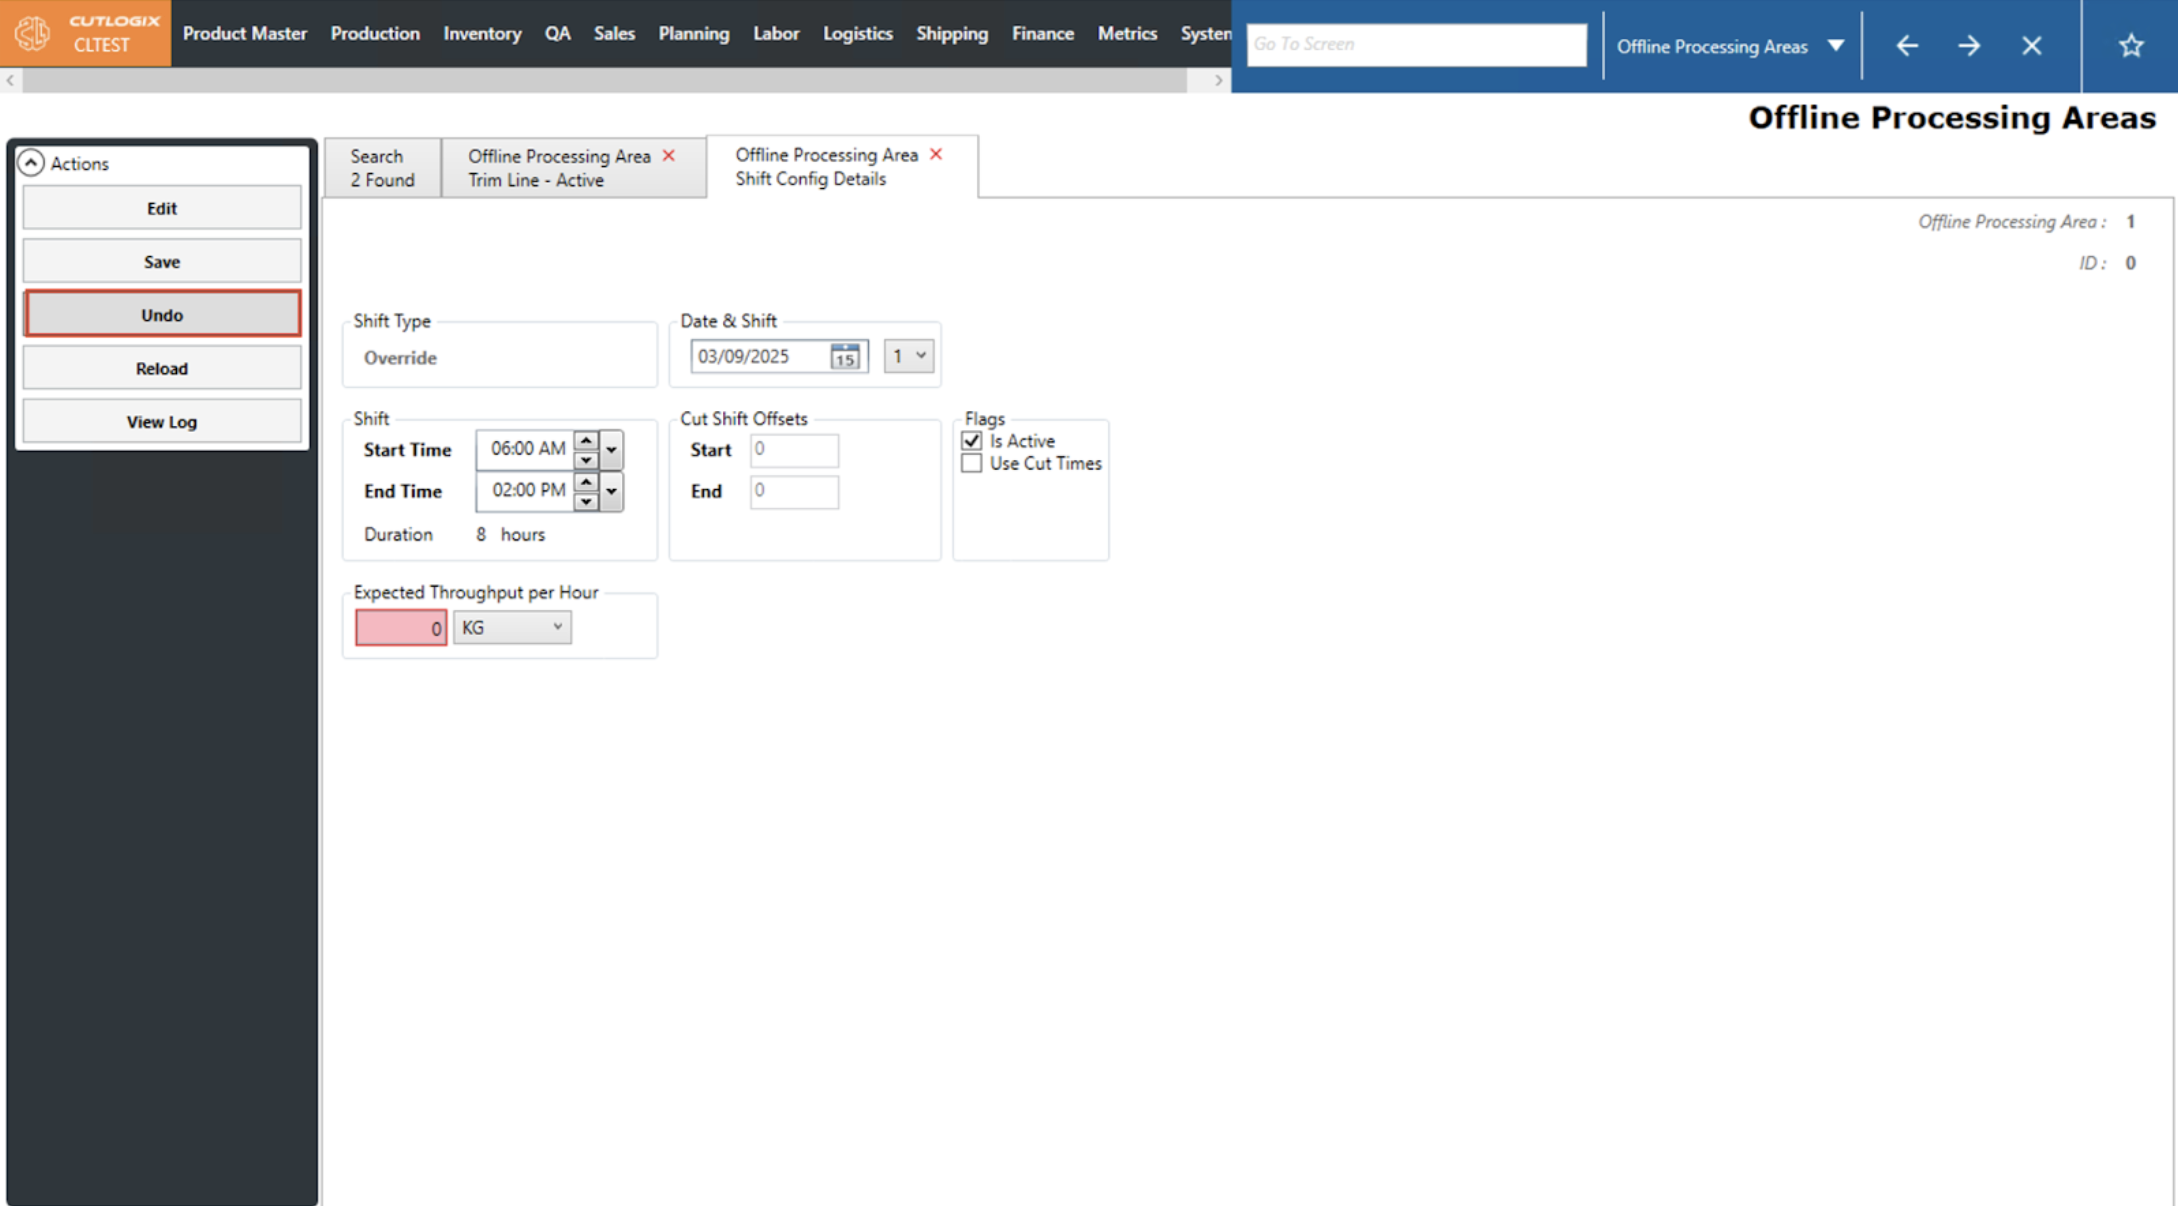
Step 5: If a user wishes to reset the changes they have made to how the override was before they clicked edit, they can click the ‘Undo’ button.

Step 6: If a user wishes to save their changes they must ensure that the throughout is an integer greater than 0 and that, if Use Cut Times is checked, that the Start and End fields contain either 0 or a positive integer.