Production Explorer Tasks
How to Interpret Columns in the Production Explorer (Product Tab)
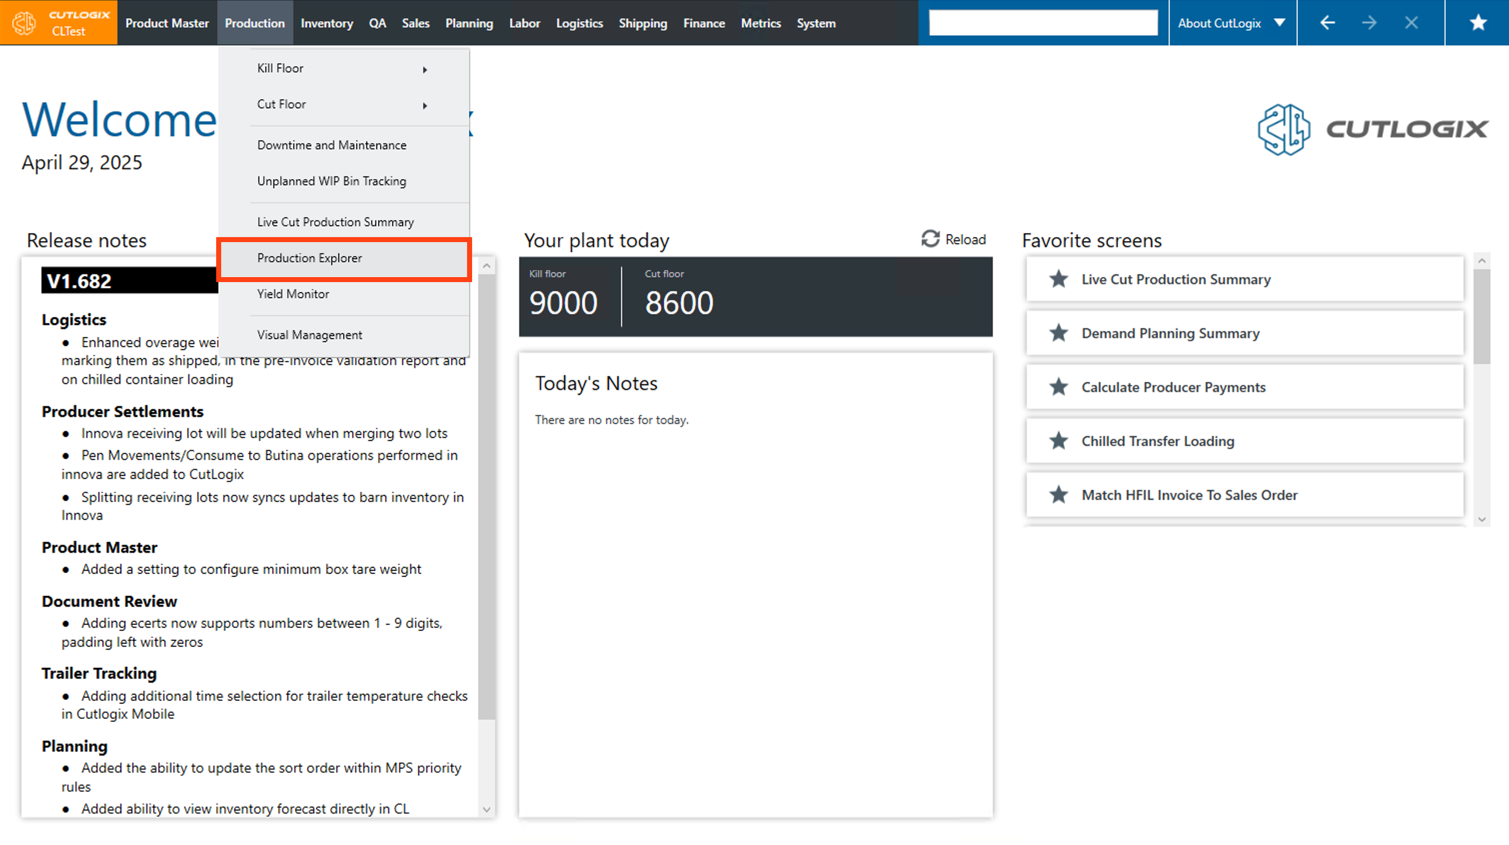
DemoStep 1: Navigate to the "Production" tab → "Production Explorer", then ensure that you are on the "Product" tab.
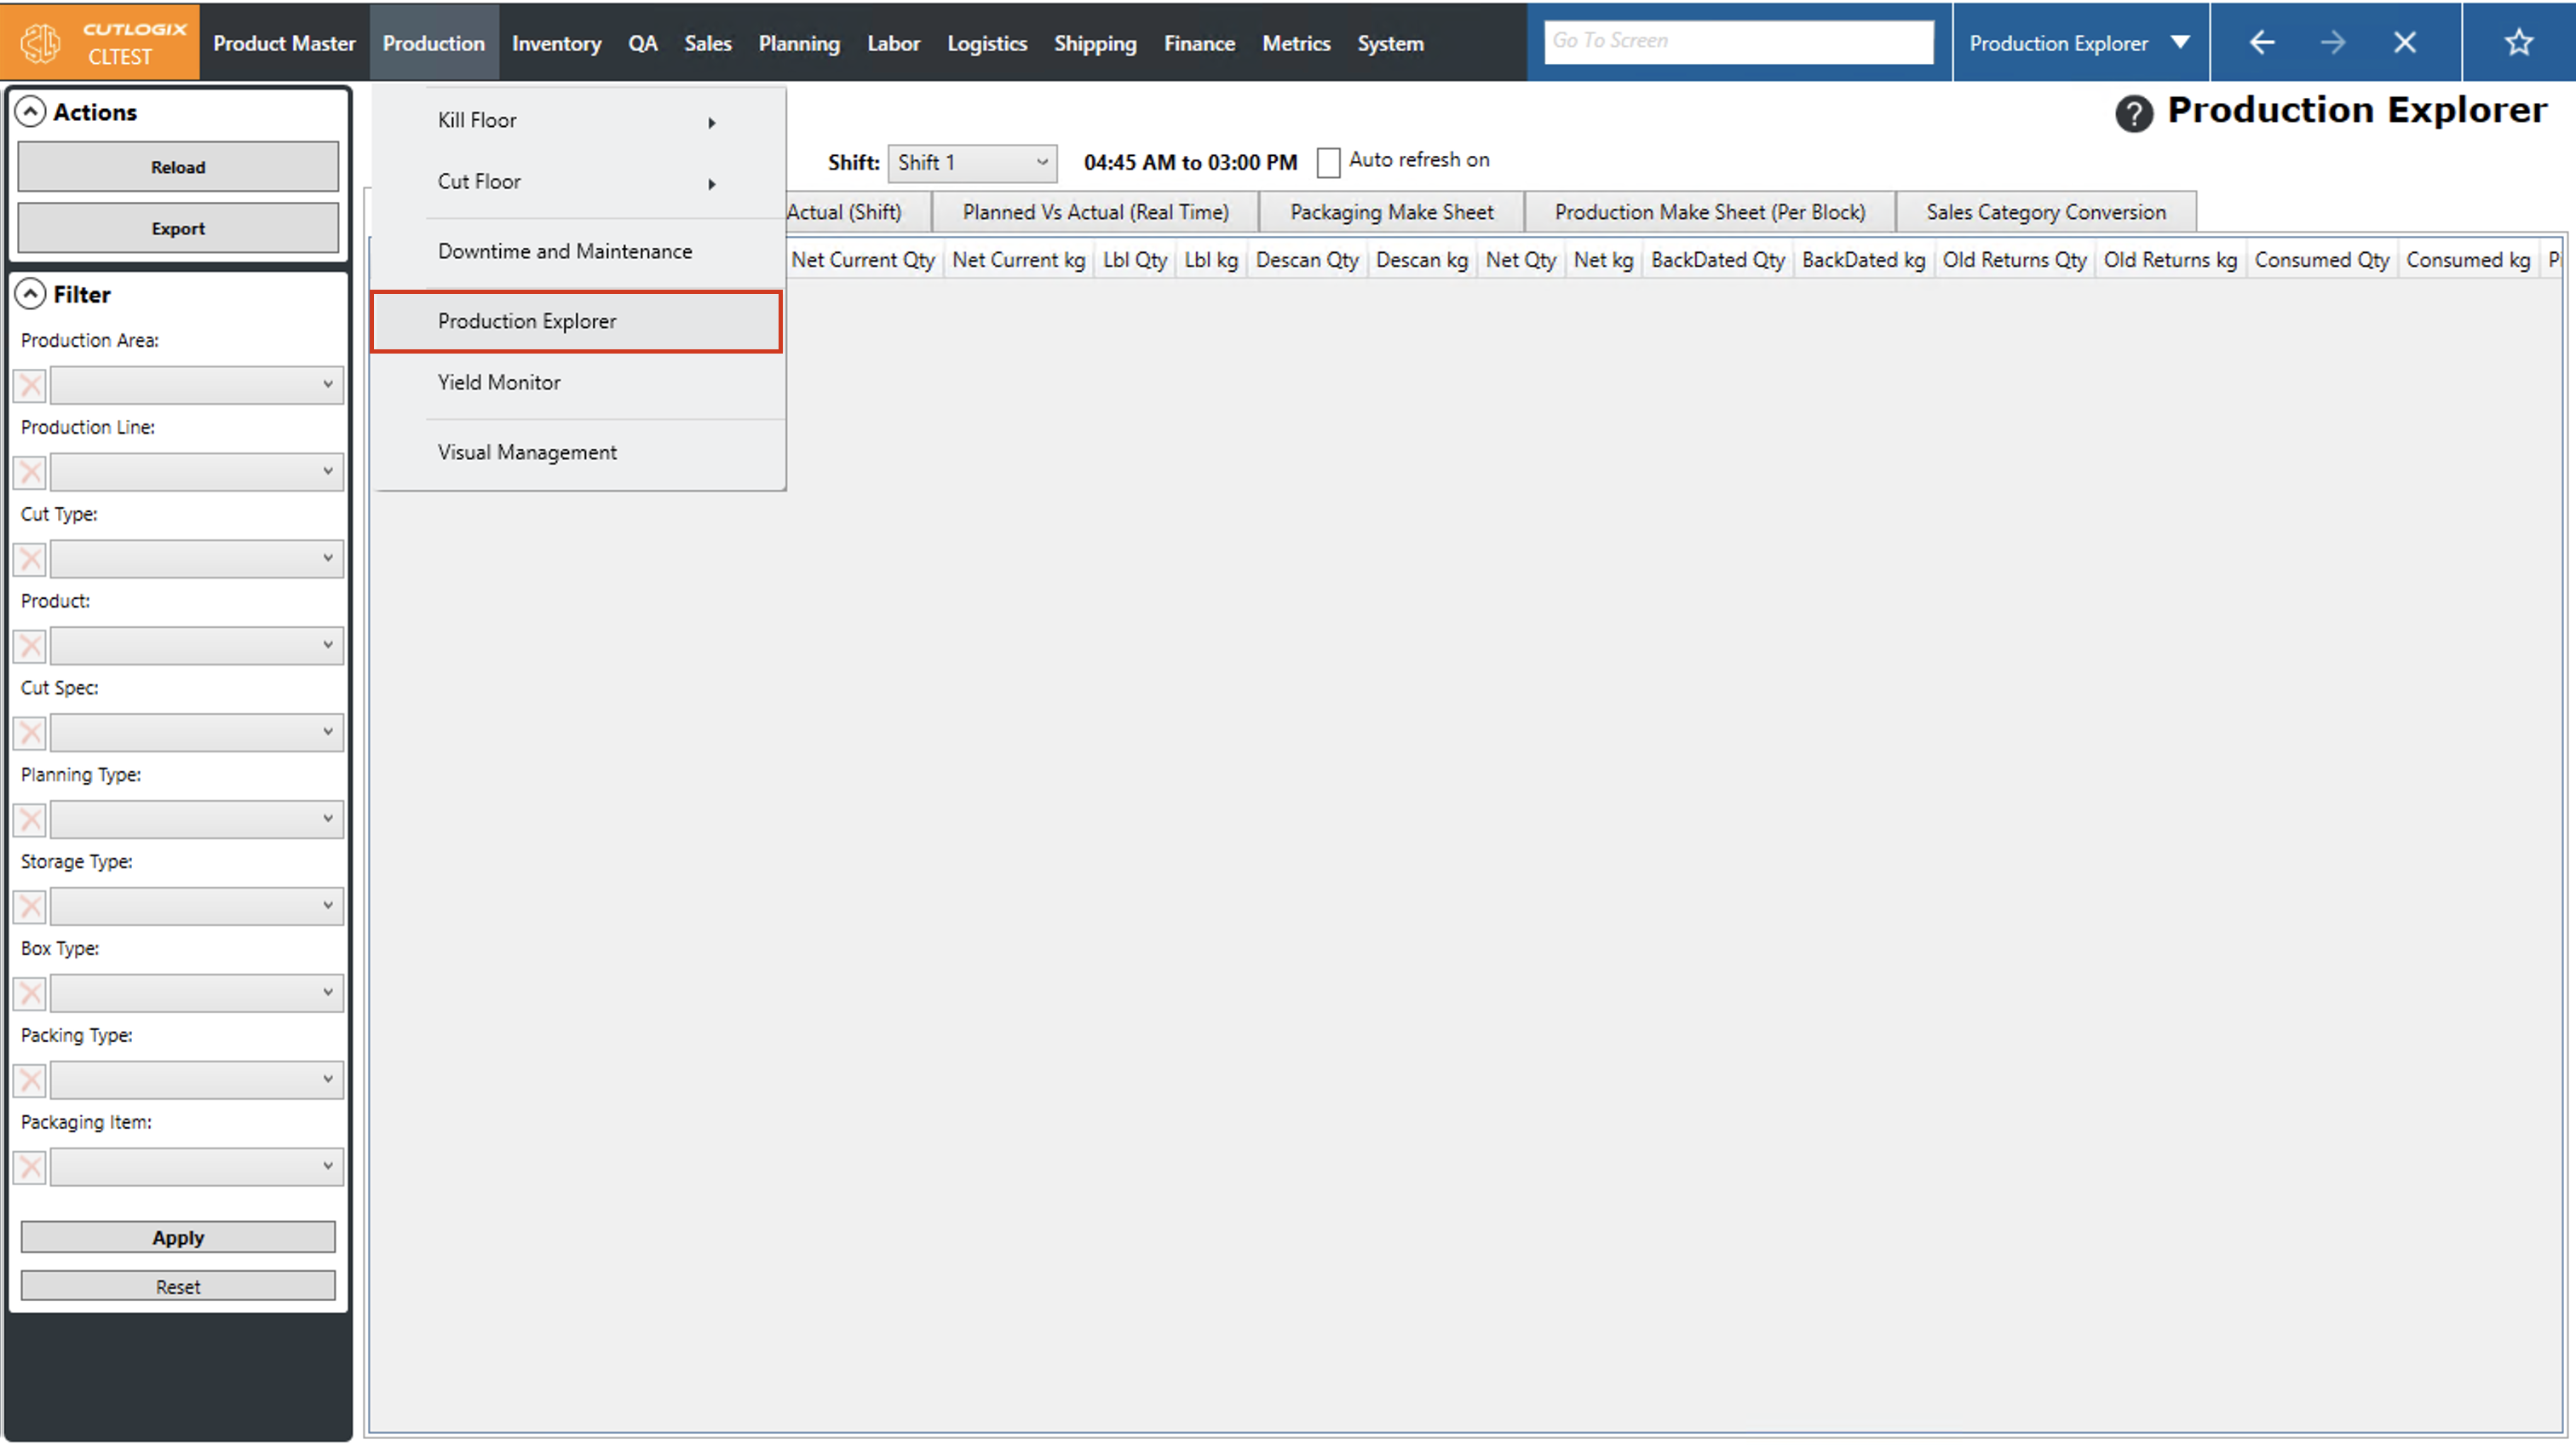
Step 2: Use the datepicker in the top left corner to select the date that you want to view production information for, and choose the appropriate shift from the "Shift" dropdown list. Then click the "Reload" button.

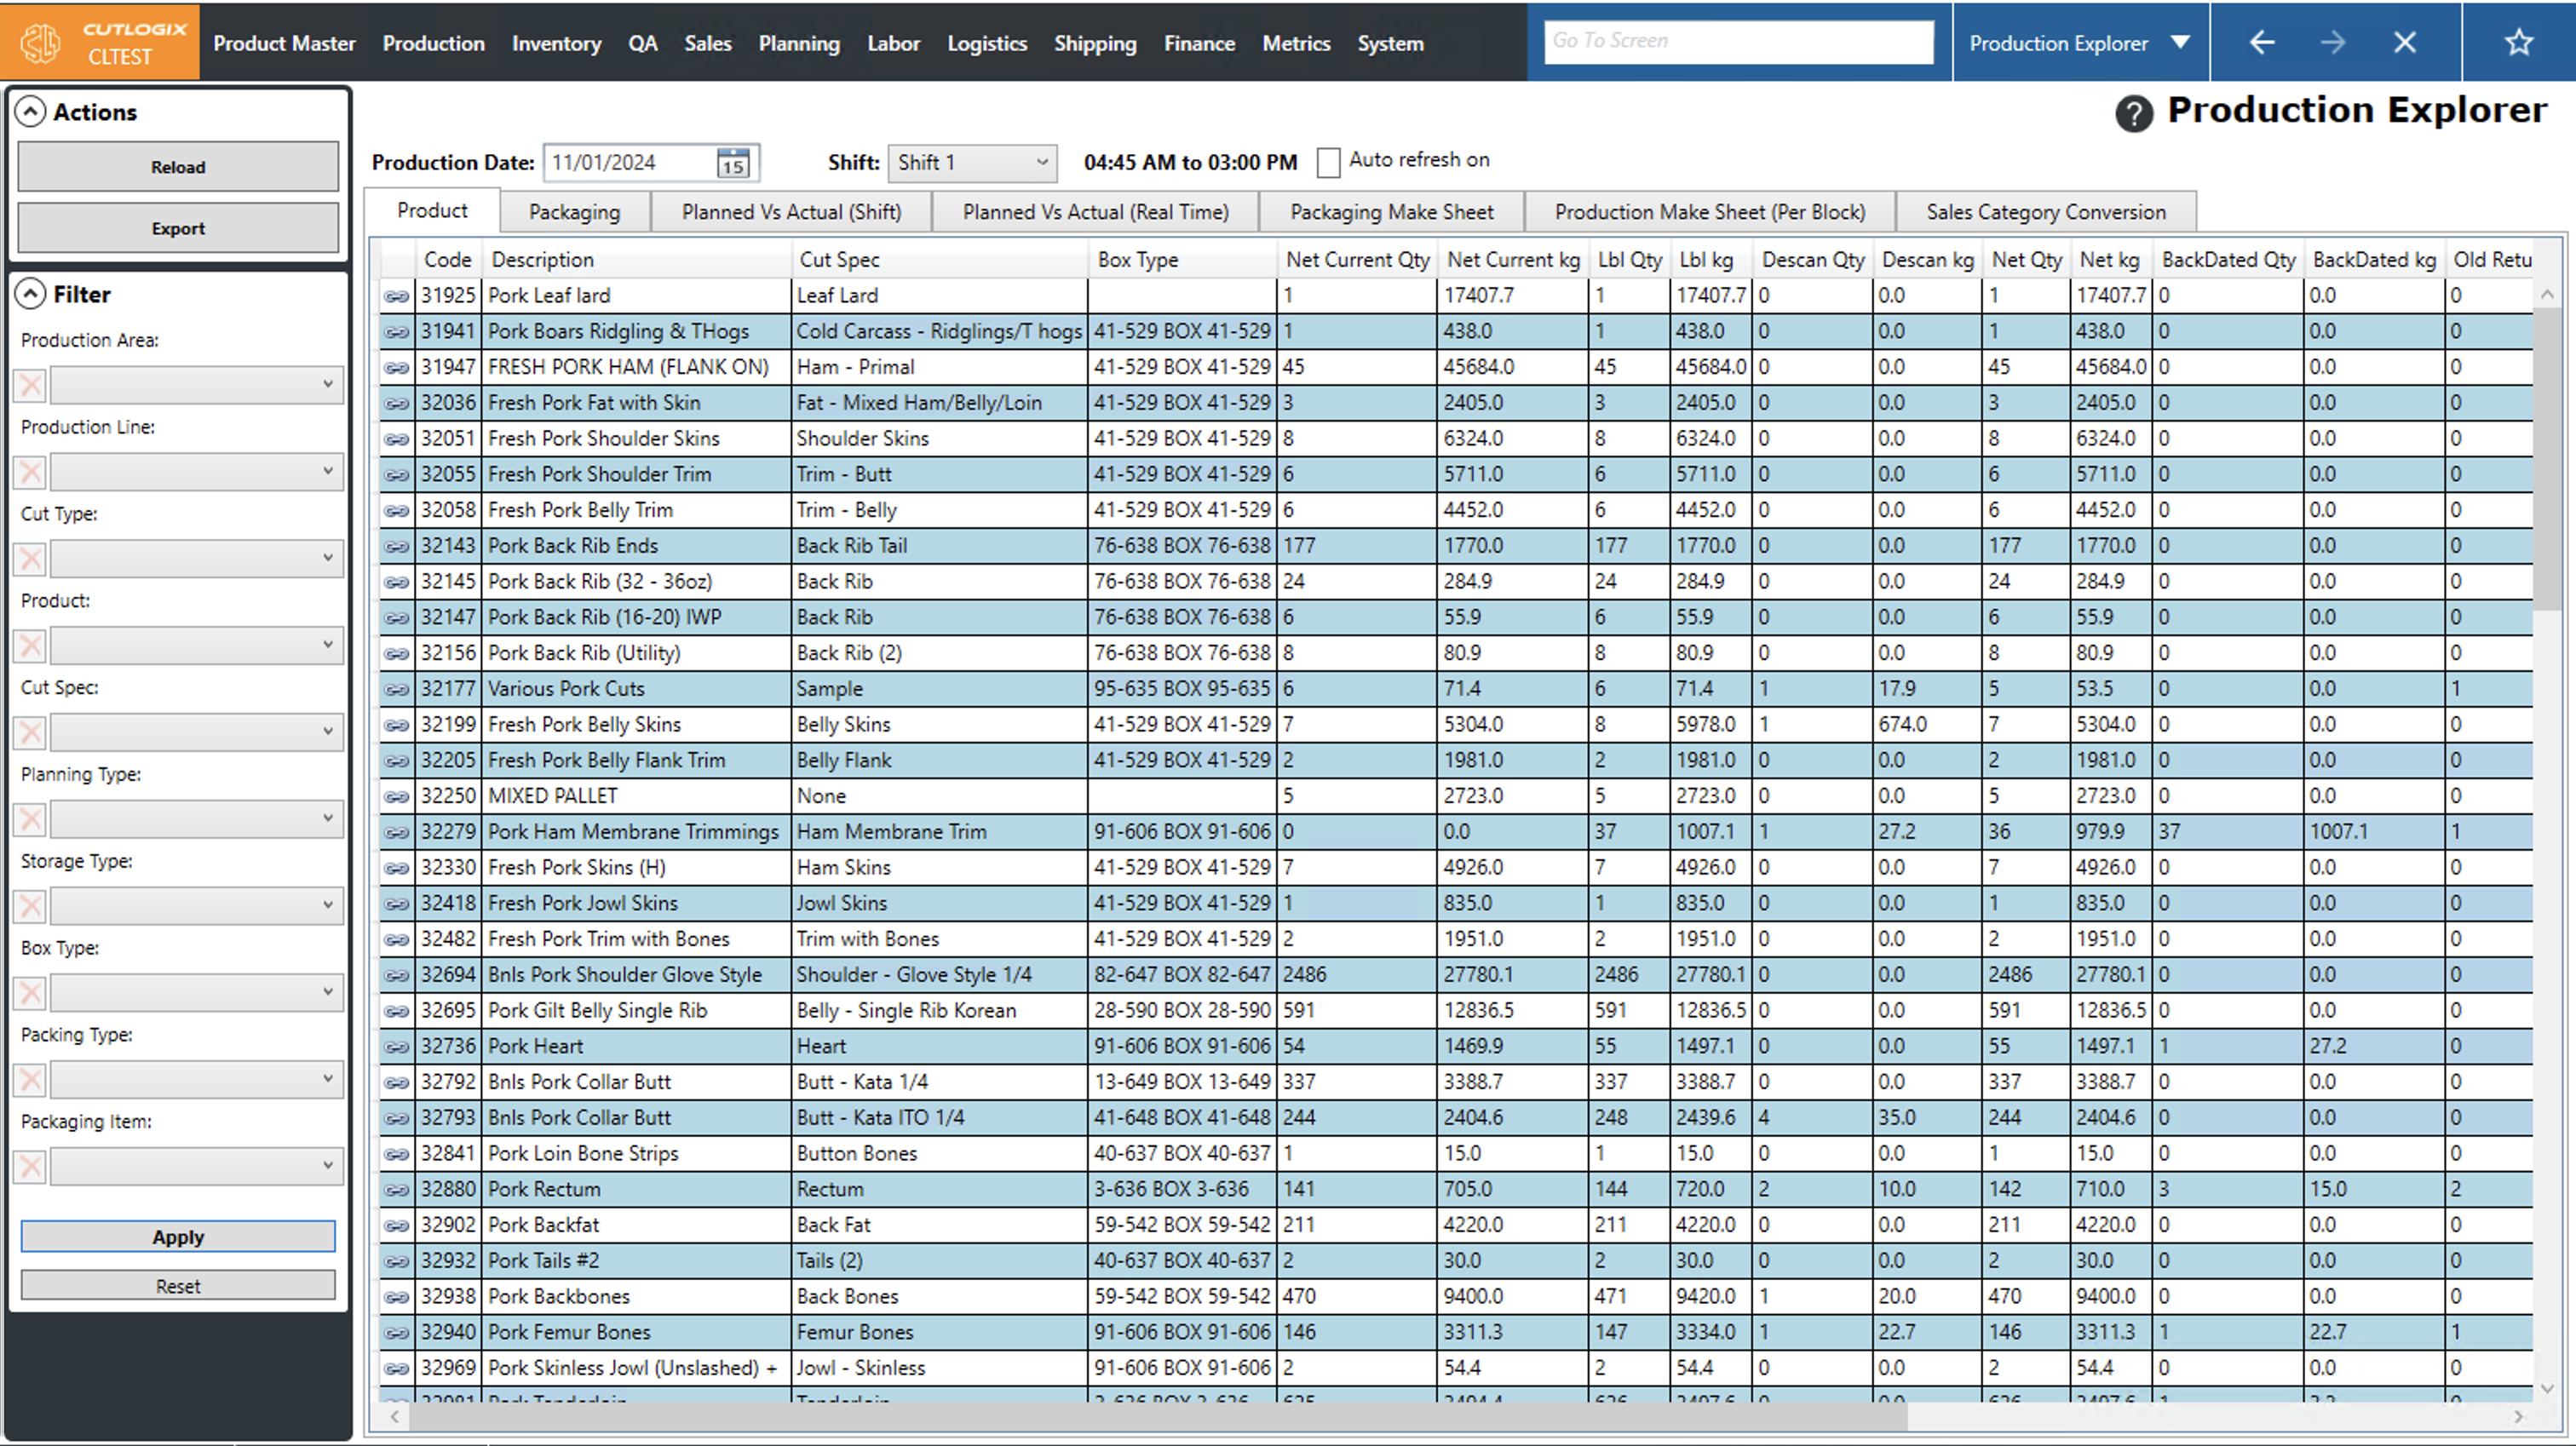
Step 3: The "Product" tab displays information on what products were produced on the selected date and shift. The following columns are shown on this page:
• Code: A unique identifier for the product.
• Description: A name/description for the product.
• Cut Spec: Indicates the cut specification (cut spec) used for the product.
• Box Type: Indicates the type of box that is used to package this cut spec.
• Net Current Qty: The number of units of product that have currently been produced on the selected day (i.e. boxes, cases, pieces, etc.).
• Net Current Kg: The weight, in kilograms, of product produced minus the weight of its packaging.
• Lbl Qty: The number of products labelled on the selected day.
• Lbl Kg: The weight, in kilograms, of product labelled on the selected day.
• Descan Qty: The number of product labels that were deleted or descanned from the manufacturing execution system (MES).
• Net Qty: Number of products labelled minus the number of products descanned.
• Net Kg: The weight of the products labelled minus the weight of the products descanned.
• Backdated Qty: The number of products that were labelled today but cut on a previous day.
• BackDated Kg: The weight of the products that were labelled today but cut on a previous day.
• Old Returns Qty: The number of backdated products that were descanned on this shift.
• Old Returns Kg: The weight, in kg, of the backdated products that were descanned on this shift.
• Consumed Qty: The number of cartons of product that have been consumed from inventory as raw materials for the production of another product.
• Consumed Kg: The weight, in kilograms, of product that have been consumed from inventory as raw materials for the production of another product.
• Piece Count: The total piece count of the product produced on the selected day.
• Estimated Piece Count: Whether the product uses an estimated piece count.
How to View Planned vs Actual
Demo Planned vs actual indicates how much product was planned to be produced (by product code) vs product that was actually produced in the specified date & shift. There are 2 ways to view this in the production explorer, by shift on the "Planned Vs Actual (Shift)" tab or in real time (up to the current time) on the "Planned Vs Actual (Realtime)" tab.
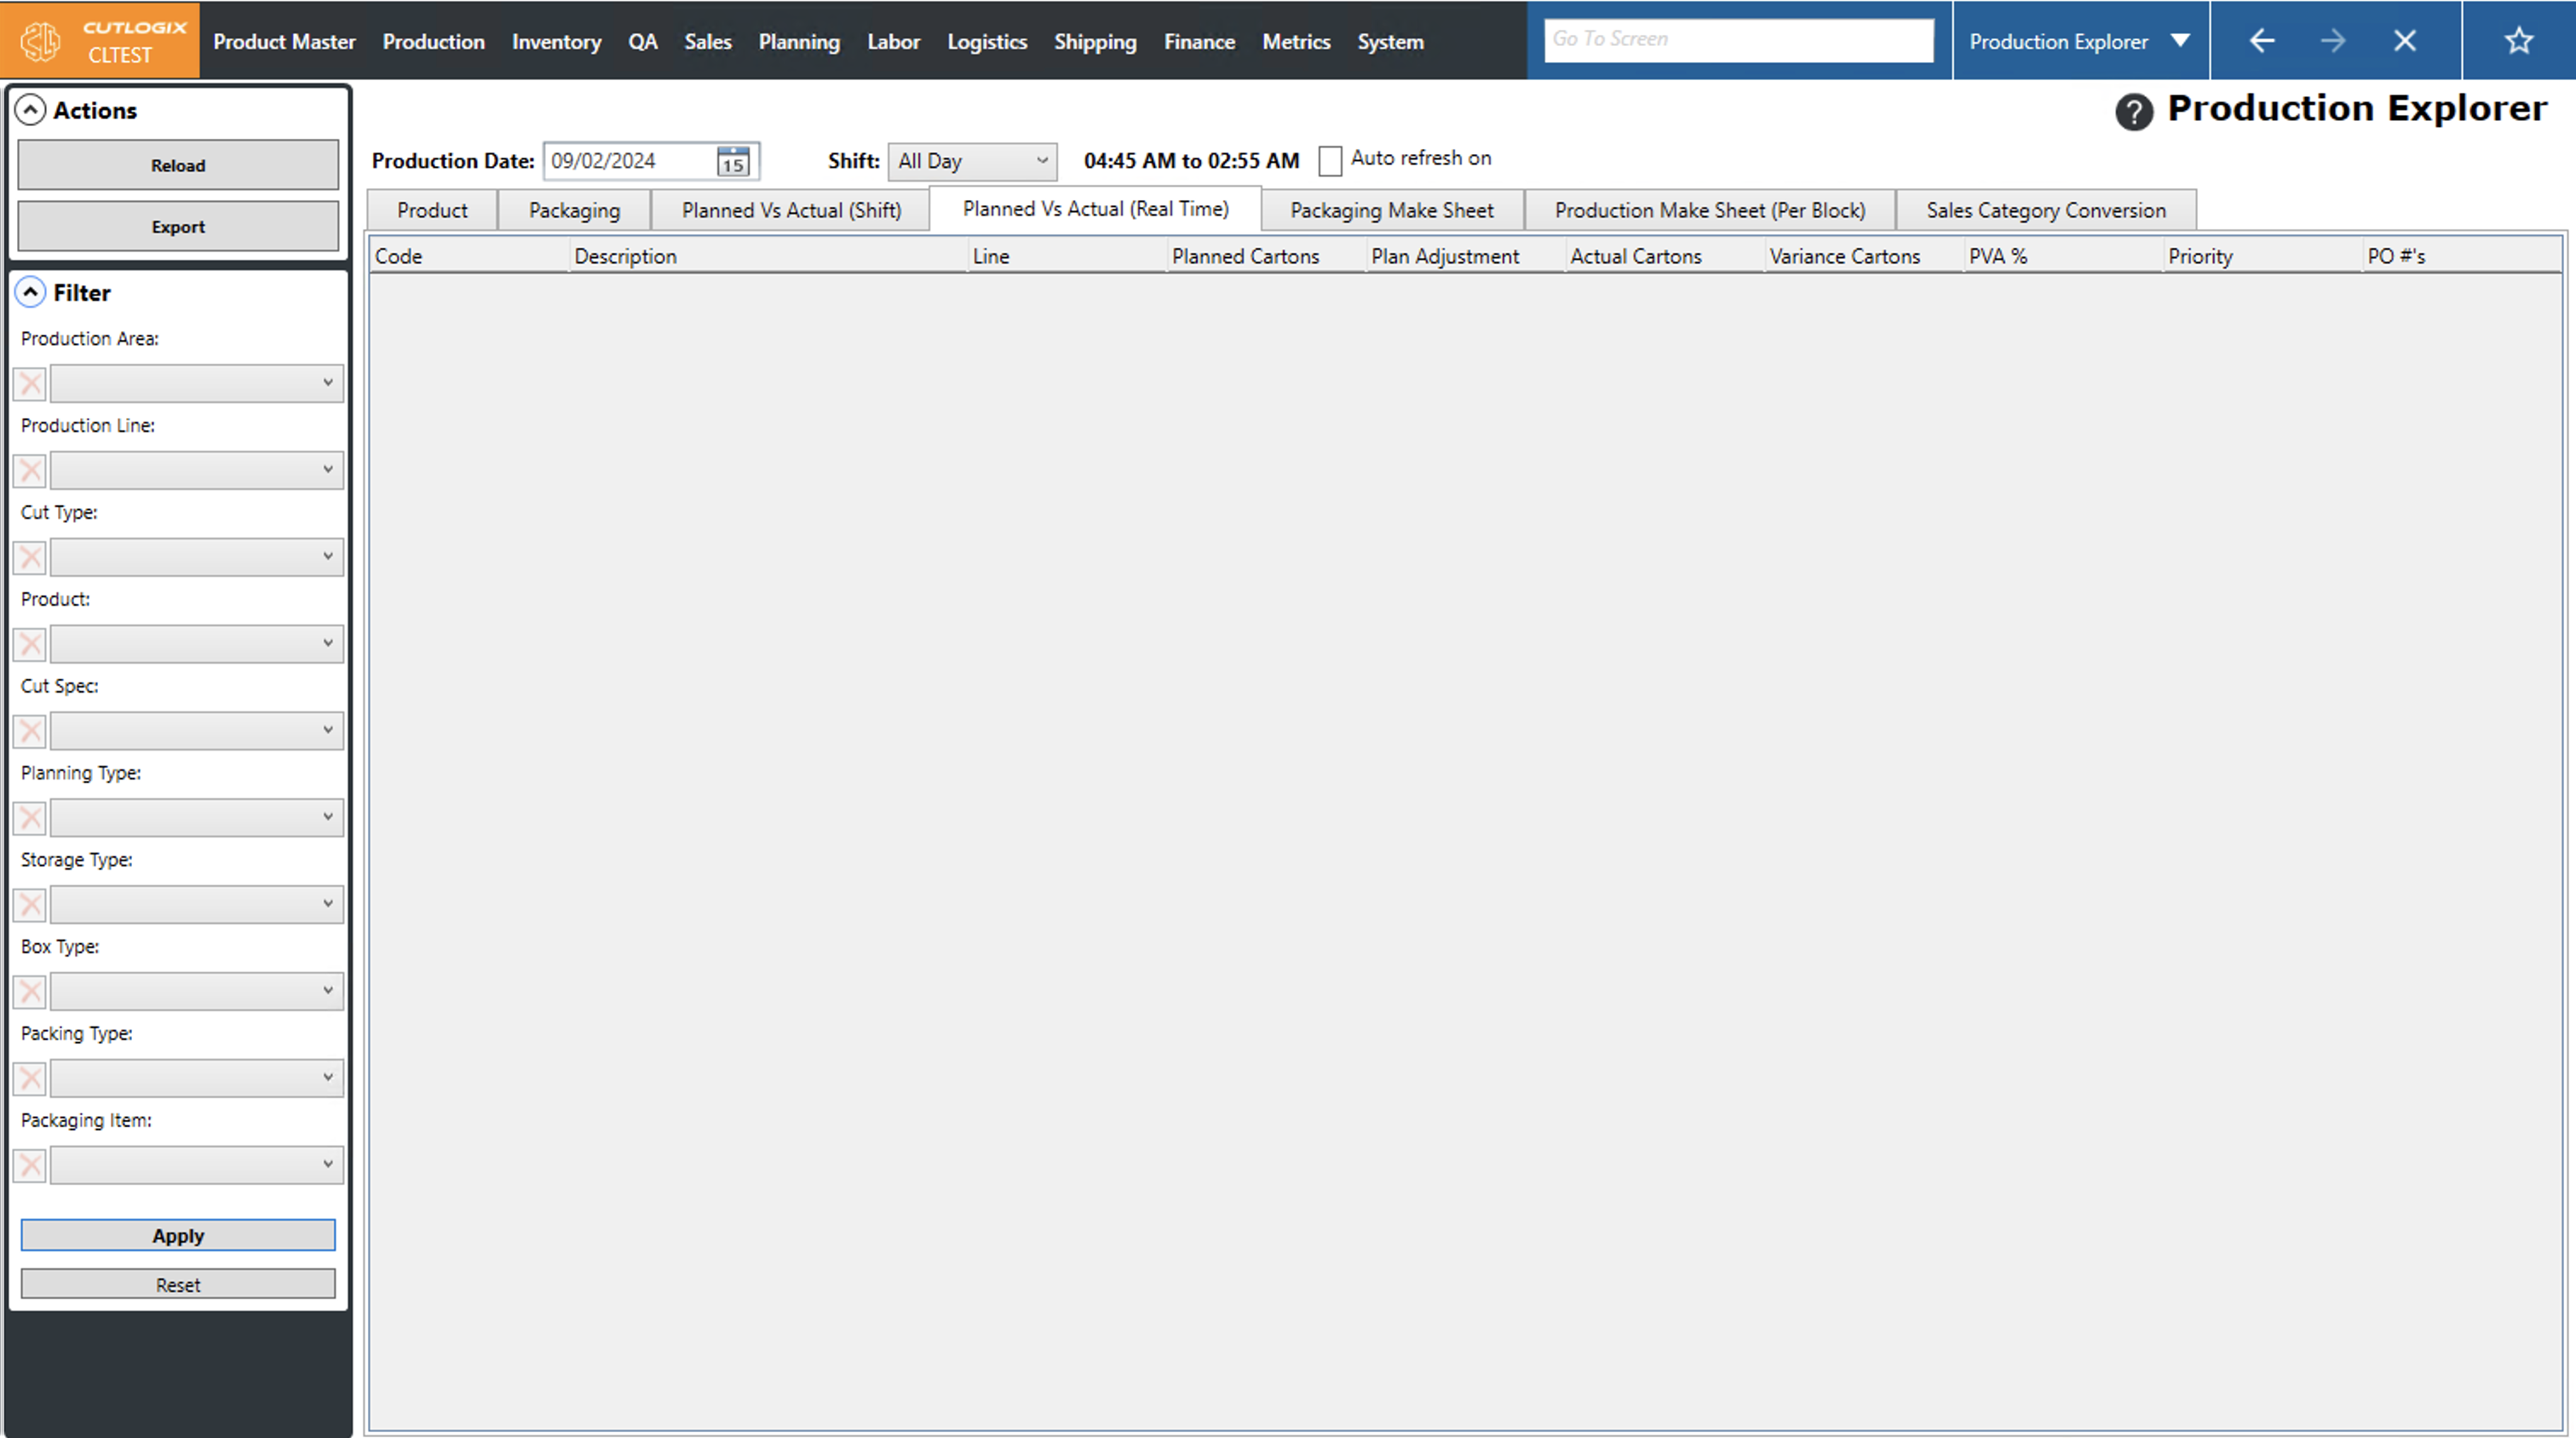
Step 1: First we'll view the planned vs actual by shift. Start by navigating to the "Production" tab → "Production Explorer", then open the "Planned Vs Actual (Shift)" tab.

Step 2: By default the production date is set to the current day & shift 1. This can be changed to view the planned vs actual for the date & shift that you want to see by clicking on the datepicker beside "Production Date" and choosing a different date, and choosing the shift that you want from the "Shift" dropdown. Click "Reload" after changing the date and shift so CutLogix can display the requested information for the chosen date & shift.
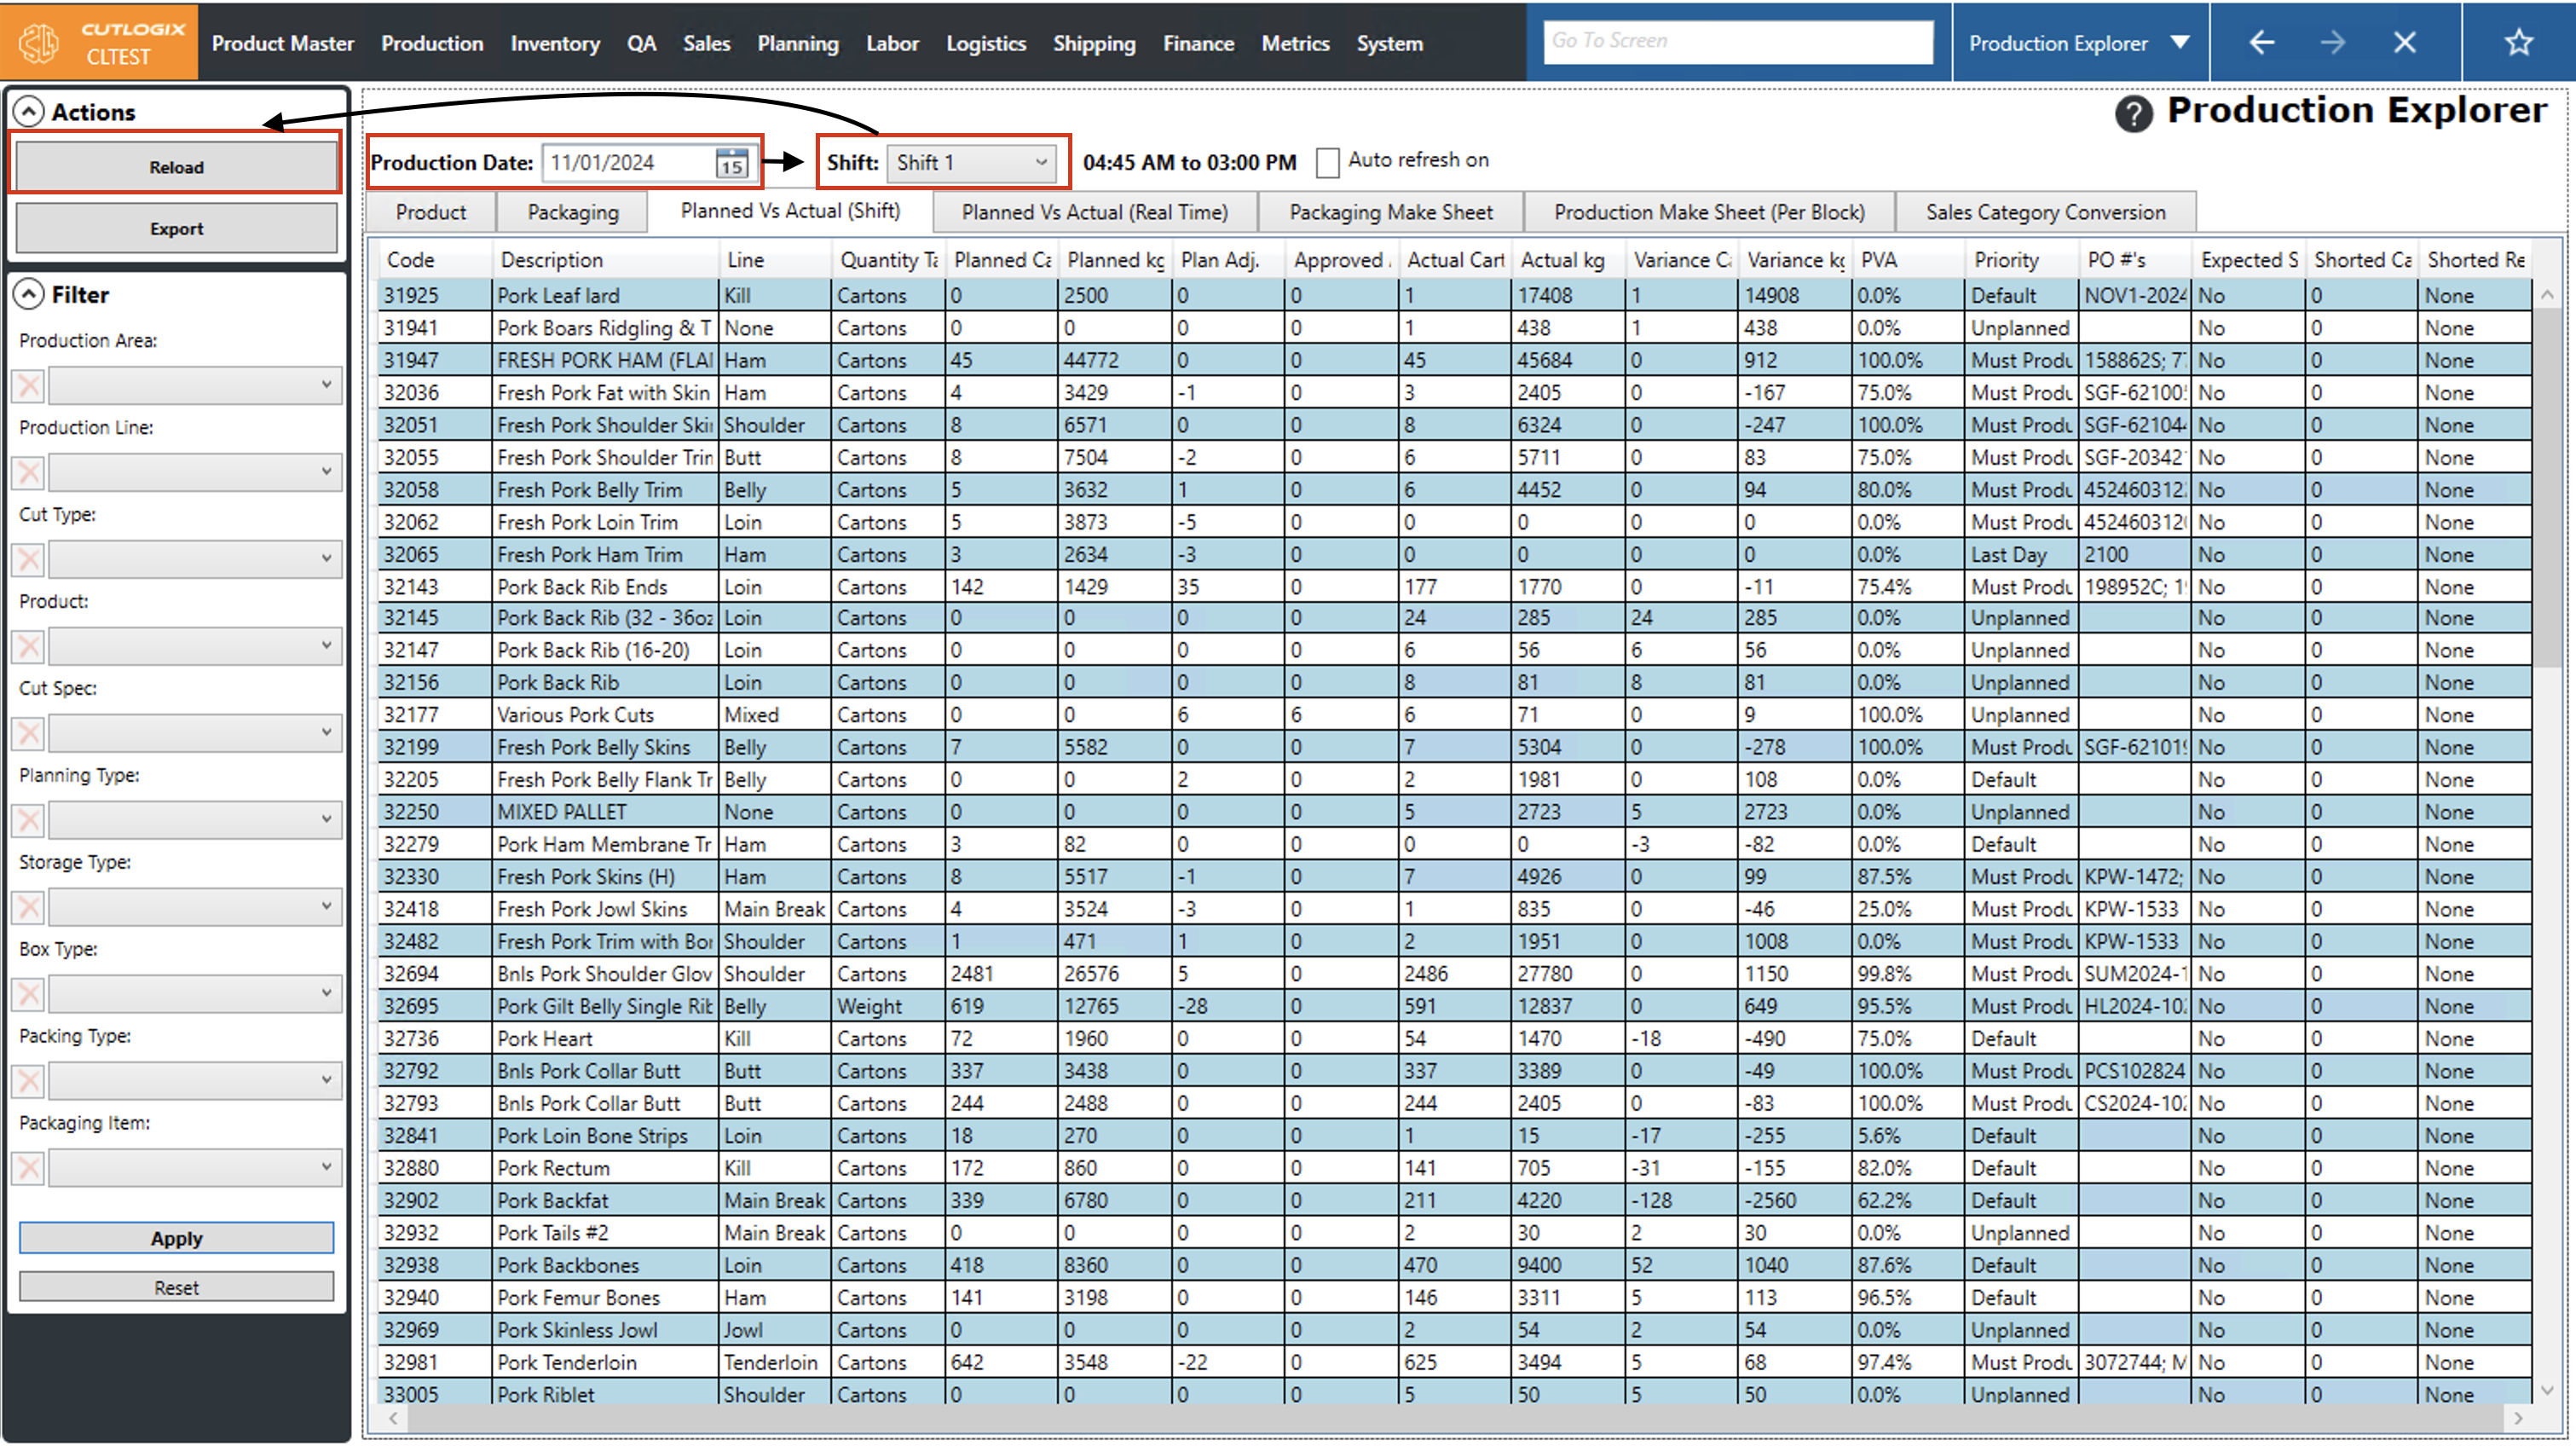
Step 3: The columns on this page display the following information:
• Code: The unique identifying number for the product.
• Description: The product's name/description.
• Line: The production line on which this product is produced (Shoulder, Butt, Ham, etc.).
• Quantity Target: The production line on which this product is produced (Shoulder, Butt, Ham, etc.).
• Quantity Target: Indicates whether the weight or the number of cartons is the production metric that must be satisfied.
• Planned Cartons: The number of cartons that are planned to be produced on the selected shift.
• Planned Kg: The weight, in kilograms (kg) of product that is planned to be produced on this shift.
• Planned Adj: Suggested number of cartons to adjust the production of this product by.
• Approved Adj: Approved number of cartons to adjust production of this product by.
• Actual Cartons: The number of cartons that have been produced so far on the selected shift.
• Actual Kg: The weight, in kg, of a product that has been produced so far on the selected shift.
• Variance Cartons: The difference between the planned and actual cartons of a product. Positive number means the actual is ahead of the planned, negative means it is behind and zero means that the actual matches the plan.
• Variance Kg: The difference between the planned product weight, in kg, of a product and its actual weight. A positive number means the actual is ahead of the planned, negative means it is behind and 0 means that the actual matches the plan.
• PVA: This is a percentage that shows how close actual production is to the planned number. Here are some examples:
- 100% means actual production exactly matches planned
- 95% means that actual production is only 95% of planned
- -15% means that actual is 15% was over what was planned
• Priority: Indicates the production priority of the product.
- Must Produce: This product must be produced according to the plan on this shift.
- Up to: This product can be produced up to the planned number but not beyond it.
• PO #'s: Purchase order numbers. These numbers are used to show what orders have that product on them.
• Expected Short: Indicates how much actual production is intended to be short of planned.
• Shorted Cartons: Indicates how much actual production is currently short of planned.
• Shorted Reason: Indicates the reason for the intentional shorted cartons.

Step 4: Now we'll view the planned vs actual in realtime. To do this click on the "Planned Vs Actual (Real Time)" tab, then select the date that you want to view production for. Then click "Reload" in the actions panel. This will show us what has been produced vs what should have been produced for the whole day that is selected.

Step 5: The columns on this page show the following information:
• Code: The unique identifying number for the product.
• Description: The product's name/description.
• Line: Production line on which the product is produced.
• Planned Cartons: Number of cartons of the product that are planned to be produced.
• Plan Adj: The amount of cartons that the planned number has been adjusted by.
• Actual Cartons: Actual number of cartons produced by the current point in the day.
• Variance Cartons: Difference between the number of cartons planned and the actual number of cartons.
• PVA %: Shows the percent of the planned cartons that have been produced. Here are some examples:
- 100% means that actual production matches planned.
- 80% means that actual production is equal to 80% of planned.
- -10% means that actual production is over planned by 10%.
• Priority: Indicates the production priority of the product.
- Must produce: This product must be produced according to plan.
- Up to: This product can be produced up to the planned number but not beyond it.
• PO #'s: Purchase order numbers. These numbers are used to show what orders have that product on them.
How to Create Midshift Adjustments in CutLogix Mobile
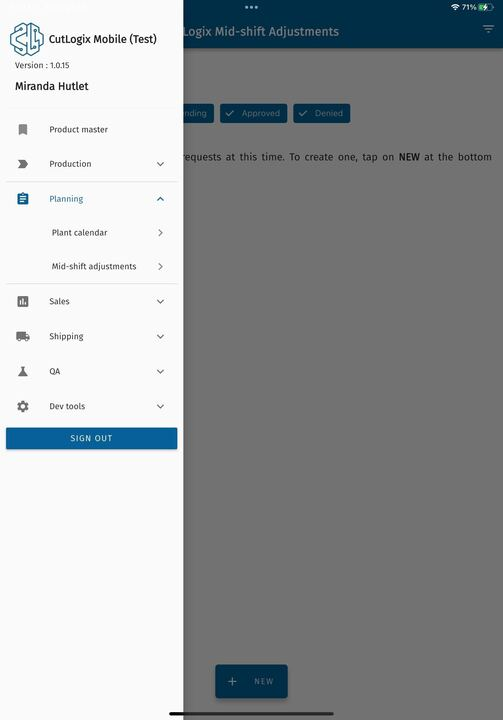
DemoStep 1: In the CutLogix mobile app, open the “Planning” menu, then click on “Mid-shift Adjustments”.
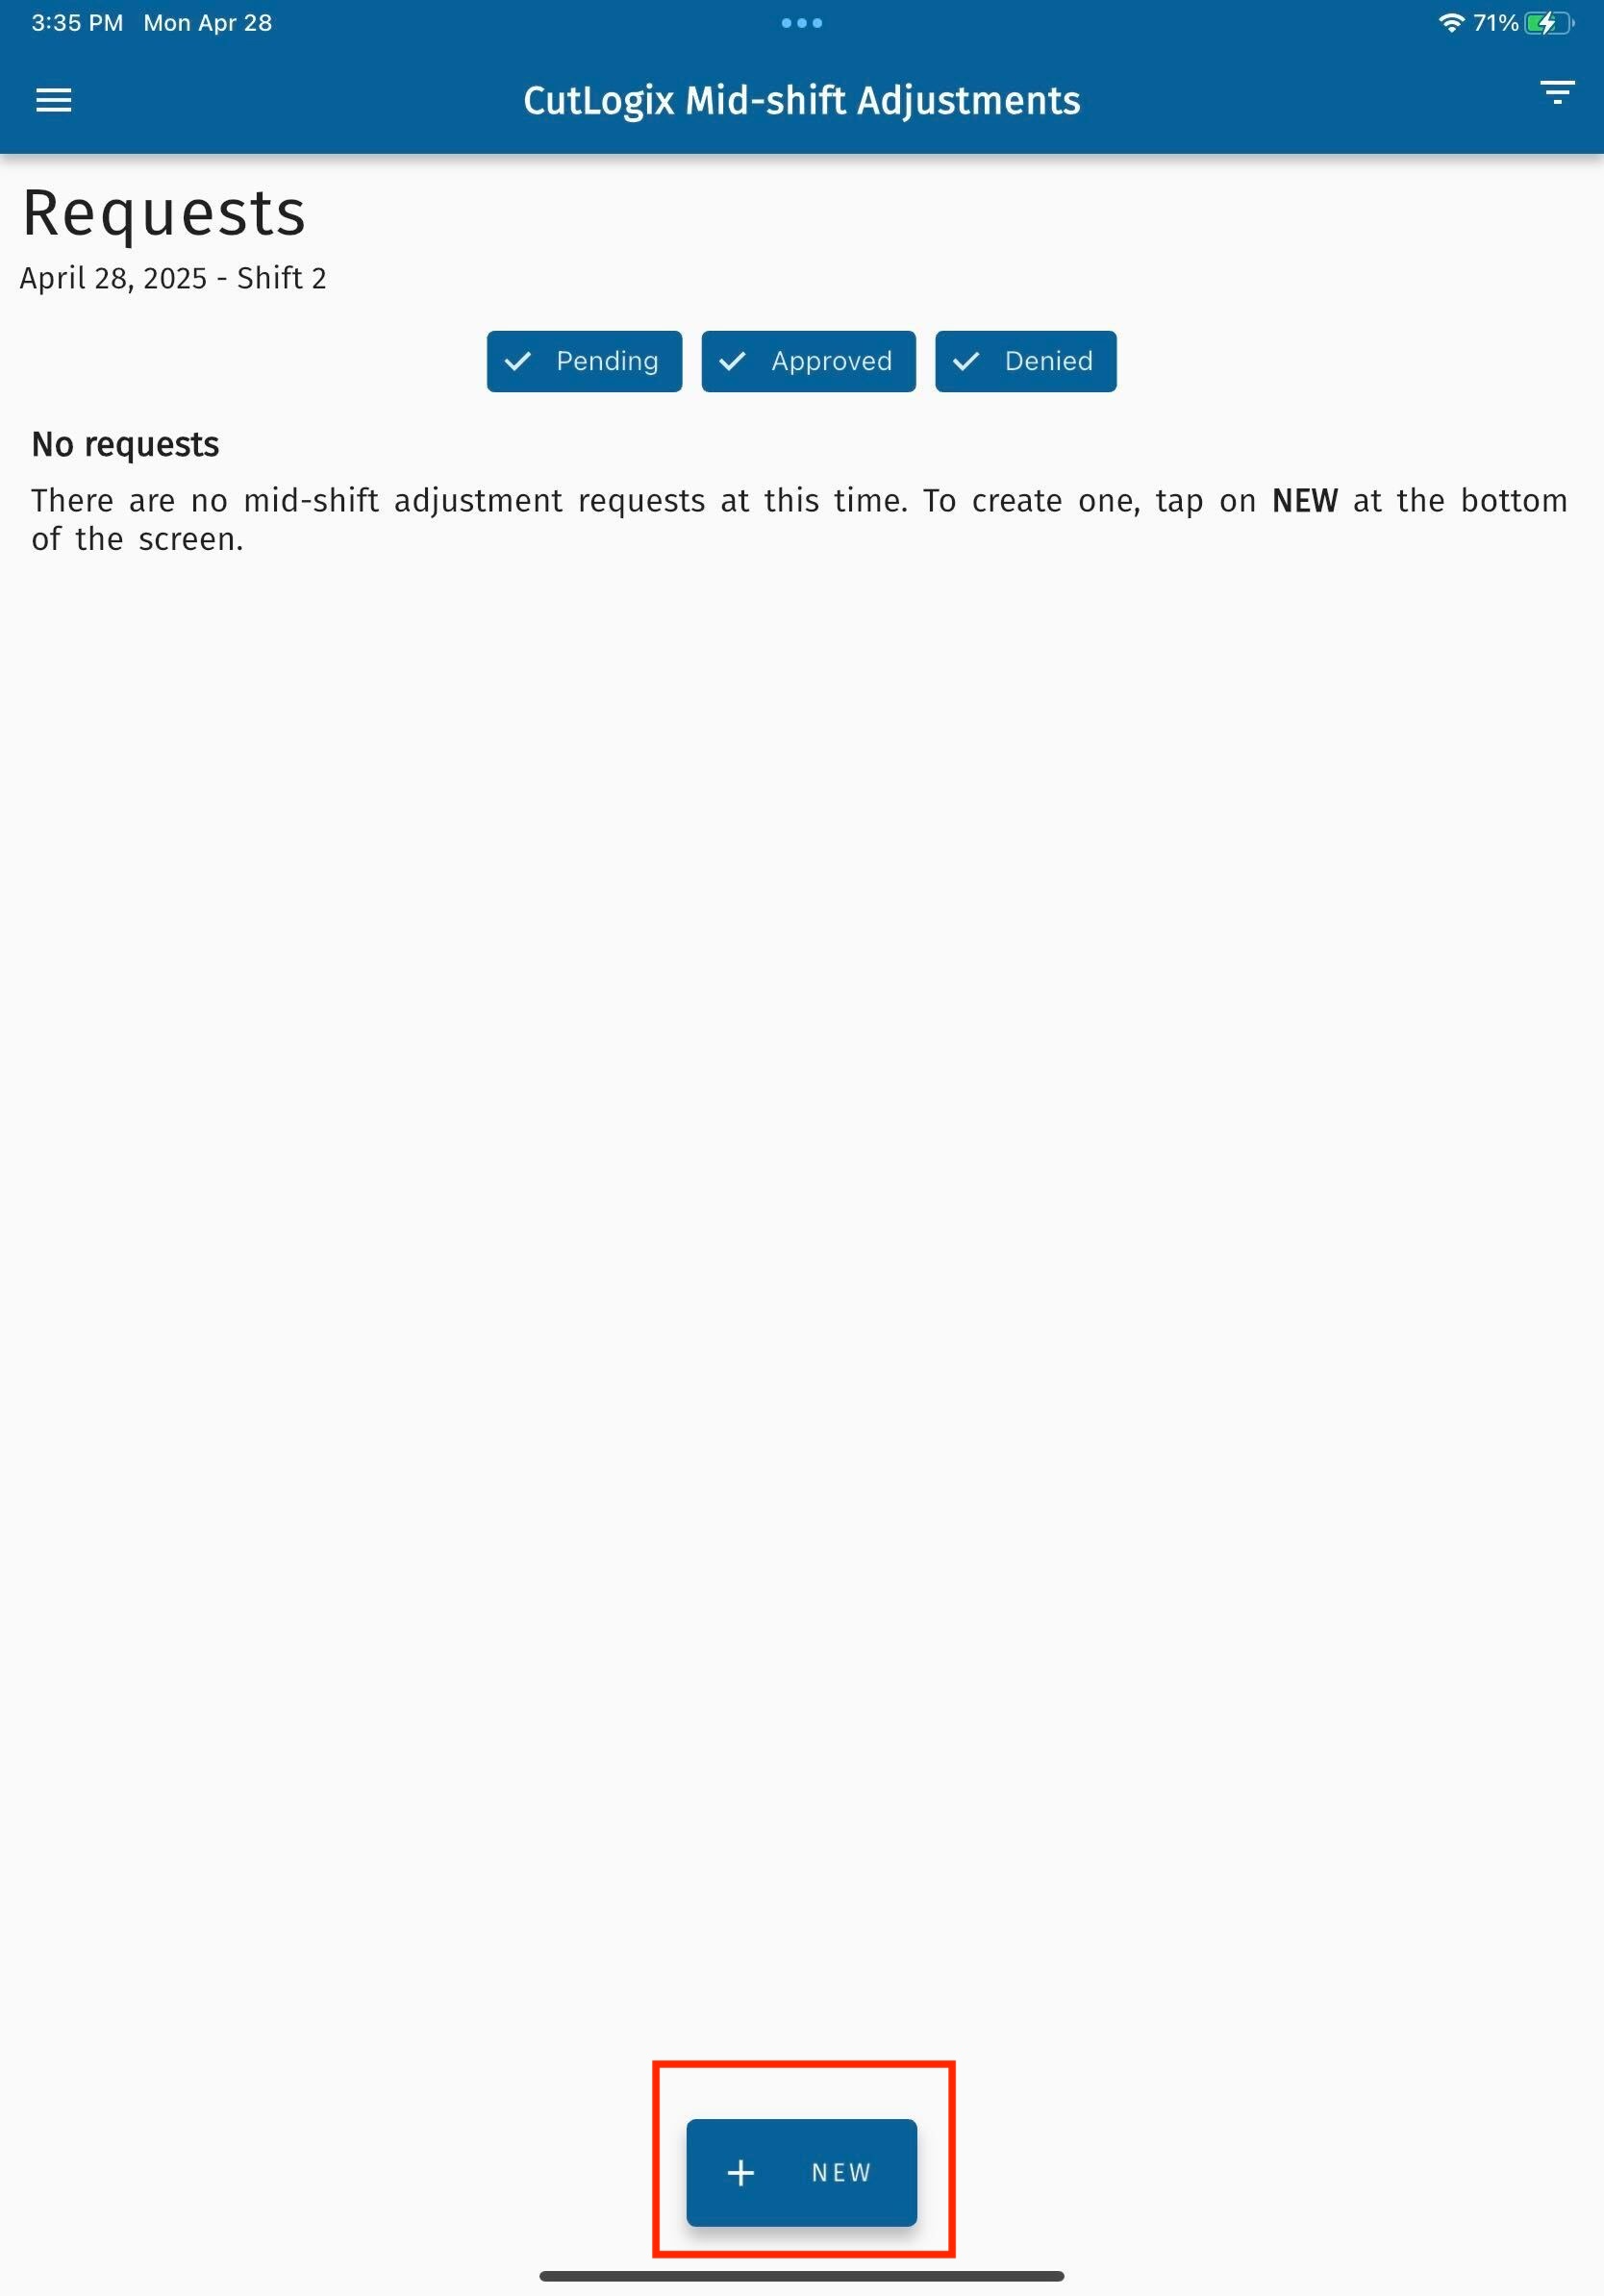
Step 2: The Mid-shift adjustments requests page will appear. Click the “+ New” button at the bottom of the page.
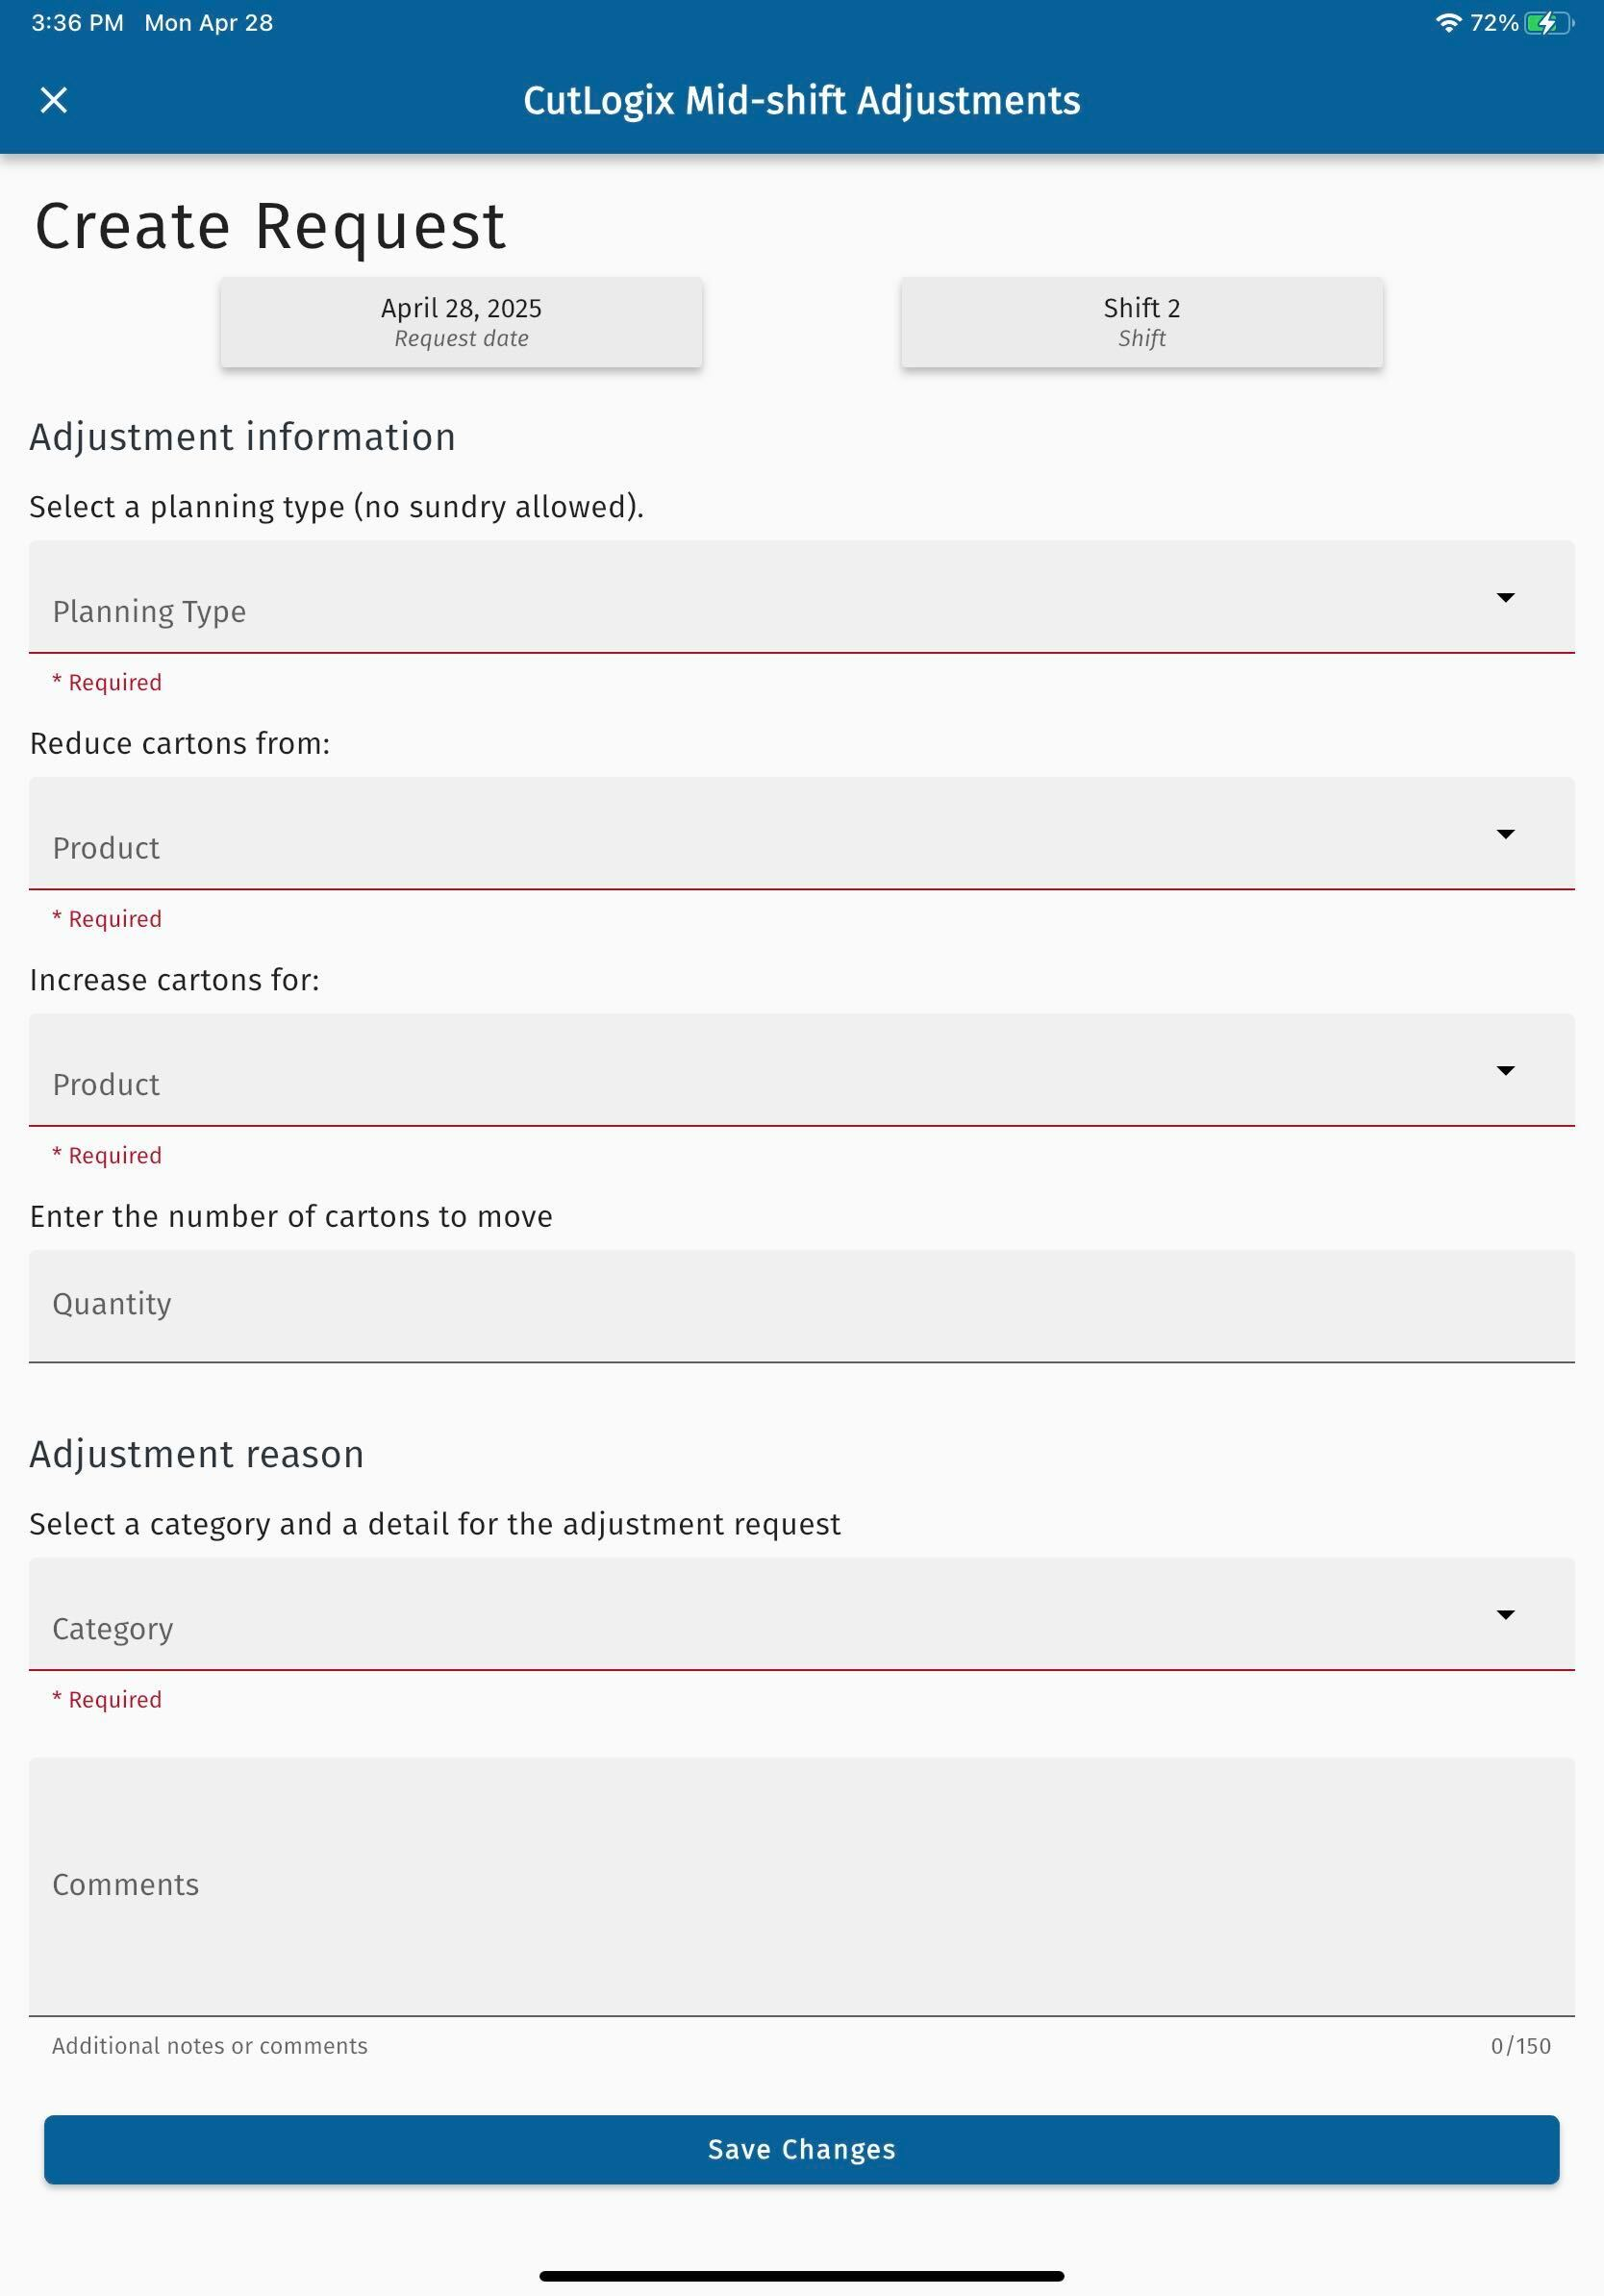
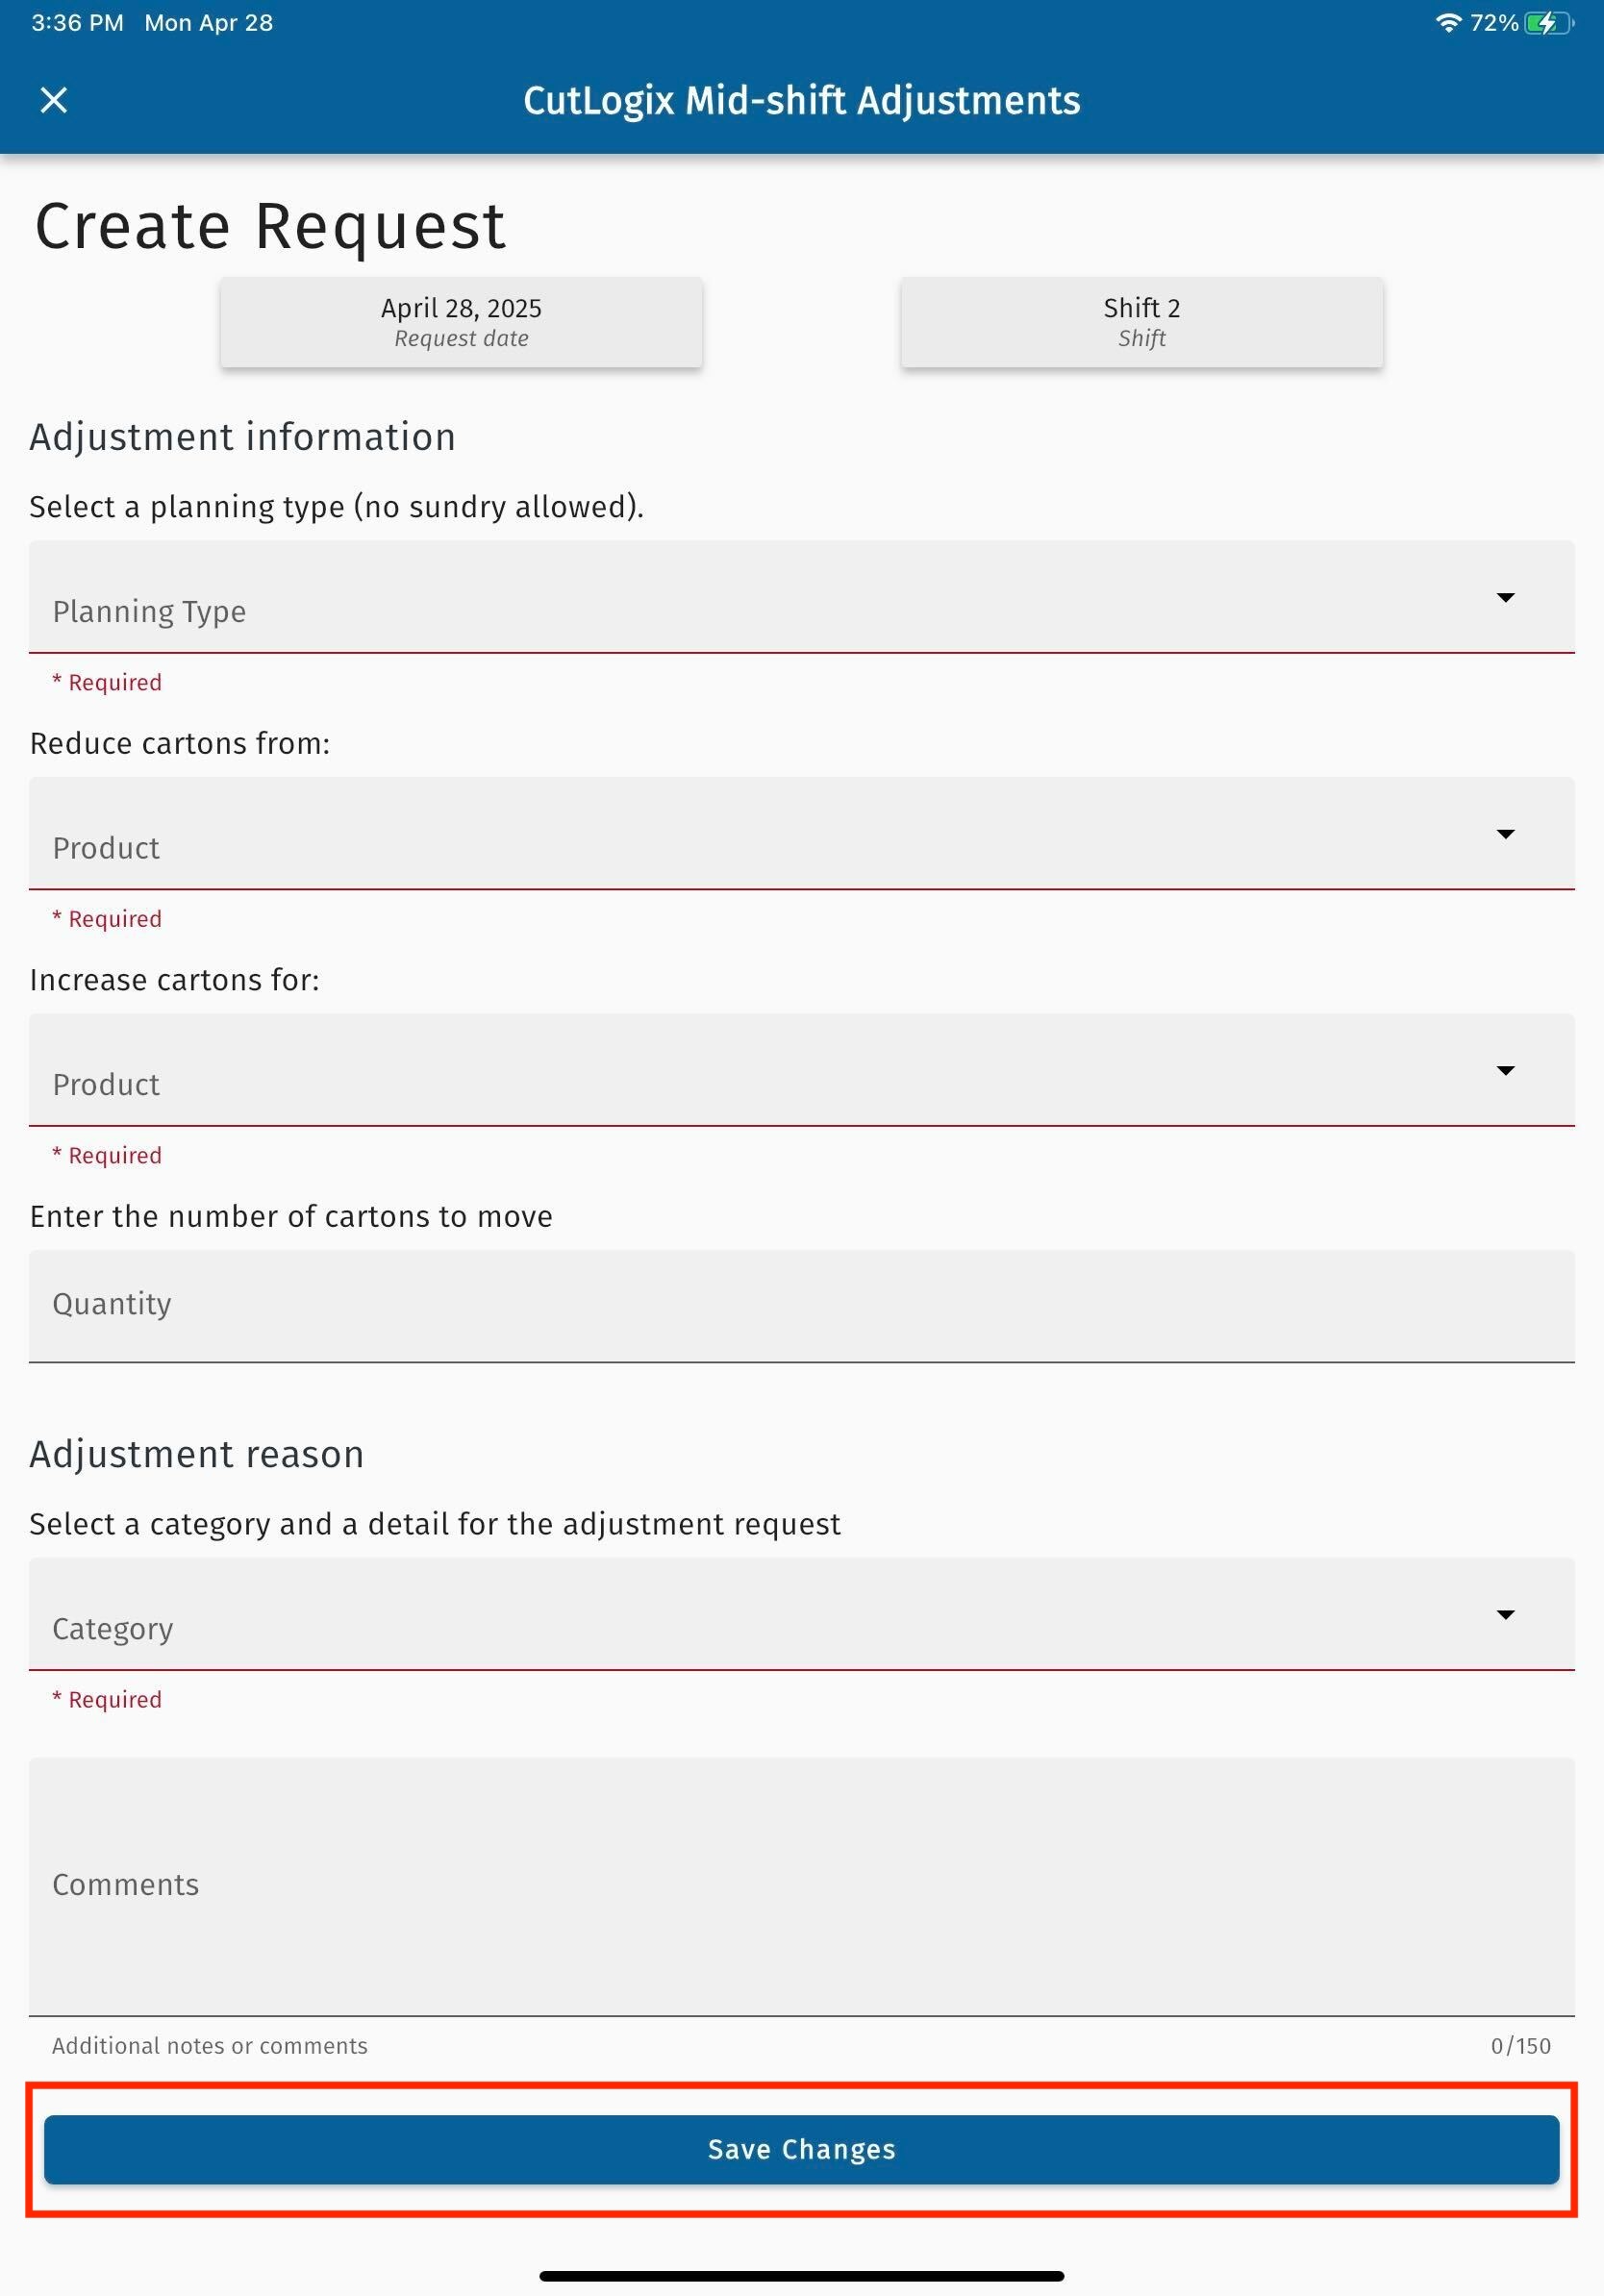
Step 3: A new screen will appear where you can enter information about the new mid shift adjustment. Fields underlined in red are required and must be entered before the mid-shift adjustment can be saved. These fields are as follows:
• Planning Type: The planning type that the adjustment request is for.
• Reduce Cartons from: The product code that the adjustment is asking to reduce cartons for.
• Enter the number of cartons to move: The number of cartons that the request is asking to move from the reduced product code to the increased product code.
• Category: The reason the mid-shift adjustment is being requested, selected from a pre-populated list of categories.
• Comments: Any comments related to the mid-shift adjustment can be entered here.
Step 4: Click the “Save Changes” button at the bottom of the page to save the mid-shift adjustment request. It will then be visible on the Mid-shift Adjustments page and you can view its status there to check if it’s pending, approved or denied.
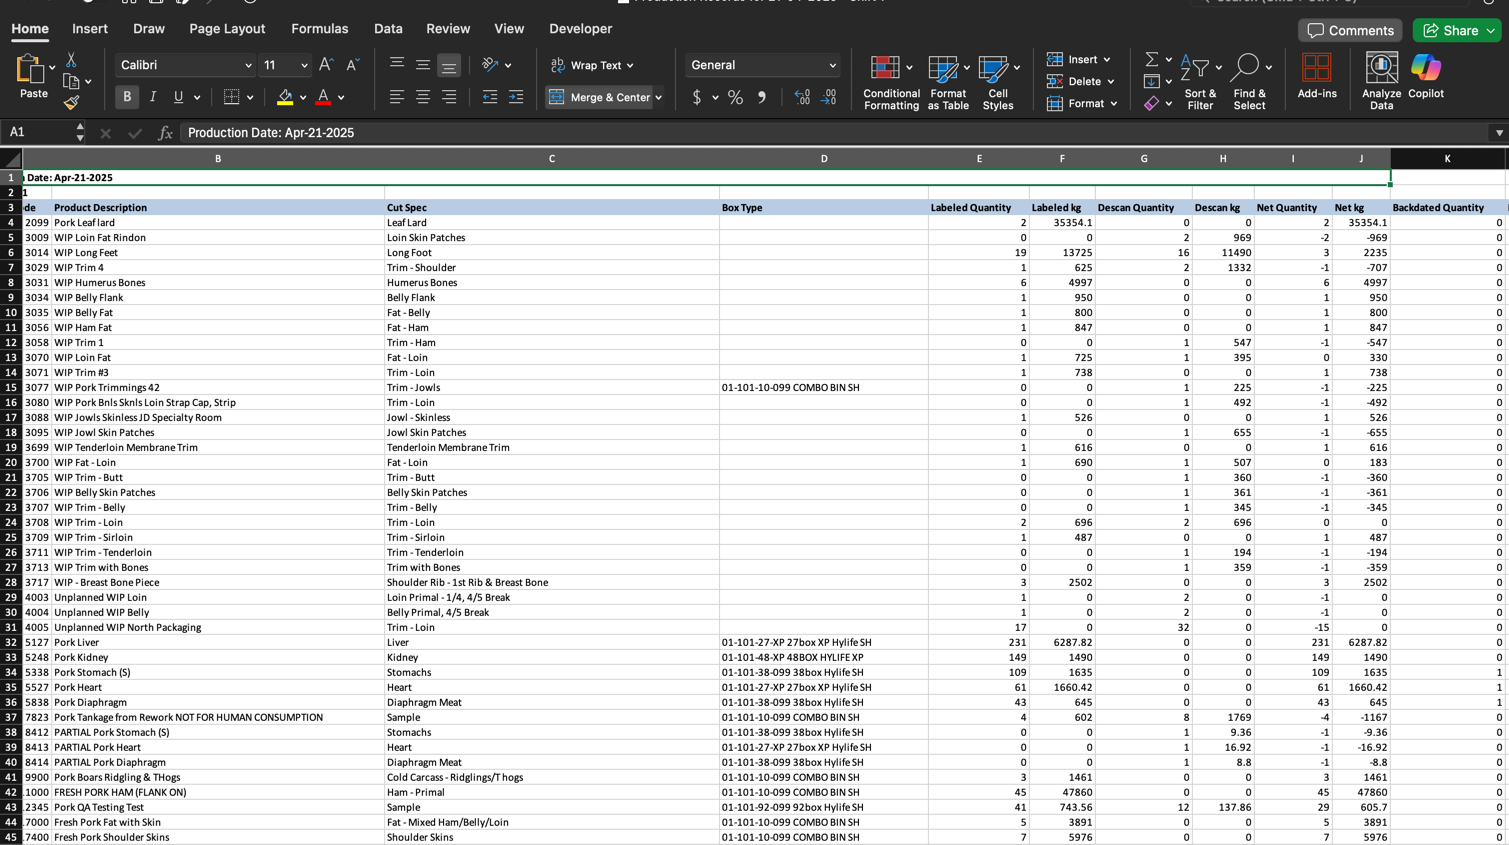
How to View Production Explorer Exports
Demo Each tab on the Production Explorer screen has a corresponding Excel export. These exports allow the user to download all the data from the selected tab on the production explorer into an excel file for easy data analysis and reporting.
Step 1: Navigate to the "Production" tab → "Production Explorer", then click on the tab that you want to export data for.
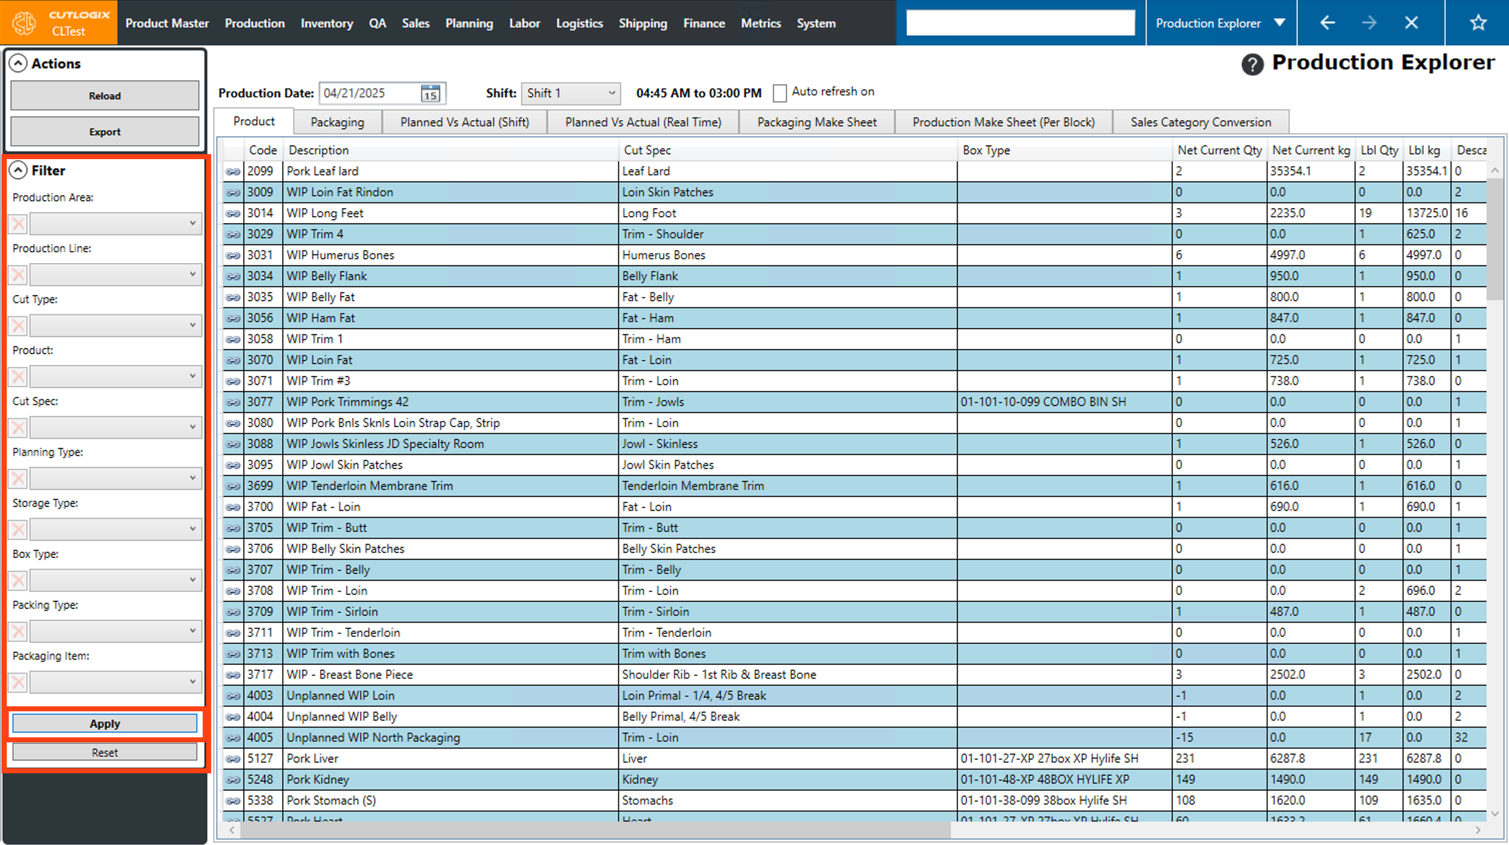
Step 2: If necessary, use the filters on the left side of the page to filter the data to only show the information that you're wanting, then click the "Apply" button to apply the specified filters.
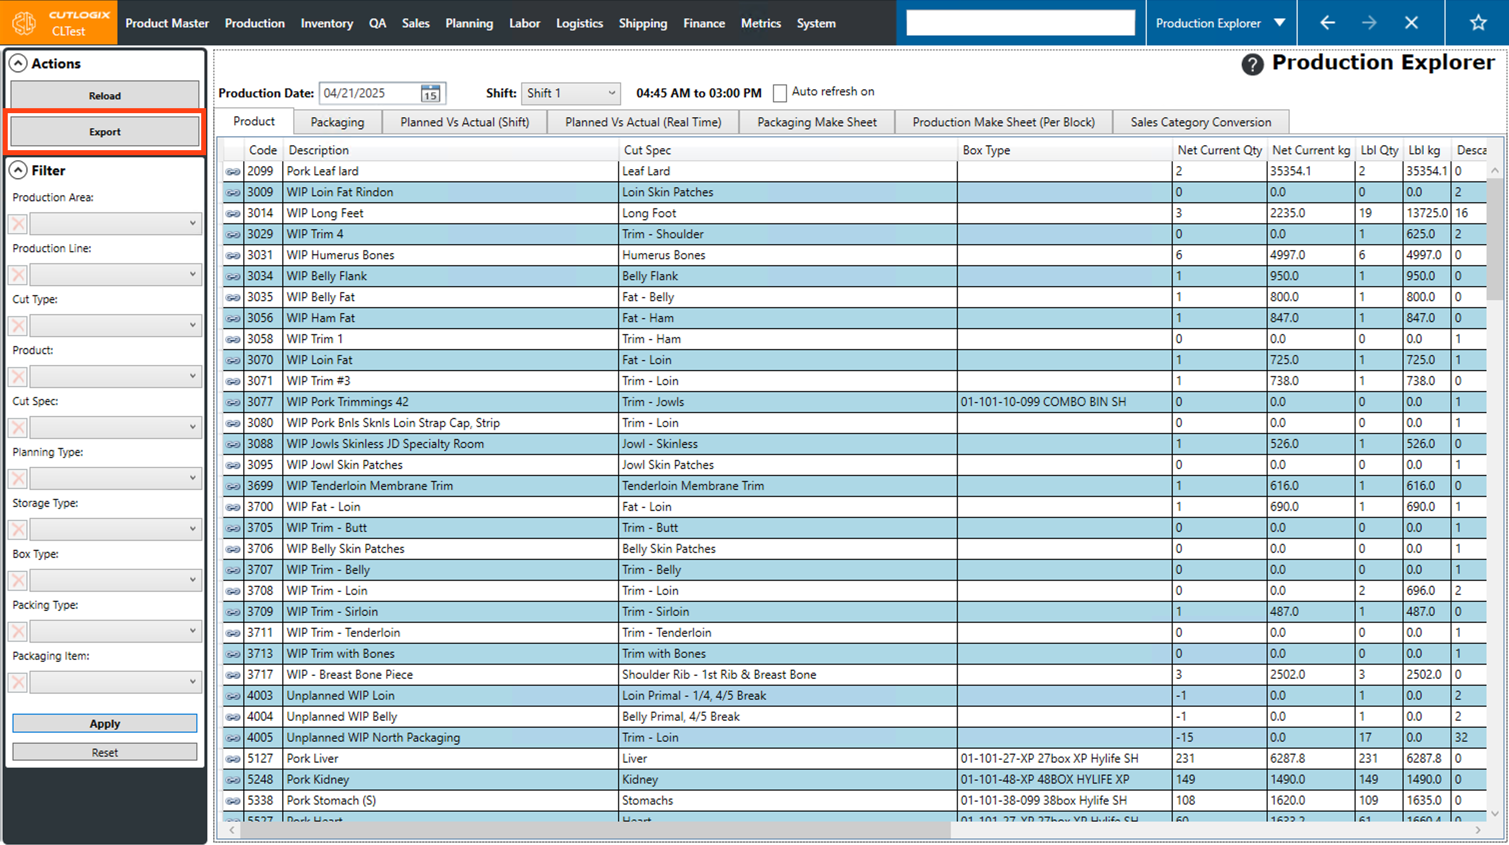
Step 3: Click the "Export" button in the Actions Panel.
Step 4: A dialog will appear, asking where you want to save the file on your computer. Here, you can also modify the filename if you want to. Choose the location that you want to save the report, then modify the filename if necessary, then click the "Save" button.

Step 5: The file will then be saved on your computer in the specified location. To open the report, navigate to the location that the file was saved in and double click it to open it. Note: You must have Excel installed on your computer in order to open the file.